LAPS (Local Administrator Password Solution) is a free solution provided by Microsoft that allows the security of workstations.
LAPS allows for each computer in OR to randomly generate a password for the local Administrator account and store it in an Active Directory attribute (ms-Mcs-AdmPwd). It ‘relies on the SID of the account which is structured in the same way on any post, which makes it possible to apply LAPS to any language of Windows or even to rename the administrator account.
It is also possible to configure a password expiration date (ms-Mcs-AdmPwdExpirationTime), which will force a new password for the Local Administrator account.
LAPS is in the form of “client / server”, it requires the installation of a part on the server (s) domain controller and the registration of a DLL on the client computers.
Prerequisites
- Minimum server: Windows 2003 SP1.
- Minimum post: Windows 8.1.
If you are in an environment with multiple domain controllers, you must install the group policy definition on all servers or use a central store. In the second case, the files (% WINDIR% \ PolicyDefinitions \ AdmPwd.admx and% WINDIR% \ PolicyDefinitions \ en-US \ AdmPwd.adml) must be copied after installation to the central store.
Installing LAPS on the domain controller
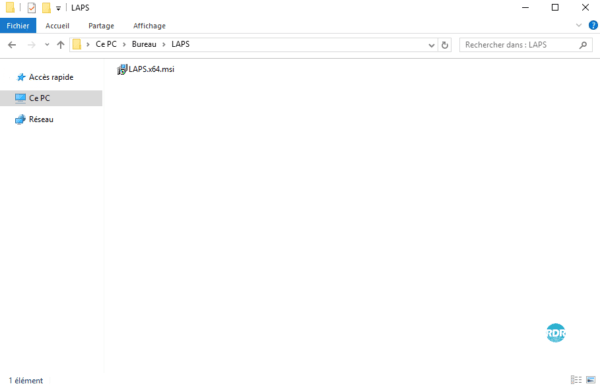
On a domain controller, run the download file.
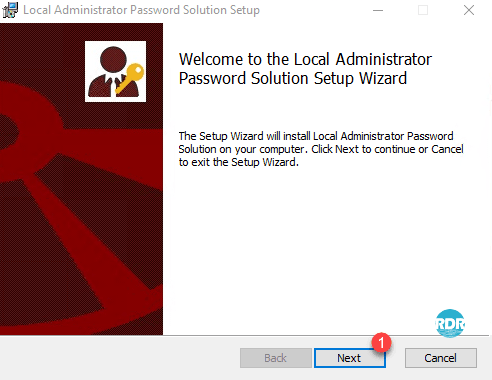
When launching the installation wizard, click Next 1 .
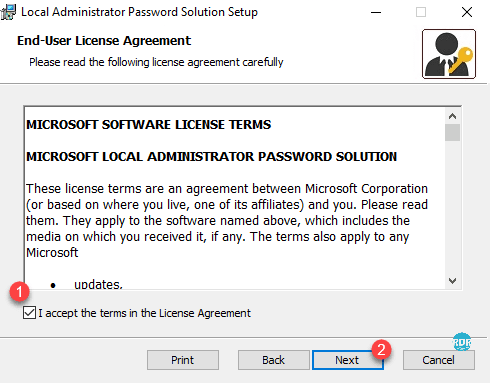
Check the box to accept the 1 license agreement and click Next 2 .
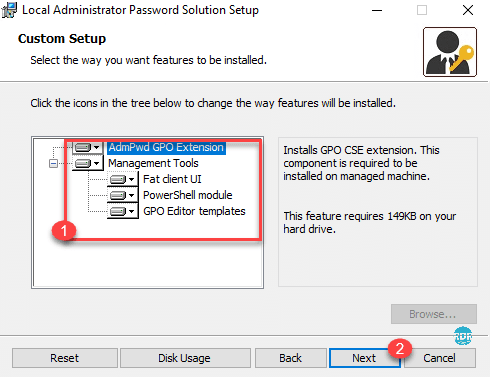
Install all components 1 then click Next 2 .
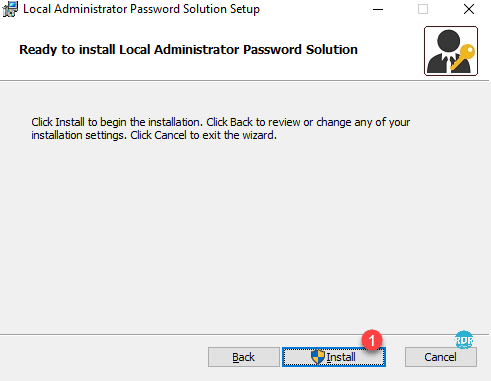
Click on Install 1 .
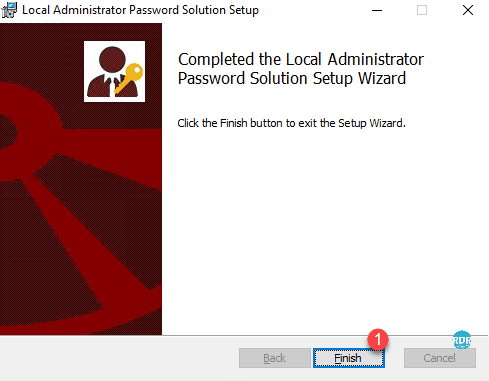
Once the installation is complete, close the wizard by clicking Finish 1 .
Now that LAPS is installed on a domain controller, we will see how to install it on the client computers.
Installing the LAPS client
To deploy the “client” part of LAPS on the computers, you have several solutions:
- Manual installation by selecting only the AdmPwd GPO Extension component.
- Installation by a Software Deployment Tool (SCCM / WAPT).
- Installation by GPO.
- Installation by script: msiexec / i <file location> \ LAPS.x64.msi / quiet
- Copy the AdmPwd.dll file and save it to the regsvr32.exe AdmPwd.dll extension
Depending on your environment, I let you choose the best solution.
Update Active Directory Schema
To work properly LAPS needs to modify the Active Directory schema to add two attributes to the computers.
On the domain controller where it was installed, open a PowerShell command prompt with Administrator rights.
Load the PowerShell module:
Import-Module AdmPwd.PSUpdate schema:
Update-AdmPwdADSchemaThe command should return the following result:
Operation            DistinguishedName                                                 Status
---------            -----------------                                                 ------
AddSchemaAttribute   cn=ms-Mcs-AdmPwdExpirationTime,CN=Schema,CN=Configuration,DC=l... Success
AddSchemaAttribute   cn=ms-Mcs-AdmPwd,CN=Schema,CN=Configuration,DC=lab,DC=intra       Success
ModifySchemaClass    cn=computer,CN=Schema,CN=Configuration,DC=lab,DC=intra            Success
The schema has been modified and the attributes added.
We will now see how to configure LAPS.
Configuring LAPS
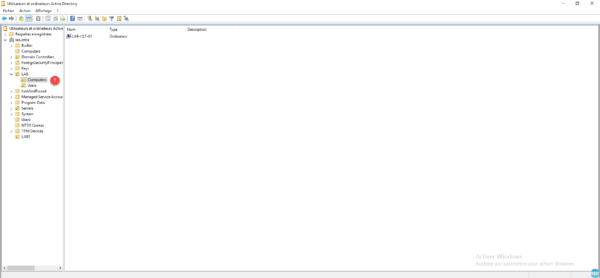
The configuration of LAPS is done by OR in the Active Directory. In this tutorial, we will apply the password policy on the OU Computers 1 that is in the OU LAB.
Before configuring Group Policy, you must give the rights to the Computer type objects to be able to modify their attributes. Open a PowerShell command prompt.
Load the module:
Import-Module AdmPwd.PSCase 1: There is only one OR carrying the name Computers:
Set-AdmPwdComputerSelfPermission -OrgUnit "Computers"Case 2: Several OUs are called Computers:
Set-AdmPwdComputerSelfPermission -OrgUnit "OU=Computers,OU=LAB,DC=lab,DC=intra"Result of the order:
Name                 DistinguishedName                                                 Status
----                 -----------------                                                 ------
Computers            OU=Computers,OU=LAB,DC=lab,DC=intra                               Delegated
If multiple OUs have the same name and you apply the case 1 command, the delegation will be applied to all OUs. The command will also return an error.
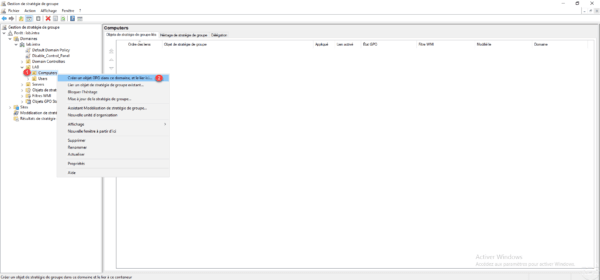
Now that computers can change their attributes, you need to create a group policy. Open the Group Policy Management Console, right-click on OR 1 where will be applied and click Create GPO in this area, and link it here 2 .
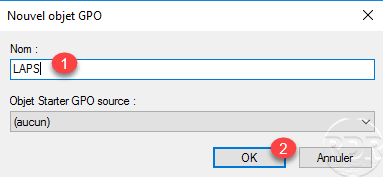
Name strategy 1 and click OK 2 .
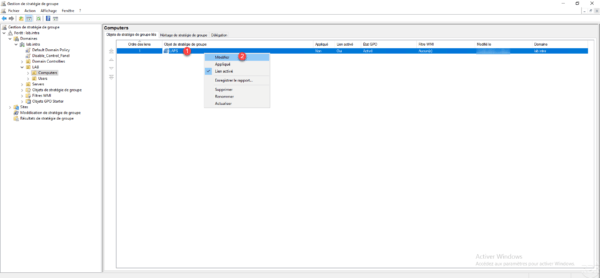
Now that the strategy is created, we will configure it, right click on 1 and click on Edit 2 .
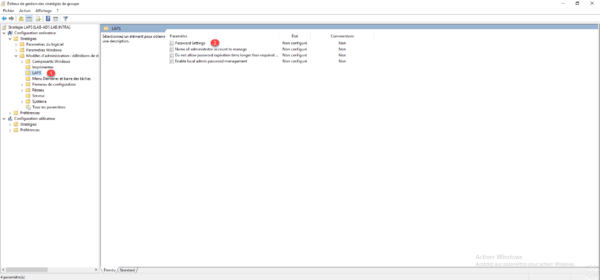
Go to Computer Configuration / Policies / Administrative Templates / LAPS 1 . In this location are the various configuration parameters. Open Password Settings 2 to configure the password.
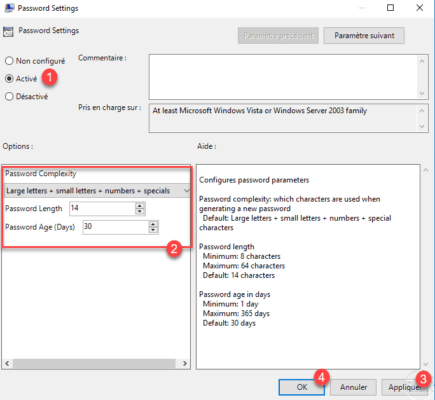
Activate 1 the parameters then configure the complexity of the password 2 using the various parameters. Click on Apply 3 and on OK 4 .
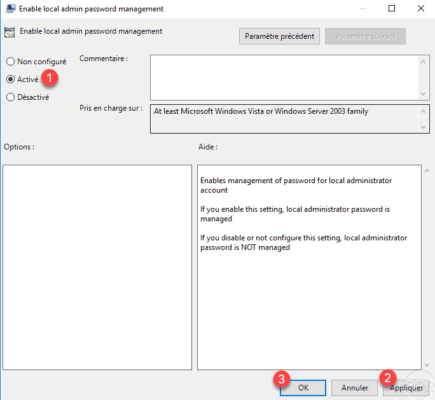
Open the Enable local admin password management parameter, activate 1 then click on Apply 2 and OK 3 . You must enable this setting to enable password management.
If you delete the local administrator account and create a new one, you can specify it with the Name of administrator account to manage parameter.
Summary of Group Policy Settings :

Now that Group Policy is ready, force it to be updated so that the computers recover the settings and generate a password for the local administrator account.
View the password generated by LAPS
Now that our computers have a different password, we will see how to recover the password.
From the Active Directory
The display of advanced features must be enabled.
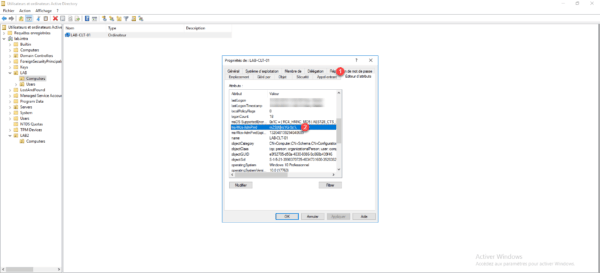
Using the Active Directory Users and Computers console, open the computer properties, go to the Attribute Editor 1 tab, and look for the ms-Mcs-AdmPwd 2 attribute.
With the LAPS client
When installing LAPS on the server, all components have been installed. A client is available through the Start menu. Once it has been launched, enter the name of the computer 1 then click Search 2 to display the password 3 and the expiry date 4 .
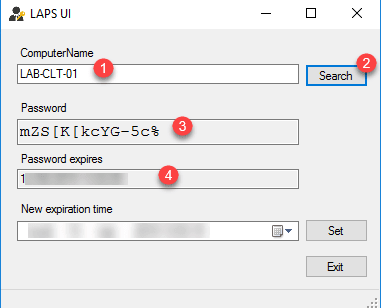
It is possible to change the expiration date of the password, once it has been configured, click on Set. The password change will be effective when applying group policies on the computer.
Allow viewing the password to an AD group
By default, the Domain Admins group can see the attribute that contains the password for the local Administrator account for the extension. It may be necessary to give the password option to other people such as the support team if they are not members of the Domain Admins group.
The client part of LAPS will have to be installed on their computer to see the password.
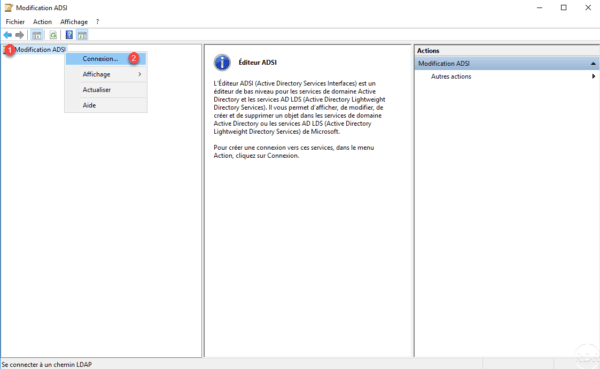
On the domain controller, open the ADSI Edit Console, right click on ADSI Edit 1 and click on Connect 2 .
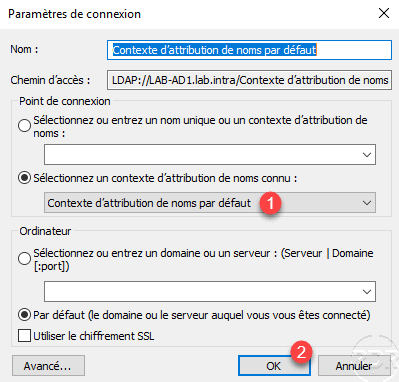
Choose Default Attribution Context 1 and click OK 2 .
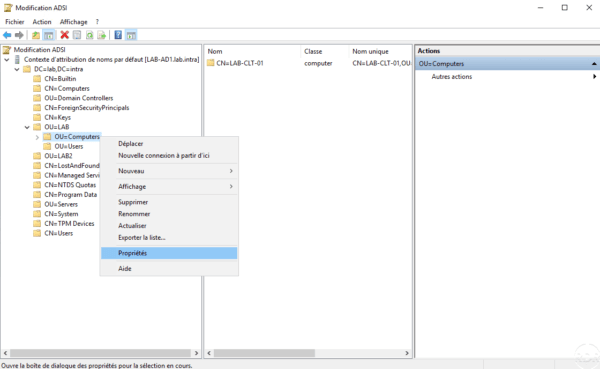
Once connected, open the properties of the OU where LAPS has been configured.
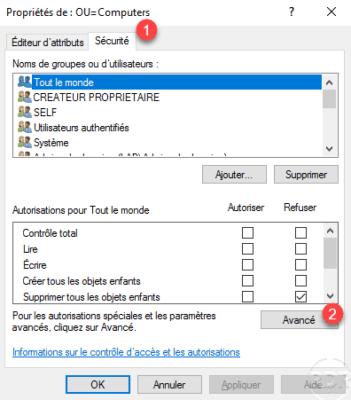
Go to the Security tab 1 and click on the Advanced 2 button.
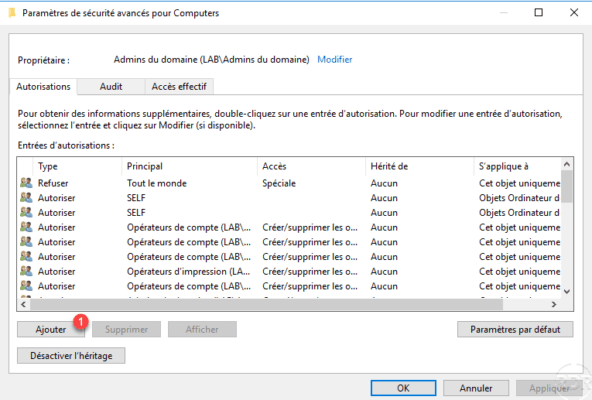
Click on Add 1 .
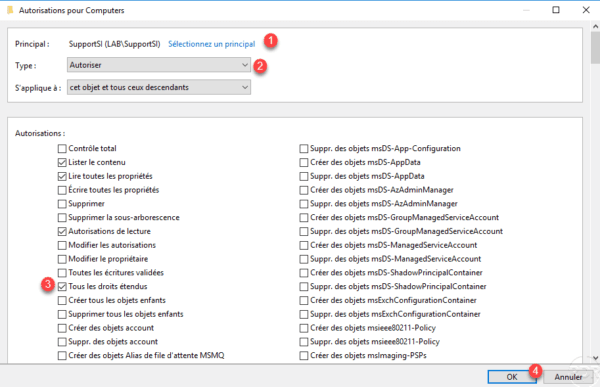
Select group 1 , type: Allow 2 . Check the authorization All rights extended 3 and validate by clicking OK 4 .
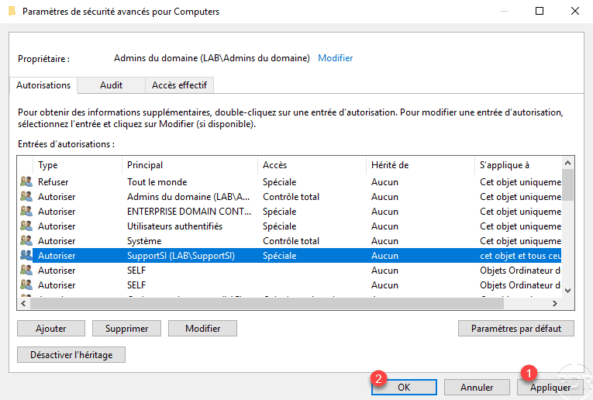
Permissions have been added to the OU, click Apply 1 and OK 2 to validate. Then close the windows.
You can do the same thing in PowerShell by using the following command:
Set-AdmPwdReadPasswordPermission -OrgUnit Computers -AllowedPrincipals SupportSI
It is possible to check in PowerShell access using the following command:
Import-Module AdmPwd.PS
Find-AdmPwdExtendedRights -Identity Computers | Format-Table ExtendedRightHolders

ExtendedRightHolders
--------------------
{AUTORITE NT\Système, LAB\Admins du domaine, LAB\SupportSI}
Users in the SupportSI group now have the option to see the password for the Local Administrator account.
To give the SupportSI group permission to change the password expiration date, enter the following PowerShell command:
Set-AdmPwdResetPasswordPermission -OrgUnit Computers -AllowedPrincipals SupportSIConclusion
LAPS is a free solution that protects the local Administrator account on client computers and servers.
I find this solution all the more interesting on servers that allows to have a different password for each of them and thus increase security. The expiration and automatic renewal of the password provides additional security when a person from the IS leaves the company.


