When migrating to Office 365, you may need to return the history of old mailboxes in the news using the PST archives.
There are several ways to do this:
- Import from the Outlook client directly (I highly recommend this solution).
- IMAP copies from the Office 365 migration interface.
- Send PSTs on Microsoft servers for import.
In this article, we will see the third solution.
Prerequisites
- Have administrator access to the Office 365 interface
- Have the rights of Import / ExportImport / Export
- Install Azure Explorer
- Have PST
Table of Contents
Correspondence file
The first step is to fill in a correspondence file to link the archive to the email account.
The file must be in csv format with a comma (,) separator.
Here is the header that must have your file:
Workload,FilePath,Name,Mailbox,IsArchive,TargetRootFolder,ContentCodePage,SPFileContainer,SPManifestContainer,SPSiteUrl| Parameter | Value / Explication |
|---|---|
| Workload | Value: Exchange Description: Defined in which office module the import should be done. |
| FilePath | Value: empty Description: path to the archive when uploading |
| Name | Valeur: archive-jdupont.pst Description: Name of the pst file sent |
| Mailbox | Value: [email protected] Description: The main email address of the account where the archive is to be sent. |
| IsArchive | Value: TRUE / FALSE Description: Determines whether the file should be imported into the archive mailbox. |
| TargetRootFolder | Value: empty or / and / MyPst Description :
|
| ContentCodePage | Value: empty Description: file encoding |
| SPFileContainer | Value: empty |
| SPManifestContainer | Value: empty |
| SPSiteUrl | Value: empty |
Here is an example of an import file:
Workload,FilePath,Name,Mailbox,IsArchive,TargetRootFolder,SPFileContainer,SPManifestContainer,SPSiteUrl
Exchange,,archive-rdr.pst,[email protected],FALSE,/,,,
Exchange,,archive-jbo.pst,[email protected],FALSE,/,,,
Now that the file is ready we will go to upload files.
Upload PST archives
1. Go to your Office 365 admin portal and click Security and Compliance 1.

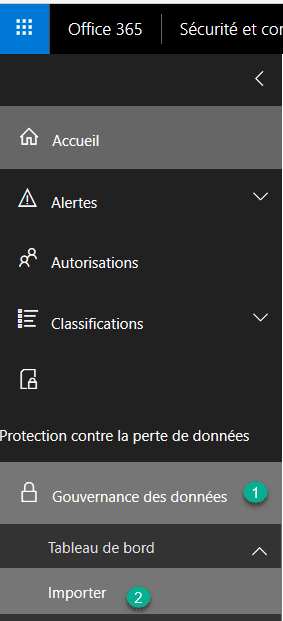
2. In the menu on the left, click on Data Governance 1 and then Import 2.
3. Click New Import Job 1

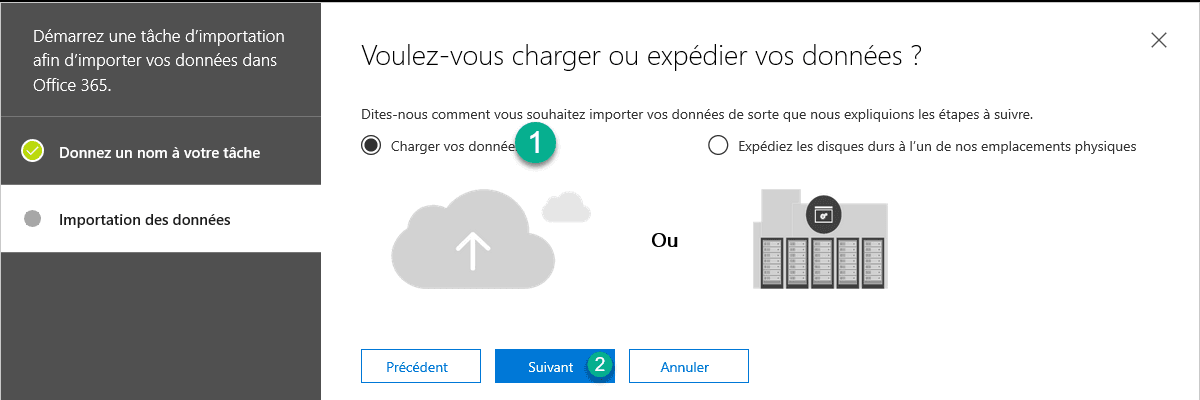
4. Select Load your data 1 and click Next 2.
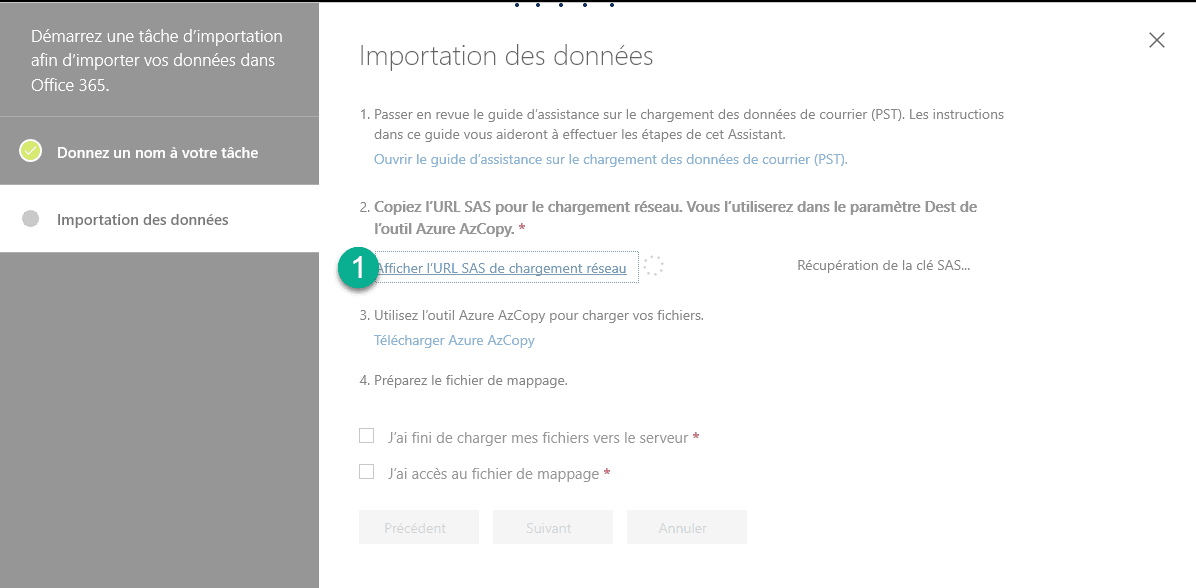
5. Click Show Network Load SAS URL 1 and wait while generating.
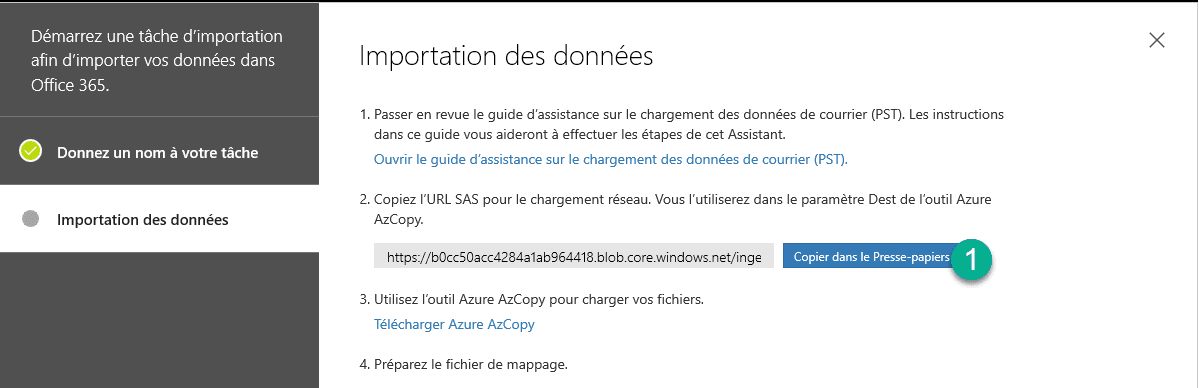
6. Copy the SAS URL 1.
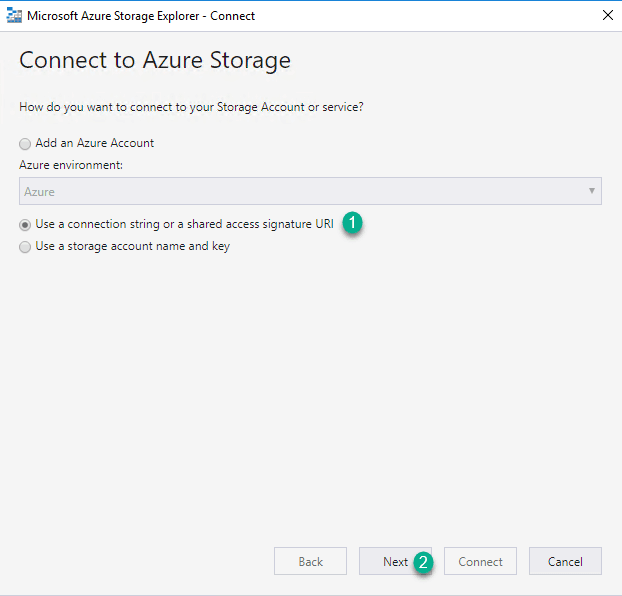
7. Launch Azure Storage Explorer and configure the connection. If this is your first launch the connection wizard should launch directly. Select option 1 and click Next 2.
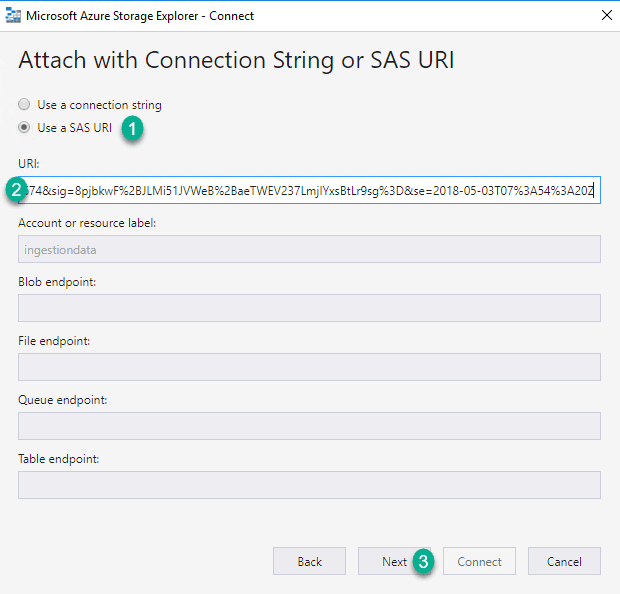
8. Check Use a SAS URI 1 and copy the address into the area 2 and click Next 3.
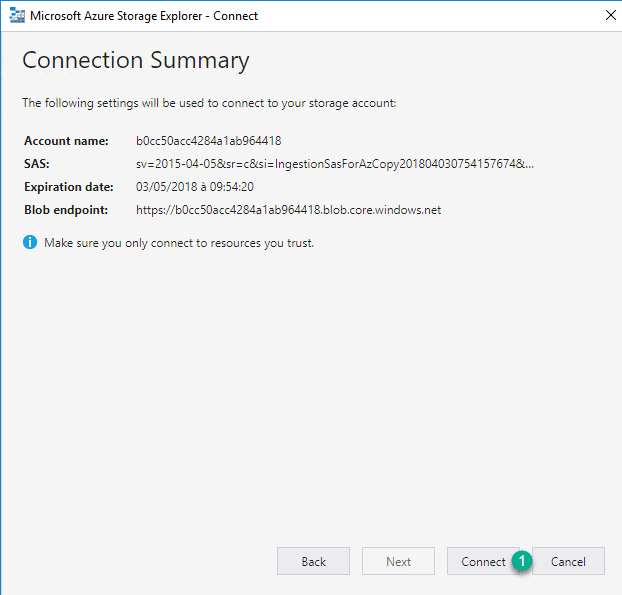
9. Click Connect 1.
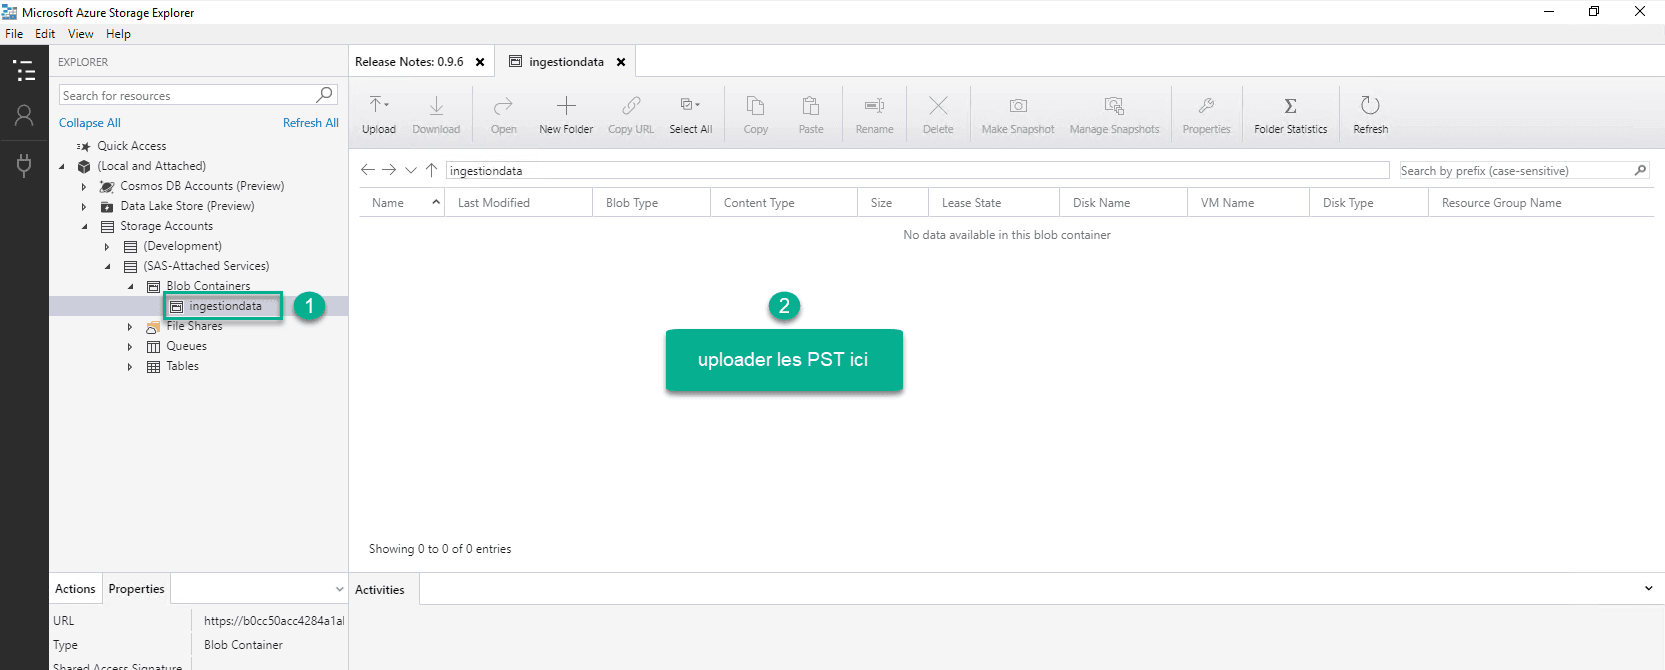
10. Place yourself in the ingestiondata 1 folder and send your pst 2 files either by drag and drop or by using the Upload button.
AZCOPY
For unknown reasons, the transfer with Azure Storage Explorer is difficult at times. If this happens to you, you can use AZCopy.
AzCopy.exe /Source:"C:\pst" /Dest:"URI AZURE" /Y /S
Import of PST
1. Return to the Security and Compliance interface where you obtained the URI for Azure Storage Explorer
2. Check both boxes 1 and click on Next 2.

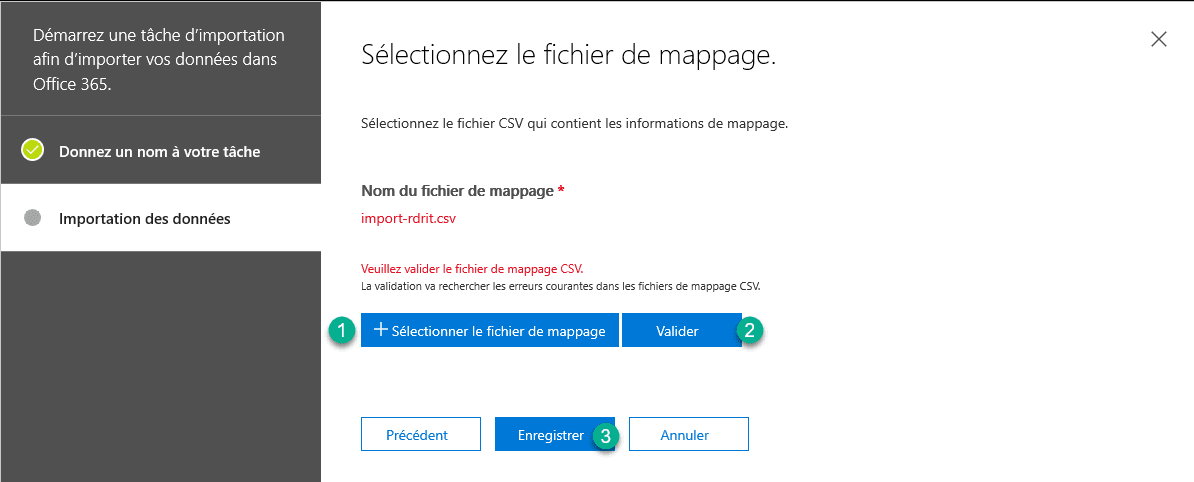
3. Select your import file 1, click on Validate 2. Once the operation is completed if there is no error click on Save 3.
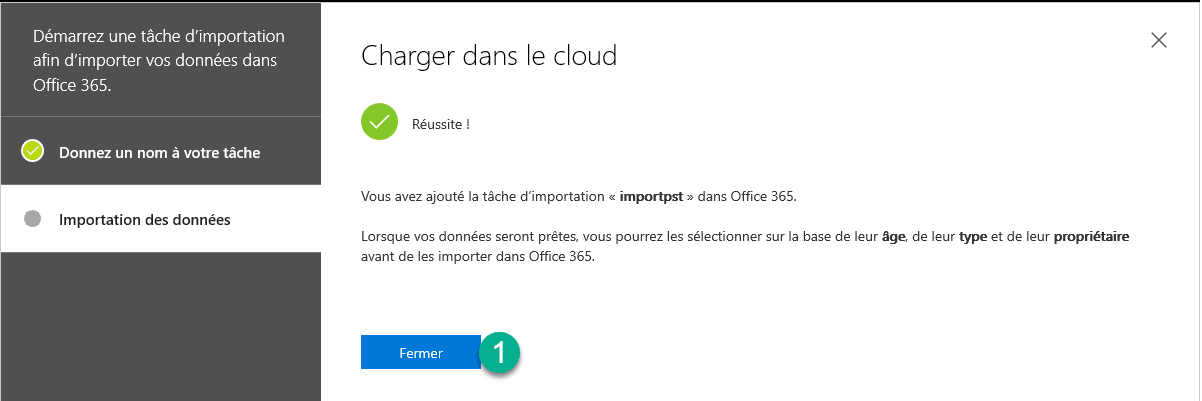
4. Click Close 1.
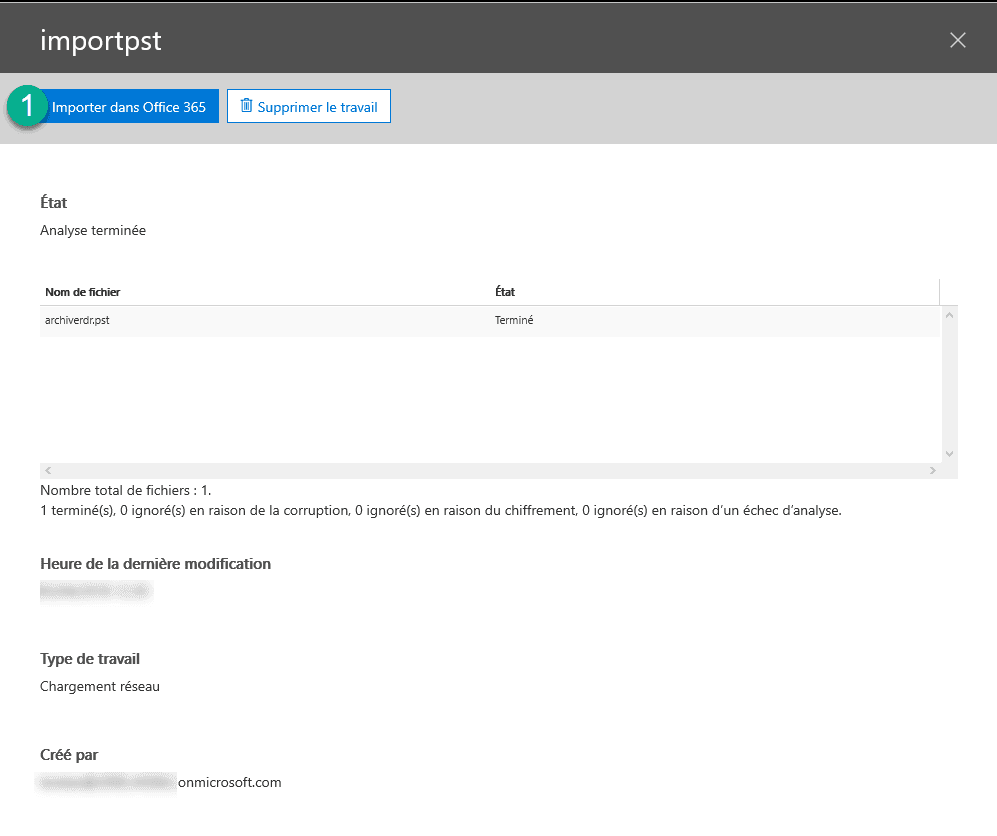
5. Before actually starting the injection into the accounts the files are analyzed.


6. When the scan is complete, click Ready to Import in Office 365 1.

7. Click Import in Office 365 1.
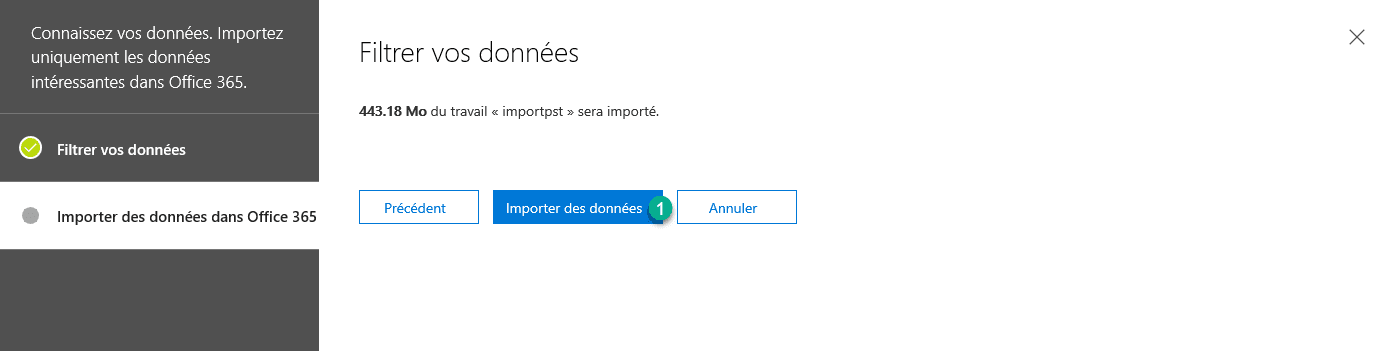
8. Depending on your strategy, select the desired option 1 and click Next 2.

9. Click Import Data 1.
10. Click Close 1.

11. Import tracking since Data Governance.

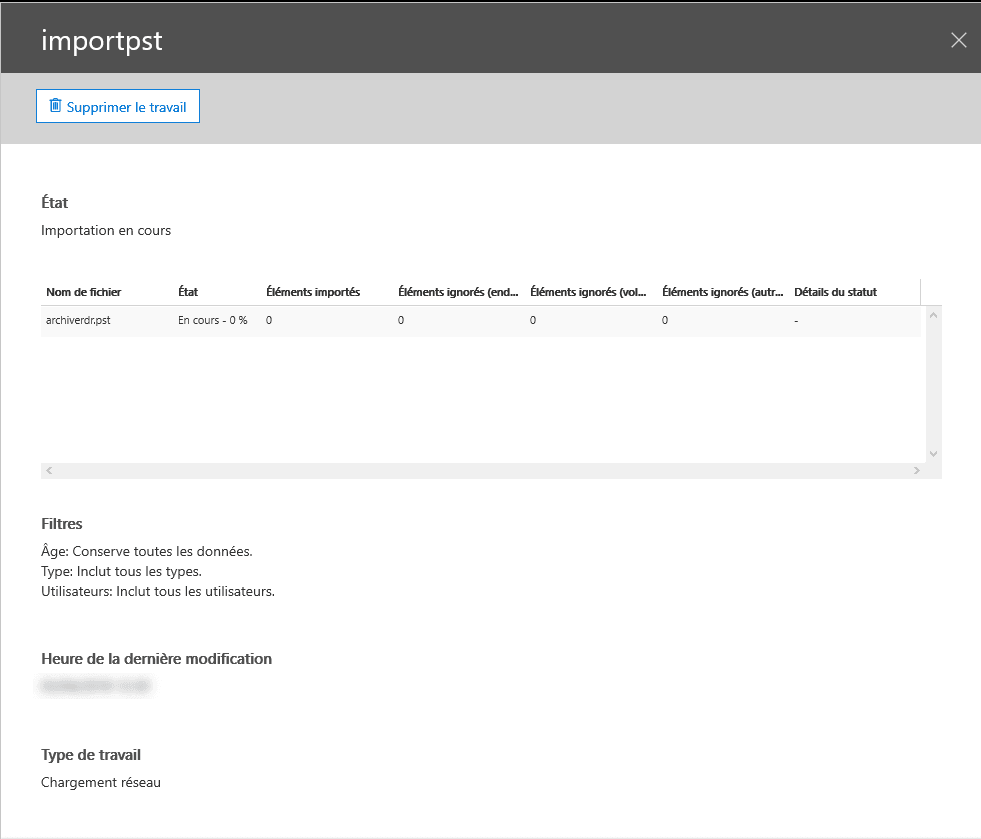
12. All you have to do is monitor the import process.
