In this article, I’ll walk you through how to bulk import users into Office 365 with the use of PowerShell and the use of a csv file.
In certain cases, it is not possible to do an Active Directory directory synchronization (refusal of the client, no AD …).
Adding a large number of accounts (for my part 10) quickly becomes long and tedious.
Table of Contents
Creation of the import file in csv
The first step is to create a file with the users. There is no “type” file.
Only two fields are required:
- UserPrincipalName : corresponds to the email address, it must be formatted as follows: [email protected]
- DisplayName : corresponds to the display name of the email address, generally consisting of the person’s First and Last Name.
Most used optional fields:
- Password : allows to define the password, during the first connection the user will be invited to change it.
- FirstName : first name
- LastName : name
- City
- Department : corresponds to the service
- UsageLocation : allows you to define the country of the account and whether or not a certain service is activated.
The separator to use is the comma (,).
I advise you to edit your file with NotePad ++.
The first line of your file will contain the headers, ie the name of the fields.
UserPrincipalName,FirstName,LastName,DisplayName,UsageLocation,City,Password,DepartmentThen you will add your users (1 per line)
[email protected],Helene,DETROIE,Helene DETROIE,FR,TROIE,Password.123,Communication
[email protected],Jean,BON,Jean BON,FR,AOSTE,Password.123,Comptabilite
Save your file. Now that it is ready we are going to import.
Import in PowerShell
Prerequisites
Pour pouvoir vous connectez en PowerShell à l’interface Office 365, vous devez avoir installer Cmdlet MSOnline d’installer
Install MSOnline Cmdlets
Start PowerShell as administrator and enter the following command:
Install-Module -Name MSOnlineAt the security warning validate the installation of the module.
Import
1. Open the PowerShell command prompt and enter the following command to initiate the connection.
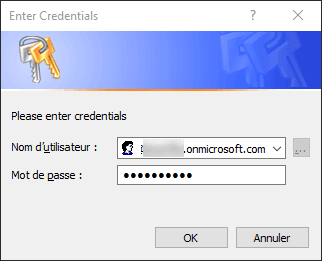
Connect-MsolService2. A login window should open, enter the information for the Office 365 tenant administrator account.
3. Start the import by entering the following command:
Import-Csv -Path C:\rdrit\users.csv | foreach {New-MsolUser -DisplayName $_.DisplayName -FirstName $_.FirstName -LastName $_.LastName -UserPrincipalName $_.UserPrincipalName -UsageLocation $_.UsageLocation -Password $_.Password -City $_.City -Department $_.Department} | Export-Csv -Path C:\rdrit\result.csvReplace C: \ rdrit \ users.csv with the location of your file to import.
Replace C: \ rdrit \ result.csv with the location of your choice to save the result file.
The following command will import your users and save a result file with a summary per user.
4. You can check the result by entering the following command:
Get-MsolUserYou should have the list of users.
