Deployment of the VDI environment
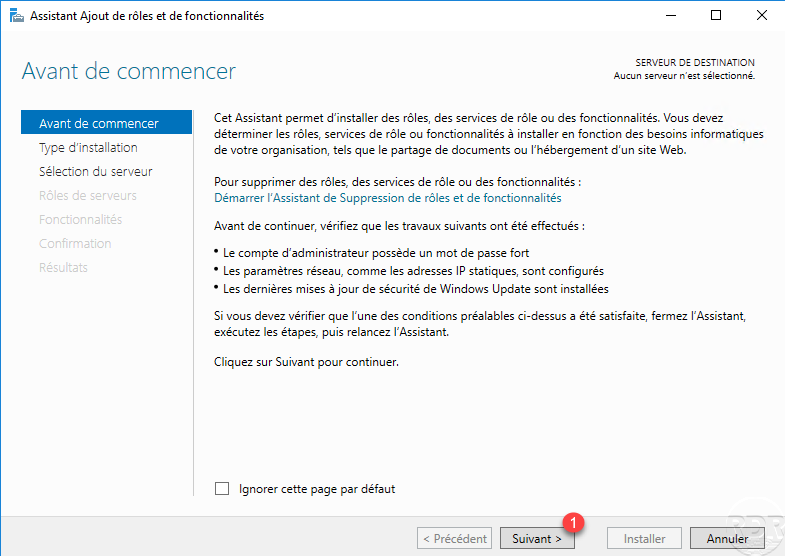
On the broker server where all the servers have been added, launch the roles and features installation wizard by clicking on Add roles and features 1.
When the wizard starts, click on Next 1.
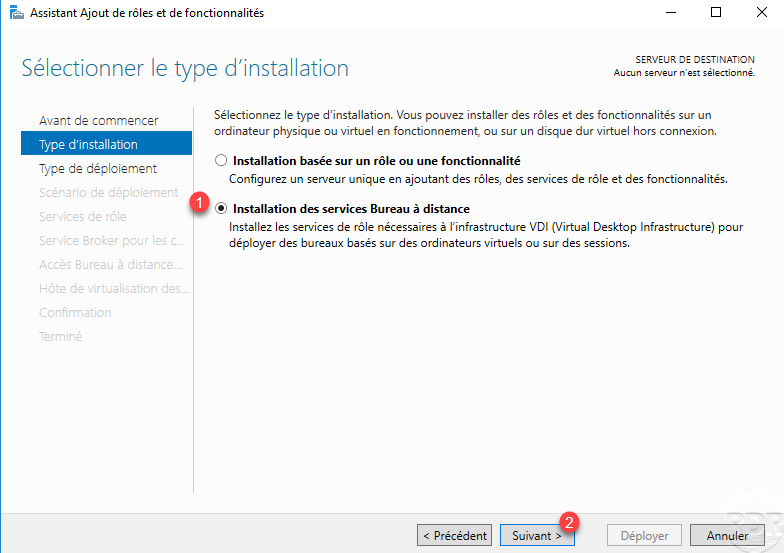
Choose the type of installation: Install Remote Desktop Services 1 and click Next 2.
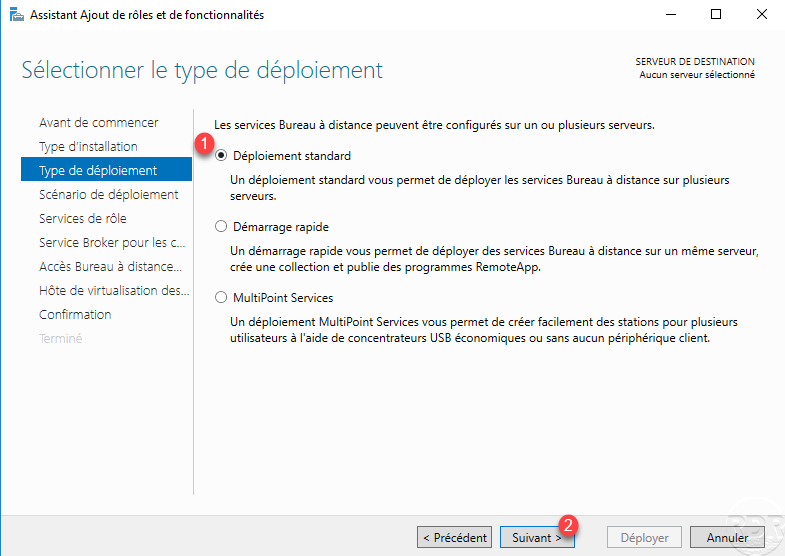
Choose the type of deployment: Standard deployment 1 and click Next 2.
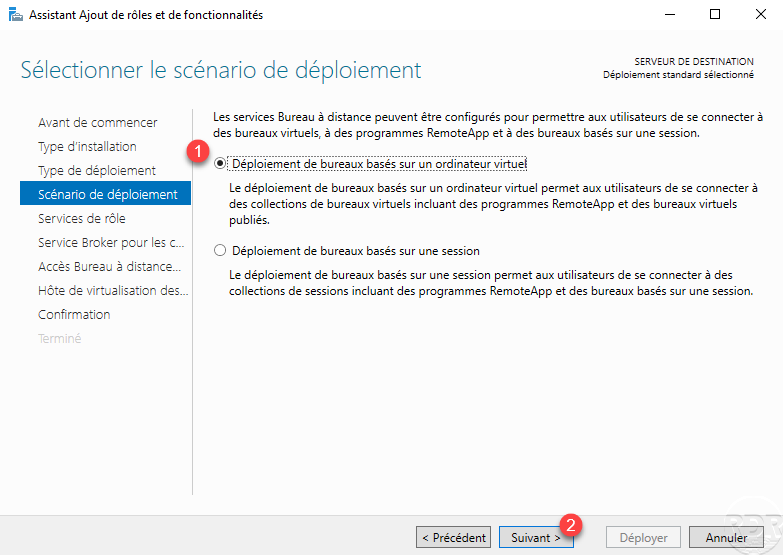
Choose the Deployment of desktops based on a virtual machine scenario 1 and click Next 2.
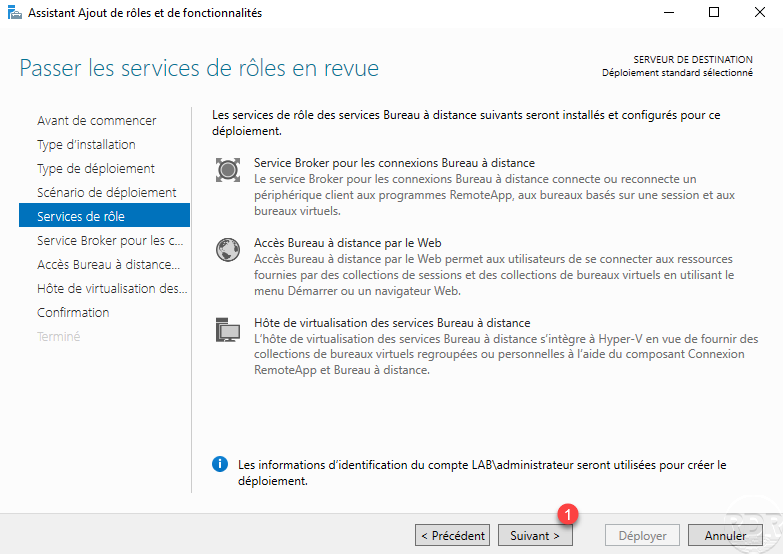
A summary of the deployment is displayed, click Next 1.
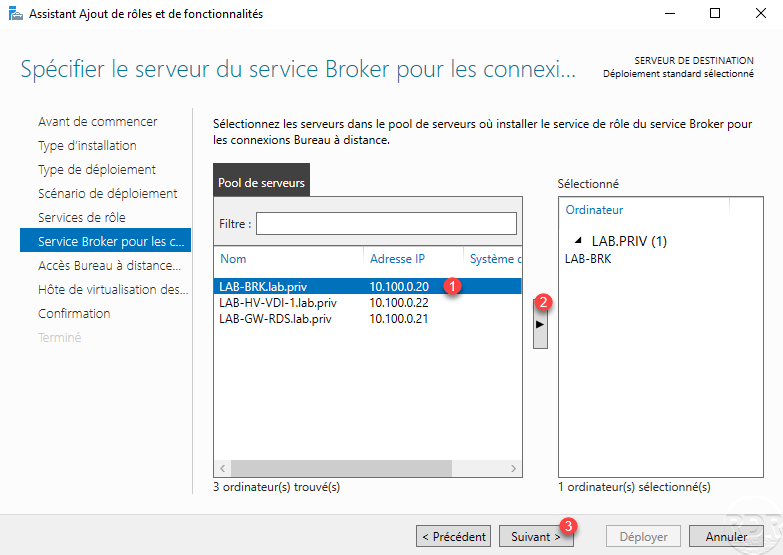
The first step is to choose the server that will have the connection broker service, select the server 1, click on the arrow button 2 to add it to the selection and click on Next 3> >.
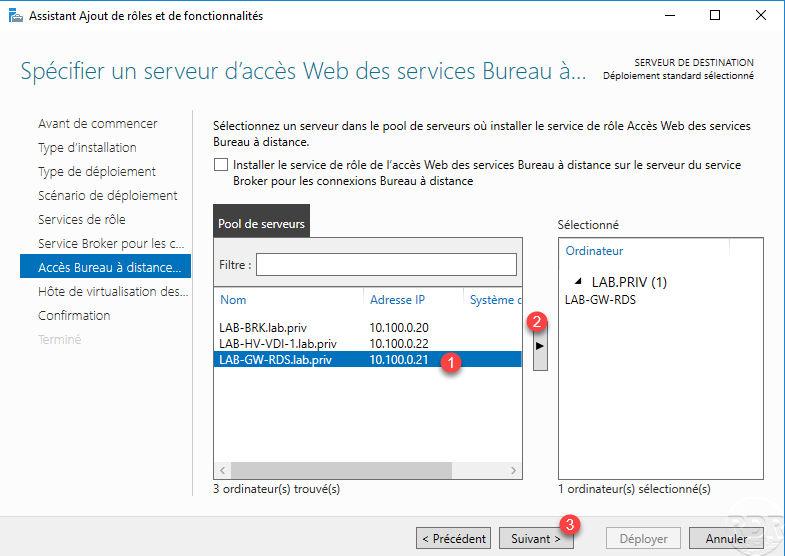
The second step is to specify the Web access server, it is possible to use the broker server but I do not recommend it in production. As for the broker service, select the server 1, click on the arrow 2 and click on Next 3 to validate.
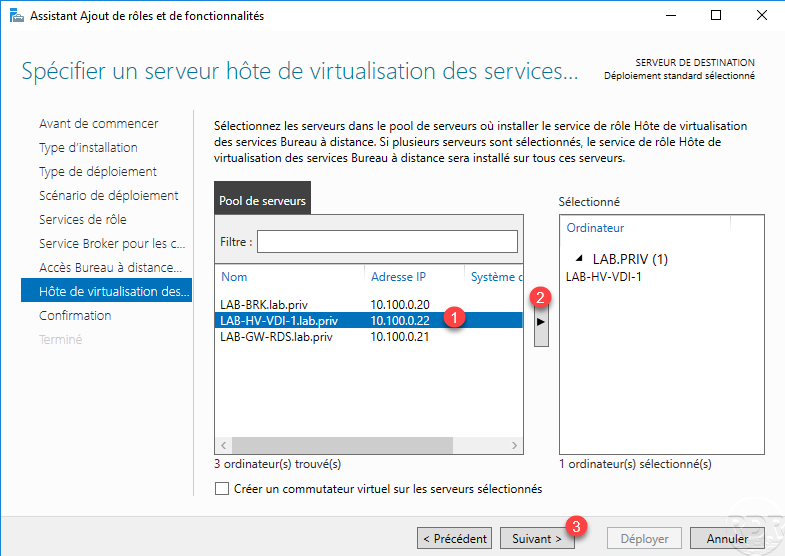
Third and last step, you must specify the remote desktop services virtualization host server, select the Hyper-V server 1, click on the 2 button to add it to the selection and click on Next 3.
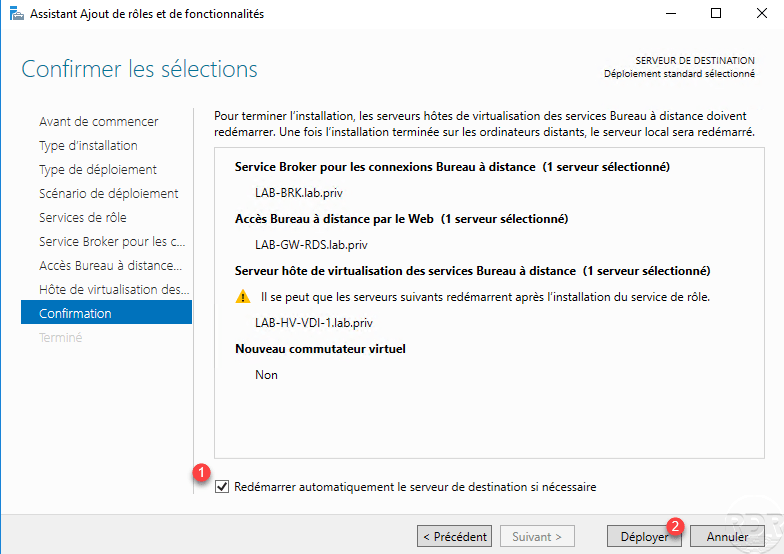
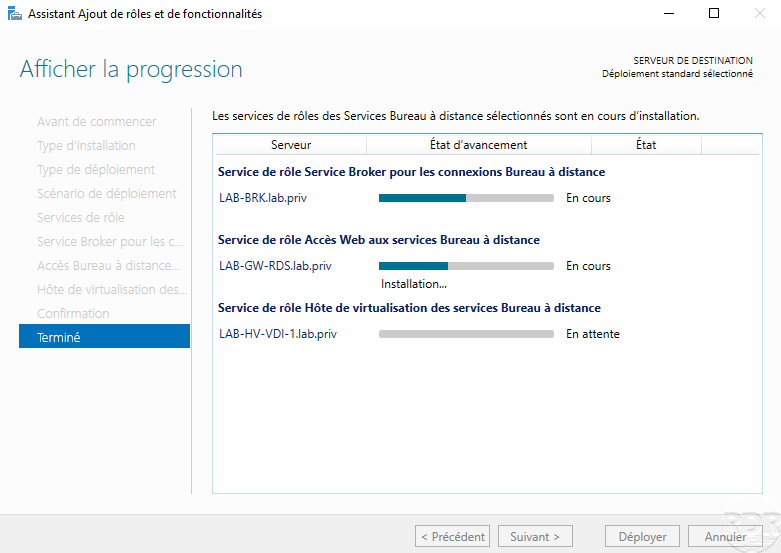
A summary of the configuration is displayed, check the Automatically restart the destination server if necessary 1 box and click on Deploy 2.
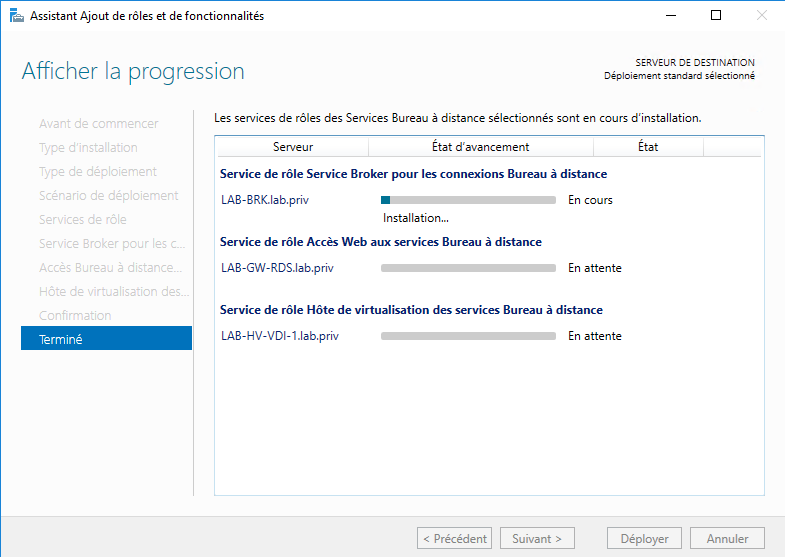
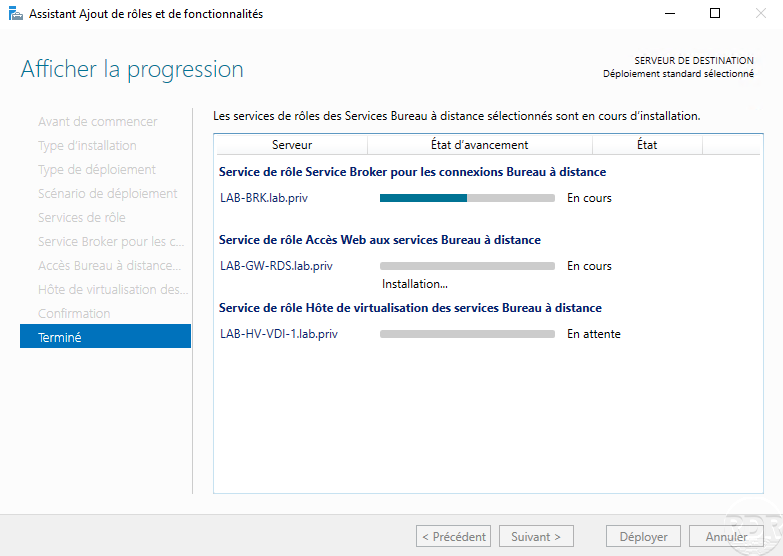
Wait while the different roles are installed …
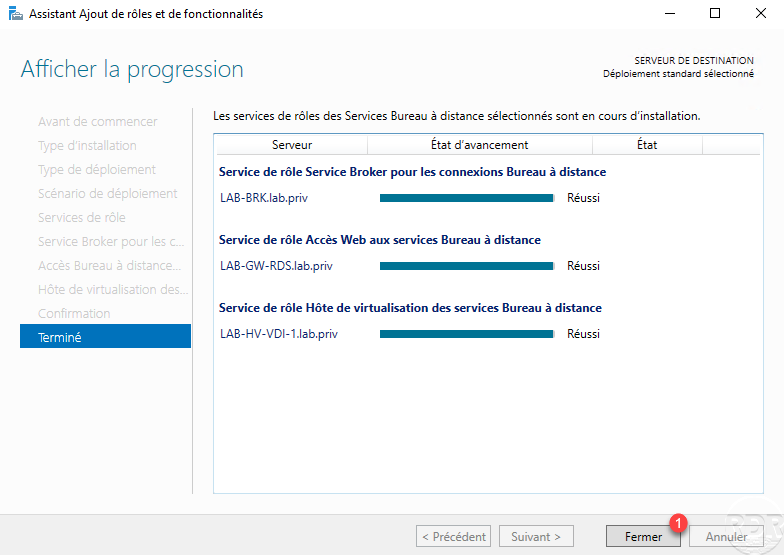
Once the installation is complete, click on Close 1.
To validate the installation, refresh the server manager, in the navigation pane should display Remote Desktop Services 1 which is the administration interface.

This is the Remote Desktop Services administration interface.
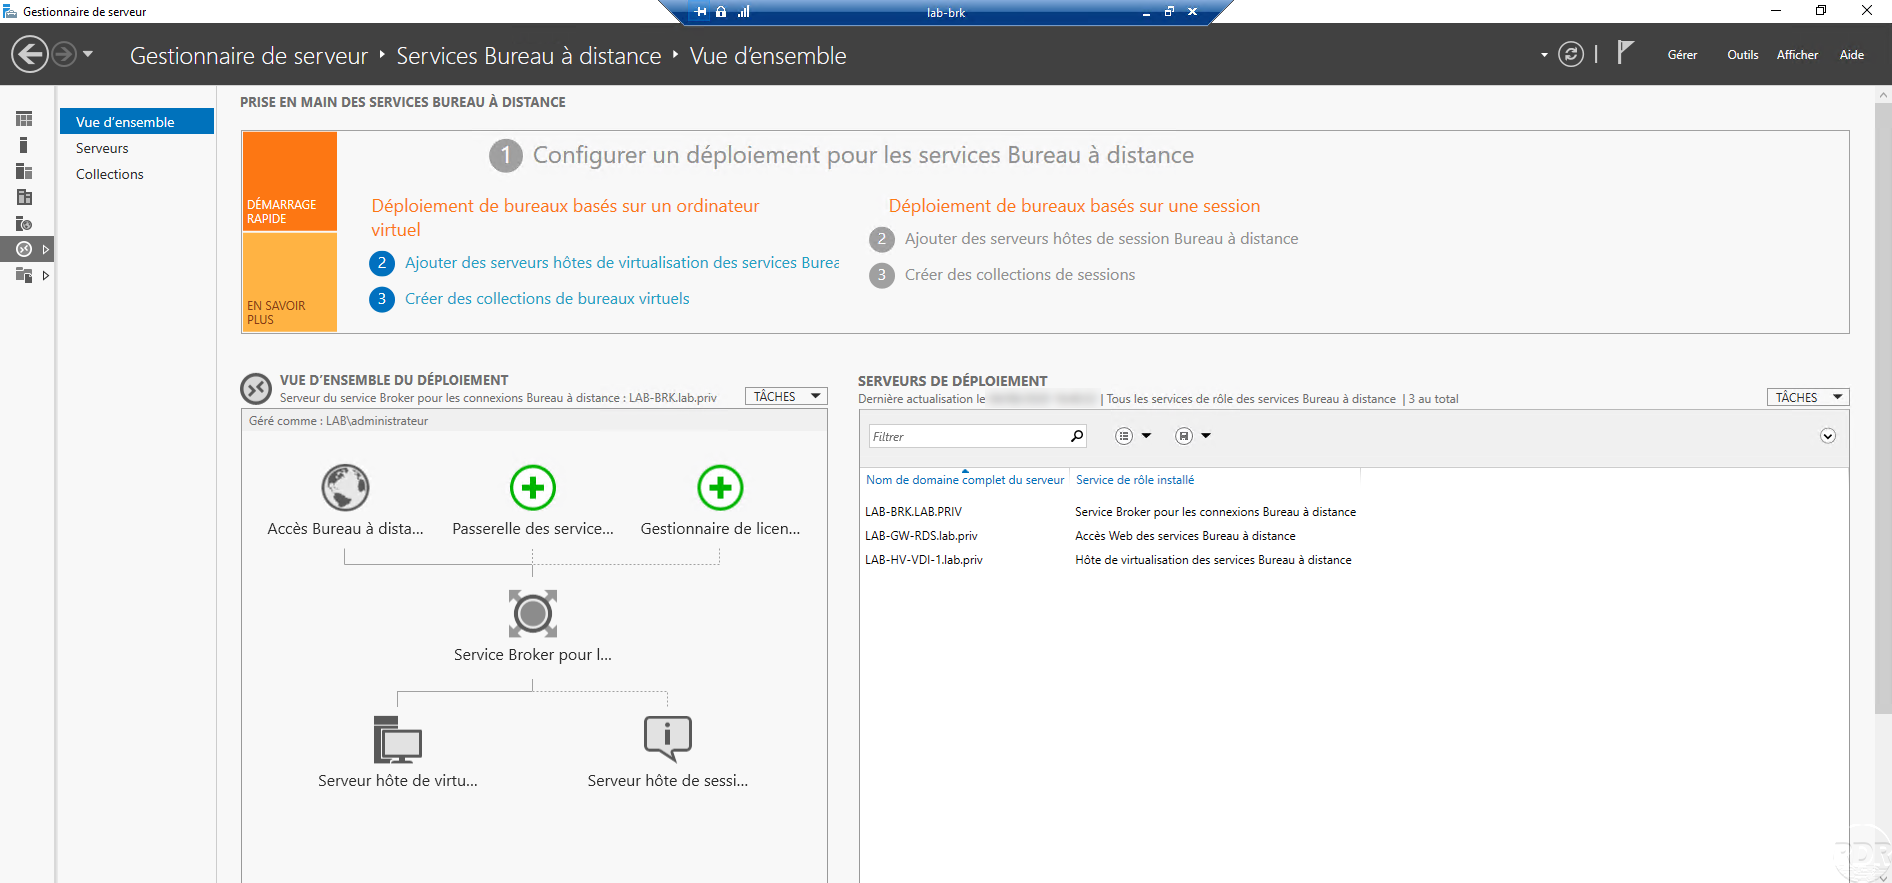
The services are ready and you have been able to see the administration interface, before using it, you must now create a template virtual machine which will be used to provide a desktop to the user.


