In this tutorial, we will see how to supervise an HP MSA 1040/1050/2040/2050 storage array.
Table of Contents
Prerequisites
You must create an equipment group in PRTG to add the two controllers.
Supervision of MSA disk array
All the sensors were created from the PRTG web interface.
Controller A
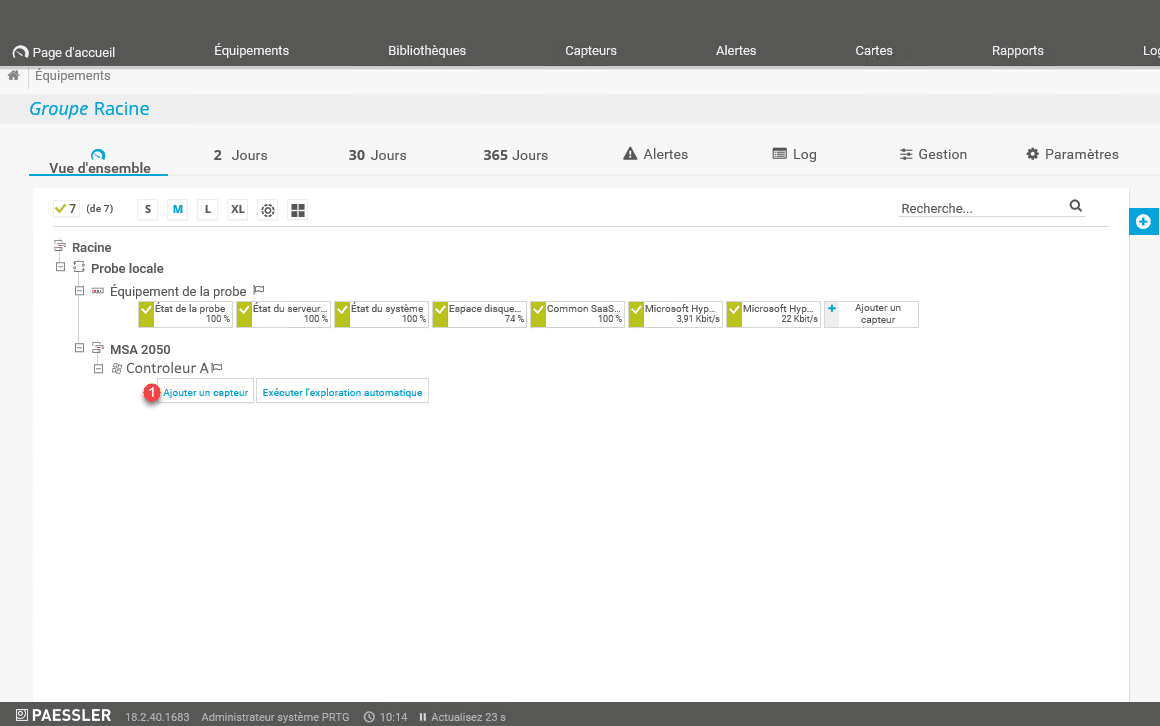
Click on Add a device 1.

Give a name to the device 1, the IP address 2 and click on OK 3.

Changing parameters
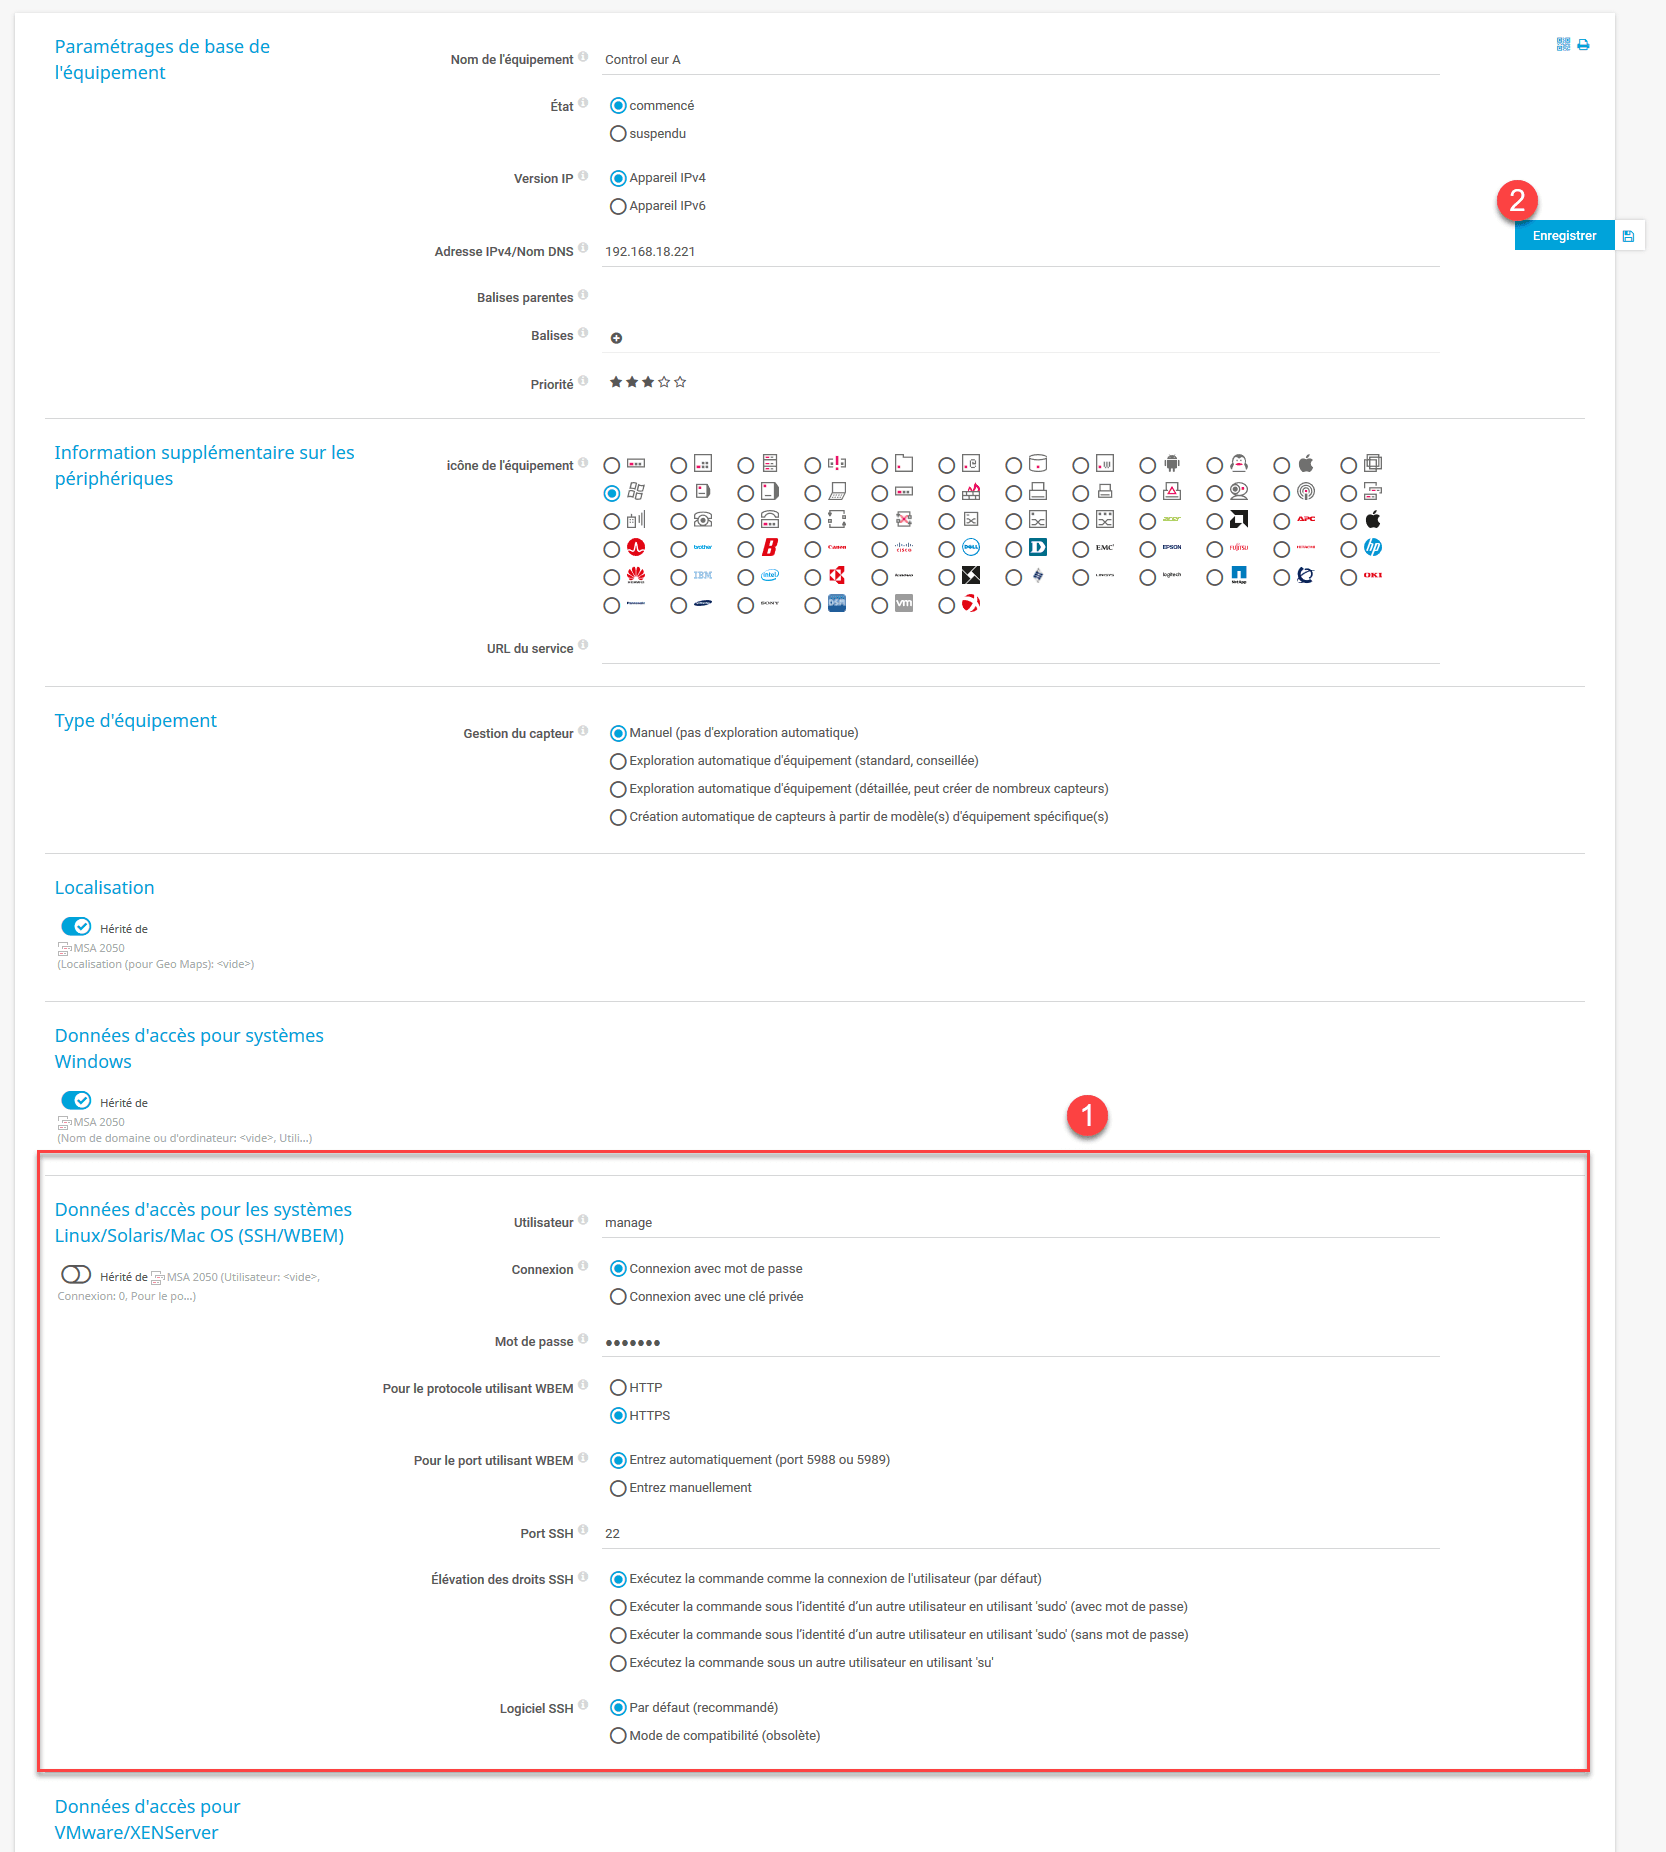
From the equipment view click on Parameters 1.

Go to the Access data parameters for Linux / Solaris / Mac OS systems (SSH / WBEM) 1. Enter the information of the manage account and click on Save 2.
The sensors
ping
Click on Add a sensor 1.
In the search box, enter ping 1 and select the sensor with the same name 2.
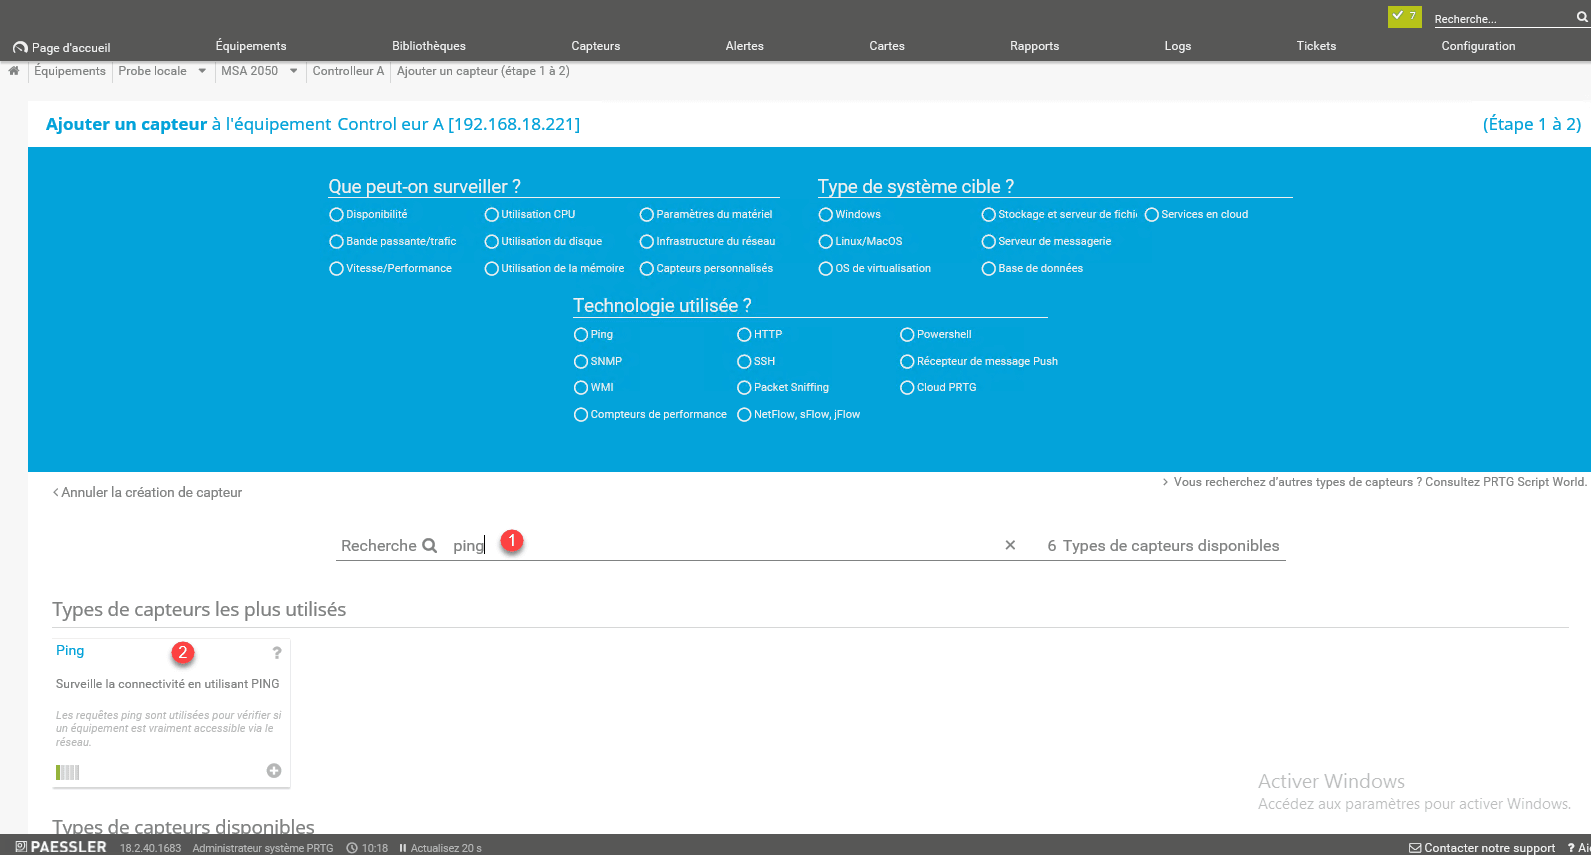
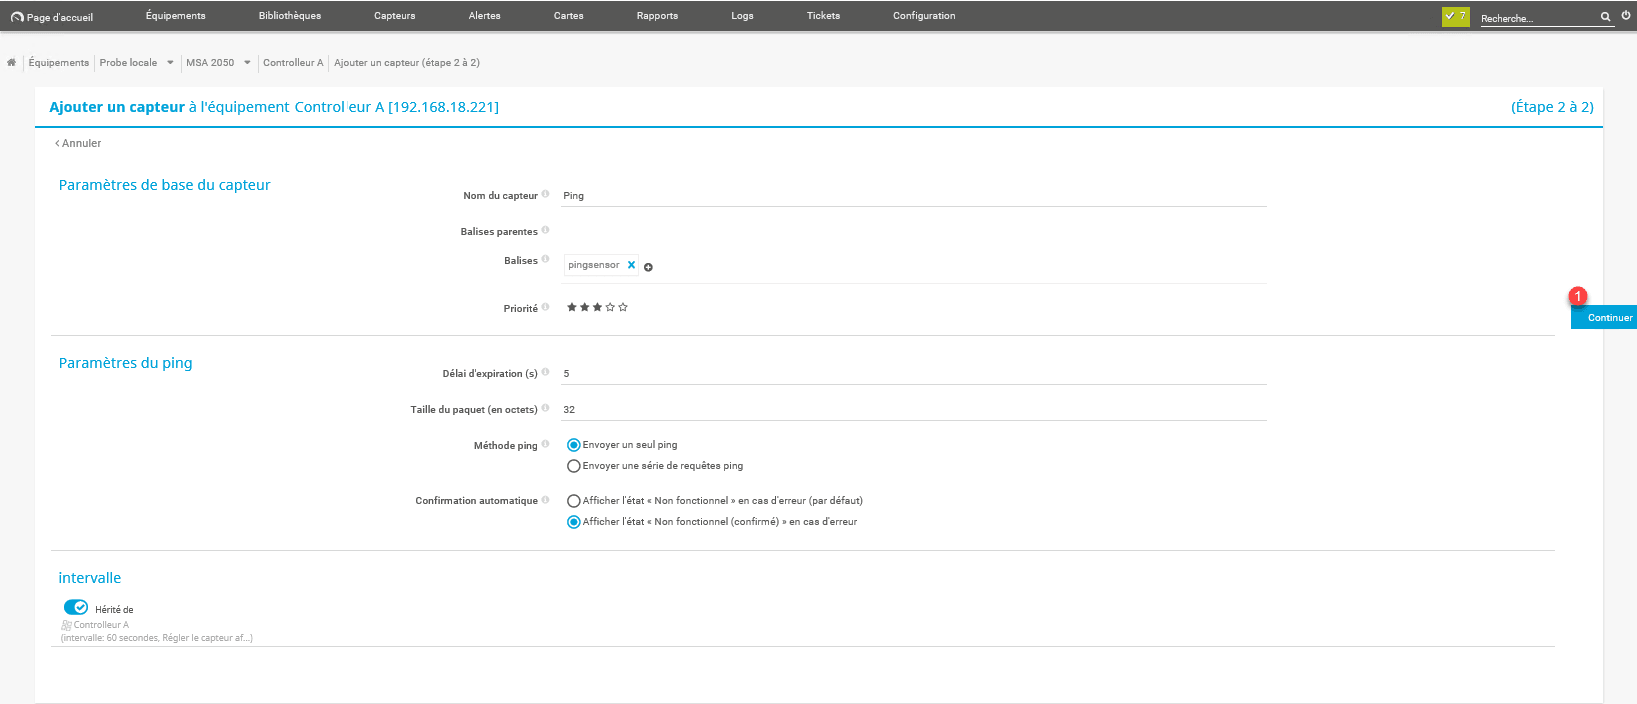
Configure the sensor and click on Continue 1.
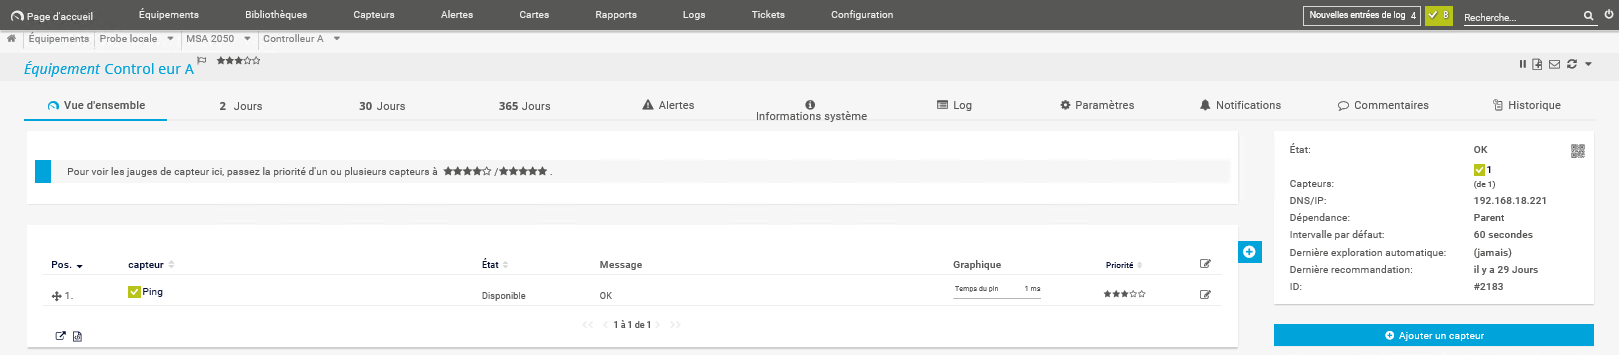
Wait a few minutes for the sensor to be operational.
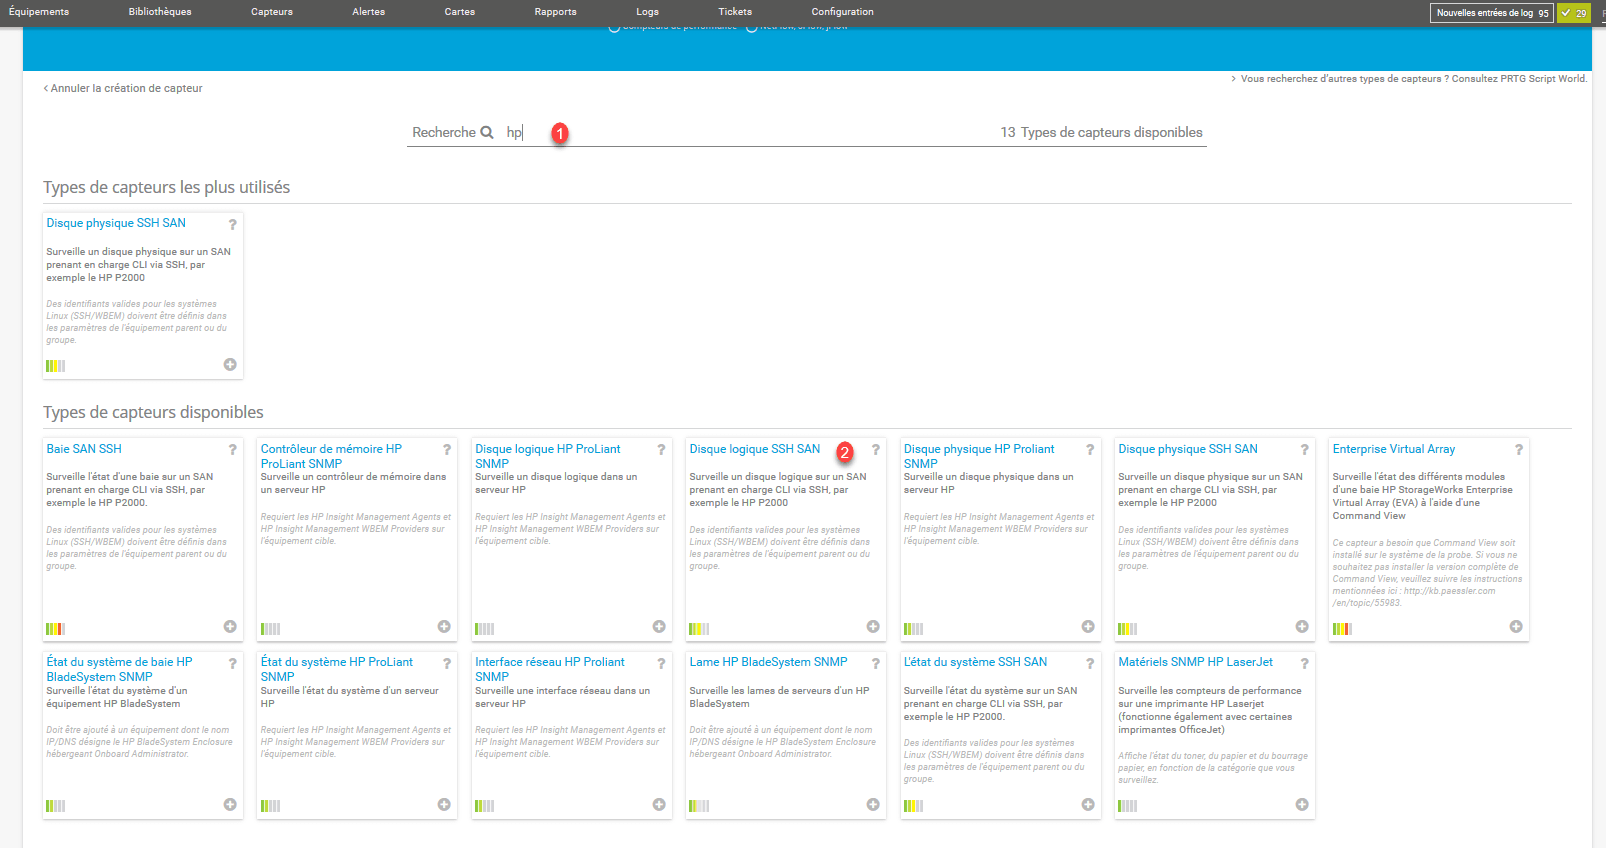
SAN SSH Array
Add a sensor to the equipment.
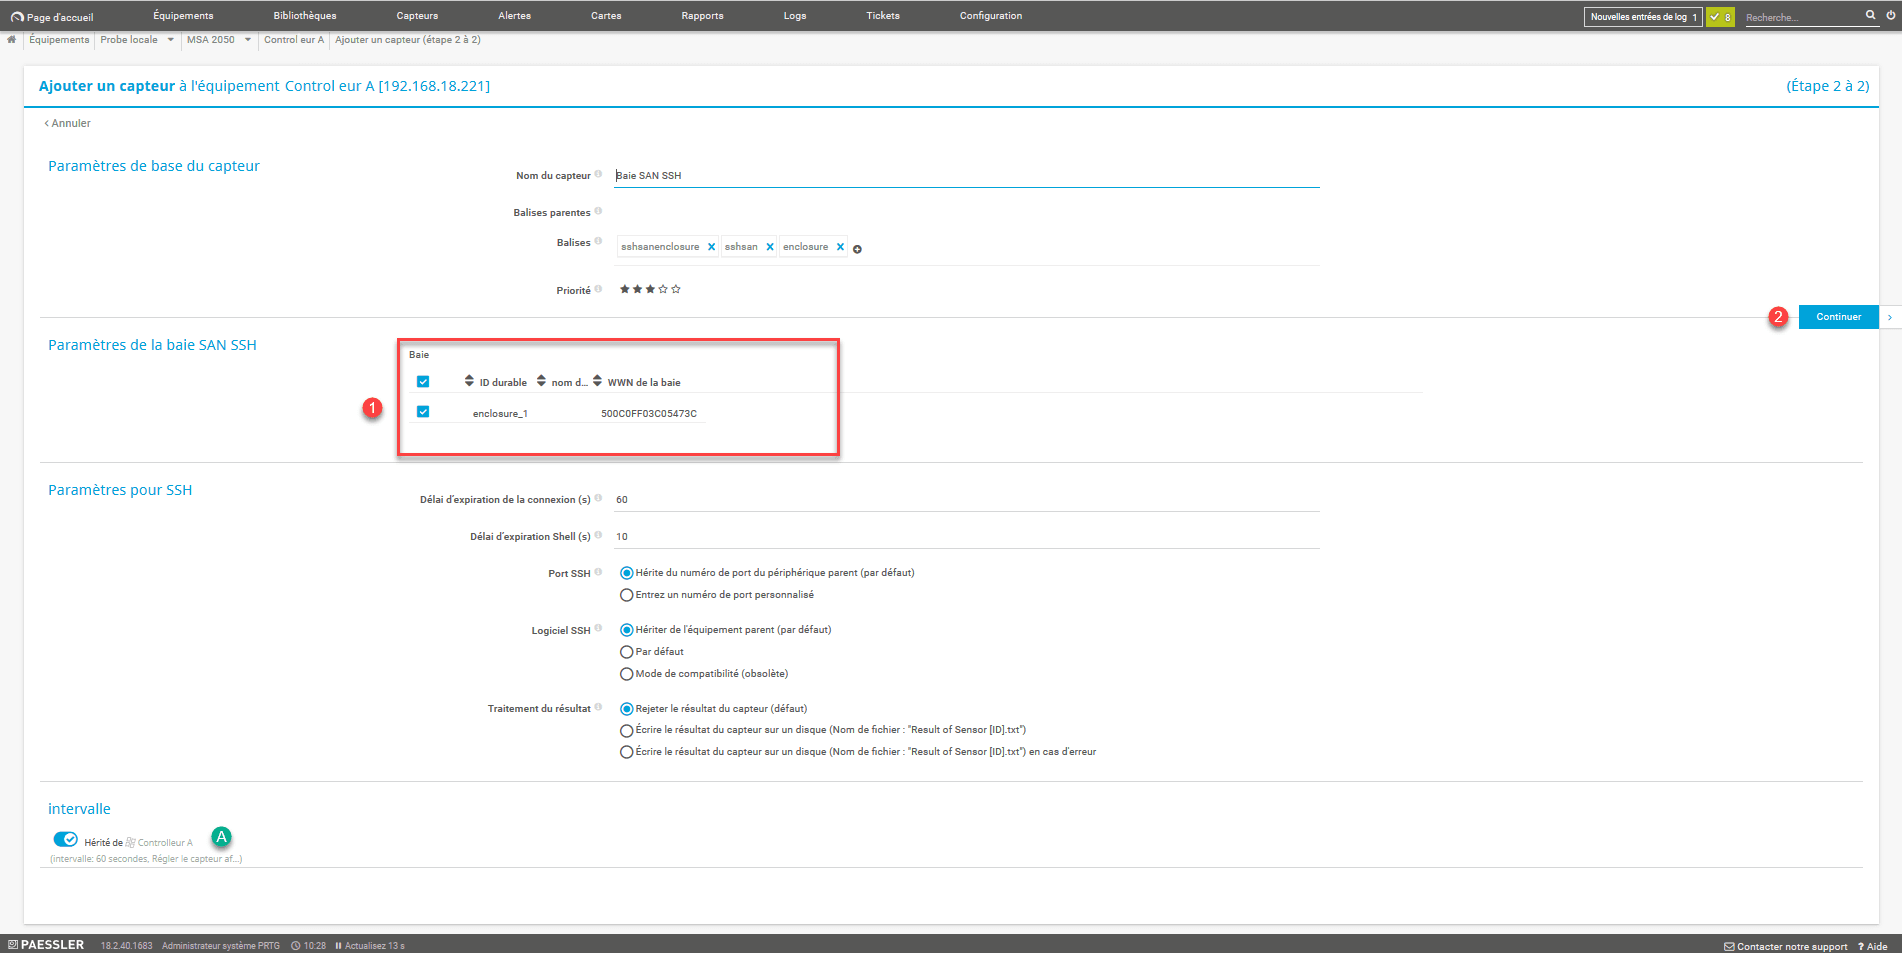
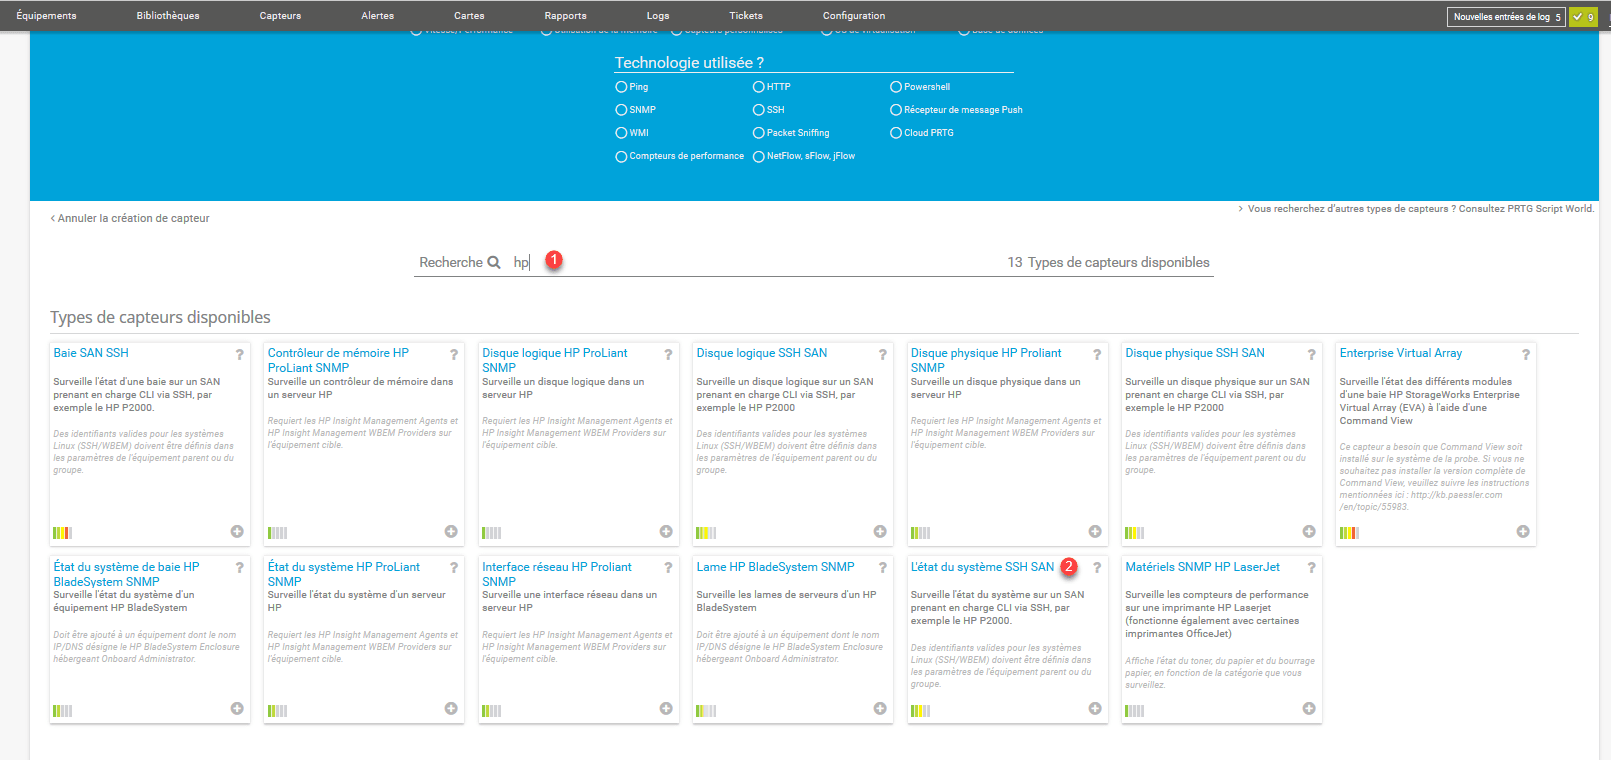
In the search box enter hp 1 and select the SAN SSH Array sensor 2.

Check that the sensor detects the bay 1 and click on Continue 2.
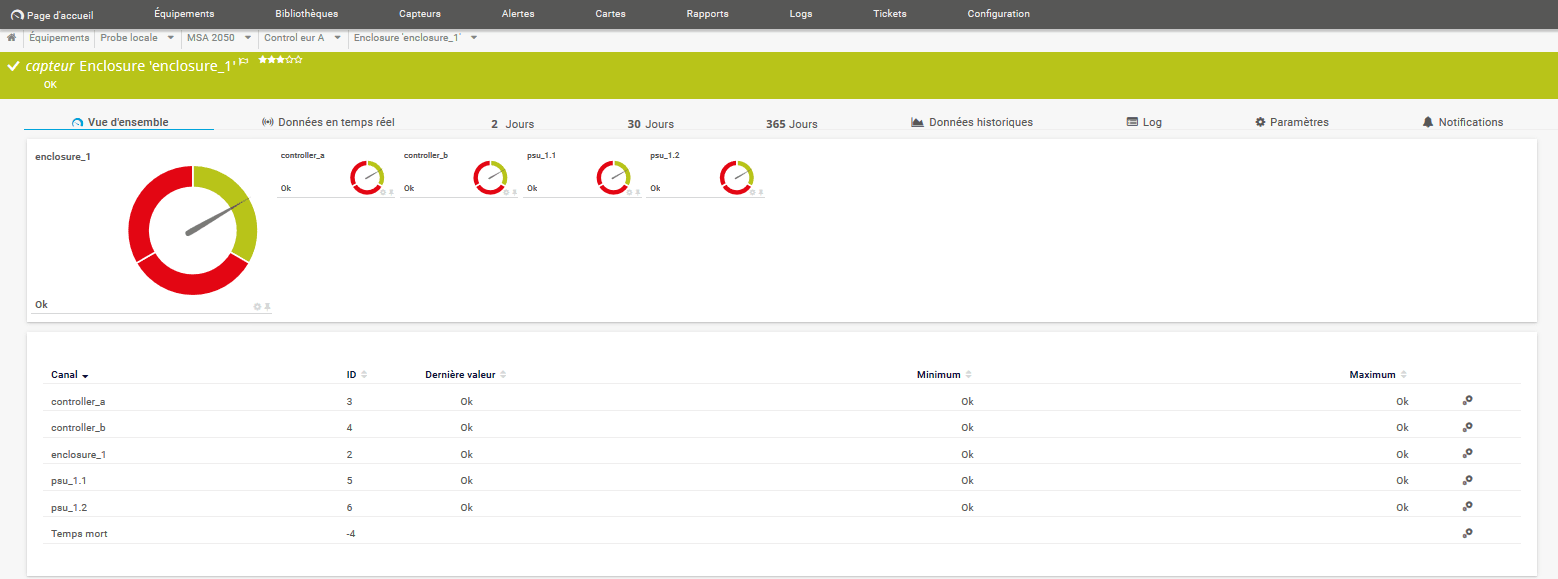
After a few minutes the sensor 1 should be operational.

Detail of the sensor.
SSH SAN system status
1. Ajouter un capteur à l’équipement.
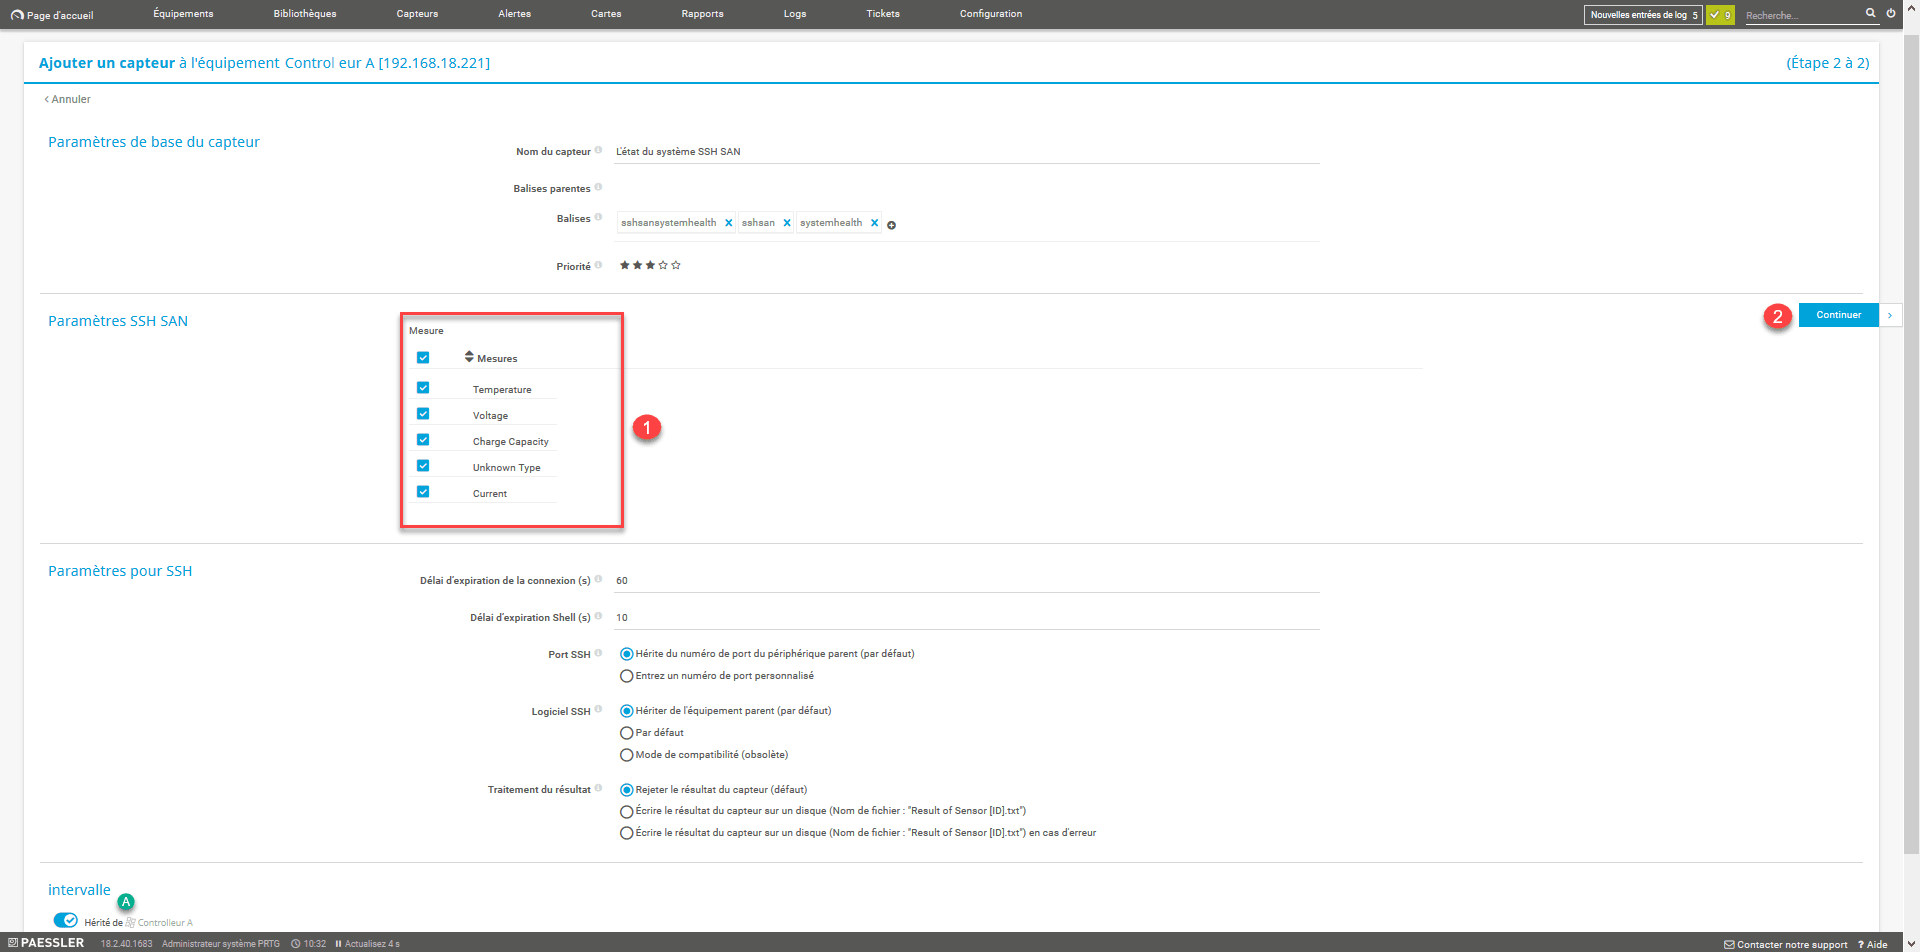
In the search field enter hp 1 and select the sensor the state of the SSH SAN system 2.
Check the items to monitor 1 and click Continue 2.
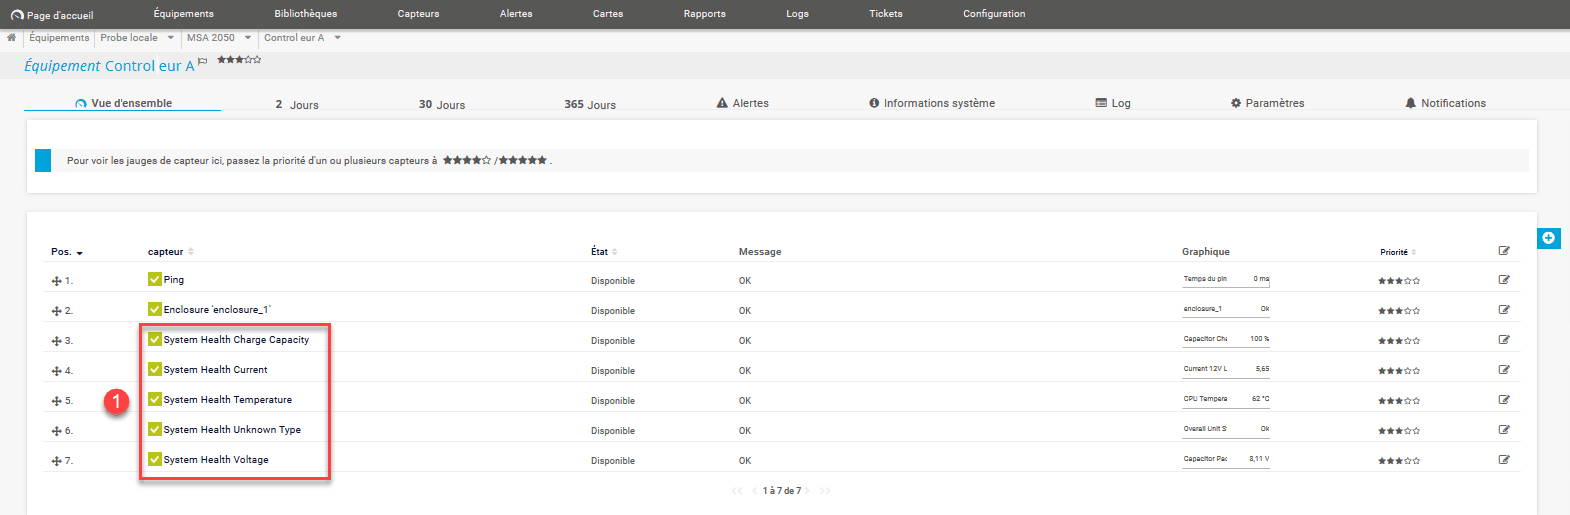
Sensor added 1.
SSH SAN physical disk
Add a sensor to the equipment.
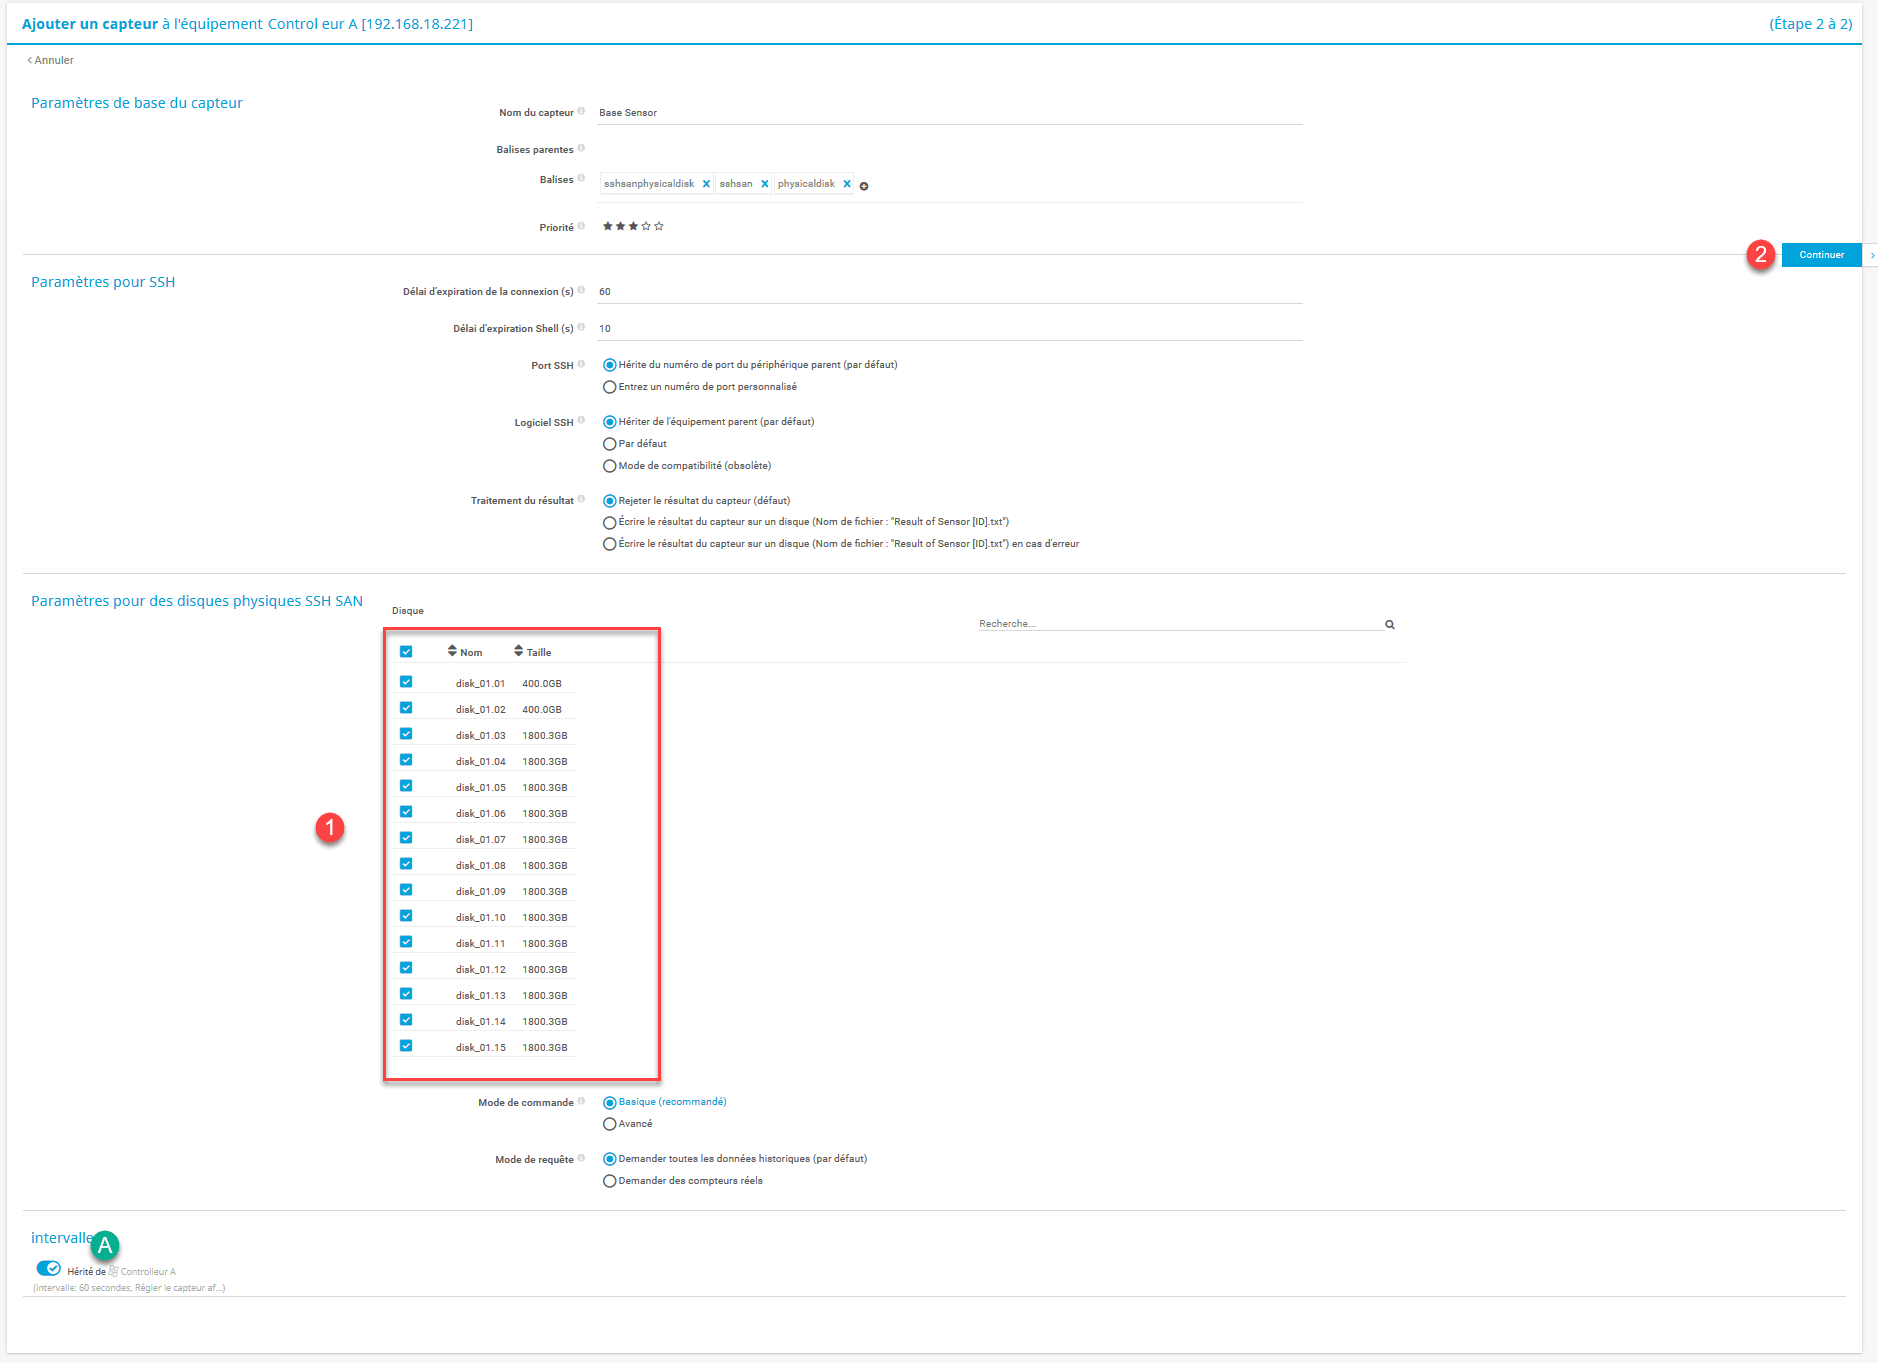
In the search field enter hp 1 and select the SSH SAN Physical Disk 2 sensor.

Select the physical disks 1 and click on Continue 2. You can also adjust the interval A (1h).
Disk sensors 1 on the equipment.

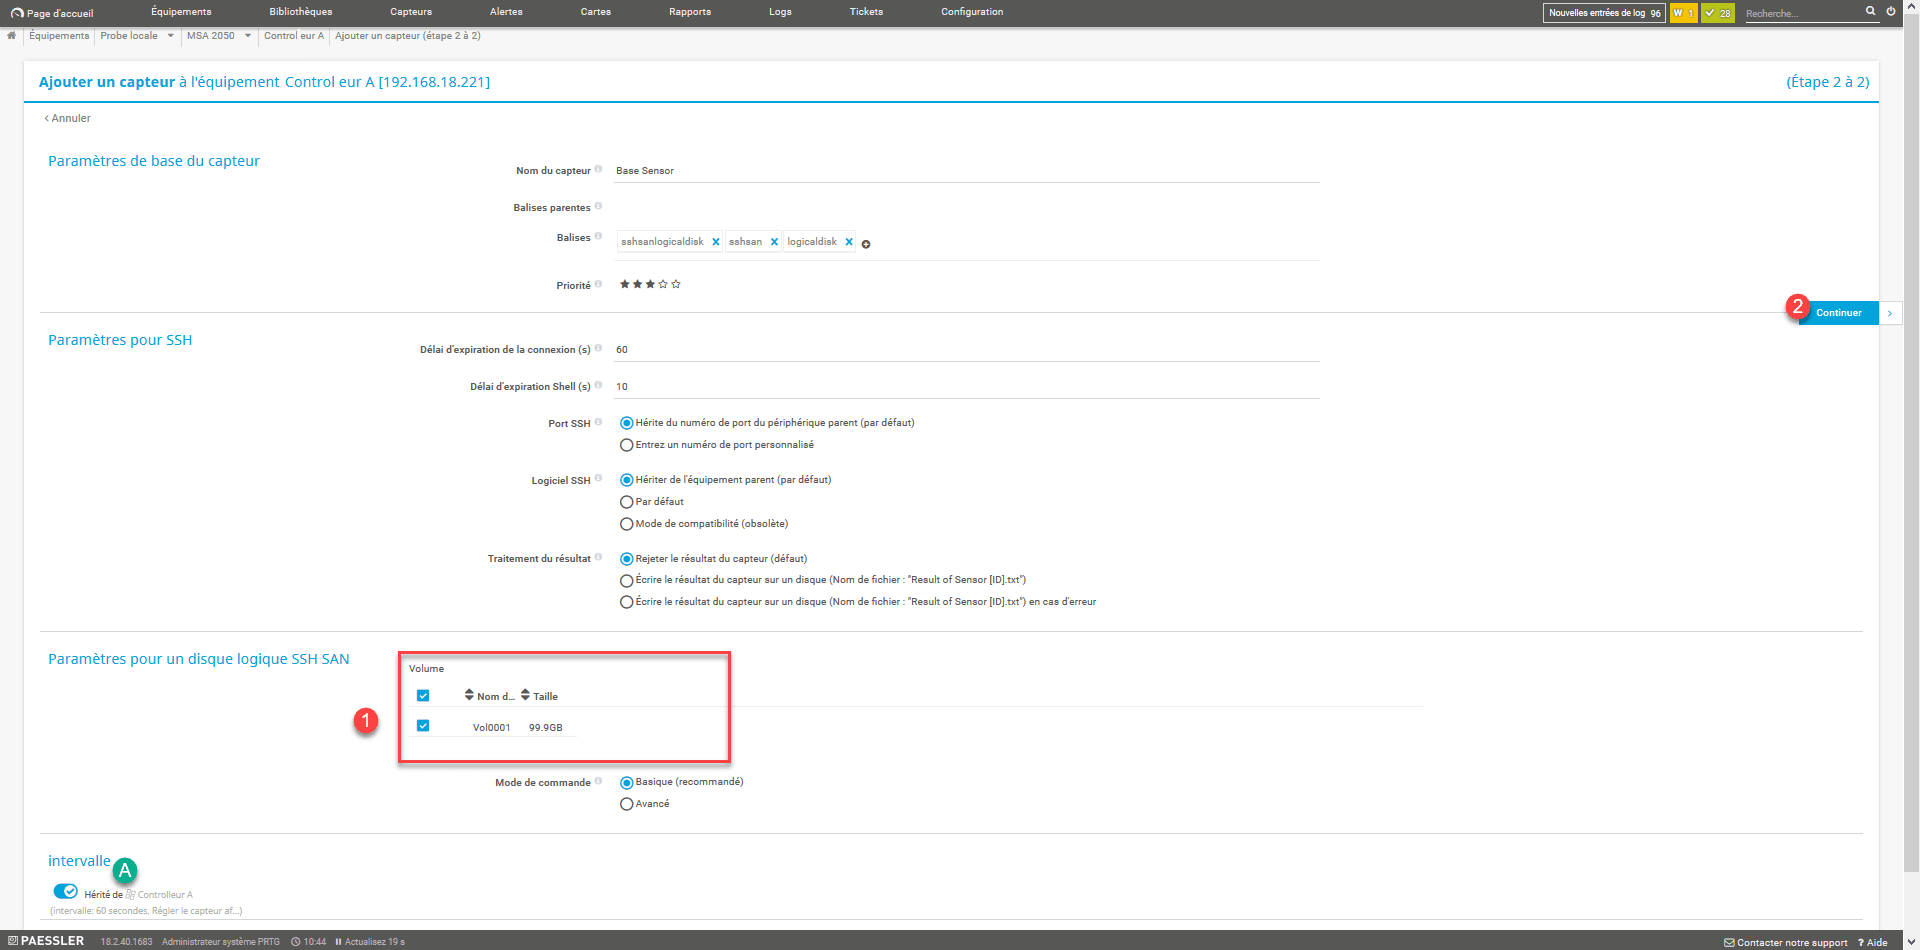
SSH SAN logical drive
Add a sensor to the equipment.
In the search field enter hp 1 and select the SSH SAN logical drive 2 sensor.
Check the volumes to be monitored 1 and click on Continue 2. You can also adjust the interval A (1h).
Display of volume 1 on the equipment.

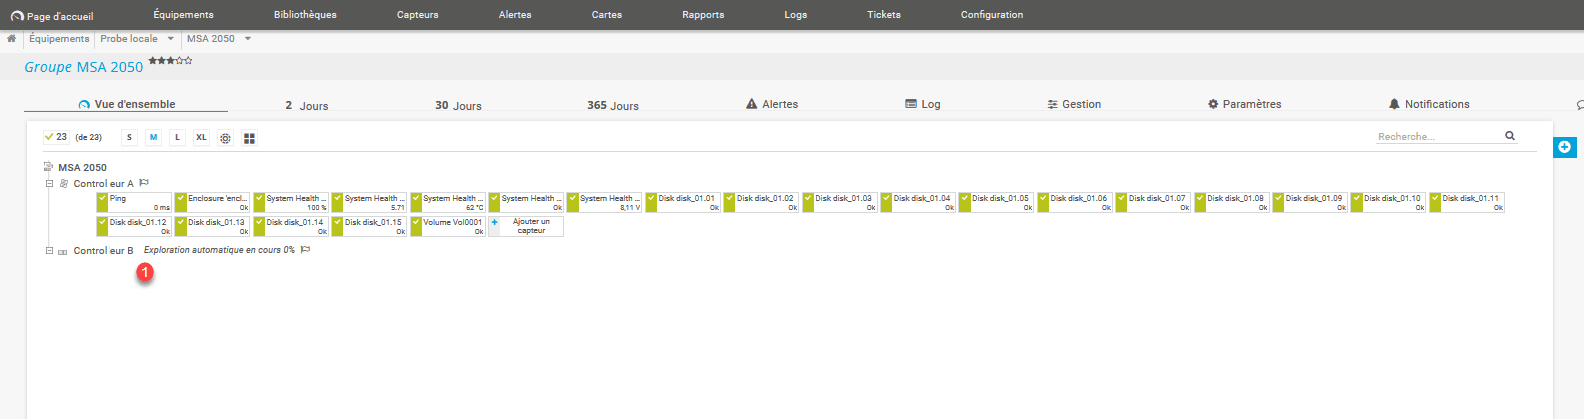
Controller B
To avoid having to redo all the manipulations, we will use the equipment models to save time.
Creation of the model
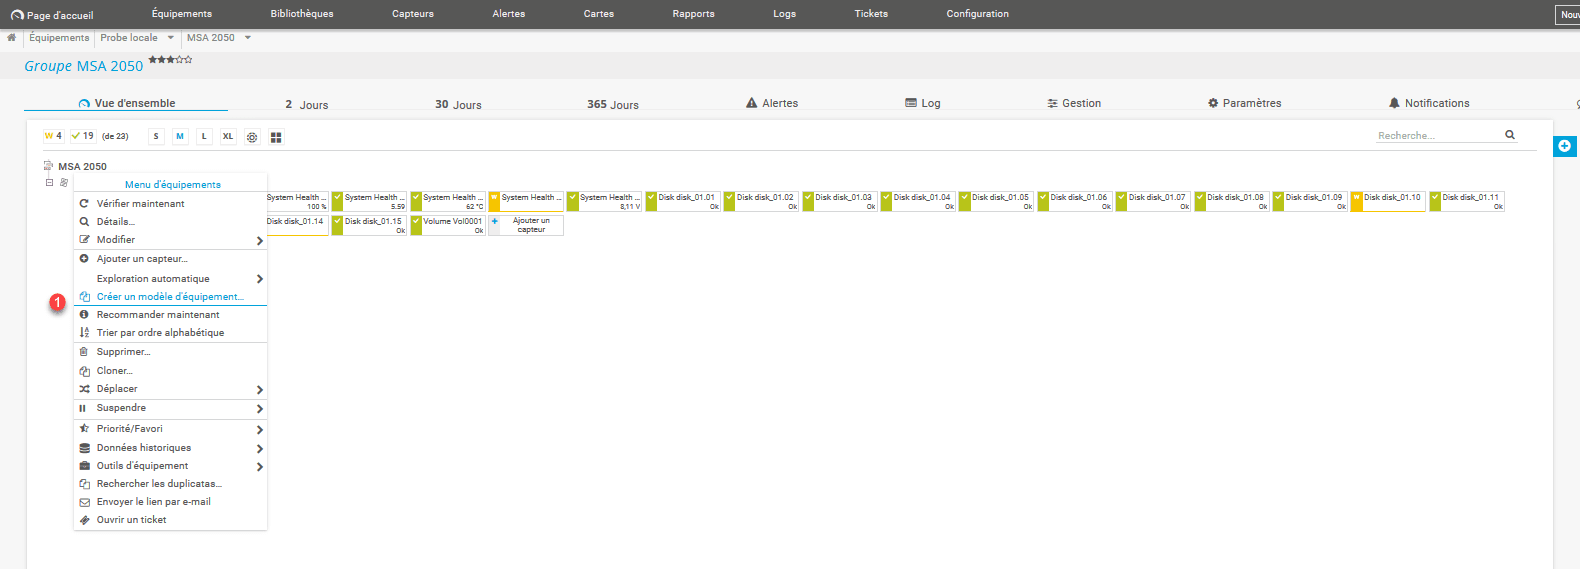
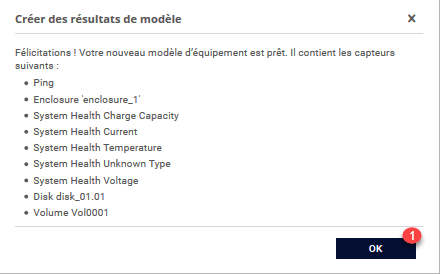
Right click on controller A and click on Create equipment model 1.
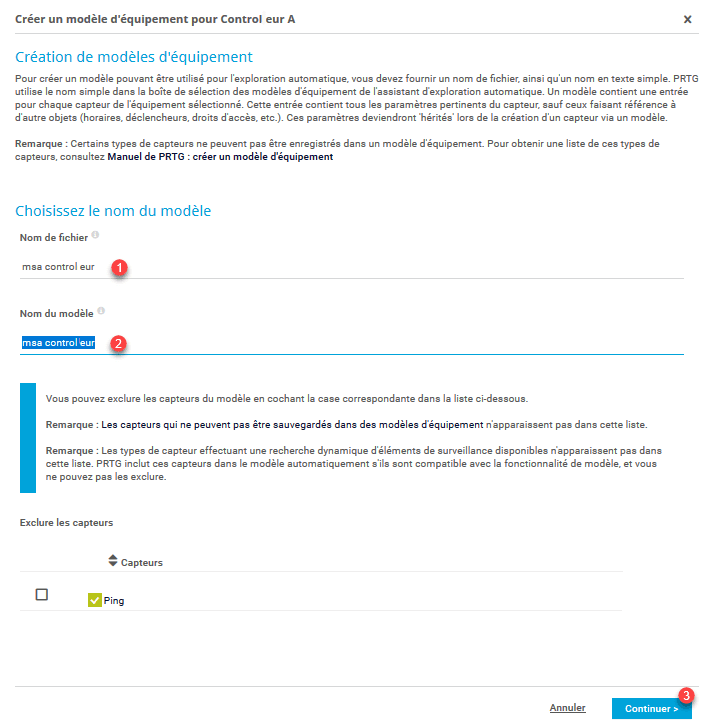
Give a name to the file 1 and to the model 2 then click on Continue> 3.
Click on OK 1 to close the result window.
Addition of equipment
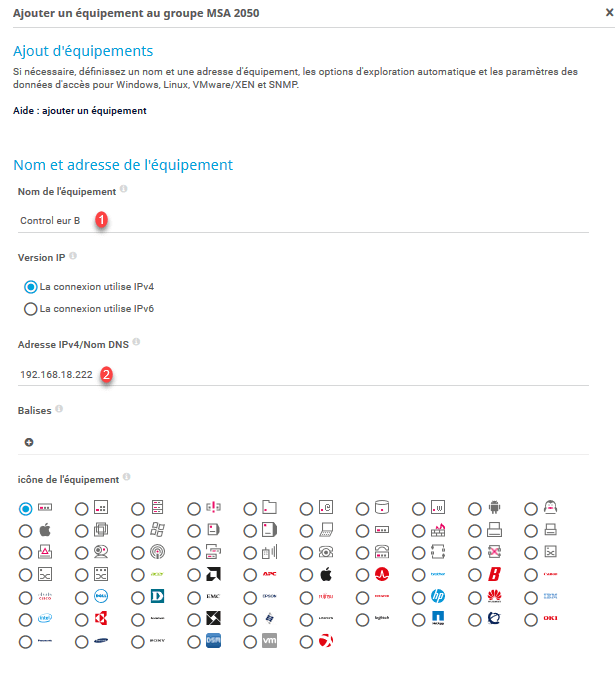
Right click on the group and click on Add a device 1.

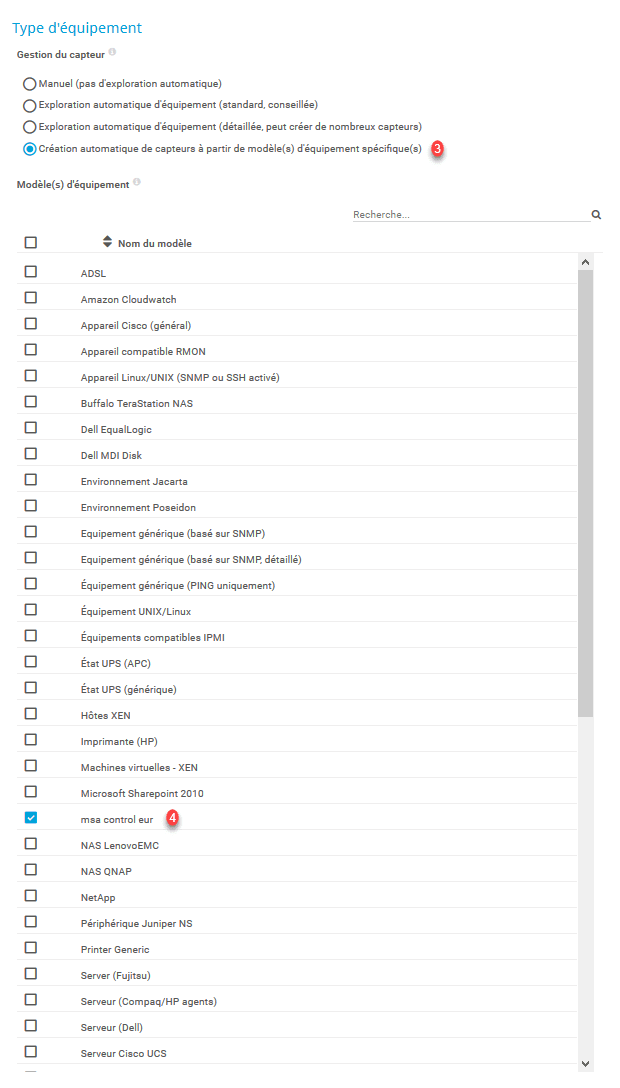
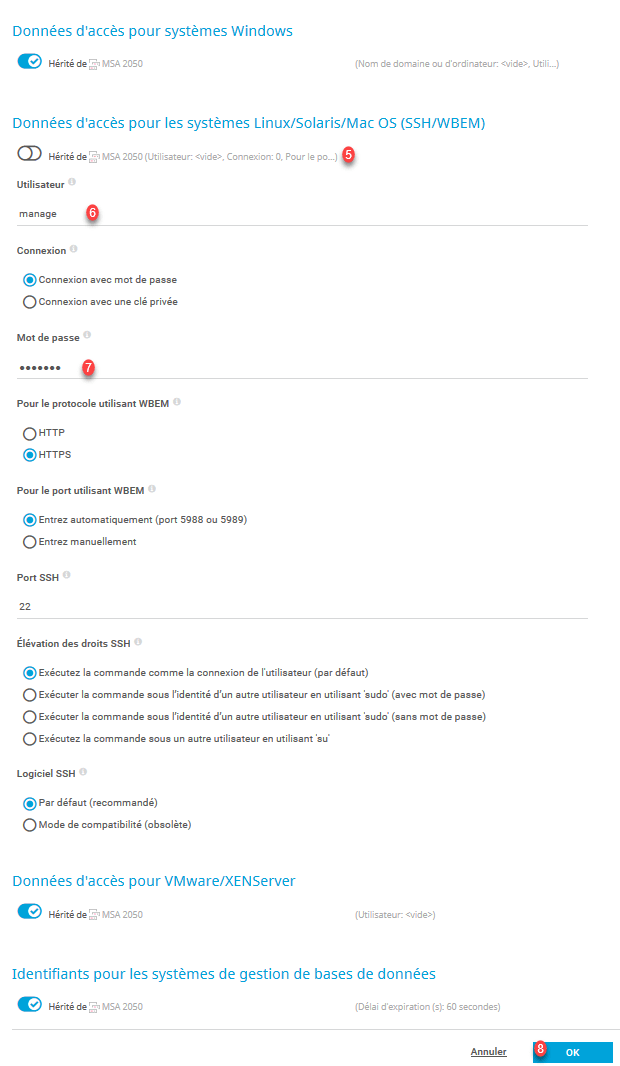
Give a name 1 and the IP address of the second controller 2. In Equipment type, check Automatic sensor creation from specific equipment model (s) 3 and select the model 4. Then in Access data for Linux / Solaris / Mac OS systems (SSH / WBEM) 5 specify the identifier 6 and the password 7 of the manage account. Finally click on OK 8 to start the creation.
The equipment is created 1, it is in the process of Exploring the sensors.
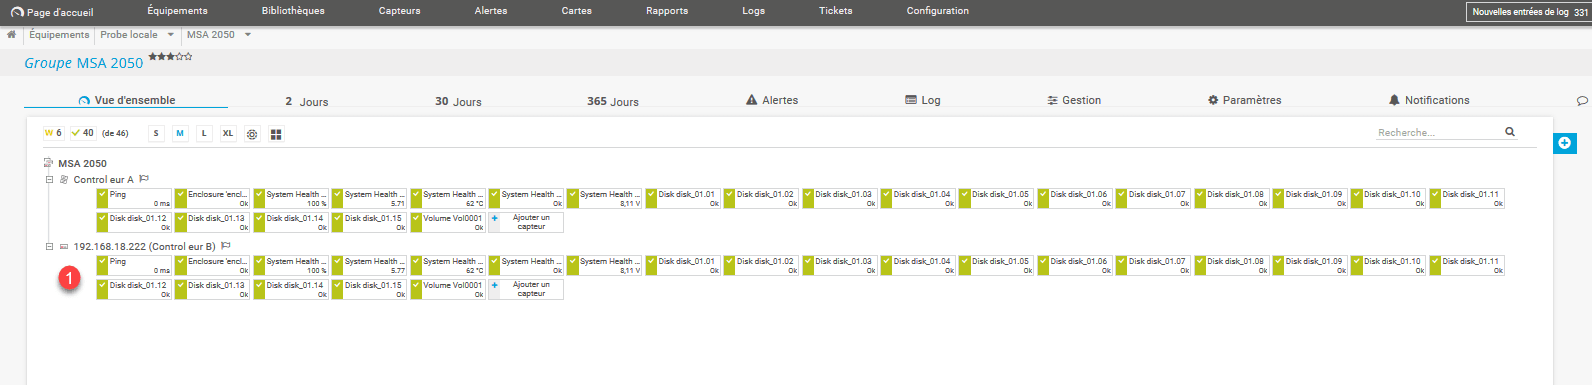
After a few minutes controller B should be available with the same sensors as for controller A.