In this tutorial, I will explain how to supervise a QNAP NAS with PRTG.
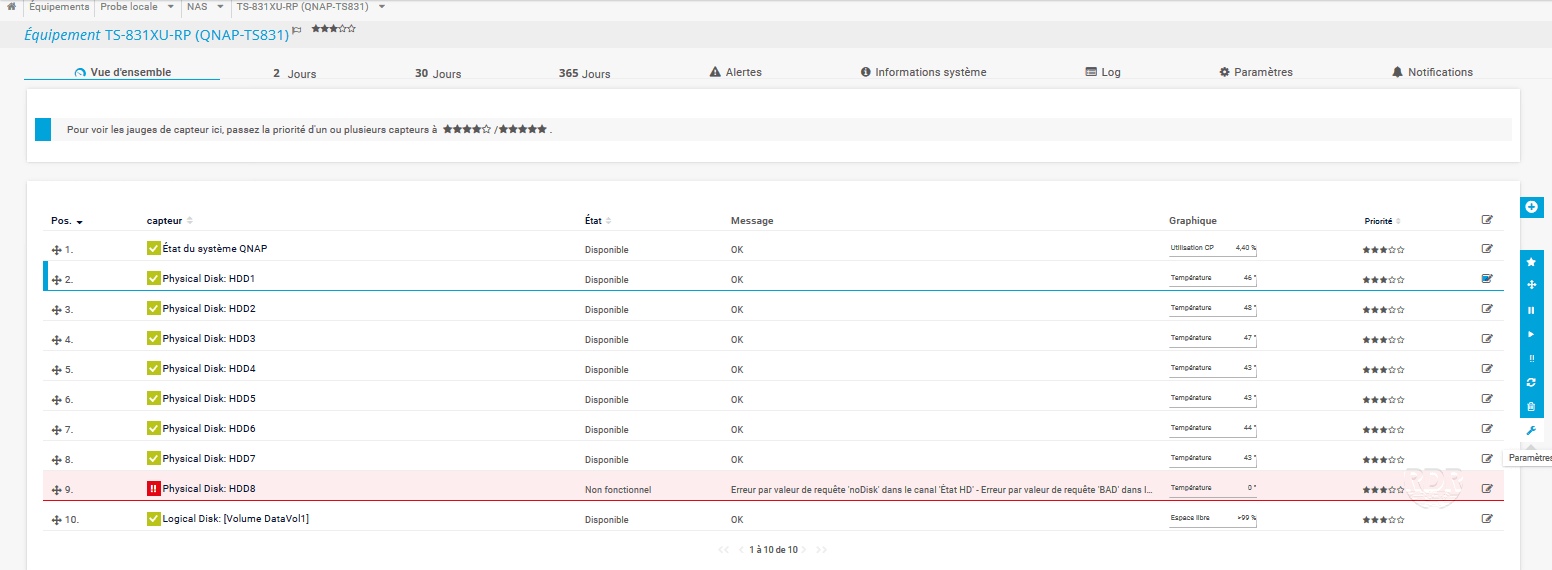
PRTG integrates a model for QNAP NAS that allows the automatic creation of the following sensors:
- QNAP system status
- Physical disks
- Logical disks.
Table of Contents
Configure the SNMP Agent on the NAS
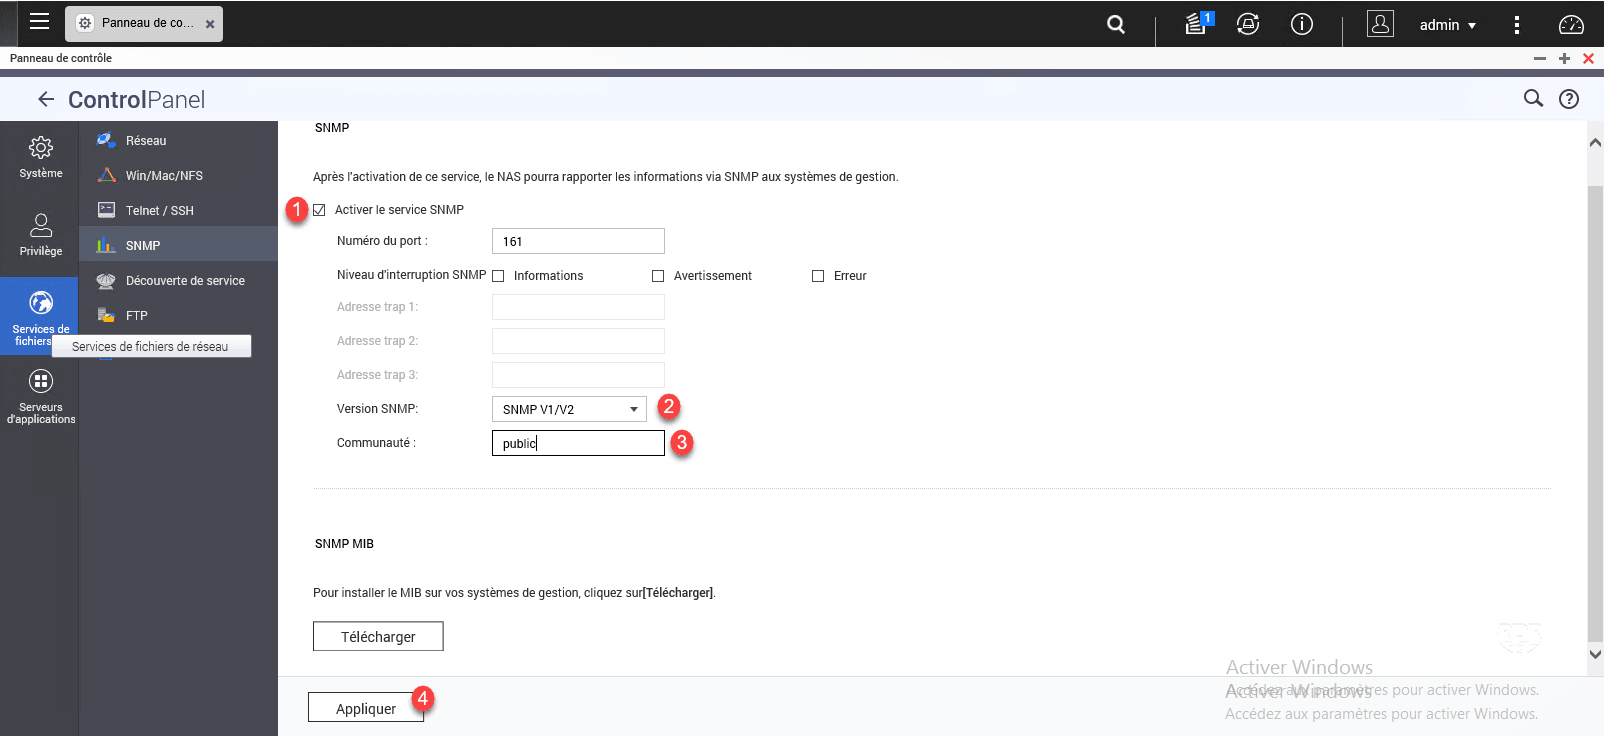
1. On the NAS web interface, open the control panel and click SNMP 1 .
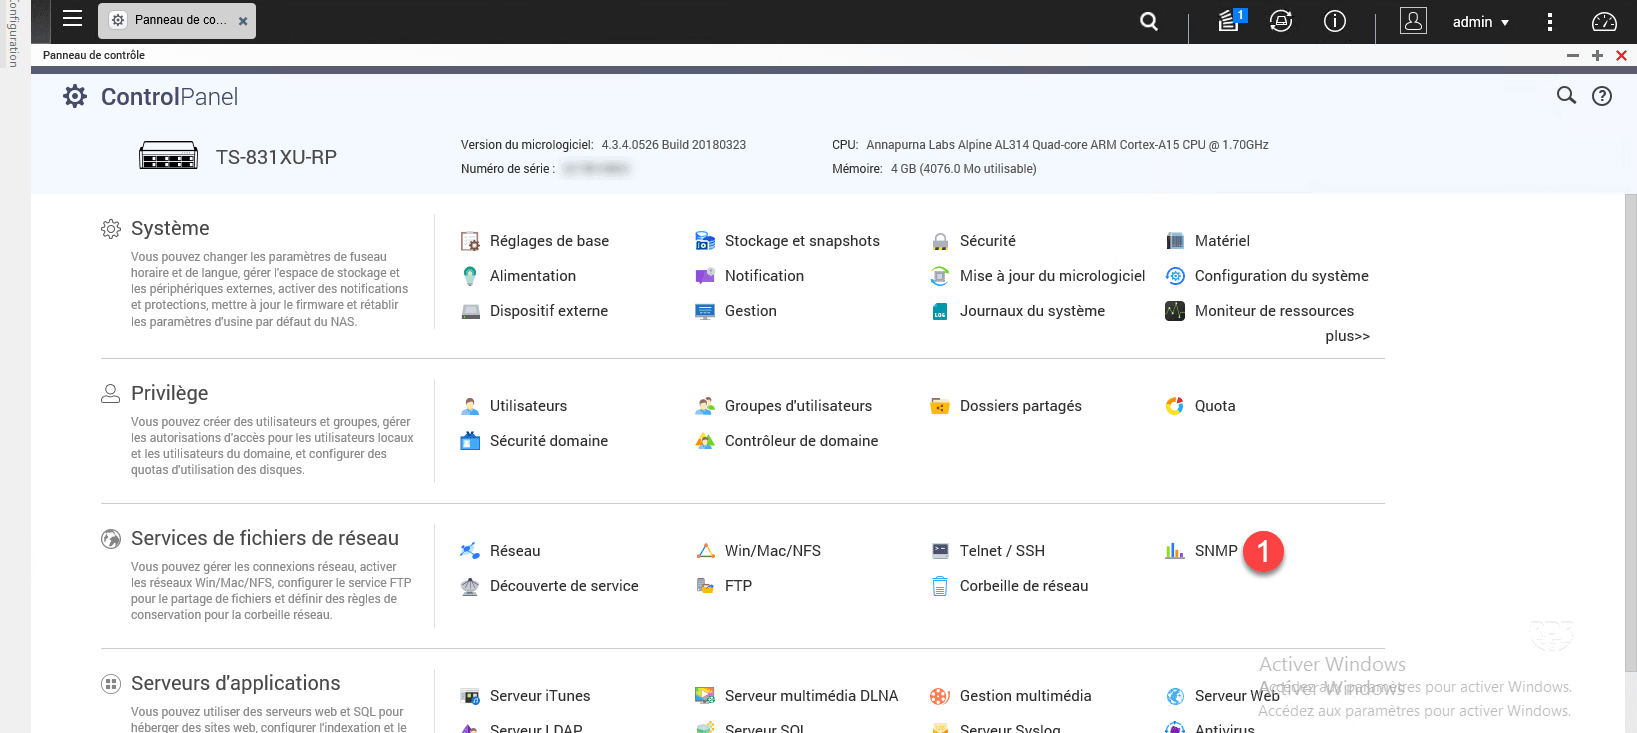
2. Check the box to enable the SNMP 1 service, configure the SNMP version 2 then enter the community name 3 and finish by clicking Apply 4 .
Now that the NAS is set up, we’re going to switch to supervising in PRTG.
Supervision of the QNAP NAS
1. Go to the PRTG interface and add a device.
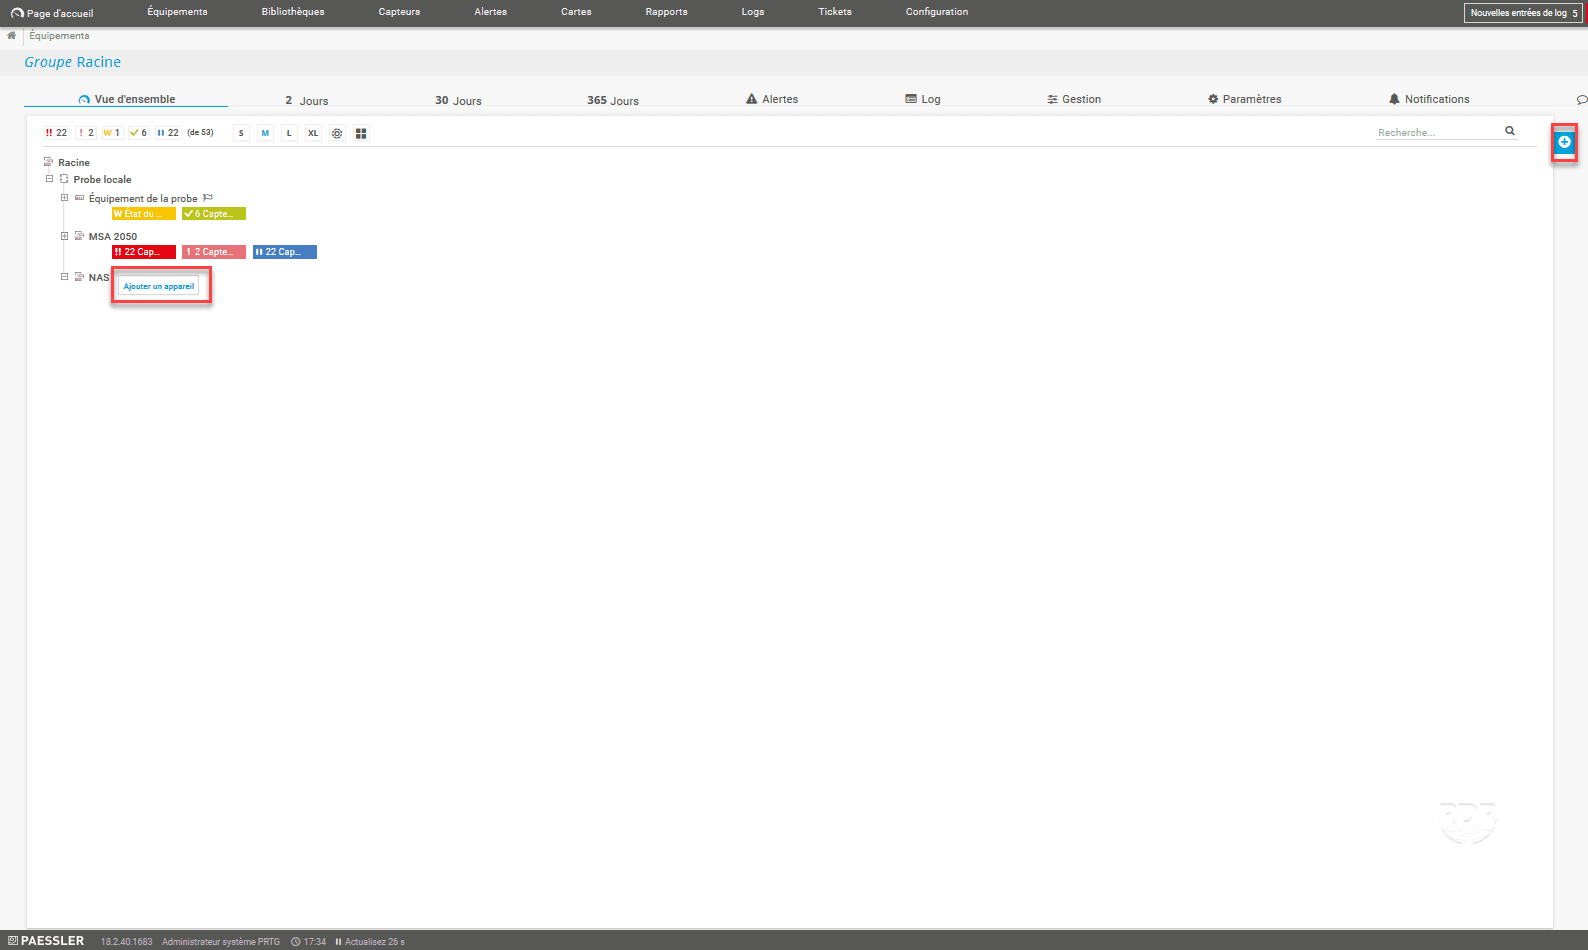
2. Configure the equipment:
| 1 Name 2 IP adress 3 Select Automatic sensor creation from specific equipment model (s) 4 Choose the QNAP NAS model 5 Configure SNMP data 6 Click OK | 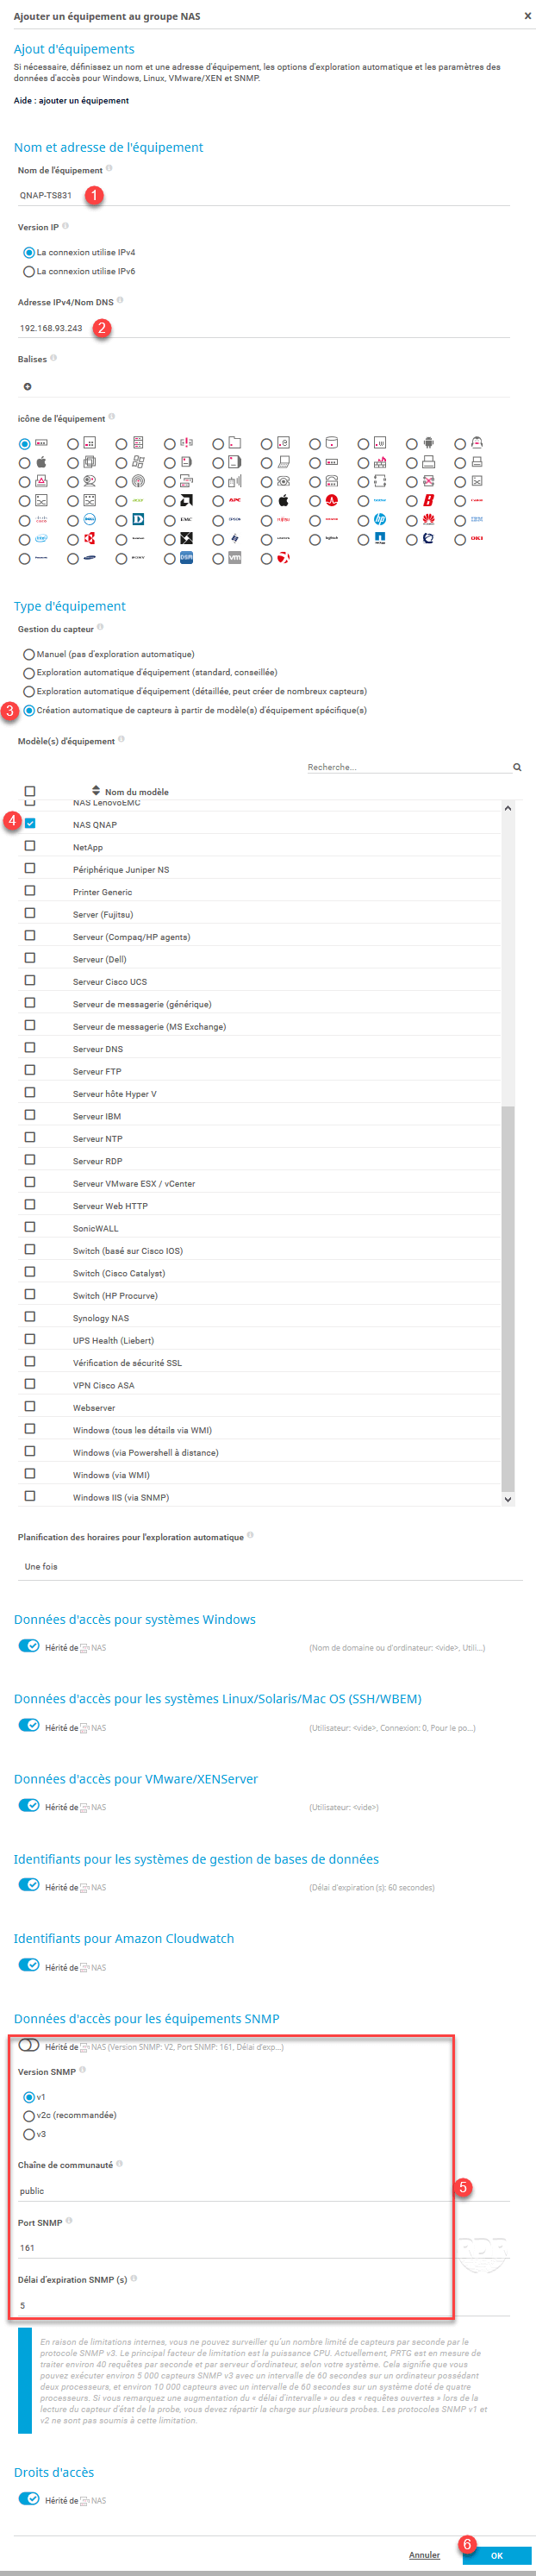 |
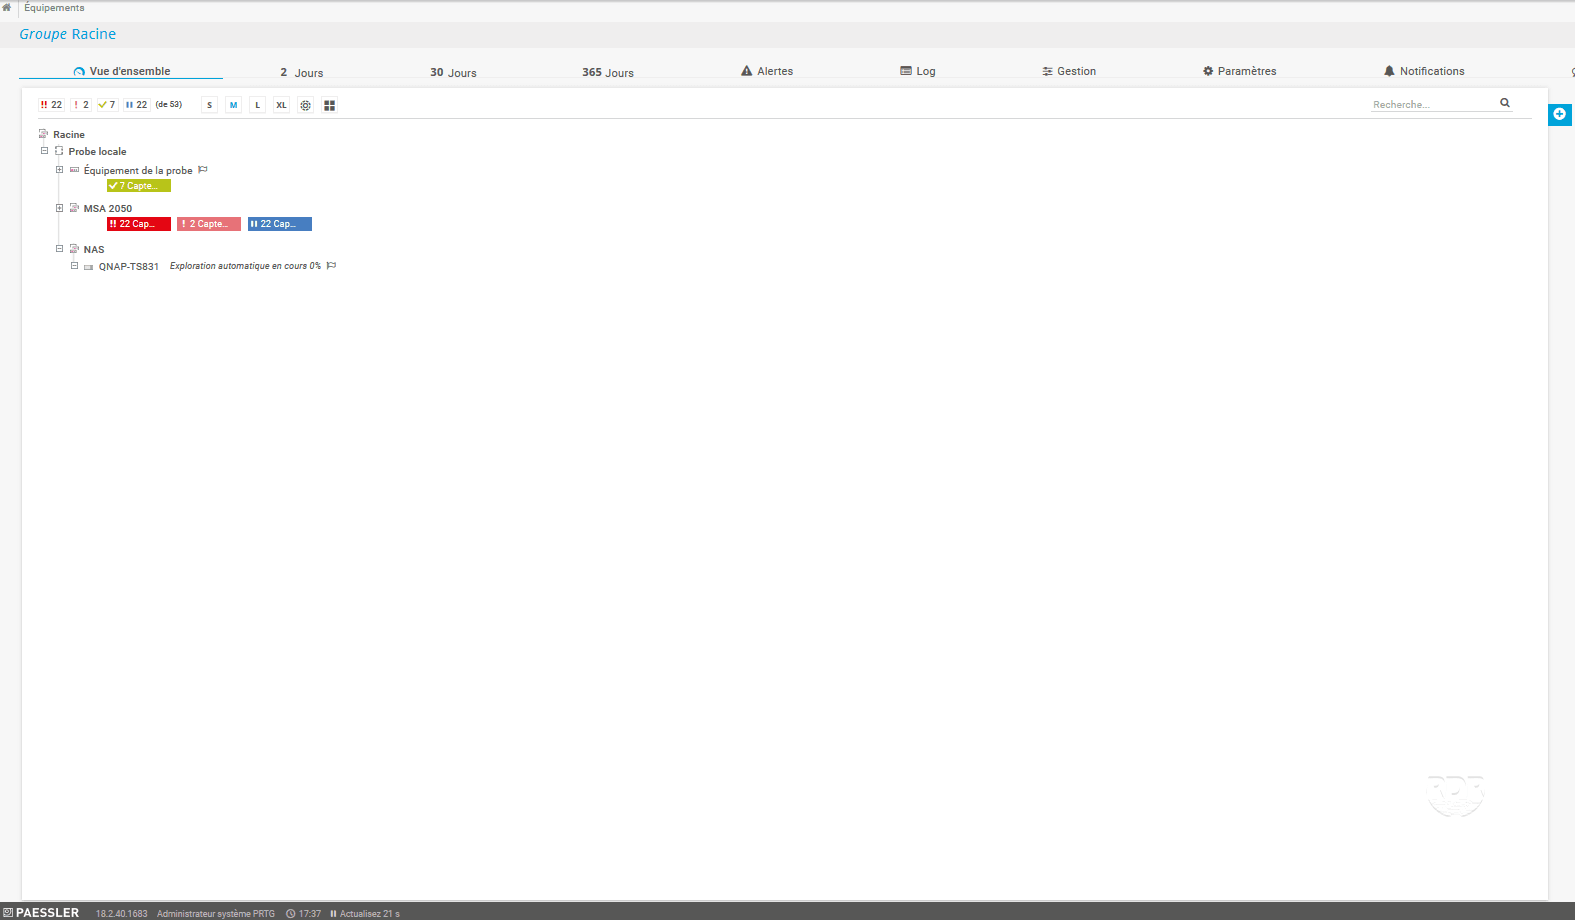
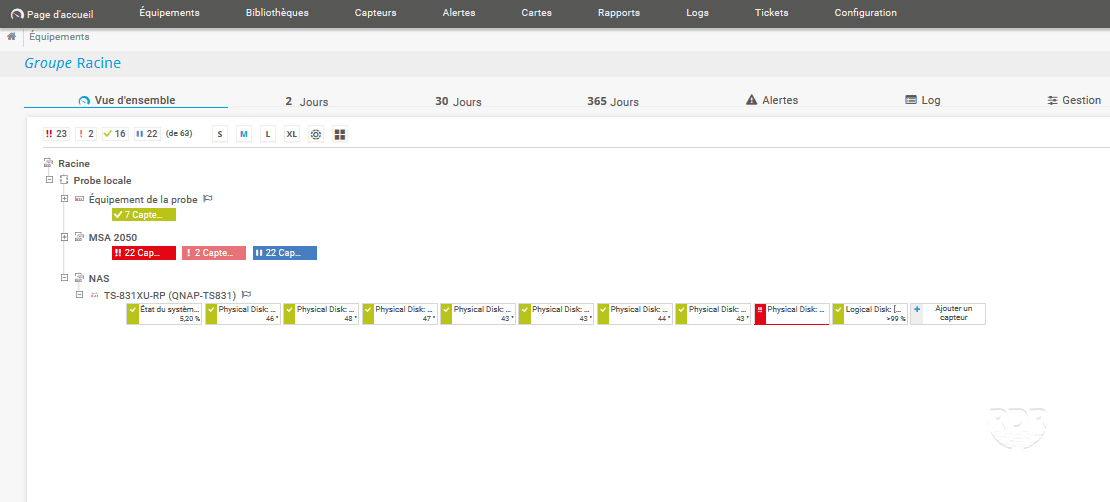
3. Wait during automatic exploration …
4. The sensors are created.
Crawl does not create a ping sensor.
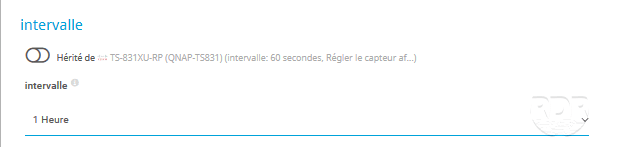
Troubleshooting
It is possible on the NAS to have an SNMP Dos detected alert.
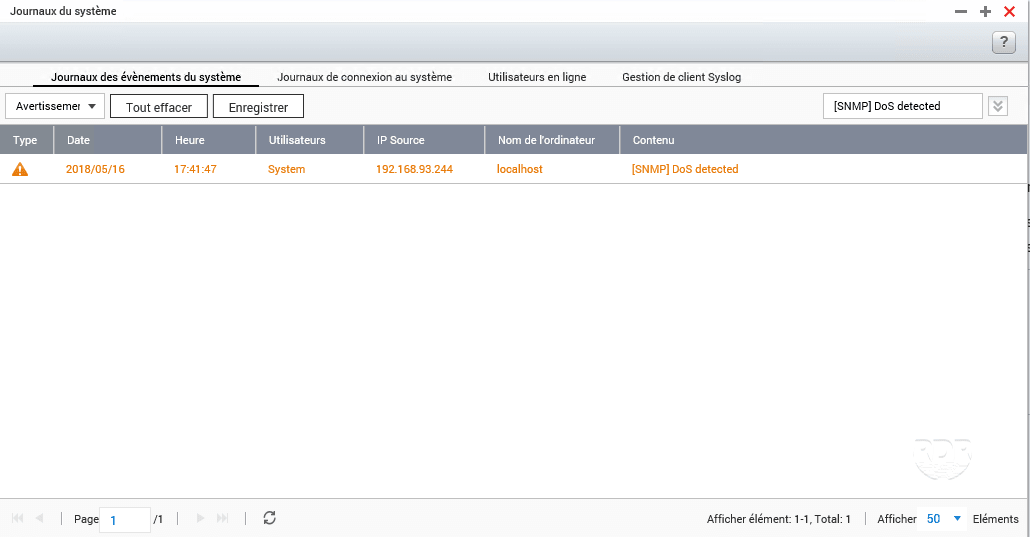
To correct the problem, change the polling interval of the SNMP sensors.