In this tutorial, we will see how to install and configure MDT (Microsoft Deployment Toolkit) which is a free deployment tool from Microsoft. Then how to deploy Windows 10.
MDT allows both the deployment of Desktop version and Server versions of Windows.
The administration of MDT is done using an MMC console in which we will configure a network share with all the elements that will allow the deployment and customization of Windows.
Unlike WDS (Windows Deployment Services), MDT does not offer a PXE boot environment, instead we will generate a Pre boot environment (WinPE) in ISO and WIM format.
To use the WinPe environment, several possible solutions:
- Burn ISO
- Create a bootable USB key.
- Present the ISO directly on Hyper-V / VMware / Idrac..
- Add WIM to WDS.
- Prerequisites for installing MDT
- Hardware requirements
- Software requirements
- Installation of Microsoft Deployment Toolkit – MDT
- Download MDT
- Installation of Microsoft Deployment Toolkit
- MDT: Configuration of deployment sharing – DeploymentShare
- Deployment sharing configuration
- A few words about Deployment Shares.
- MDT: Generate the WinPE installation image
- Configuring the WinPE environment
- Generate WinPE image
- MDT: add Windows image
- MDT: Add a task sequence
- MDT: Windows deployment
- Conclusion
Prerequisites for installing MDT
Hardware requirements
To set up MDT, you need a computer (virtual or physical) with preferably Windows server installed (it is possible to install MDT on Windows 10).
MDT consumes very little CPU and RAM resources, it is necessary to provide enough disk space for storing images, driver applications that will be deployed.
It is recommended to have at least a 1Gb connection.
Software requirements
On the computer where MDT will be installed it is necessary to install Windows ADK and the WinPE add-in for Windows ADK.
Windows ADK must first be installed and then the WinPE environment, because this is an additional module if ADK is not installed, it will not be possible to install the WinPE environment.
The installation of the two components being basic, I do not detail all the steps.
Warning
Since writing this tutorial, several Windows ADK and Windows PE updates have been released.
To work correctly with MDT, I advise you to download the ADK and Windows PE version for Windows 10, version 2004. This version of the ADK and Windows PE components in no way prevents the deployment of Windows 11 with MDT
Windows ADK installation
Downlaod Windows ADK on the Microsoft site.
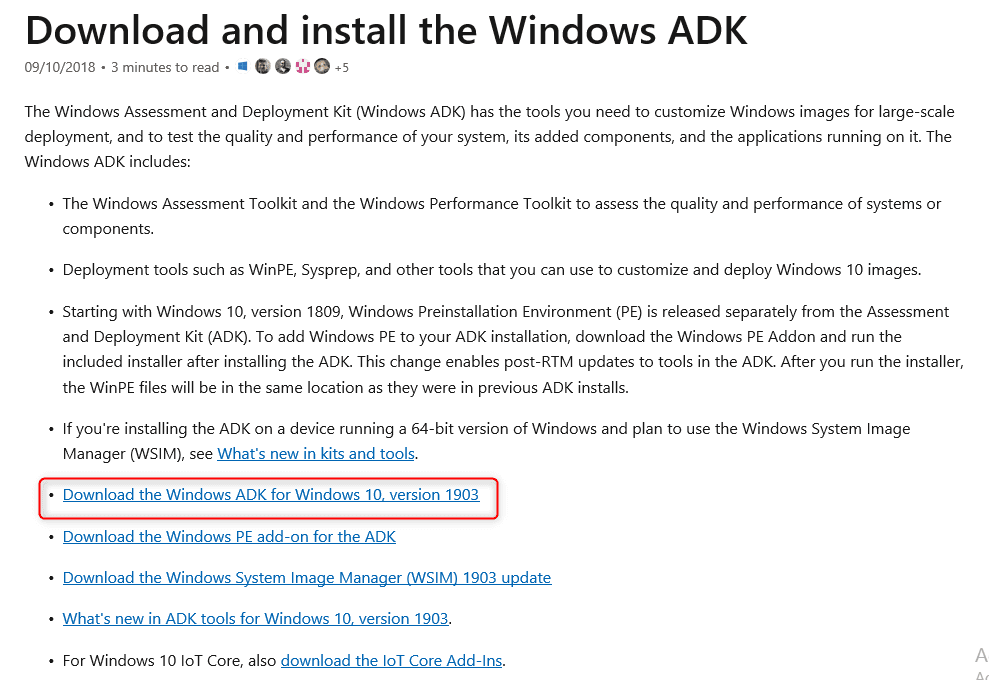
Run the download file (adksetup.exe).
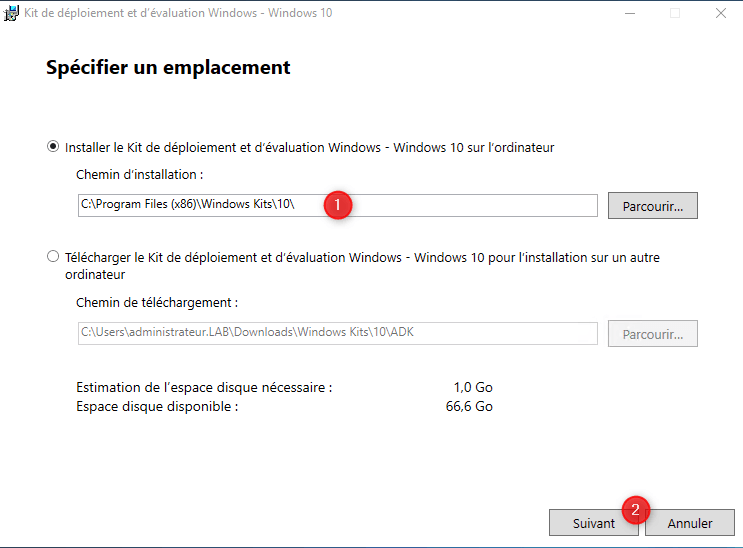
When launching the wizard, choose Install Windows Deployment and Assessment Kit – Windows 10 on computer 1 and click Next 2.
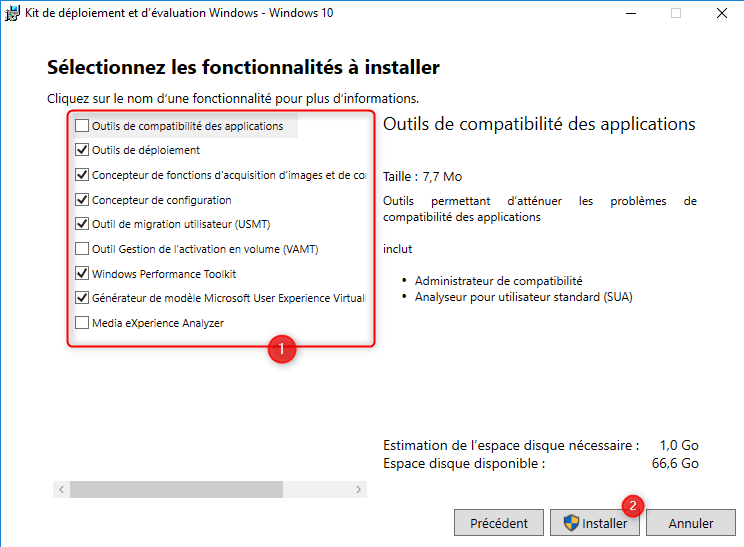
Skip the different stages of the wizard, at the choice of functionalities, select the functionalities as in the screenshot below 1 and click on Install 2.
Confirm the execution of the MSI then wait during the installation, once finished close the wizard.
Installation de Windows PE add-on for the ADK
Download Windows PE add-on for the ADK on the Microsoft website.

Run the download file (adkwinpesetup.exe).
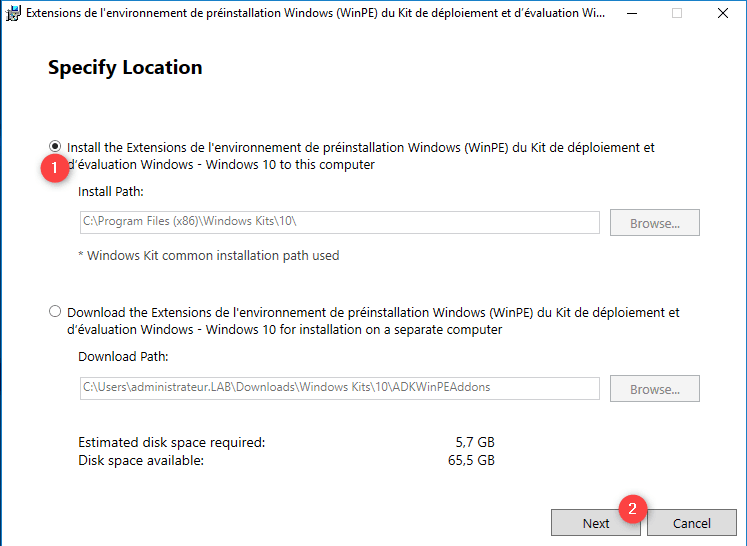
When launching the wizard, choose the installation option 1 and click on Next 2.
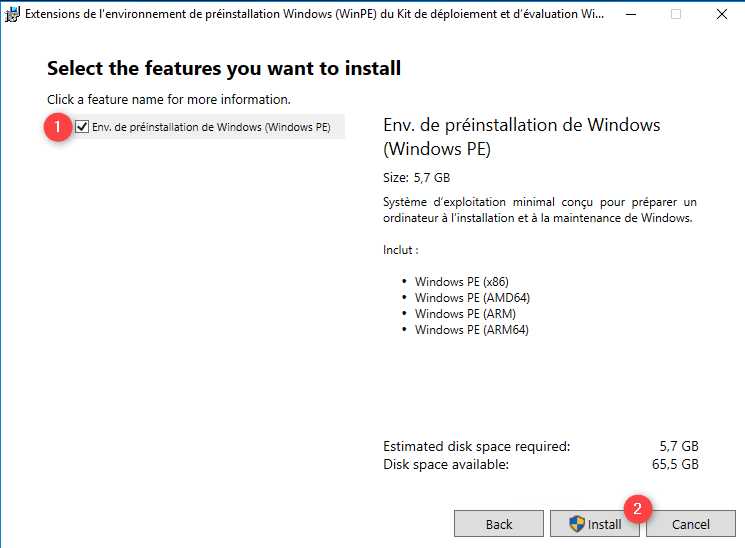
Select the Env component. Windows Preinstallation Guide (Windows PE) 1 and click Install 2.
Wait during the installation, the time will depend on the Internet connection ….
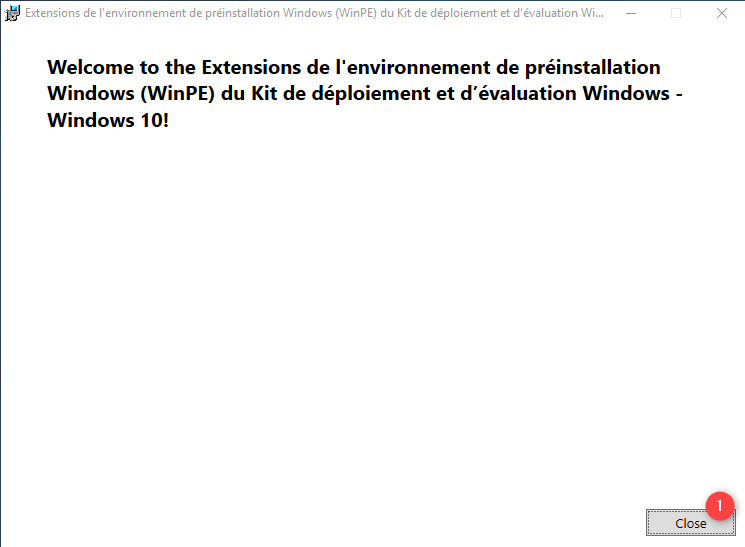
At the end of the installation, quit the wizard by clicking on Close 1.
Installation of Microsoft Deployment Toolkit – MDT
Download MDT
Download MDT on the Microsoft website.
Installation of Microsoft Deployment Toolkit
Run the download file (MicrosoftDeploymentToolkit_x64.msi).
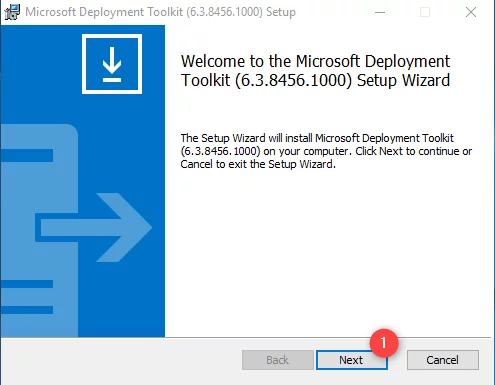
When the wizard is launched, click on Next 1.
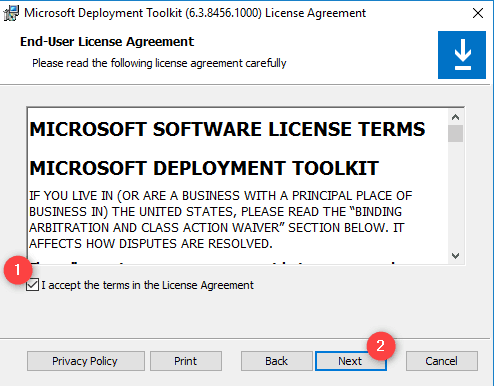
Check the box 1 to accept the license and click on Next 2.
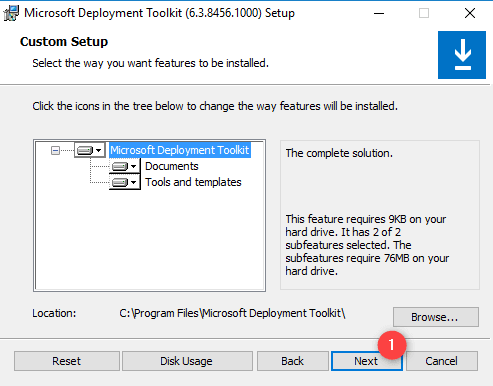
Leave the default components, if necessary change the installation path (the configuration of the location of the images is done after). Click on Next 1.
Choose if you want to send information to Microsoft 1 and click on Next 2.

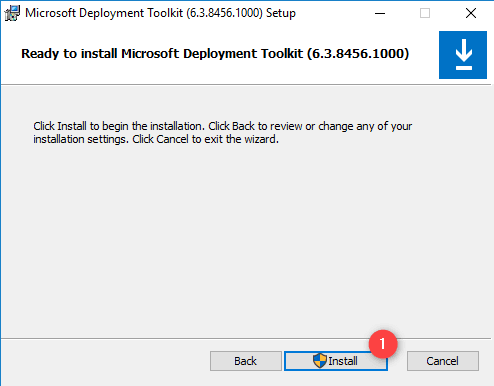
Click on Install 1.
Click on Yes 1 to authorize the installation program.

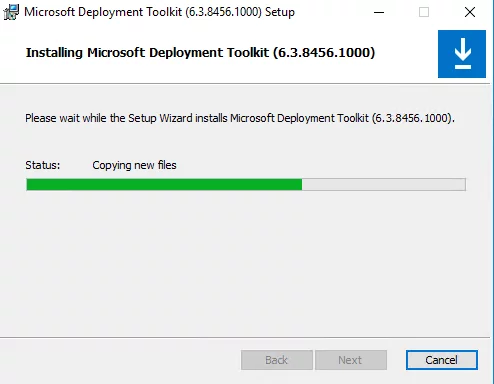
Wait during installation …
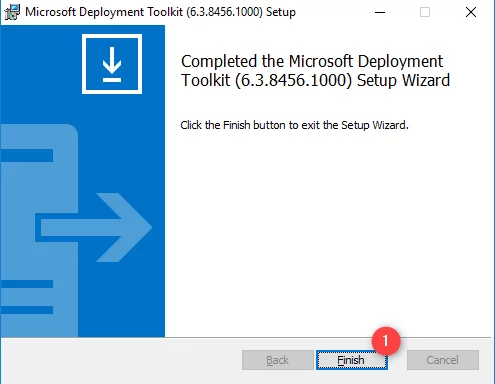
Once MDT has been installed, click on Finish 1 to close the wizard.
MDT: Configuration of deployment sharing – DeploymentShare
The first configuration step (which is to be done only once) is the configuration of the network share, which will store Windows images, applications and drivers. The WinPE installation environment is generated from the deployment share properties,
It is possible to configure multiple shares from the same console.
Deployment sharing configuration
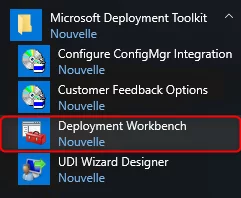
Open the MDT administration console available from the start menu.
Right click on Deployment Shares 1 and click on New Deployment Share

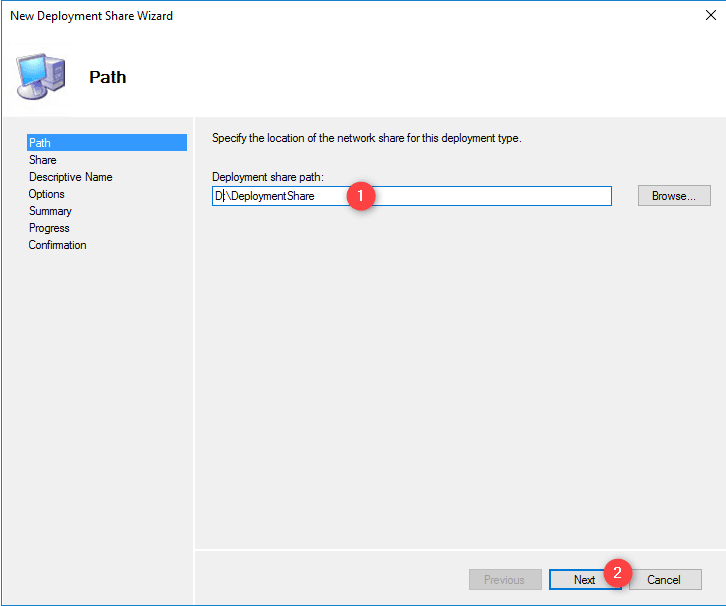
Indicate the physical location on the server 1 and click on Next 2>
Indicate the name of the share 1 and click on Next 2.
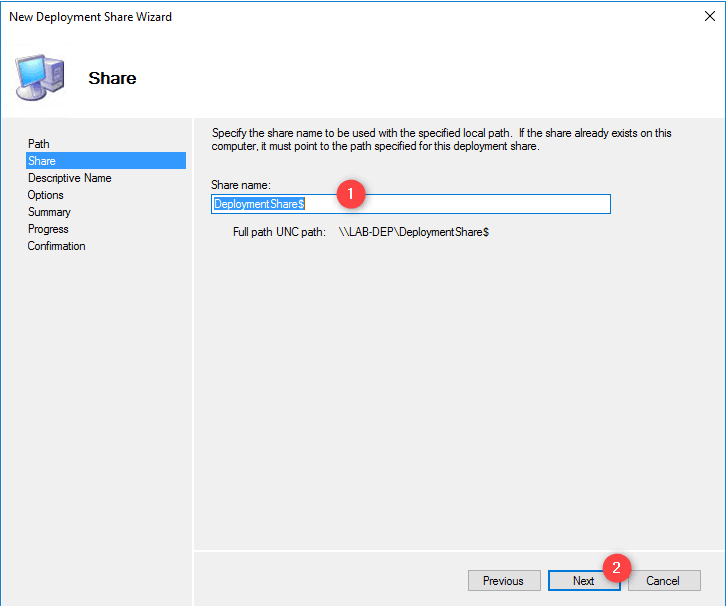
A $ is added to the end of the share name to make it invisible on the Windows network.
Enter a description for sharing 1 and click Next 2.

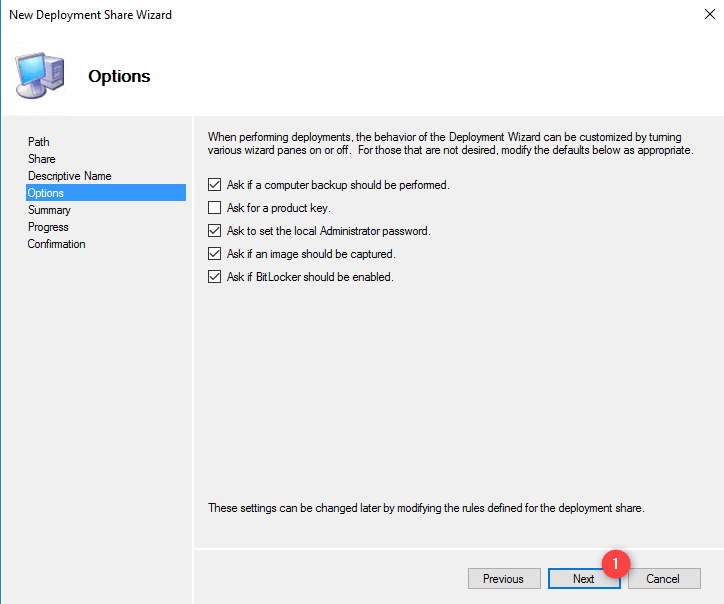
Click on Next 1 to validate the default options.
We will see in another tutorial, how to customize the entire deployment sequence.
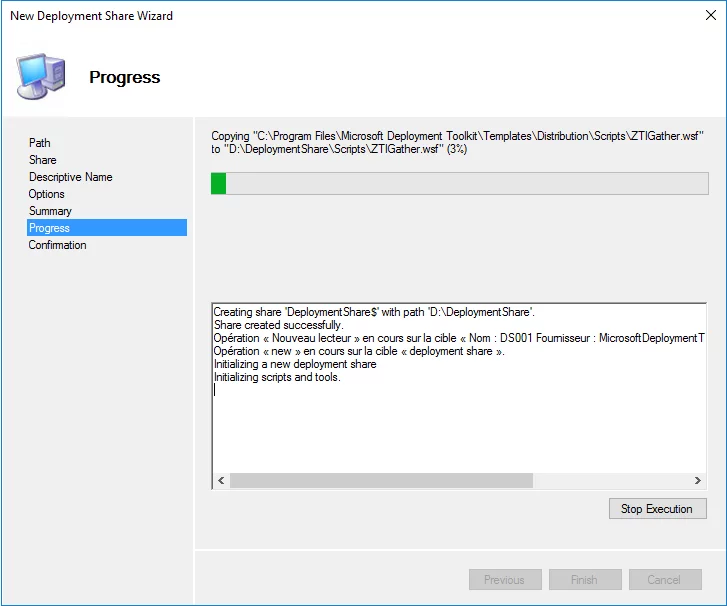
A summary of the configuration is displayed, click on Next 1 to create the deployment share.

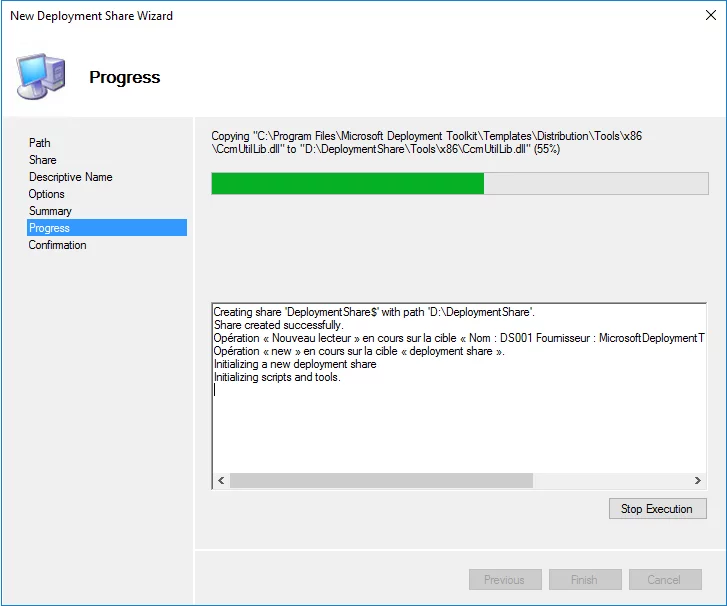
Wait while creating and configuring the deployment share for MDT.
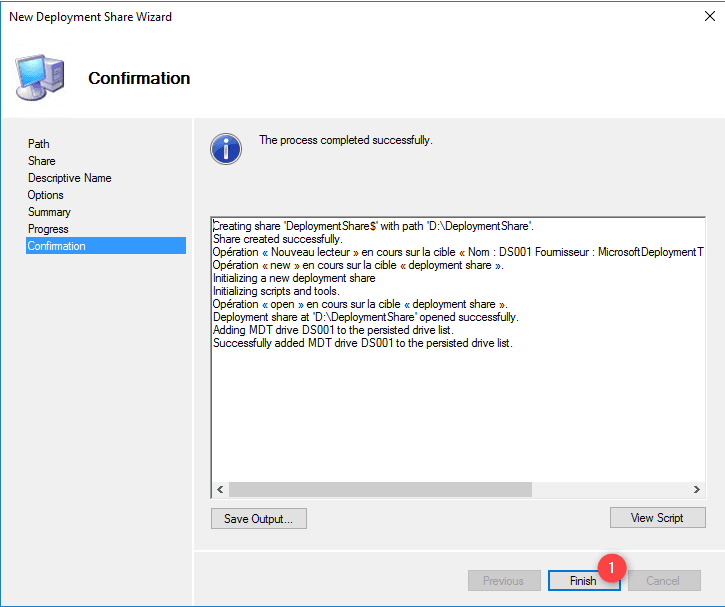
When finished, click on Finish 1 to exit the wizard.
Share 1 is available in the MDT console in the Deployment Shares node.
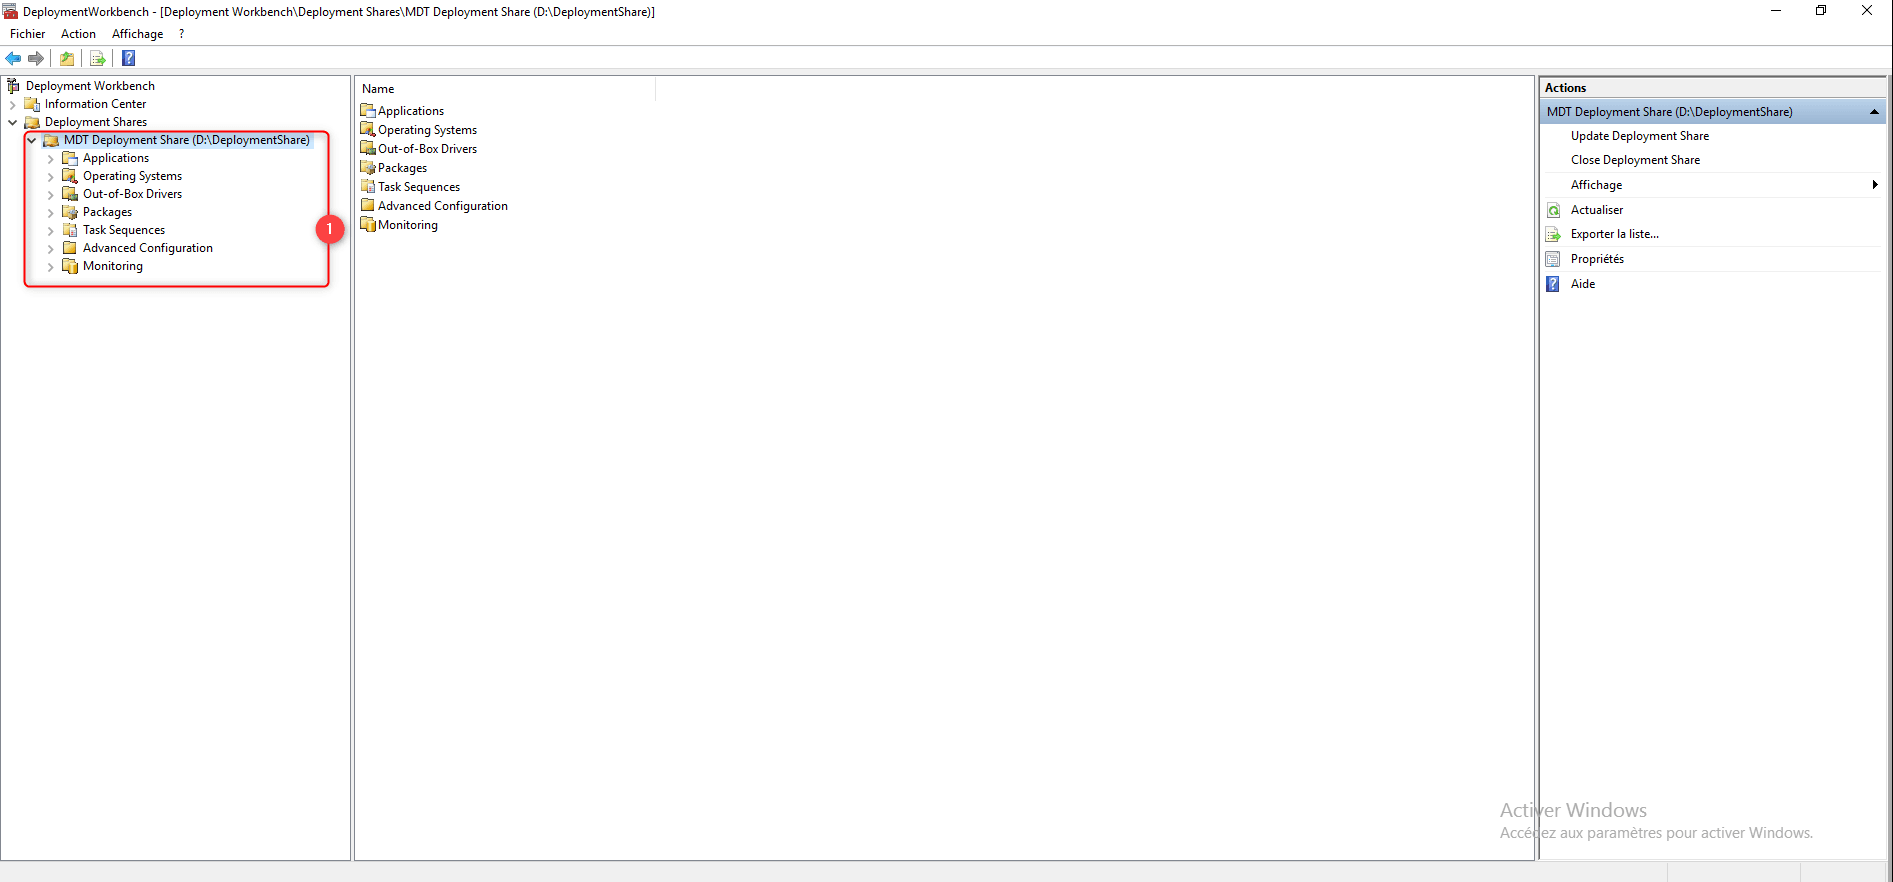
If we look at Windows Explorer, we find in the folder almost the same tree structure as in the console.

A few words about Deployment Shares.
As we can see on the previous capture, each folder available in the console (except monitoring) is physically present on the server.
The folders correspond to items available for deployment such as applications, Windows images, etc.
It is possible to create folders and sub-folders to organize items.
Presentation of the files: First step with the MDT console.
Deployment share properties
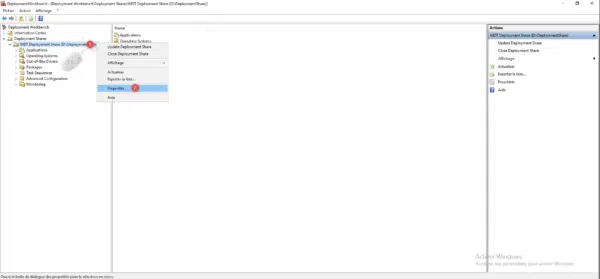
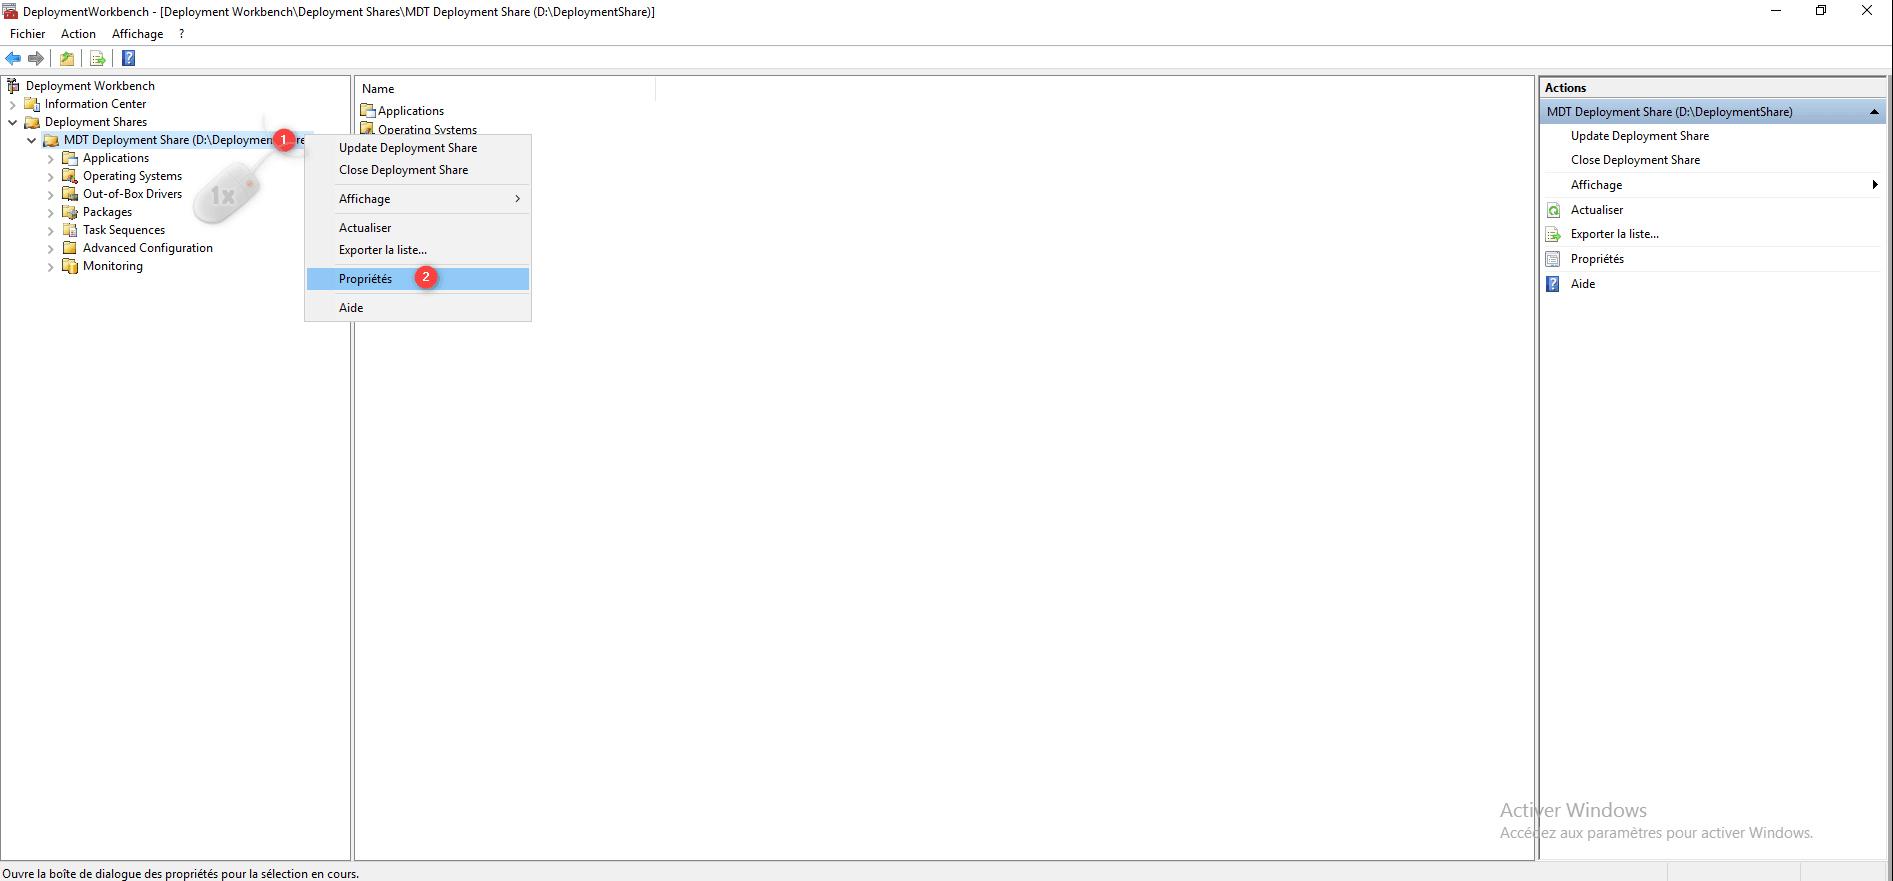
To access the properties, right click on the 1 folder and click on Properties 2.
General tab
From the General tab, it is possible to modify the physical location and UNC. It is also possible to choose the supported versions. In a recent environment, it may be possible to disable x86 support.

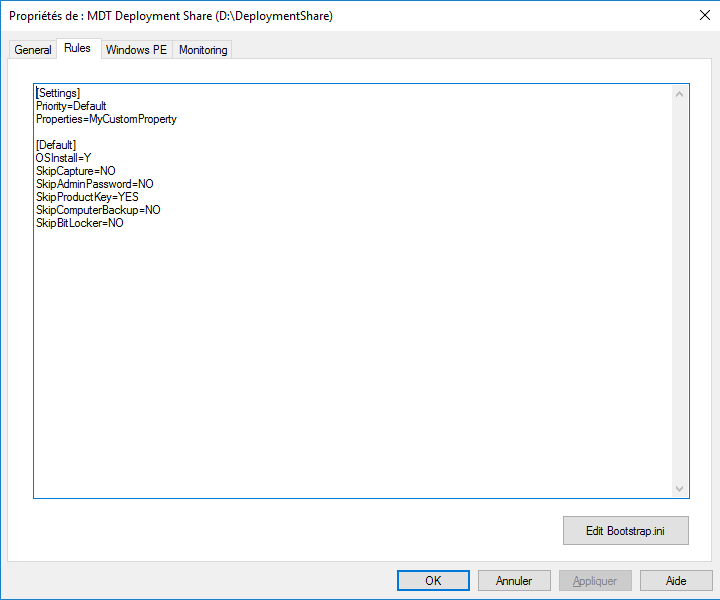
Rules tab
From this tab, it is possible to modify the behavior of WinPE during deployment, to pre-configure options such as the keyboard, time zone … It is also possible to access the bootstrap.ini file which is a customization file integrate into WinPE image.
Each time you modify the bootstrap.ini file, you must (re) generate the WinPE image.
WinPE tab
The WinPE tab is used to configure and customize the boot images.

Monitoring tab
From this tab, it is possible to activate monitoring to follow the progress of deployments from the MDT console.

MDT: Generate the WinPE installation image
We will see how to generate the WinPE image, which will allow the deployment of Windows with MDT.
Configuring the WinPE environment
Depuis la console d’administration, faire un clic droit sur le partage 1 et cliquer sur Propriétés.
Go to the Windows PE tab 1, choose the version 2 and the images to generate 3 then go to the Features tab 4.
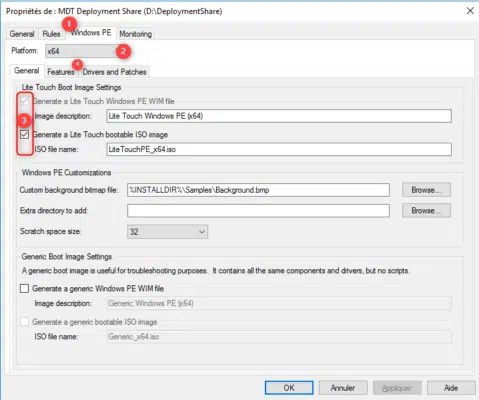
On the screenshot above, I configure the X64 image which will be generated in WIM and ISO format.
The Features tab allows you to add additional components to the WinPE environment, once the configuration is complete, click on Apply 1 and OK 2 to close the properties window.
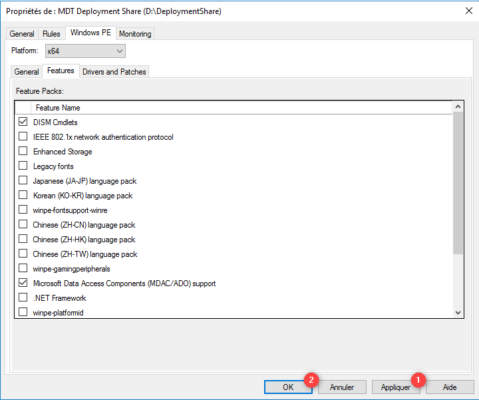
The Drivers and Patches tab allows you to choose the drivers to inject, by default all network drivers and storage controllers are added to the image.
Generate WinPE image
Right click on the share 1 and click on Update Deployment Share 2 to launch the wizard.

When the wizard is launched, click on Next 1.
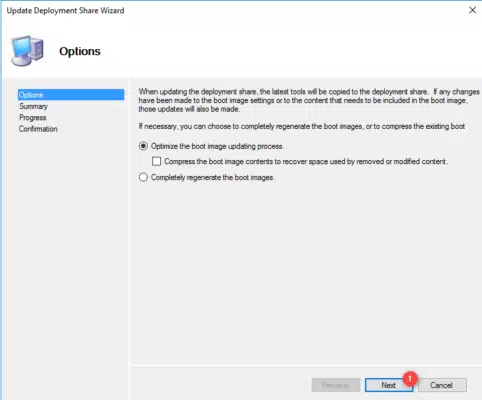
Since this is the first generation of image, it will be complete, in order to save time during modifications and regeneration, the image is updated according to the modifications. It is possible to redo a full generation by selecting the Completely regenerate the boot images option.
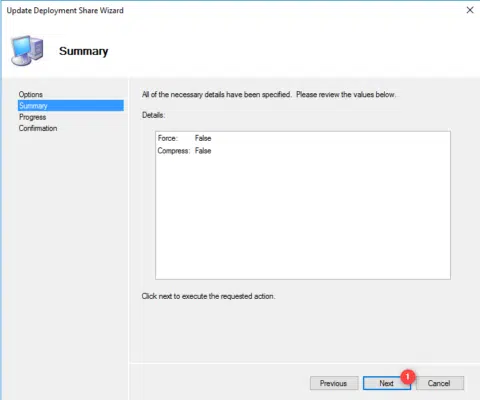
A summary of the action is displayed, click on Next 1.
Wait while creating WinPE images …
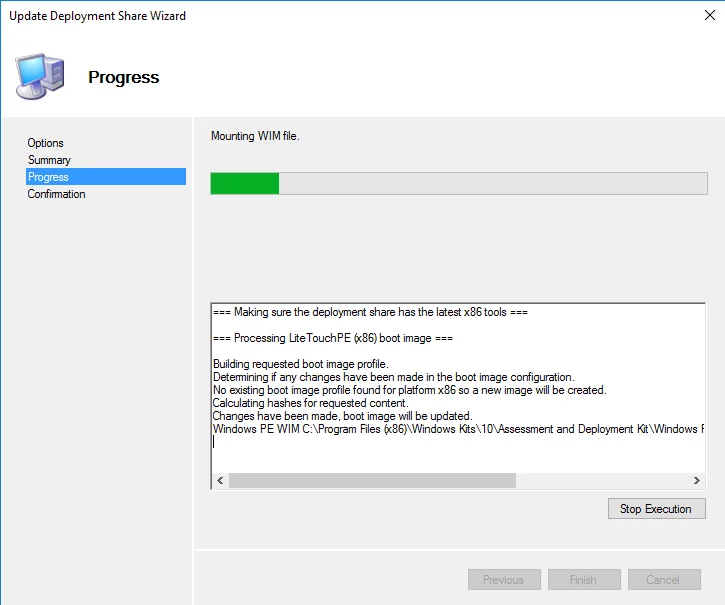
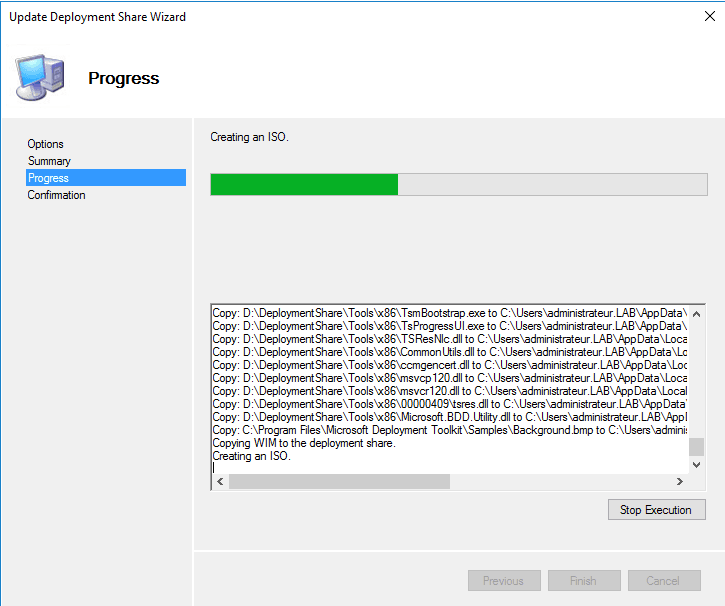
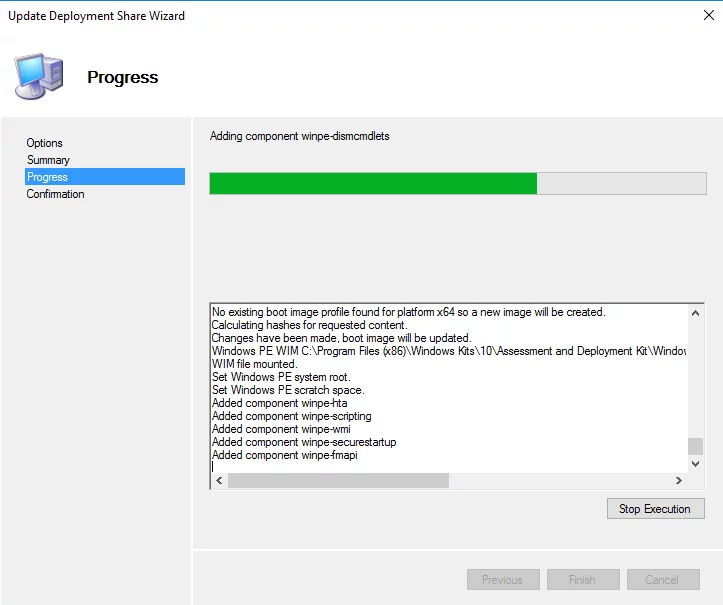
When the generation is finished, click on Finish 1 to close the wizard.
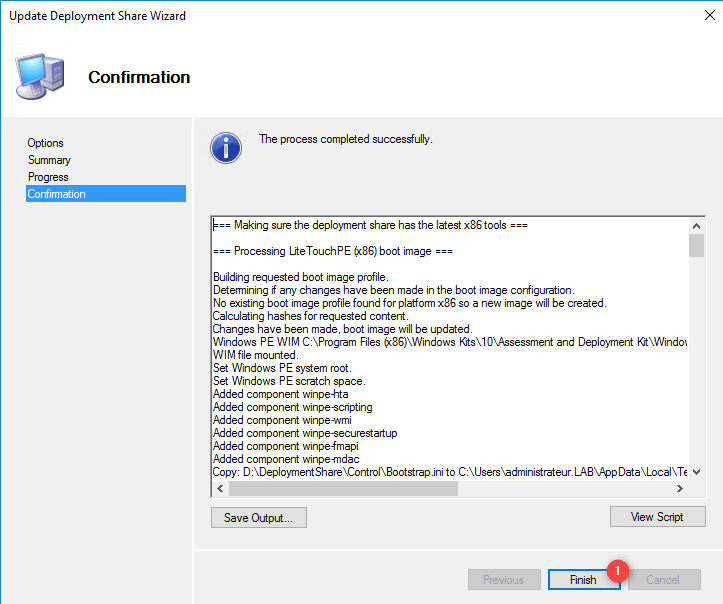
With Windows Explorer, go to the Boot folder of the deployment share to recover the generated images.

The image in WIM format can be used with WDS to use it in PXE and the ISO file can be burned, be put on a USB key or used in Hyper-V / VMware.
MDT: add Windows image
In this part, we will see how to add a Windows image to MDT.
Download the latest version of Windows 10 in ISO format using the Media Creator Tool.
Convert the ESD file to WIM format to import it into MDT.
Create a folder
In order to organize Windows images, they will be stored in a folder.
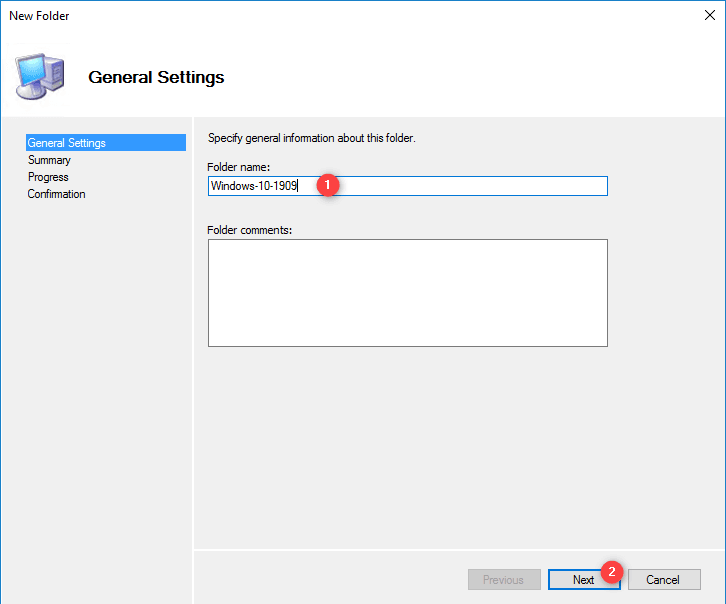
Right click on Operating System 1 and click on New Folder 2.
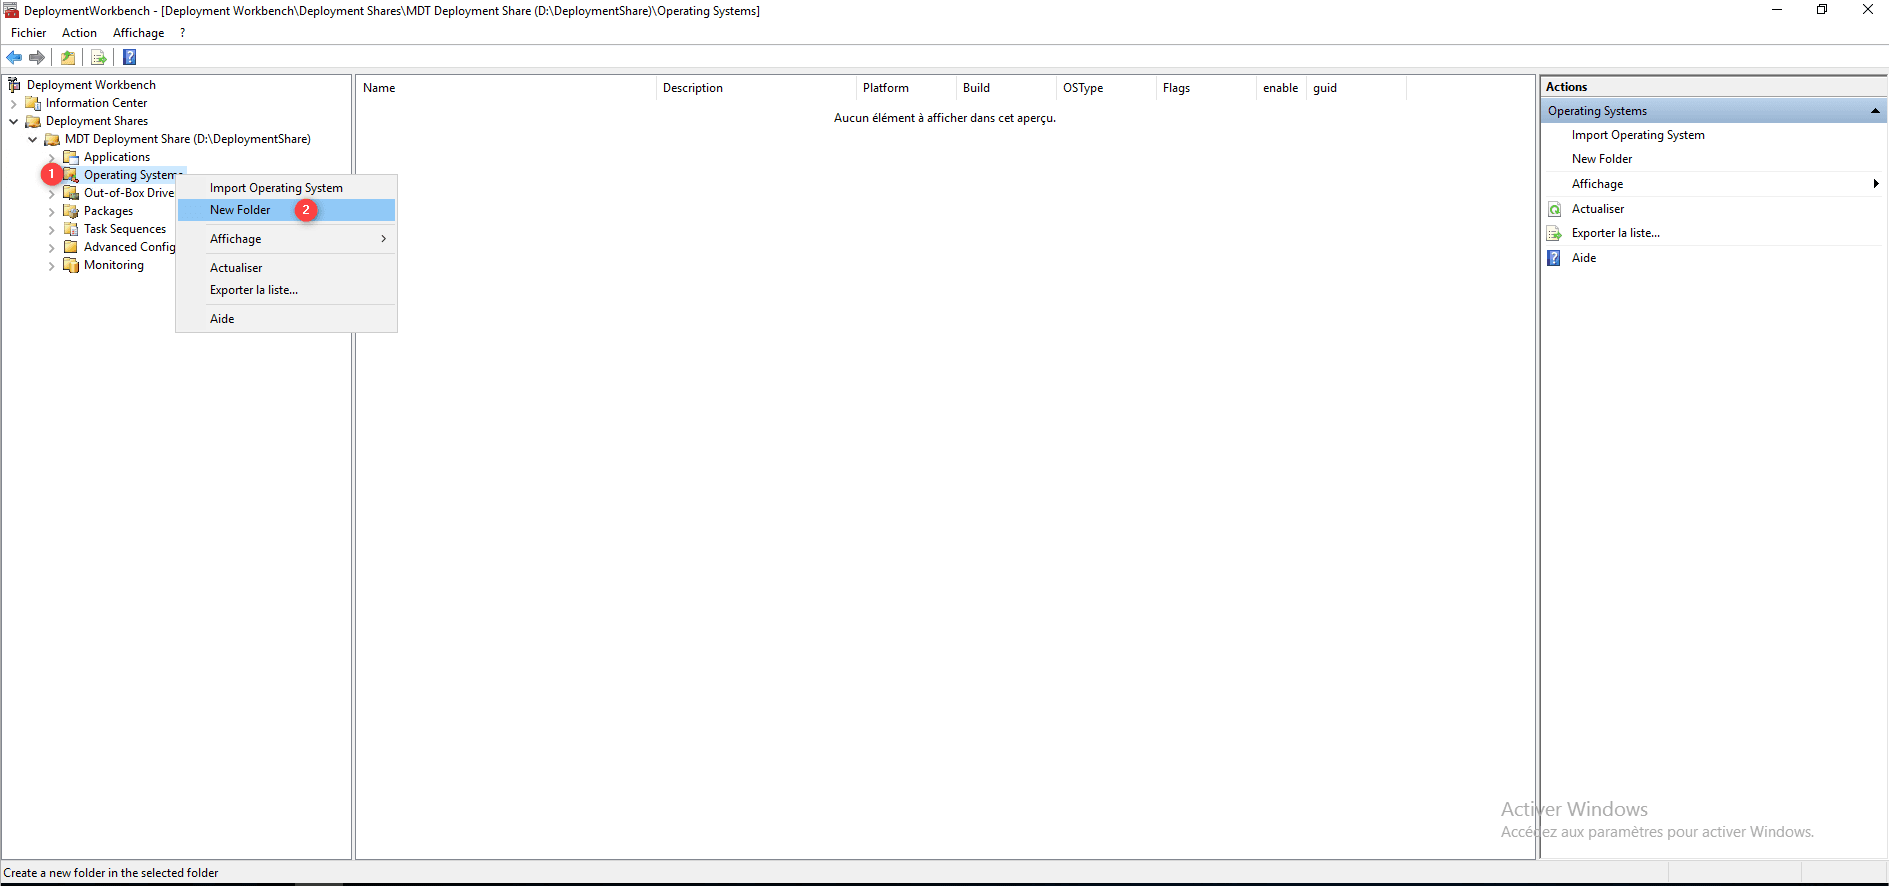
Name the folder 1 and click on Next 2.
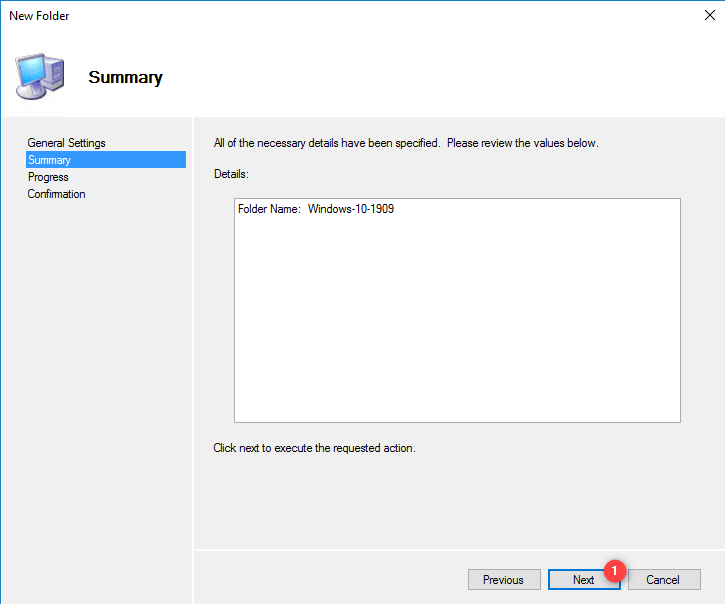
Click on Next 1 to confirm the creation of the folder.
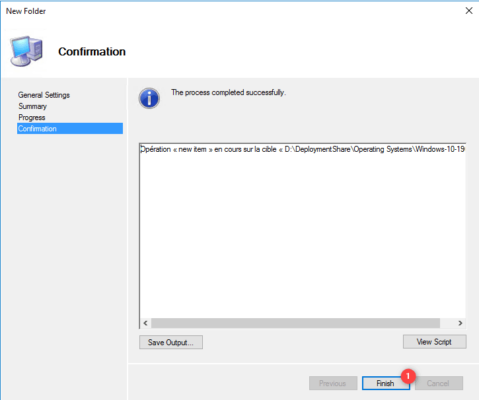
Once the folder has been created, exit the wizard by clicking on Finish 1.
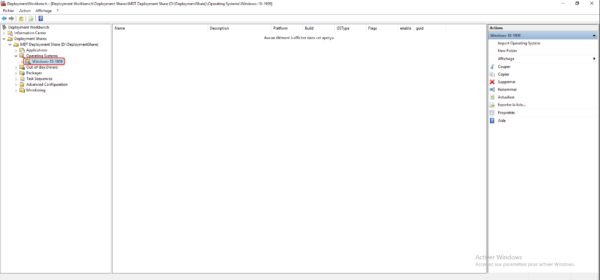
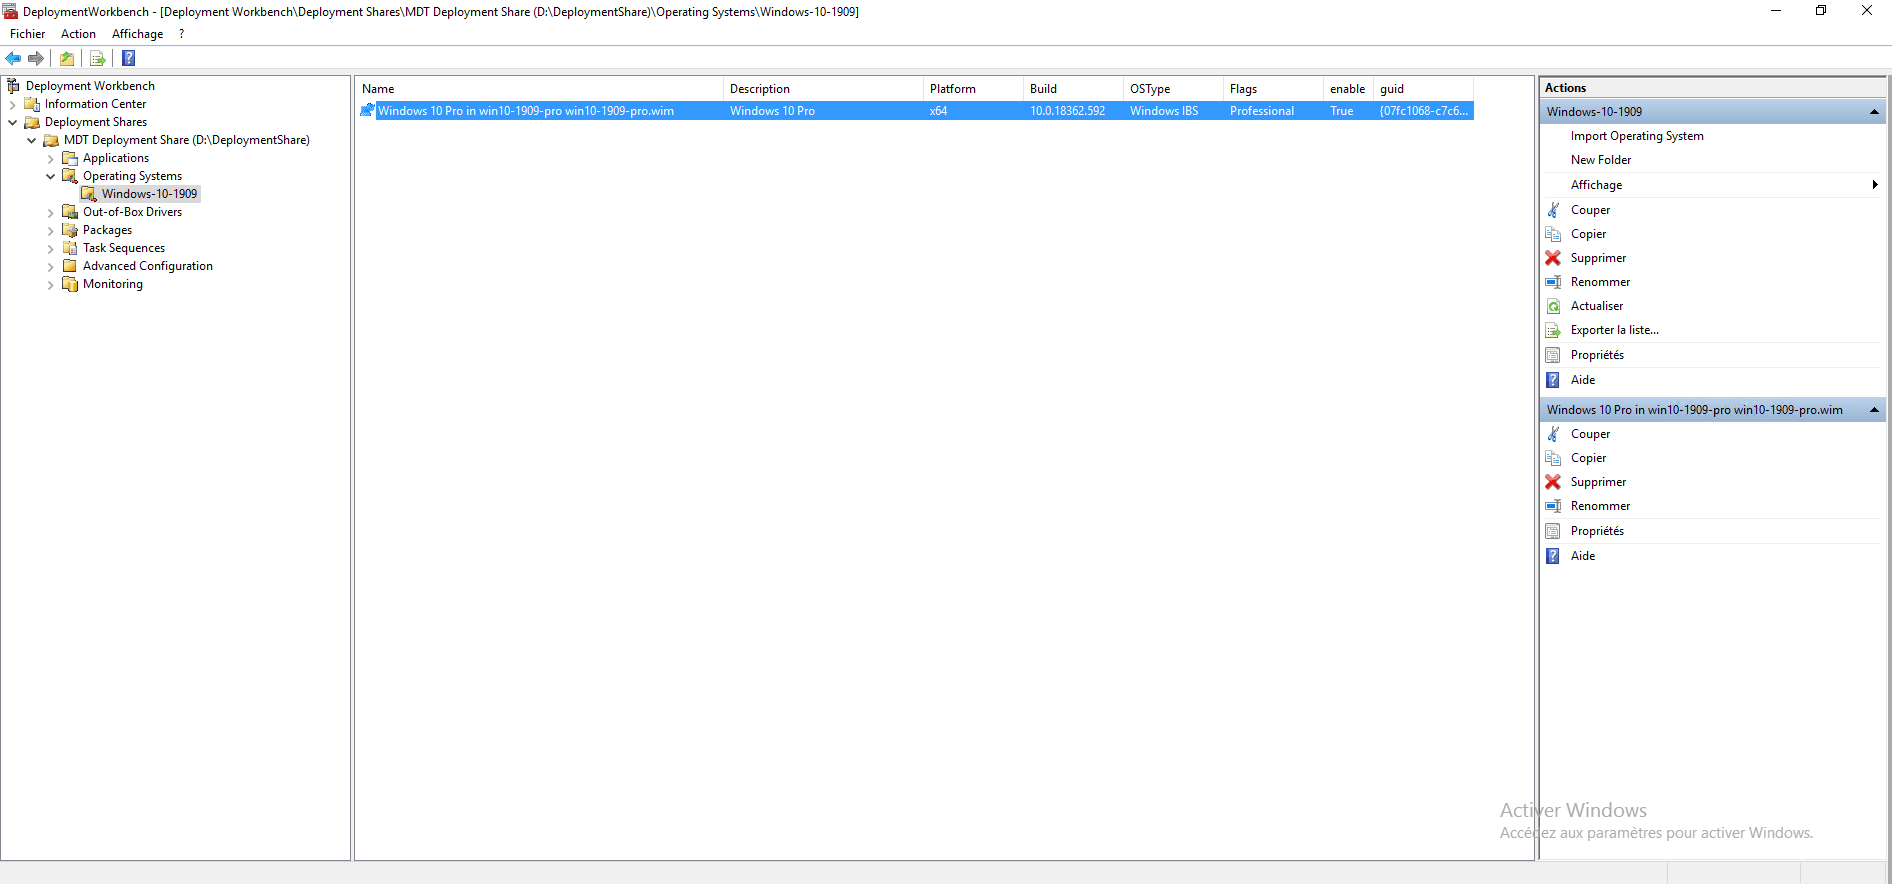
The folder is accessible in the MDT console.
Import a Windows image into MDT
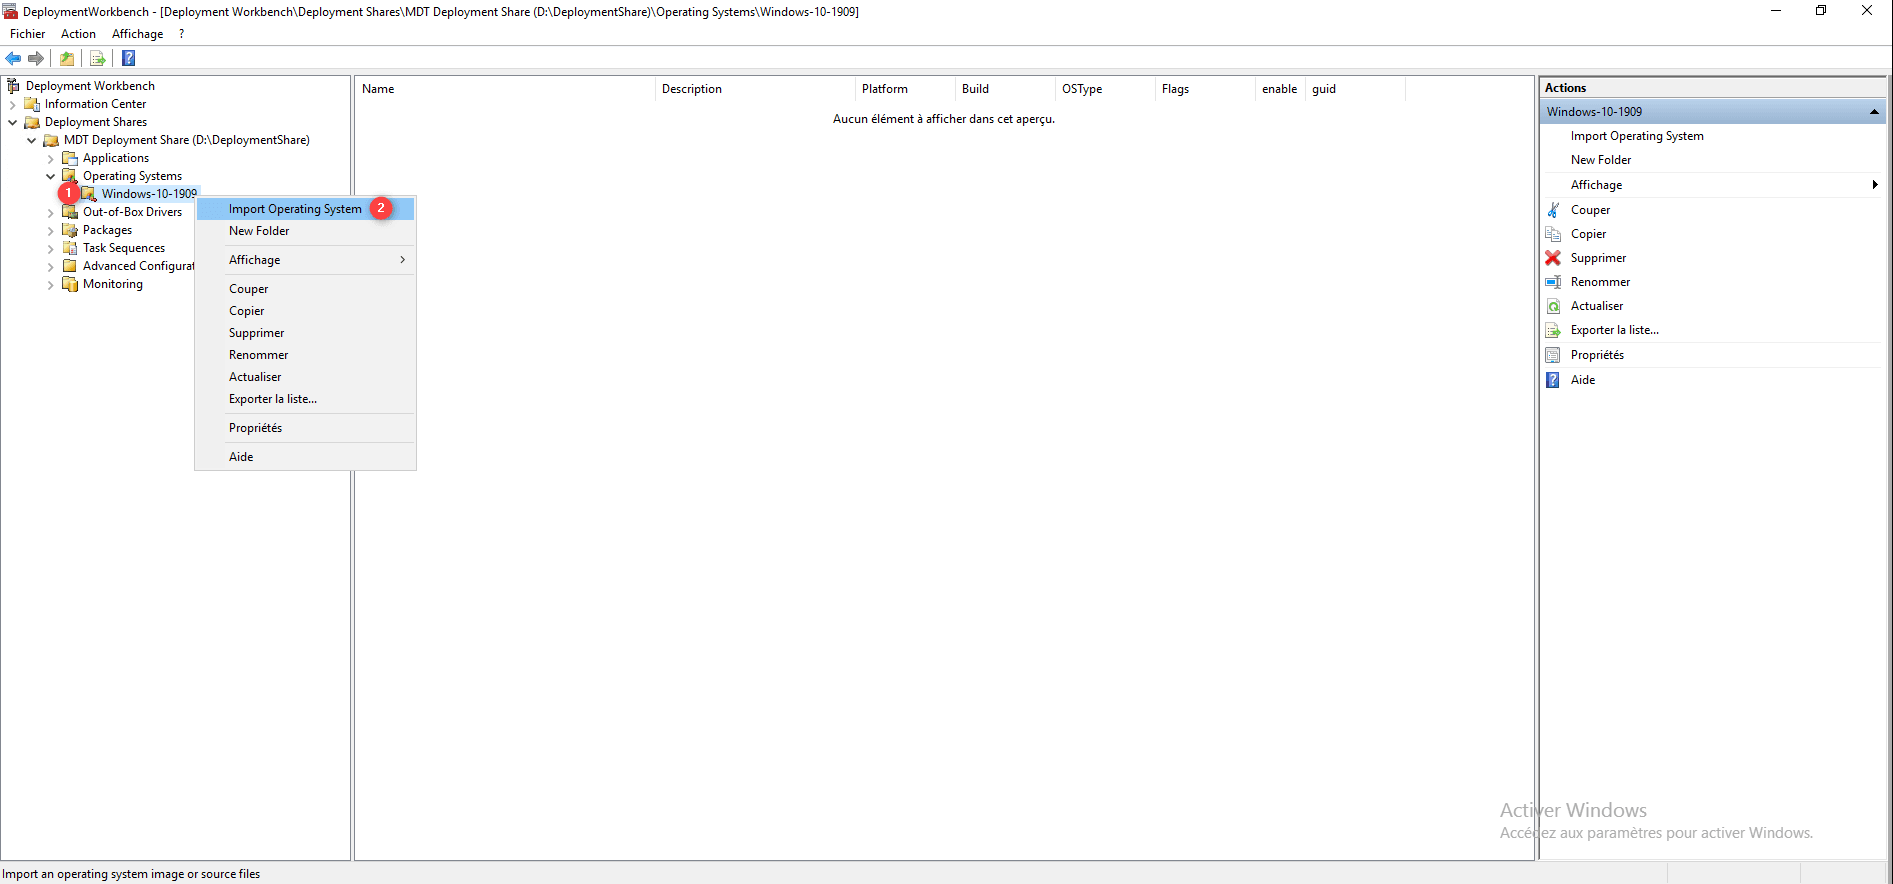
From the console, right click on folder 1 where the image should be stored and click on Import Operating System 2.
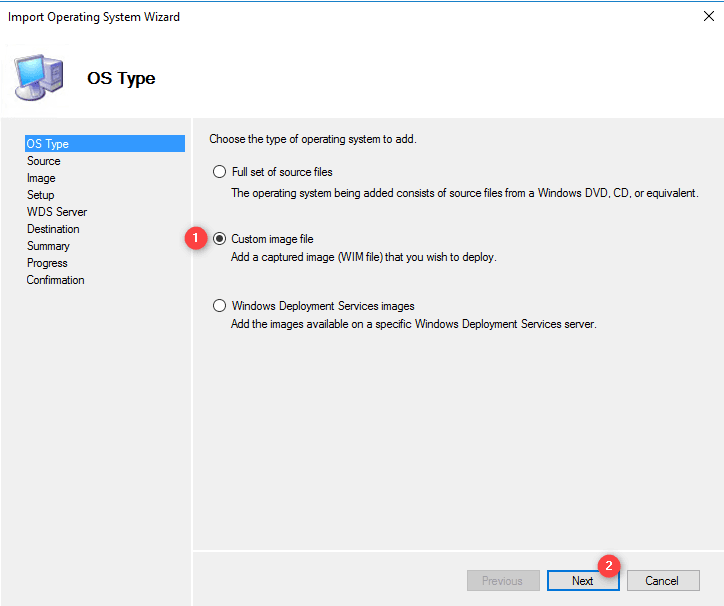
Choose the type of image, to import a file in WIM format, choose Custom image file 1 and click on Next 2.
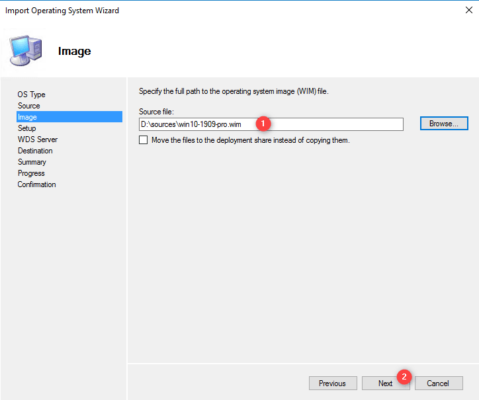
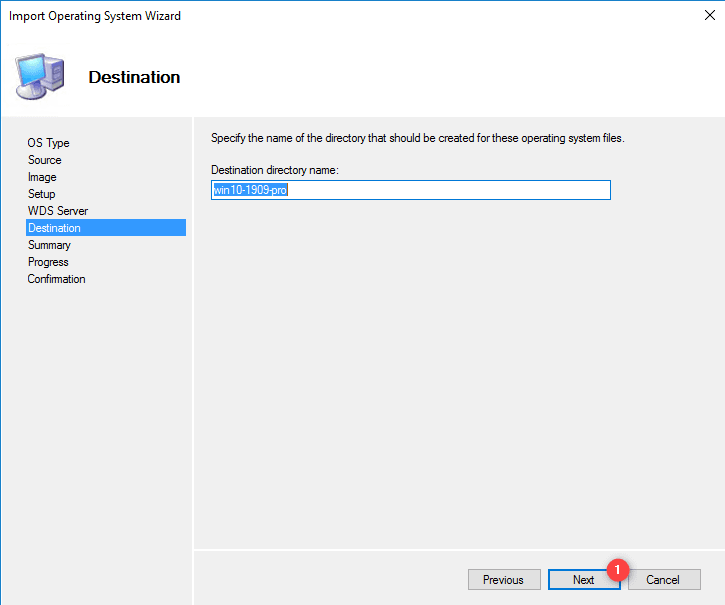
Indicate the location of the WIM file 1 to import and click on Next 2.
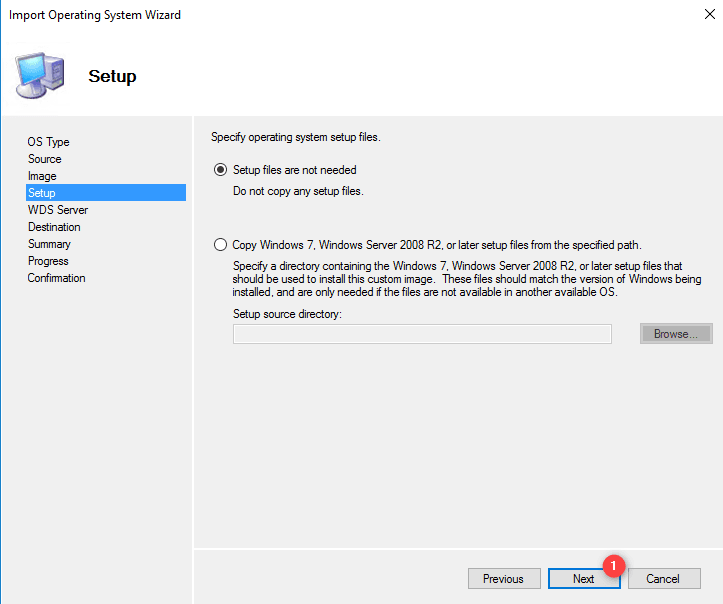
Click on Next 1.
Click again on Next 1, if necessary change the name of the folder.
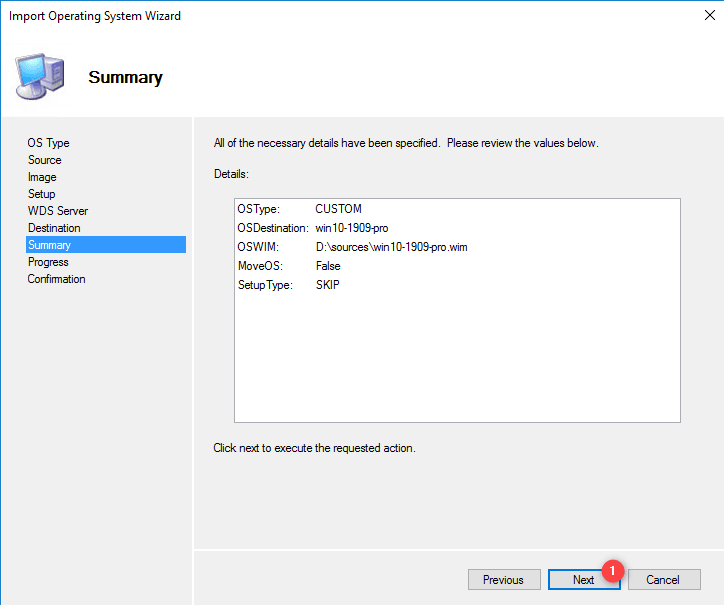
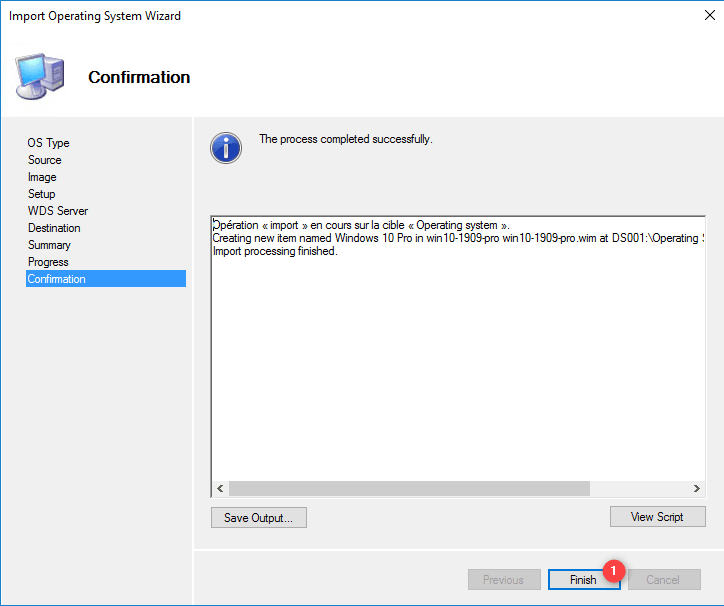
A summary is displayed, click on Next 1 to import the operating system into MDT.
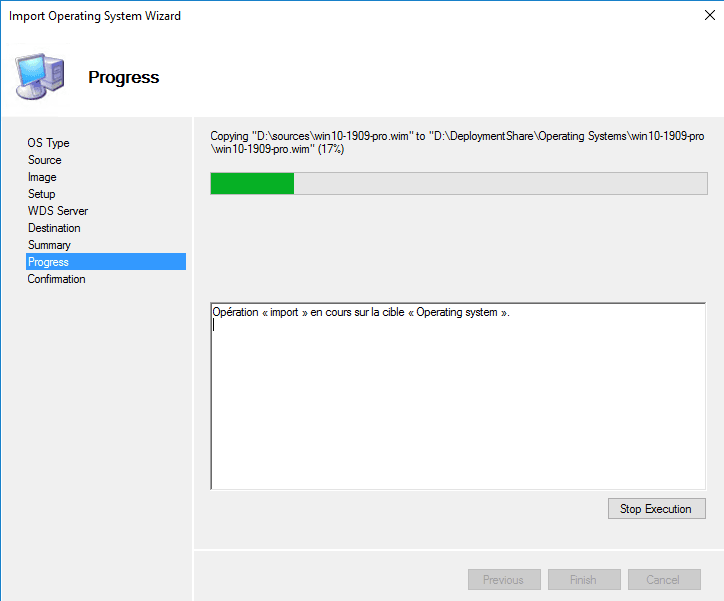
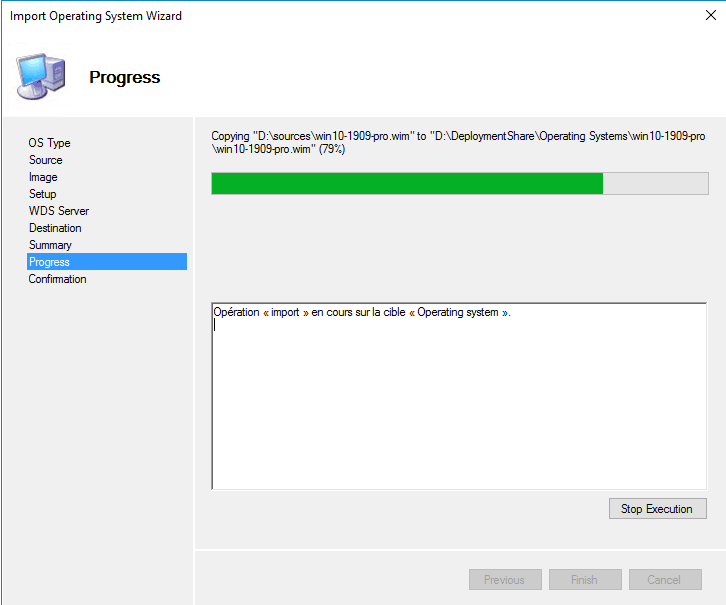
Wait during the import …
The import of the MDT image in Windows is finished, exit the wizard by clicking on Finish 1.
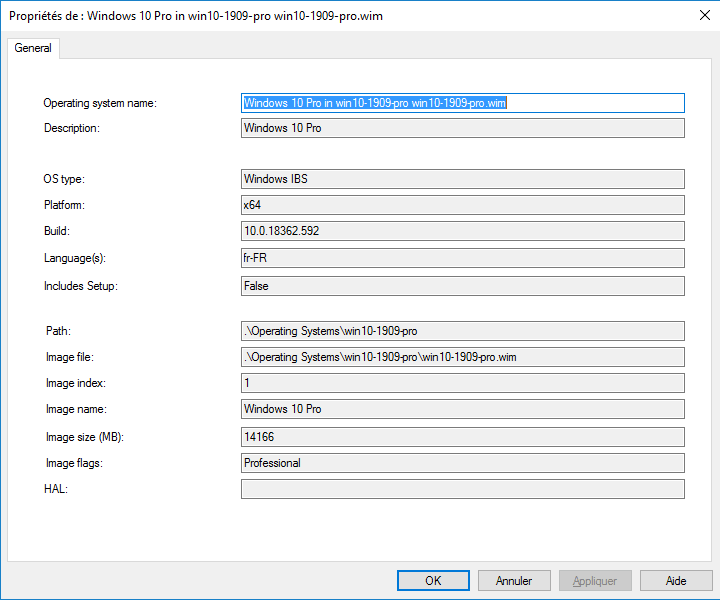
The image has been added to the MDT console.
MDT: Add a task sequence
A task sequence contains a set of actions to be performed on the computer that executes it:
- Windows deployment
- Application installation
- Sysprep
- Backup
- ….
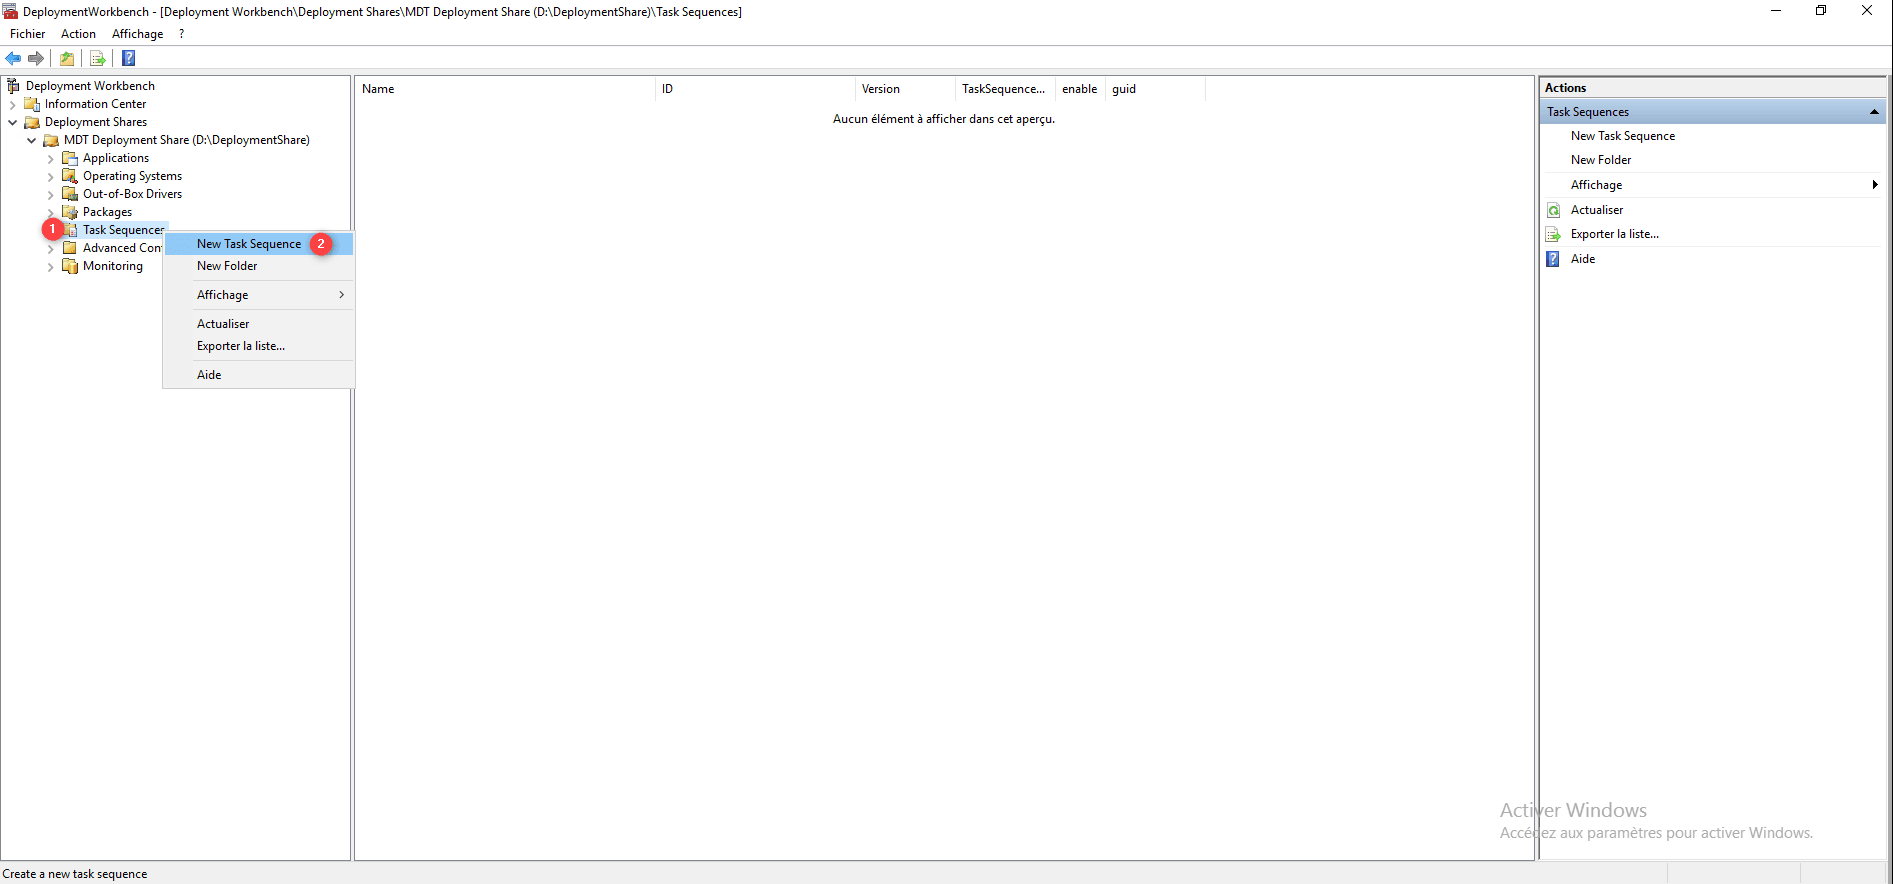
In order to be able to deploy the Windows image, it is necessary to create a task sequence.
Right click on Task Sequences 1 then click on New Task Sequence 2.
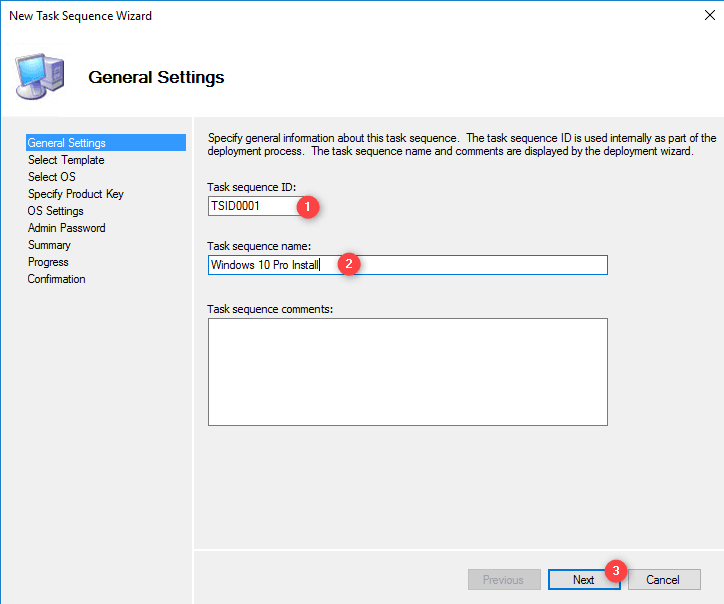
Enter an ID 1 in Task Sequence ID, name the sequence 2 then click on Next 3.
Choose the Standard Client Task Sequence 1 template and click Next 2.

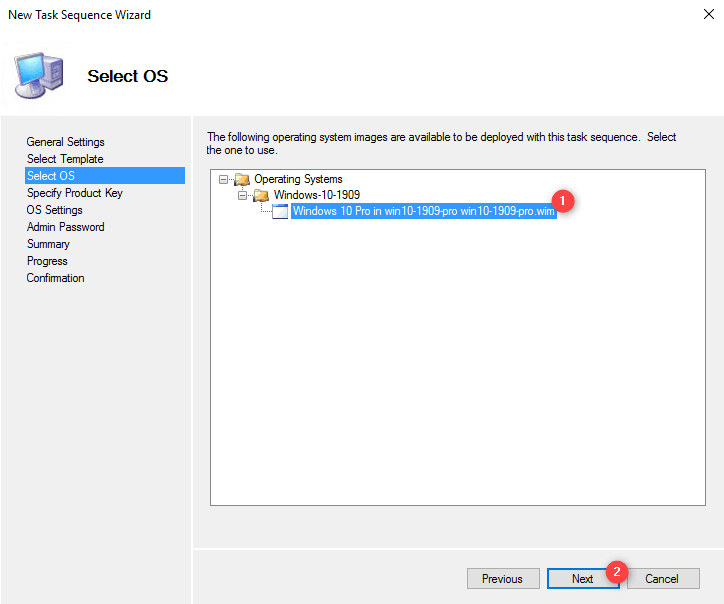
Select the Windows image 1 to be installed and click on Next 2.
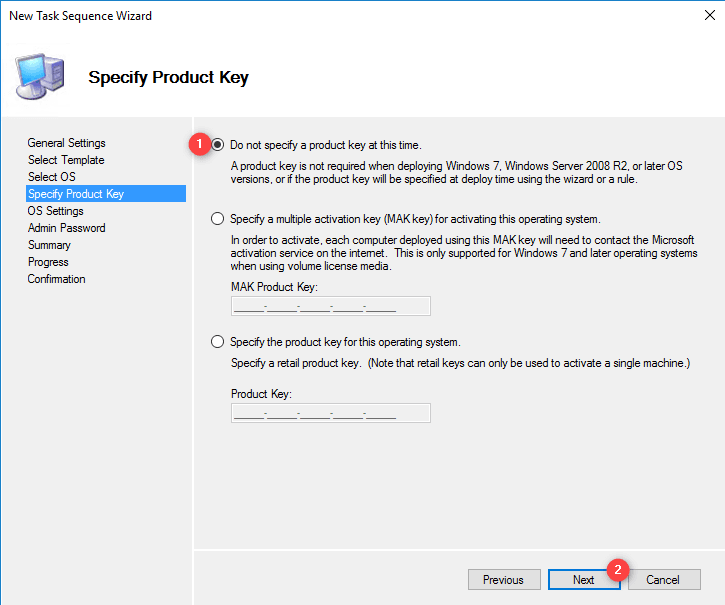
Choose Do not specify a product key at this time 1 and click on Next 2.
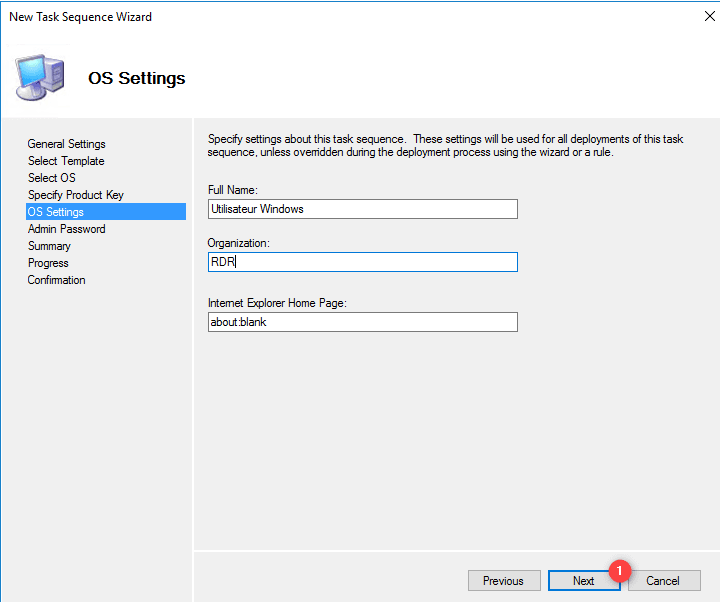
Click on Next 1 to pass the OS parameters.
Enter the password for the local Administrator account 1 and click Next 2.
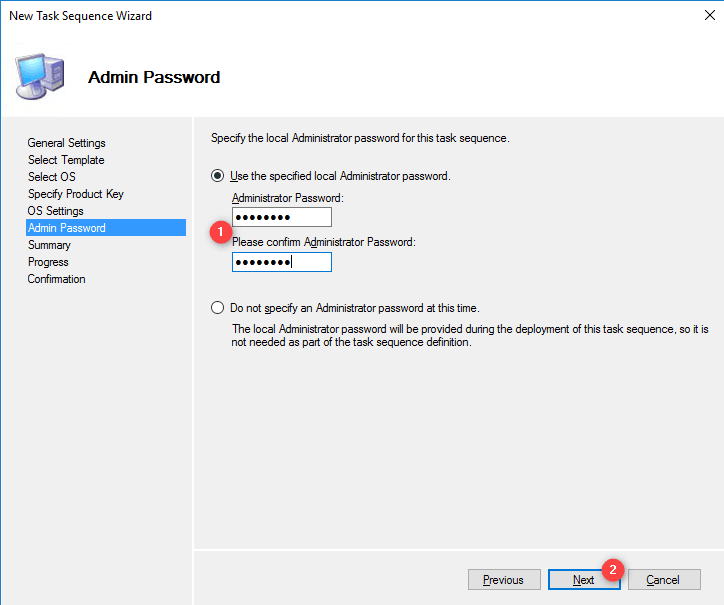
We will see that during deployment, the password will be requested, it is necessary to configure the SkipAdminPassword = YES directive in the CustomSetting.ini file to take account of the password.
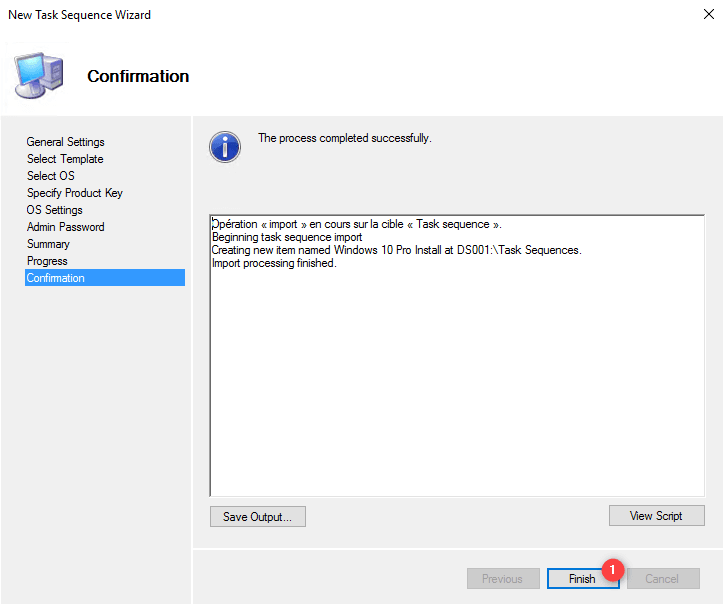
A summary of the task sequence is displayed, confirm the creation by clicking Next 1.

Once the sequence has been created, click on Finish 1.
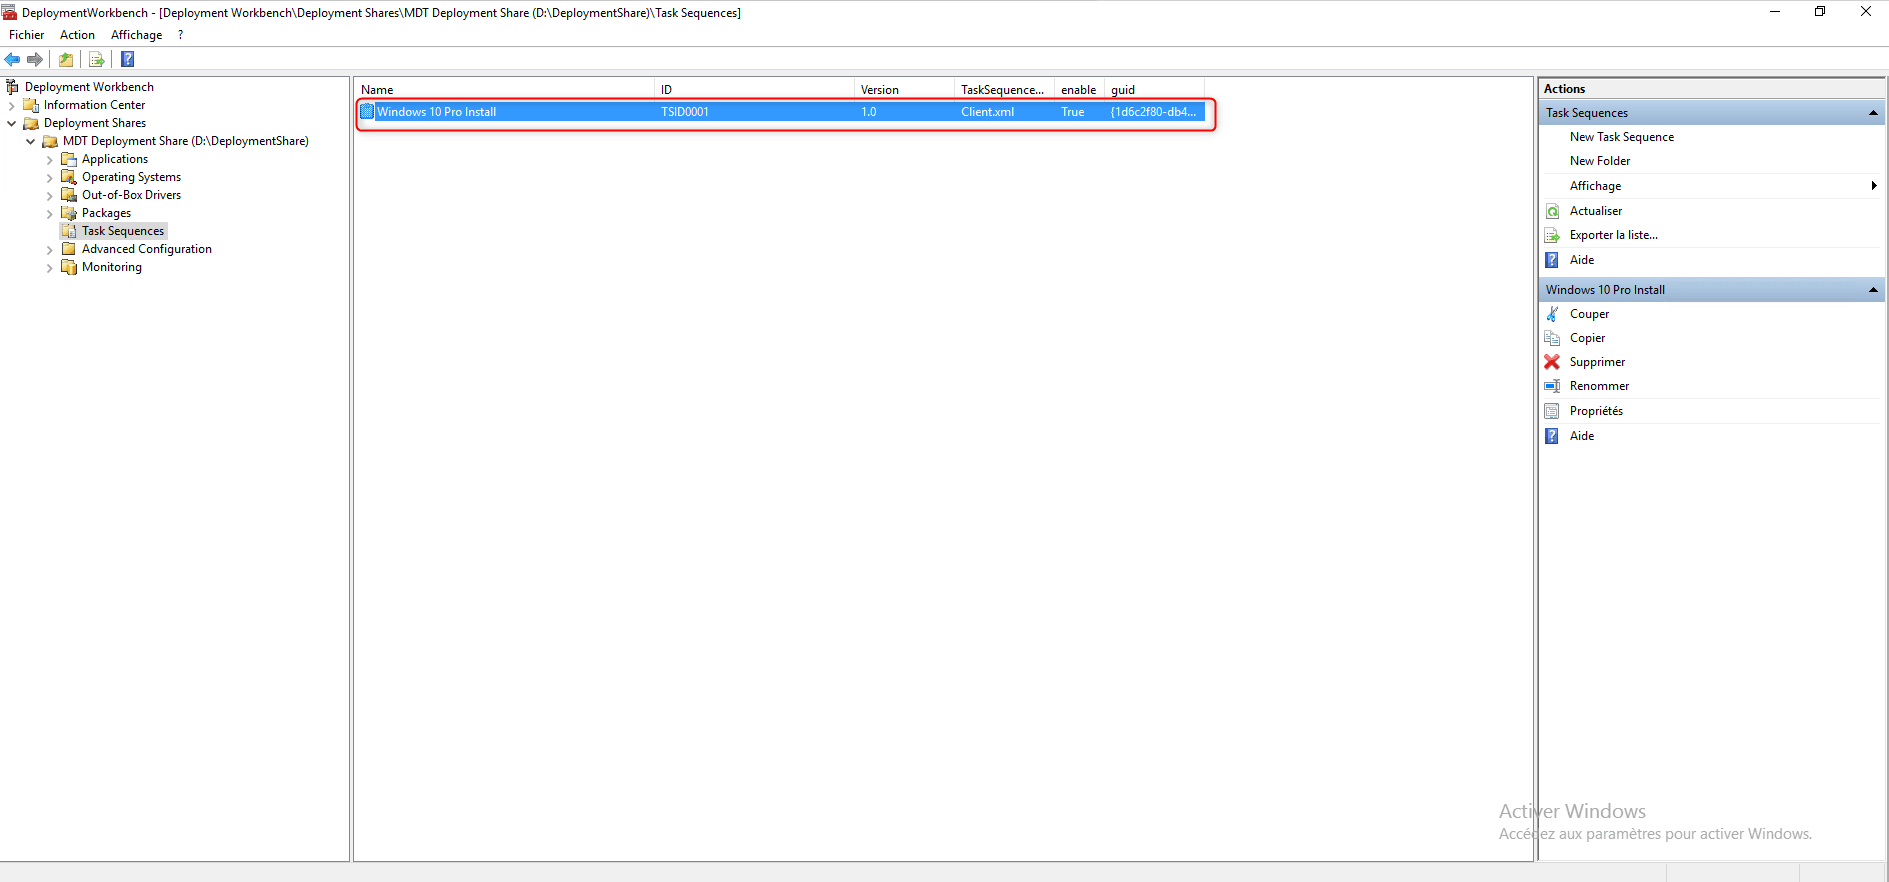
The sequence is added.
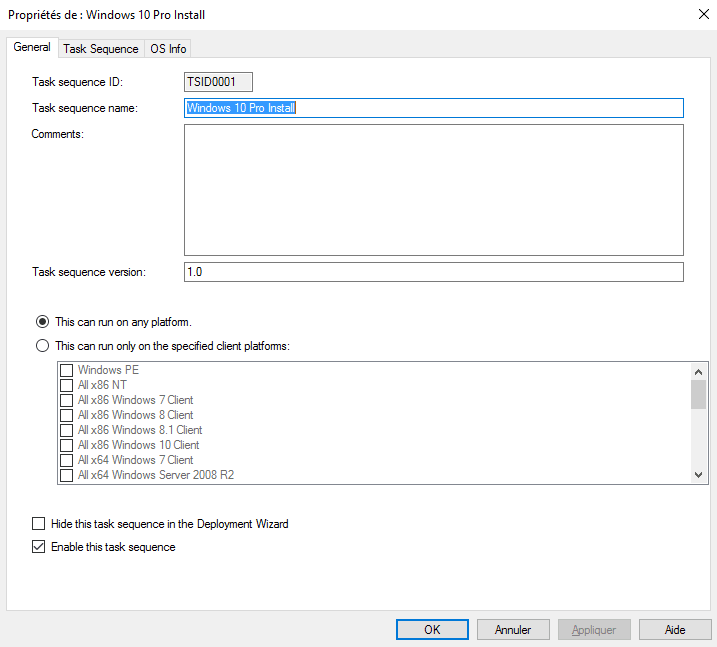
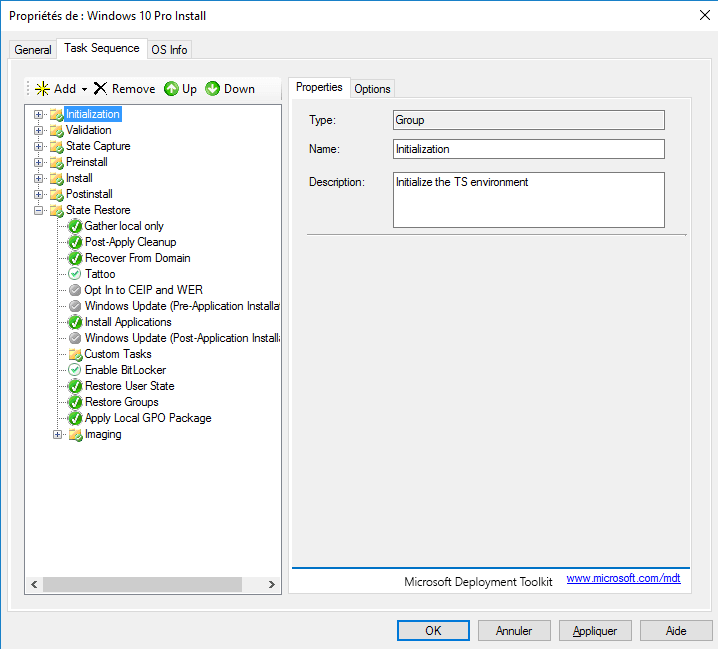
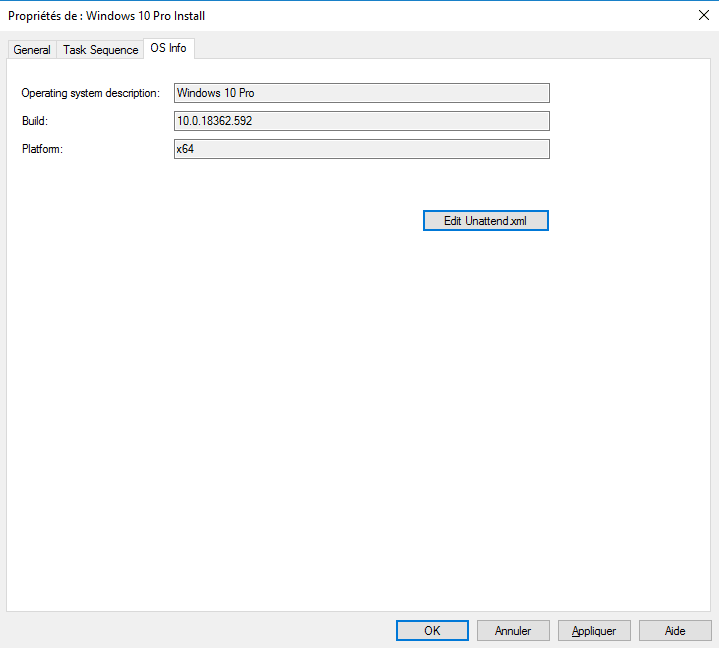
The properties of the task sequence allow you to rename it, to deactivate it, which allows it to be hidden during deployment. The Task sequence tab allows you to see all the steps performed during the application of the sequence such as formatting, restoration … It is possible to customize actions such as adding a script. The OS Info tab provides information on the operating system linked to the task sequence.
MDT: Windows deployment
Maintenant que MDT est configuré, nous allons voir le déploiement de Windows.
For the tutorial, I use a virtual machine under Hyper-V which is configured to start on the CD / DVD drive with the ISO Winpe which has been generated.

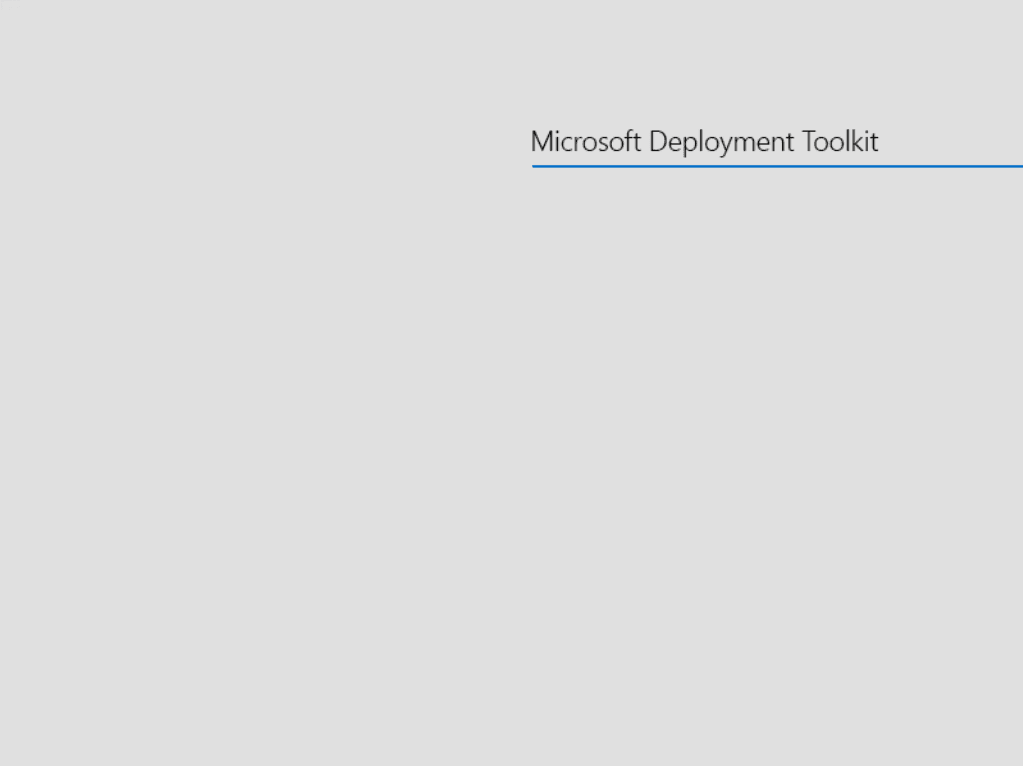
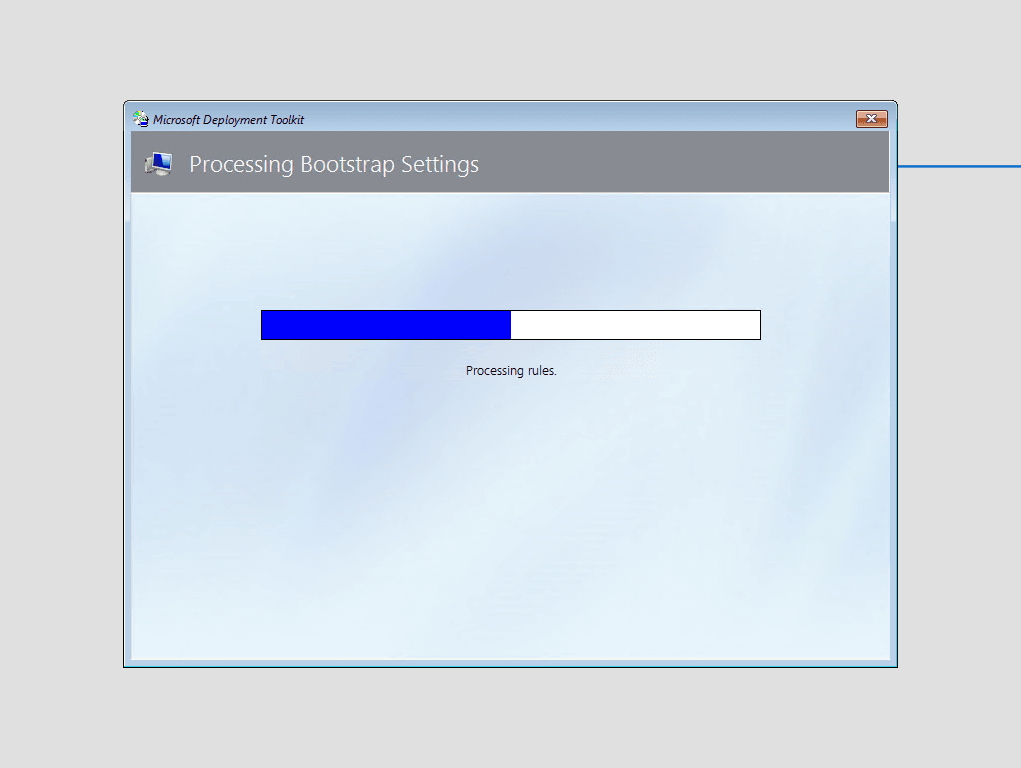
Start on the WinPE image and wait while loading …
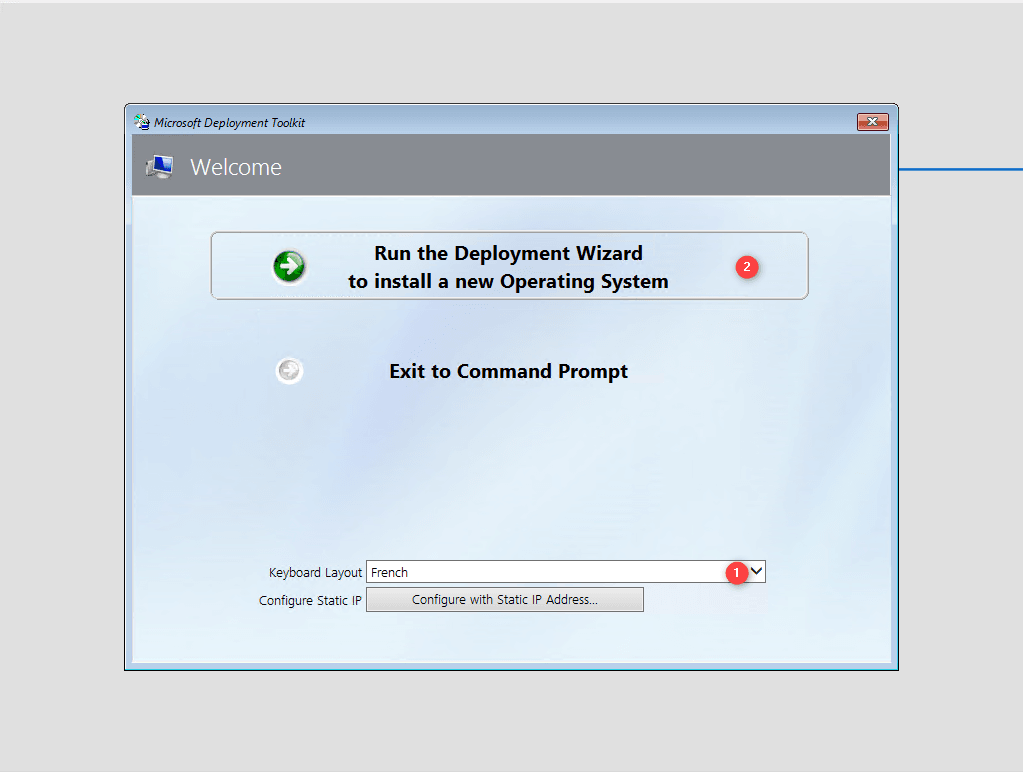
Configure the keyboard 1 and click on Run the Deployment Wizard to installa new Operating System 2.
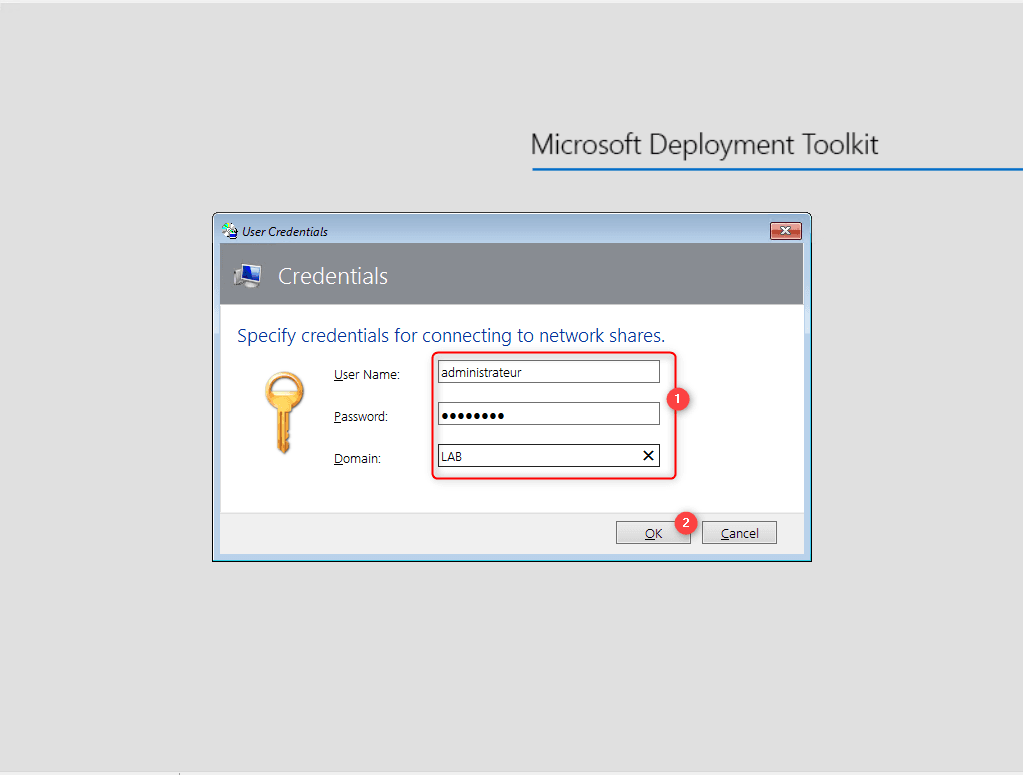
Enter the identifiers 1 of user authorized to connect to the MDT share and click on OK 2.
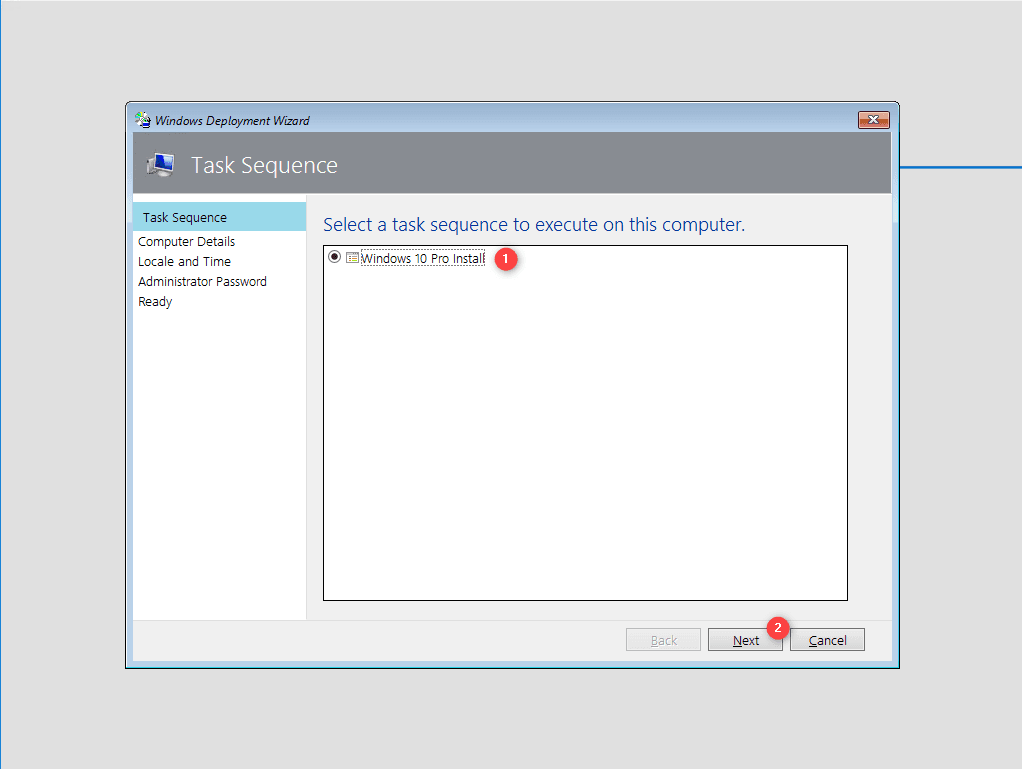
Select the task sequence 1 and click on Next 2.
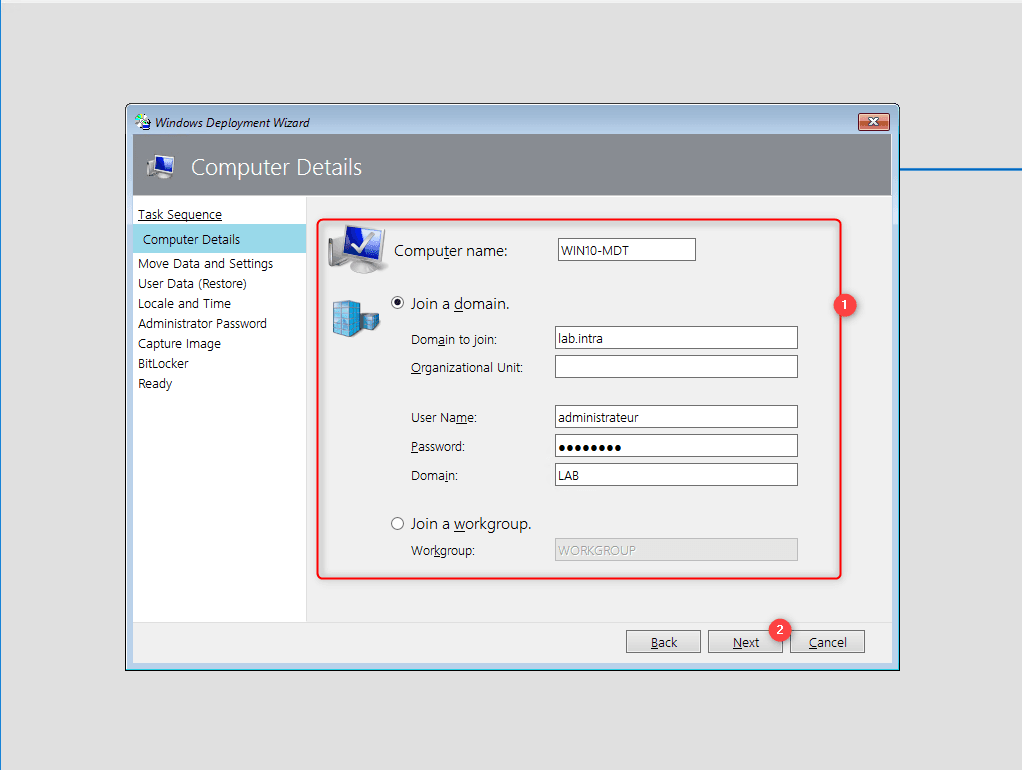
Configure the computer name and if it should be added to the domain 1 and click on Next 2.
Click on Next 1.
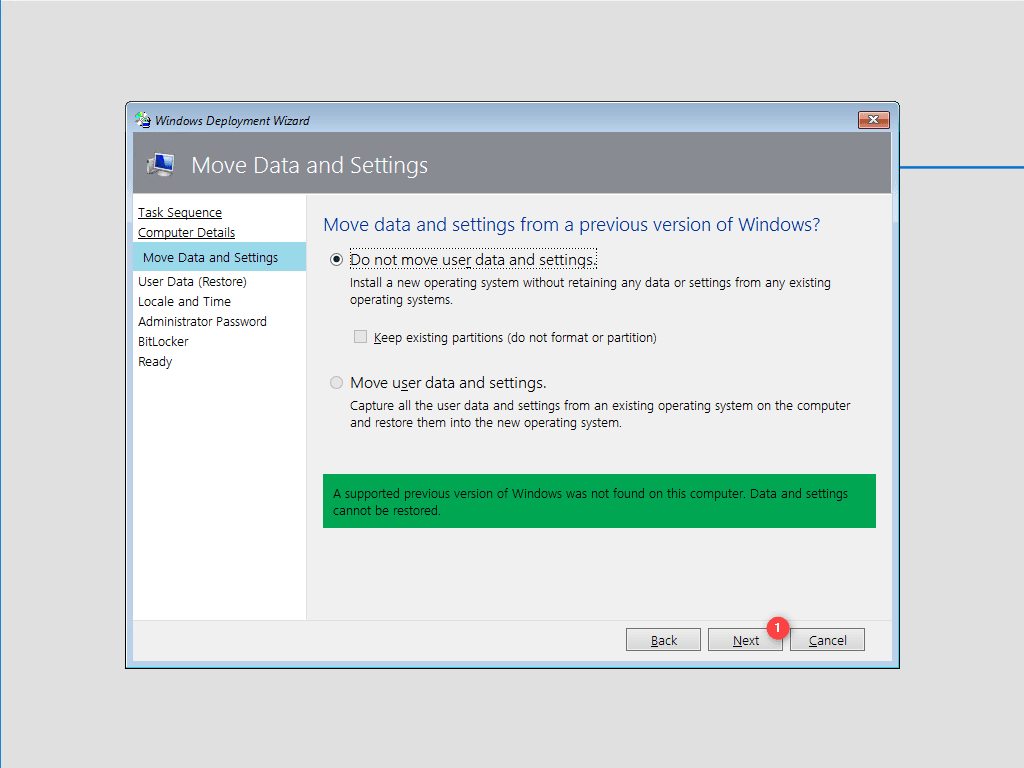
If the computer already had a Windows installation, it is possible to save user profiles.
Click on Next 1 to proceed with profile restoration.
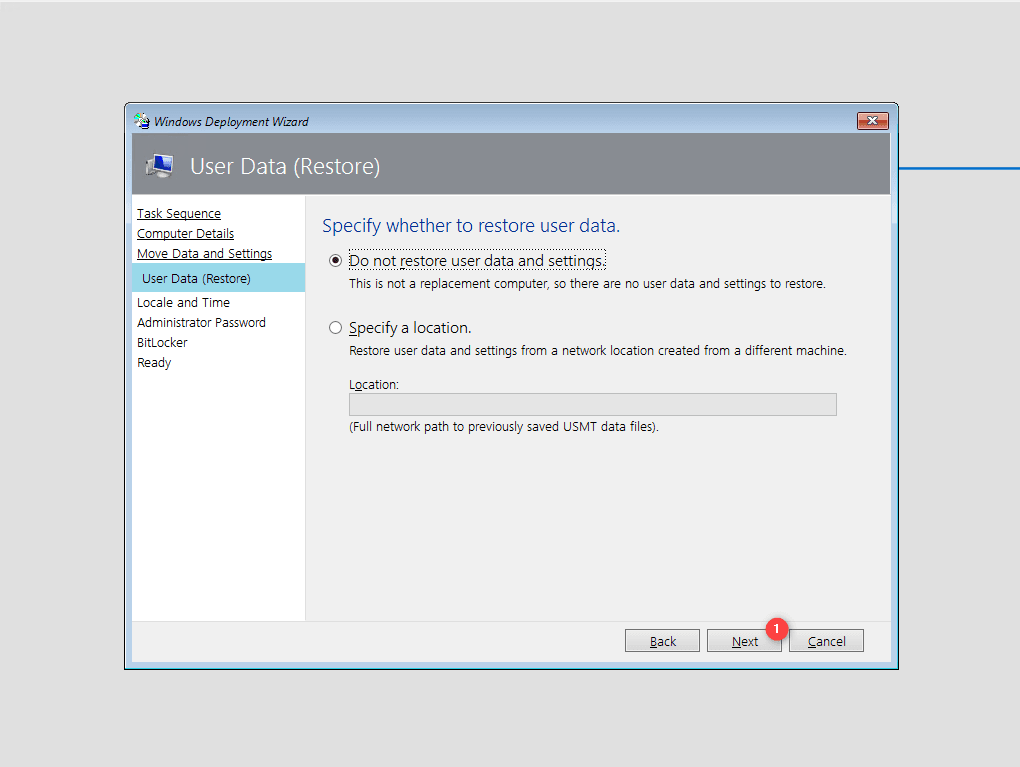
Backup data can be restored by a backup task sequence.
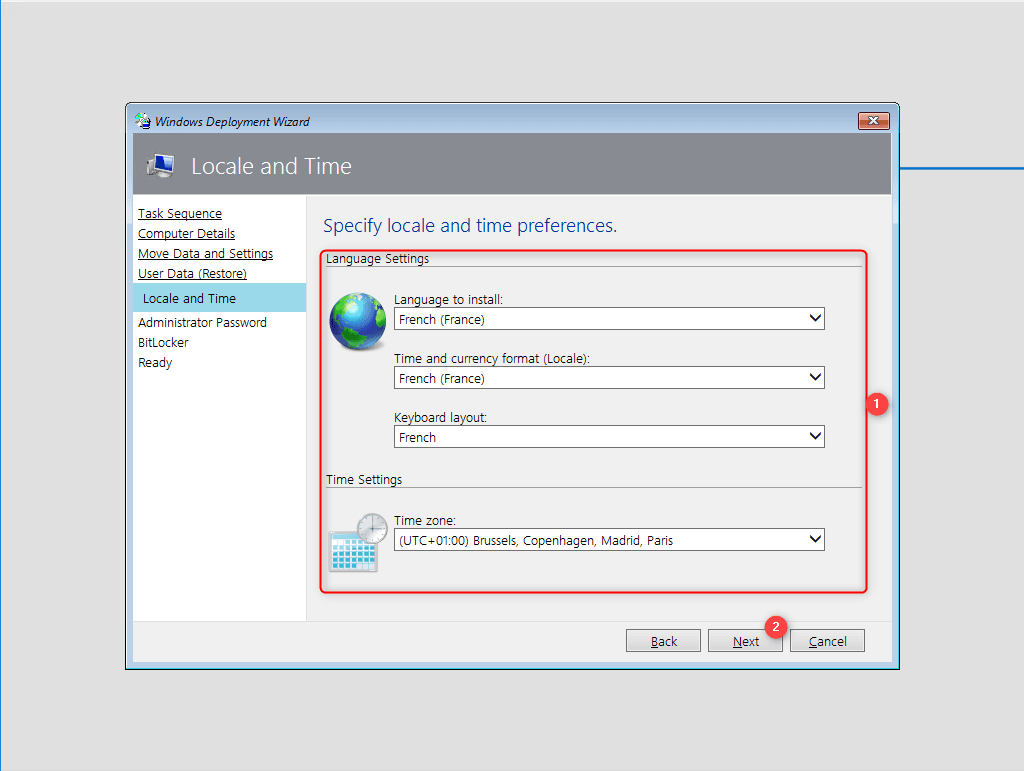
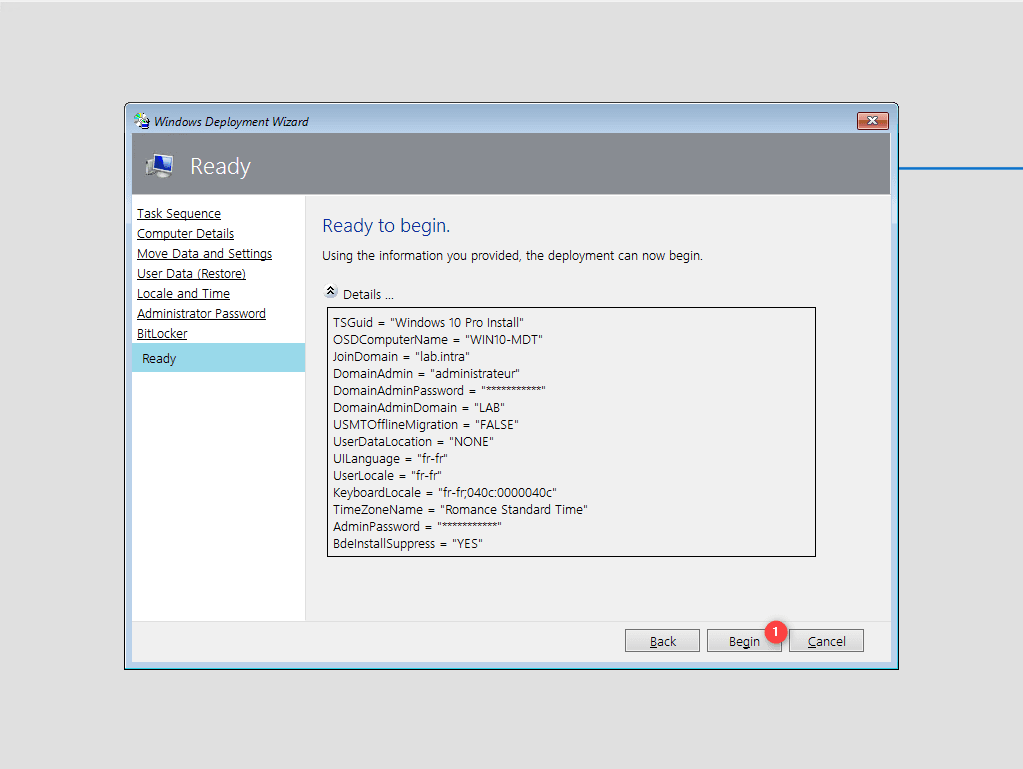
Configure the language options and time zone 1 and click Next 2.
Enter the password 1 for the local administrator account and click on Next 2.

Click on Next 1 to pass the configuration of BitLocker.

A deployment summary is displayed, click on Begin 1 to start it.
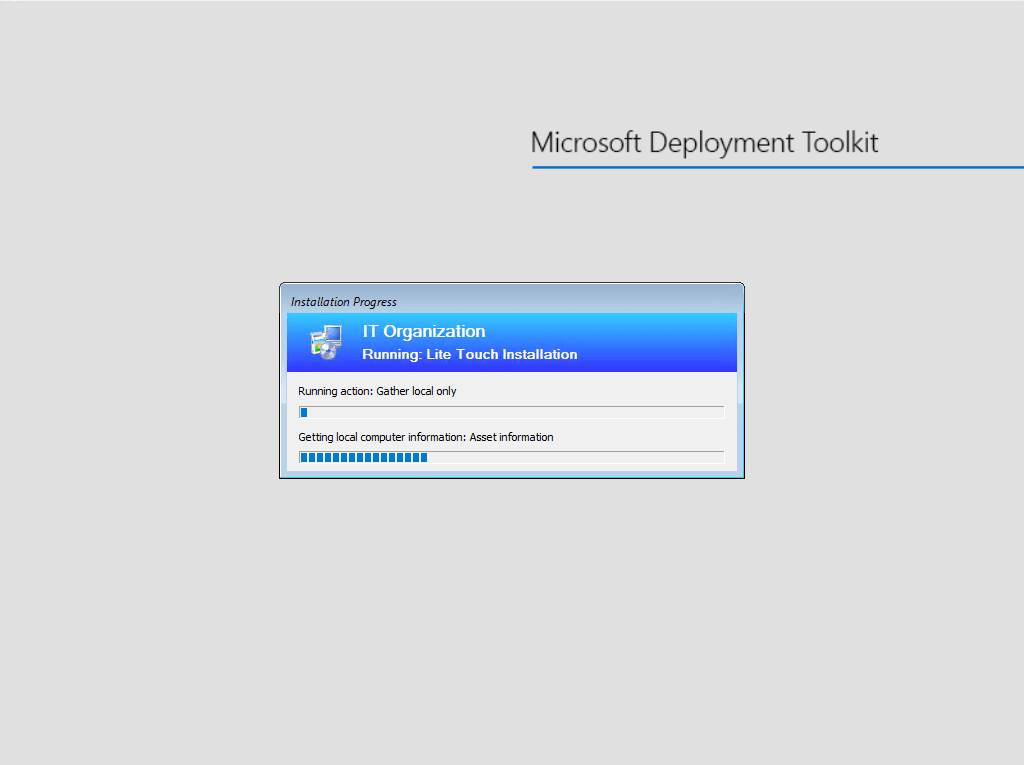
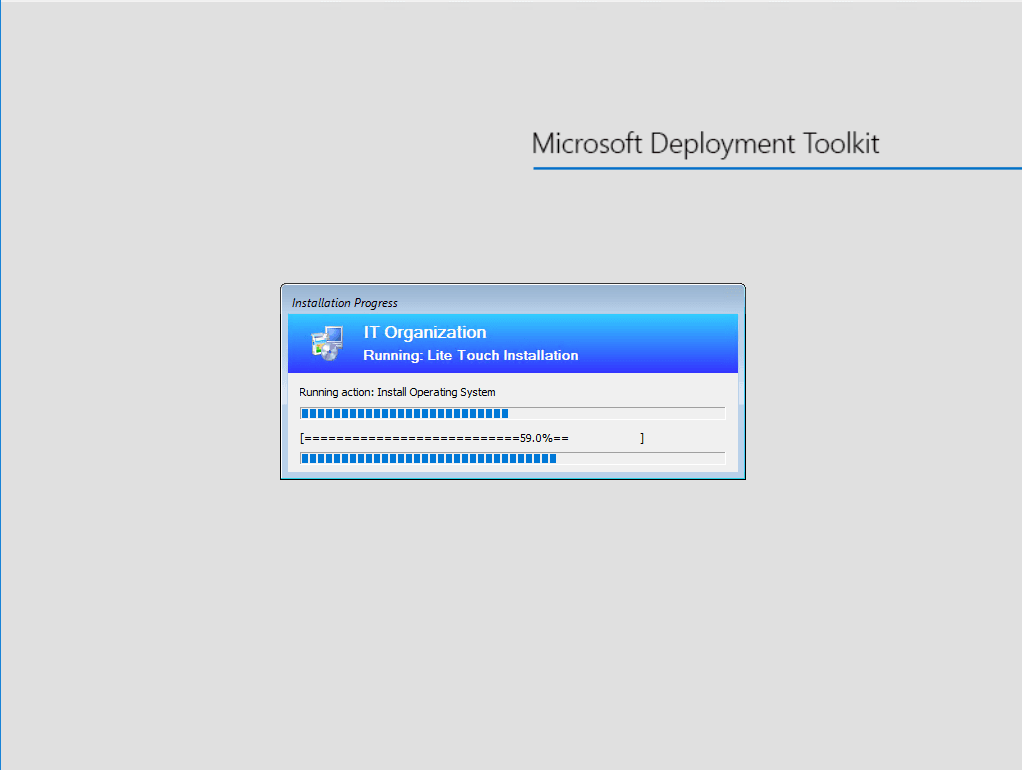
Wait for the deployment, the computer will restart several times.
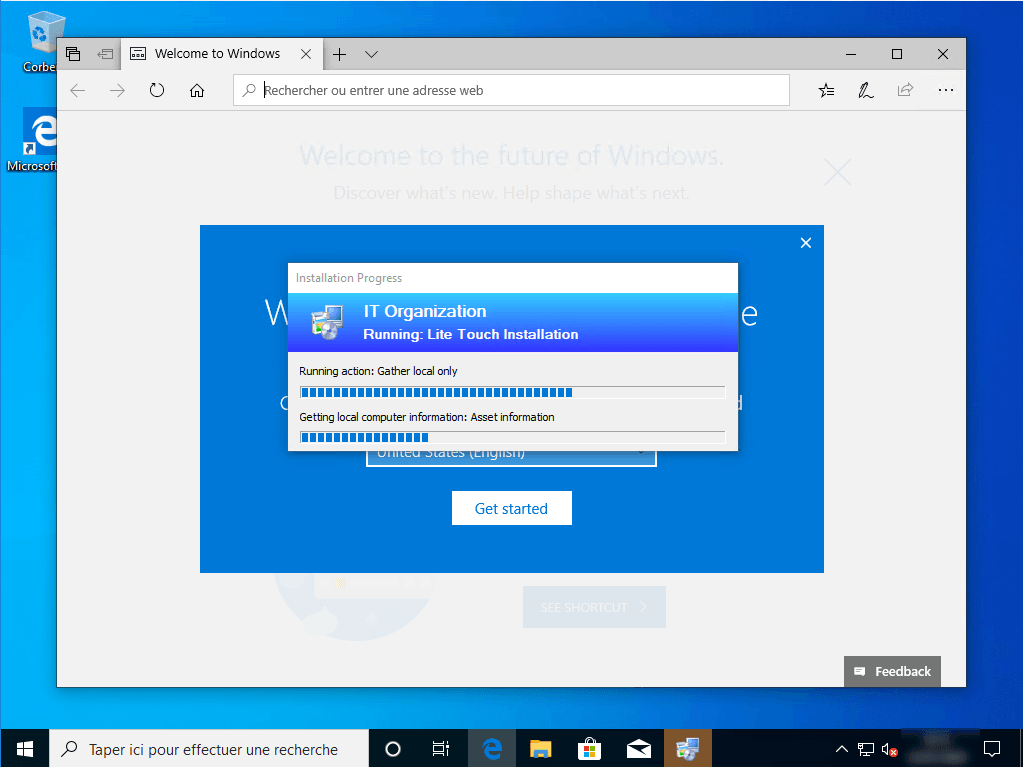
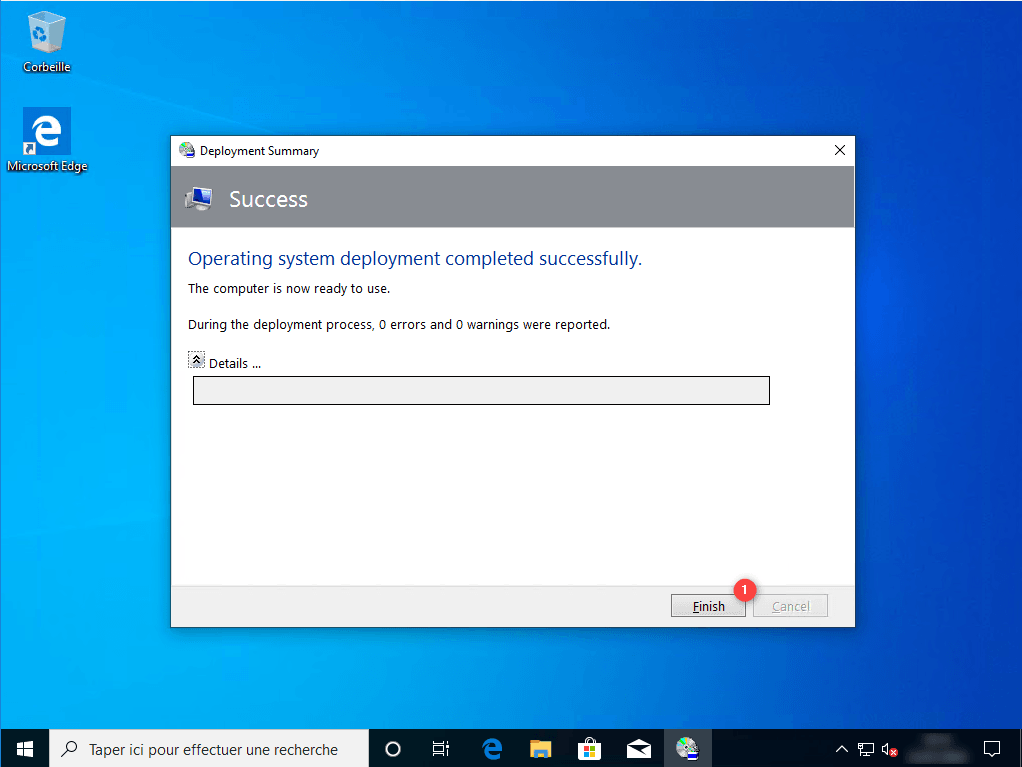
Once the deployment is complete, a window with the result is displayed, click on Finish 1 to close it.
The computer is ready.
Conclusion
Through this tutorial, we have seen how to install and use MDT with Windows deployment. The tutorial gives you an overview of what can be done with Microsoft Deployment Toolkit.
To go further with MDT, you can consult these other tutorials (in French translation in progress):


