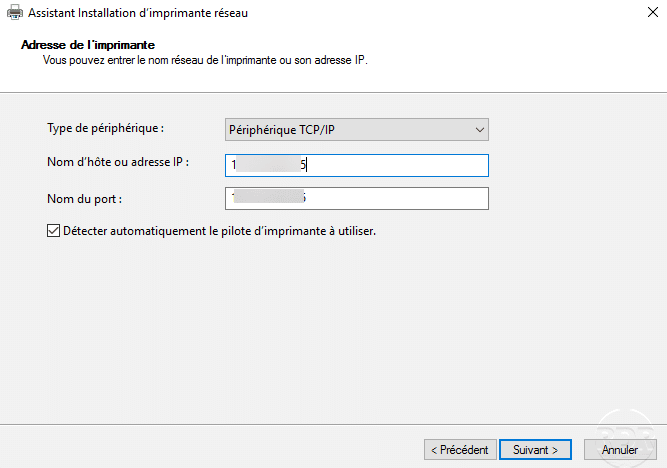
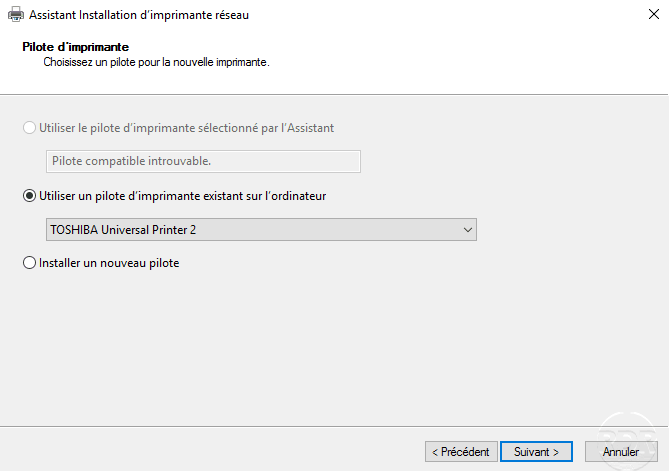
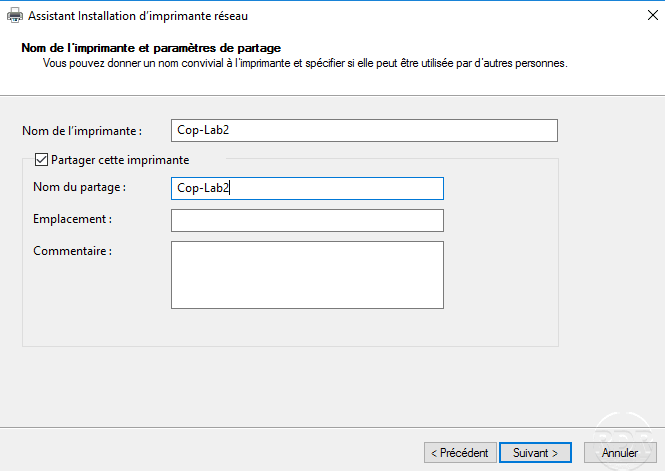
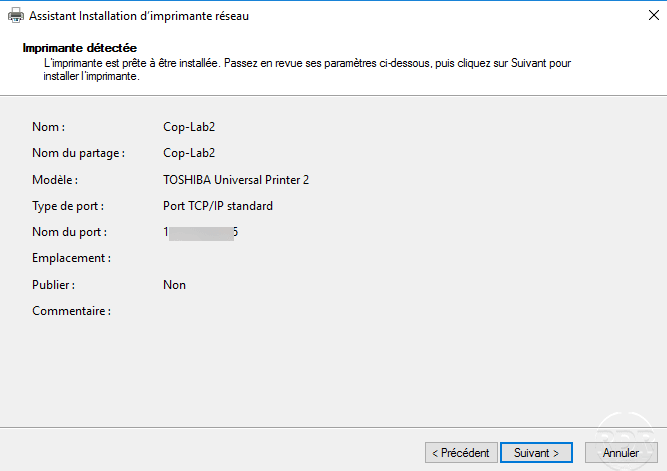
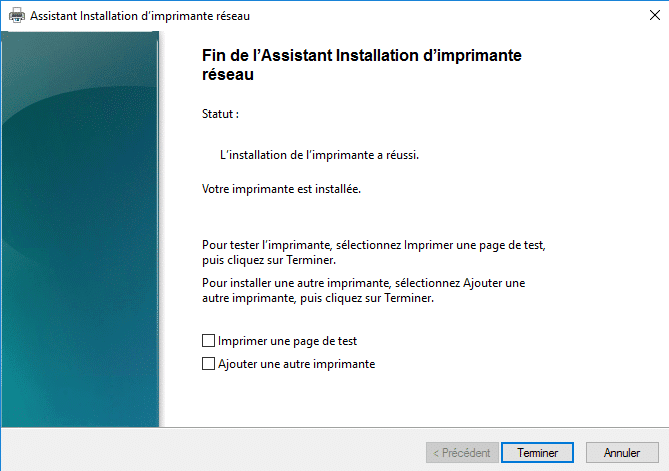
{“@context”:”https://schema.org”,”@type”:”HowTo”,”name”:”Add a shared printer”,”description”:”Prerequisite:<br>- <a rel=\”noreferrer noopener\” href=\”https://rdr-it.com/en/windows-print-server-installation-and-configuration/\” target=\”_blank\”>Print service role installed on the server</a>.<br>- Printer driver already installed on the server.”,”image”:{“@type”:”ImageObject”,”url”:””,”height”:”406″,”width”:”305″},”totalTime”:””,”estimatedCost”:[],”tool”:[],”supply”:[],”step”:[{“@type”:”HowToStep”,”url”:”#”,”name”:”Open the print management console”,”text”:”On the server, open the Print Management MMC and right-click on Printer and click on Add a printer”,”image”:”https://rdr-it.com/wp-content/uploads/2019/11/printers-service-26-add-printer.png”},{“@type”:”HowToStep”,”url”:”#”,”name”:”Choose the type of installation”,”text”:”Depending on the type of printer, choose the type of installation”,”image”:”https://rdr-it.com/wp-content/uploads/2019/11/add-printer-01-type.png”},{“@type”:”HowToStep”,”url”:”#”,”name”:”Configure the port type and IP address”,”text”:”Choose TCP / IP and enter the IP address”,”image”:”https://rdr-it.com/wp-content/uploads/2019/11/add-printer-02-adr-ip.png”},{“@type”:”HowToStep”,”url”:”#”,”name”:”Driver configuration”,”text”:”Choose the printer driver”,”image”:”https://rdr-it.com/wp-content/uploads/2019/11/add-printer-03-select-driver.png”},{“@type”:”HowToStep”,”url”:”#”,”name”:”Printer name”,”text”:”Configure the name as well as its share name.”,”image”:”https://rdr-it.com/wp-content/uploads/2019/11/add-printer-04-name.png”},{“@type”:”HowToStep”,”url”:”#”,”name”:”Printer summary”,”text”:”A summary of the printer added is displayed”,”image”:”https://rdr-it.com/wp-content/uploads/2019/11/add-printer-05-overview.png”},{“@type”:”HowToStep”,”url”:”#”,”name”:”Printer installed”,”text”:”The printer is installed on the server, all you have to do is deploy it”,”image”:”https://rdr-it.com/wp-content/uploads/2019/11/add-printer-06-printer-added.png”}]}
Add a shared printer
Prerequisite:
– Print service role installed on the server.
– Printer driver already installed on the server.


