In this tutorial, I will explain how to migrate your WSUS database, which is default on Windows Internal Database to SQLExpress.
Since Windows Server 2016, the installation of WSUS can be done directly on a SQL Server (Express) database.
Table of Contents
Why migrate to SQLExpress?
There are several answers to this question:
- For performance and stability reasons, switching to SQLExpress can resolve stability issues on WSUS and improve performance on the management console (faster display of information).
- You already have an SQL instance on your server and you want to use it to avoid multiplying the services.
- You want to put the database on another server.
Prerequisites
- A server with WSUS installed.
- Have an SQLExpress instance.
- Have the SQL Server Management Studio console (SSMS) on the WSUS server.
Migration of the WSUS database to SQLExpress
Open the PowerShell console as administrator and enter the following commands to stop the IIS and WSUS services.
Stop-Service IISADMIN
Stop-Service WsusService
Launch SSMS in administrator mode.
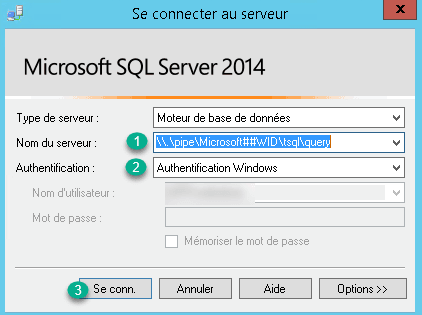
In server name 1 enter: \\.\pipe\Microsoft##WID\tsql\query , authentication 2 Windows authentication and click on Connect. 3.
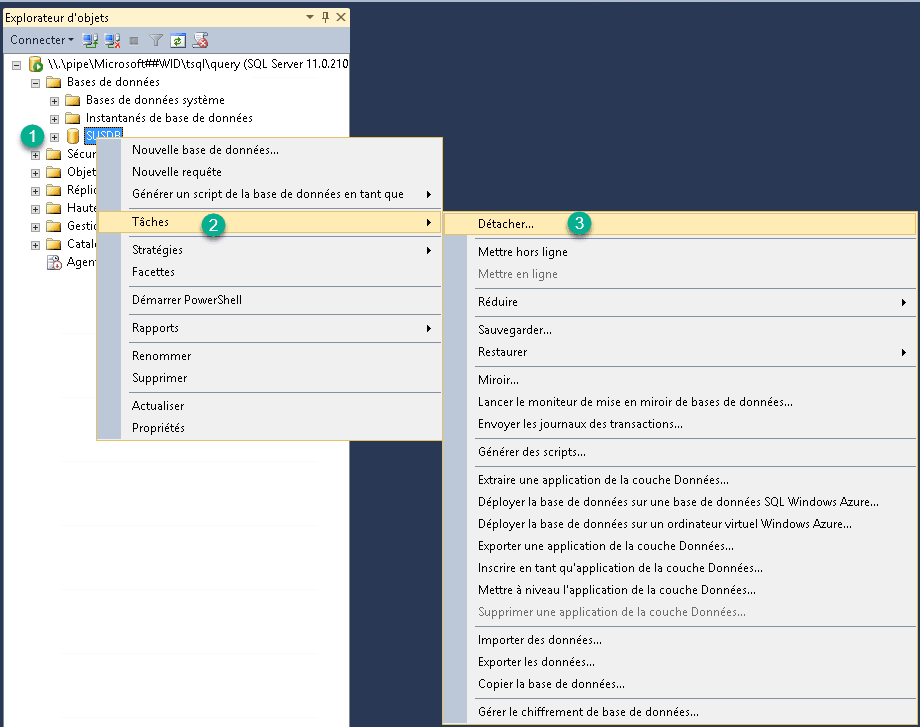
You must now detach the base, for this right click on the base 1 -> Tasks 2 -> Detach 3.
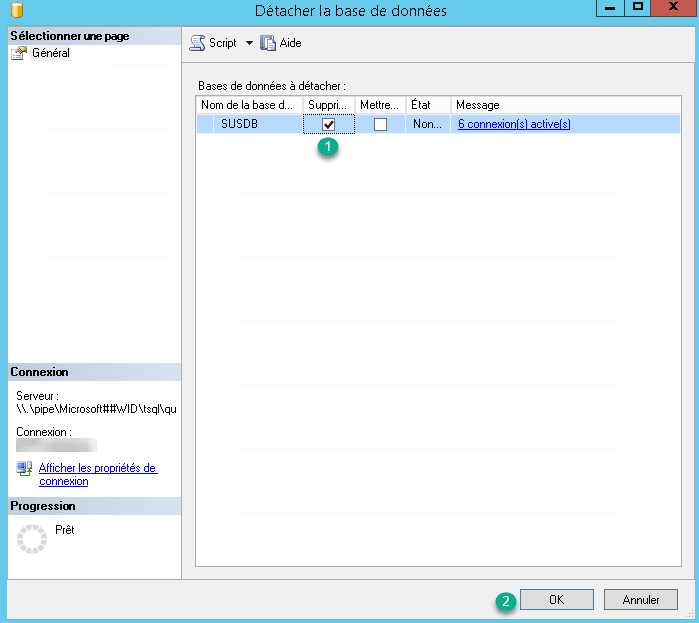
Check Delete 1 to cut the active connections and click on OK 2 to detach the database. Once the base is detached, you can close SSMS.
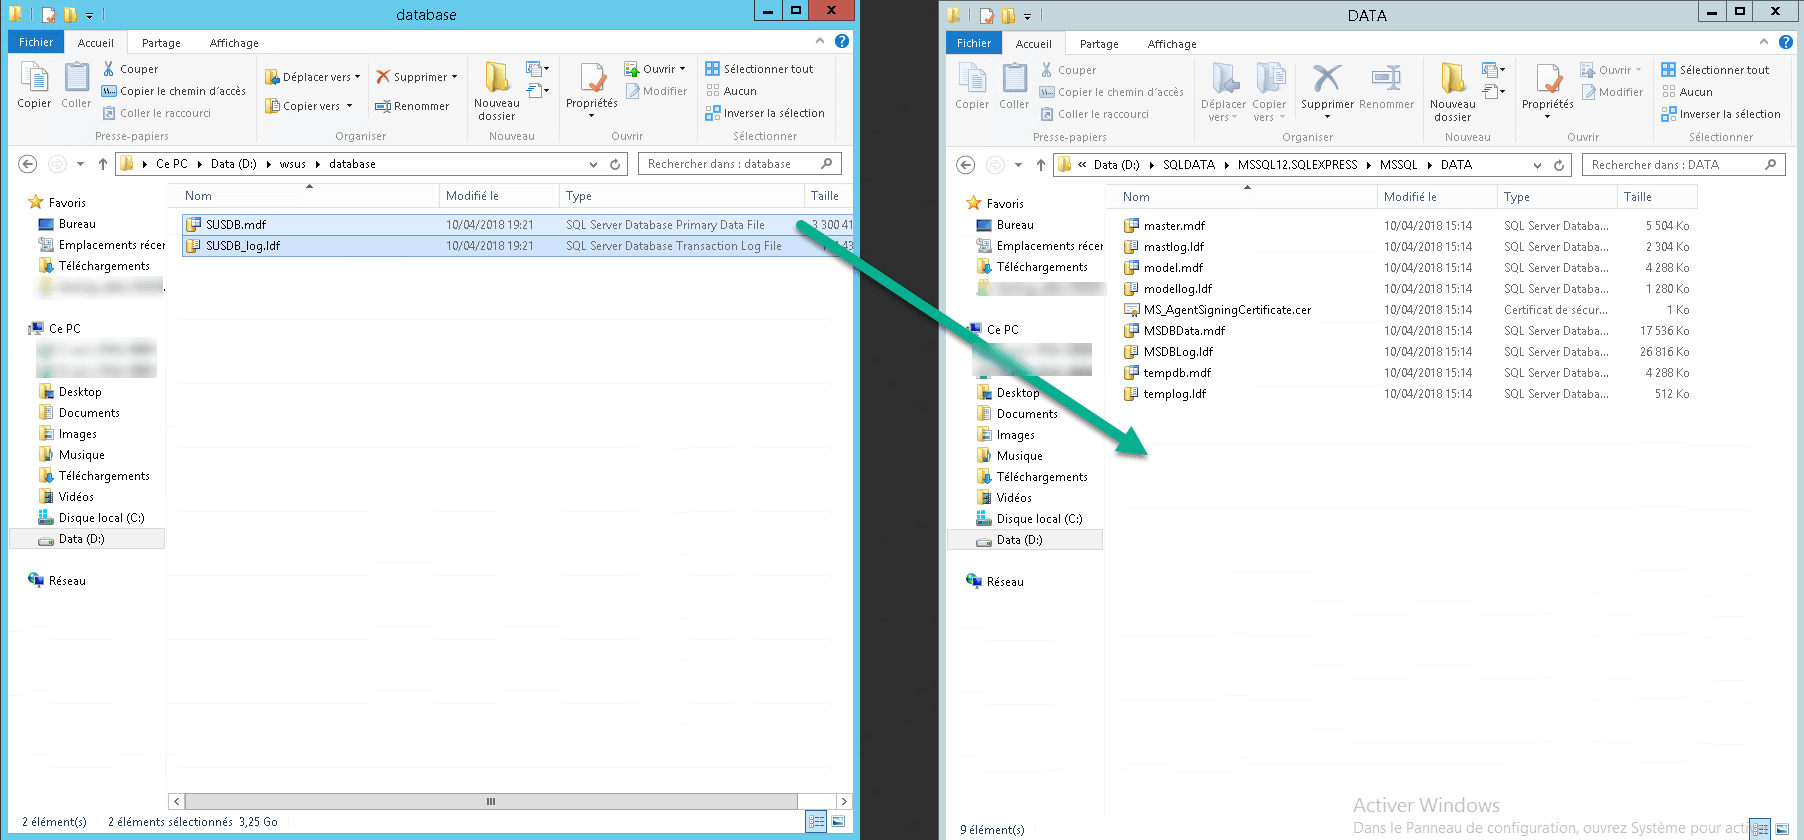
Move the files from the database to the desired location. By default, the database is in the following location: C: / Windows / WID / Data. The default folder for SQL Server is C: / Program Files / Microsoft SQL Server / MSSQLXX.MSSQLSERVER / MSSQL / Data.
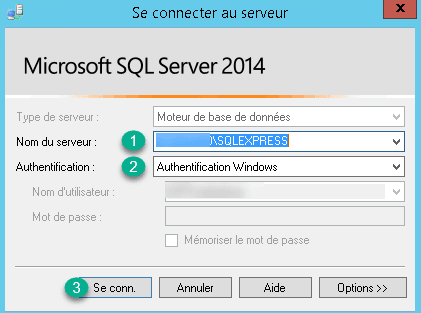
Relaunch SSMS to connect this time to the instance that will receive the WSUS database.
Server name 1: The new instance
Authentication 2: Windows authentication
Click on Conne. 3
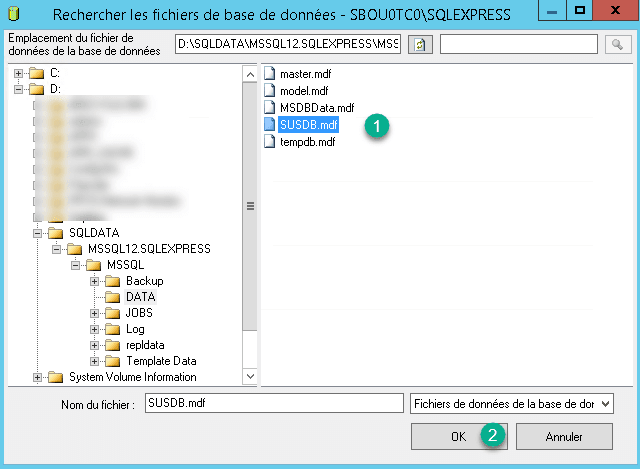
Right click on Database 1 -> Attach 2.

Click on Add 1.

Select the file SUSDB.mdf 1 and click on OK 2.
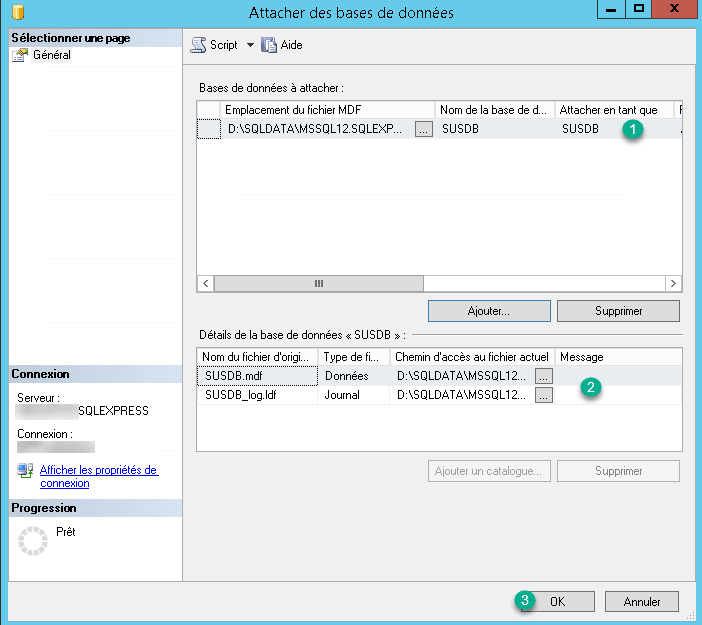
Check the database 1 and also the recovery of the log file 2 and click on OK 3.
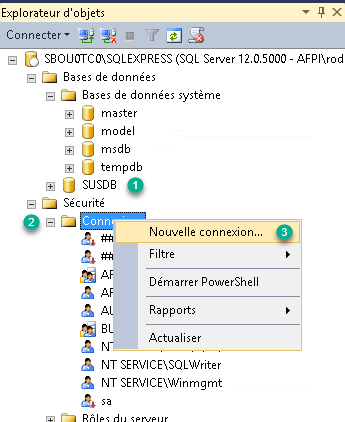
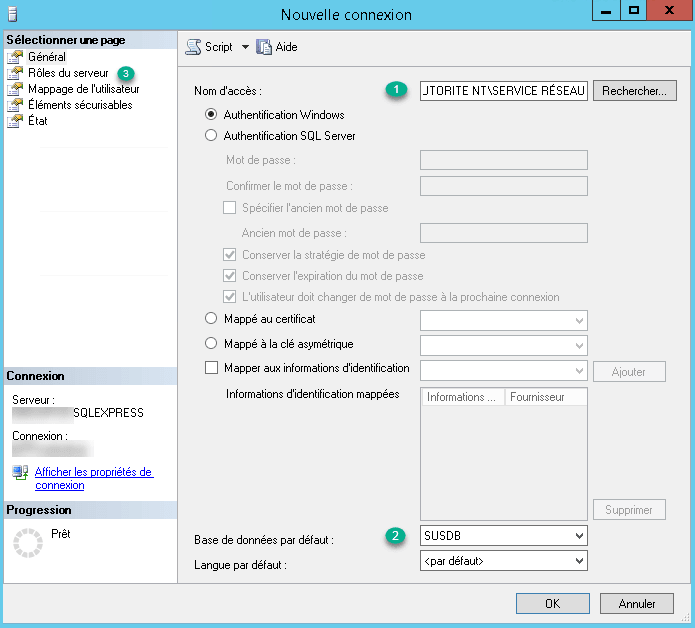
You must now create a connection for the service running WSUS. From the menu on the left Security 1 -> Connection (right click) 2 -> New connection 3.
Configuration of the new connection:
Access name 1: AUTORITE NTSERVICE RÉSEAU (Fr) | NT AUTHORITYNETWORK SERVICE (En).
Default database: SUSDB 2. Click on Role of the server 3.
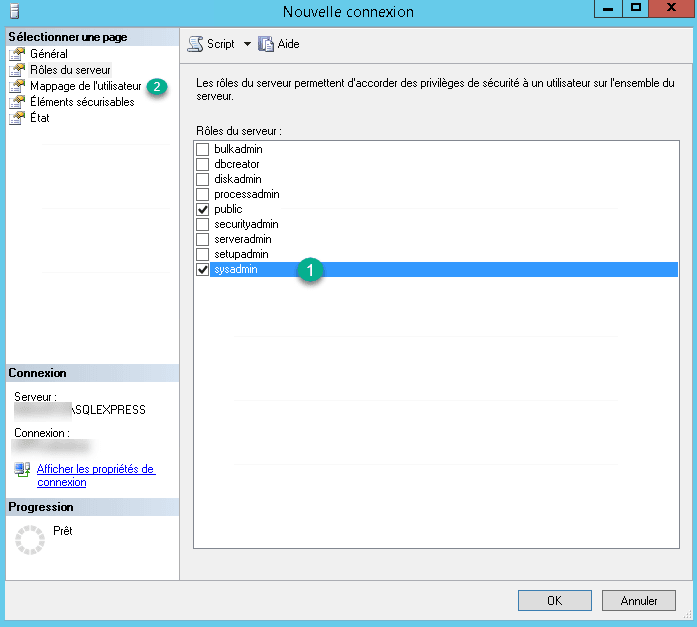
Check sysadmin 1 to give the administration rights on the database. Then click on User Mapping 2.
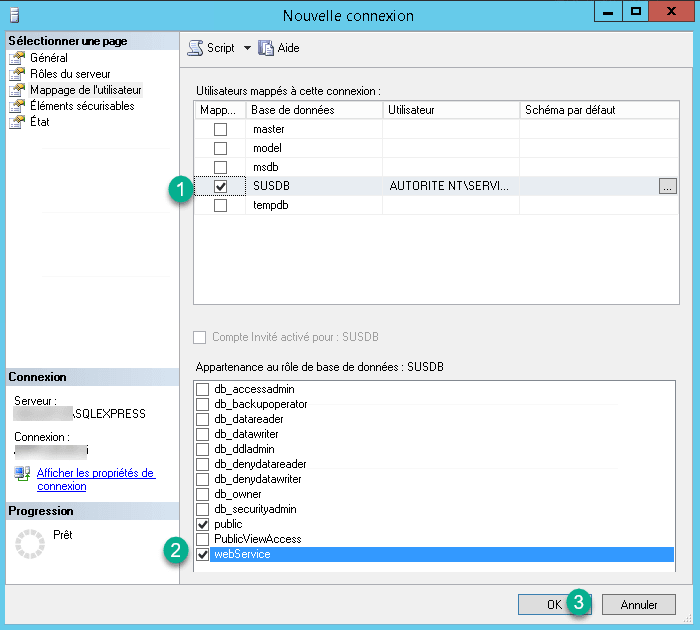
Tick the SUSDB database 1, add the webService role 2 and click on OK 3 to validate the connection.
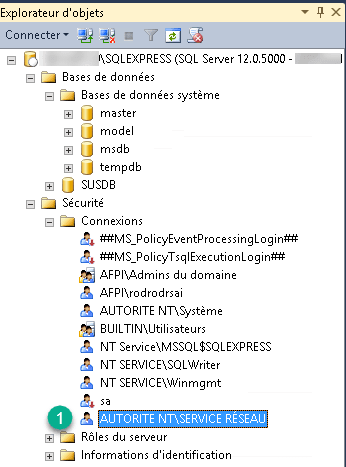
Check the connections for the presence of the user AUTHORITY NTSERVICE NETWORK 1.
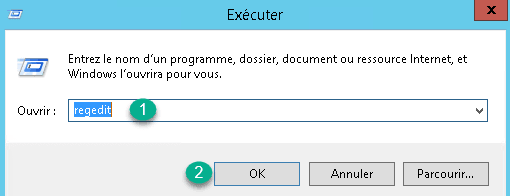
We must now modify the parameters of WSUS to make it point to the new base. To do this open the registry editor: Windows key + R, type regedit 1 and click on OK 2.
Look for the key: HKEY_LOCAL_MACHINE / SOFTWARE / Microsoft / Update Services / Server / Setup / Installed Role Services / UpdateServices-WidDatabase 1.
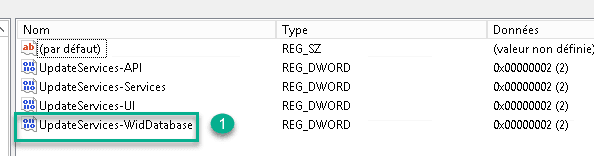
Rename the key to UpdateServices-Database 1.

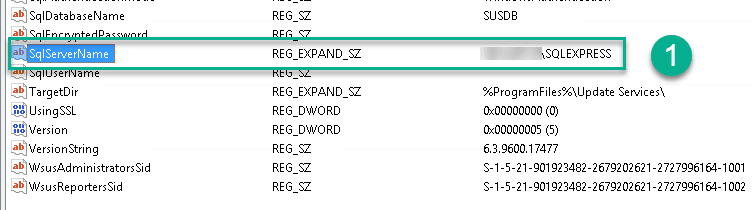
Find the key HKEY_LOCAL_MACHINE / SOFTWARE / Microsoft / UpdateServices / Server / SetupSqlServerName 1.
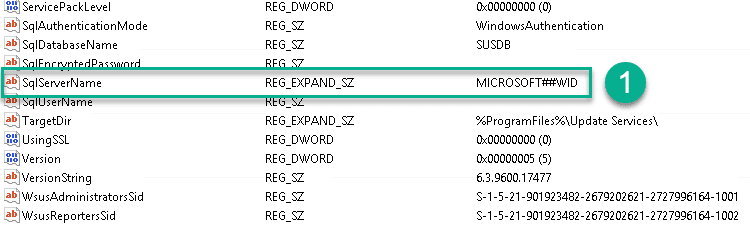
Change the value not the name of your SERVERINSTANCE instance 1.
Restart the services.
Start-Service IISADMIN
Start-Service WsusService
It’s over, the WSUS database is migrated. It is not recommended to uninstall the WID functionality, as this functionality contains WSUS post-installation scripts. You can deactivate the service without problem.
