In this tutorial, we will see how to import backups into Veeam in case you need to access an old repository or import agent backups made on a network share.
Add the repository
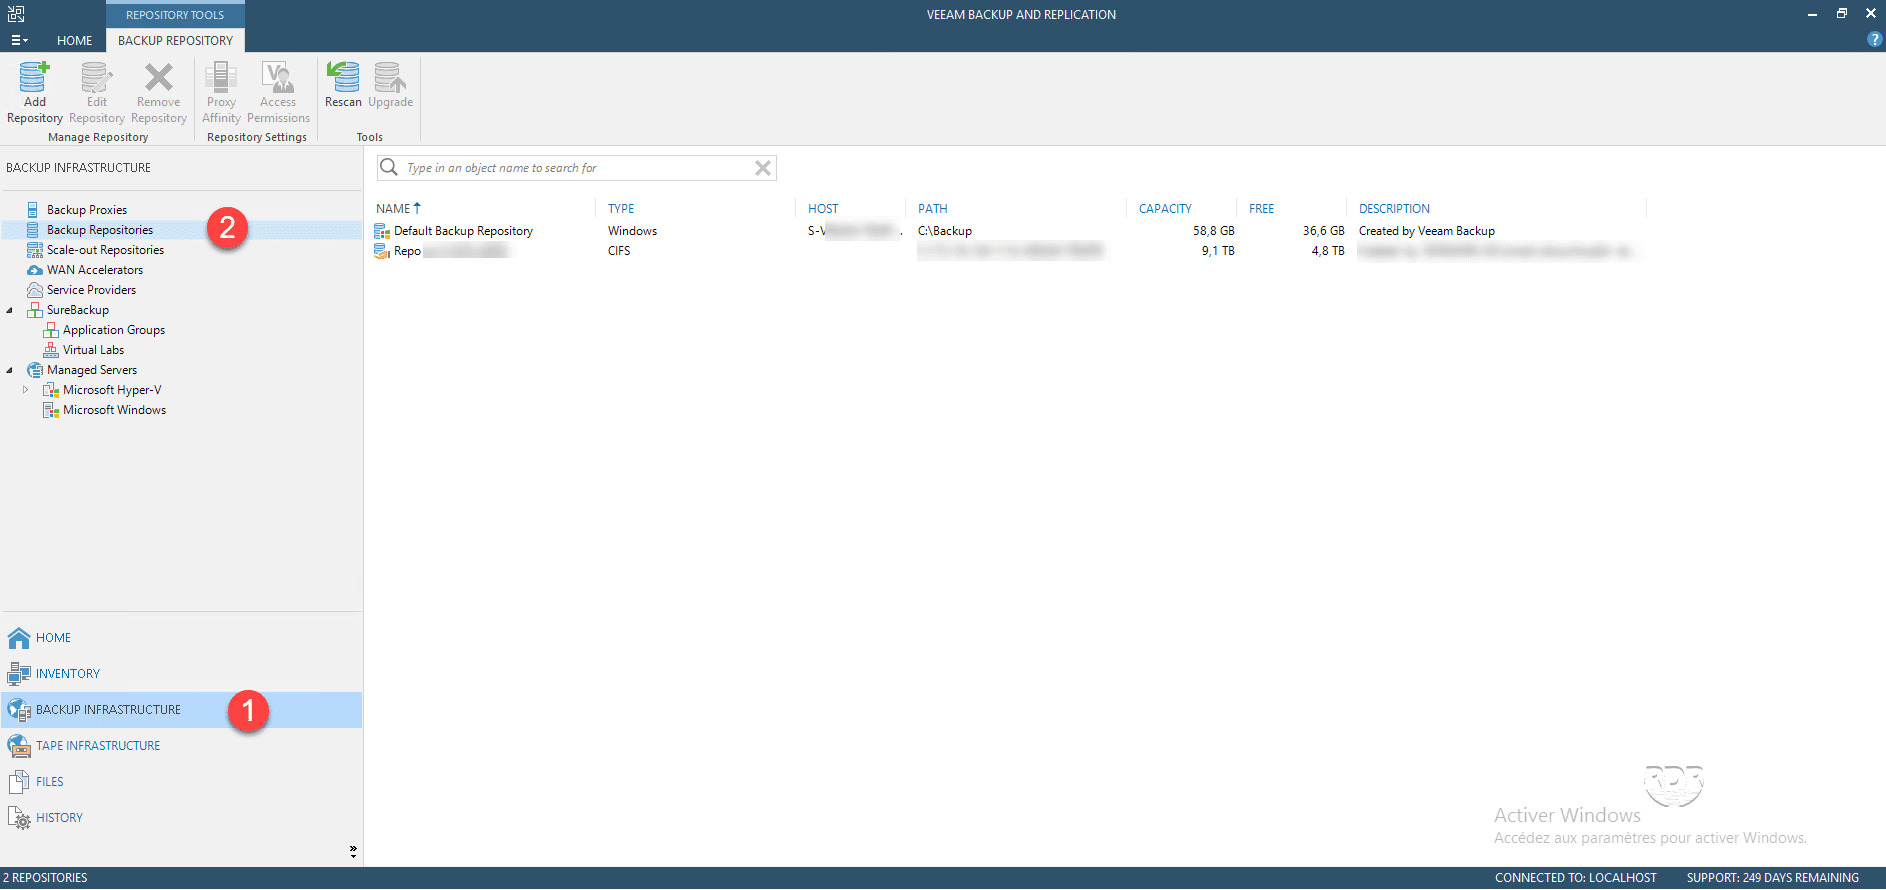
1. From the Veeam console, click on BACKUP INFRASTRUCTURE 1 and go on Backup Repositories 2.
2. Right click in the area of repositories1 and click on Add Backup Repository… 2.

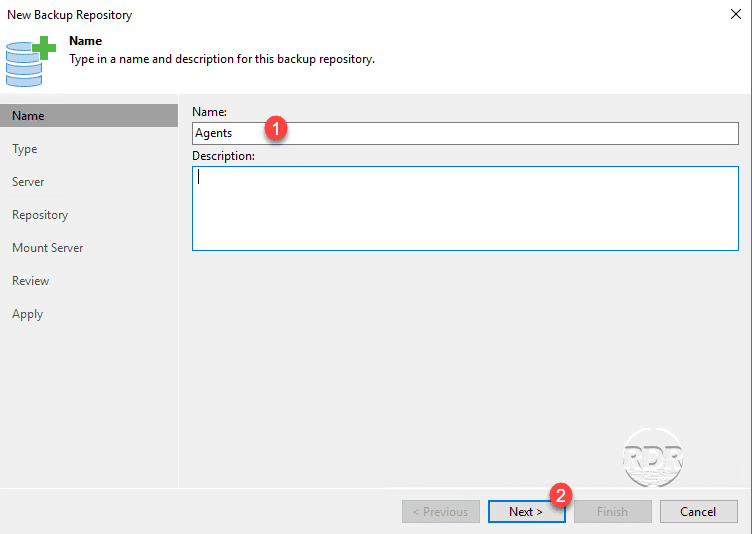
3. Name the deposit 1 and click on Next 2.
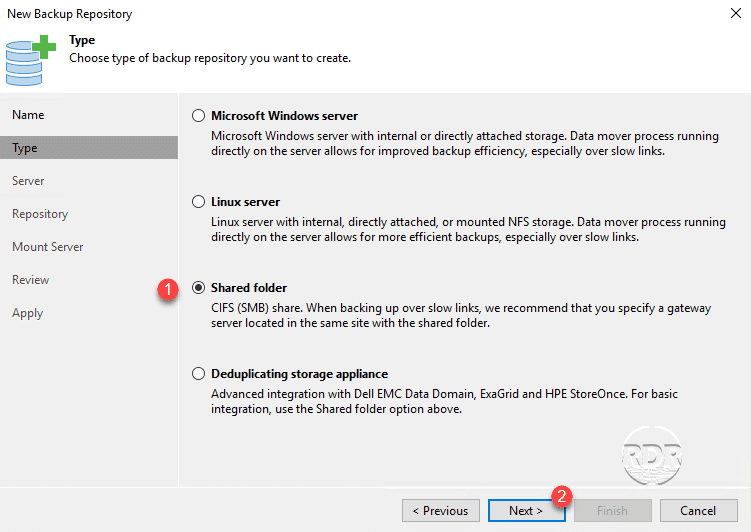
4. Choose the type of repository 1 and click on Next 2.
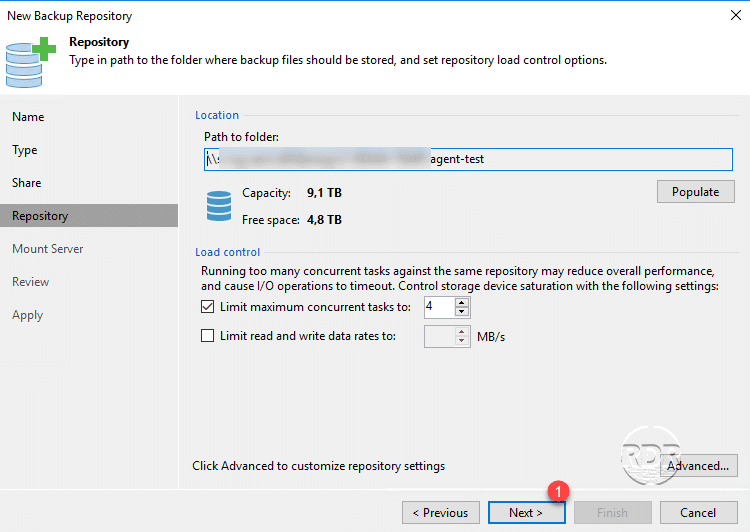
5. Configure the deposit information (access address and login) 1 then click on Next 2.

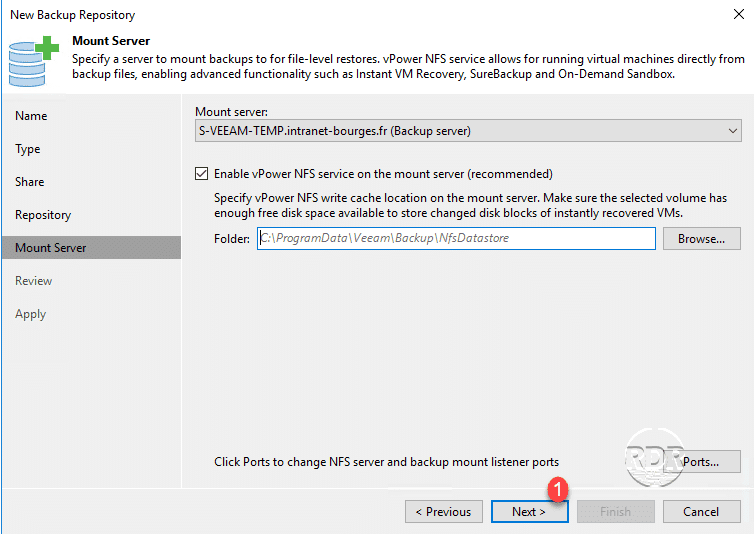
6. Click on the button Next 1.
7. Click on Next 1.
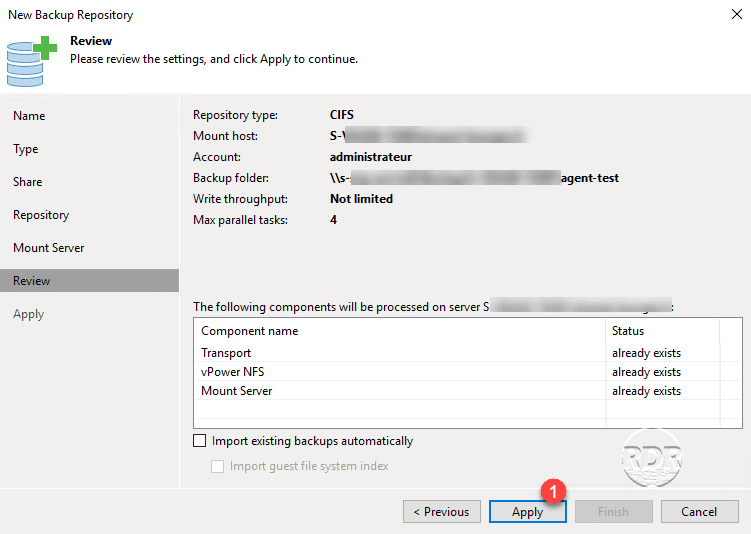
8. Click on Apply 1 to confirm the addition of the repository.
9. Once the deposit is added, close the wizard by clicking on the Finish button 1.

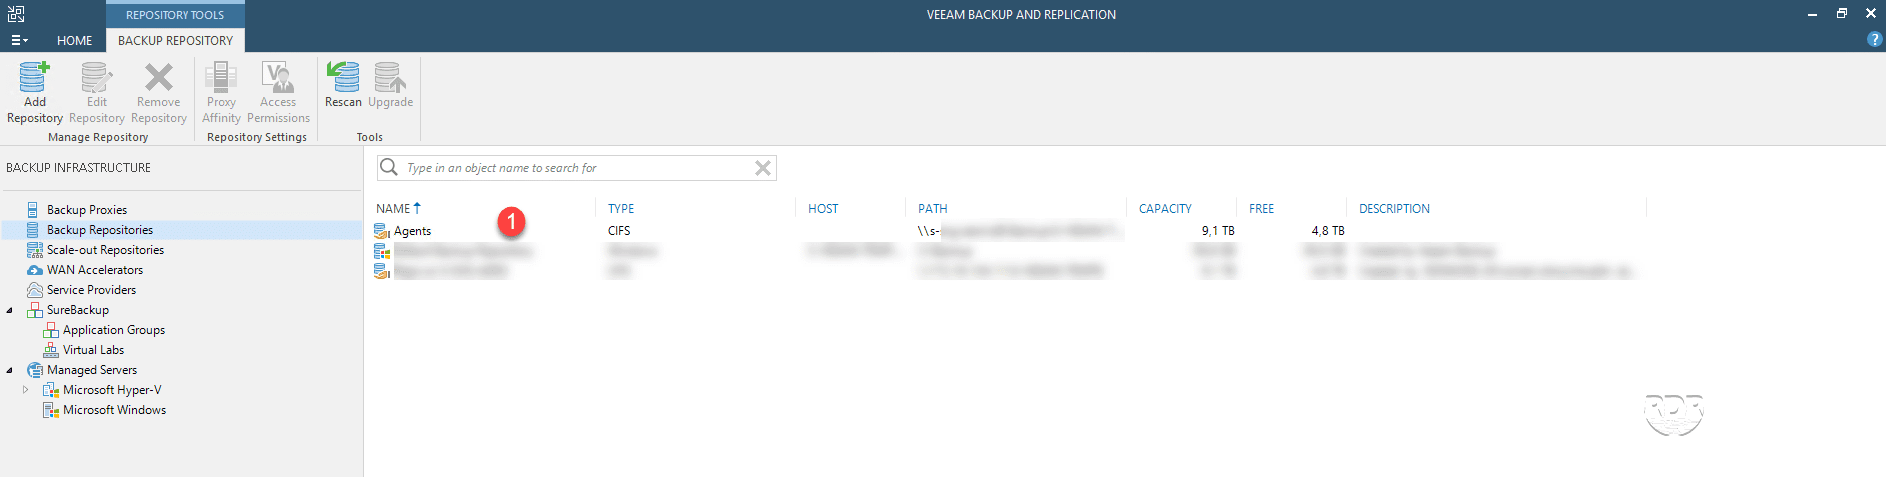
10. The repository is added 1 and visible in the list.
Import backups
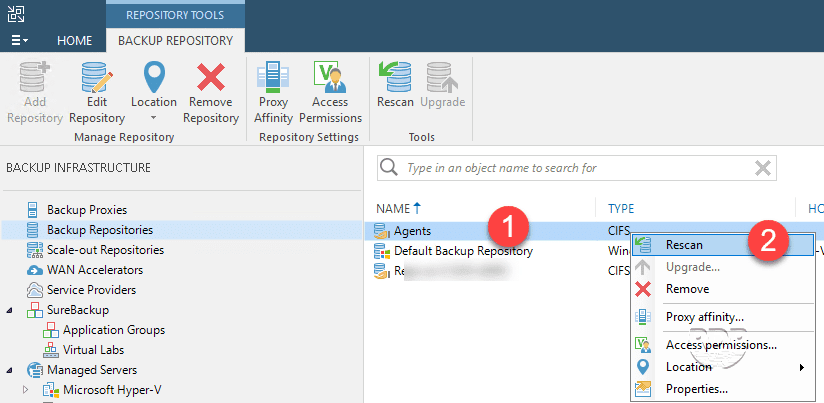
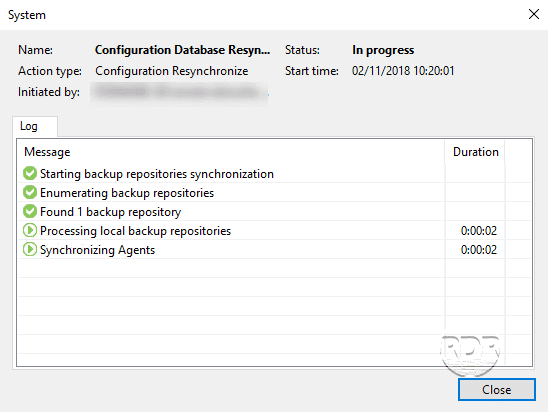
1. Right click the depot 1 and click on Rescan 2.
2. Wait while deposit synchronization.
3. Close the window by clicking on Close 1.
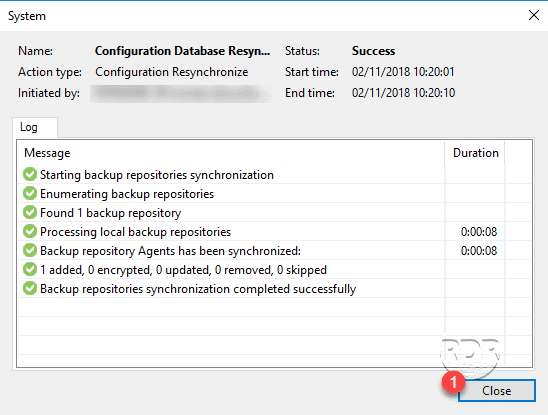
The number of imported items is visible in the window above.
4. To access the imported backups, clickr Home 1, unfold Backup 2 and click on Disk (imported) 3to have the list 4.

