Sommaire
Overview of classification management
In this tutorial, I will introduce you to Classification Management on a Windows File Server and how to set it up.
Classification is an element of File Server Resource Manager (FSRM) that also allows you to set up file filters and quotas.
The classification is also used for the implementation of dynamic access control (DAC) through the ADAC console. This feature will be the subject of another tutorial.
The classification that we will see in this tutorial does not allow dynamic access control, but above all allows you to add “tags” ‘to files in order to generate reports and management tasks such as moving to the using a script.
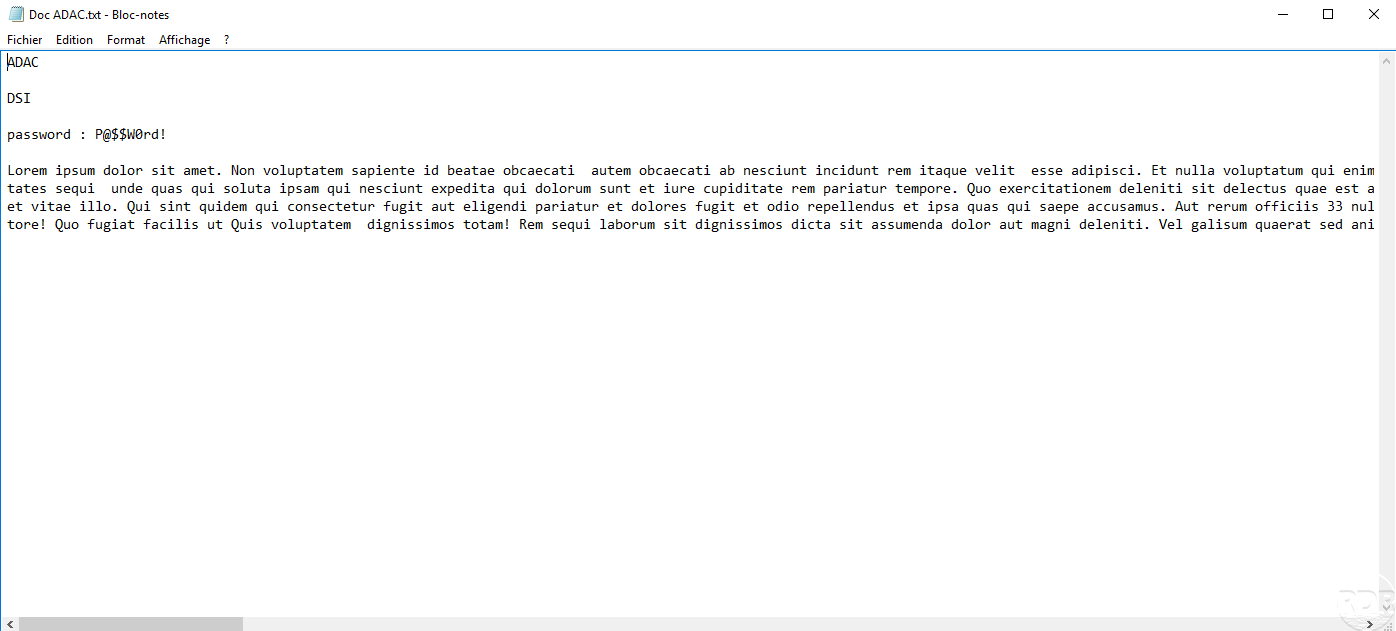
To illustrate the tutorial, we will create a classification that will mark the classification as Yes if the file contains the word Password.
Prerequisite
On the file server, it is necessary to have the File Server Resource Manager role to install.
Classification configuration
The implementation of classification rules is carried out in two stages, you must first create a classification property and then create a classification rule.
To get started, open the File Server Resource Manager console.
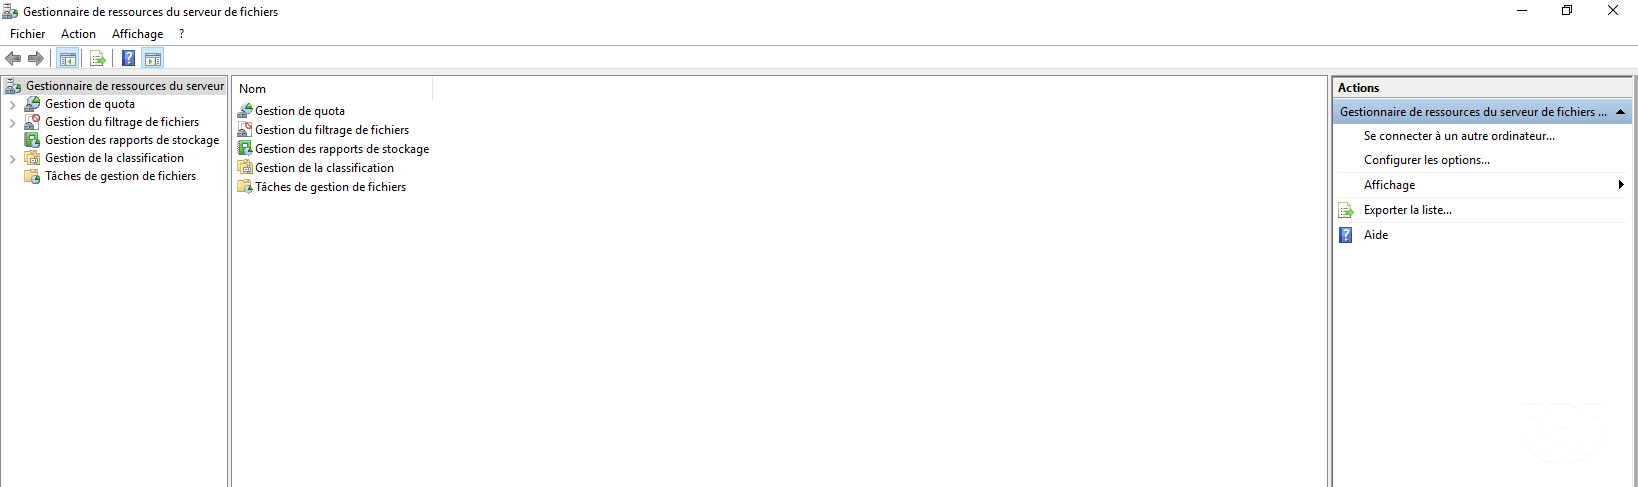
Classification properties
A classification property is a property (information) that will be added to files. Once set in the console, it can be applied to files manually or using Classification Rule.
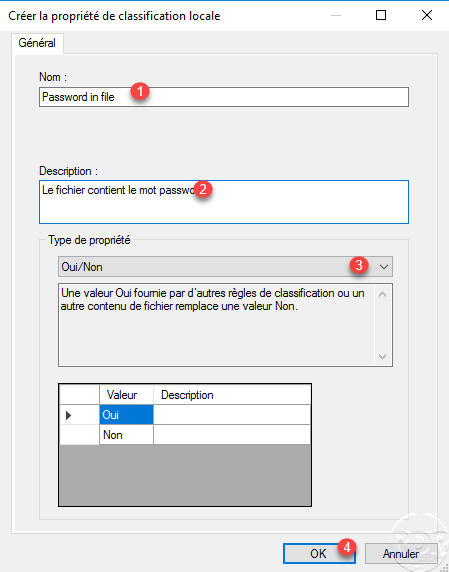
From the File Server Resource Manager console, expand the Classification Management 1 node, go to Classification Properties 2, in the central zone right-click and click on Create a local property 3.

Name the property 1 and fill in the description 2, select the type 3 (in the Yes / No example) and click OK 4 to create it.
The property is created 1 and available in the list.

Classification rules
The classification rule will allow you to automatically apply classification properties to files.
Go to Classification rules 1 then right-click in the central area and click on Create a classification rule 2.

On the General tab, name the rule 1 then go to the Scope 2 tab.

The Scope tab is used to configure the list of files concerned by the rule, click on Add 1.

Choose the folder where the rule will be applied 1 and click OK 2 to add it.
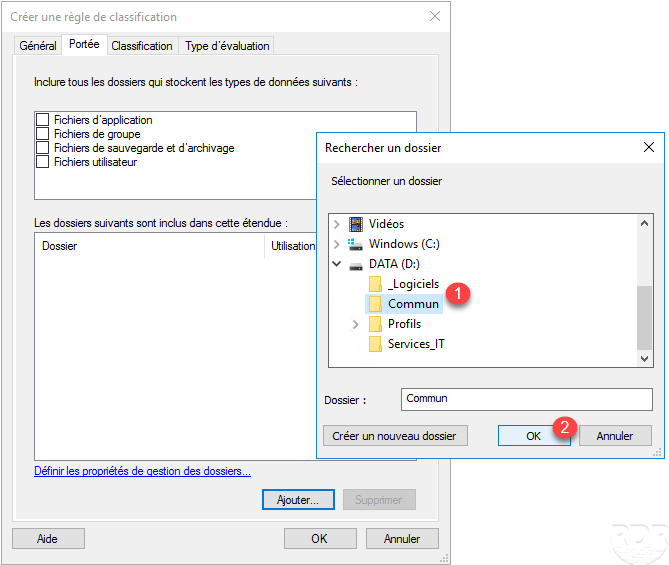
The folder is added 1 to the scope of the rule, go to the Classification 2 tab.

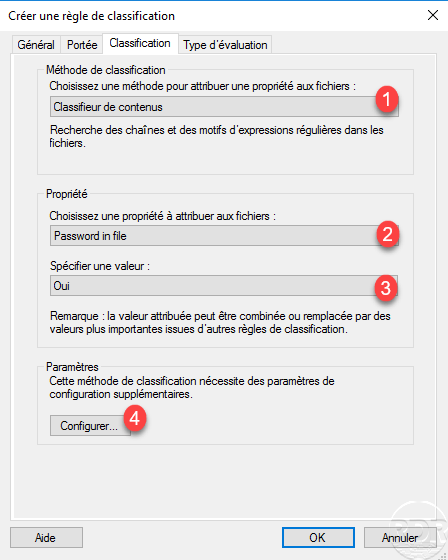
From the Classification tab, choose the Content Classifier 1 method, choose the previously created property 2, select the value 3 that will be applied and click Configure 4 .
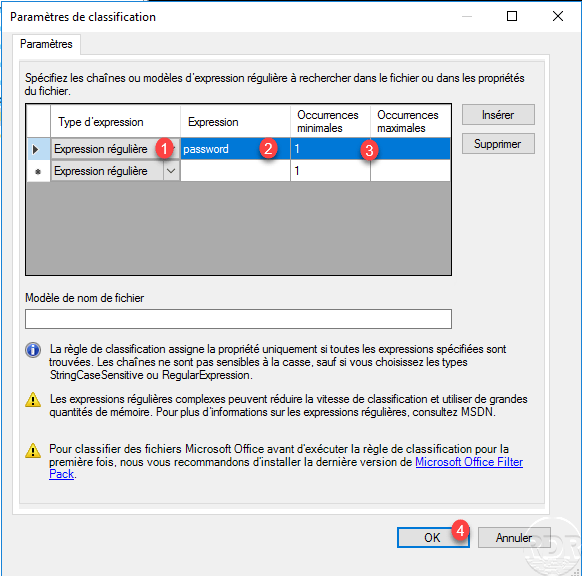
We must now configure how the rule will apply the classification, we must define the type 1 (Regular expression), the expression 2 (here the word password) and the number of occurrences 3 (name of times the expression is present) then click OK 4 to validate the parameters.
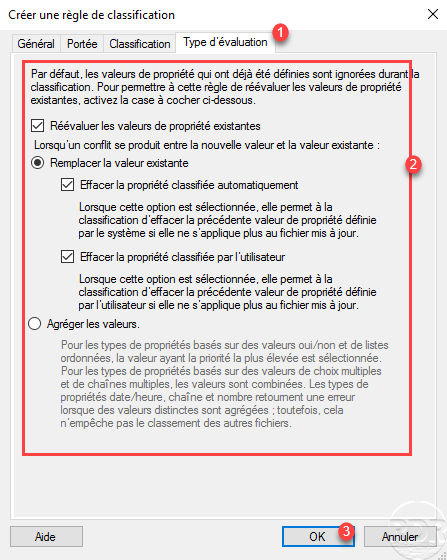
Now go to the Evaluation type tab 1 and configure according to your needs how the rule is applied 2 and click on OK 3 to create the rule.
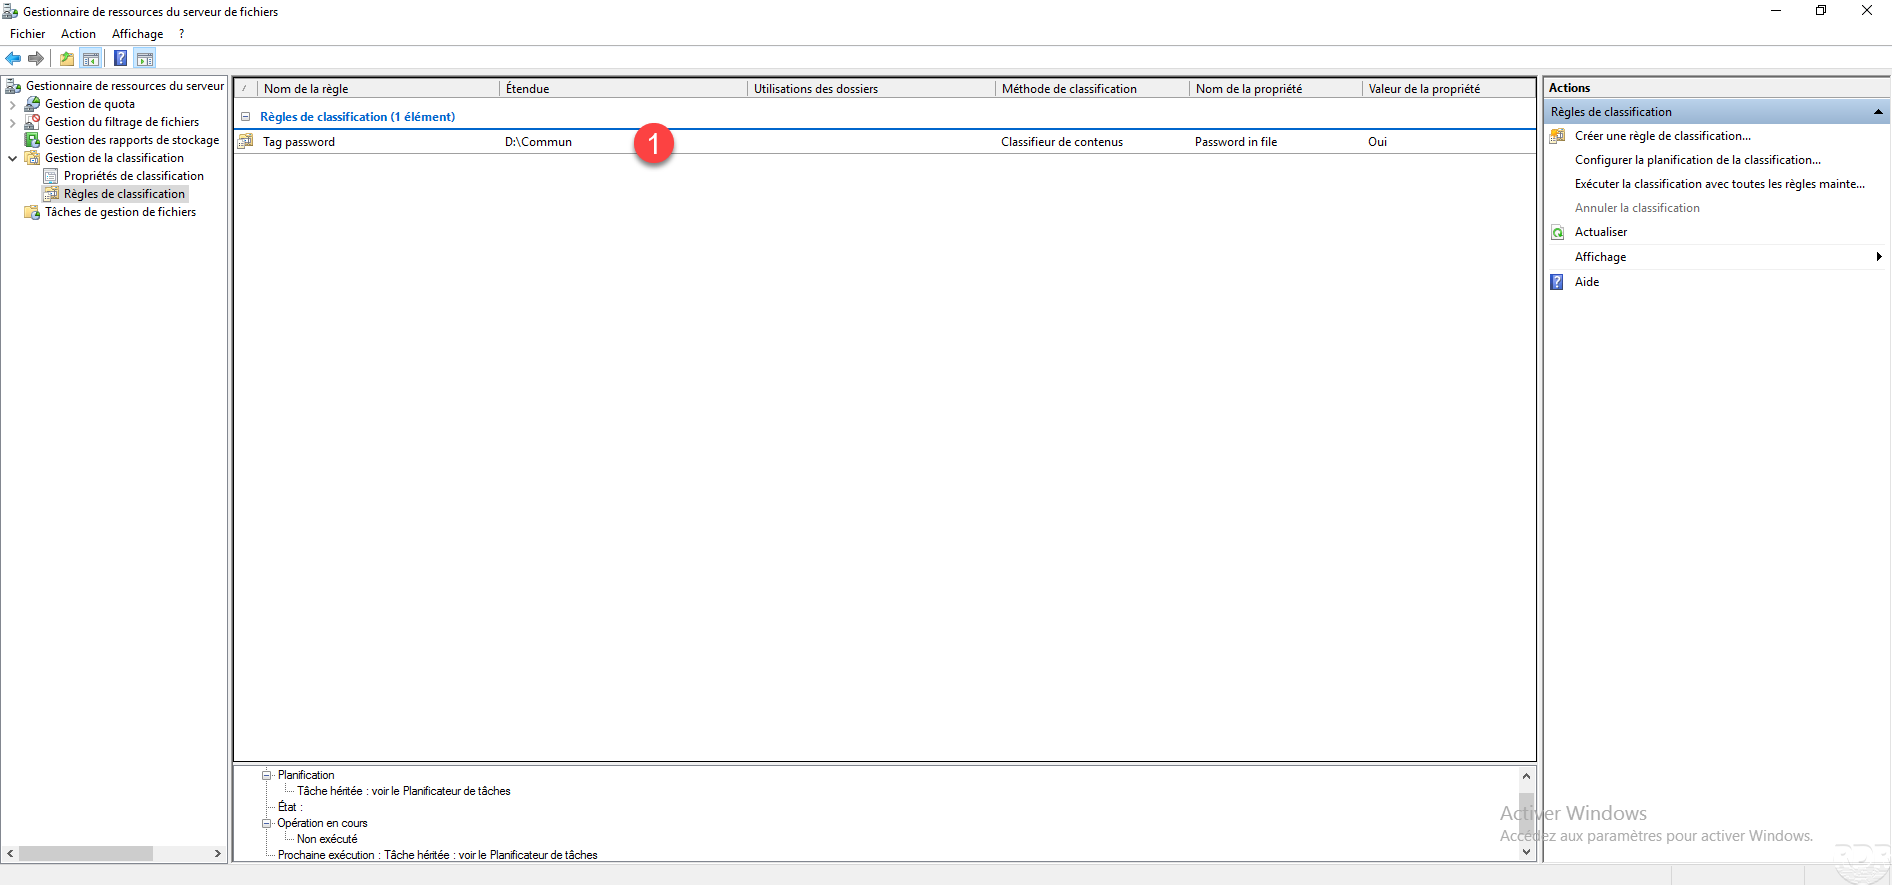
The rule is added 1 and available in the list.
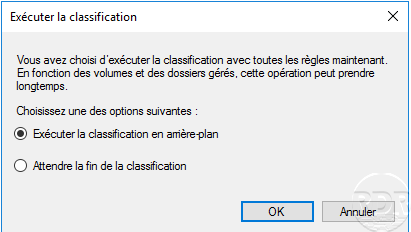
All that remains is to execute the rules, for this there are two possibilities which are accessible via the Actions menu:
Manually by clicking on Run classification with all rules now.
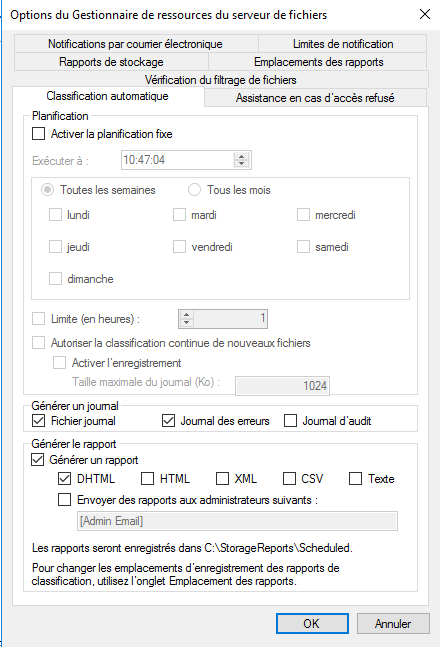
Automatically by configuring a schedule, for this in the Actions menu click on Configure classification schedule.
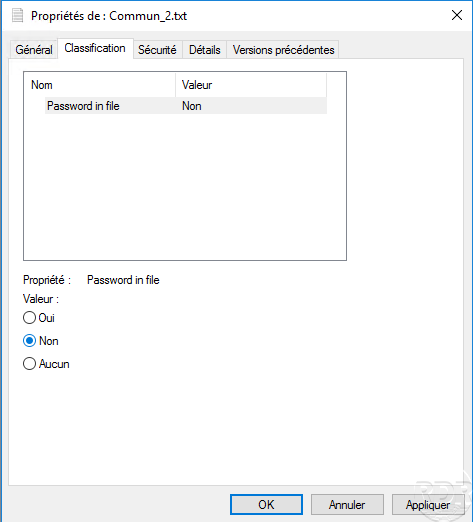
Now that the rules have been executed, open the properties of a file.
Then go to the Classification tab and check the execution of the rule.

Conclusion
Now you know how to put the classification with the file server resource manager.
This type of classification does little for the file server environment except for reporting.
If you want to set up dynamic access control (DAC), it is necessary to master the classification.
