In this tutorial, I will show you how to display system related information with BgInfo.
BgInfo allows you to display several information directly in the background of the computer, which allows you to know at a glance information such as the version of the OS, the IP address or the name of the computer.
When I’m connected to multiple servers at the same time, BgInfo lets me quickly know which server I’m on.
It can also be practical to display this information on client computers, in particular for support teams when they need information such as the name of the computer or the IP address in order to do the same remotely.
Users on the other hand are more reluctant, because you will display information on the head of the little cat;)
It is possible to run BgInfo from the command line, therefore by script, and to be able to display information on all the computer workstations of a company using a group policy in an Active Directory environment.
First, I will tell you where to download BgInfo, how to use it and save the config file, then I will show you how to display information automatically on computers using a GPO
Display system information with BgInfo
1. Download BgInfo on the Microsoft site.
2. Uncompresses the archive.
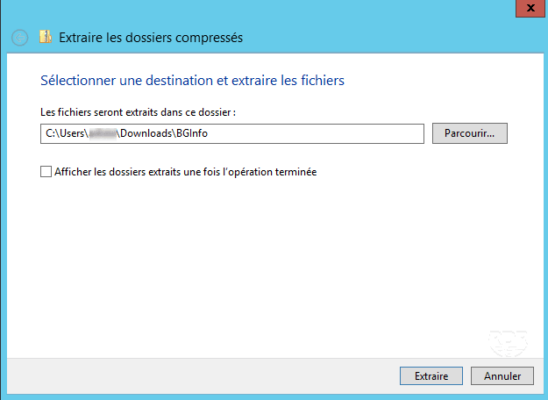
3. Run BgInfo by selecting the file corresponding to the version (32 / 64bits) of the operating system.

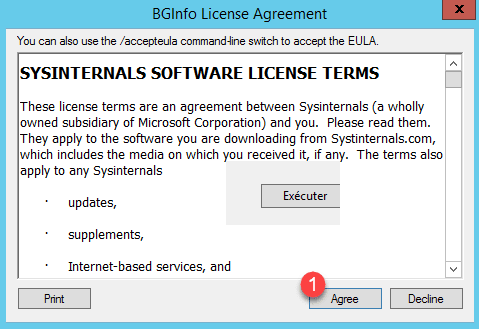
4. Accept the license by clicking on Agree 1.
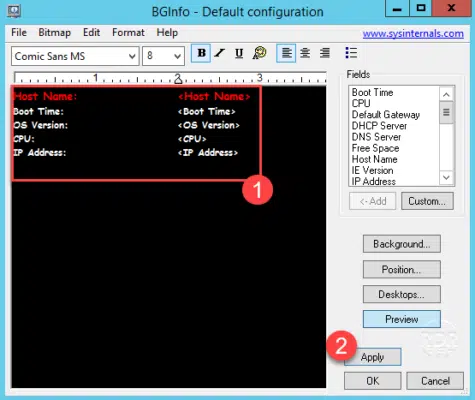
5. Configure the 1 elements to display and click Apply 2.
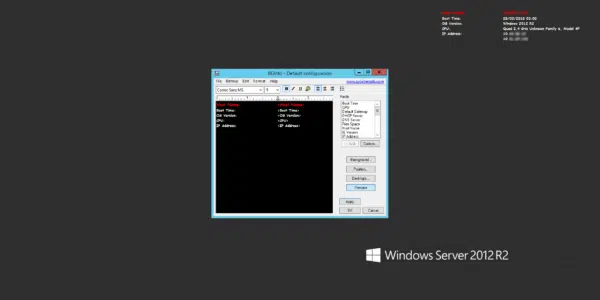
Here is the result :
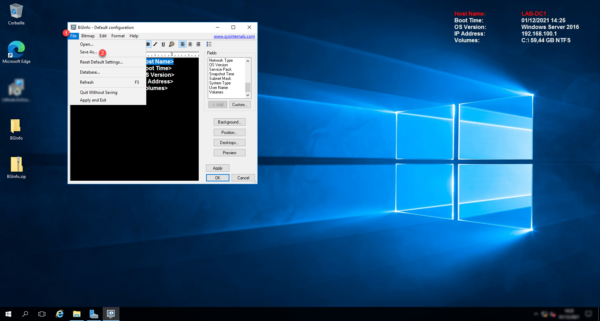
Before closing BGInfo, it is possible to save the configuration, so that it can be used on other computers or used with Group Policy. From the menu, click File 1 then on Save As 2.
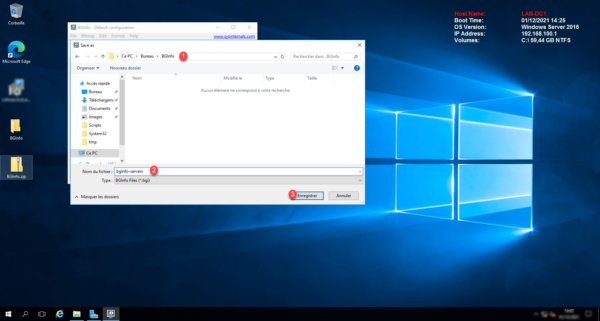
Choose the save location for the file 1, name the file 2 and click on the Save 3 button.
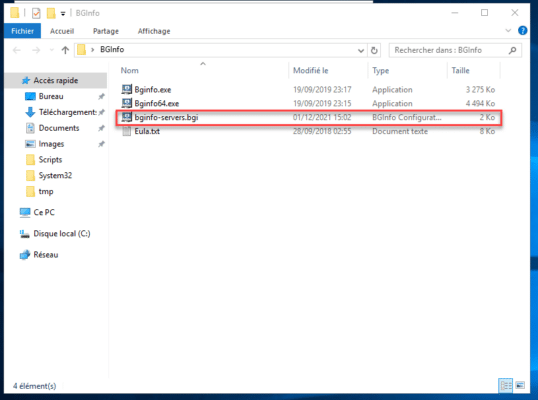
Once saved, we find the bgi file.
Now that you know how to use BgInfo, we will see how to make sure that information is displayed automatically using group policy.
Automatically display system information with Group Policy and BgInfo
To automatically display the information, we will run BgInfo when the user logs on in the same way as we would run a login script (vbs).
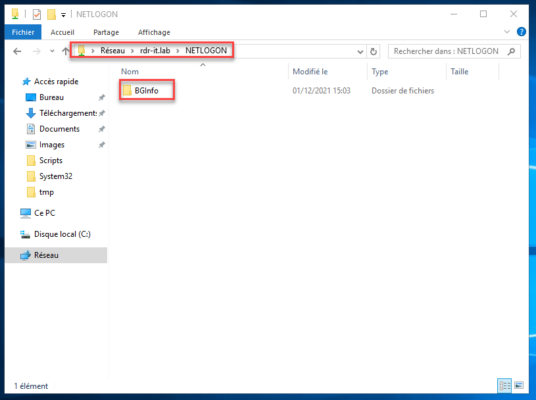
Before creating the GPO, we will put in the NETLOGON folder of the Active Directory domain, the Bginfo folder with the template.
Open the file explorer and enter the following address \ domain_AD \ NETLOGON and copy the folder.
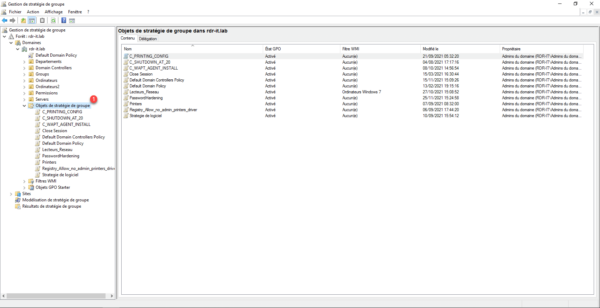
On a domain controller, open the Group Policy Management console and go to the Group Policy Objects 1 container (folder).
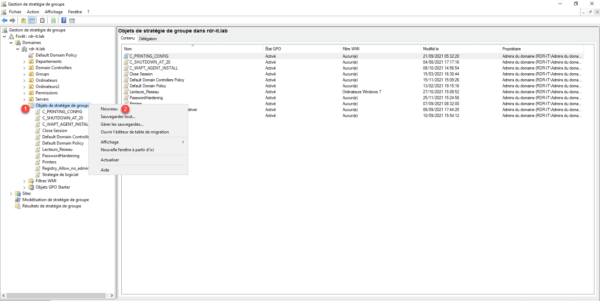
Right click on Group Policy Objects 1 and click New 2.
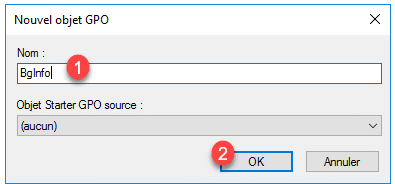
Name the GPO 1 and click OK 2.
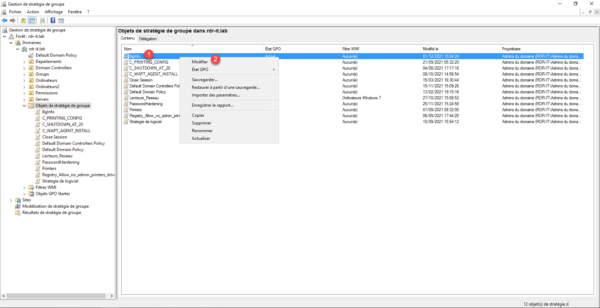
Group Policy added, right click on it 1 and click Edit 2.
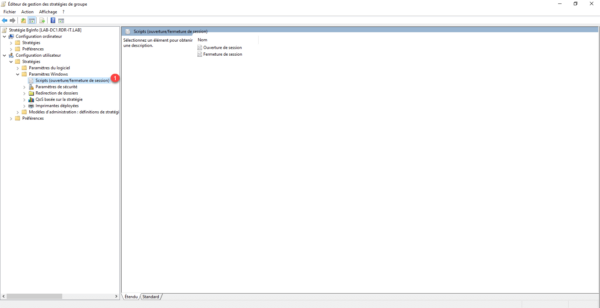
Go to the following location: User Configuration / Policies / Windows Settings / Scripts (logon / logoff) 1.
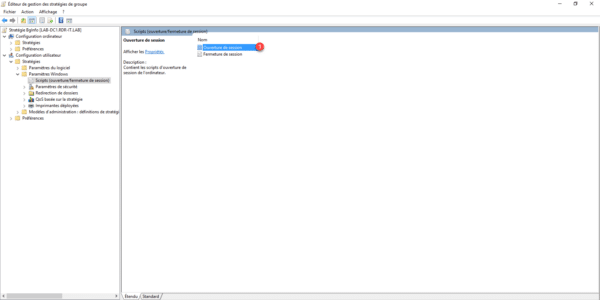
Double click on Login 1.
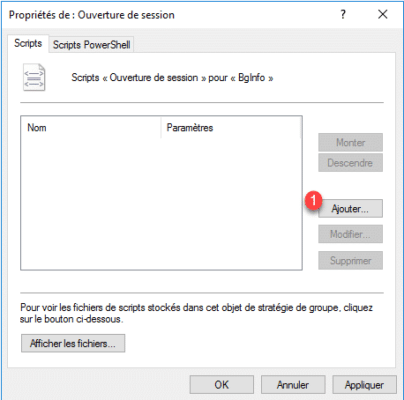
Click on the Add 1 button.
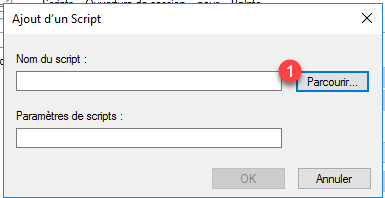
In the non-script field, we are going to put the Bginfo executable, click on the Browse button 1.
Go to select the BgInfo64.exe 1 file located in the NETLOGON folder and click on Open 2.
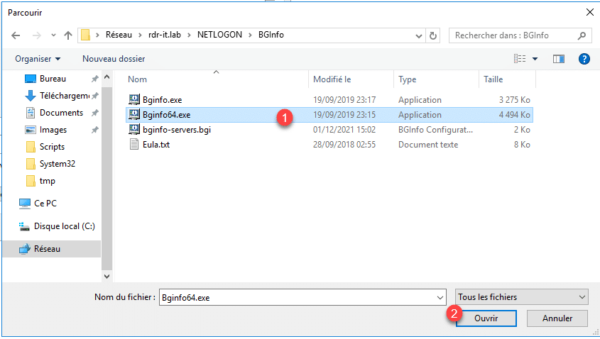
The executable is selected 1.
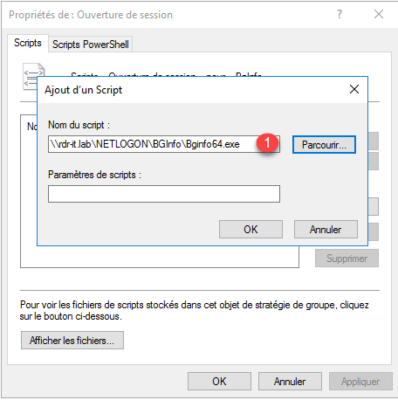
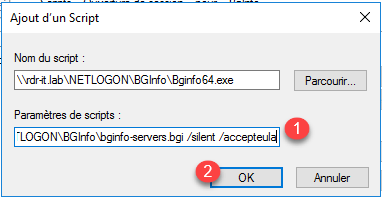
We will now indicate the parameters which will include:
- The path to the model
- A parameter to accept the license
- A parameter to indicate not to display an error message.
Which give :
\\domain\NETLOGON\BgInfo\template.bgi /silent /accepteulaEnter the script parameters 1 and click OK 2.
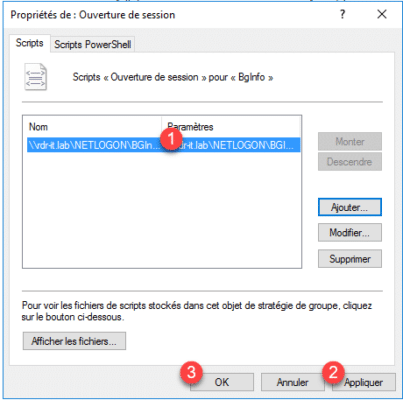
The script is added 1, click on Apply 2 and OK 3.
We will now link the group policy so that it applies to users, in the tutorial, I will do it on the root of the domain so that it is applied to everyone. In a production environment, I advise you to do it before on a limited OU in order to test the correct functioning of the GPO.
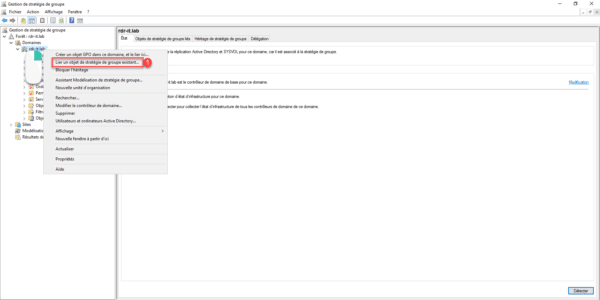
Right-click at the desired location and click Link an existing Group Policy Object 1.
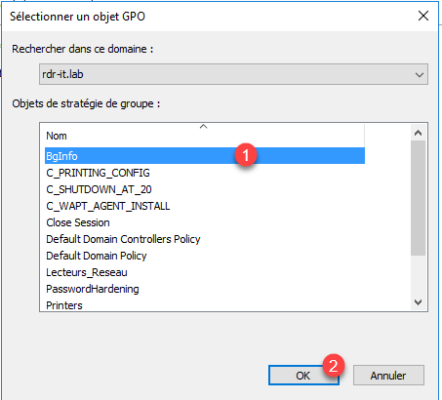
Select Group Policy 1 and click OK 2.
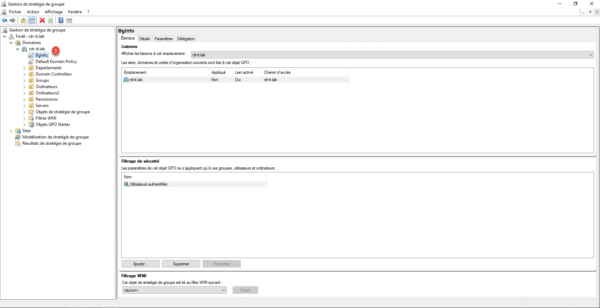
The GPO is linked 1.
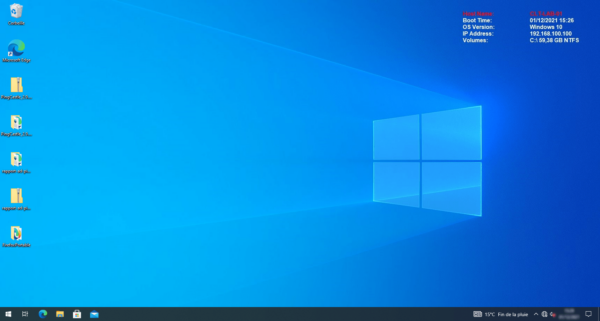
Now all you have to do is log on to a computer in order to apply Group Policy and have the information displayed in the background.
You now know how to use BgInfo.


