IIS ARR Presentation
ARR is an add-in (plugin) that installs on IIS and allows to transform the Windows Web server into a Reverse Proxy.
ARR is a free add-on that installs on an IIS service and allows:
- HTTP (S) routing
- Load Balancing
- Offloading SSL
- CDN (cache)
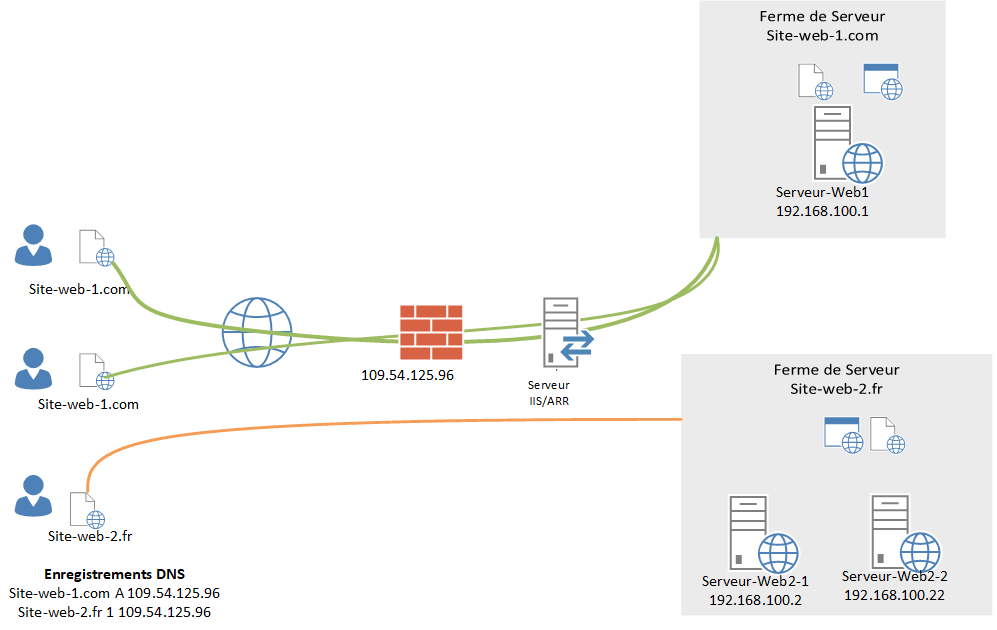
Example of deployment with IIS / ARR:
Prerequisites
For the implementation of ARR you need:
- Web services to publish (IIS / Apache / nginx …)
- A server with IIS installed.
ARR installation
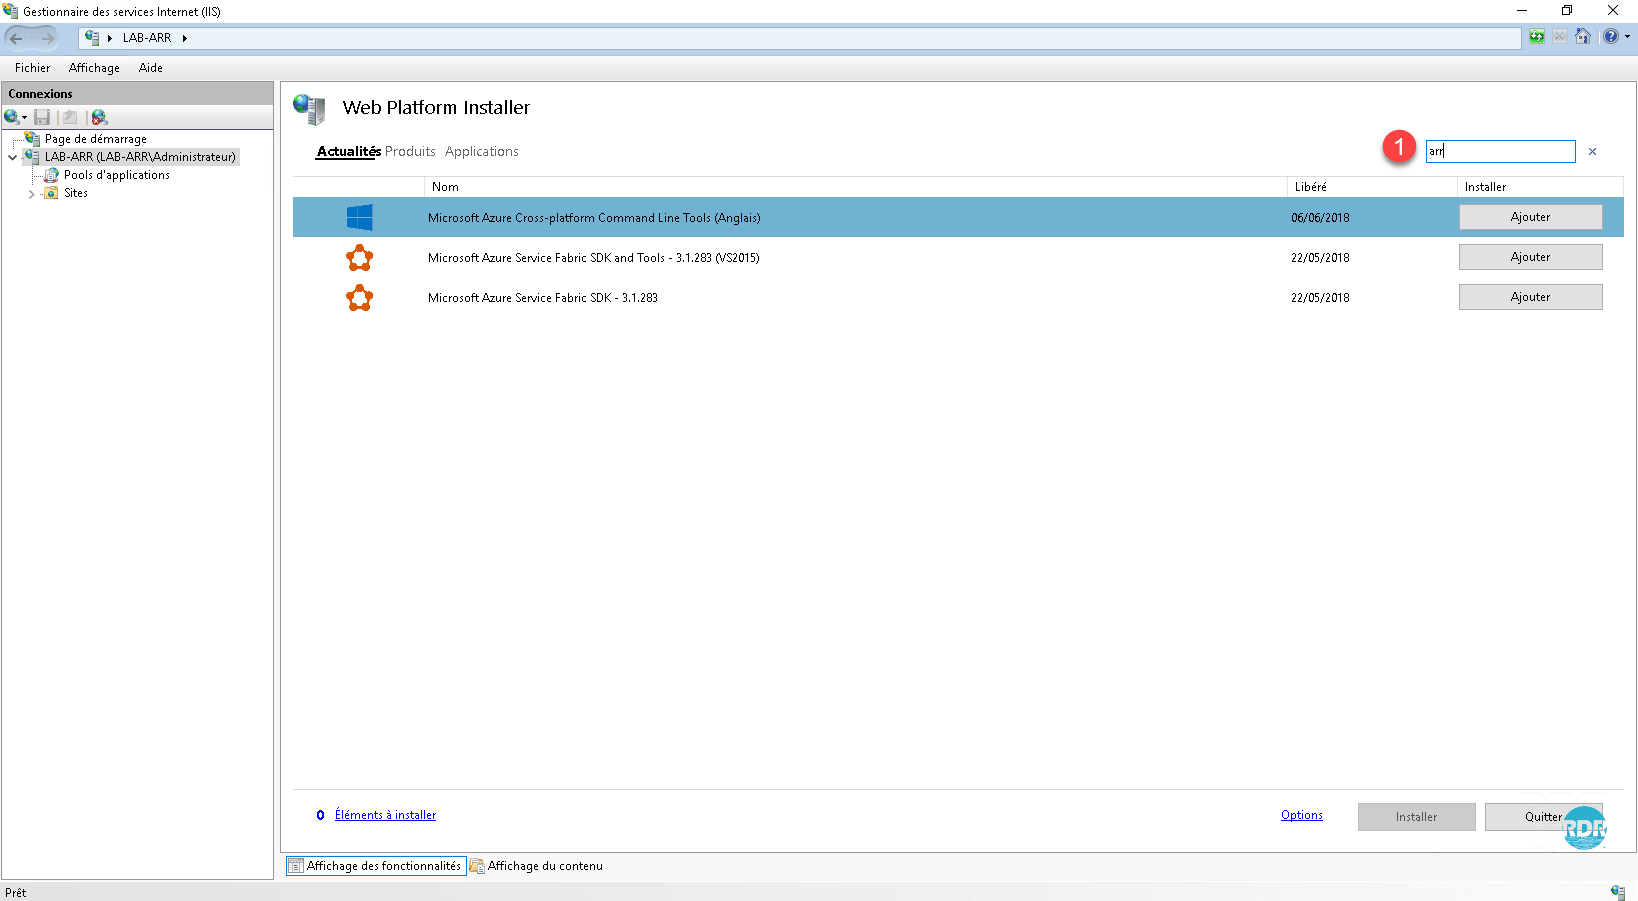
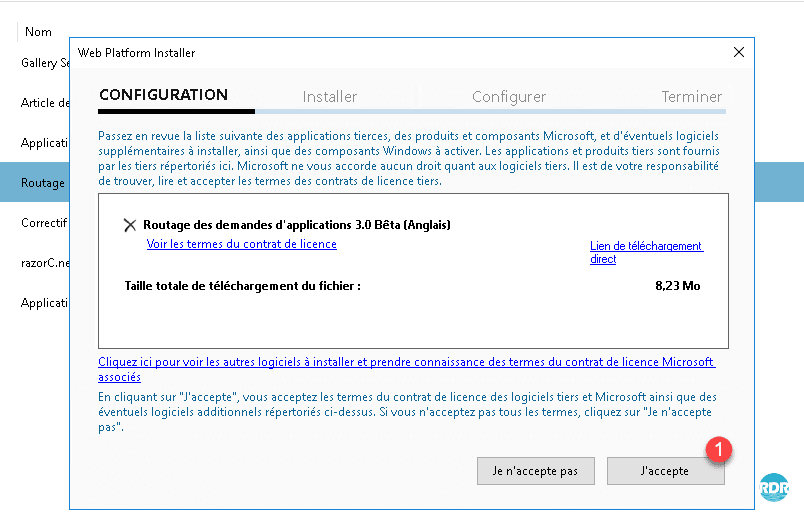
From the IIS console, launch Web Platform Installer.
In the search box enter ARR 1 and press Enter on the keypad.
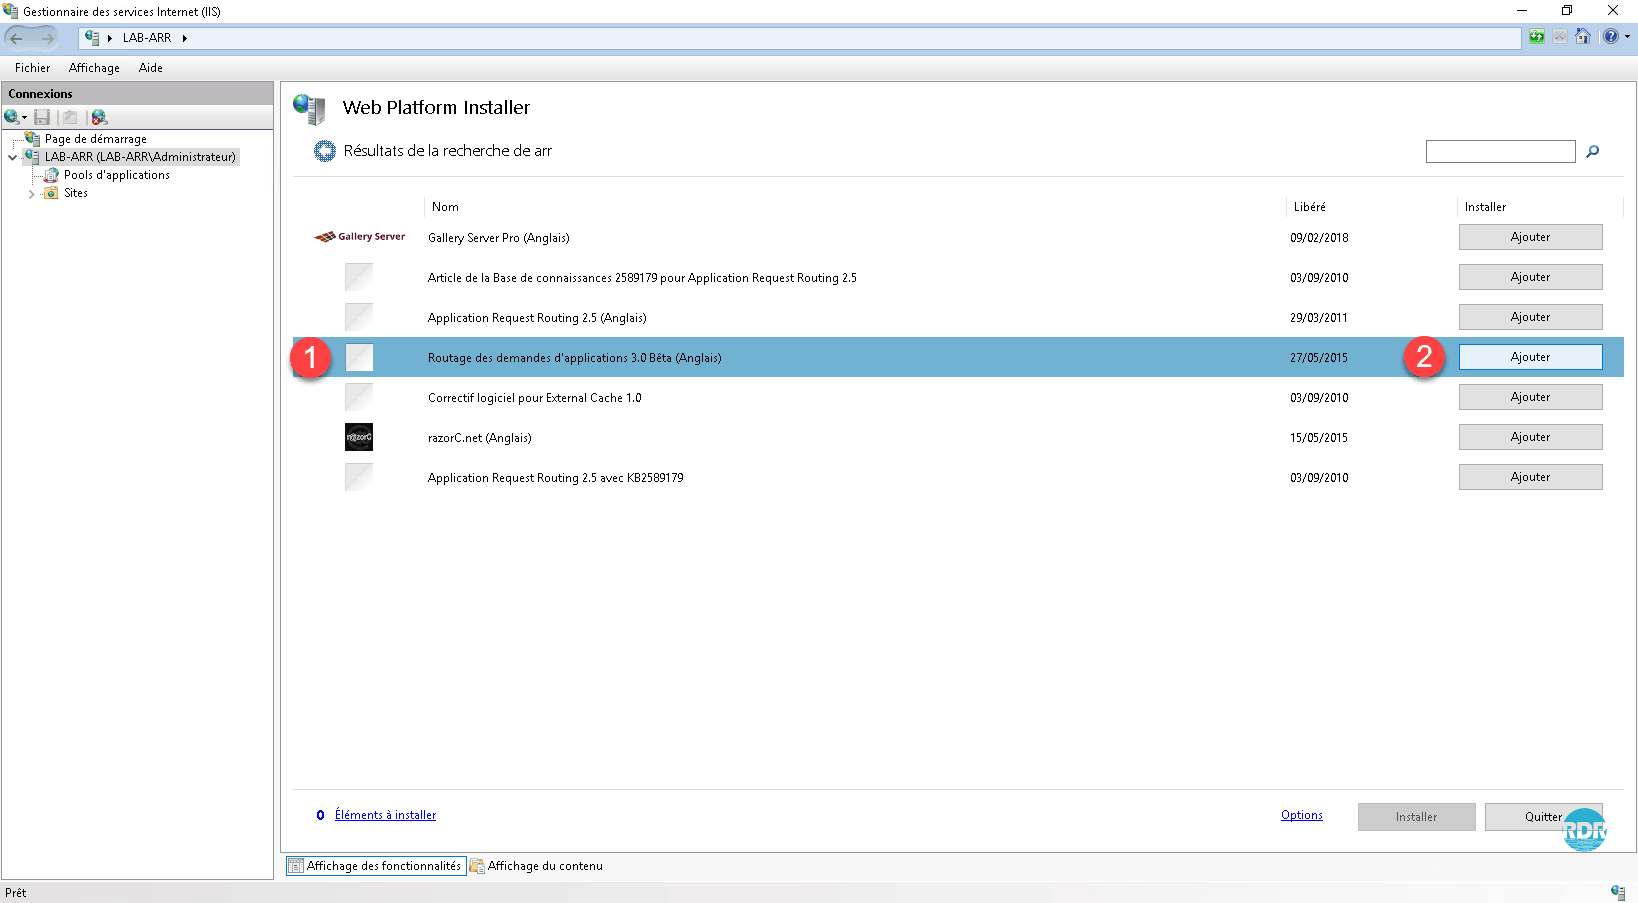
Select Application Routing 3.0 Beta 1 and press the Add 2 button.
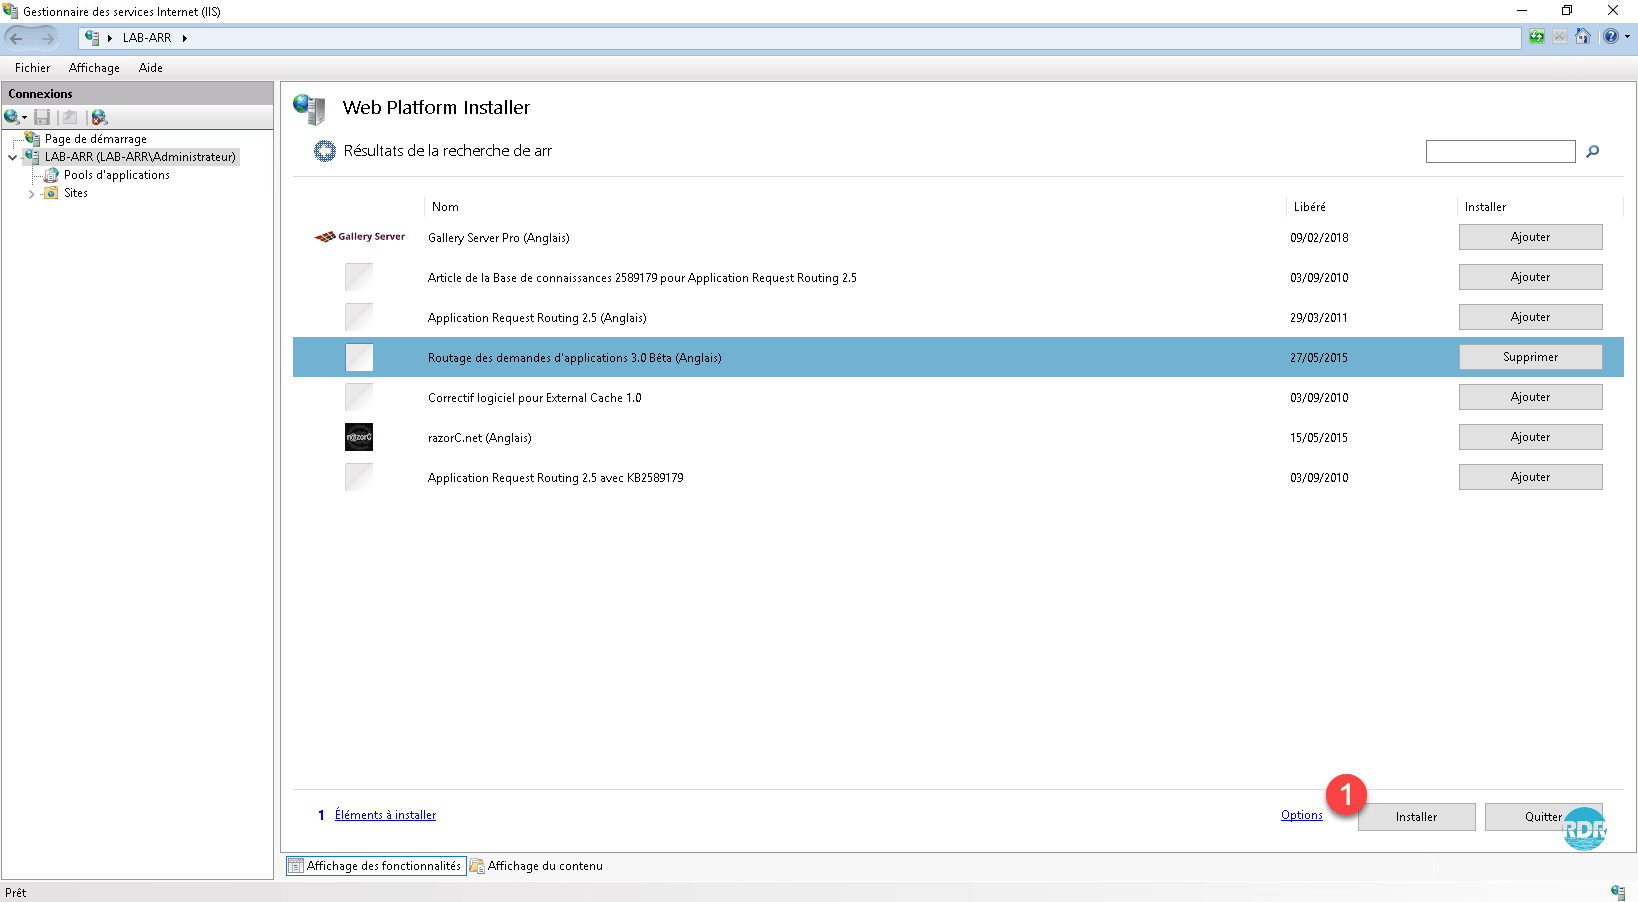
Click on the Install 1 button.
Click on I accept 1 .
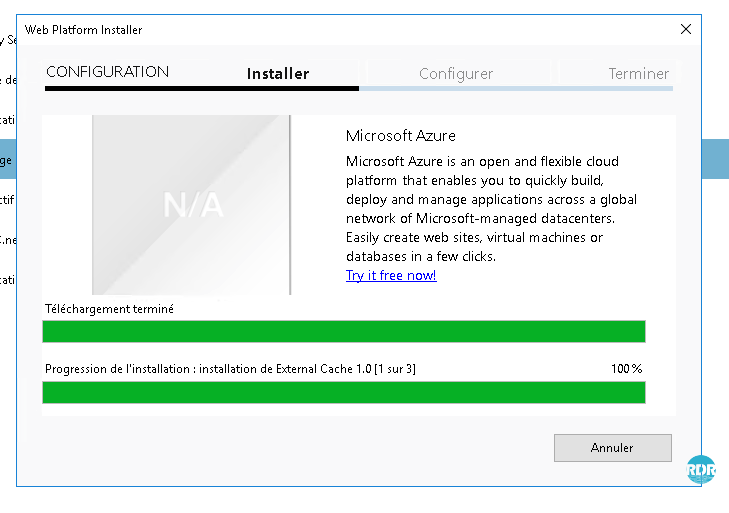
Wait during the installation.
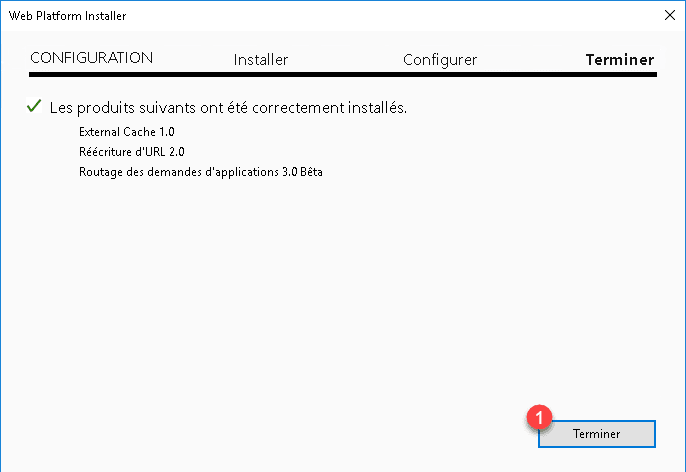
The 3 components required for the installation and operation of ARR are installed, click on Finish 1 to close the installation wizard.
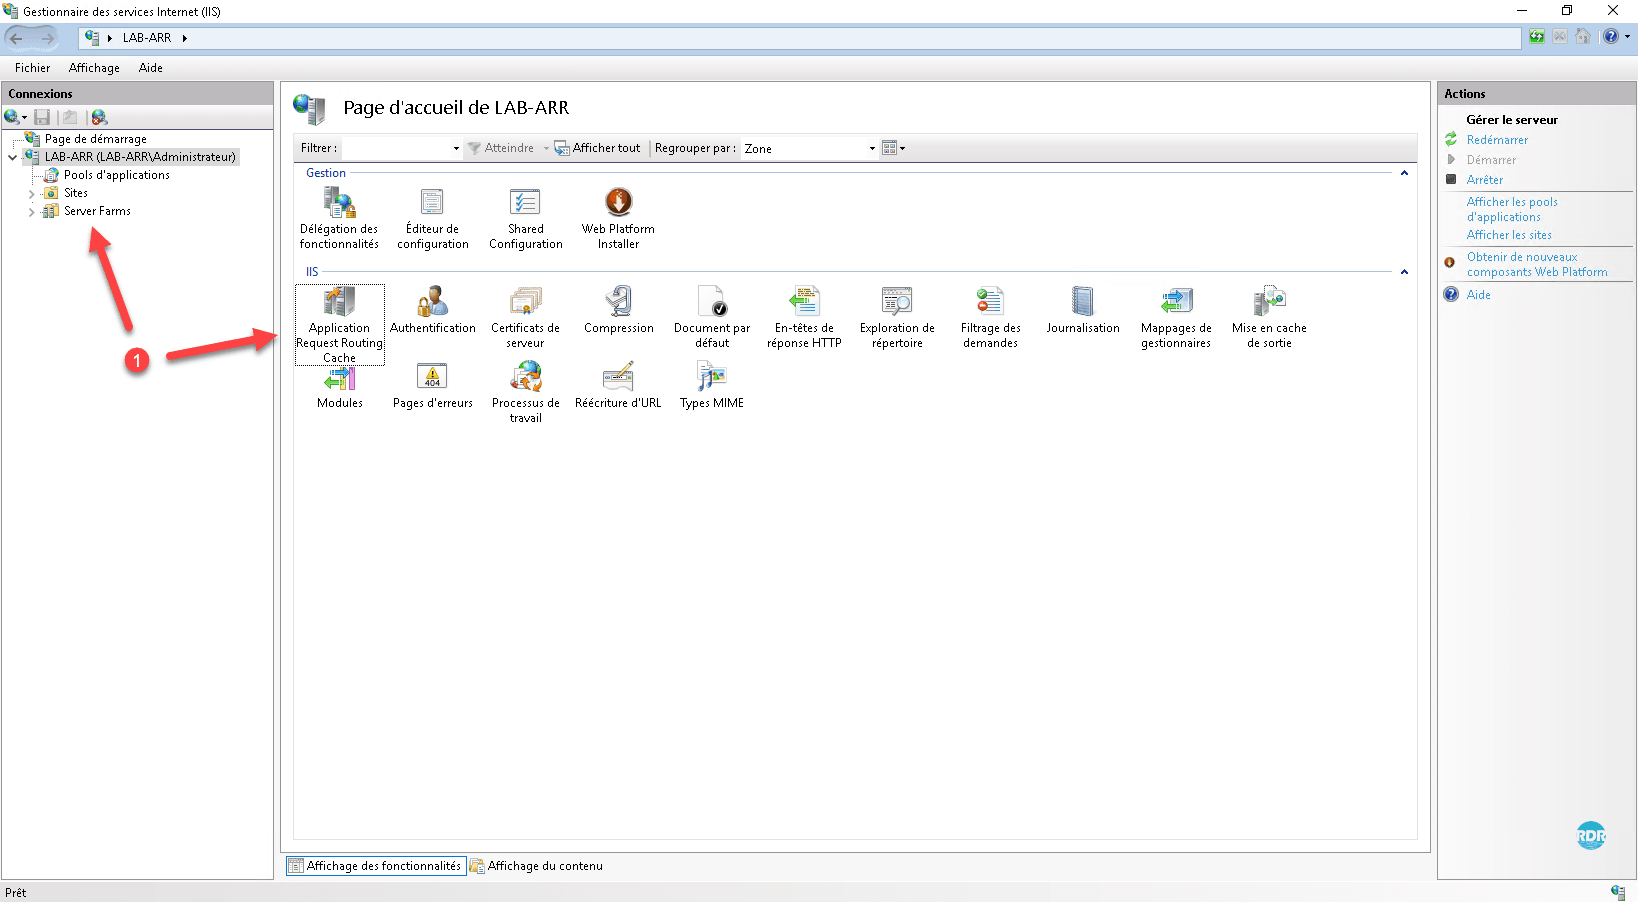
Restart the IIS console, the ARR 1 administration components should be available.
Configuration: Simple Routing
In this part we will set up a simple routing of the HTTP protocol. The HTTP requests will arrive on the ARR server and it will transfer them to the WEB server hosting the site (s).
La première étape est de créé une Ferme de serveur qui correspond à un ou plusieurs serveurs Web qui héberge l’application et ensuite de modifier la règle de réécriture pour le routage vers la bonne ferme en fonction de l’url.
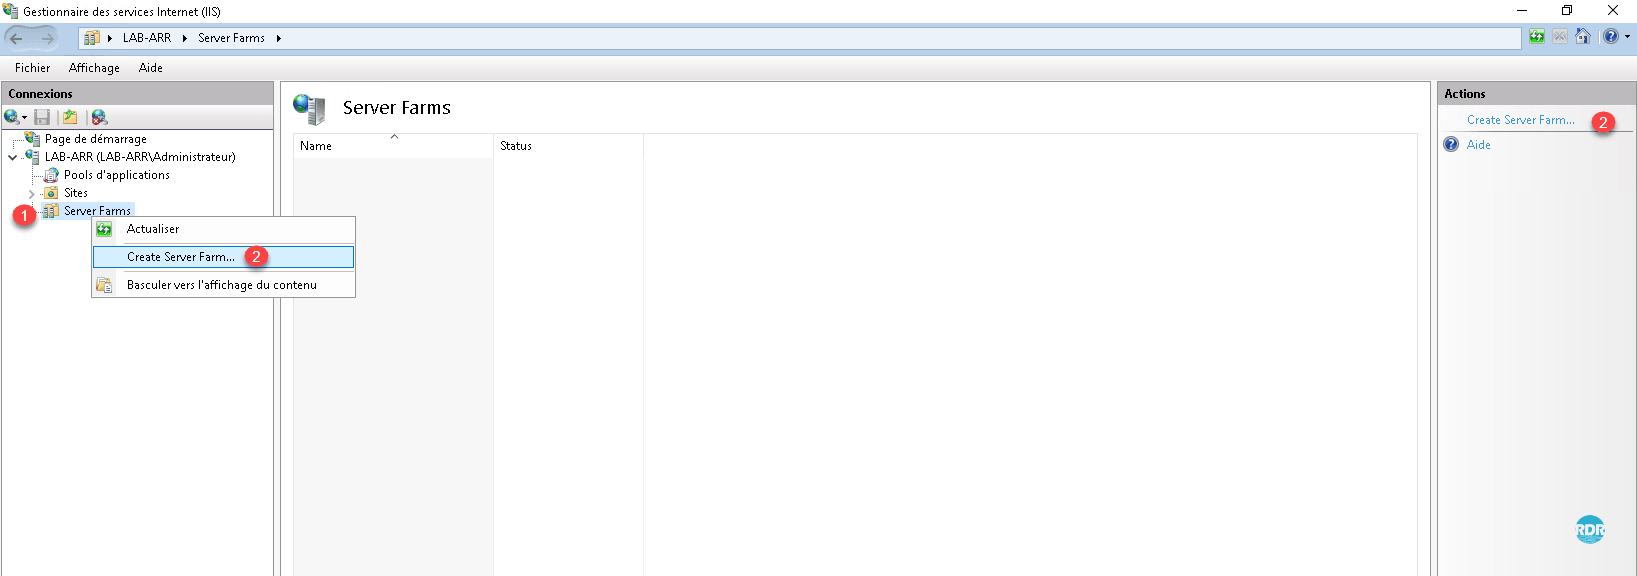
Select Server Farm 1 , right click on it and click Create Server Farm … 2 or go through the Actions menu.
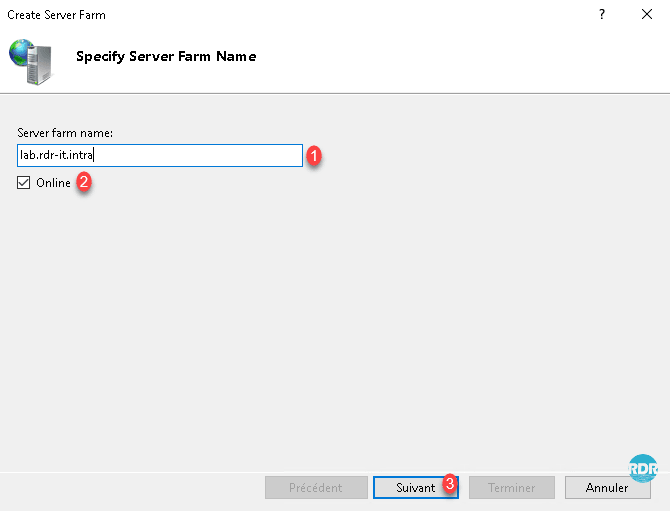
Enter the name of Server Farm 1 (by convention the access DNS name), check the box Online 2 if it is not done and click Next 3 .
Enter the name or IP of the servers hosting site 1 and click on Add 2 .
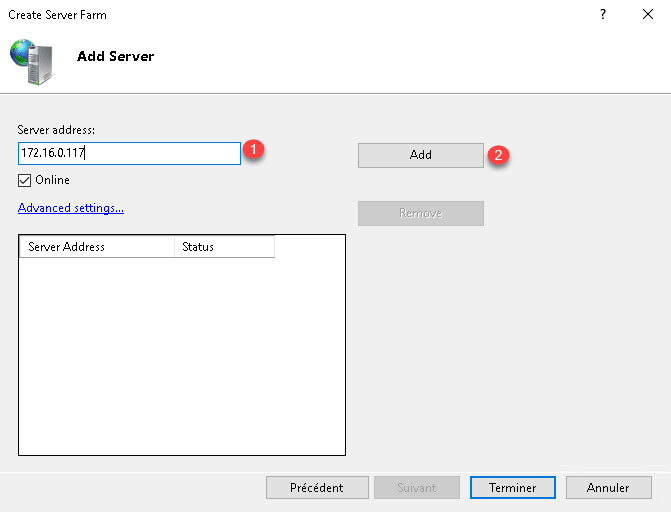
Once the server (s) added 1 click the button Finish 2 .

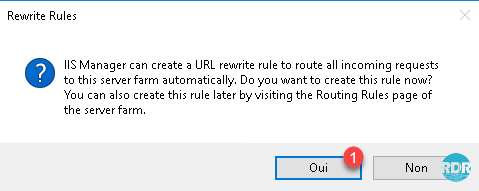
Click Yes 1 to confirm the automatic creation of rewrite rule (routing).
Automatic rules rely on the name of the farm to rewrite. We will see later how to modify the rules for reliability.
The first “server farm” 1 is created and available in the IIS administration interface.
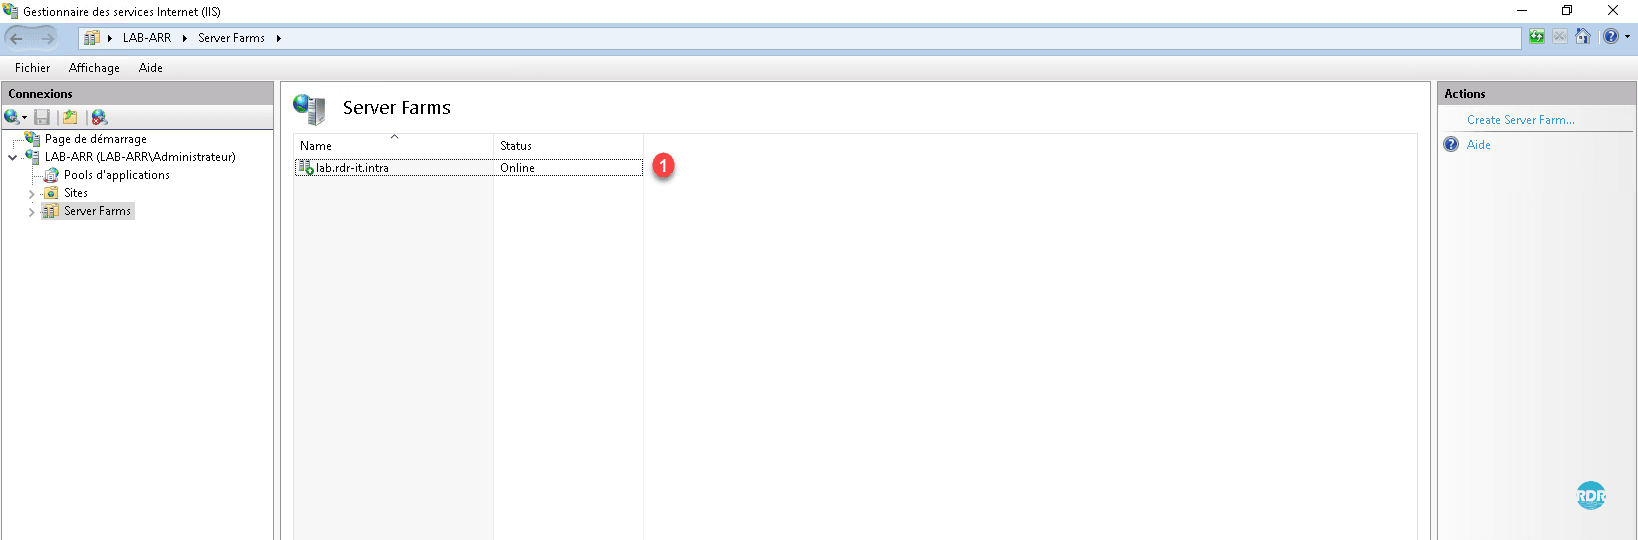
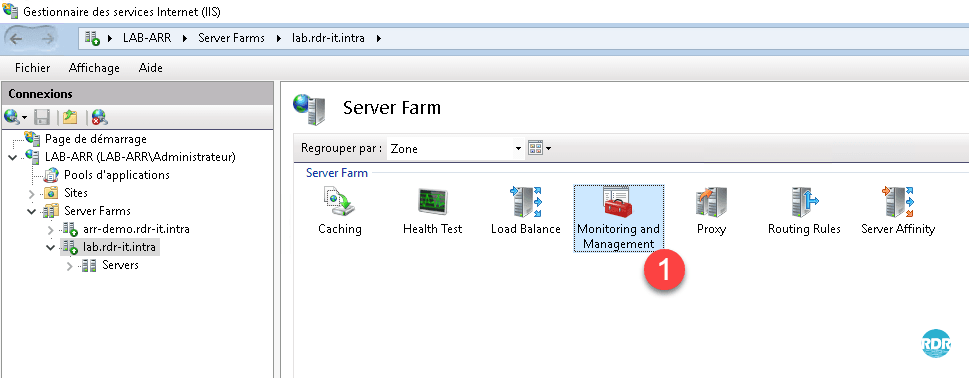
Expand the Server Farms 1 folder and select the farm that has just been created 2 . In the central area 3 there are the available actions.

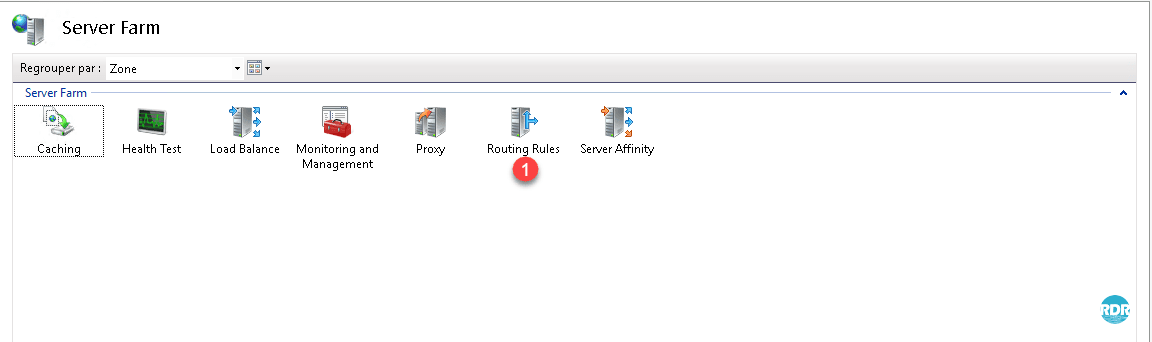
We will now take a closer look at the rewrite rules.
Click on Routing Rules 1 .
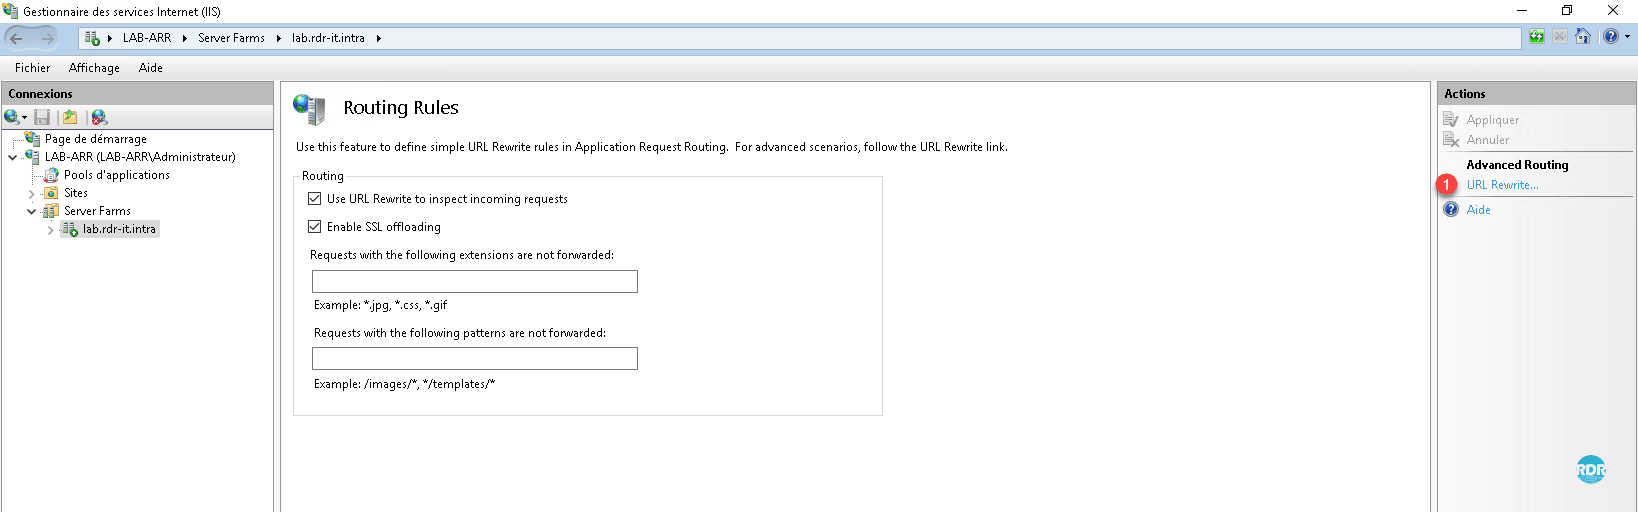
In the Actions menu click Url Rewrite … 1 .
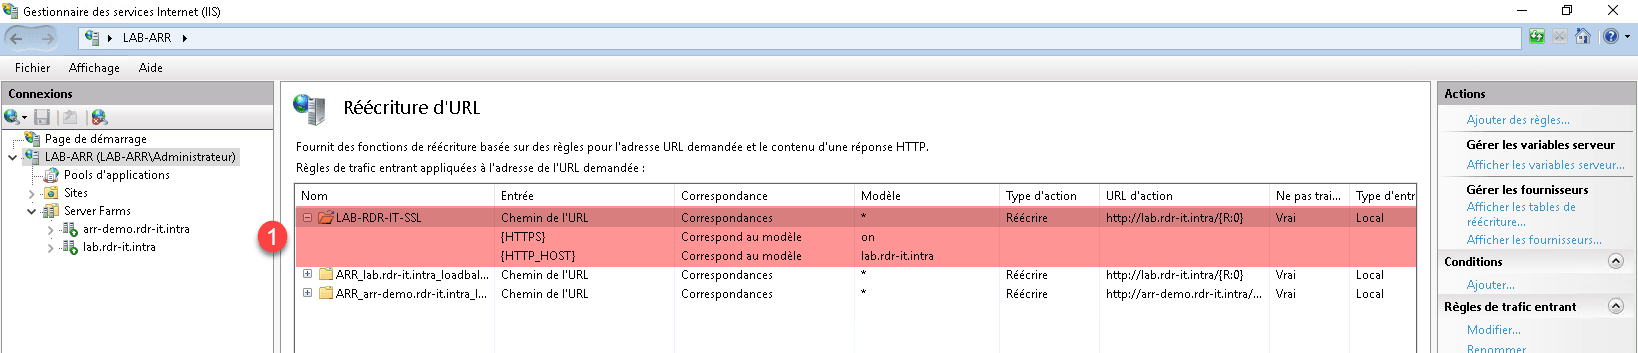
We see the transfer rule automatically create 1 . Double click on it to display the details of the rule.
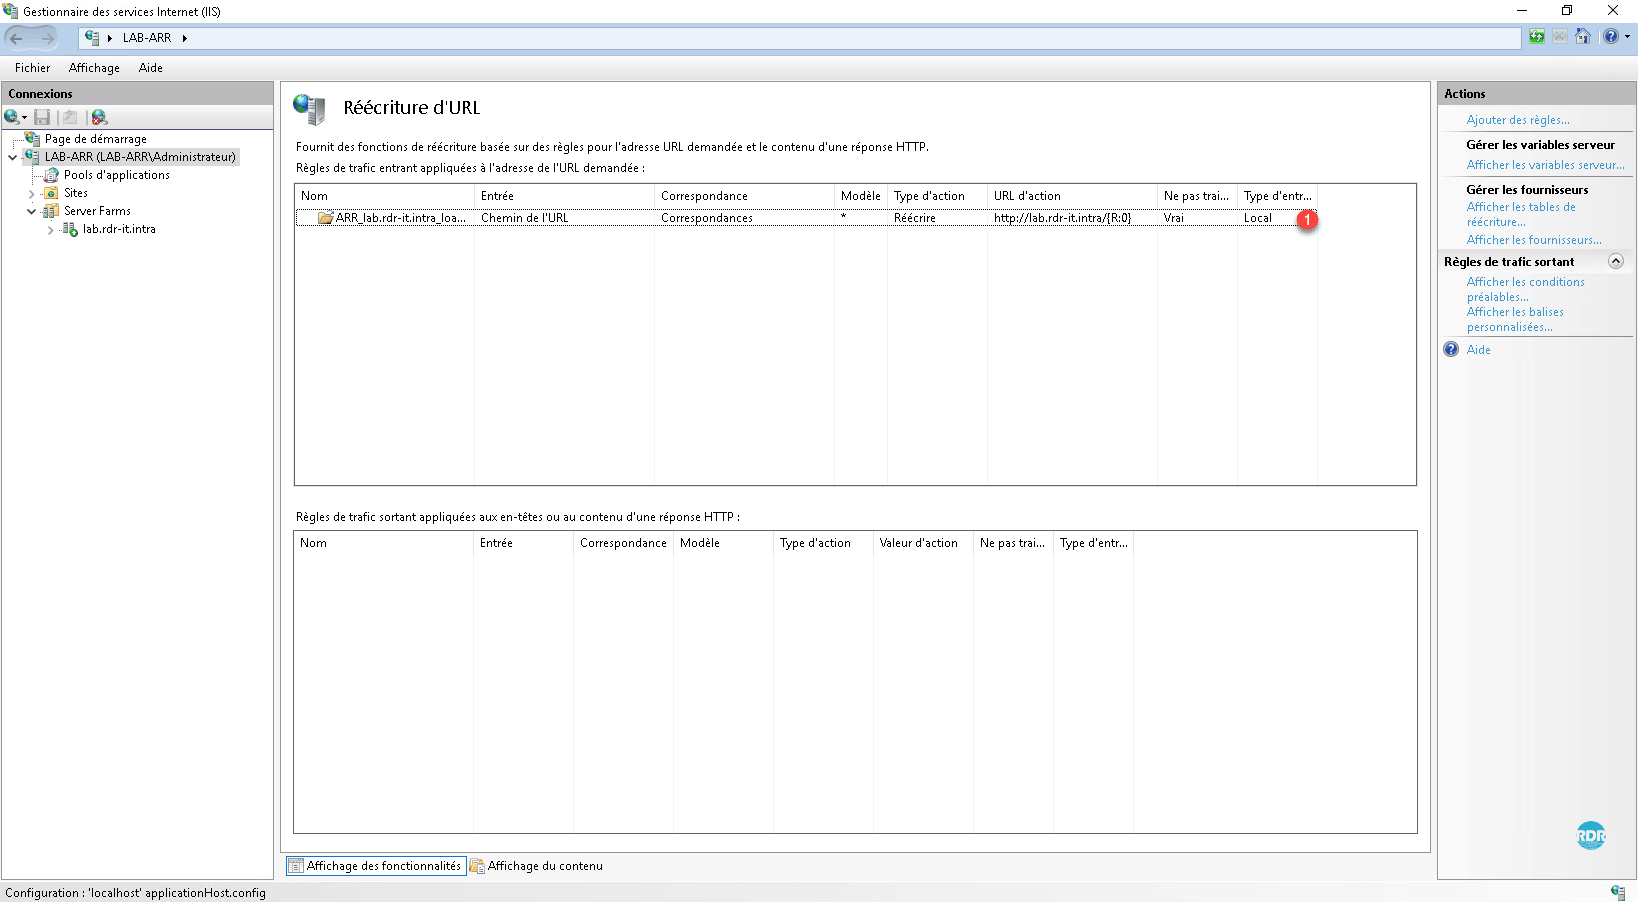
In the case where a single web server hosts all the sites internets on vhosts (sites), it would be possible to make a single rule by keeping the header of the host.
A : we see here that the traffic arriving on the server is transferred and not rewritten as can be seen in the list of rules. We will now make sure to limit the transfer to the URL lab.rdr-it.intra. Click on Conditions 1 .

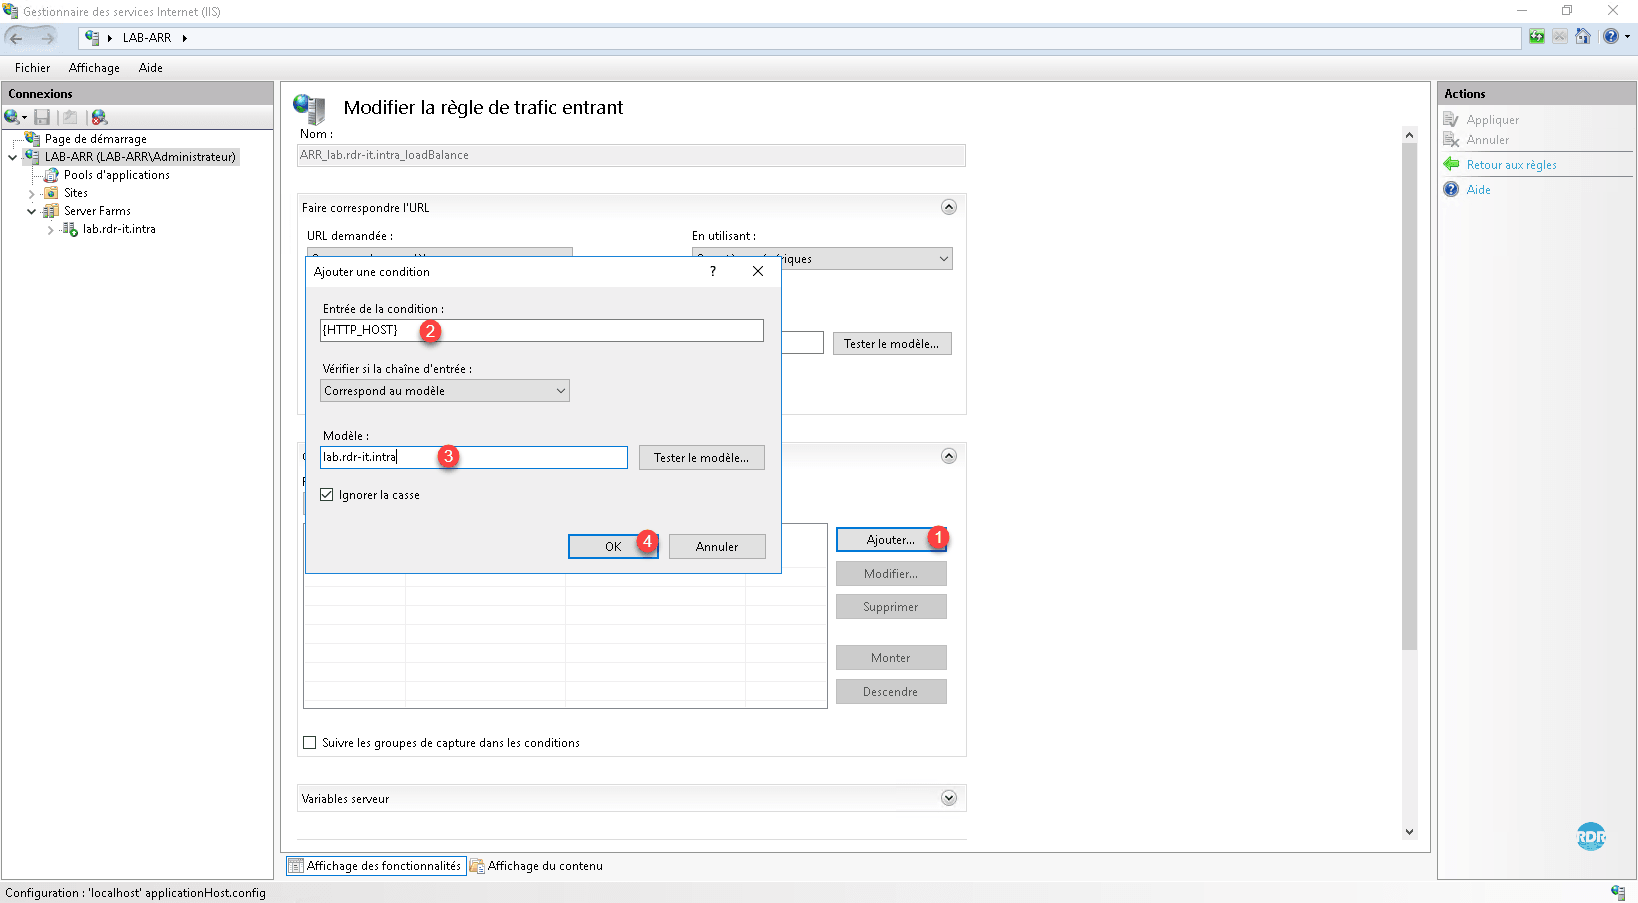
Click the Add button 1 . In the new window that opens, enter the server variable that will be tested here {HTTP_HOST} 2 , in the model field 0 3 enter the (sub) domain to be processed and click OK on 4 to save the condition.
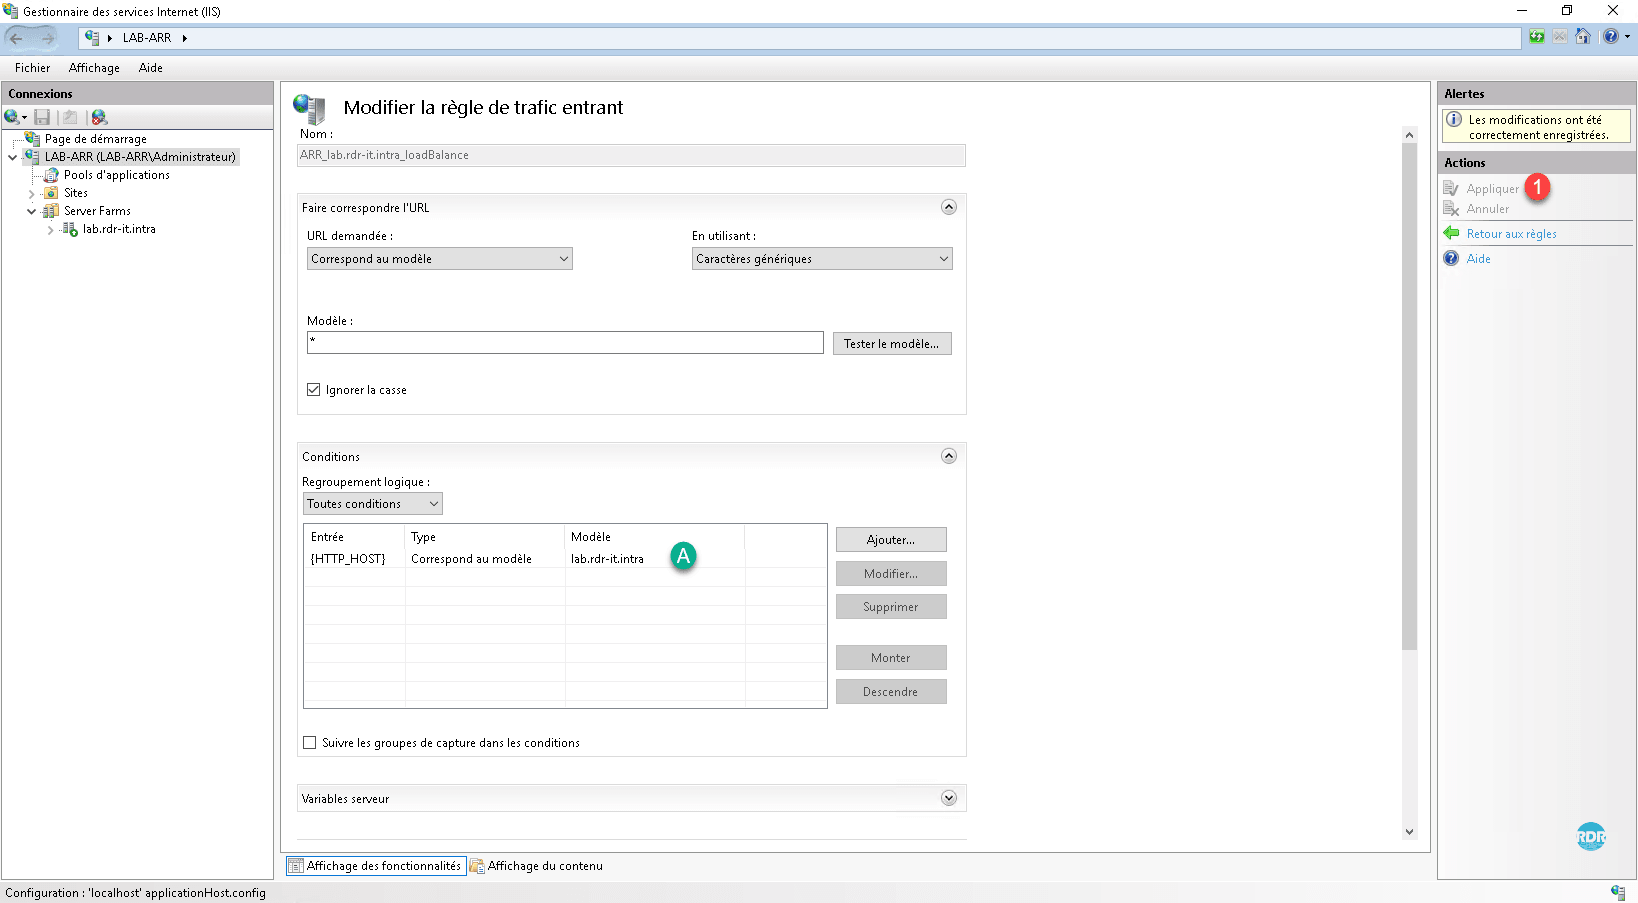
A : the condition is added, click on Apply 1 to take into account.
For tutorial purposes, I added a second arr-demo.rdr-it.intra site that goes through ARR and is hosted on the same IIS server.
The DNS records of type A sites must point to the ARR server.
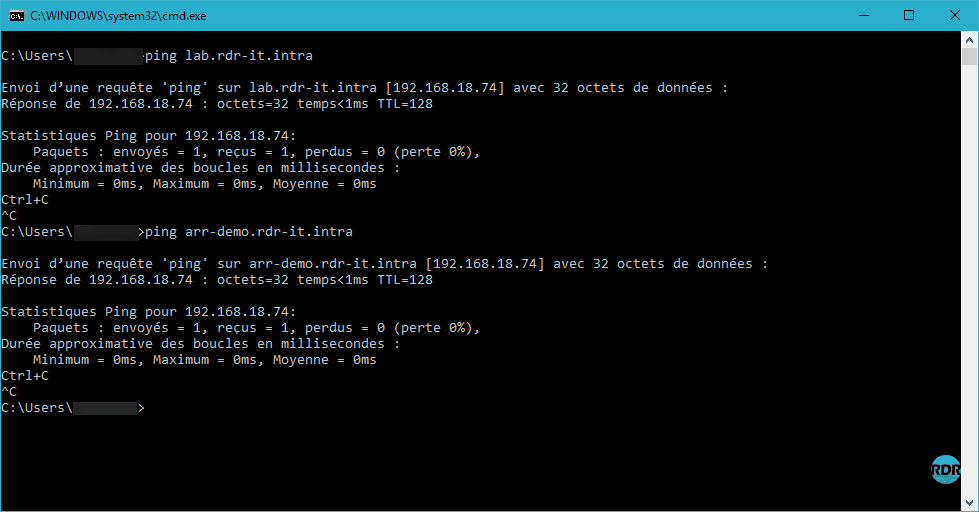
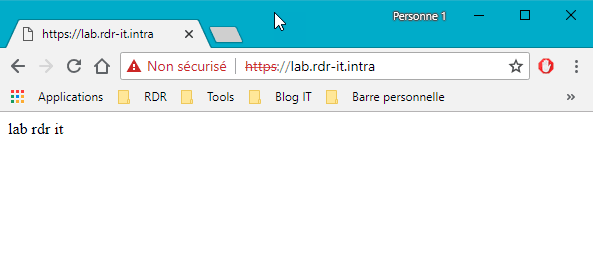
Launch an internet browser and go to the sites.
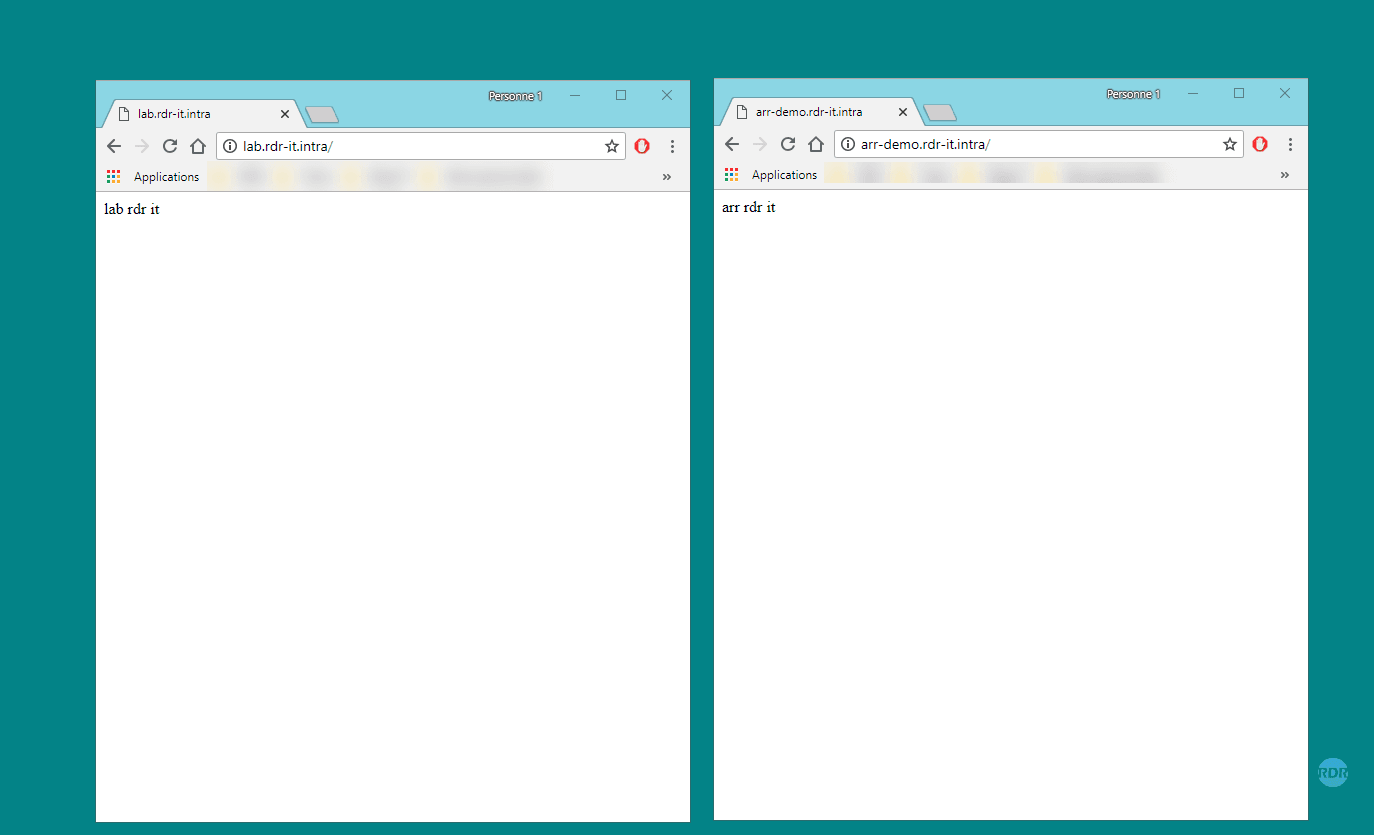
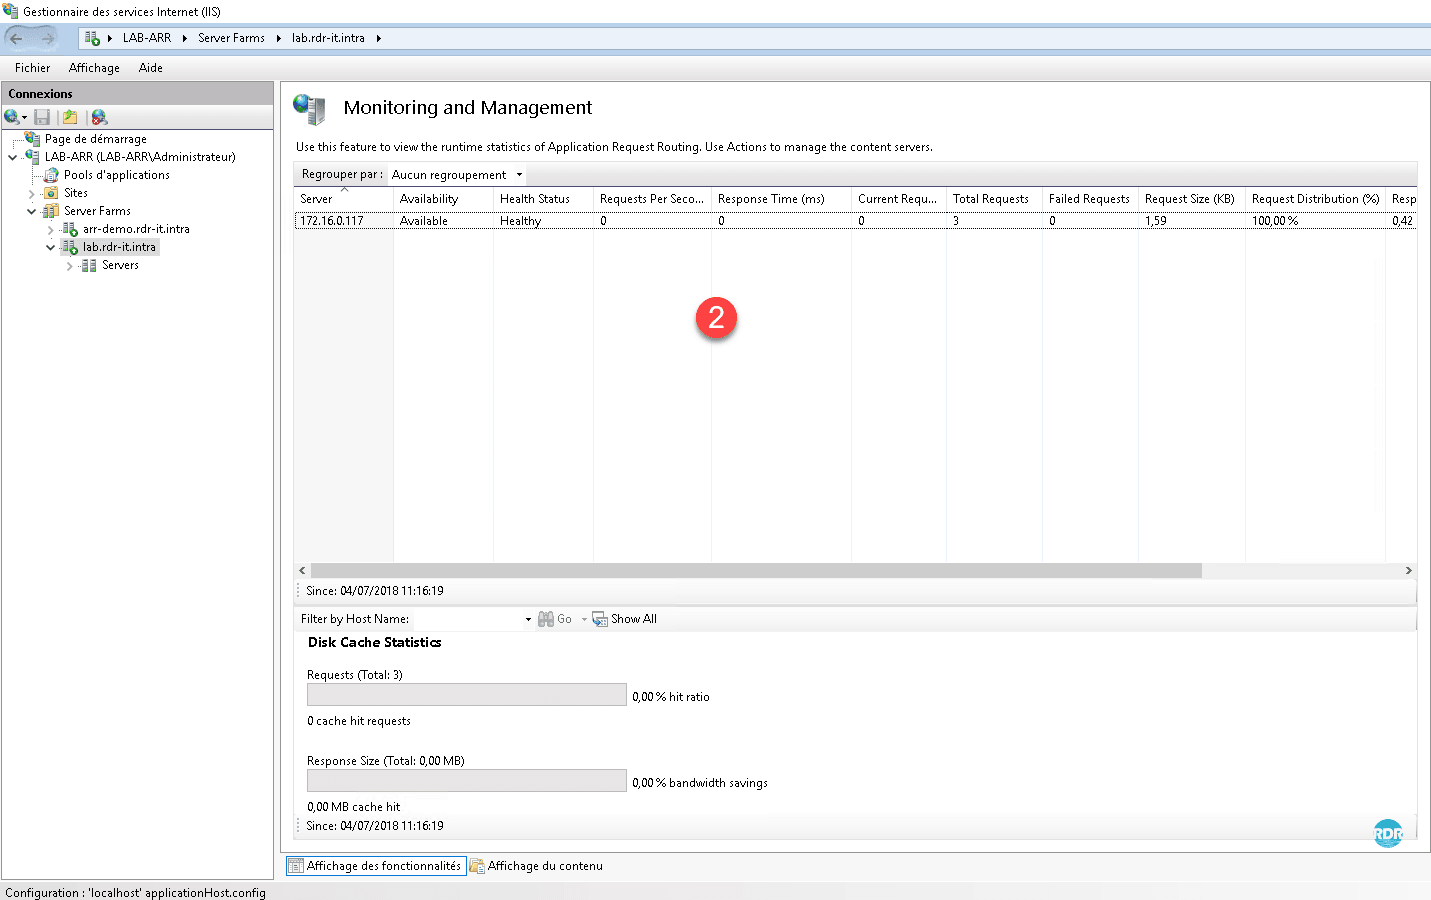
To validate the passage in ARR, it is possible to check it at the level of the IIS logs which is in C: / inetpub / LogFiles / W3SVC1 (by default). The passage through ARR can also be monitored at the 1 monitoring level on the farm with a 2 statistics page.
Configuration : Offloading SSL
The purpose of the SSL offloading is to publish a site using ARR in HTTPS and to communicate the ARR server with the web server in HTTP. This solution allows the Web server to be unloaded from encryption.
Install the certificate on the ARR server
Since ARR is linked to only one site (Default Web Site) on IIS, if multiple domains need to be supported, it is necessary to have a SAN type certificate.
For the tutorial, I generated a self signed certificate in * .rdr-it.intra to cover all subdomains.
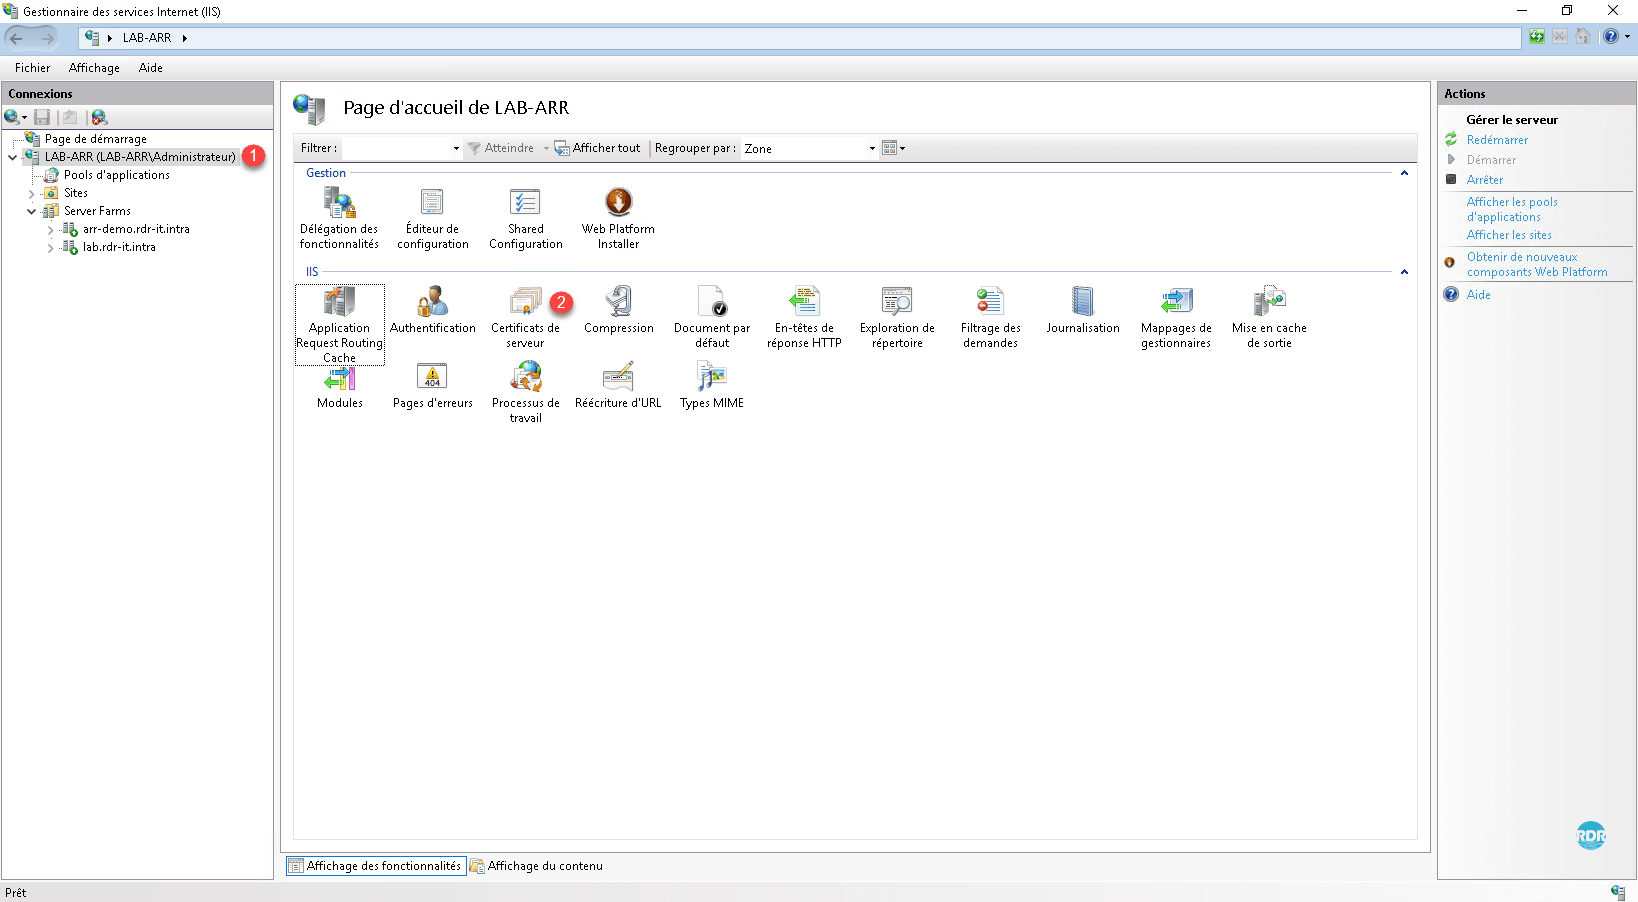
Go to the root of the IIS console 1 and then to Server certificates 2 .
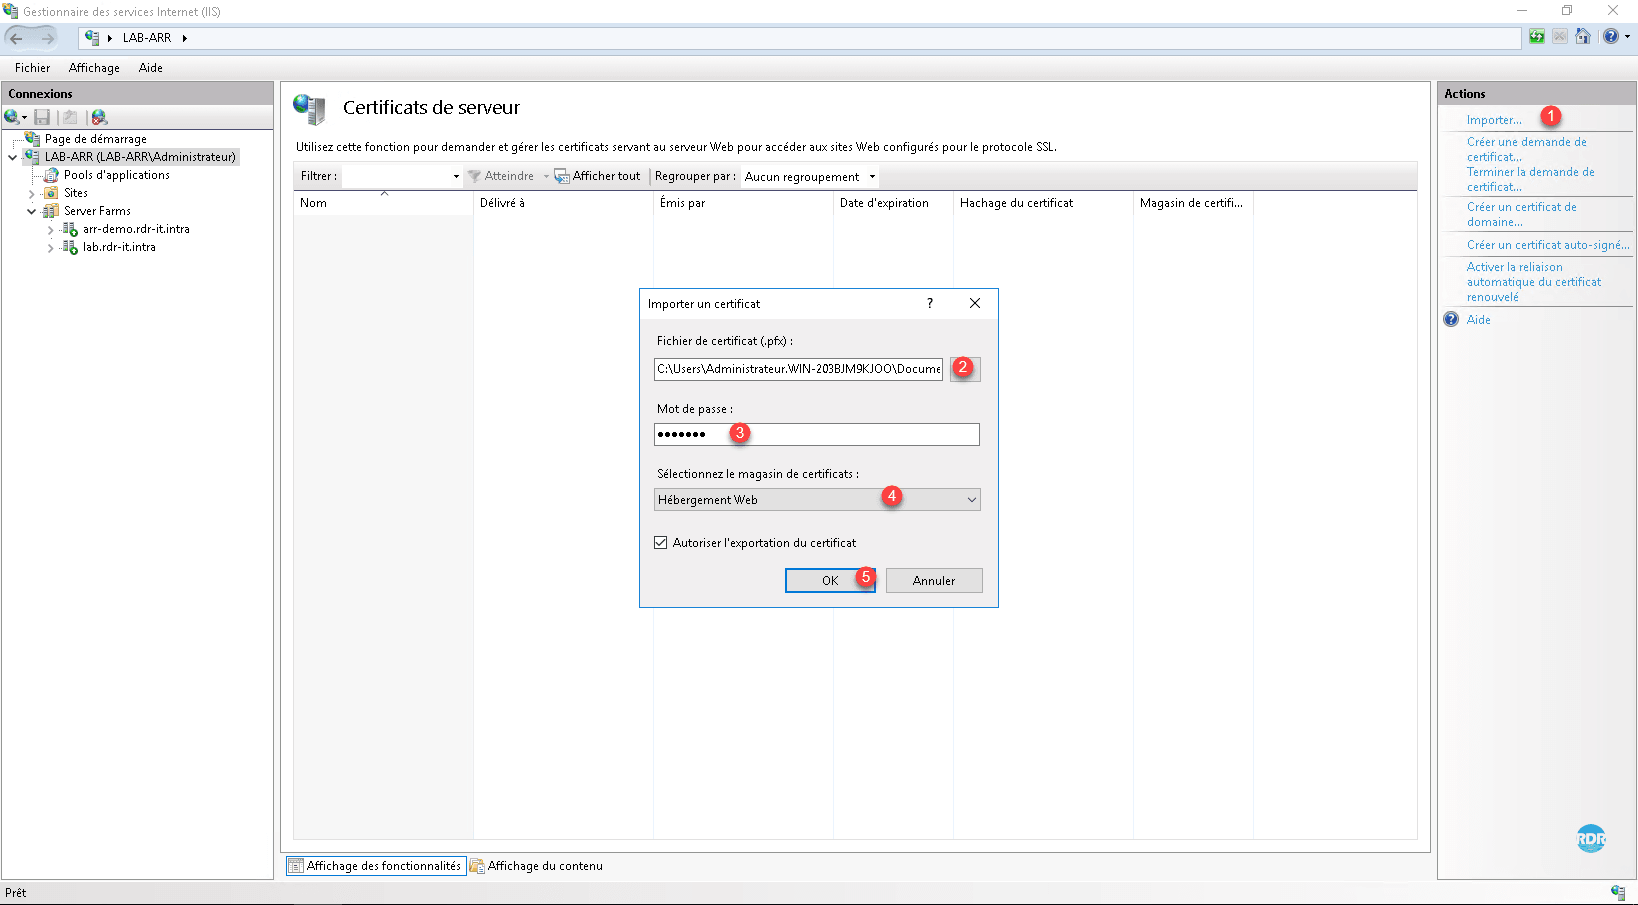
Click Import 1 in the Actions menu. Select the certificate in pfx 2 format, enter the private key (password) 3 , choose the storage magazine 4 (Web Hosting) and click OK 5 .
The certificate is imported 1>.

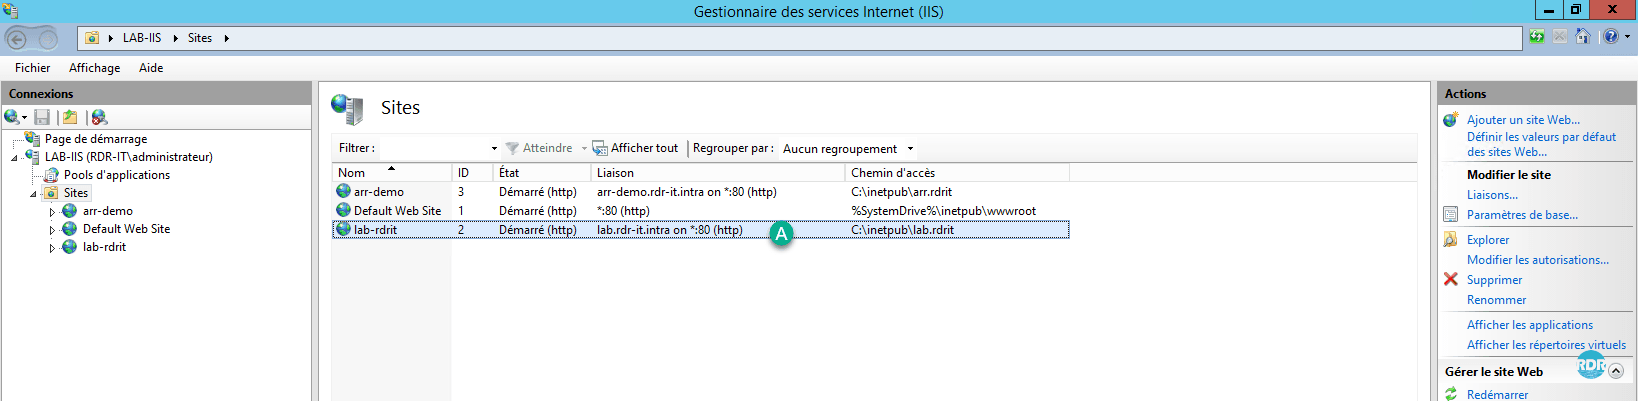
Display the list of sites available on the server by clicking on the folder Sites 1 , select the default site 2 , right click on it and click on Links … 3 .
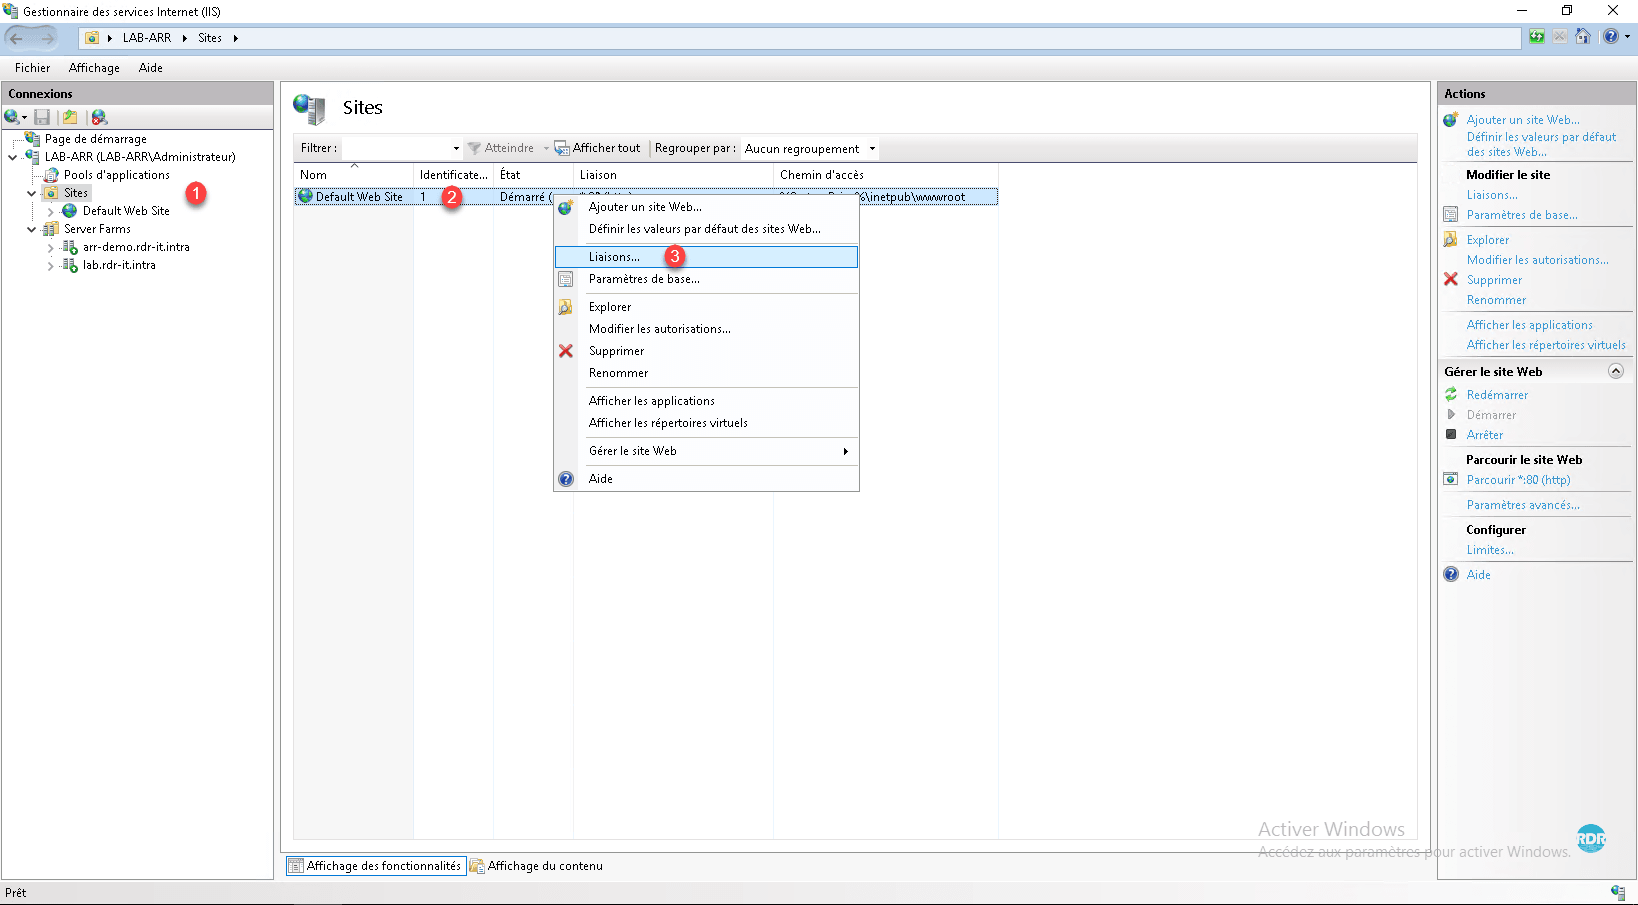
Click the Add button 1 .
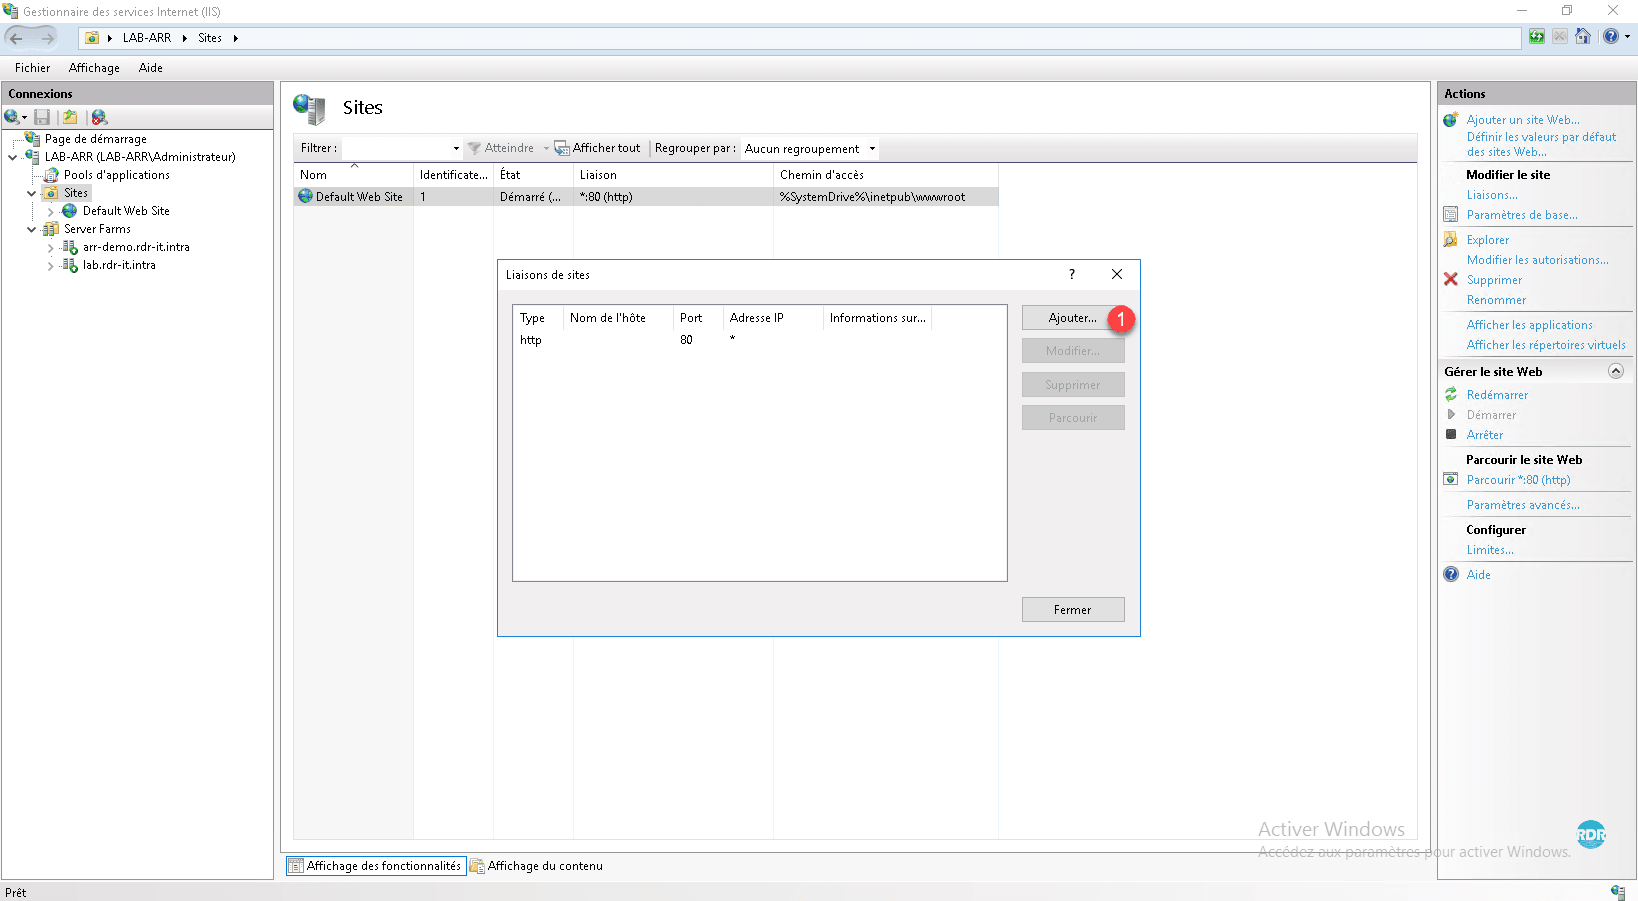
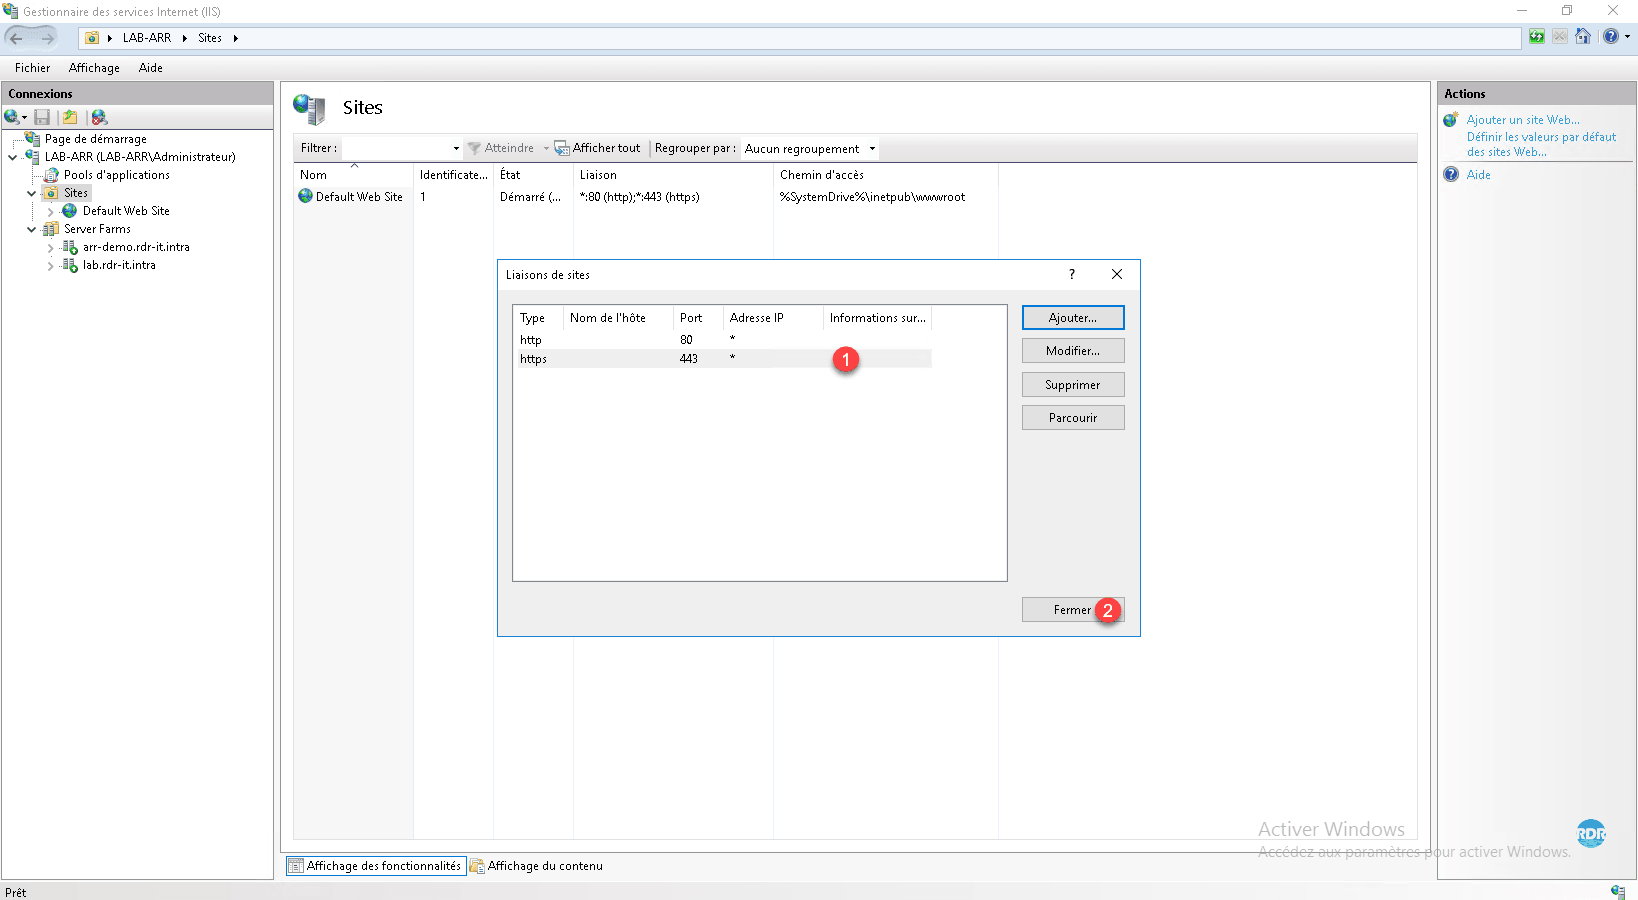
Link type choose https 1 , select certificate 2 then press OK button 3 .

The HTTPS link is added 1 . Exit by clicking Close 2 .
Configuration of rewrite rules – routing
Go to the rewrite rules management page.
Add a new rule from the Action menu by clicking Add Rules 1 , choose Blank Rule 2 and click OK 3 .

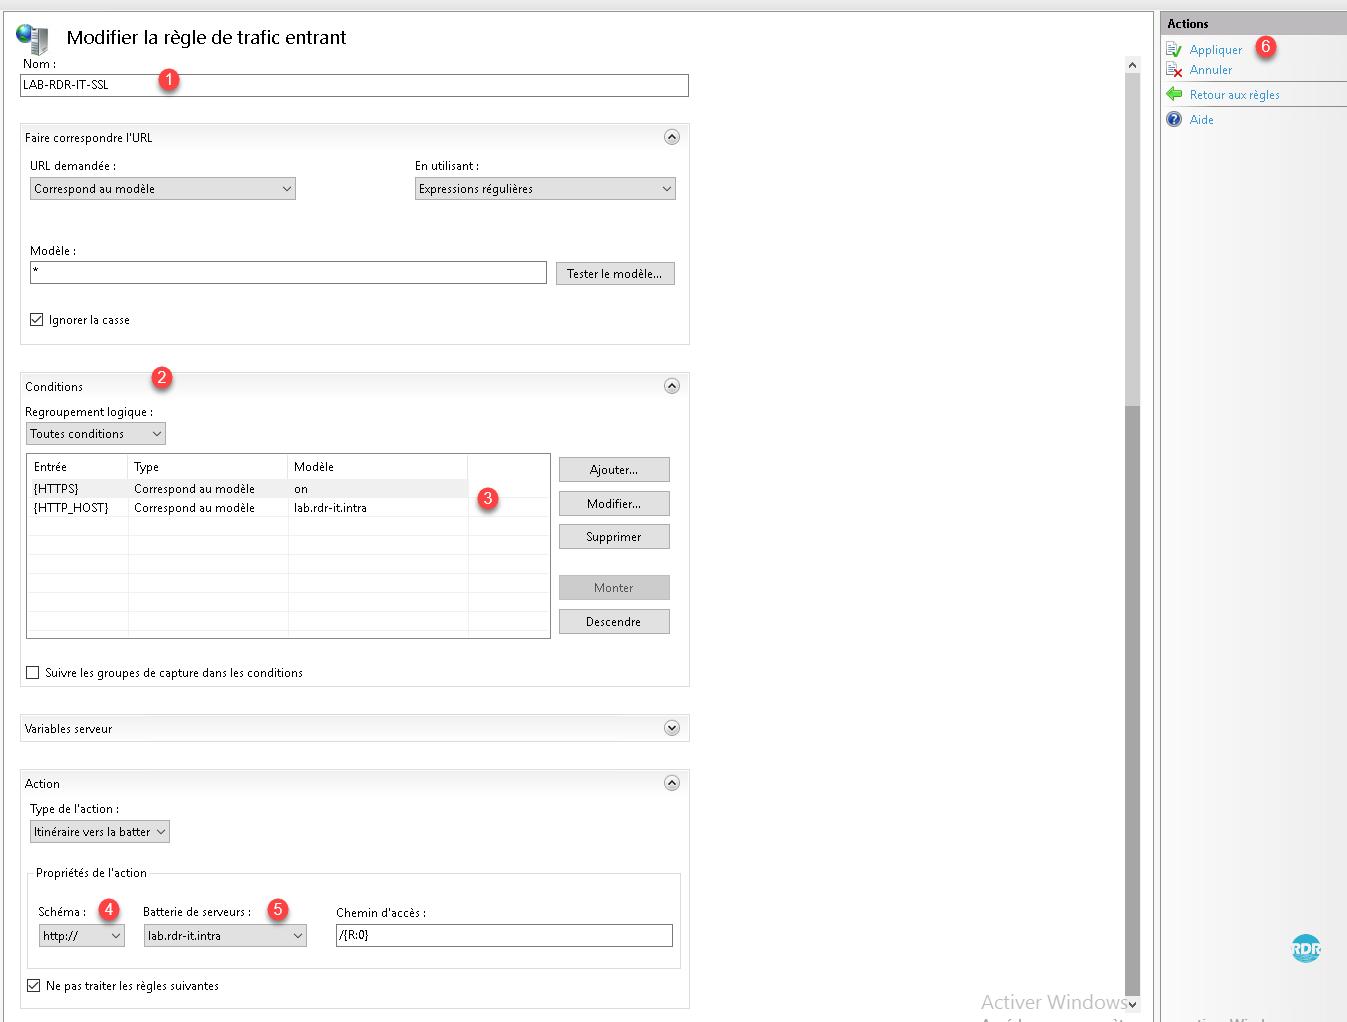
Name the rule 1 , click Conditions 2 to expand the option, add the two rules 3 (the first verifies that the call is made in https and the second limit to the domain ). In the Action section, select the diagram 4 then the farm 5 and click Apply 6 .
Go back to the list of rules, it is added 1 .
Launch a browser and access the site in https.
As can be seen below, there is no SSL link on the IIS A> site.
To force access in HTTPS (SSL), it is necessary to add before the unload rule, a rule that makes a 301 HTTP to HTTPS redirect.
Configuration: Enabling the cache
One of the features available with ARR is cache system, which saves queries on web servers.
Sur le serveur créé un dossier pour stocker le cache.
From the IIS console, click Application Request Routing 1 .
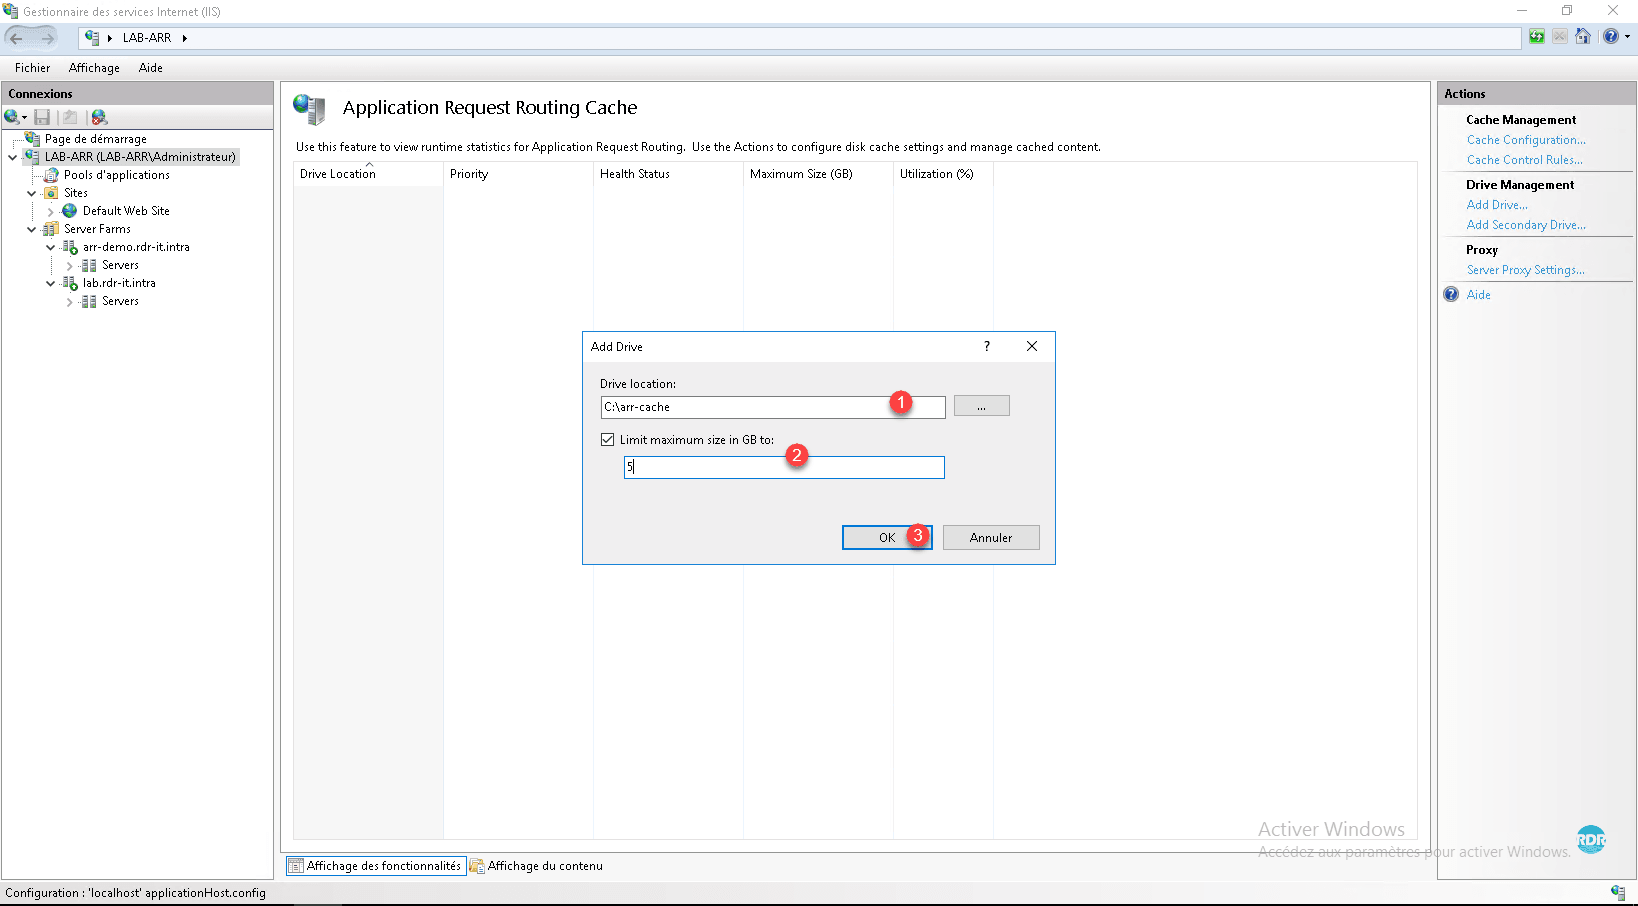
From the Actions menu click on Add Drive … 1 .

Enter the path of the file 1 , define a limit 2 then click on OK 3 .
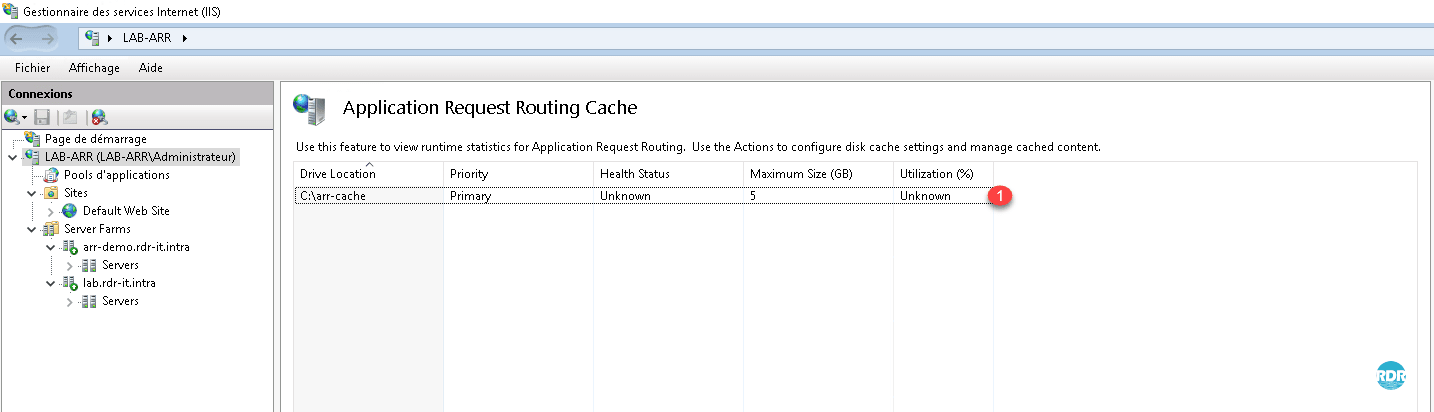
Storage for the cache is declared 1.
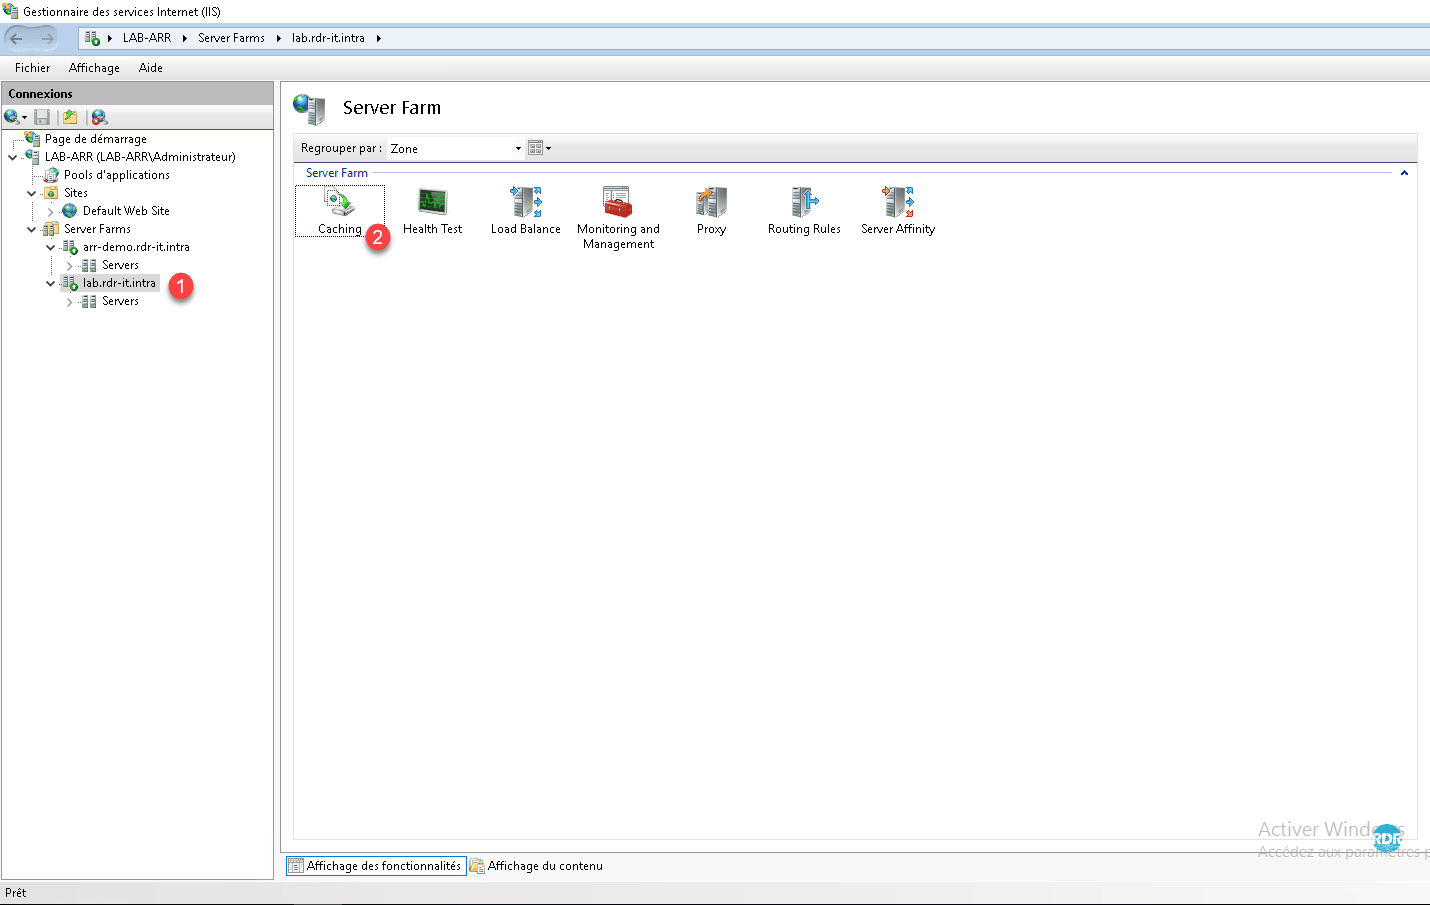
Go to one of the sites declared in the farm 1 and click on Caching 2 .
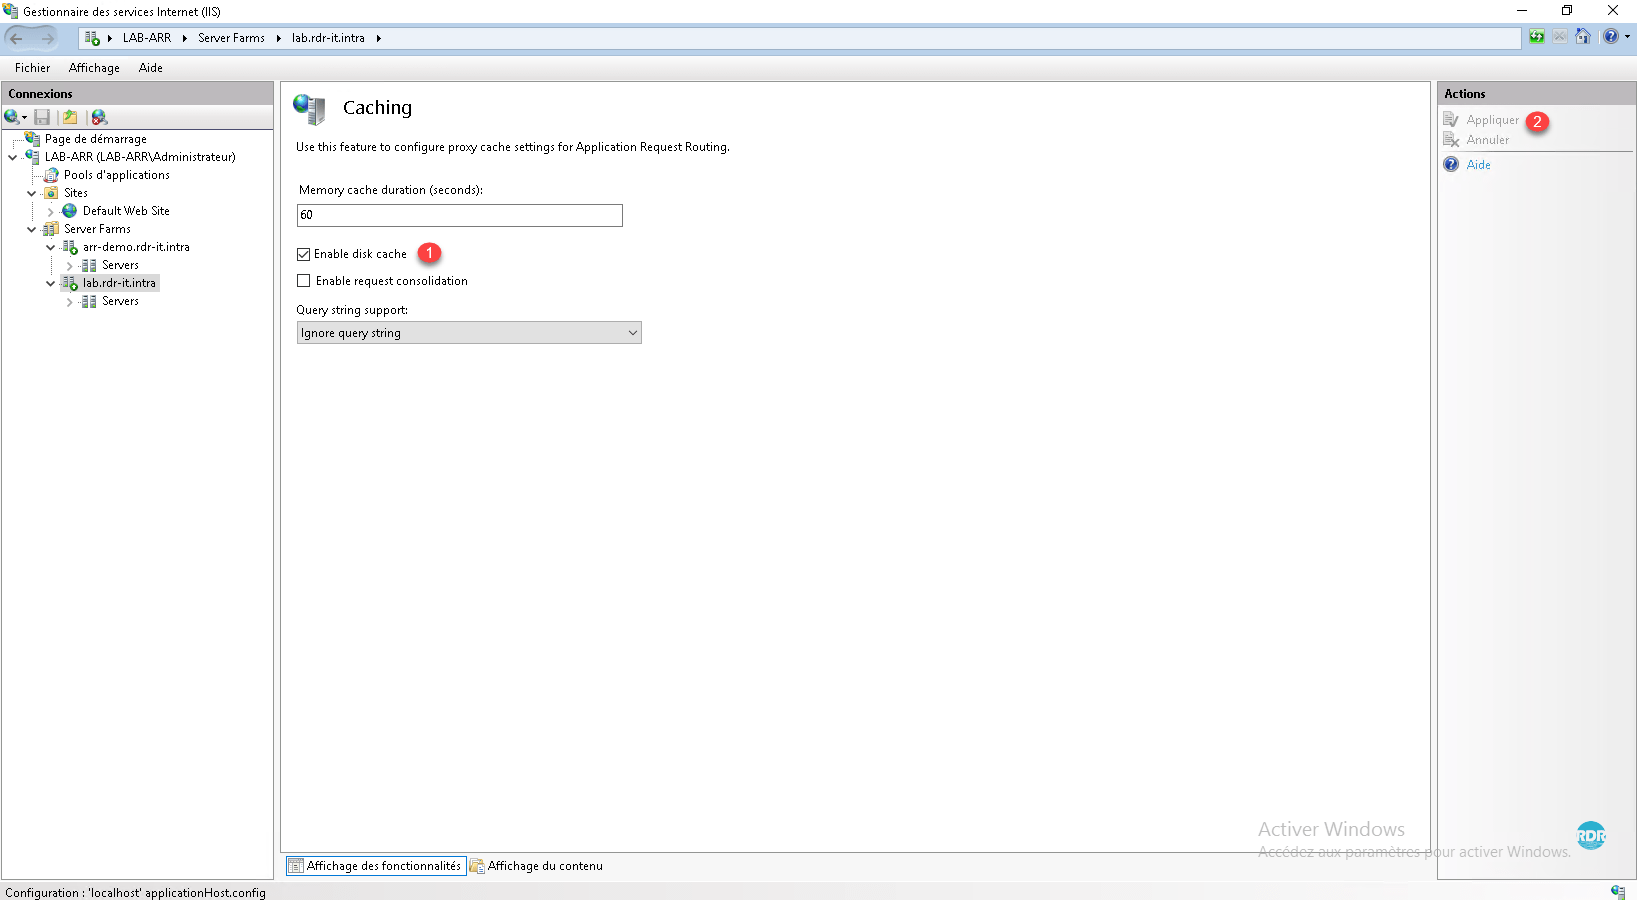
If this is not the case, activate the cache by checking the box 1 Enable disk cache and click Apply 2 .
Refresh the site where the cache is enabled.
Open the folder where the cache is written, you should have A files.


