In this tutorial, we will see how to set up and use replication between two Hyper-V infrastructures.
This Hyper-V native solution makes it easy to set up a PRA at a lower cost.
Replication is possible between standalone hosts and clustered hosts.
Prerequisites
You must have two Hyper-V hosts in the same configured version and enough disk space to accommodate the replicas.
It is also necessary to take into account the impact on overall performance: disk access, CPU and network.
Configure Hyper-V for replication
The following configurations must be carried out on the server which will receive the replicas.
Host alone
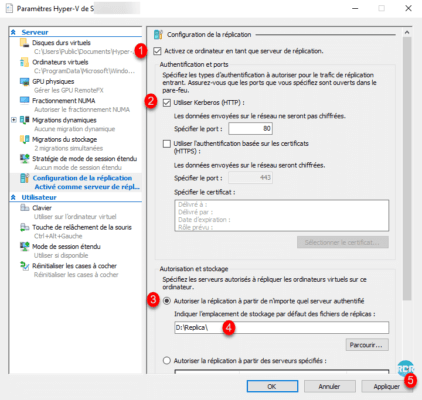
Go to the Hyper-V Manager console and click Hyper-V Settings 1 in the Actions menu.

Check the box Enable this computer as a replication server 1, check the box Use Keberos (HTTP) 2, select the option Allow replication from any authenticated server 3. Configure the storage location replicas 4 and click Apply 5.
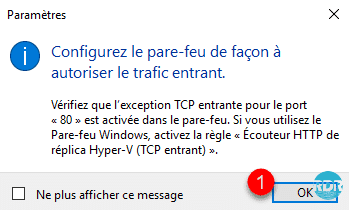
Validate the message concerning the firewall rule by clicking OK 1.
Hyper-V Cluster
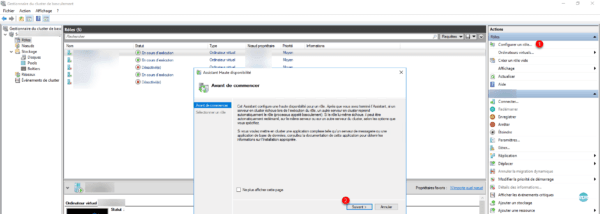
To accept replications on a Hyper-V cluster, you must add a role.
From the Failover Cluster Manager console, click Configure a Role… 1 to launch the wizard. At the first window click on Next 2.
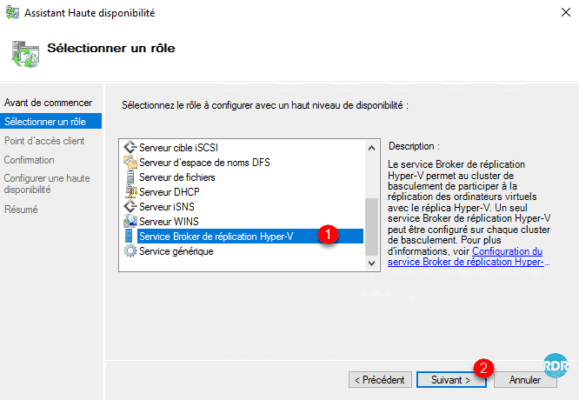
Select the Hyper-V Replication Broker Service role 1 and click Next 2.
Name role 1, assign an IP address 2 and click Next 3.
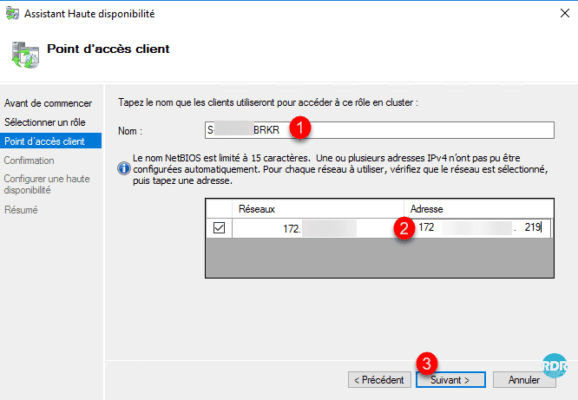
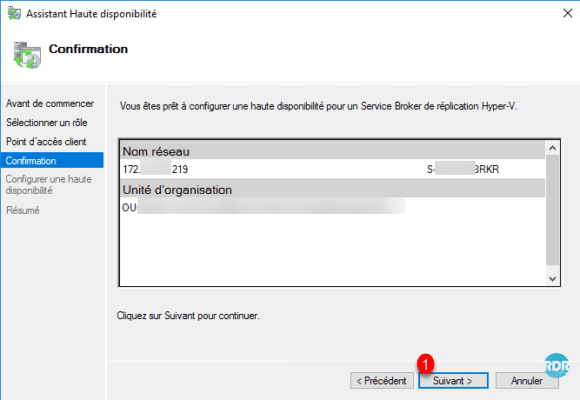
Confirm the creation of the role by clicking Next 1.
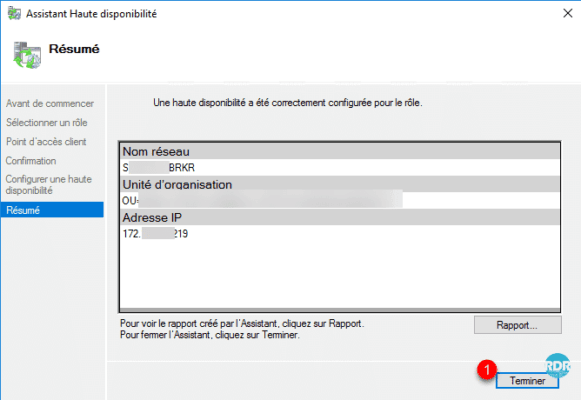
Once the role has been created, close the wizard by clicking Finish 1.
The role is added to cluster 1.

Now that the Hyper-V servers are ready to receive the replicas, we will see how to do it.
Configuring virtual machine replication
Right-click on the replicated computer
- On a non-clustered virtual machine, click Enable Replication 1.
- on a clustered computer Replication 1 / Enable replication 2.
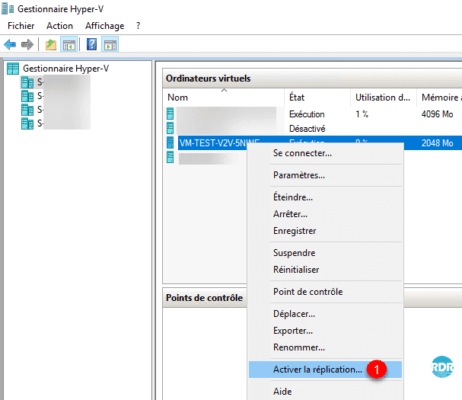
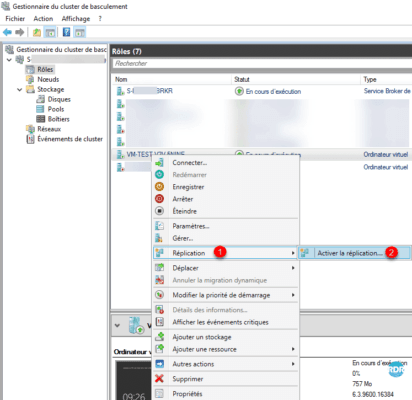
The captures and explanations below were made from a cluster, they are identical on a standalone host.
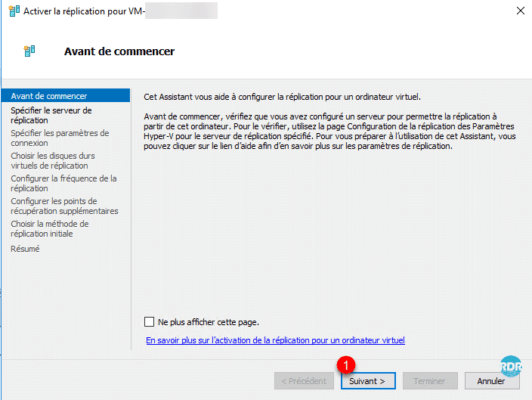
When the wizard launches, click Next 1.
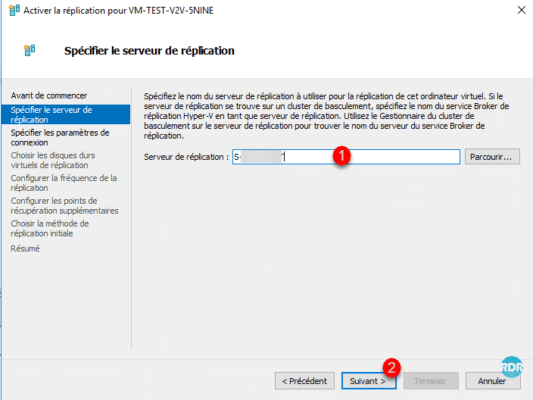
Indicate the destination host or cluster 1 then click Next 2.
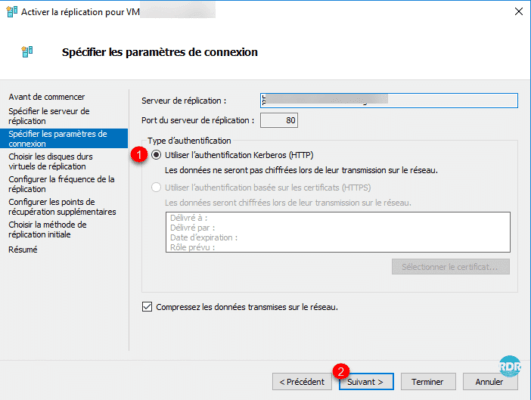
Configure the authentication mode between the two servers 1 and click on Next 2.
Select the disks to replicate 1 then click Next 2.
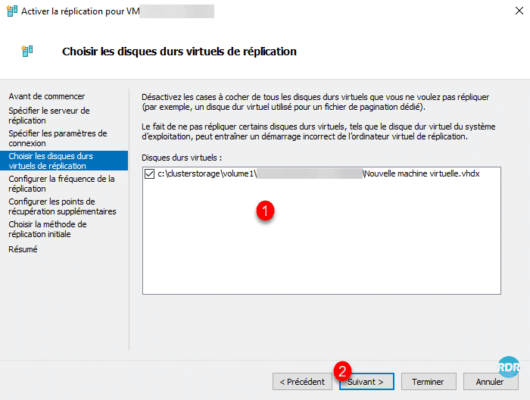
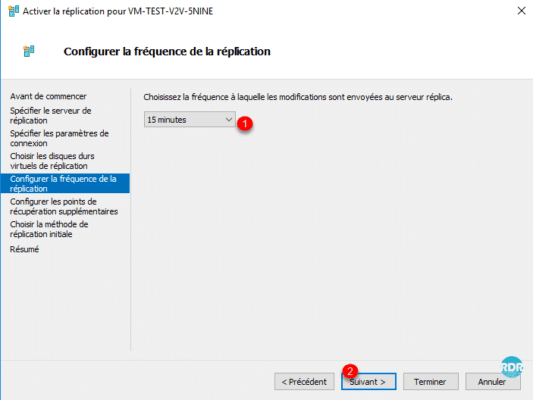
Configure replication frequency 1 and click Next 2.
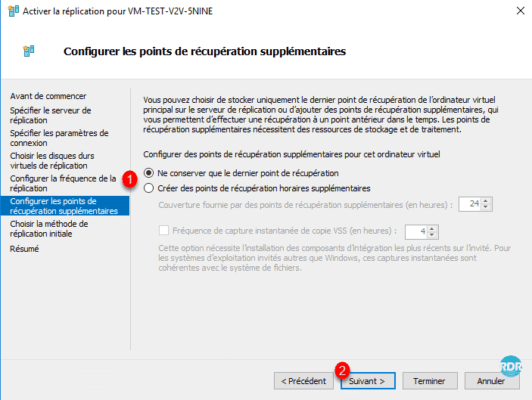
Configure additional restore points 1 if necessary and click Next 2.
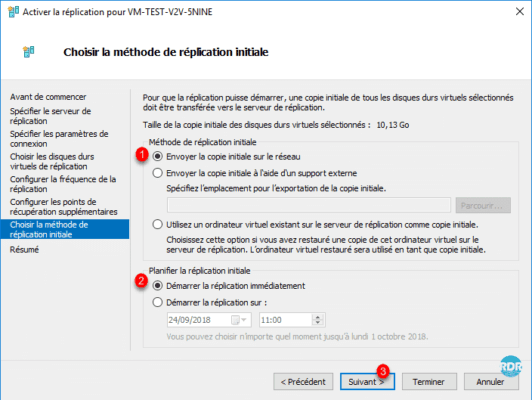
To start configuration immediately, choose Send initial copy to network 1 and Start replication immediately 2 and click Next 3.
Click Finish 1.
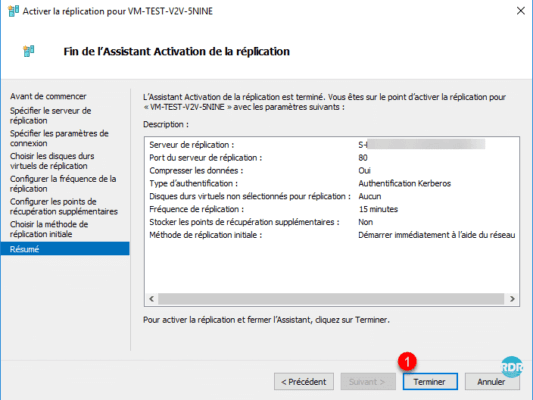
A confirmation message is displayed. Since the two Hyper-Vs do not have the same configuration at the virtual switch level, it is possible to configure the virtual computer by clicking on Settings 1.
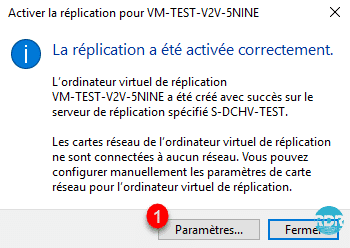
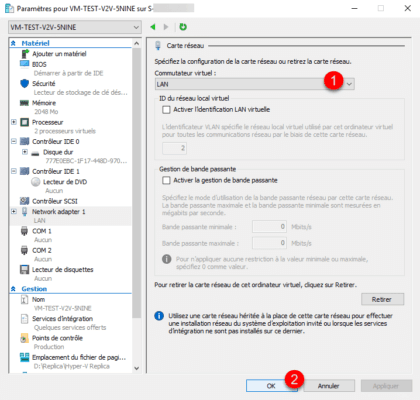
Configure replica virtual switch 1 and click OK 2.
Wait during replication, it is possible to follow the progress on the source and destination Hypervisor.


It is also possible to have information and statistics per virtual computer, simply right-click on Replications / Show replication integrity to have the following statistics:
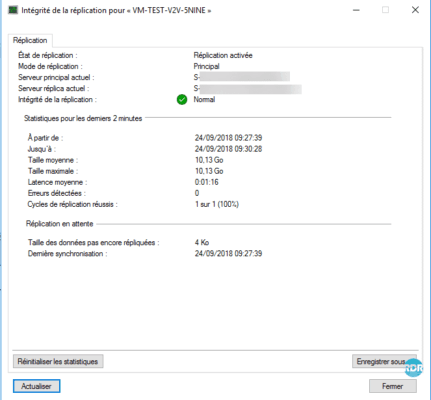
Now that the replica of our VM is ready, we will see how to switch to it.
Failover
There are 3 types of failover:
- planned failover
- failover
- the failover test (available on the destination server)
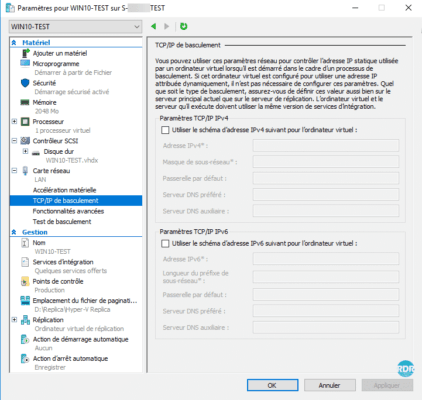
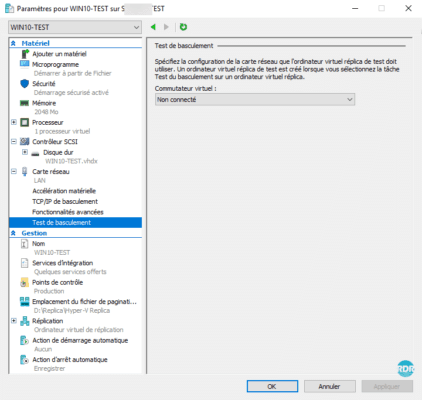
On replicas, it is possible to configure the IP address of the VM directly in its settings. For Testing it is possible to configure another different virtual switch to isolate from production.
Failover test
The failover test makes it possible to validate the correct functioning of the replica without impacting production. During the test, a copy of the is made and therefore does not block ongoing replications as well.
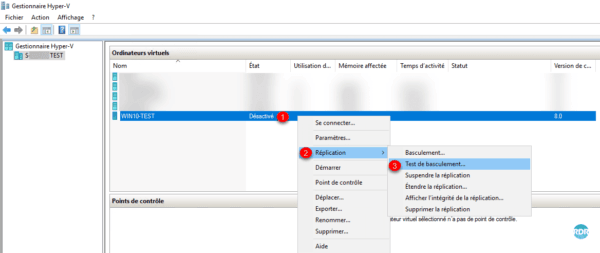
From the Hyper-V console, right-click on replica 1, go to Replication 2 / Failover Test 3.
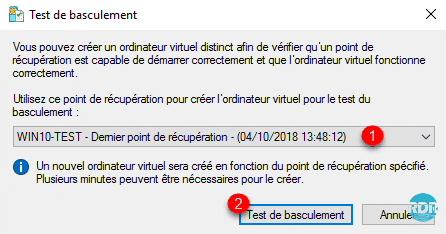
Choose restore point 1 then click on Failover Test 2.
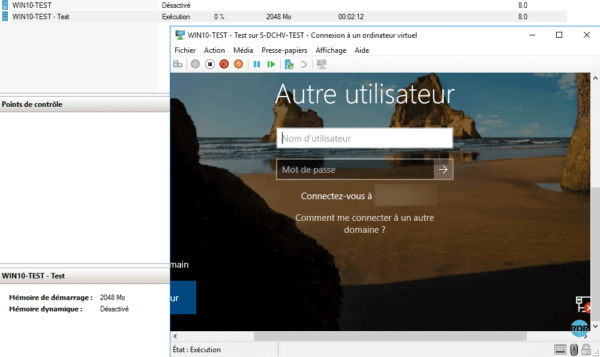
A new virtual machine is created with the replica name with the prefix – Test 1.

Start the computer and validate the tests to be performed.
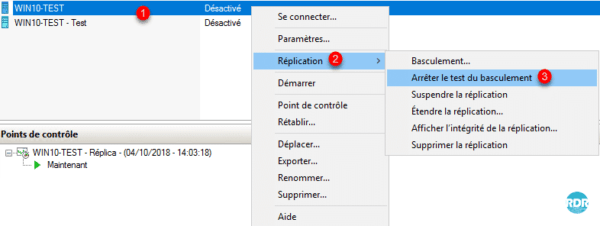
To stop the test, right-click on base replica 1, go to Replication 2 and click on Stop Failover 3 Test.
Confirm the shutdown, click on Stop failover test 1.
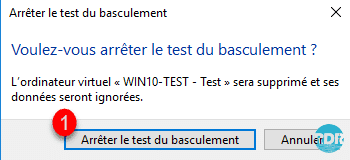
The test virtual machine is deleted.

Before starting to do tests, I advise setting up a test plan with the things to do and validate. Critical elements must be tested regularly.
Failover and planned failover
Both options do the “same” thing, it starts the replica to put it into production, the scheduled failover is something scheduled and the failover is starting the PRA if something goes wrong.
Before starting the failover, it is necessary to take into consideration that the replica will become the main virtual computer, to subsequently put the replica back on the production infrastructure, it is necessary to reverse the direction of replication or move the virtual computer to the production infrastructure.
Before a failover can be triggered, the source computer must be powered off.
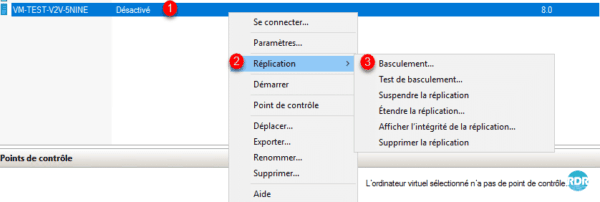
a. The planned failover is triggered from the source host. Before starting the replica the data is sent to be sure not to allow any data. Right click on computer 1 / Replication 2 / Scheduled failover… 3.
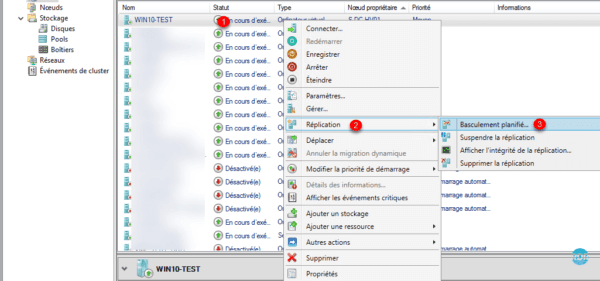
b. Failover is triggered from the server hosting the replicas, this action is done in case of loss of the primary host. Right click on computer 1 / Replicate 2 / Failover… 3.
Click on the Failover 1 button.
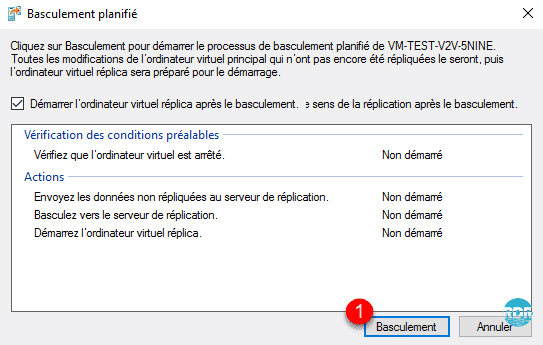
As part of the failover, it is possible to choose the checkpoint to start.
Wait while the virtual machine starts.
After the failovler
What to do after returning to normal. Several options are possible:
- Cancel failover, right click on computer / Replication / Cancel failover. This implies that all modifications made to the replica will be lost.
- If both Hyper-v hosts are in the same domain use move function. First remove the replication option, then right click on the computer / Move… . Once the vm has been moved, you must put the replication back in place. If the hardware (CPU) is compatible between the two Hyper-Vs, it is possible to perform the hot move without interruption for production.
- Reverse the direction of replication, once the operation has been carried out, two solutions:
- The PRA becomes production, therefore inversely compared to the initial state.
- Perform a planned failover to return the vms to the initial location and redo replication.
Reverse replication
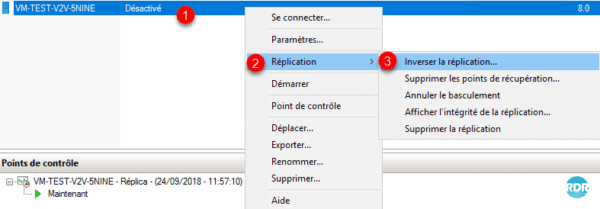
Right click on Computer 1 / Replication 2 / Reverse Replication 3.
This launches the same wizard as for replication, click Next 1.
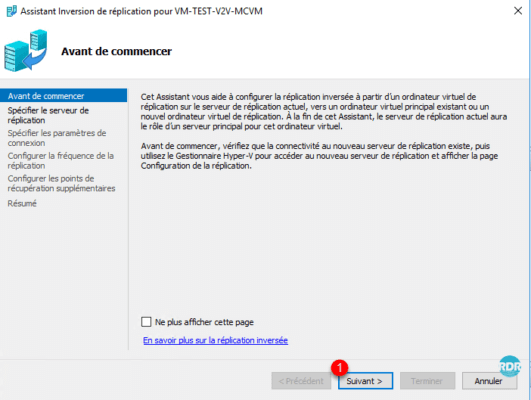
Normally, the replication server is already specified, click on Next 1.
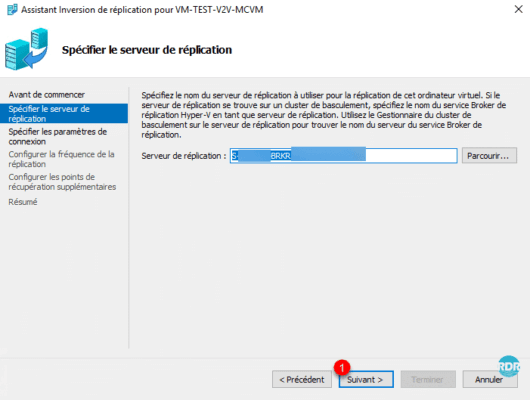
Let yourself be guided by the wizard…
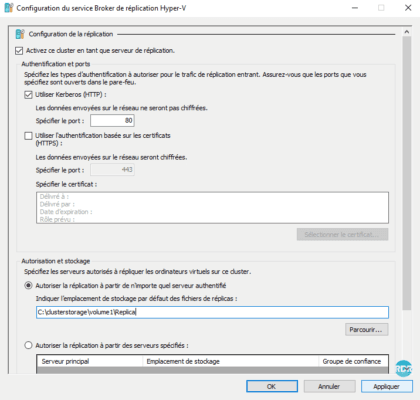
Note: If the destination host is not configured to receive replications, the Configuration window opens.
Conclusion
I hope this tutorial will help you set up a PRA. Setting up replication does not replace backups, remember to make regular backups of your data.
The hardest part in setting up the PRA is not technical but financial, because it is necessary to convince management to invest in a backup infrastructure… Even if replication does not require material investment (use of old server) you must acquire Windows Server licenses.
It is also possible to extend Hyper-V replication from replicas to increase the level of “security”


