Table of Contents
Overview
In this tutorial, I will explain how to install a certificate on Exchange 2013/2016/2019 and how to assign it to the different services.
There are two ways to do this:
- Via the ECP web interface
- In PowerShell
In this tutorial we will see the two ways to do this.
Prerequisites
You must have the certificate in PFX format with its password and place it on a network share accessible by the Exchange servers.
Install and configure an SSL certificate on Exchange
You have placed the certificate on a network share, we will now proceed to its installation.
Via the ECP web interface
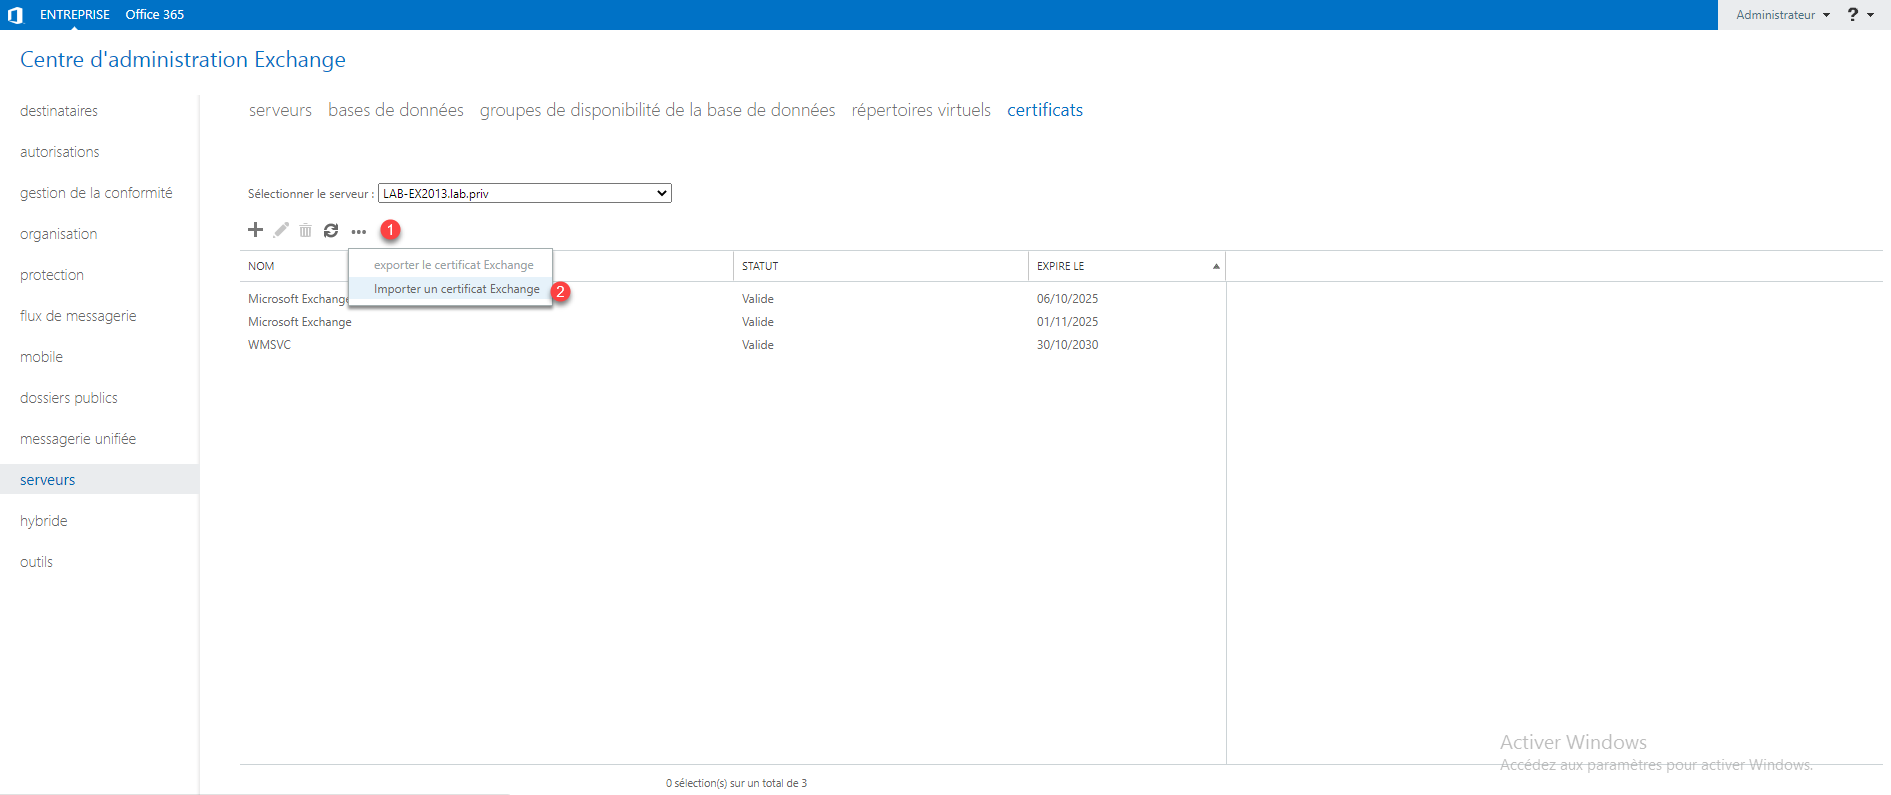
Go to the server management 1 then in the certificates section 2.

Click on … 1 then on Import an Exchange certificate 2.
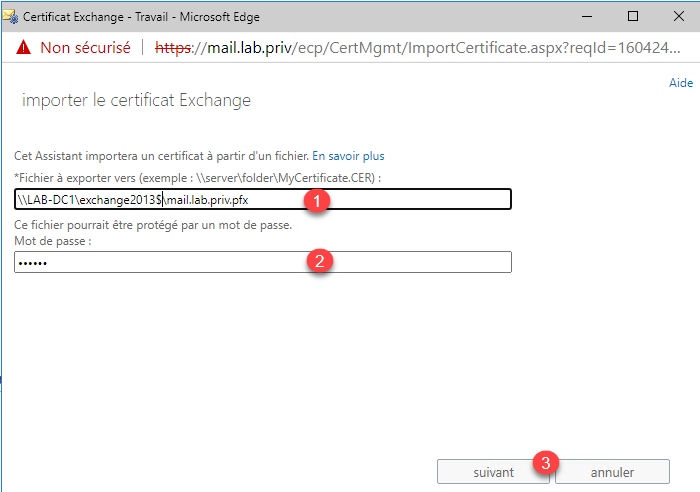
In the new window, indicate the UNC location of the certificate 1 as well as the password 2 and click on next 3.
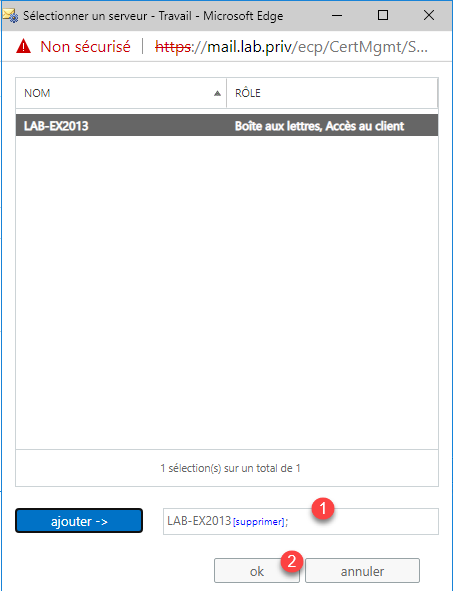
You must now indicate on which servers the server will be imported (it is possible to select several), click on the + 1 icon.

Select the server (s) 1 in the list and click on the add button 2.

The selected servers 1, click on ok 2.
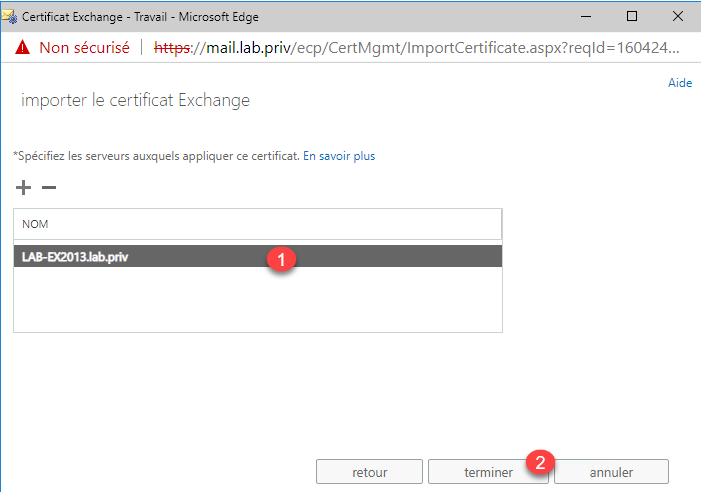
The server (s) added for installing the certificate, click finish 1.
Certificate 1 is installed and normally it is displayed on the list.

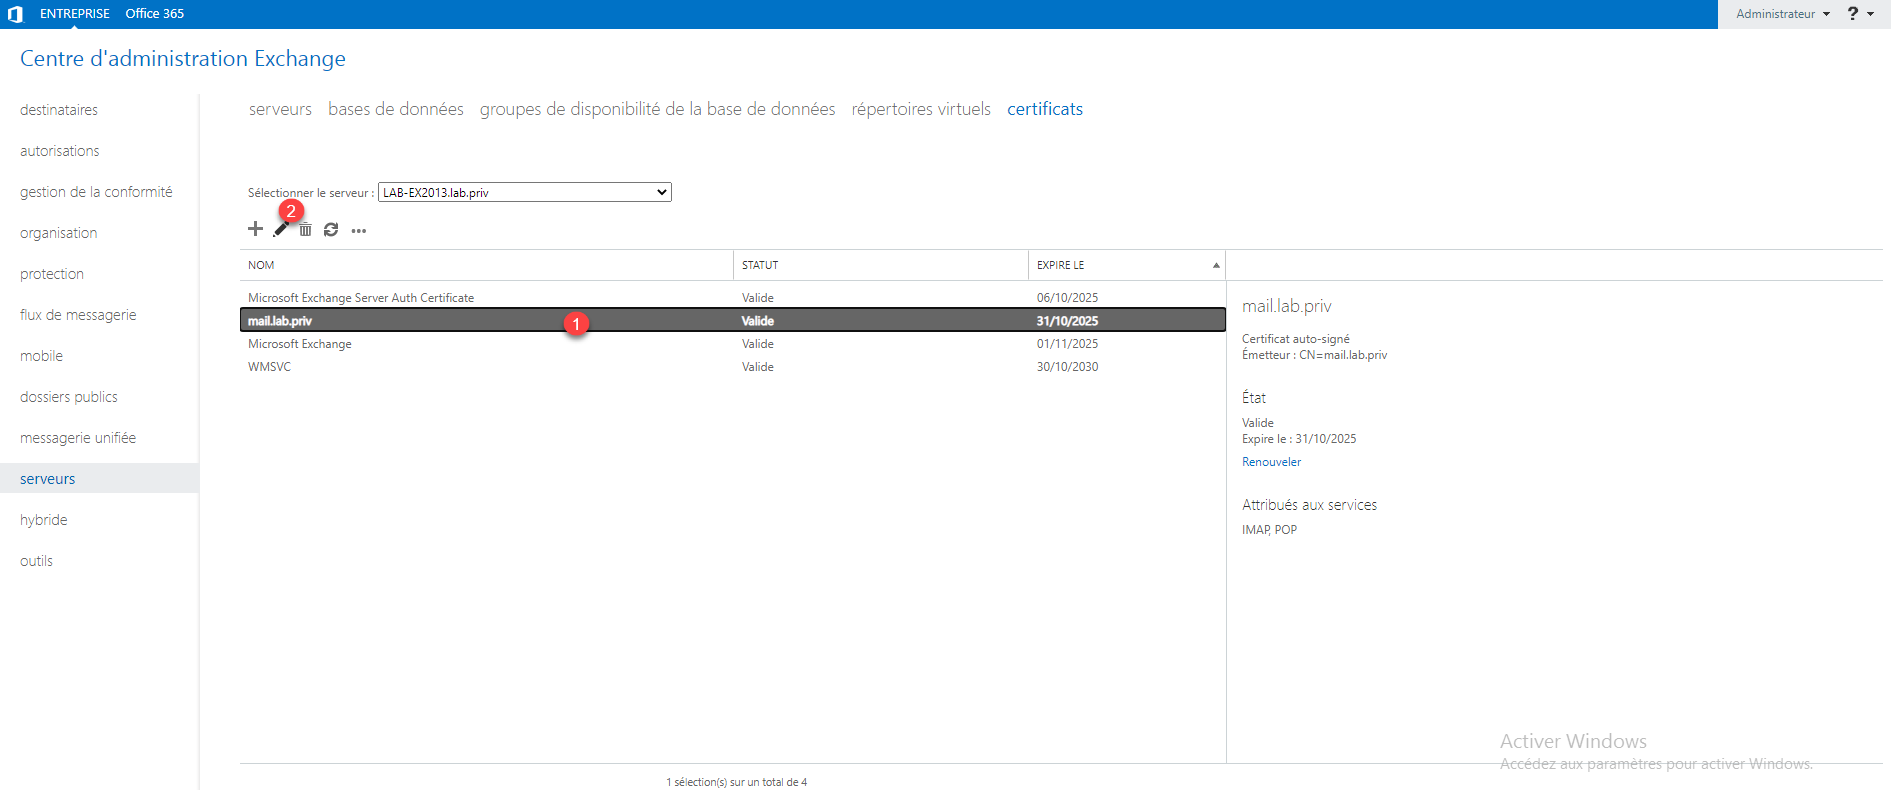
Now, you have to assign it to the services, select the certificate 1 and click on the modification icon 2.
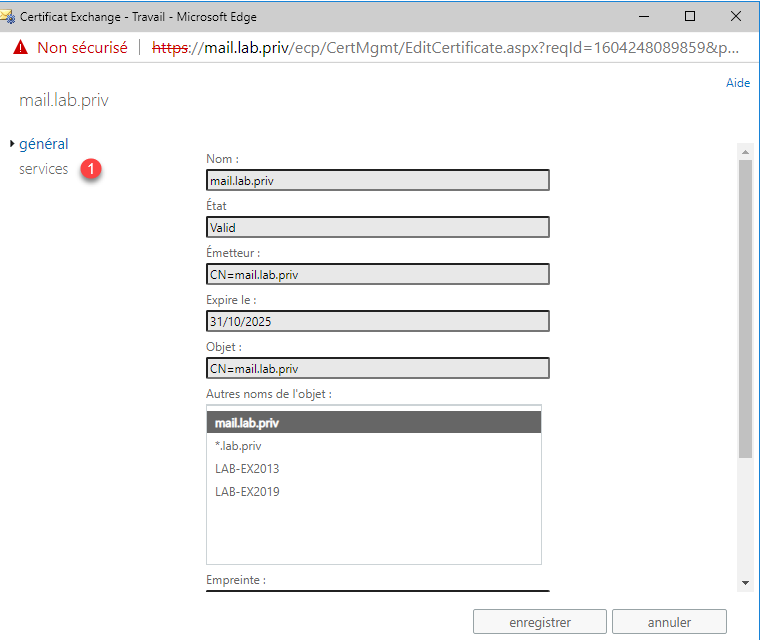
Click on services 1.
Check the services to which the certificate is assigned 1 and click on Save 2.
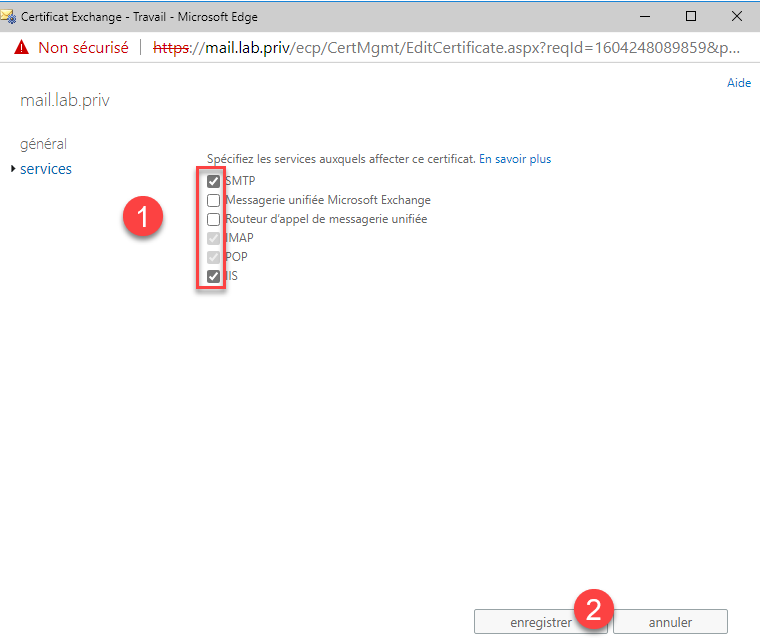
Validate the warning message if you have selected the SMTP service.
Close the window, the certificate is assigned to the services.
If you have multiple servers, start over for each one.
With PowerShell
From a PowerShell prompt launch from an Exchange server, enter the following command adapted to your environment to import the certificate:
Import-ExchangeCertificate -Server SRV-EXCHANGE -FileName "\\SRV\certs\ExchangeCertificat.pfx" -PrivateKeyExportable:$true -Password (ConvertTo-SecureString -String "CertPassword" -AsPlainText -Force)
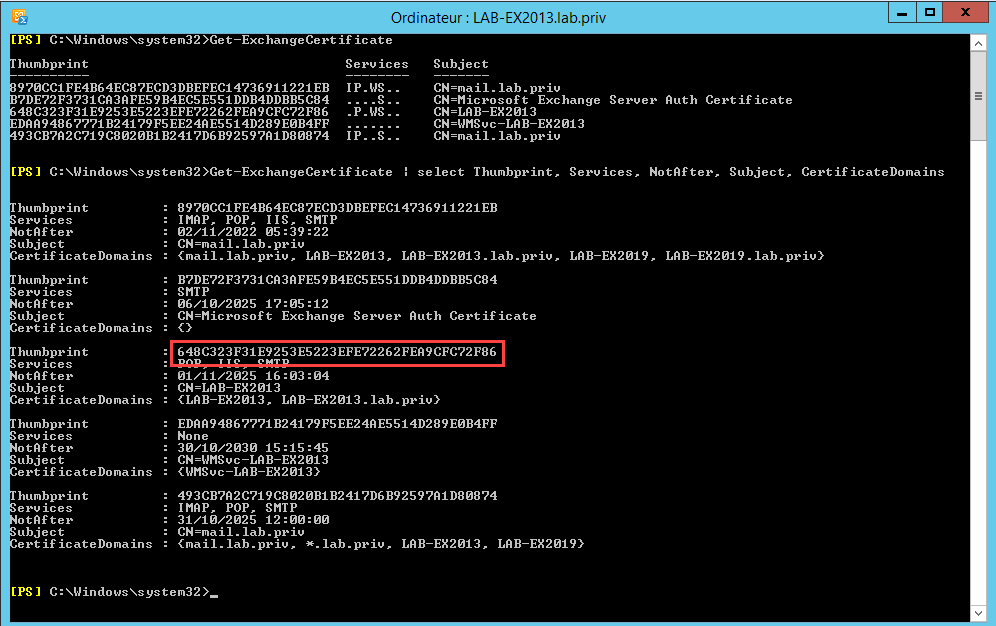
You must now retrieve the digital fingerprint of the certificate, enter the command below:
Get-ExchangeCertificate | select Thumbprint, Services, NotAfter, Subject, CertificateDomains
Select the certificate fingerprint to copy it, which you want to assign to services.
Then enter the command below to assign the certificate to the services:
Enable-ExchangeCertificate -Thumbprint 870cc1072e80500acdb187ec0b2cdc6221eb -Services SMTP,IMAP,IIS
Confirm the replacement in the PowerShell window.
Conclusion
The two solutions are equivalent, in an environment with several Exchange servers, the use of PowerShell allows to automate the change of the certificate and the assignment to the services.
