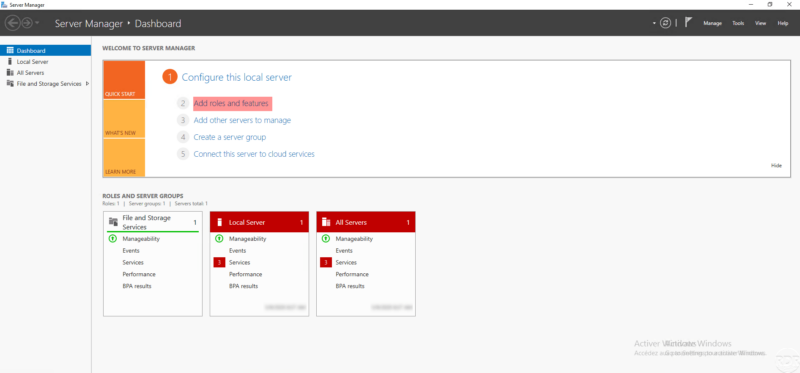
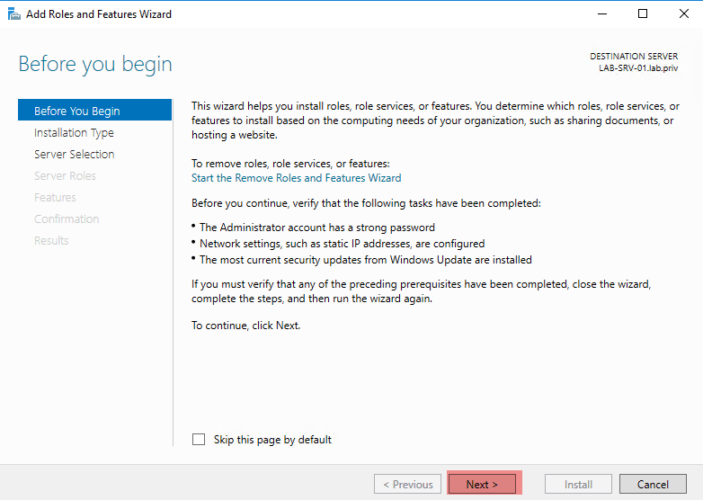
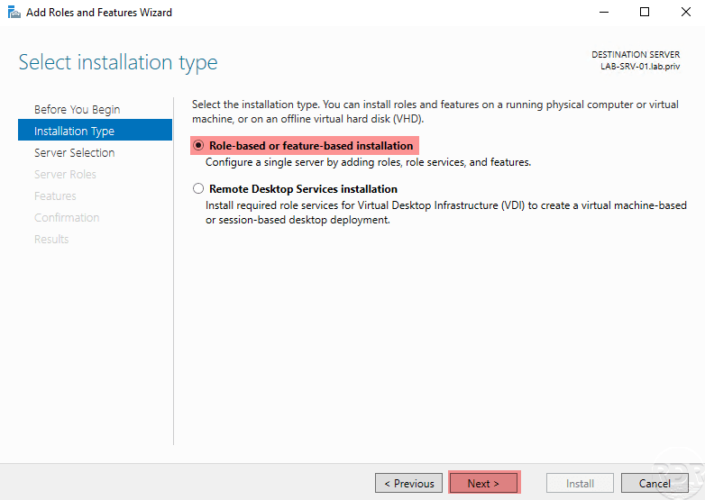
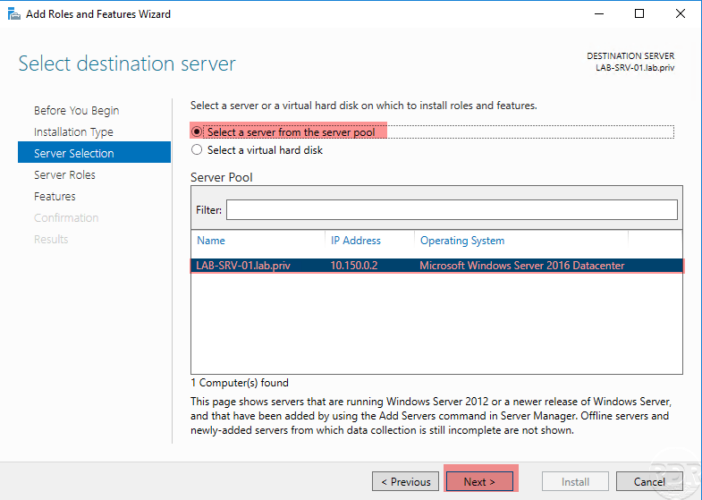
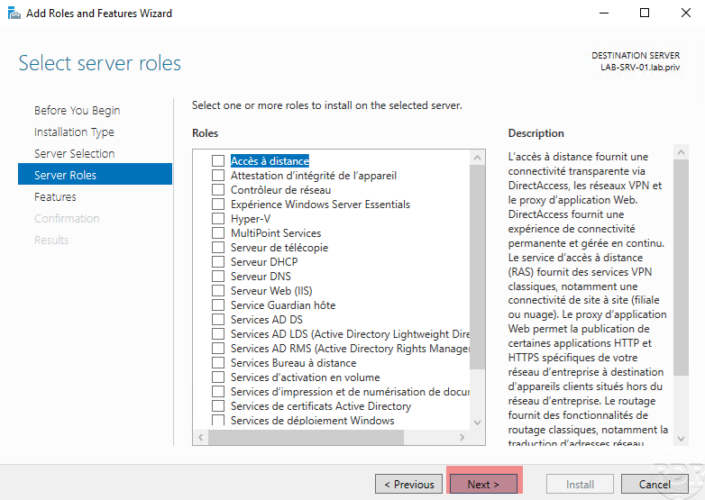
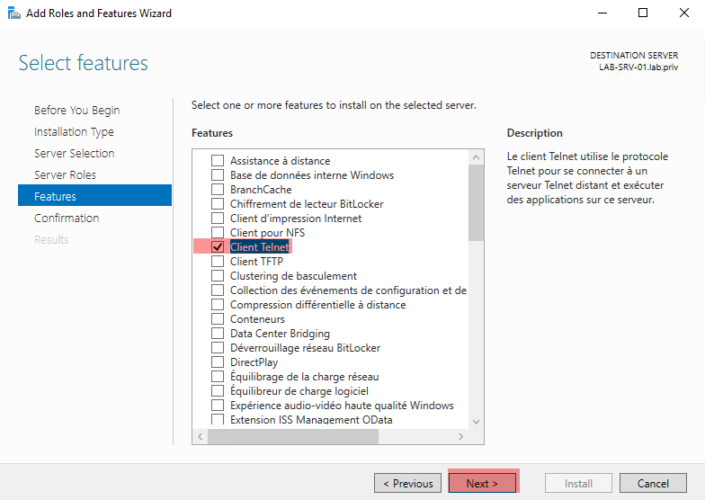
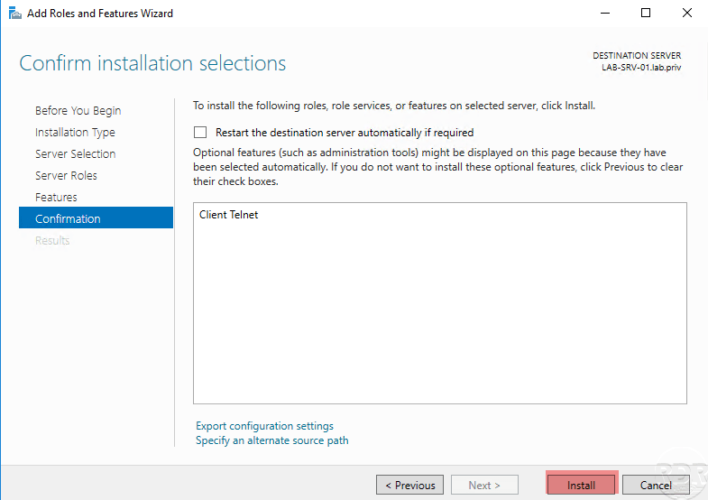
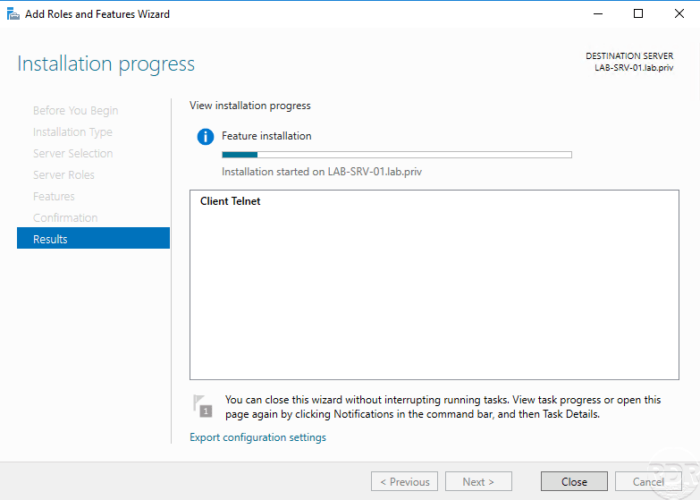
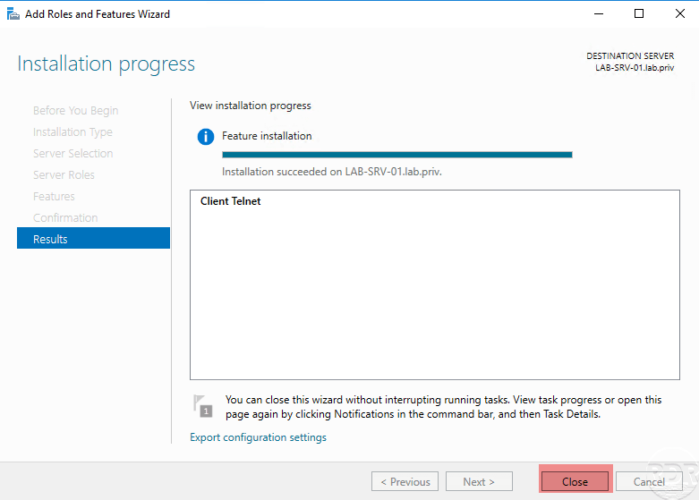
{“@context”:”https://schema.org”,”@type”:”HowTo”,”name”:”Installing the Telnet client”,”description”:”In this tutorial \”how to\”, we will see how to install the Telnet client on Windows Server. The Telnet client is a very useful command line utility to diagnose certain connection problems or to connect to the administration of certain equipment such as switches.”,”image”:{“@type”:”ImageObject”,”url”:””,”height”:”406″,”width”:”305″},”totalTime”:””,”estimatedCost”:[],”tool”:[],”supply”:[],”step”:[{“@type”:”HowToStep”,”url”:”#”,”name”:”Open the Add Roles and Features Wizard”,”text”:”From the server manager where the Telnet client will be installed, click on Add roles and functionalities.”,”image”:”https://rdr-it.com/wp-content/uploads/2020/05/ht-en-client-telnet-ws-01.png”},{“@type”:”HowToStep”,”url”:”#”,”name”:”Skip the \”Before You Begin\” section”,”text”:”When the <strong>Next</strong> client assistant is launched.”,”image”:”https://rdr-it.com/wp-content/uploads/2020/05/ht-en-client-telnet-ws-02.png”},{“@type”:”HowToStep”,”url”:”#”,”name”:”Installation type : Role-based or feature-based installation”,”text”:”Choose <strong>Role-based or feature-based installation</strong> and click <strong>Next</strong>”,”image”:”https://rdr-it.com/wp-content/uploads/2020/05/ht-en-client-telnet-ws-03.png”},{“@type”:”HowToStep”,”url”:”#”,”name”:”Server selection : choose the server where to install the Telnet client”,”text”:”Choose the option <strong>Select a server from the server pool</strong>, click on<strong> the server</strong> in the pool and click <strong>Next</strong>.”,”image”:”https://rdr-it.com/wp-content/uploads/2020/05/ht-en-client-telnet-ws-04.png”},{“@type”:”HowToStep”,”url”:”#”,”name”:”Server roles : skip the list”,”text”:”Client on <strong>Next </strong>to pass the list of roles.”,”image”:”https://rdr-it.com/wp-content/uploads/2020/05/ht-en-client-telnet-ws-05.png”},{“@type”:”HowToStep”,”url”:”#”,”name”:”Features : select Client Telnet”,”text”:”In the list of features, check the box for <strong>Client Telnet</strong> and client on <strong>Next</strong>.”,”image”:”https://rdr-it.com/wp-content/uploads/2020/05/ht-en-client-telnet-ws-06.png”},{“@type”:”HowToStep”,”url”:”#”,”name”:”Start the installation”,”text”:”Confirm the addition of the \”Client Telnet \” functionality by clicking on <strong>Install</strong>.”,”image”:”https://rdr-it.com/wp-content/uploads/2020/05/ht-en-client-telnet-ws-07.png”},{“@type”:”HowToStep”,”url”:”#”,”name”:”Wait while installing the Telnet client”,”text”:”Wait during the installation.”,”image”:”https://rdr-it.com/wp-content/uploads/2020/05/ht-en-client-telnet-ws-08.png”},{“@type”:”HowToStep”,”url”:”#”,”name”:”Close the wizard after installation is complete”,”text”:”Once the installation is complete, click on <strong>Close </strong>to exit the wizard.”,”image”:”https://rdr-it.com/wp-content/uploads/2020/05/ht-en-client-telnet-ws-09.png”}]}
Installing the Telnet client
In this tutorial “how to”, we will see how to install the Telnet client on Windows Server. The Telnet client is a very useful command line utility to diagnose certain connection problems or to connect to the administration of certain equipment such as switches.
