Presentation
Windows 10 Sandbox allows you to launch an isolated Windows 10 (build 18342) environment to perform tests in all security.
Prerequisites
- Enable virtualization in the BIOS.
- Have Windows 10 Pro or Enterprise.
Installation
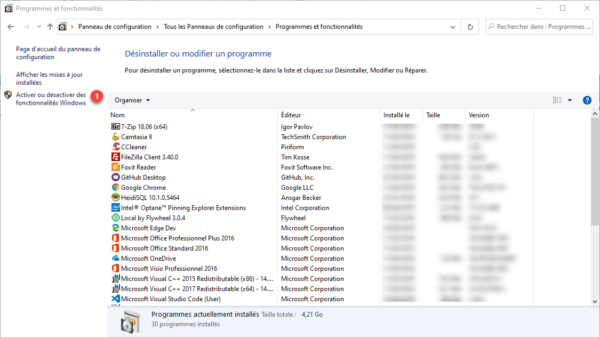
Open the Control Panel, go to Programs and Features, and click Enable or Disable Windows Features 1 .
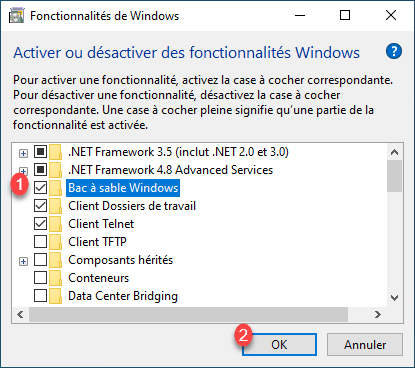
Check Windows Sandbox 1 and click OK 2 .
Wait during installation and restart the computer if necessary.
Using the sandbox
From the start menu search Windows SandBox.
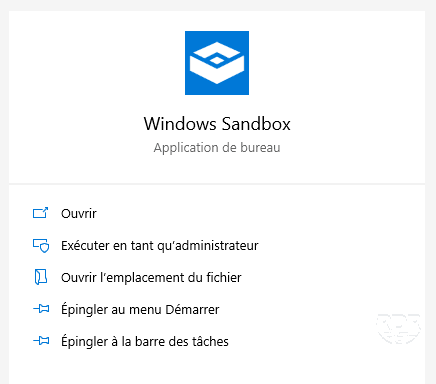
Wait while creating and loading the environment.

The environment is loaded, it is now possible to do tests without risk for your Windows installation.
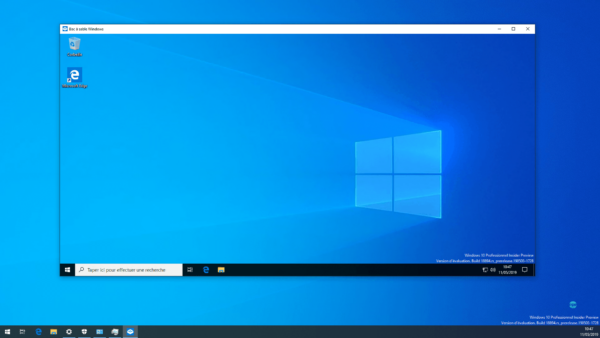
It is possible to transfer a file from the production environment to the sandbox by copy / paste.
Customize the sandbox
It is possible to customize the environment by creating a wsb file, which is nothing more than an XML file with the configuration.
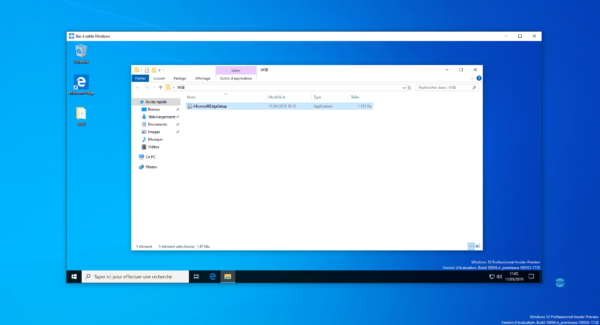
In order to have a shared space between the work environment and the test, I created a WSB folder at the root of drive C where I put a file. This folder will be read-only.
On your computer, create a file with the extension wsb.
Open the file with a text editor and copy the text below then save.
<Configuration>
	<!-- enable vgpu -->
    <VGpu>Enable</VGpu>
	<!-- enable network -->
    <Networking>Enable</Networking>
	<!-- share folders -->
    <MappedFolders>
       <MappedFolder>
         <HostFolder>C:WSB</HostFolder>
         <ReadOnly>true</ReadOnly>
       </MappedFolder>
    </MappedFolders>
</Configuration>
It is possible to add a script at startup using the LogonCommand parameter
<LogonCommand>
   <Command>command to be invoked</Command>
</LogonCommand>
Double click to launch the sandbox, at launch we find on the desktop the WSB folder that has been mapped in the WSB file.
Video
Conclusion
This new feature of Windows 10 will now allow you to perform tests without affecting the work environment. You can also use this function to analyze a “dubious” file or install a program to test it to validate it.


