After seeing how to use Nginx as a reverse proxy, I will explain in this tutorial how to configure the caching of static elements (image, css files, js ….).
The use of the cache will reduce the number of HTTP requests to the Web server and therefore reduce this workload.
The first step will be to create a folder on the server that stores the cache.
sudo mkdir /var/cache/nginx_cache_sitenameYou can create the cache folder wherever you want on the server, if you activate the cache on several sites (virtualhost), I advise you to separate the folders.
Now that we have the folder, we will move on to configuring the virtualhost.
Open the virtualhost file:
sudo nano /etc/nginx/sites-available/sitenameYou must first declare the cache using the proxy_cache_path parameter which must be added before the server{} block
For this we will use the proxy_cache_path parameter to indicate the cache configuration.
proxy_cache_path /var/cache/nginx_cache_sitename levels=1:2 keys_zone=cache_name_site:10m max_size=4g inactive=60m use_temp_path=off;This line is used to configure the location of the cache, as well as its size and lifetime. The keys_zone parameter is important, because we will use it next to indicate which cache is used.
Now we will configure the virtualhost to use the cache for static files.
The configuration is done in the server{} block by declaring a location{} block.
The code below enables the caching of static elements (image, font, css and js).
	# Cache IMG/CSS/JS/Font
	location ~* \.(?:jpg|jpeg|gif|png|ico|woff2|css|js)$ {
		proxy_cache cache_name_site;
		proxy_pass https://taget_server_or_name;
		proxy_ssl_verify off;
		include proxy_params;
		add_header X-Cache-Status $upstream_cache_status;
	}
As you can see, it’s the same as for a configuration except that we add the proxy_cache parameter with the value of the cache key that has been configured.
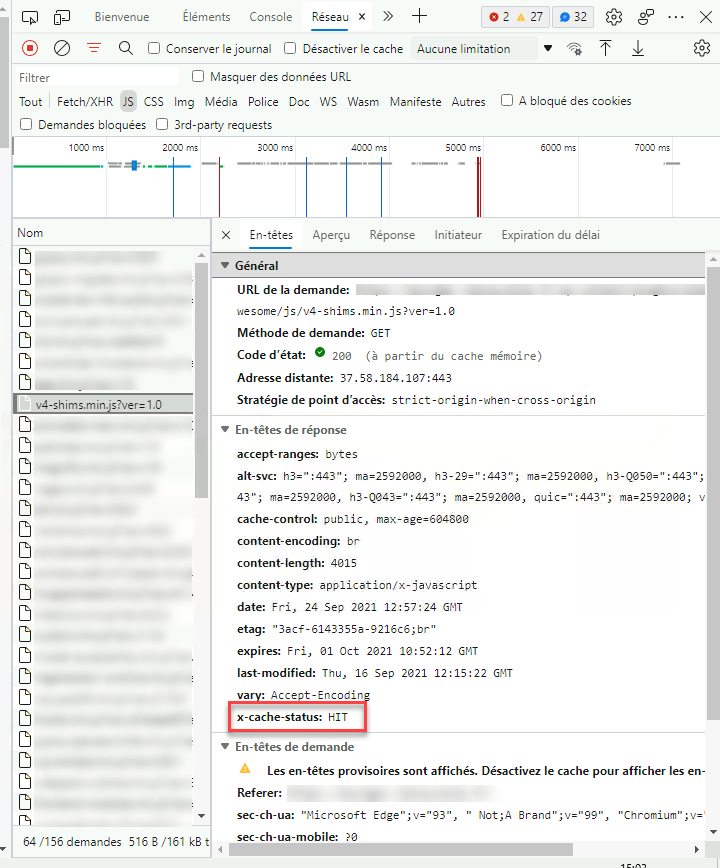
The add_header X-Cache-Status parameter $upstream_cache_status; allows you to add the response header of the request if the cache has been used.
Which gives us in a browser:
Une fois la configuration du cache ajouté à virtualhost, tester la configuration :
sudo nginx -tReload the configuration for consideration:
sudo systemctl reload nginxSome additional information
Clear the Nginx cache:
To purge the cache, you just need to empty the folder:
sudo rm -rf /var/cache/nginx_cache/*There is another method using using a URL.
In-memory cache – RAM
It is also possible to use the random access memory (RAM) of the server in order to have an even faster cache.
Create cache folder:
sudo mkdir -p /var/cache/nginx_ramMount the folder in RAM:
sudo mount -t tmpfs -o size=2G tmpfs /var/cache/nginx_ram
All you have to do is configure this folder as a cache location.
To make the edit persistent:
Open file /etc/fstab :
sudo /etc/fstabAdd the following line, adapting to your configuration:
sudo tmpfs /var/cache/nginx_ram tmpfs defaults,size=2G 0 0You now know how to configure the cache with Nginx in use as a reverse proxy.
The use of the cache is practical when Nginx is placed in front, it limits the number of HTTP requests to the server hosting the Web application.
Cache configuration is often used when an Apache2 server is behind the proxy, as Nginx is known to be very good at serving static files.
