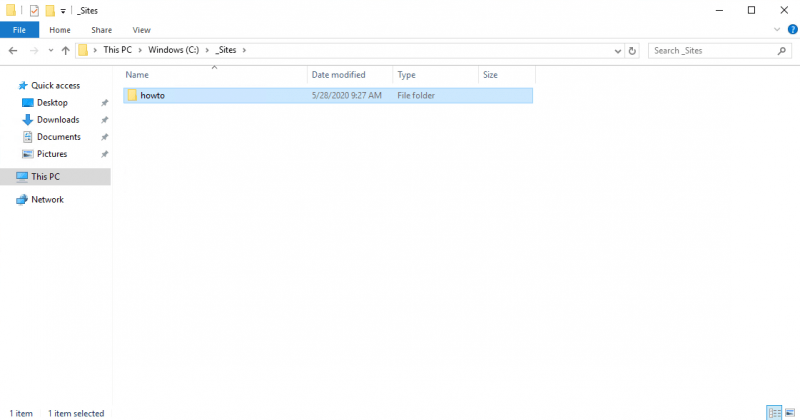
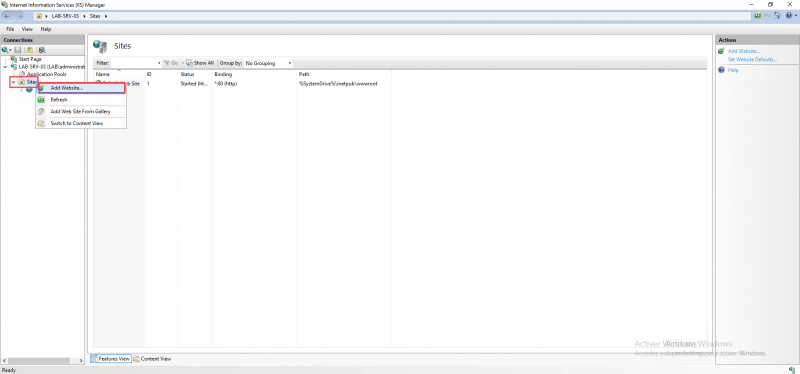
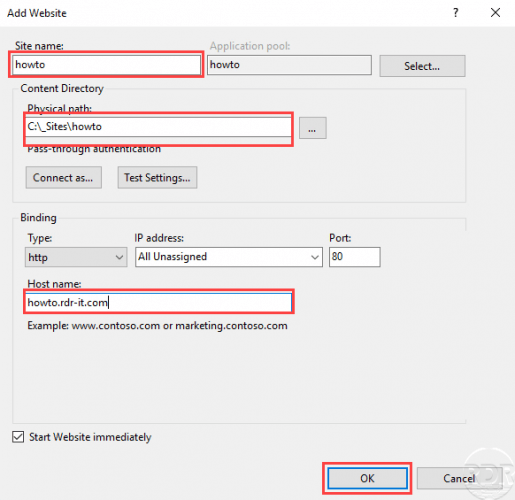
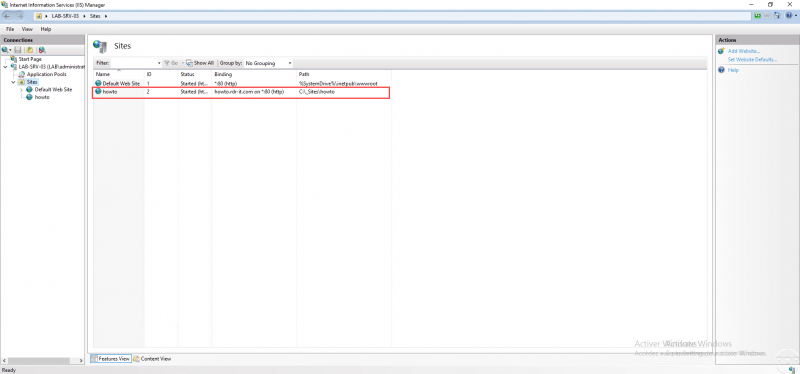
{“@context”:”https://schema.org”,”@type”:”HowTo”,”name”:”IIS: add a site based on the DNS name”,”description”:”This \”How to\” tutorial explains how to add a site to an IIS web server based on the DNS name.”,”image”:{“@type”:”ImageObject”,”url”:””,”height”:”406″,”width”:”305″},”totalTime”:””,”estimatedCost”:[],”tool”:[],”supply”:[],”step”:[{“@type”:”HowToStep”,”url”:”#”,”name”:”Create the folder that will host the website on the IIS server.”,”text”:”Click here to change this text. Lorem ipsum dolor sit amet, consectetur adipiscing elit. Ut elit tellus, luctus nec ullamcorper mattis, pulvinar dapibus leo.”,”image”:””},{“@type”:”HowToStep”,”url”:”#”,”name”:”Step 1″,”text”:”On the IIS server, create a folder that will contain the site files.”,”image”:”https://rdr-it.com/wp-content/uploads/2020/05/iis-add-site-based-dns-en-01.png”},{“@type”:”HowToStep”,”url”:”#”,”name”:”Open the IIS Administration Console – Internet Service Manager.”,”text”:”On the server, open the Internet Information Services (IIS) Manager console.”,”image”:”https://rdr-it.com/wp-content/uploads/2020/05/iis-add-site-based-dns-en-02.png”},{“@type”:”HowToStep”,”url”:”#”,”name”:”On the Sites folder, right click and click on Add Website”,”text”:”In the navigation panel, unfold the server, in the Sites folder, right click and click on Add website.”,”image”:”https://rdr-it.com/wp-content/uploads/2020/05/iis-add-site-based-dns-en-03.png”},{“@type”:”HowToStep”,”url”:”#”,”name”:”Configure website settings.”,”text”:”Enter the name of the site, the physical path (folder created at the start), indicate the DNS name (site url) and click OK to create the site.”,”image”:”https://rdr-it.com/wp-content/uploads/2020/05/iis-add-site-based-dns-en-04.png”},{“@type”:”HowToStep”,”url”:”#”,”name”:”The site is created”,”text”:”The site is created, managed by the IIS console and accessible by its url on port 80 by default.”,”image”:”https://rdr-it.com/wp-content/uploads/2020/05/iis-add-site-based-dns-en-05.png”}]}
IIS: add a site based on the DNS name
This “How to” tutorial explains how to add a site to an IIS web server based on the DNS name.
In order for the site to be available, it is necessary to create a record on the DNS server which manages the domain name.


