In this tutorial, I will explain how to configure a tiering system in an Active Directory environment, more specifically how to configure group policies (GPOs).
This tutorial is not a complete guide to setting up tiering, but it does explain the basic GPOs you need to set up.
This tutorial is not a complete guide to setting up tiering, but it does explain the basic GPOs you need to set up.
Table of Contents
What is tiering?
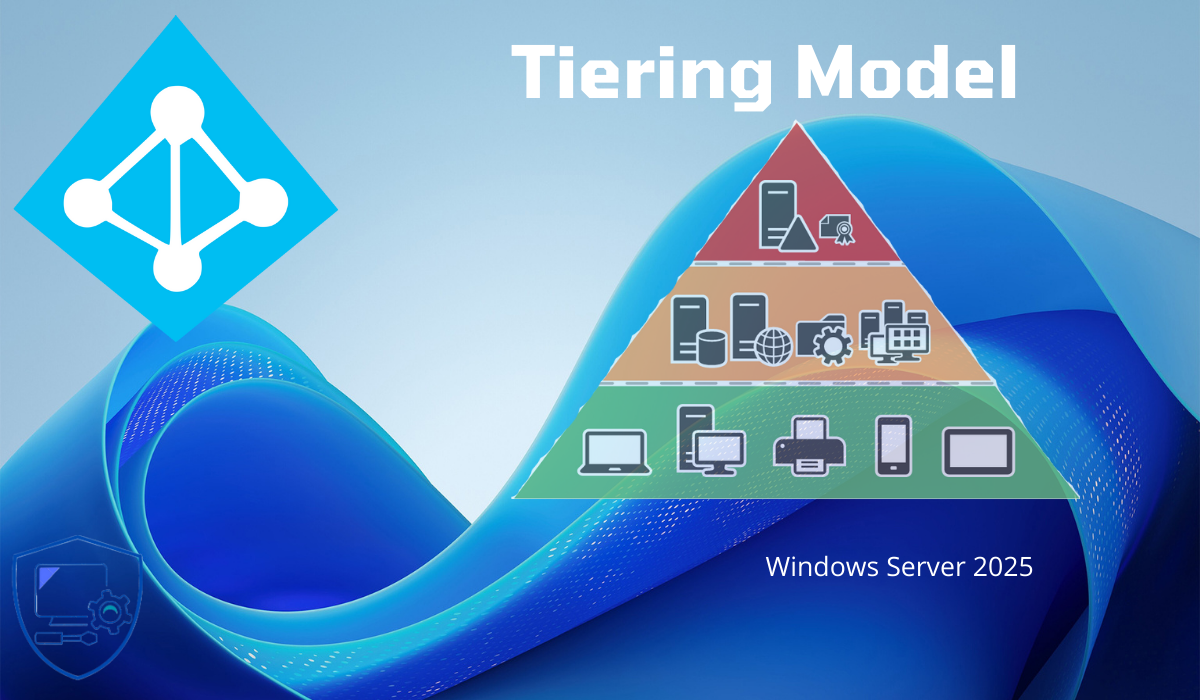
Before starting with the technical part, I will give you a little reminder about the 3-tier model also called tiering. In recent years, the number of cyberattacks has increased significantly and securing IT environments has become a major issue, particularly that of Active Directory environments. To harden AD environments, the 3-tier model (tiering) has become a reference.
The idea behind this model is to partition the Active Directory environment into 3 levels of sensitivity/trust.
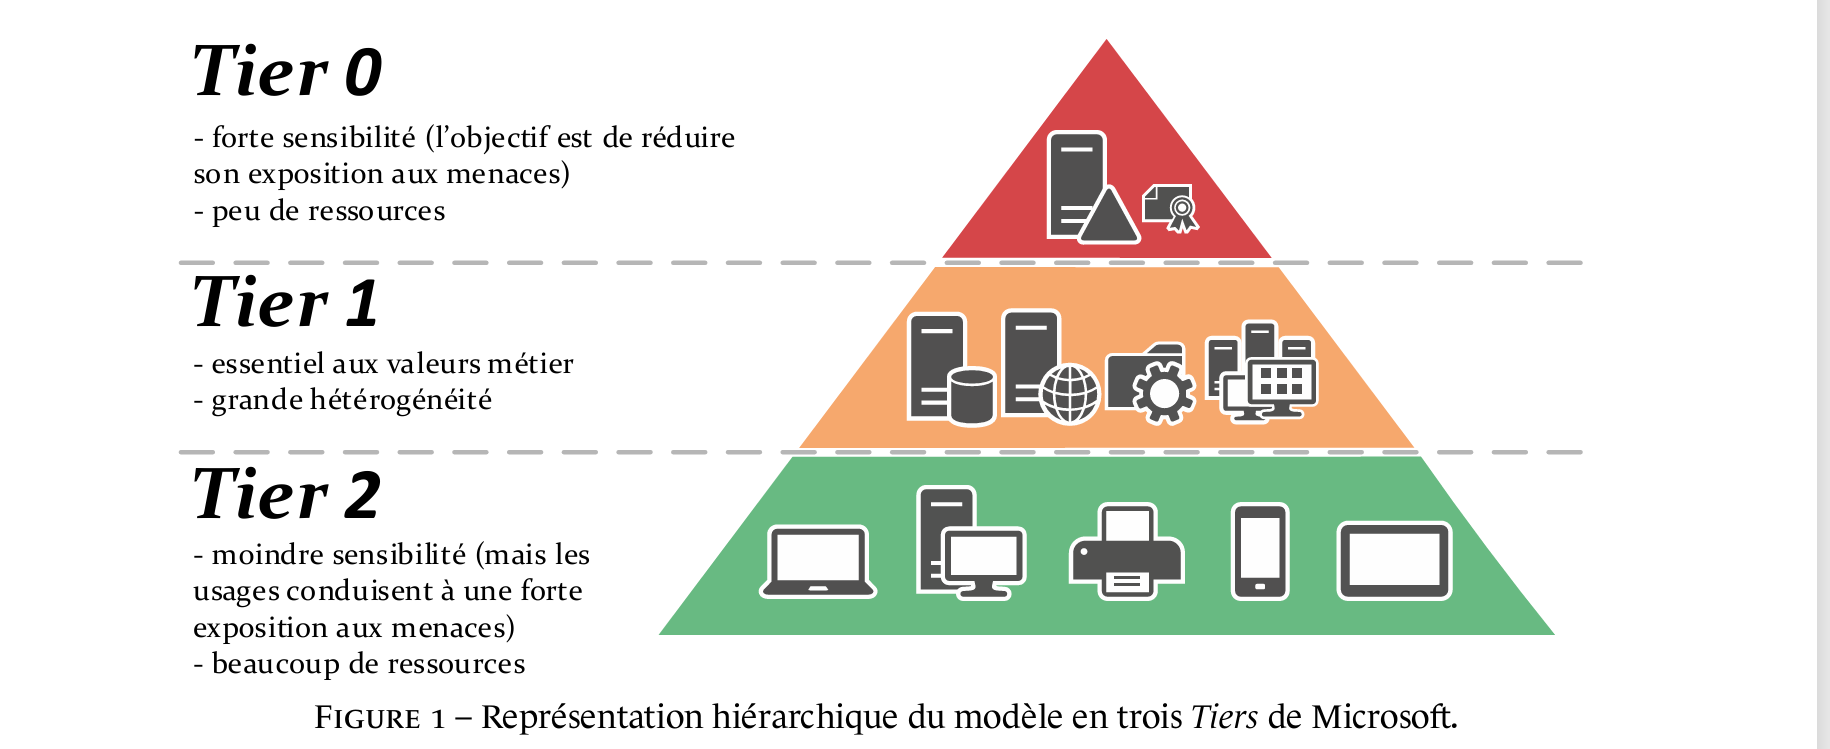
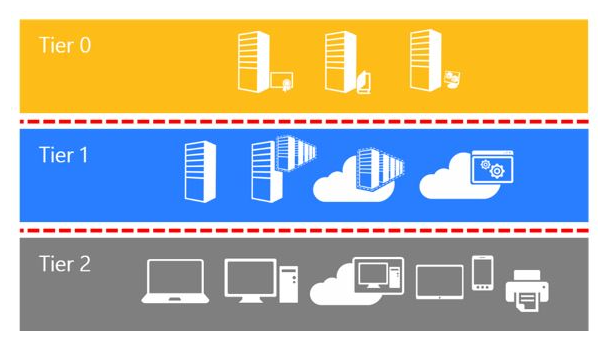
- Tier 0 : which is the most critical in which we will find the domain controllers, PKI
- Tier 1 : which is also critical, it will contain all the servers such as file servers, applications, databases …
- Tier 2 : will contain the rest of the equipment, such as computers, remote desktop server, telephones, printing …
Some illustrations:
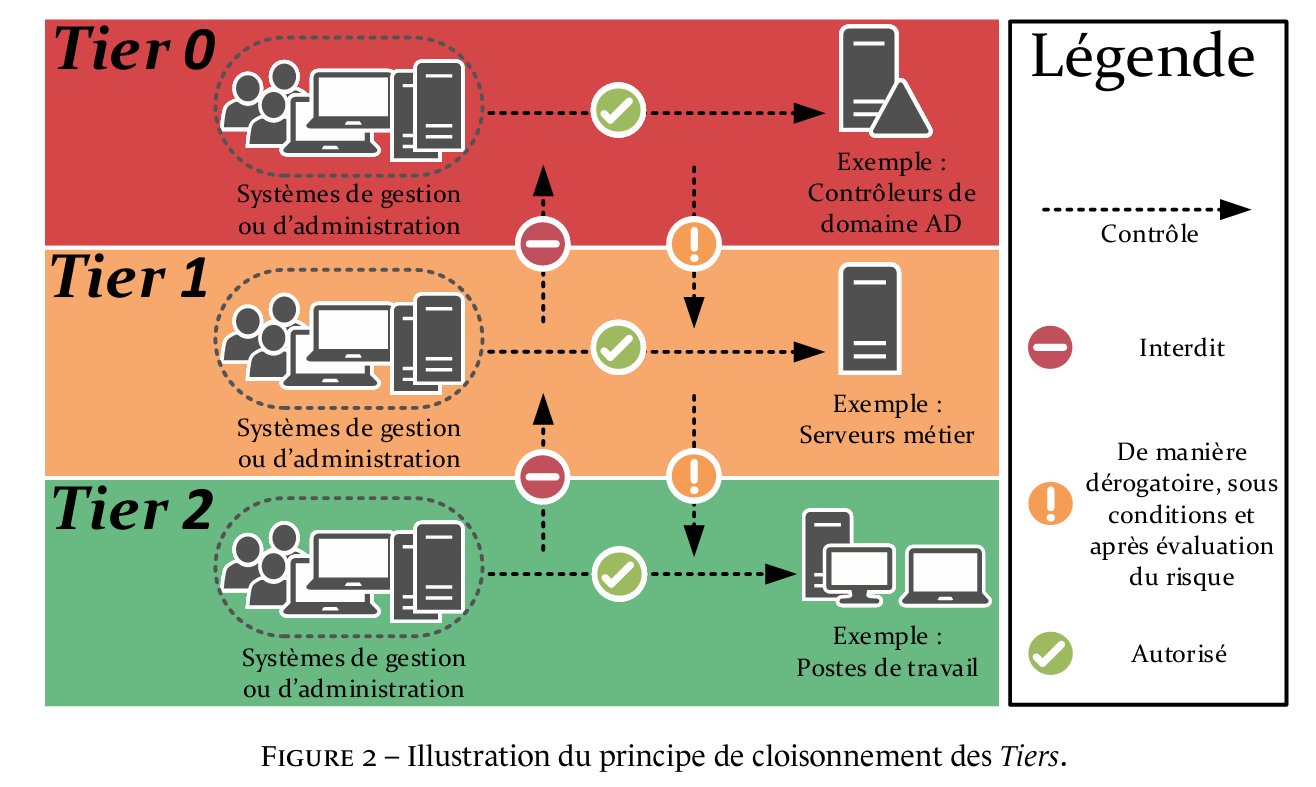
After identifying the elements that will be in each tier, it is also necessary to manage access and flows. It is from this moment that the implementation of tiering becomes more complex, because the accounts used in each tier level must not be used in another tier, except, in a derogatory manner from a tier of a higher level to a lower tier. It is also necessary to provide administration machines for each tier; we will not administer tier 0 from a machine that is in tier 2.
Here is an infographic of the possible flows:
Setting up administration systems involves the use of several bastions, PAWs (Privileged Access Workstations).
Finally, it is also advisable to implement protection mechanisms such as MFA, the use of Restricted Admin mode for RDP connections, the use of the Protected Users group, etc.
As you will have understood, the tiering model is complex to implement and like all complex solutions, it is advisable to proceed in stages.
What will we see in this tutorial?
As you can imagine, in this tutorial, we cannot see the entire implementation of a 3-tier solution, because it will be specific to each environment, I will simply show you group strategies that will allow you to set up the partitioning between tier 0 and tier 1.
Active Directory Organization
Before starting to create group policies, it is advisable to set up an organization in the Active Directory, which will facilitate the implementation of tiering.
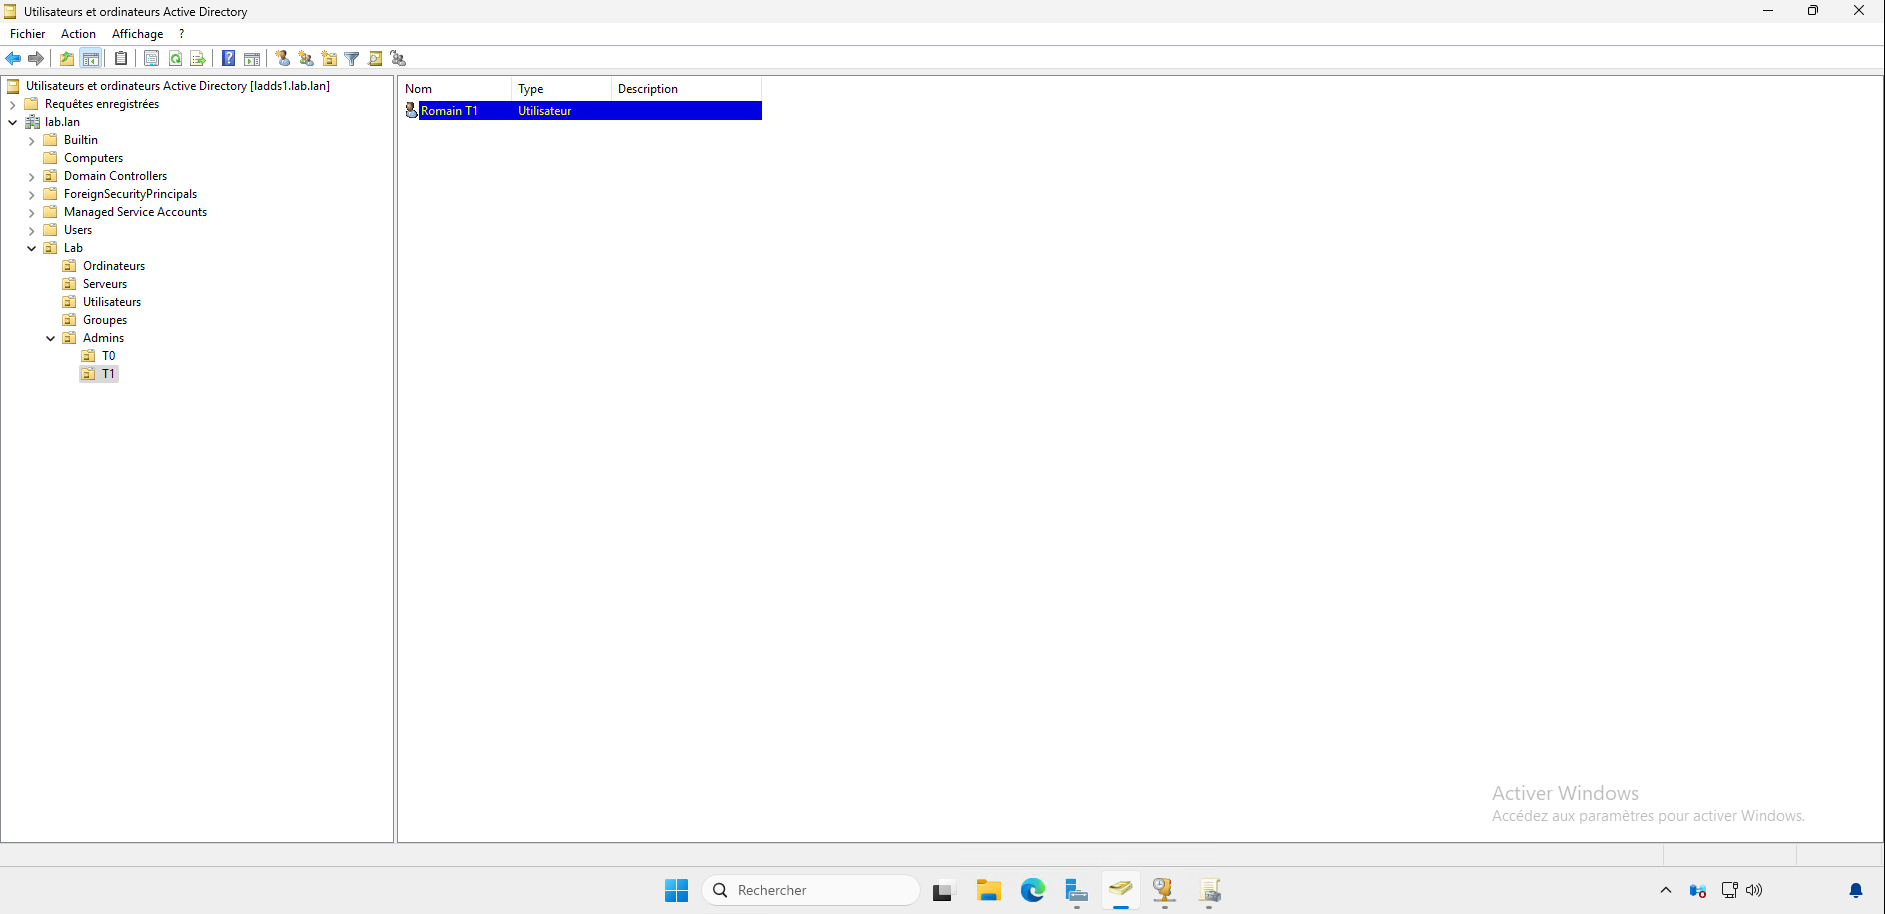
I started by creating an Admins OU with sub-OUs T0 and T1 which will contain the administrator accounts, as you can see in the screenshot, I created a romain.t1 account, which will be used to administer the servers in Tier 1, at this stage, the user is only a member of the Domain Users group.
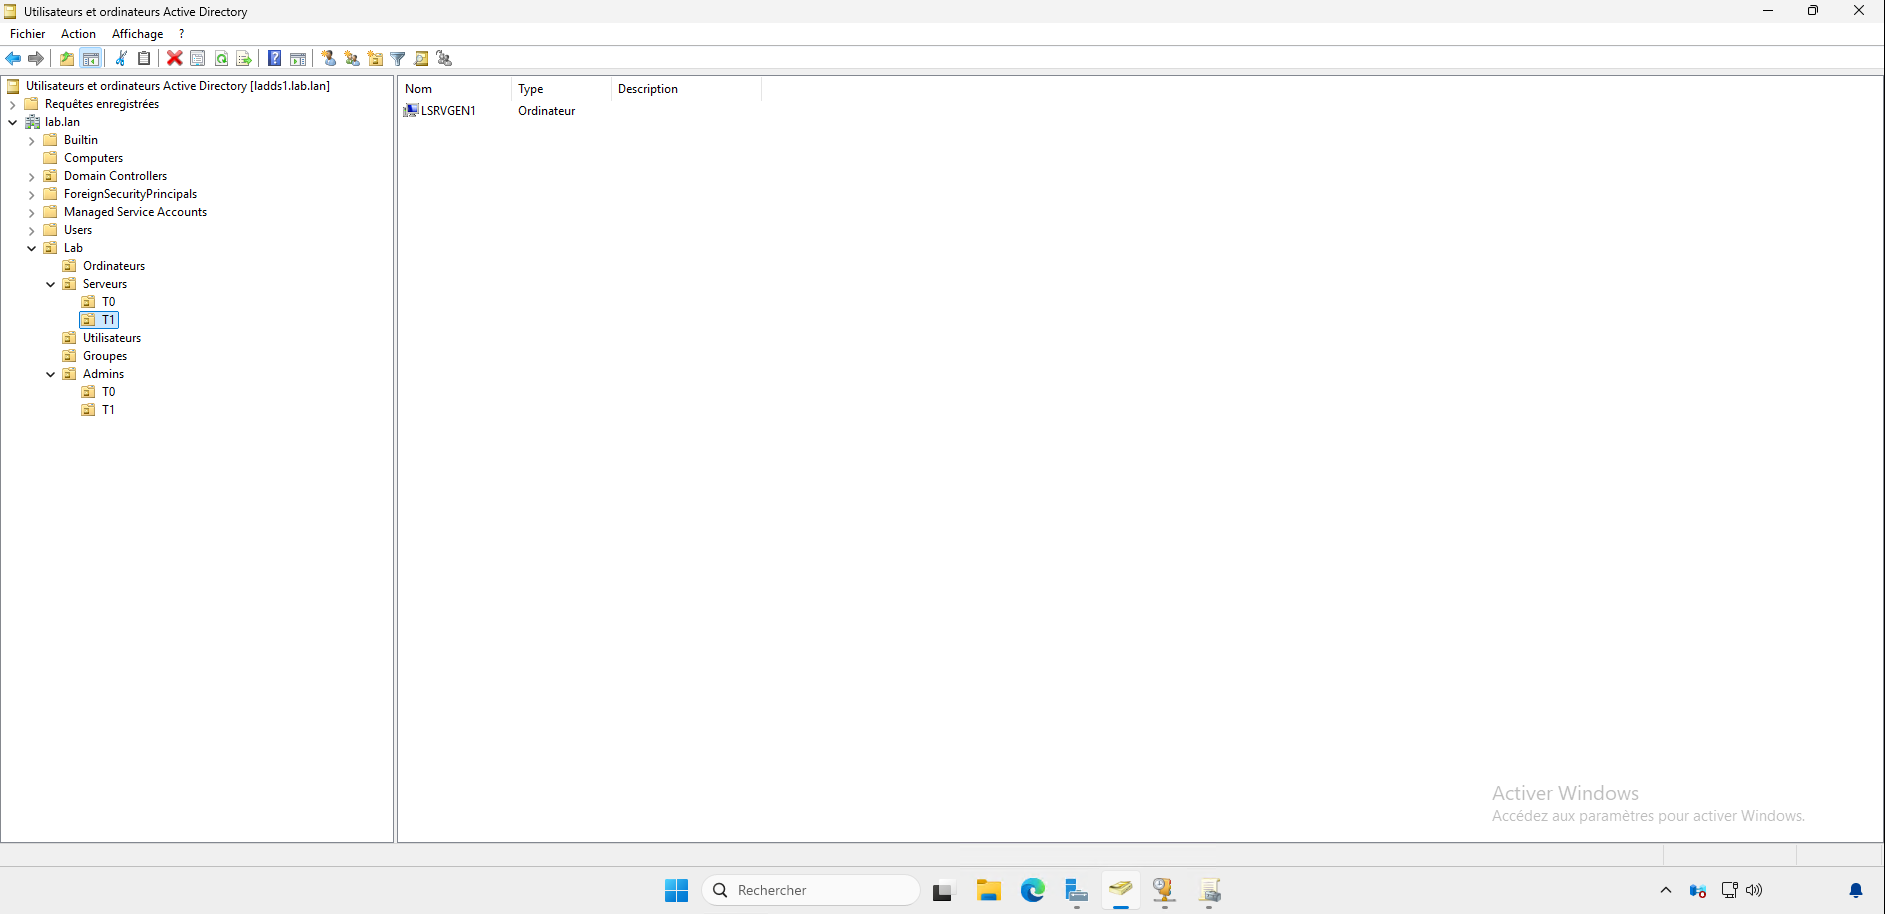
I then created a Servers OU with sub-OUs T0 and T1 which will contain the servers according to their Tier, as we can see, the LSRVGEN1 server is in the T1 OU.
On ne déplace pas les contrôleurs de domaine dans l’OU T0, ils doivent rester dans l’OU Domain Controllers, dans l’OU T0, on placera les serveurs PKI par exemple.
To organize the different groups, which will allow the management of Administrator rights on the servers, I also created sub-T0 and T1 in an OU a Third Party which is itself in an OU group. Also on the capture, we can see that there is a group named GL-T1-ADM_LSRVGEN1, this group will allow to define the administrators for the LSRVGEN1 server. Once the group created, I added the user romain.t1 in the group.

We will see the group naming convention later.
GPO 1: Automate T1 Administrators
To begin, we will create a group policy, which will allow us to automatically put an Active Directory group in the local Administrators group of the server in OU T1.
To “automate” this process, you must first place all Tier 1 servers in the correct OU. Once this is done, you must choose a naming scheme for the group that will be added to the local Administrator group of the different servers.
For my part I chose GL-T1-ADM_ServerName, which can be translated as GL-T1-ADM_%ComputerName%, the use of the Windows environment variable %ComputerName% will allow this “automation”.
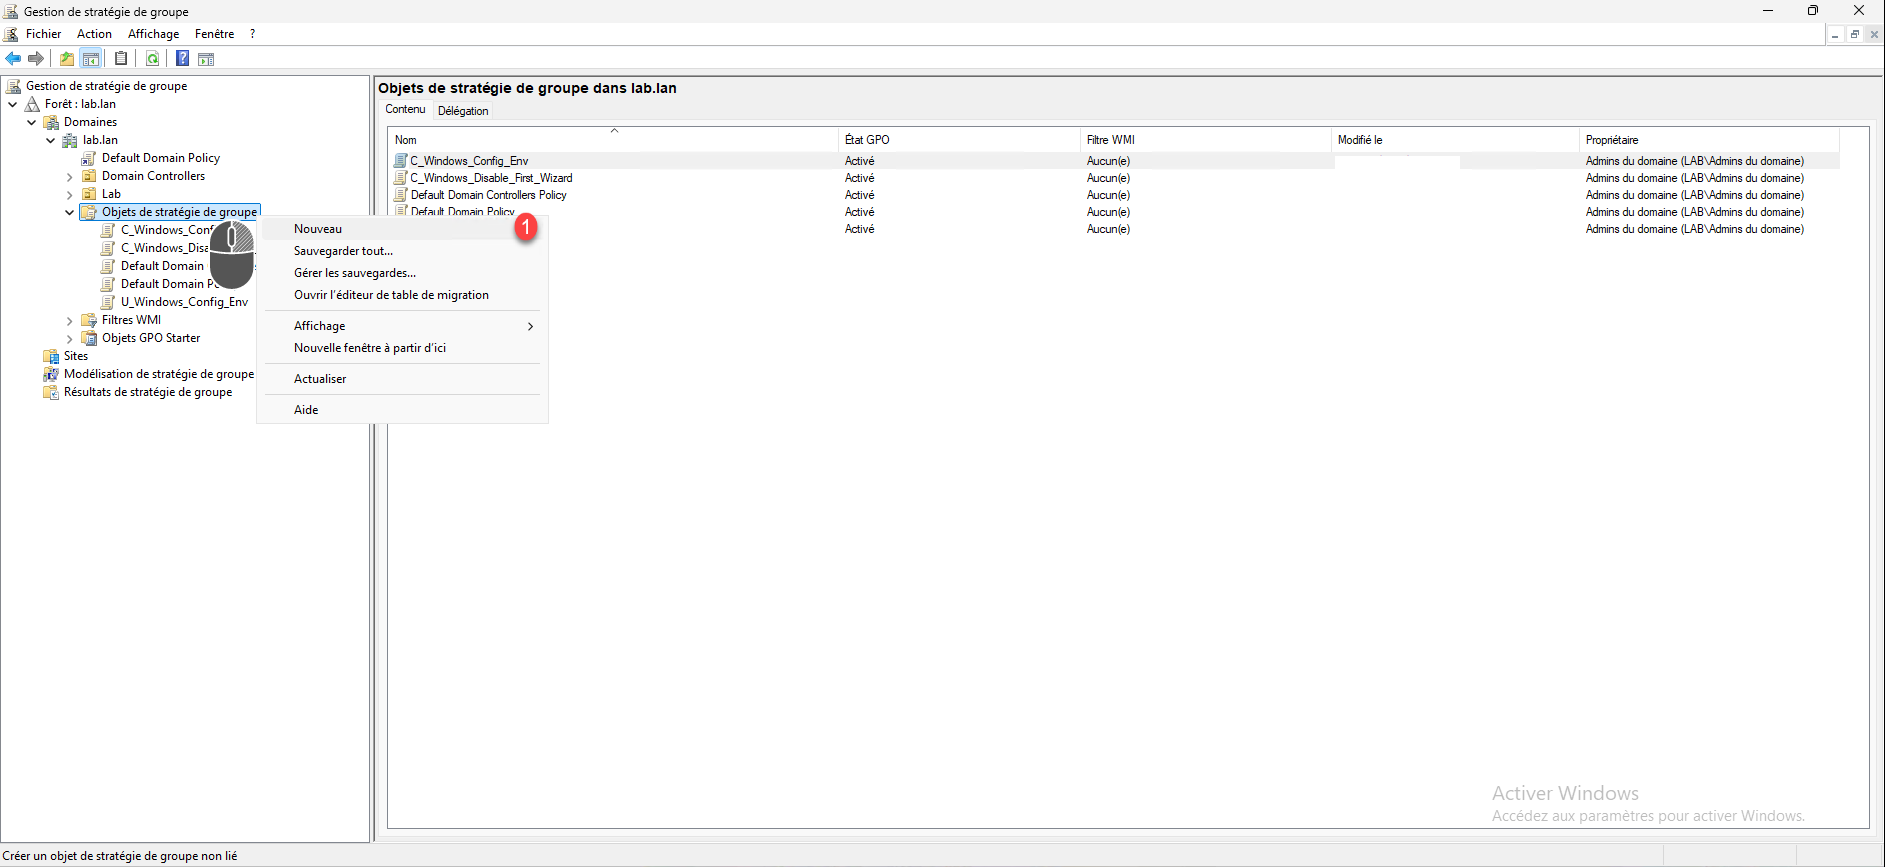
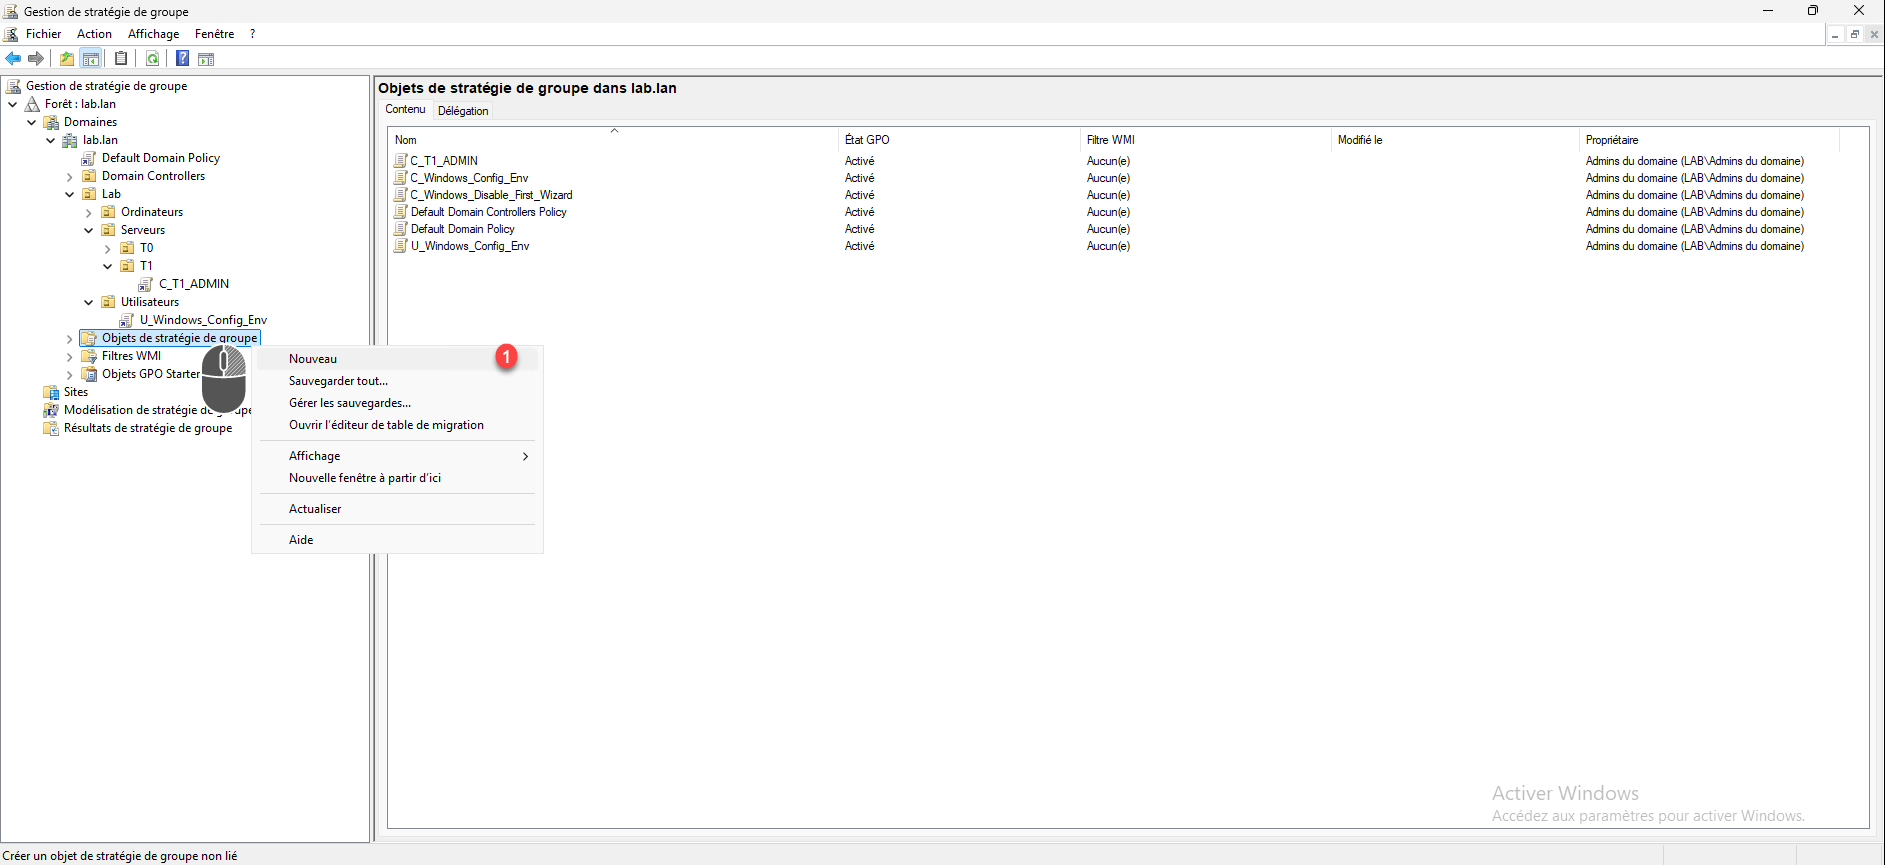
From a domain controller in the Group Policy Management console, right-click Group Policy Object and then click New 1.
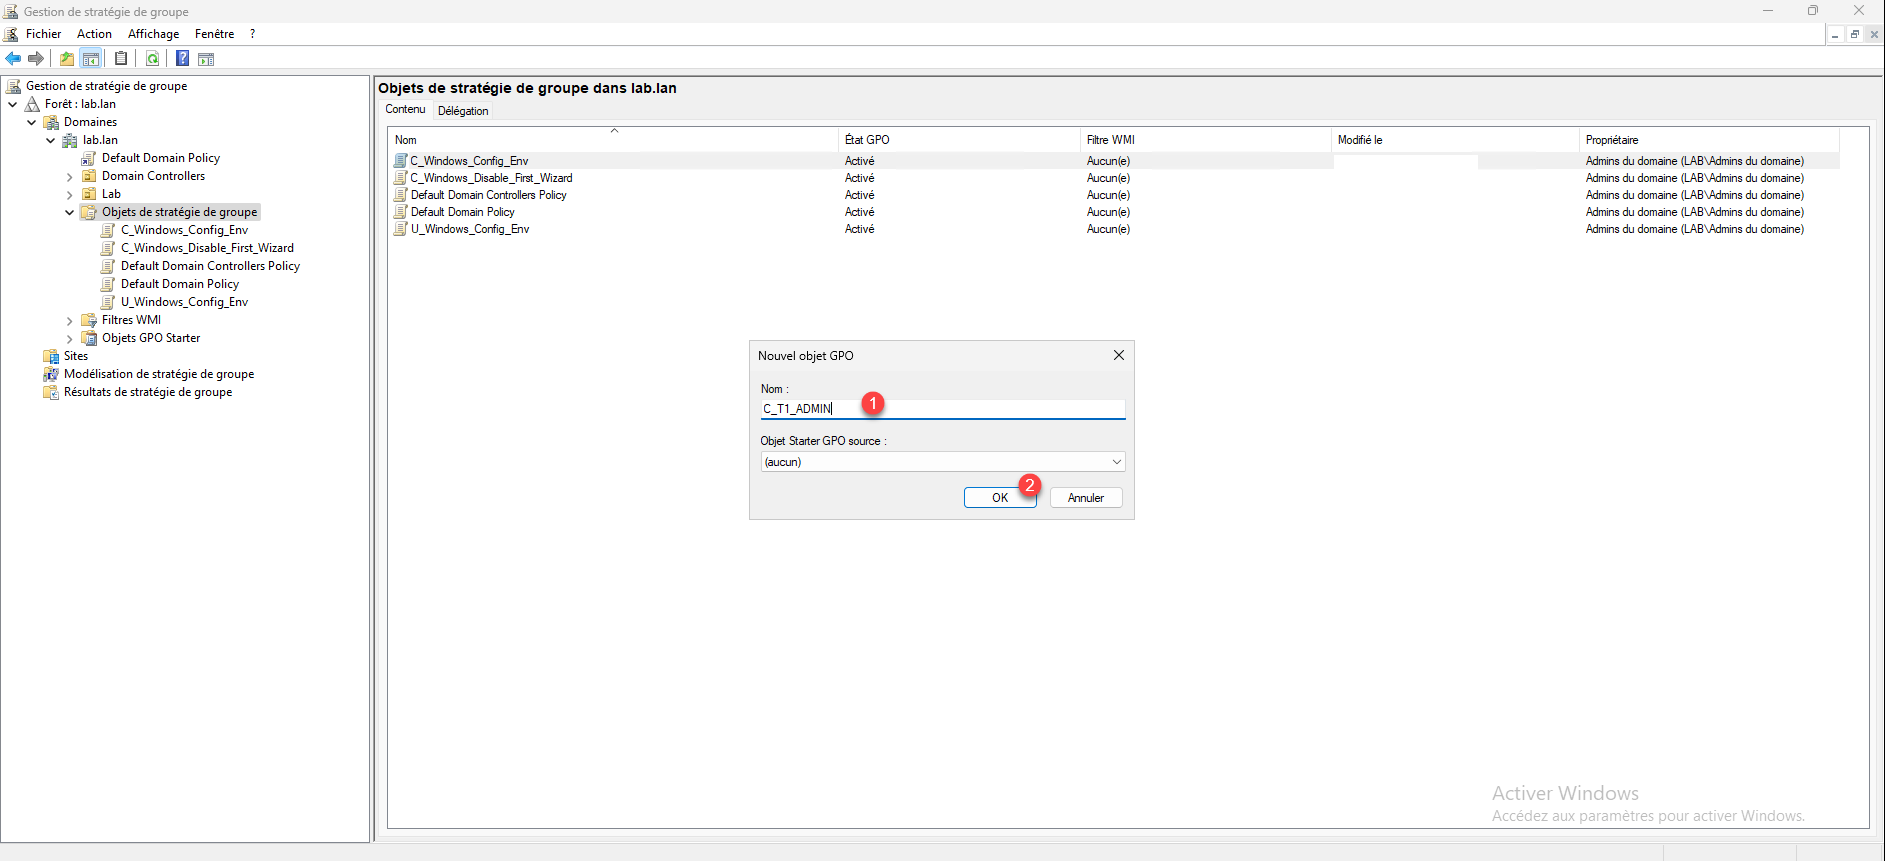
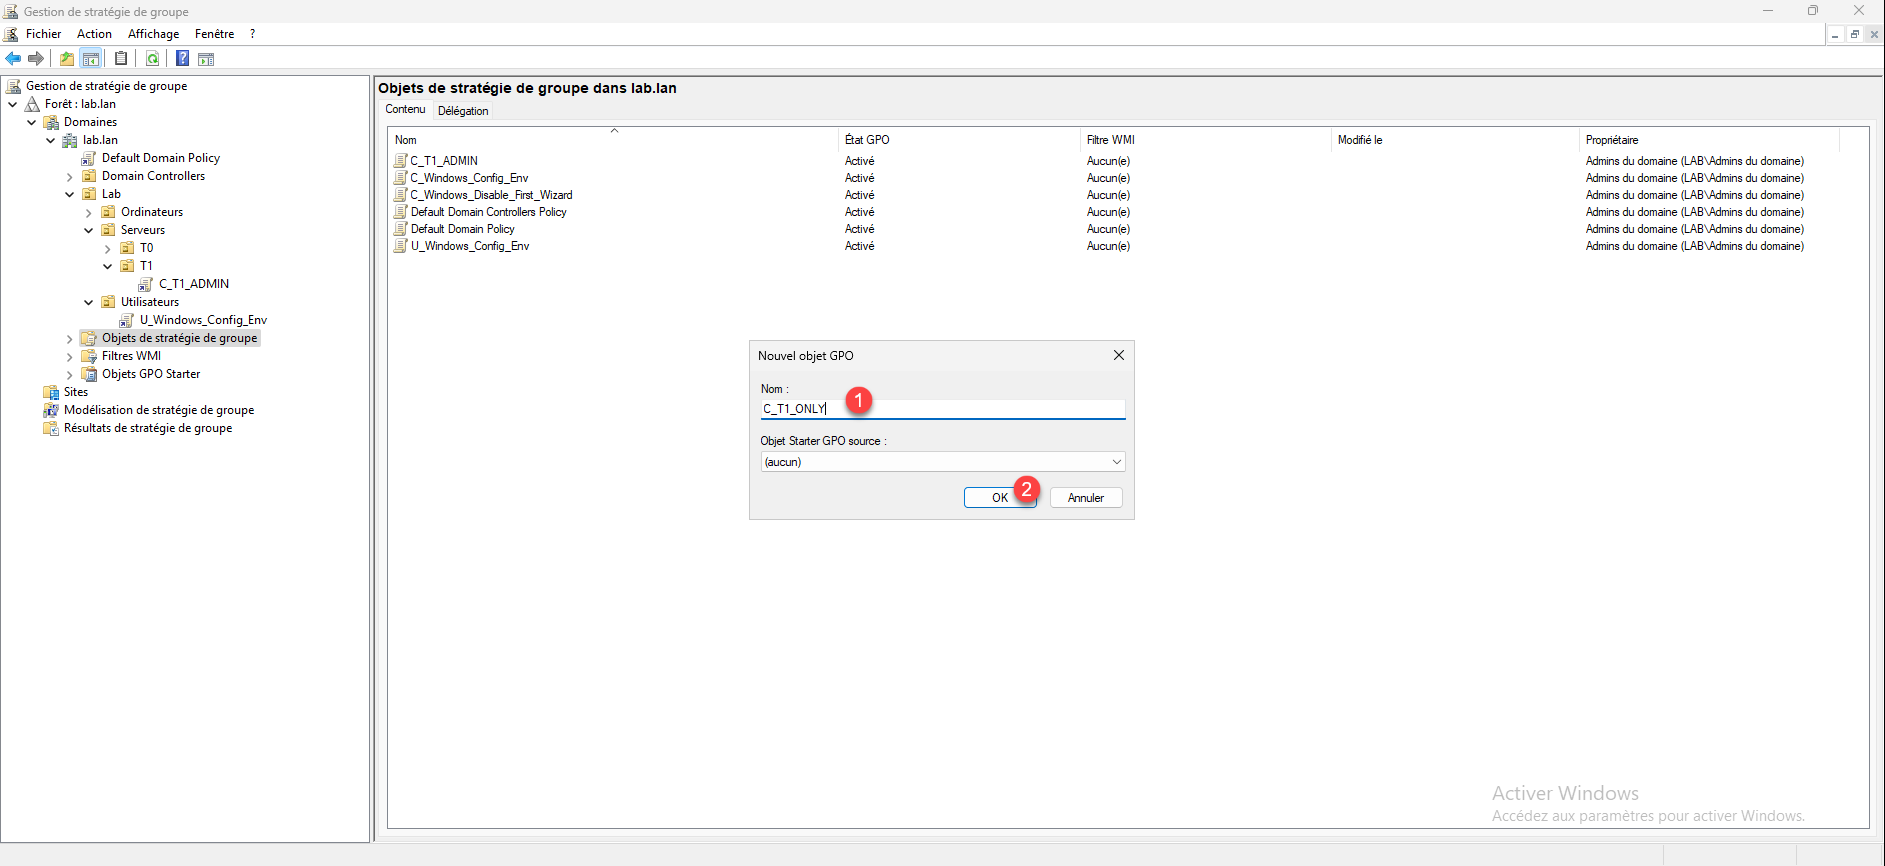
Name the Group Policy Object 1 and click the OK button 2.
In the list, right-click on the GPO you just created and click on Edit 1.
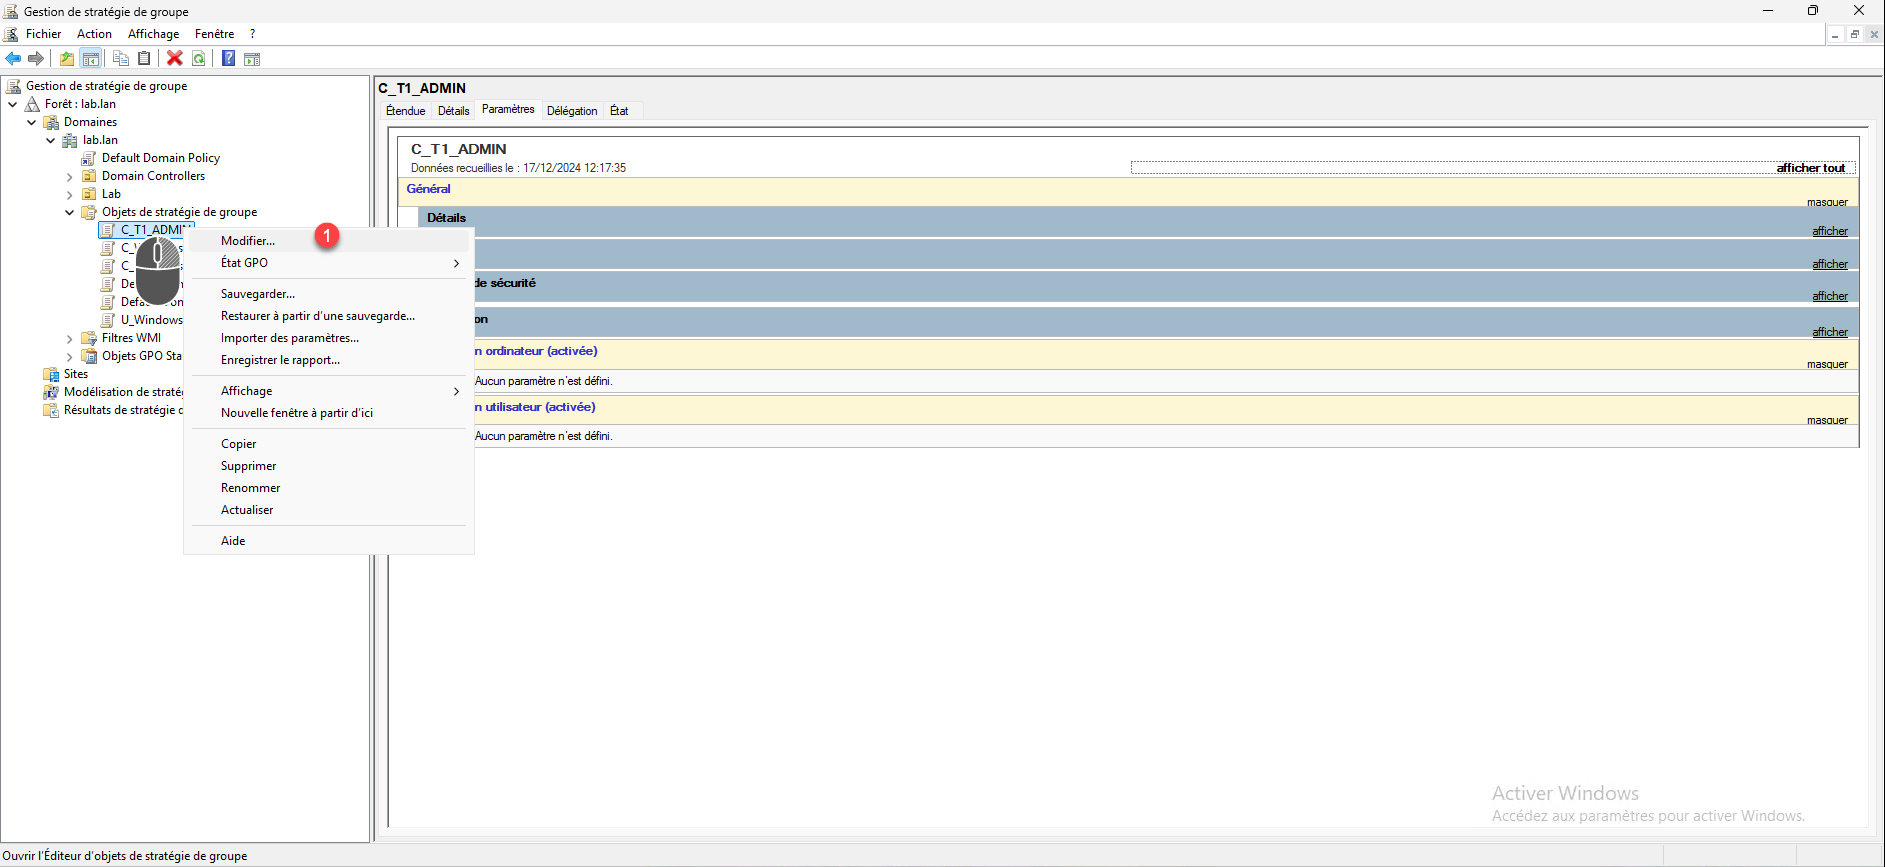
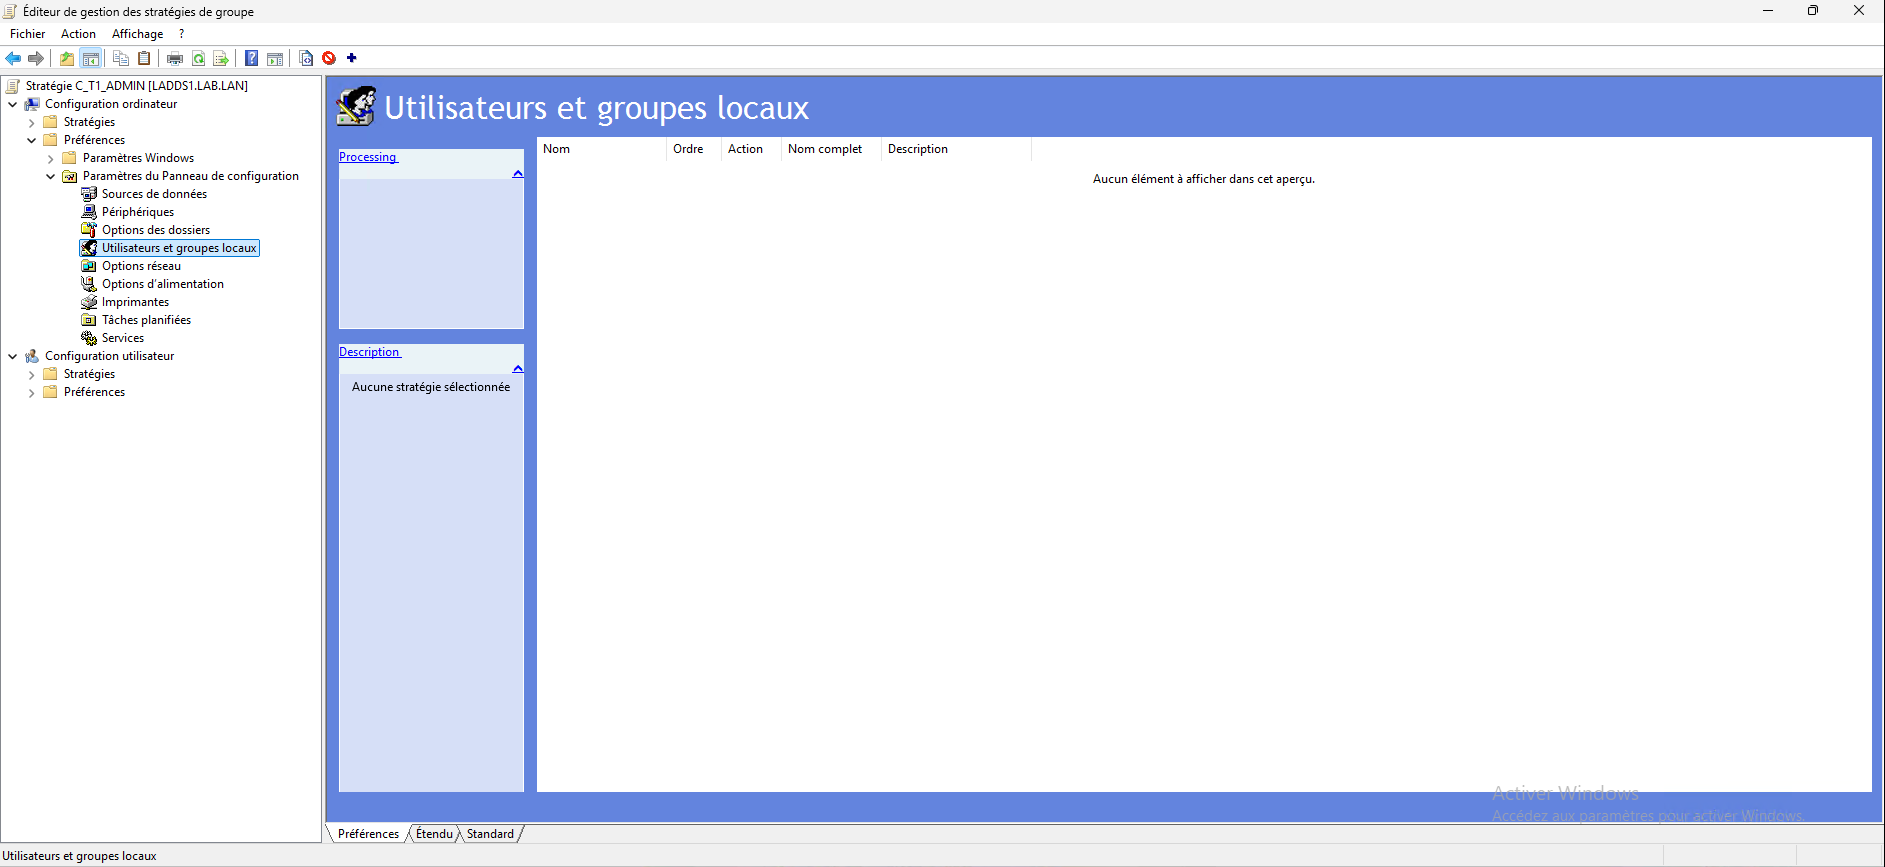
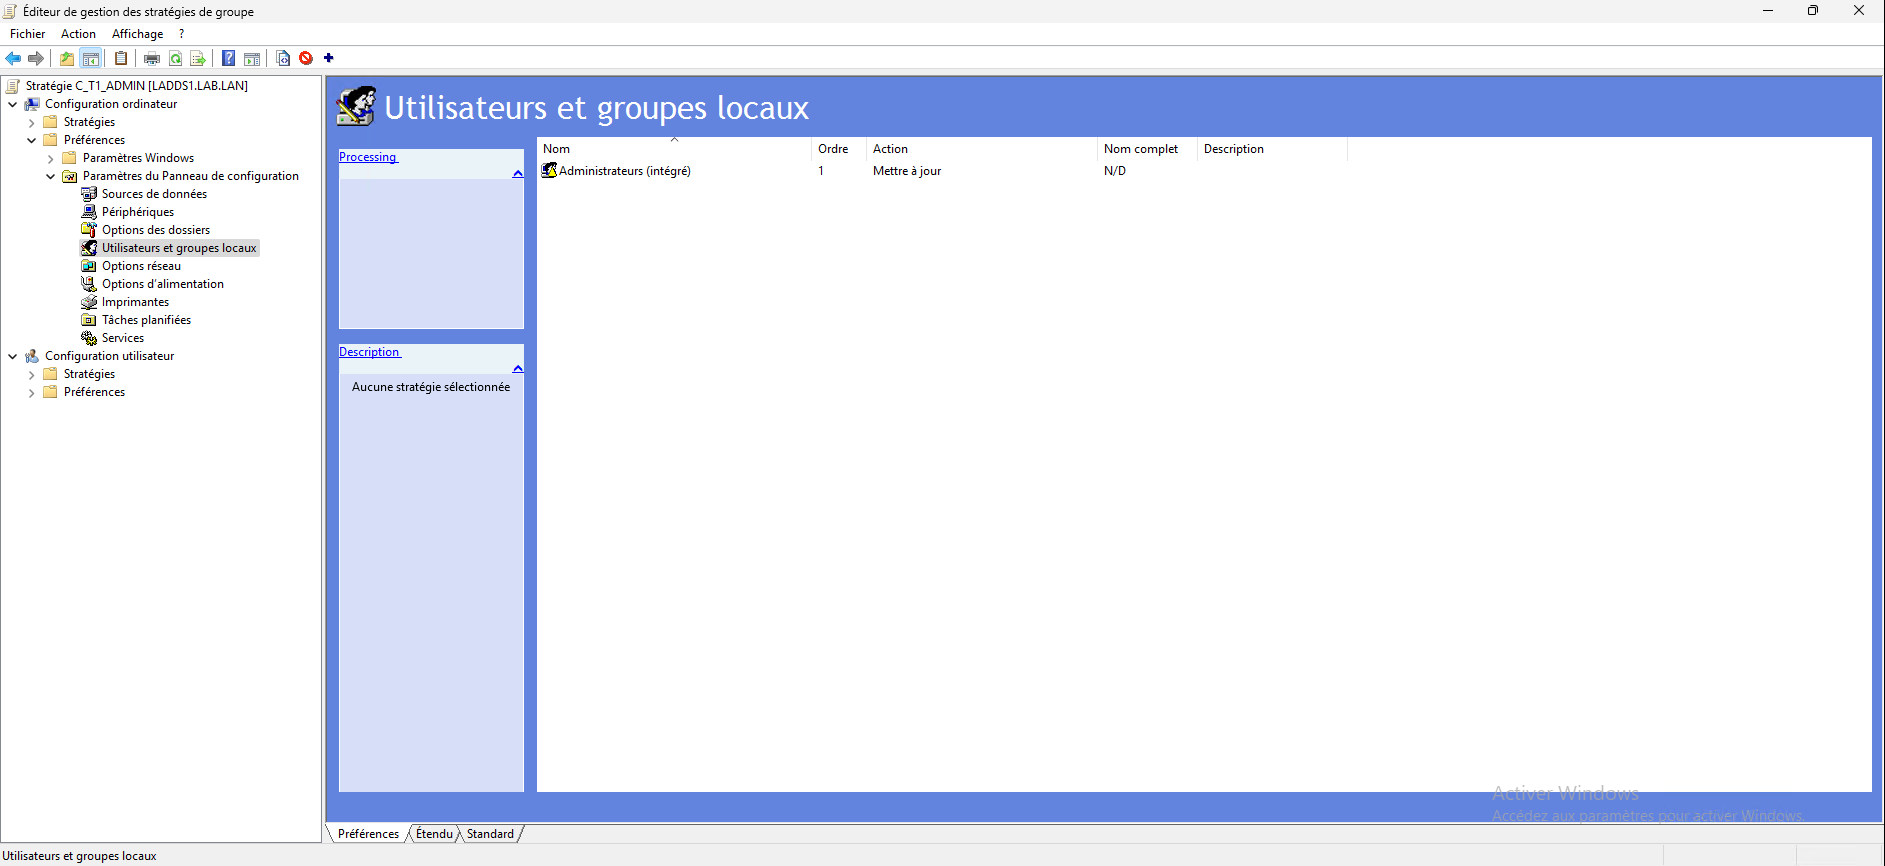
Go to the following location: Computer Configuration / Preferences / Control Panel Settings / Local Users and Groups.
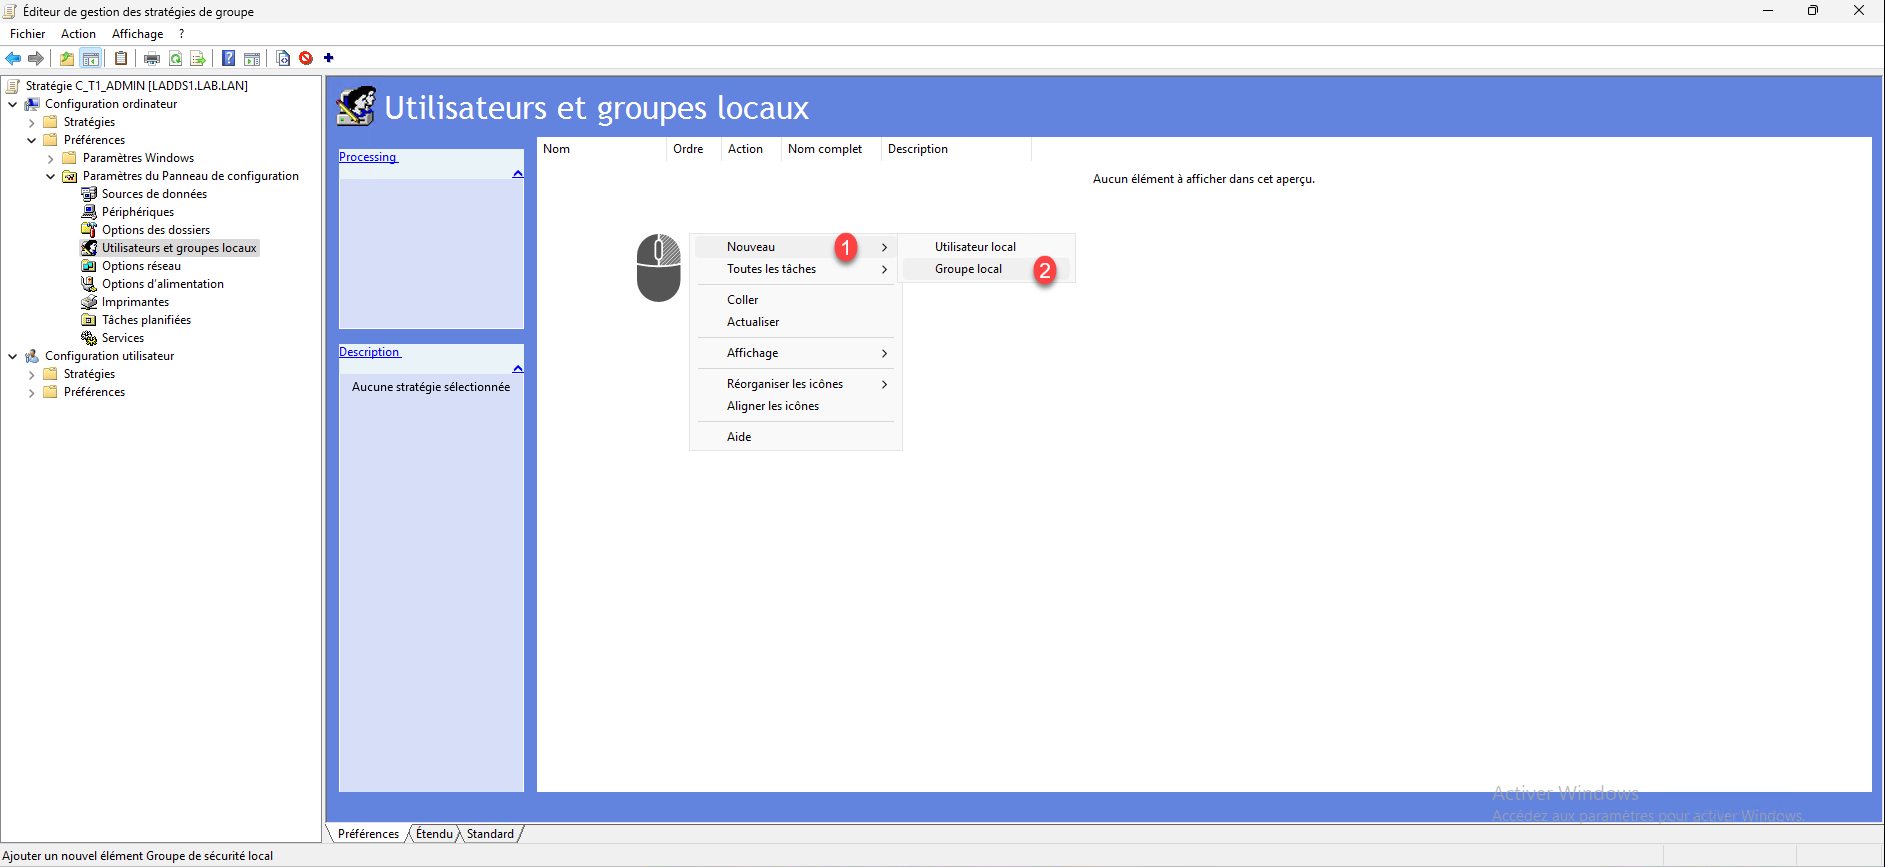
In the central area, right-click then go to New 1 and click on Local Group 2.
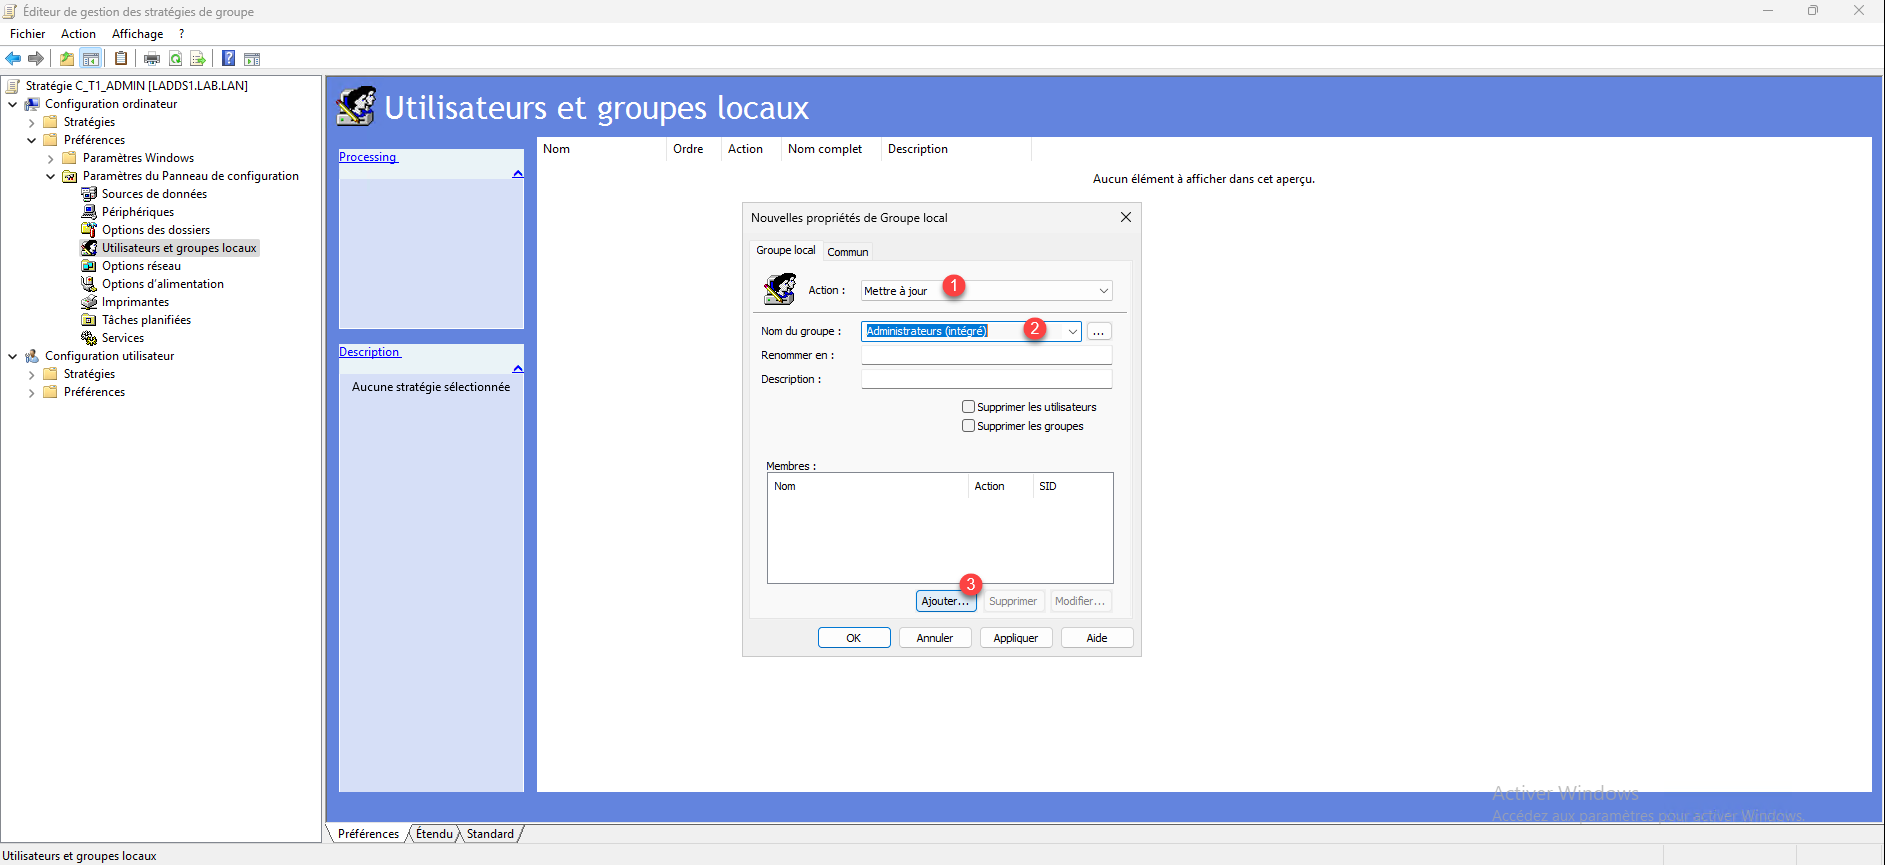
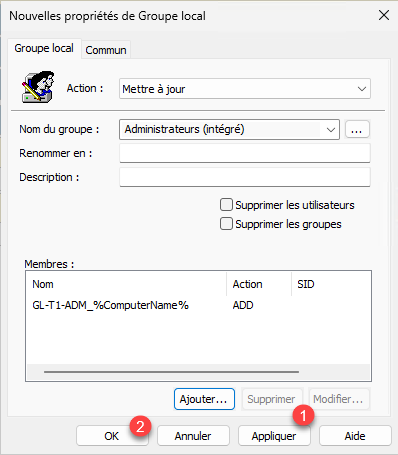
Action, choose Update 1, Group Name, select Administrator (built-in) 2 then click the Add button 3.
In the name, enter the nomenclature 1 which will be used for group management, for me: GL-T1-ADM_%ComputerName%, action choose Add to this group 2 then click on OK 3.

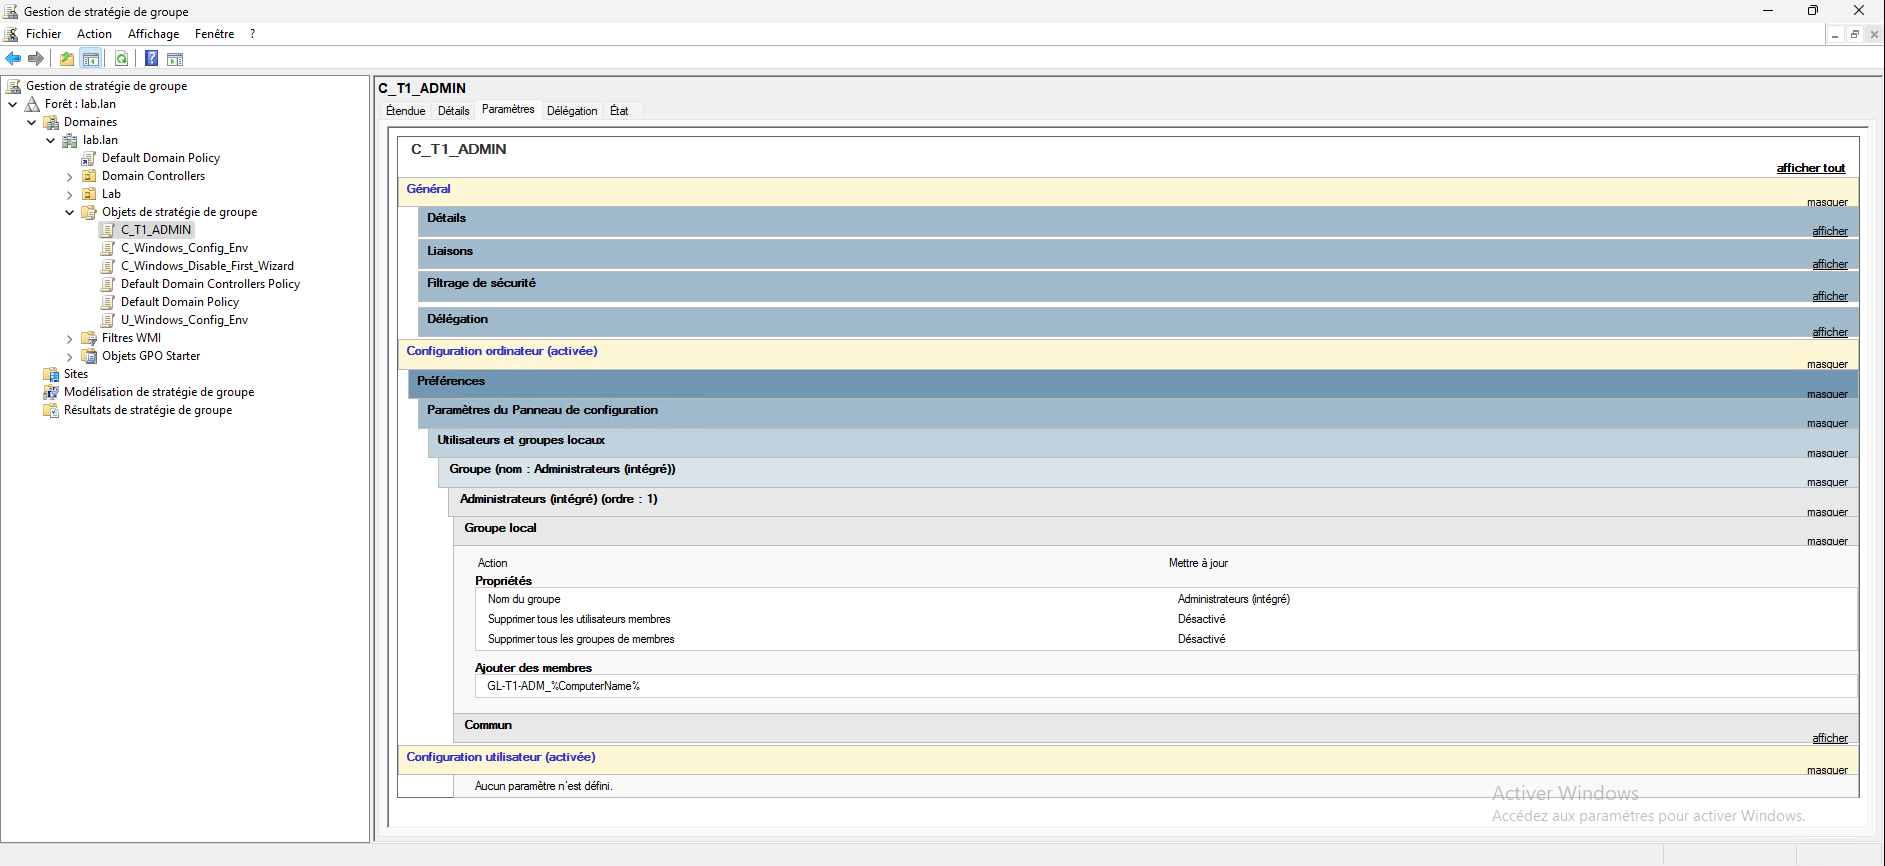
The group is added, click on the Apply 1 and OK 2 buttons.
Our group policy is ready, you can close the editor.
Now we will link our Group Policy to the OU, right click on OU T1 and click Link an existing Group Policy Object 1.

Select the Group Policy object 1 that you just configured and click OK 2.
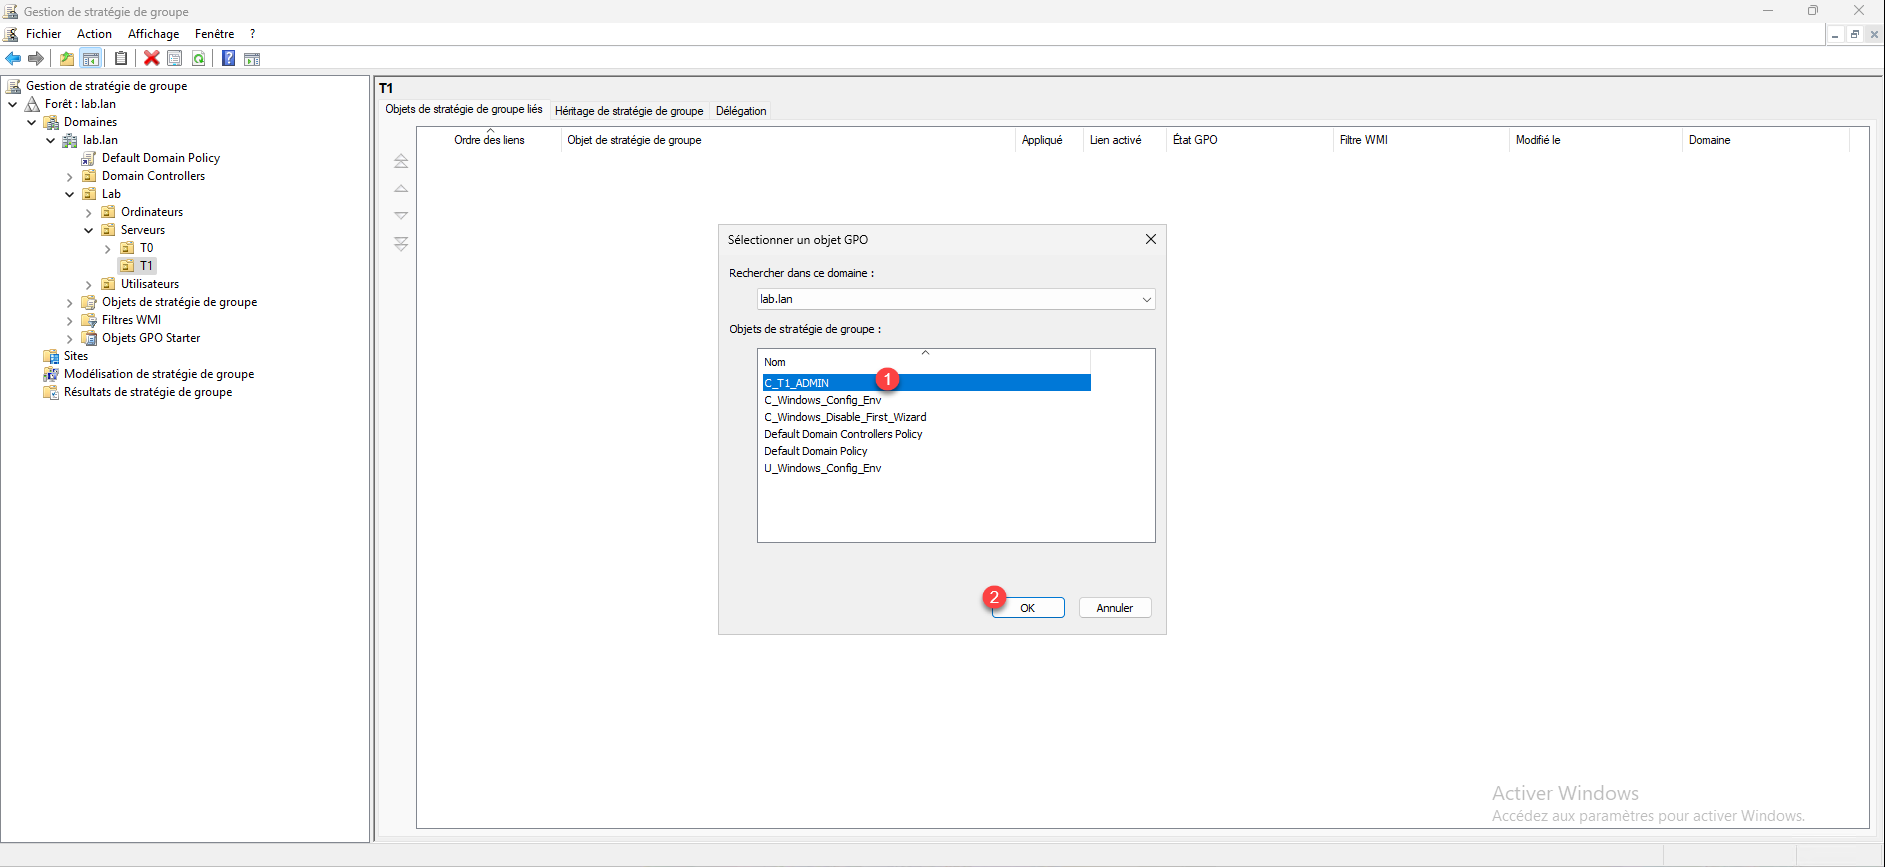
The GPO is linked to the OU and will be applied to the server.
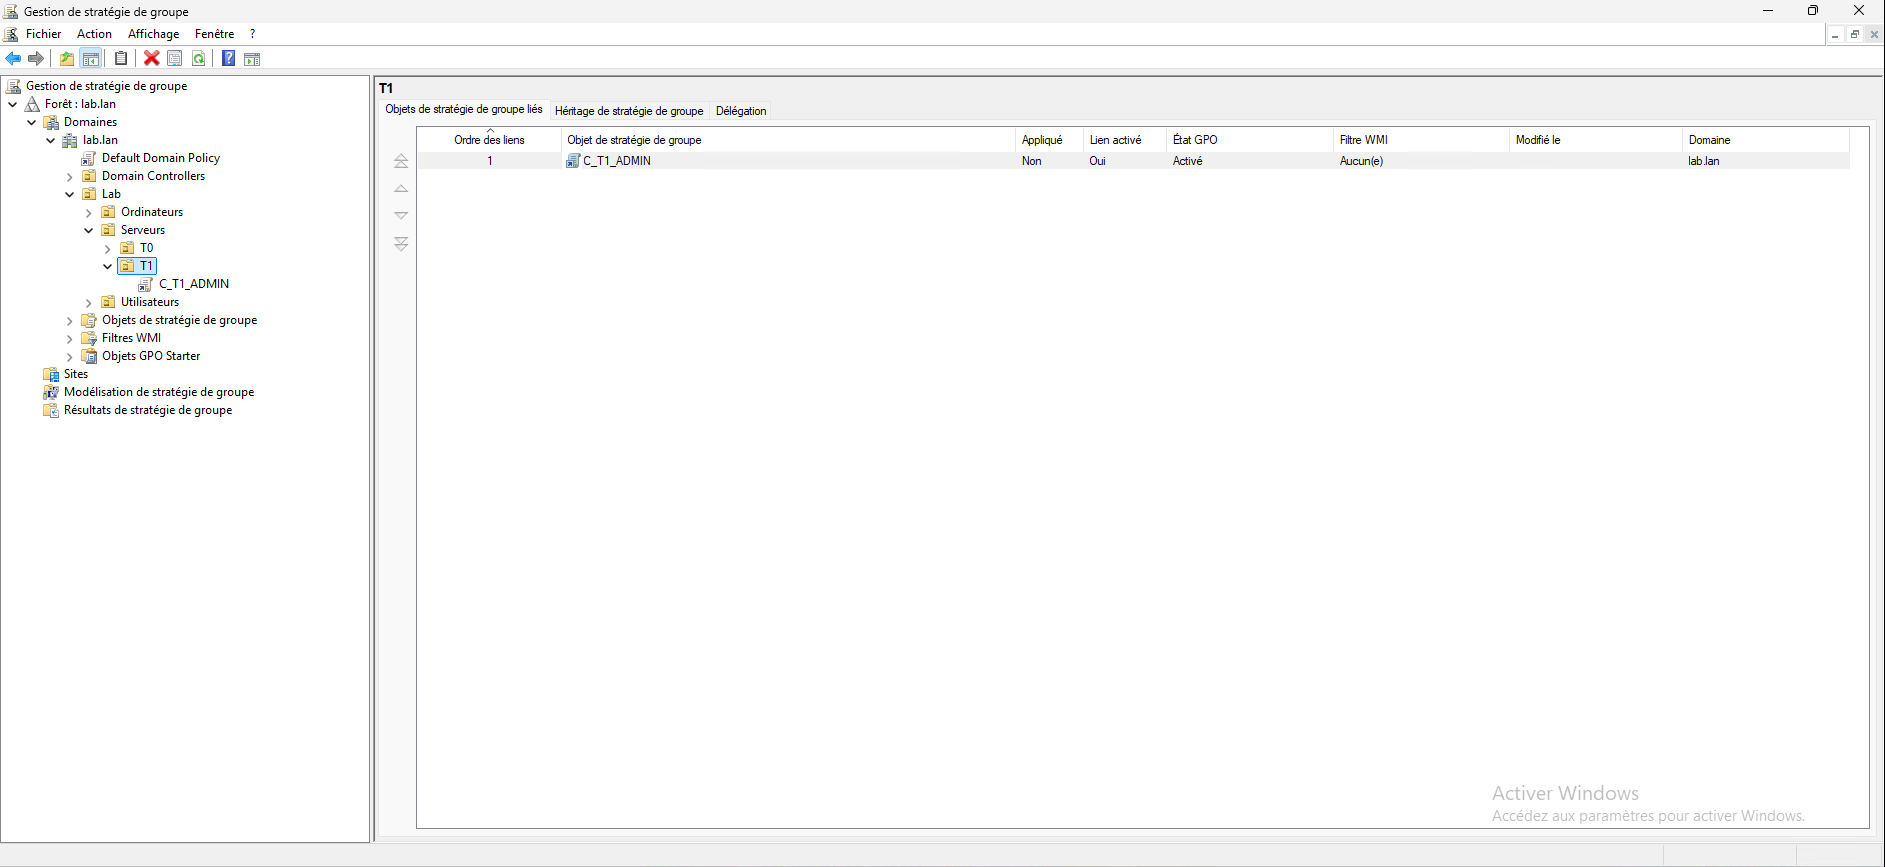
After restarting my LSRVGEN1 server for a “quick” application of the GPO, I will log in with my T1 account.
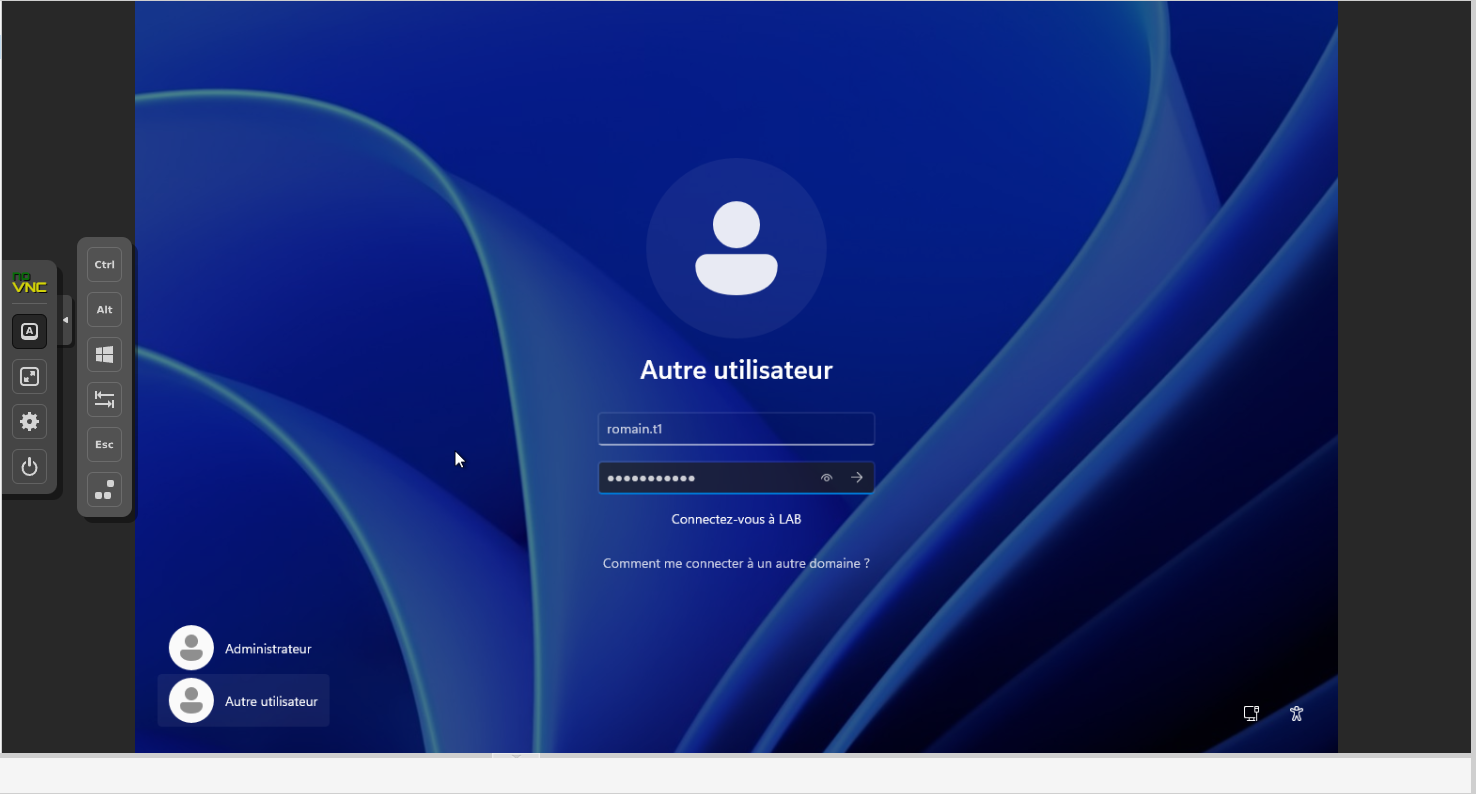
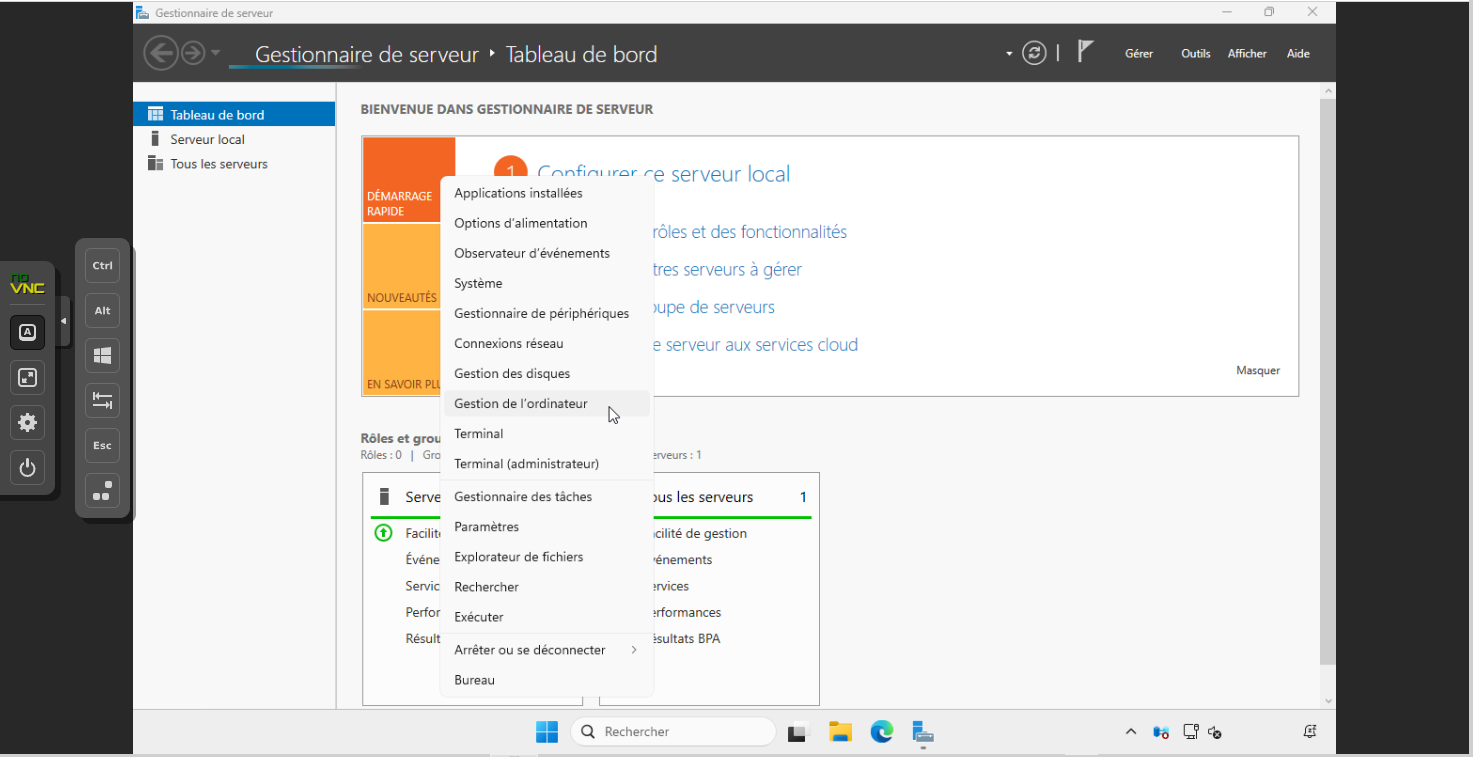
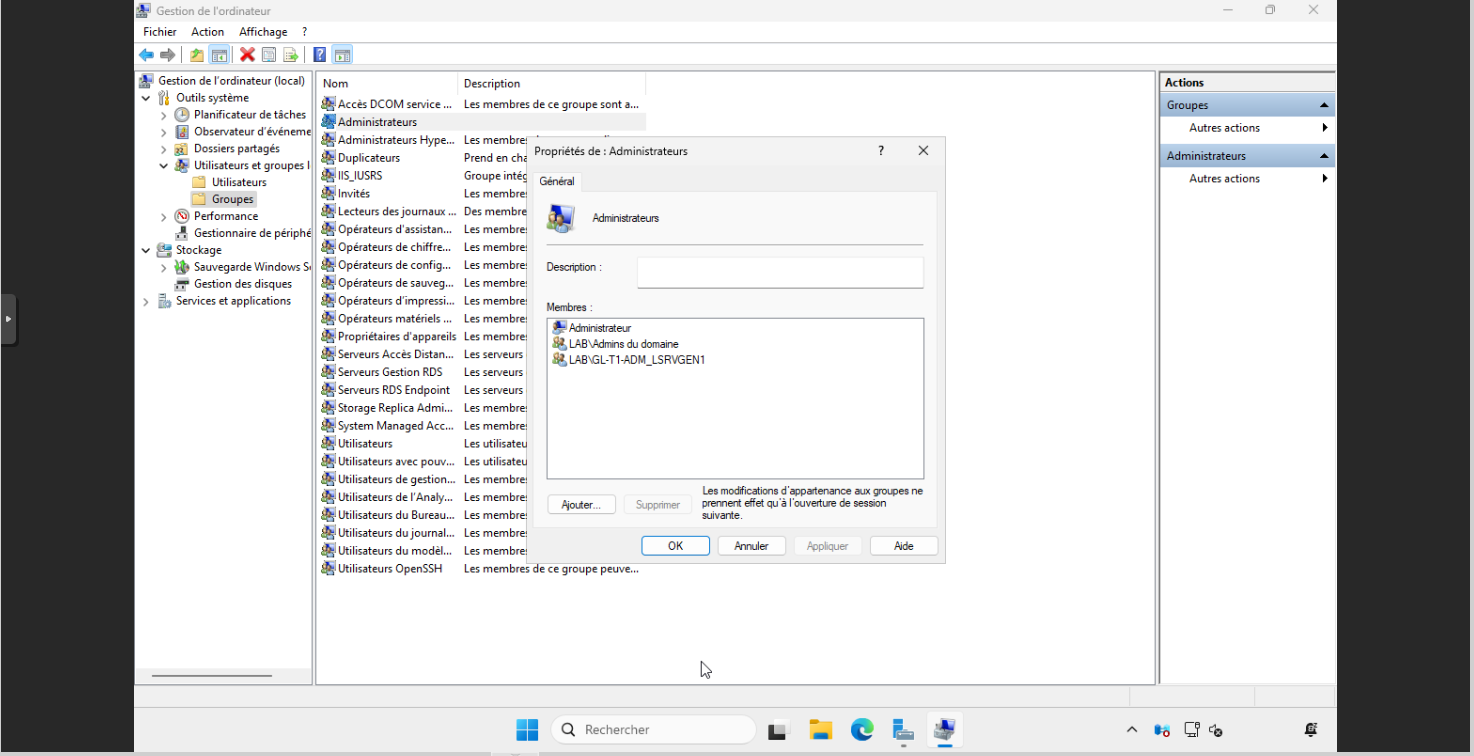
No worries, I was able to open my session on it and I will go and check in the computer management on my GPO is correctly applied, if it was not I would not have been able to open my session on it.
As you can see, the group has been added to the computer’s local Administrators group.
With this first GPO, we saw how to manage T1 administrators for their data rights on the server, however, at this stage, members of the groups, Domain Admins can connect to the server.
GPO 2: Allow only T1 administrators to connect to Tier 1
The second part of this tutorial will be to block the connection of Tier 0 accounts, which will generally be members of the Domain Admins group.
Still in the Group Policy Management console, right-click on Group Policy Objects and click on New 1.
Name the GPO 1 and click OK 2 to create the object.
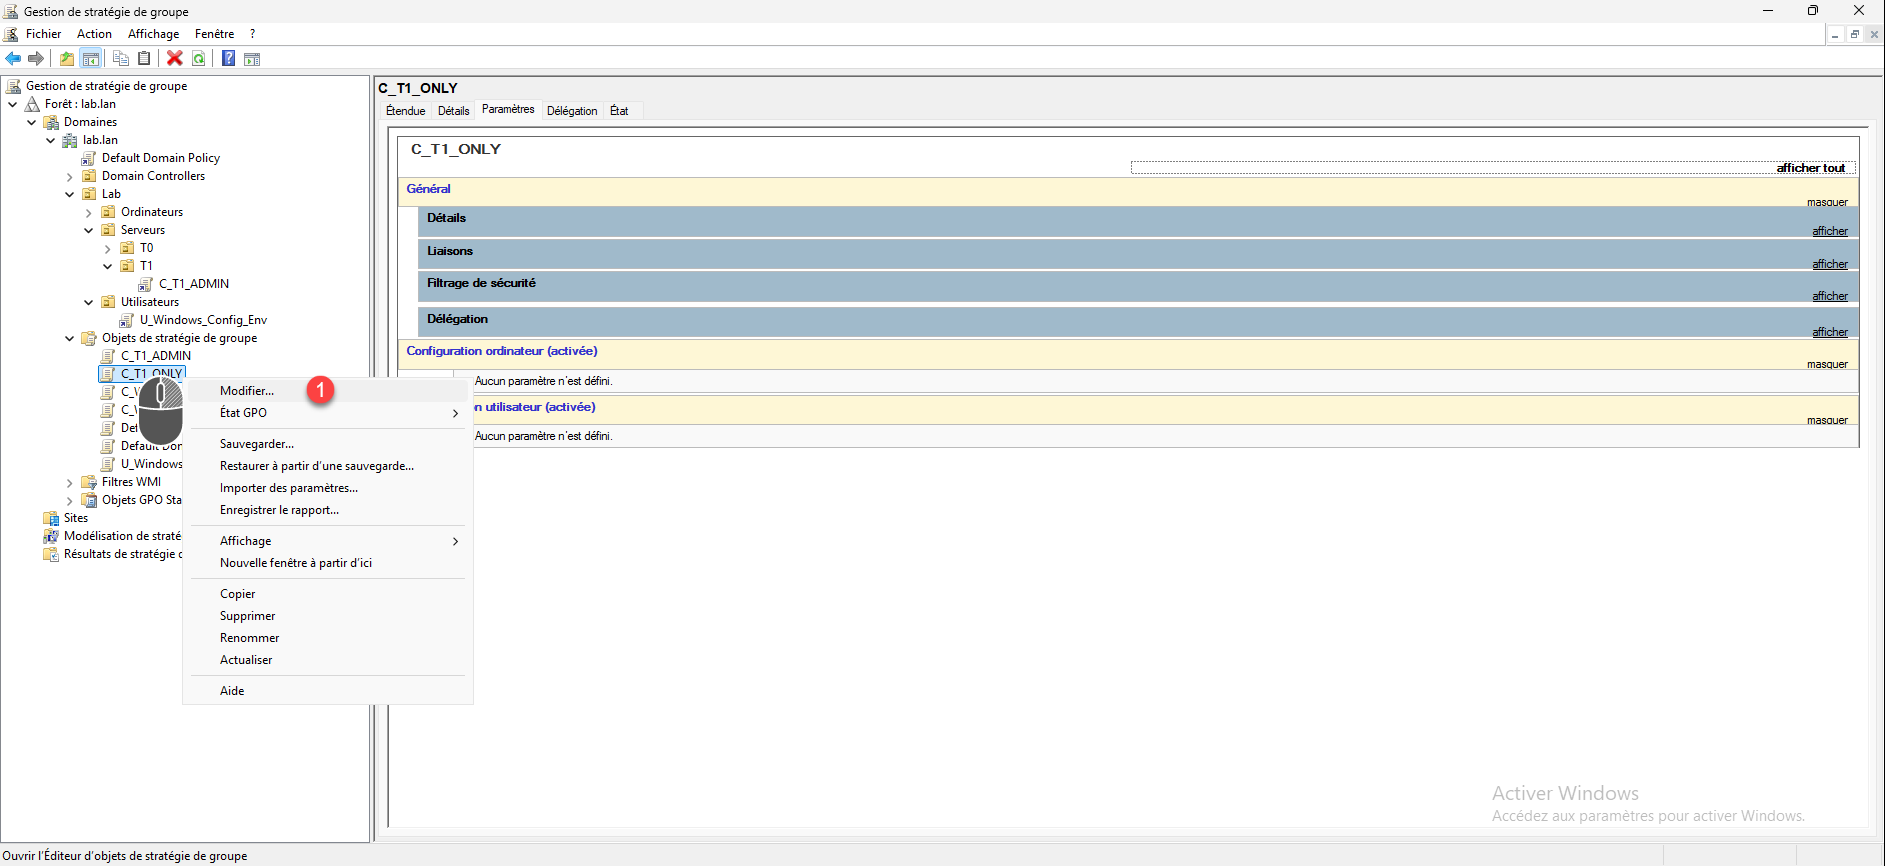
Right-click on the object you just created and click Edit 1.
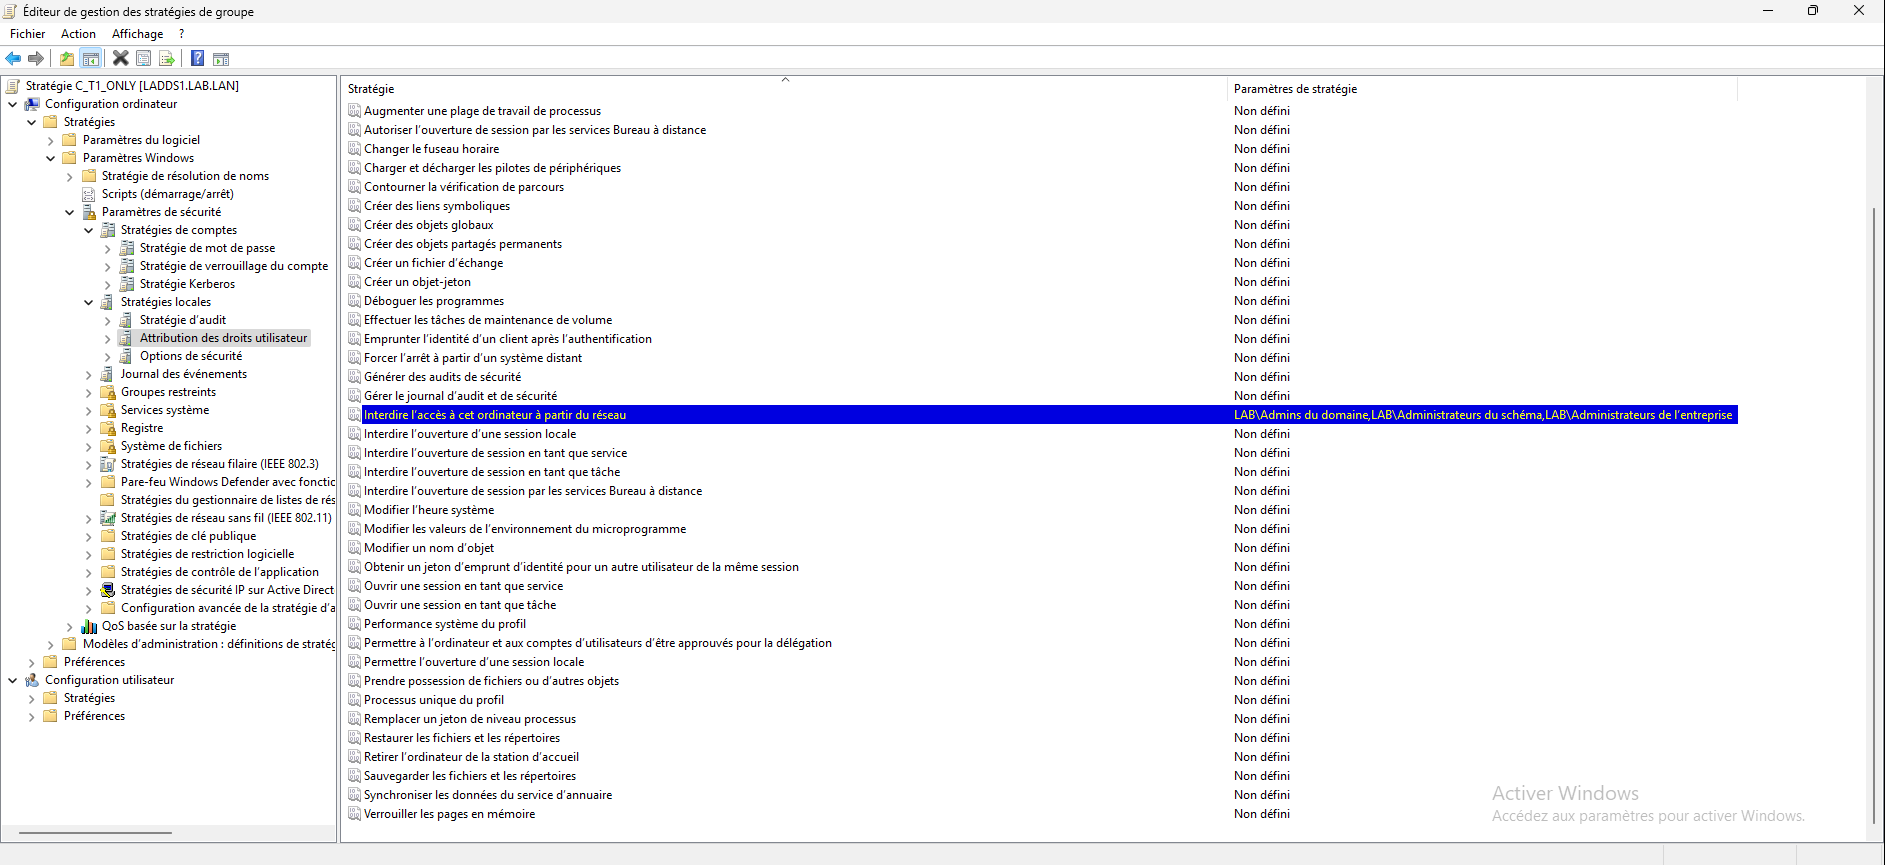
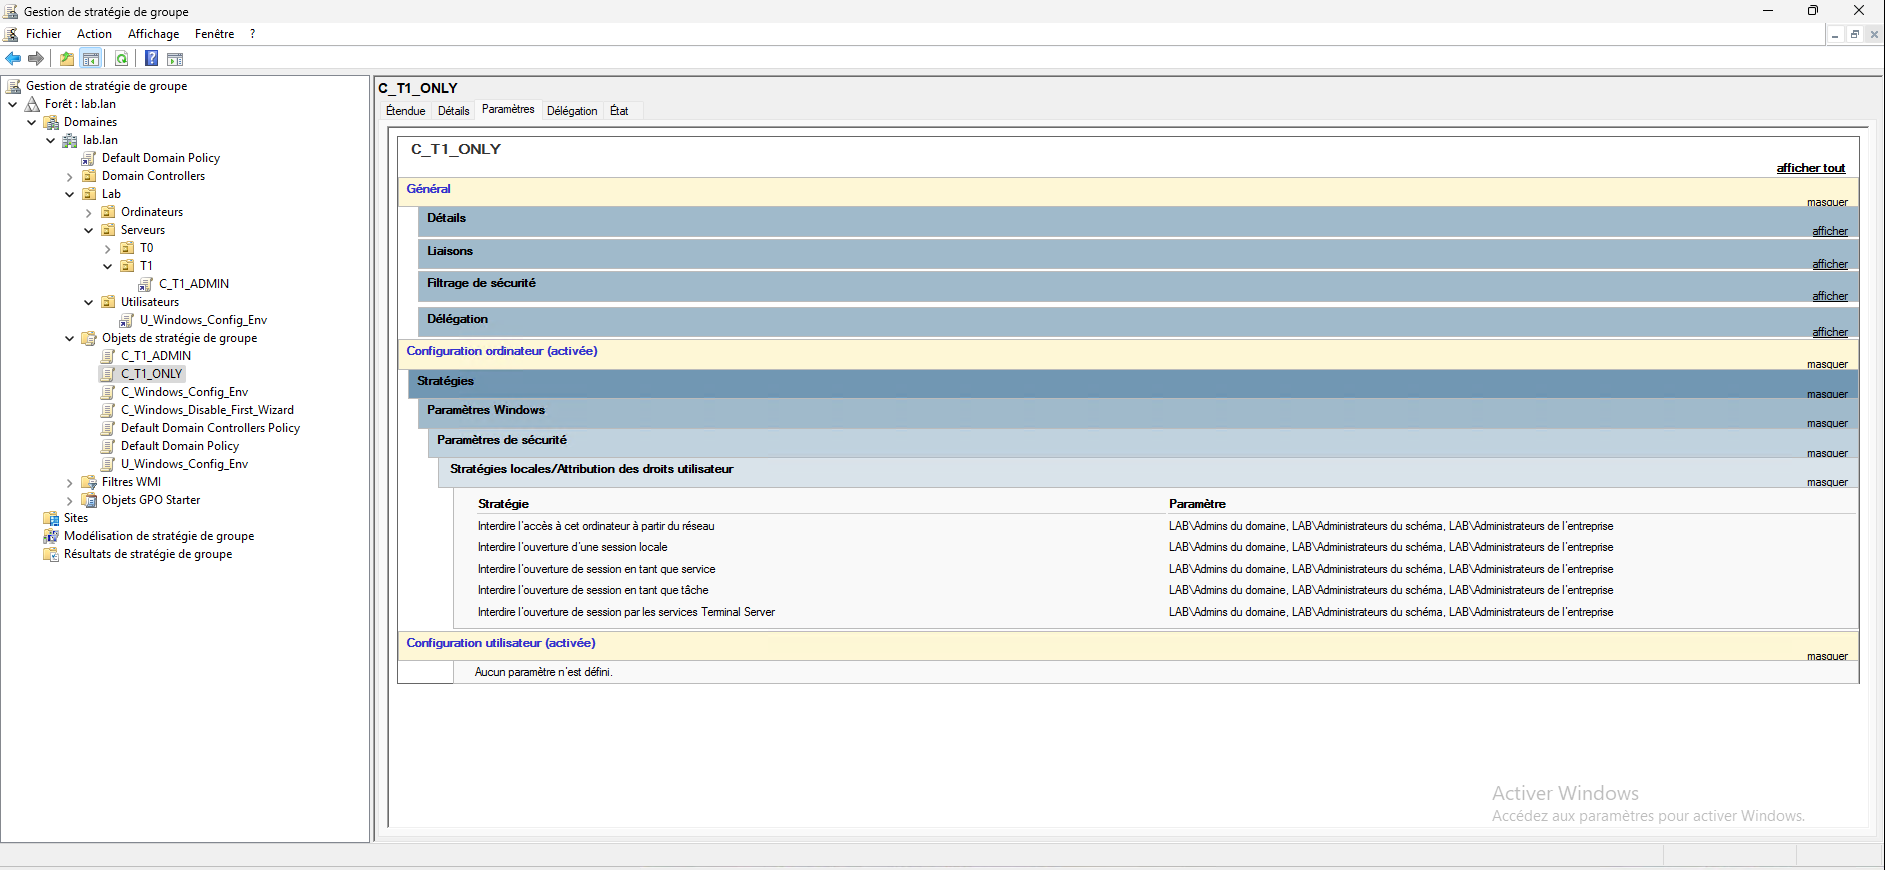
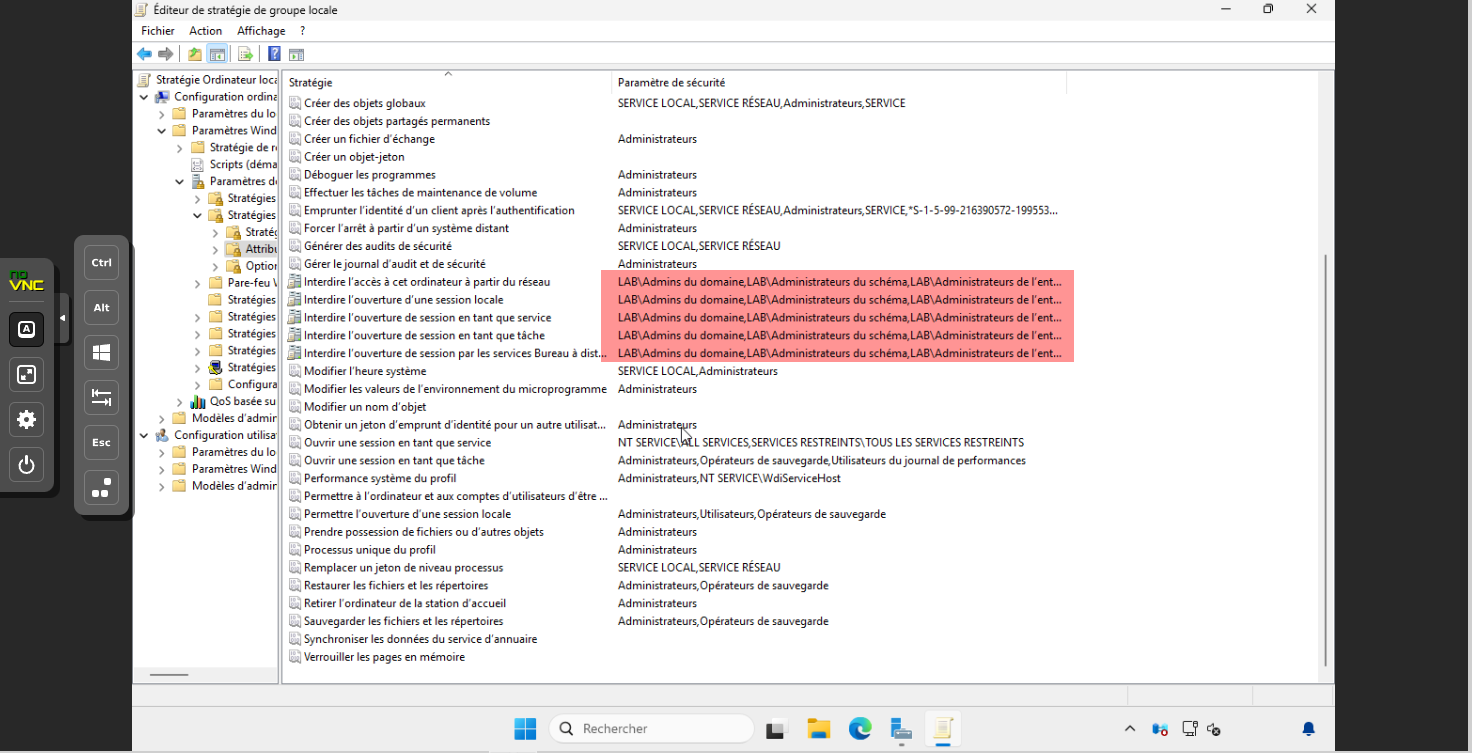
Go to the following location: Computer Configuration / Windows Settings / Security Settings / Local Policies / User Rights Assignment.
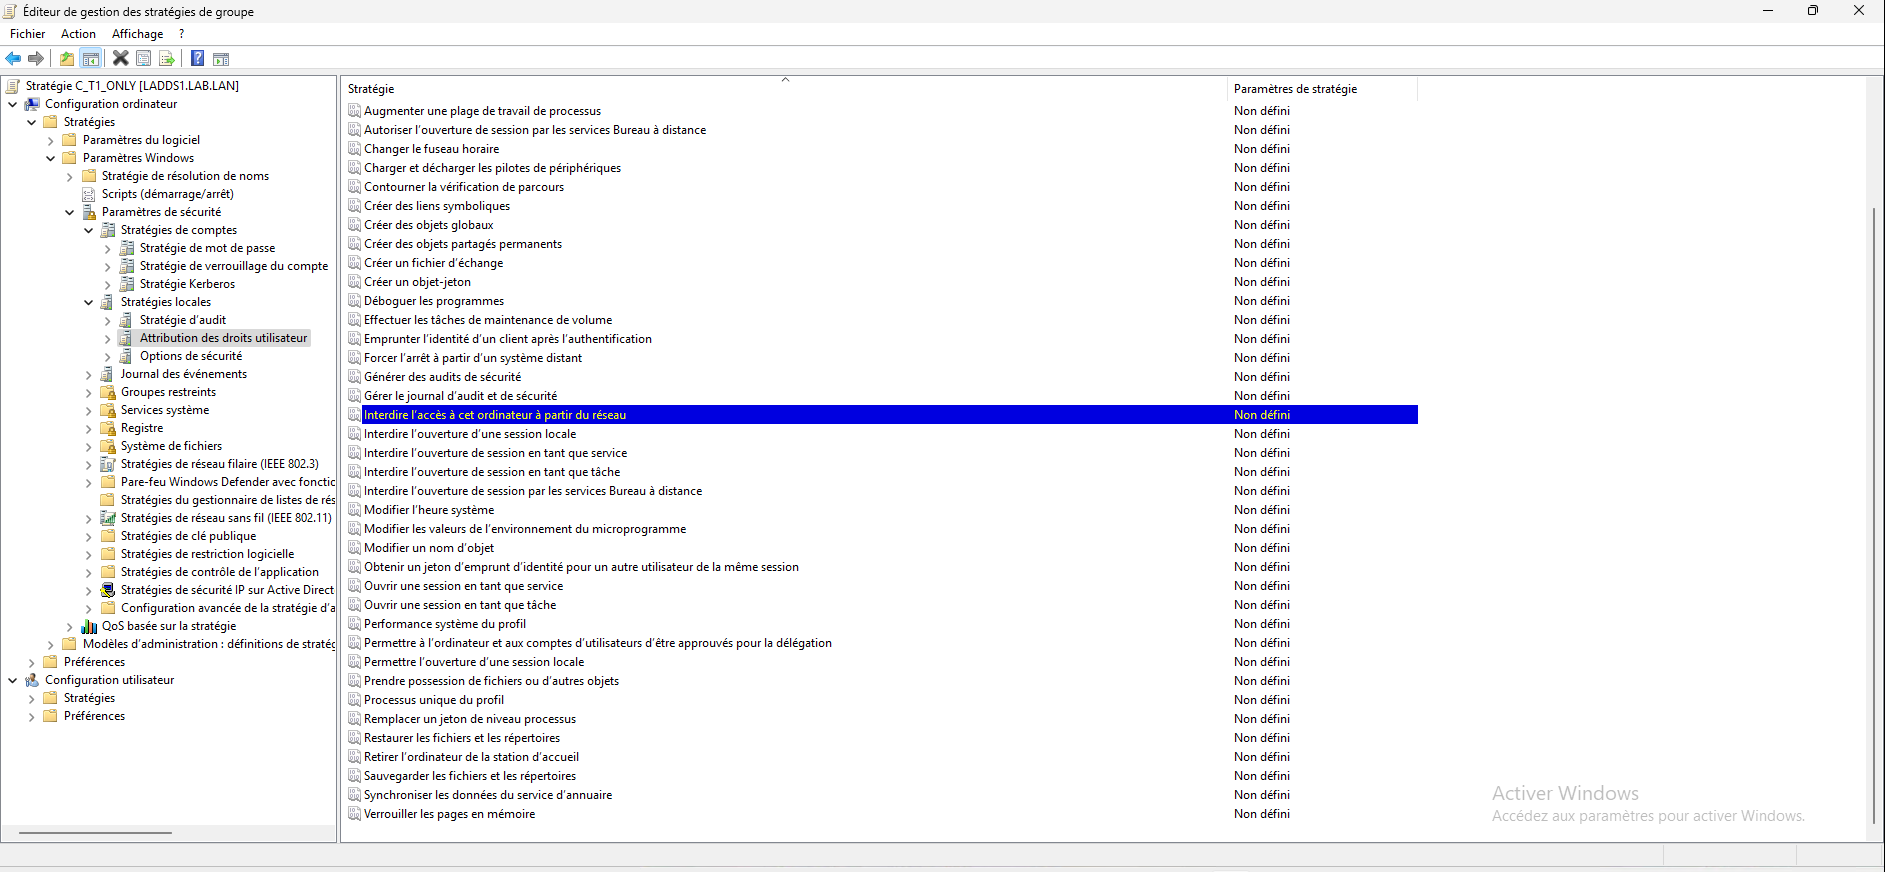
We will configure the following settings: Deny access to this computer from the network, Deny local logon, Deny logon as a service, Deny logon as a task, and Deny logon through Remote Desktop Services so that we cannot use an account that is a member of the Domain Admins group on the T1 servers.
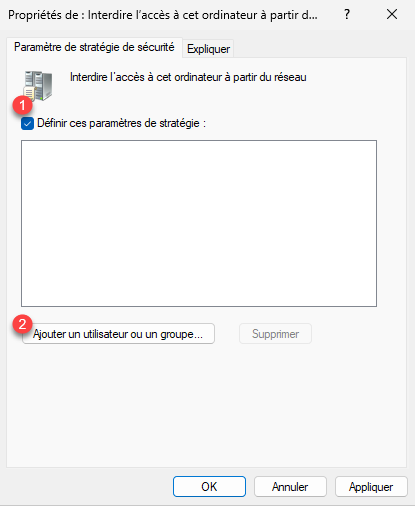
Open the first setting, check the box Define these policy settings 1 and then click the Add user or group button 2.
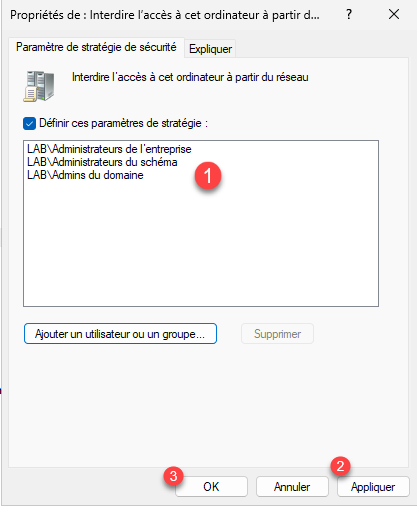
Add the following groups 1:
- Entreprise administrator
- Schema Administrators
- Domain Admins
Then validate the settings by clicking on the Apply 2 and OK 3 buttons.
The first parameter is configured.
Do the same with the other Prohibition settings.
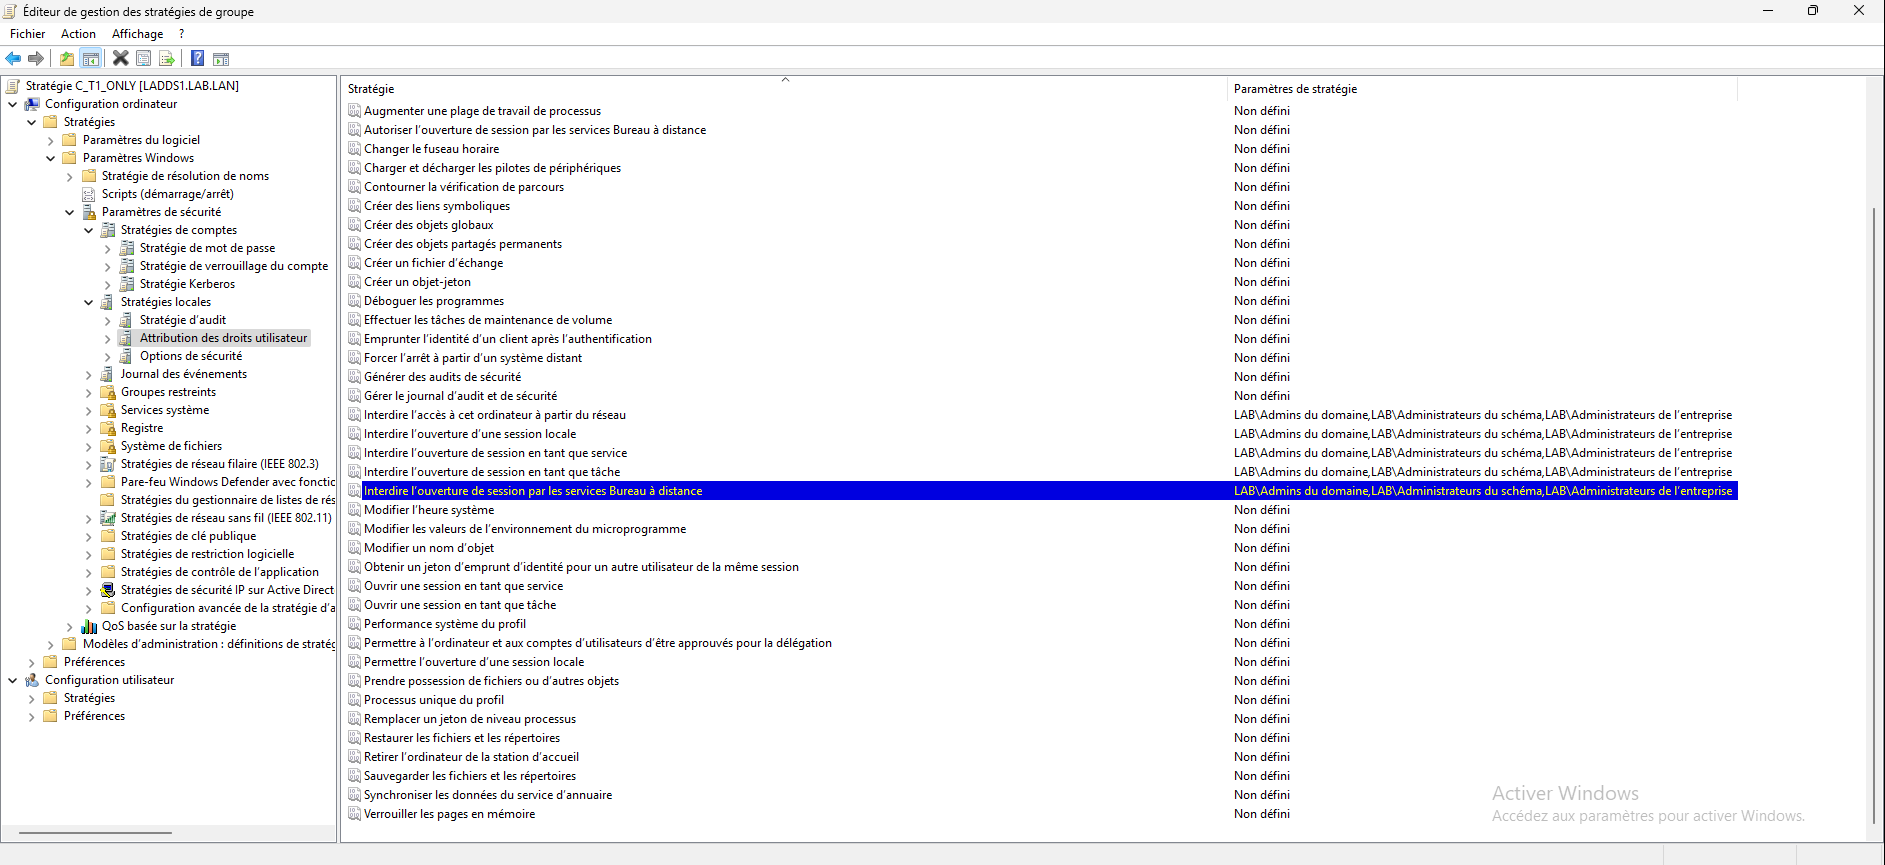
Close the editor, the GPO is configured.
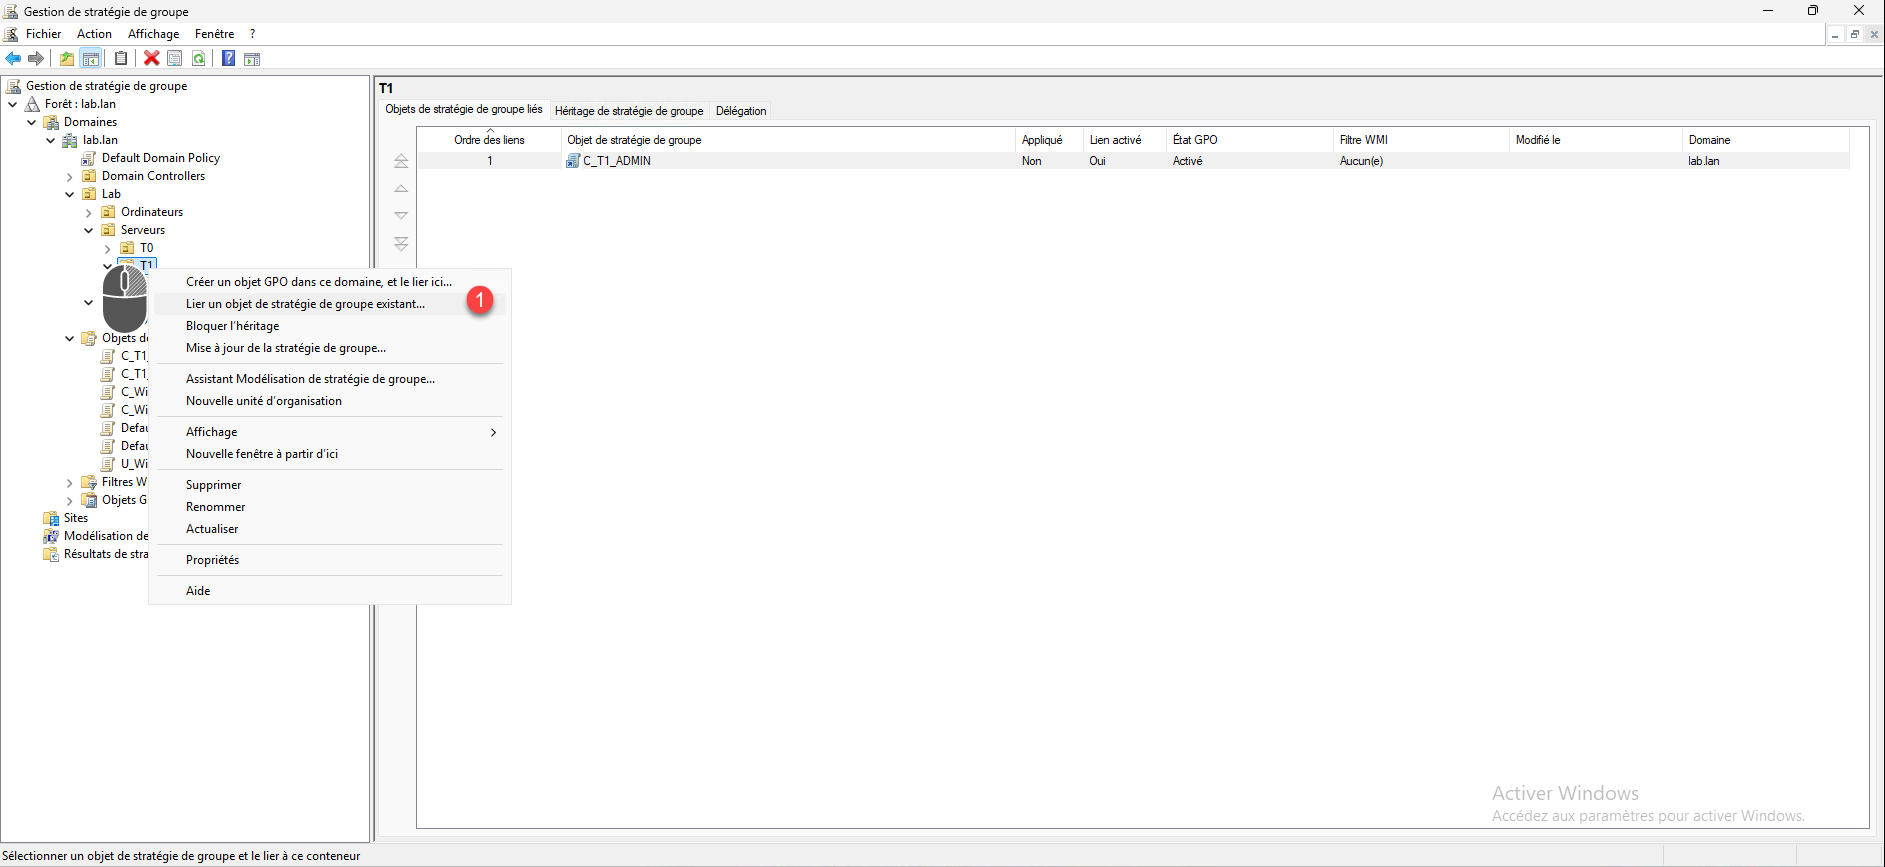
Now you need to link the GPO to the OU for it to be applied, right click on OU T1 and click Link an existing GPO 1.
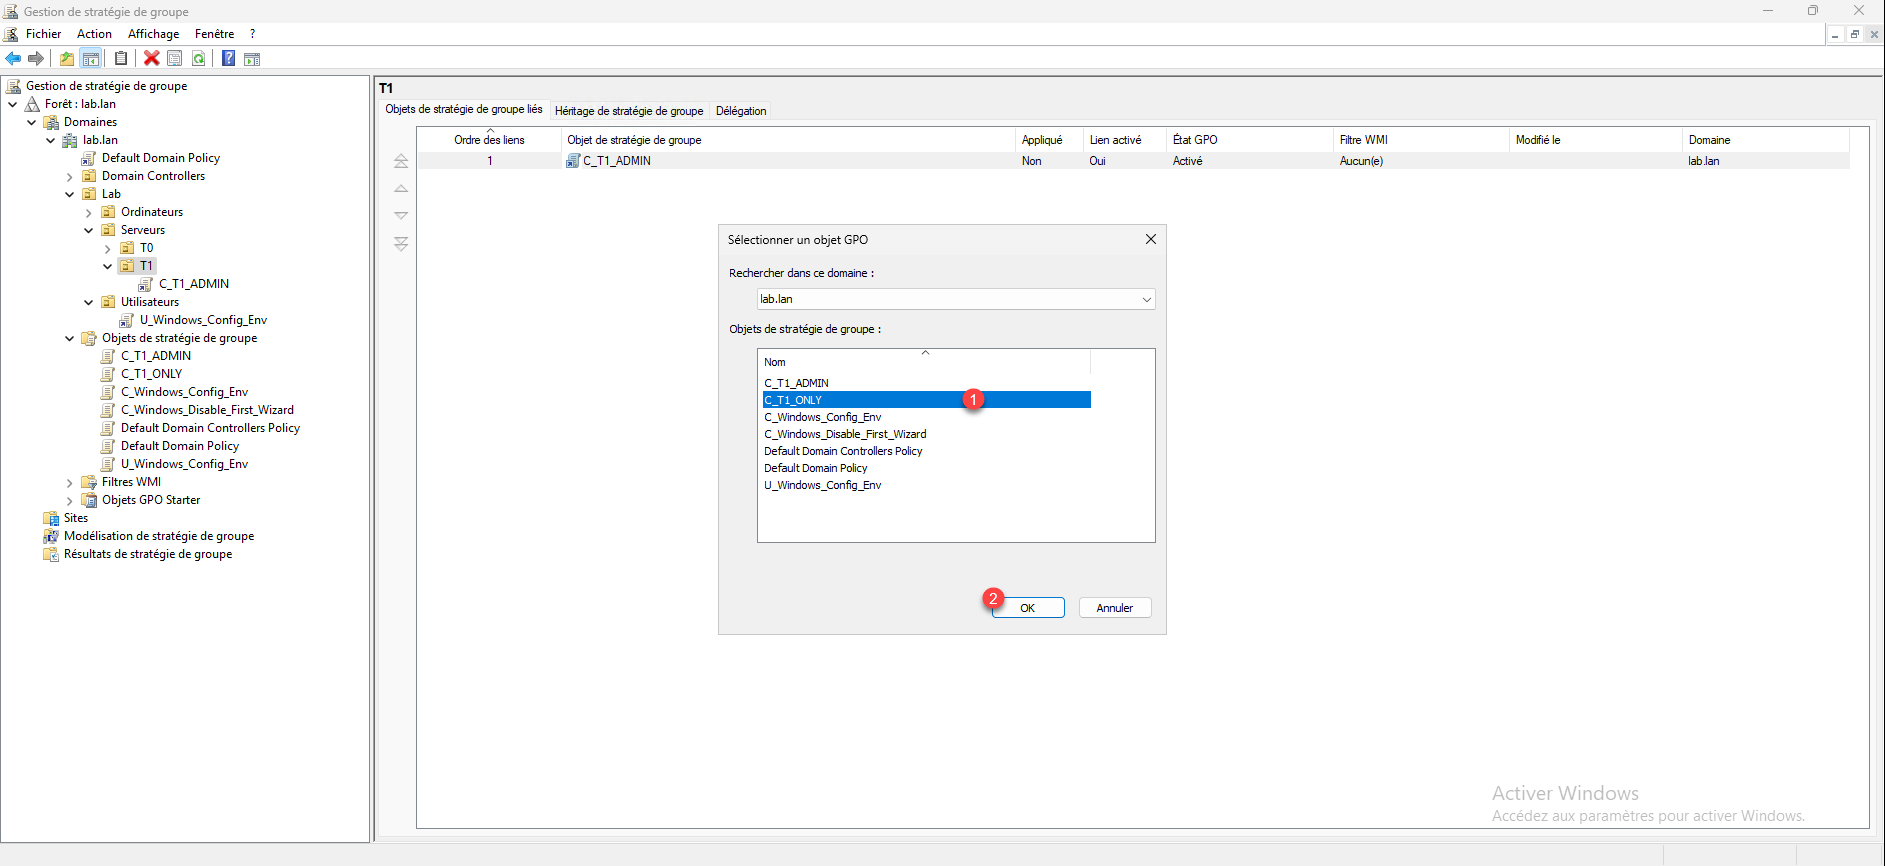
Select GPO object 1 and click OK 2.
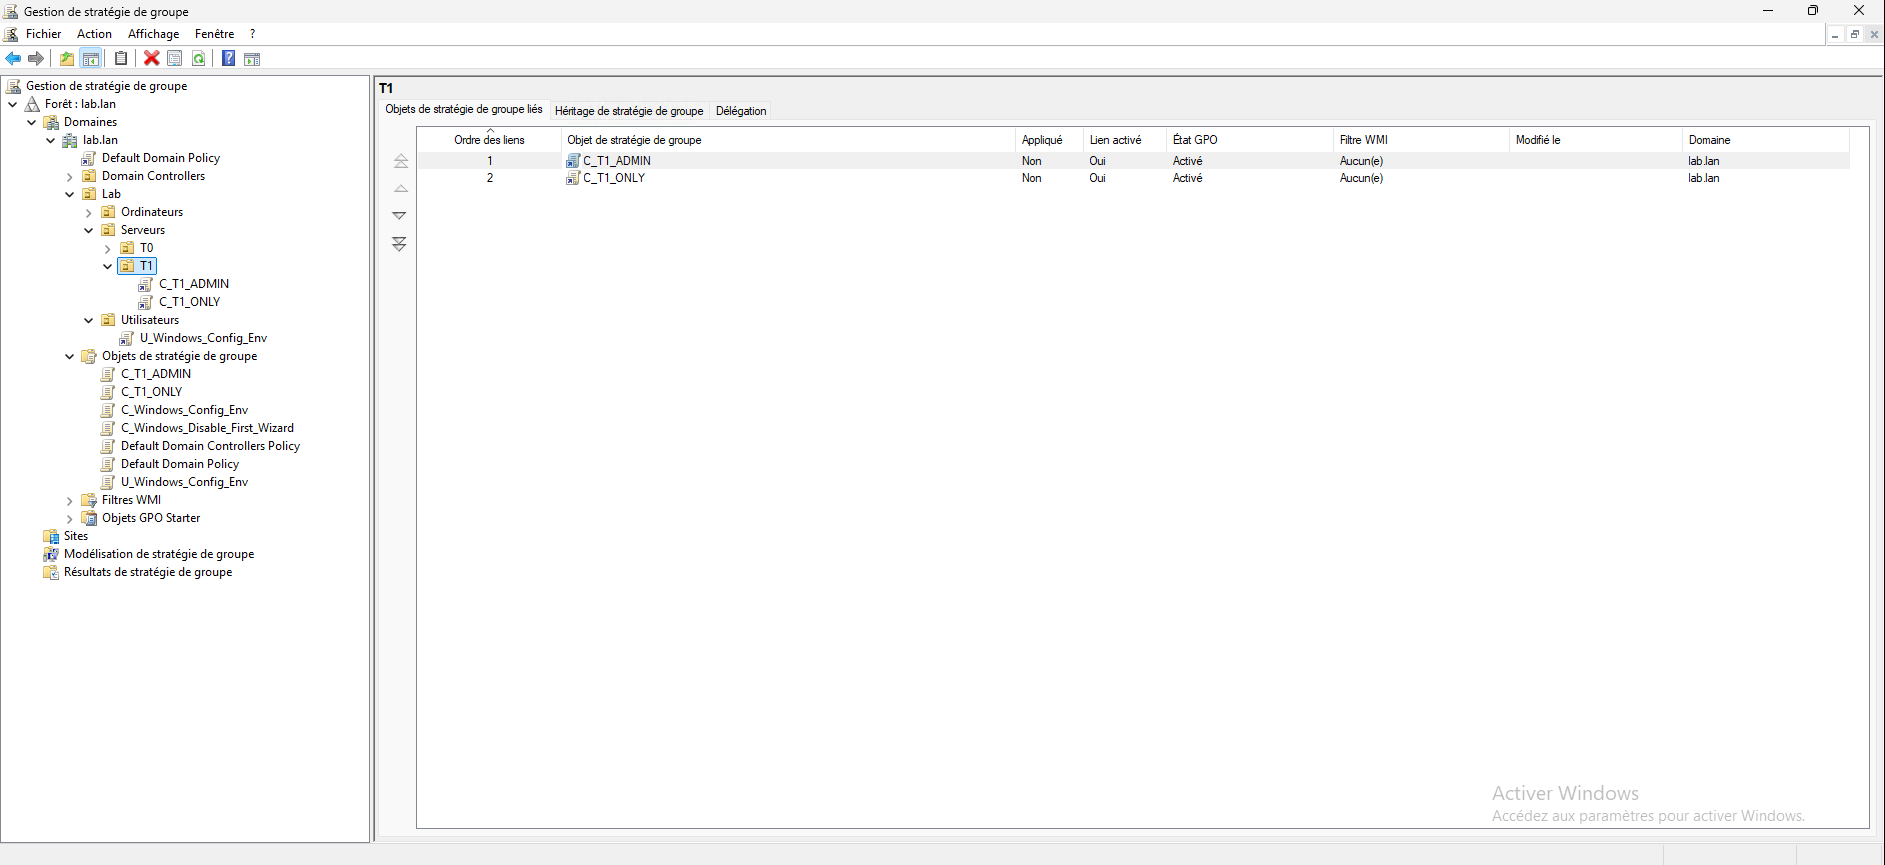
The object is linked to the OU.
On a T1 server, do a gpupdate to force the application of the update, as we can see in the screenshot below, the GPO has been applied.
Now, we are going to test the GPO, for this, I have a romain.t0 account which is a member of the Domain Admins group that I will use to try to connect locally to the server.

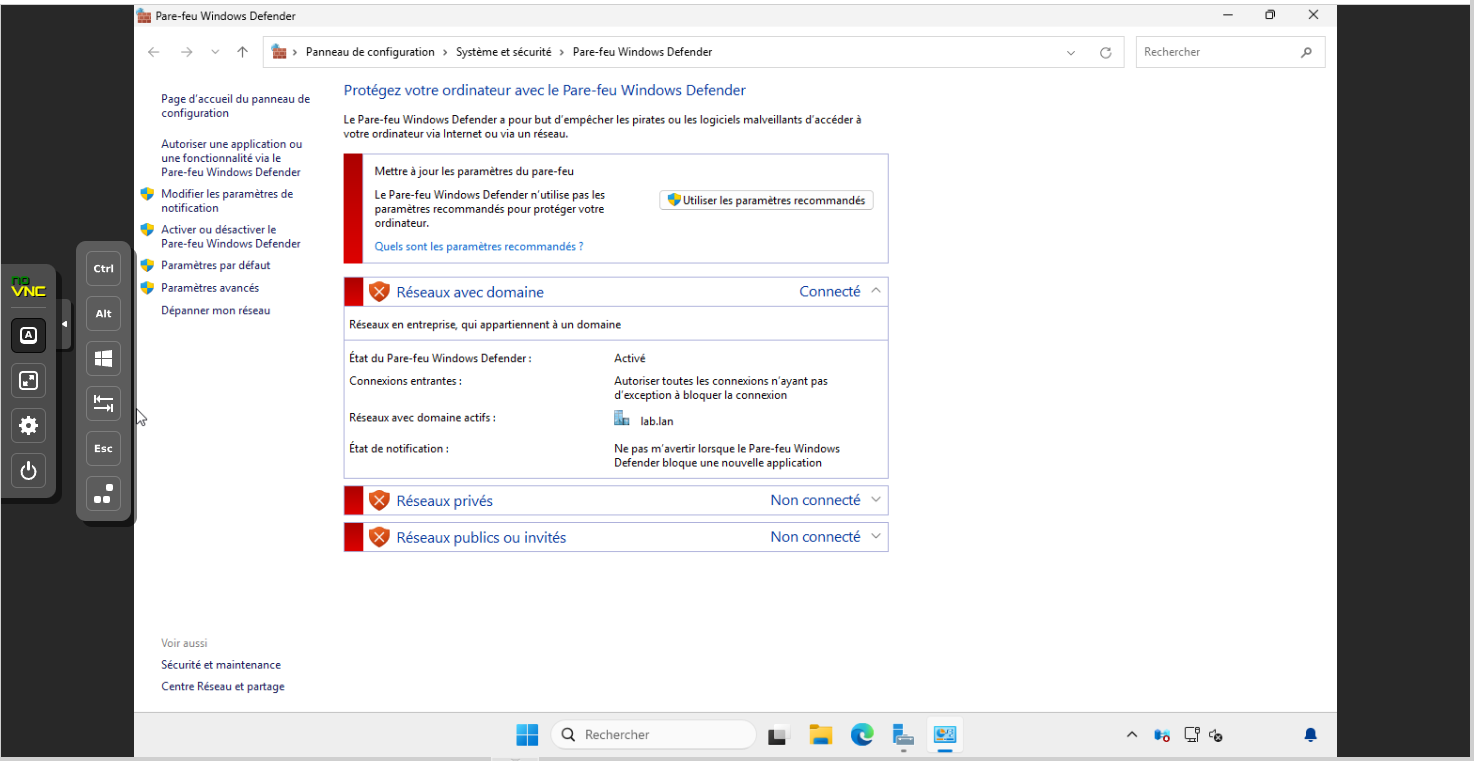
To ensure that the blocking was actually coming from the Windows system and not the firewall, I deliberately disabled it on the T1 server.
To begin this first test, I am logged in with the Administrator account on a domain controller, therefore a member of the Domain Admins group, and I will try to access the administrative share of the C$ server.
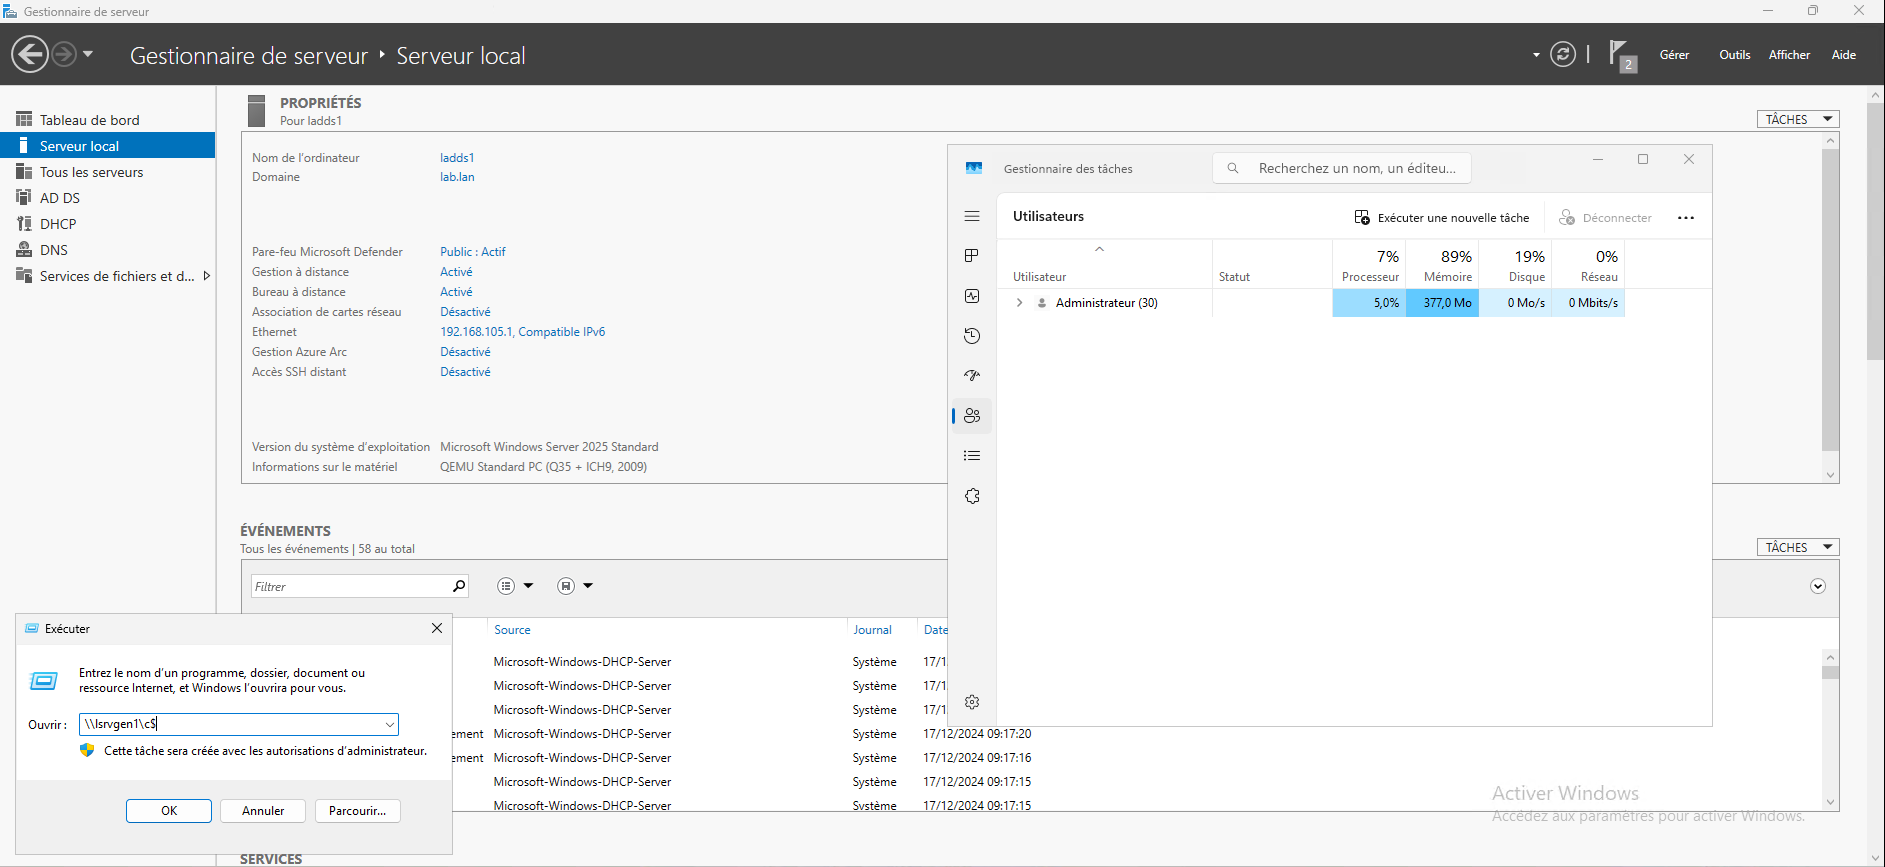
You can see that I cannot log in to the server with my account which is a member of the Domain Admins group.
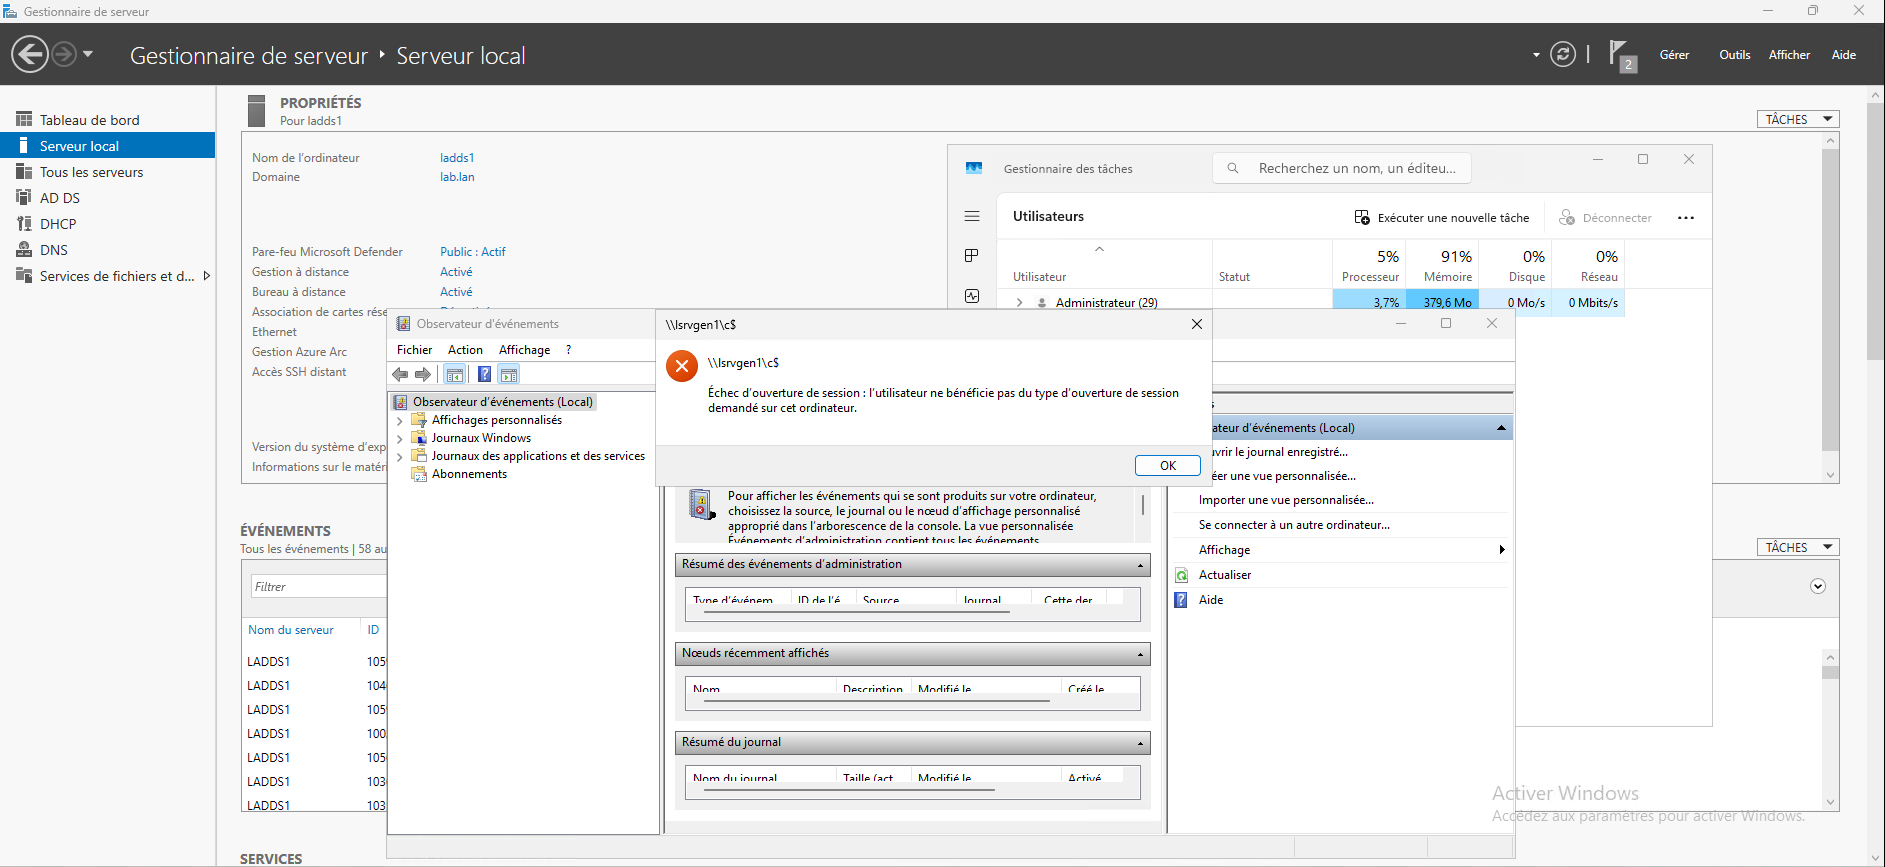
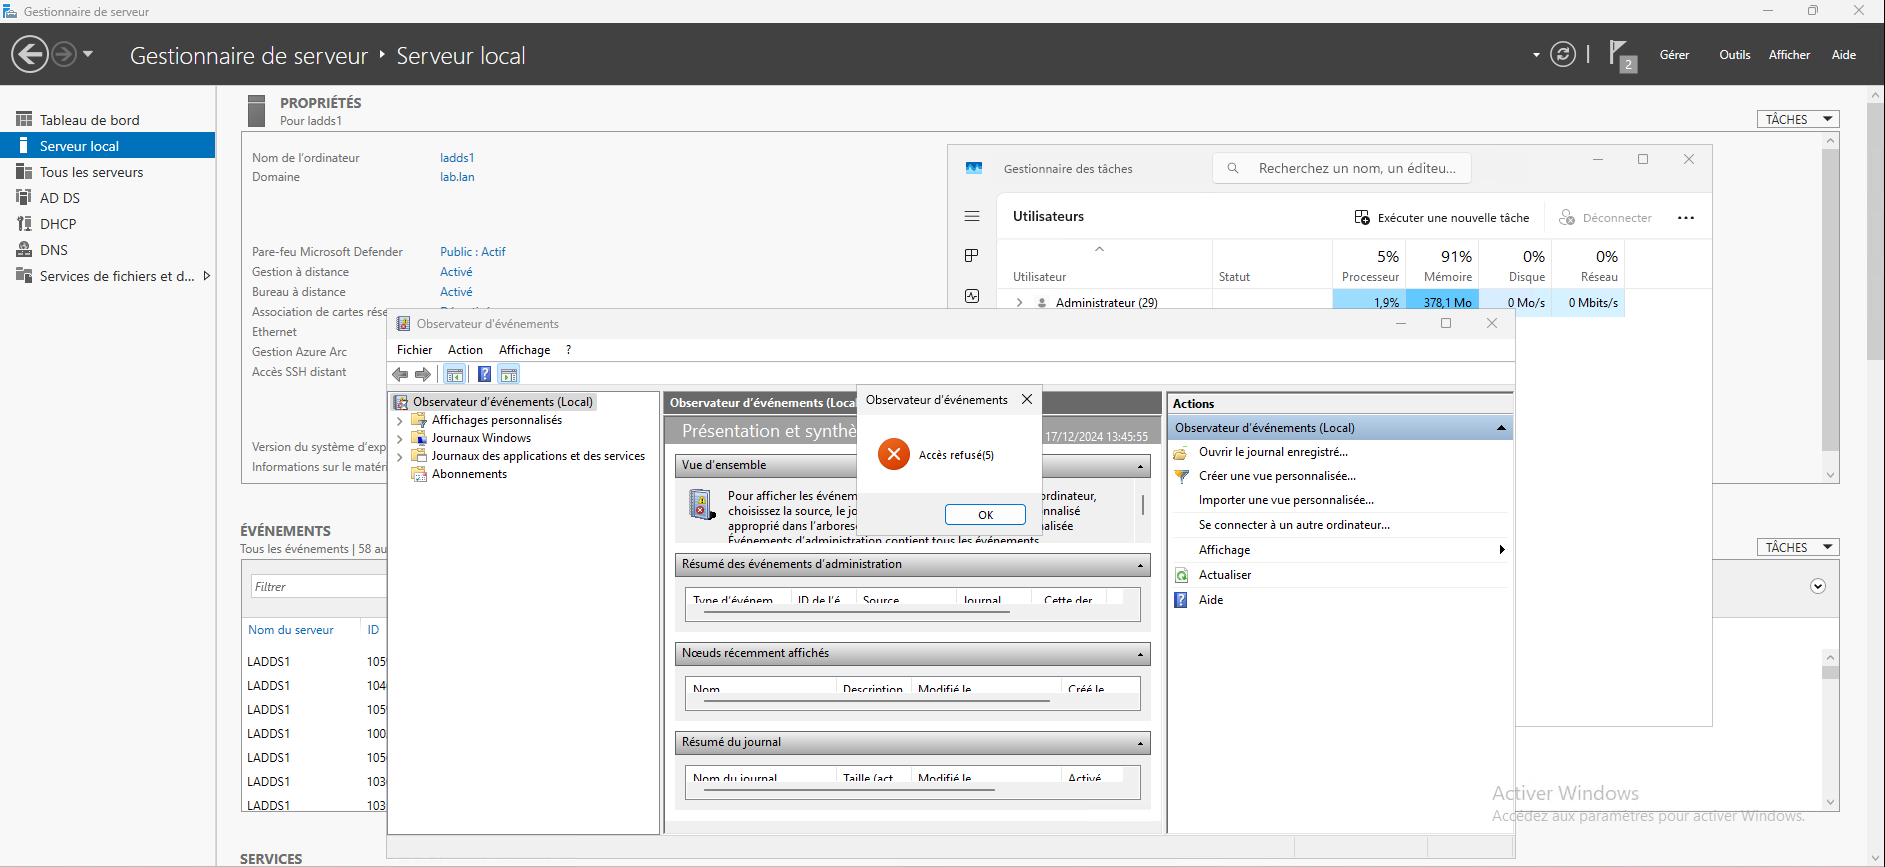
The second test will be to connect to the event viewer from the domain controller on my server in T1.
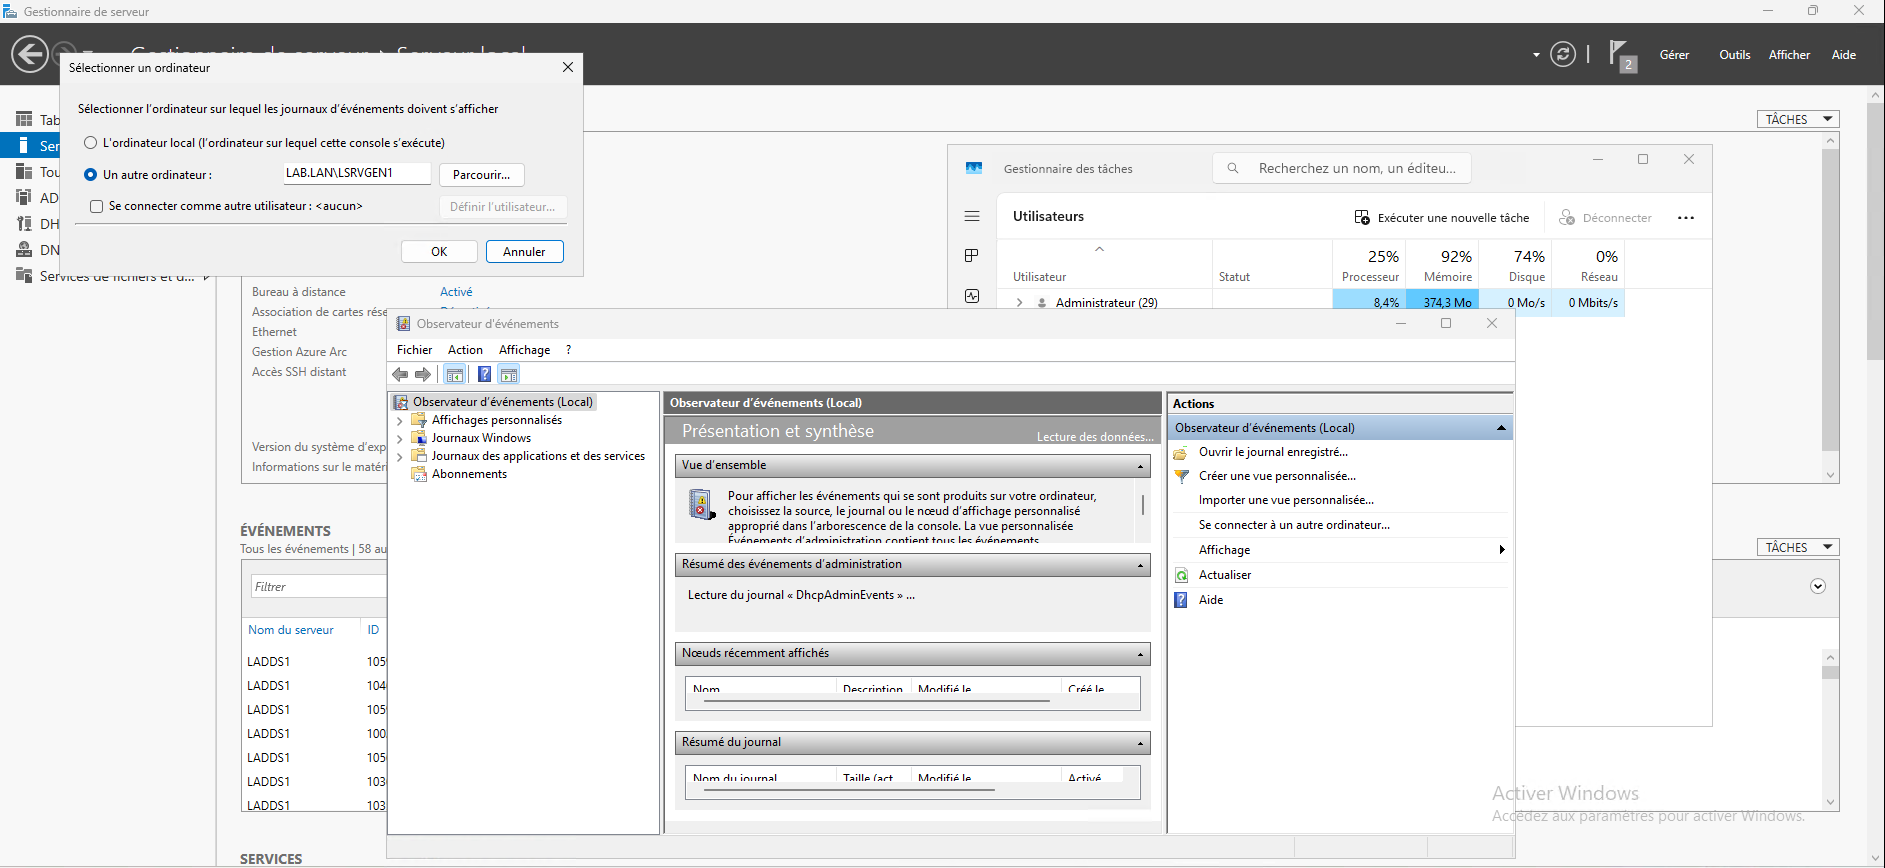
There too, access is denied.
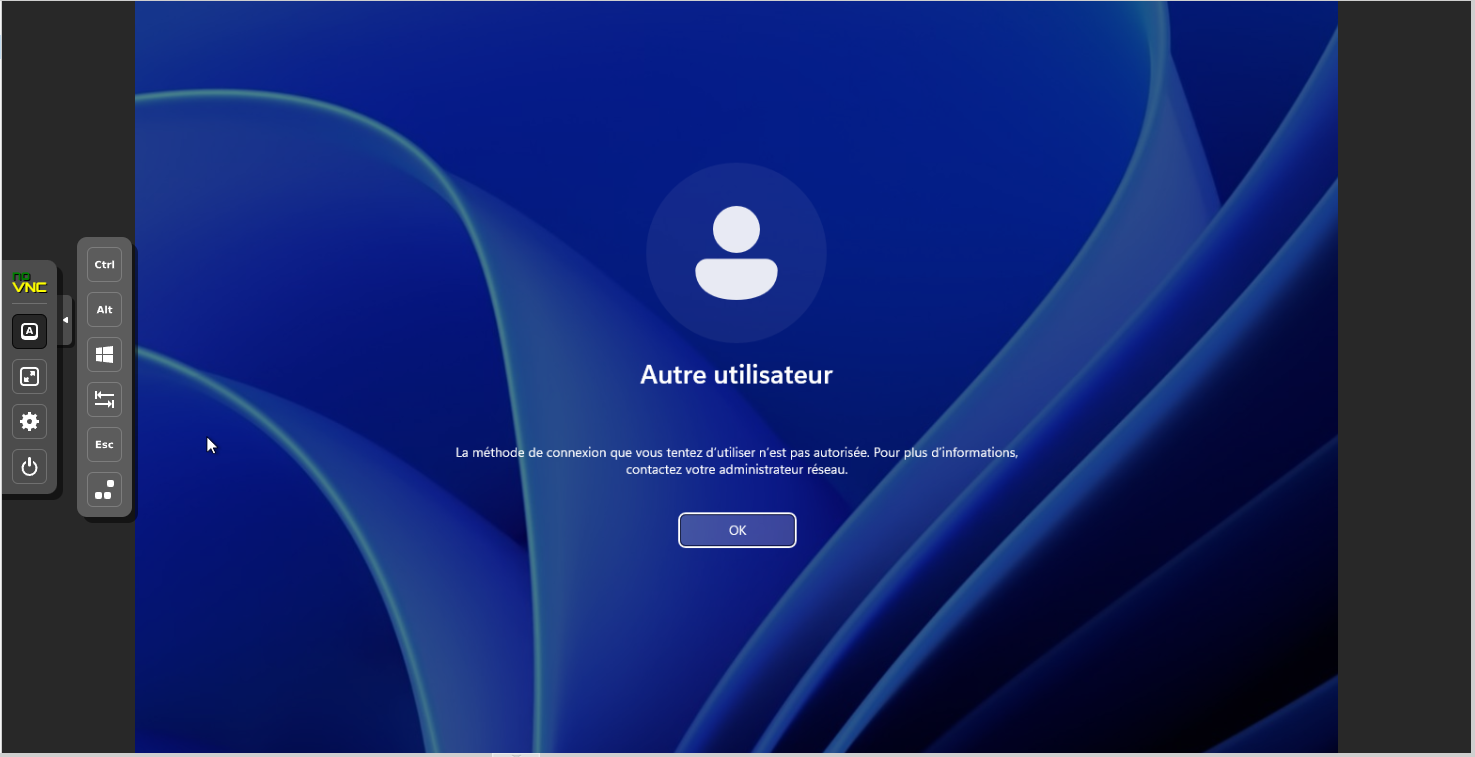
Finally, I tried to open a local session with my account in T0 on the server.
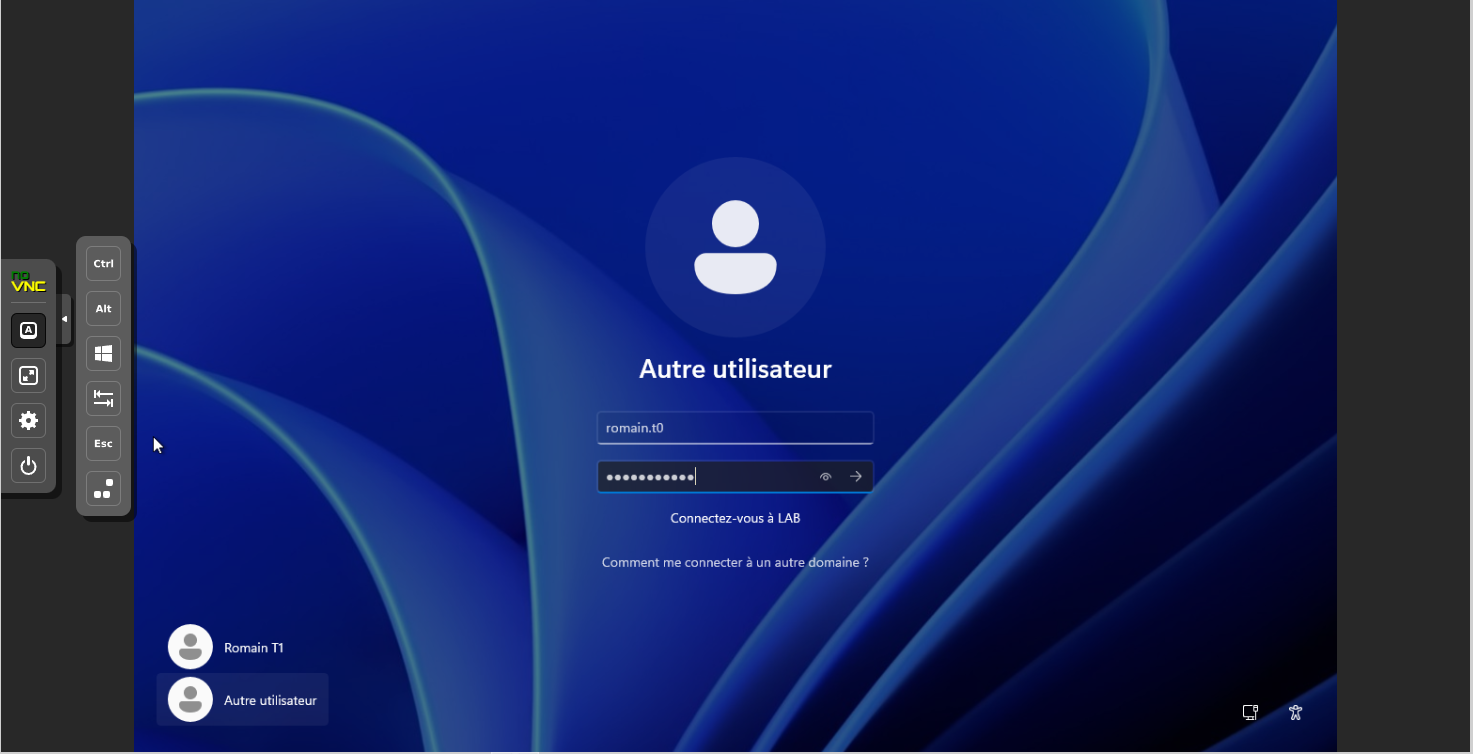
Here too, the connection is refused.
In this tutorial, we saw how to set up the first building blocks of the Tiering model in an Active Directory environment. The aim of this article is not to show you how to do it from A to Z, but to give you elements to help you understand its implementation and operation.
For Tier0, it is advisable to set up an Authentication silo to ensure that only T0 accounts connect to machines of this same tier. You will find detailed explanations in the ANSSI guide.
To help you with the implementation, you can also use HardenAD, which allows you to deploy all the groups and policies needed to set up a tiering model using a PowerShell script. To understand how it works, I strongly recommend deploying it in a LAB.
