Table of Contents
Presentation
This tutorial follows Exchange migration to Office 365 – minimum hybrid configuration for uninstalling (decommissioning) of Exchange in the local environment
Microsoft recommends not to decommission the local Exchange, by doing this you can no longer administer with an interface mailboxes including aliases.
This tutorial can also serve as a guide for uninstalling after migrating to a higher version or simply removing Exchange from your environment.
Prerequisites
Add the autodiscover record to the domain as defined in the administration interface of your Office 365 account.
Exchange Decommission
Disable Azure AD Connect synchronization
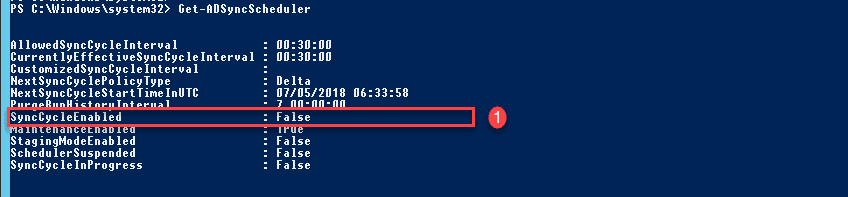
Go to the server where Azure AD Connect is installed and disable synchronization by entering the following powershell command:
Set-ADSyncScheduler -SyncCycleEnabled $FalseCheck that the synchronization status by entering the following command:
Saving proxyAddress attributes
Export the proxyAddress attribute using the powershell script available here.
Migrating Public Folders – optional
Check public records are still active by entering the following command:
Get-OrganizationConfig | Format-List PublicFoldersEnabledIf you have files, you must migrate them before continuing.
Removal of SCP
The SCP point allows automatic configuration of Outlook clients. Do not execute this command if you are upgrading locally.
Delete the SCP point by entering the following command:
Get-ClientAccessServer | Set-ClientAccessServer -AutoDiscoverServiceInternalUri $NullDelete offline address books
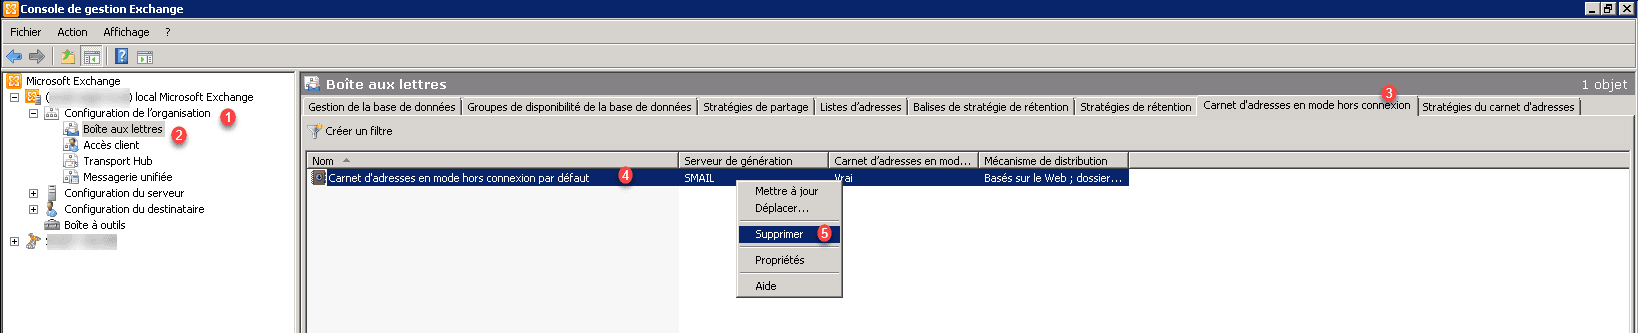
You must now delete the offline address book from the management console, go to Organization configuration 1 / Mailboxes 2. Go to the Offline Address Book 3 tab. Select the address book 4 then right click on it and click on Delete 5.
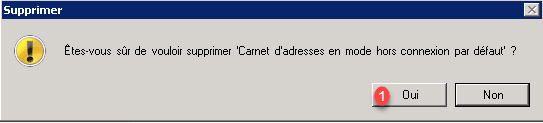
Confirm the deletion by clicking on Yes 1.
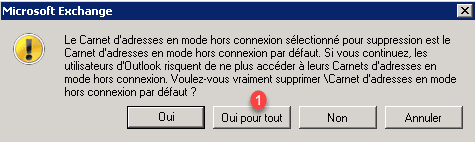
Confirm the deletion again by clicking Yes for all 1.
Identify if several address books are present.
Delete public folders
Delete public folders, enter the following powershell command:
Get-PublicFolder -Server SERVERNAME “\” -Recurse -ResultSize:Unlimited | Remove-PublicFolder -Server SERVERNAME -Recurse -ErrorAction:SilentlyContinue
Confirm the deletion.

Now delete the public folder database.
Return to the management console of Exchange, go to Configuration of the organization 1 / Mailbox 2. Go to the tab Database management 3, select the public folder database 4, right click on it and click on Delete 5.
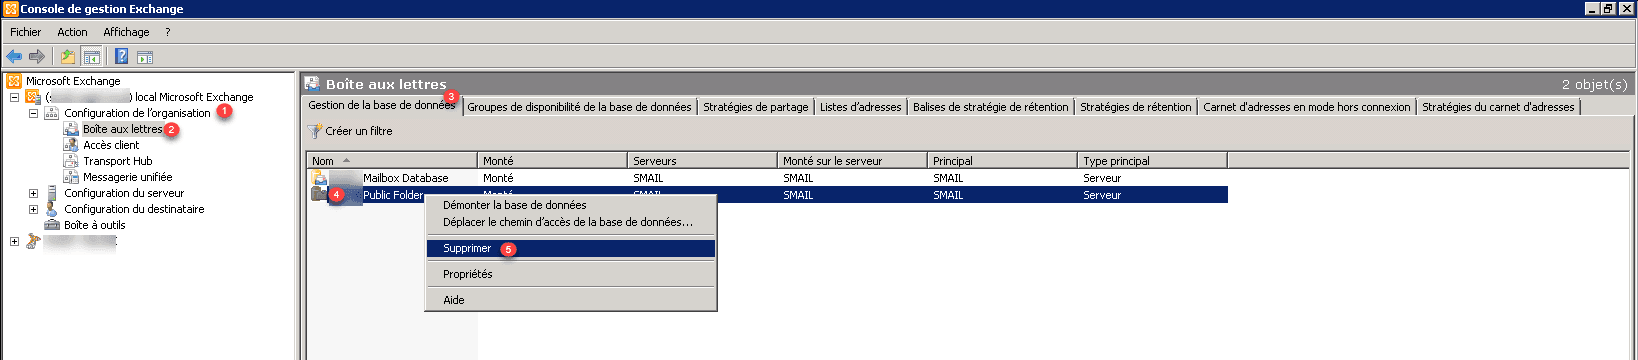
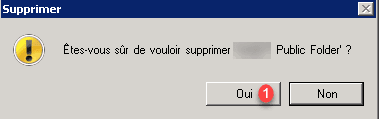
Confirm the deletion of the public folder by clicking on Yes 1.
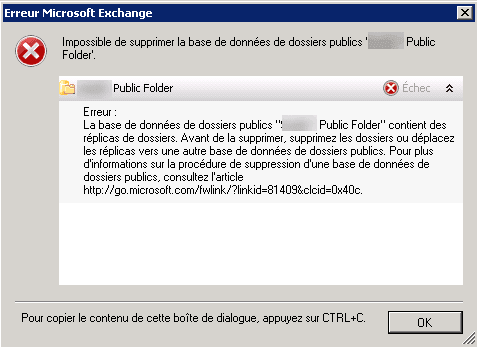
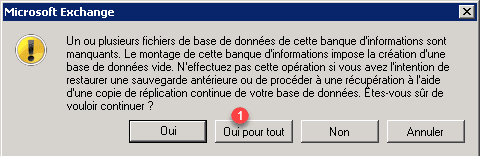
Resolve the error deleting the public folder database.
If the error message below appears, here is how to delete the base.
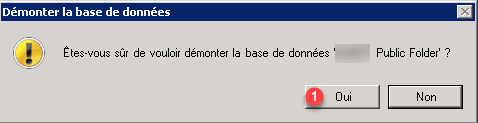
Go back to database 1 and right click on it and click on Dismount database 2.
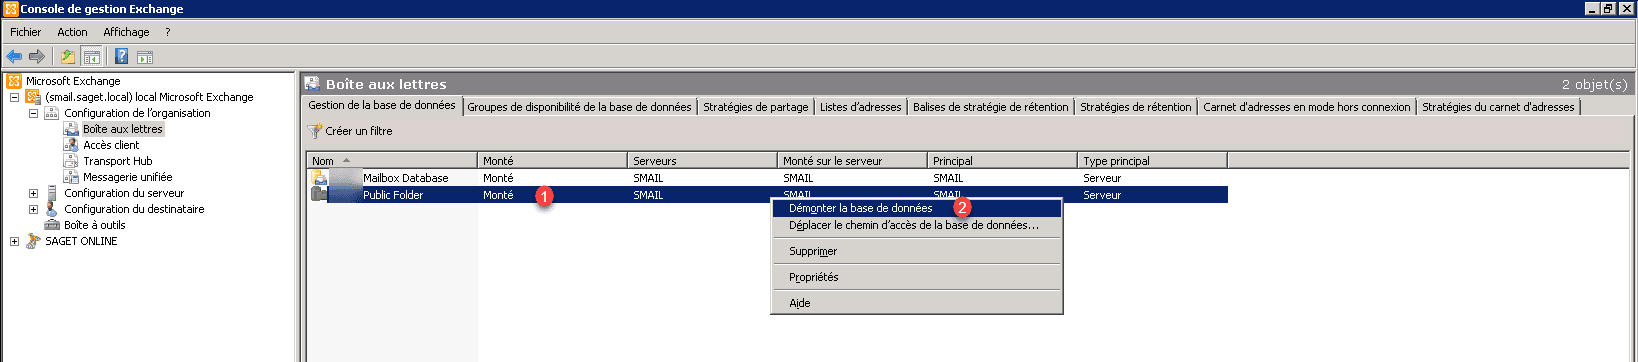
Confirm by clicking on Yes 1.
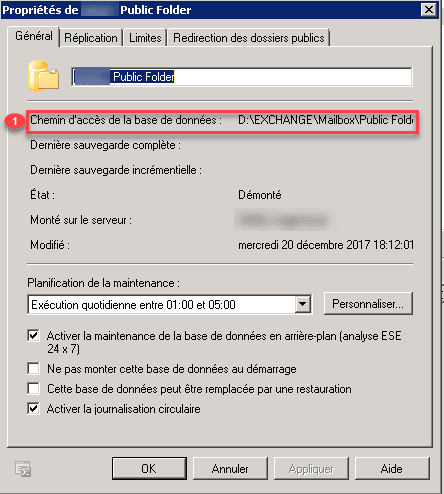
Retrieve the path of the files, right click on the base and Properties and note the Path to the database 1.
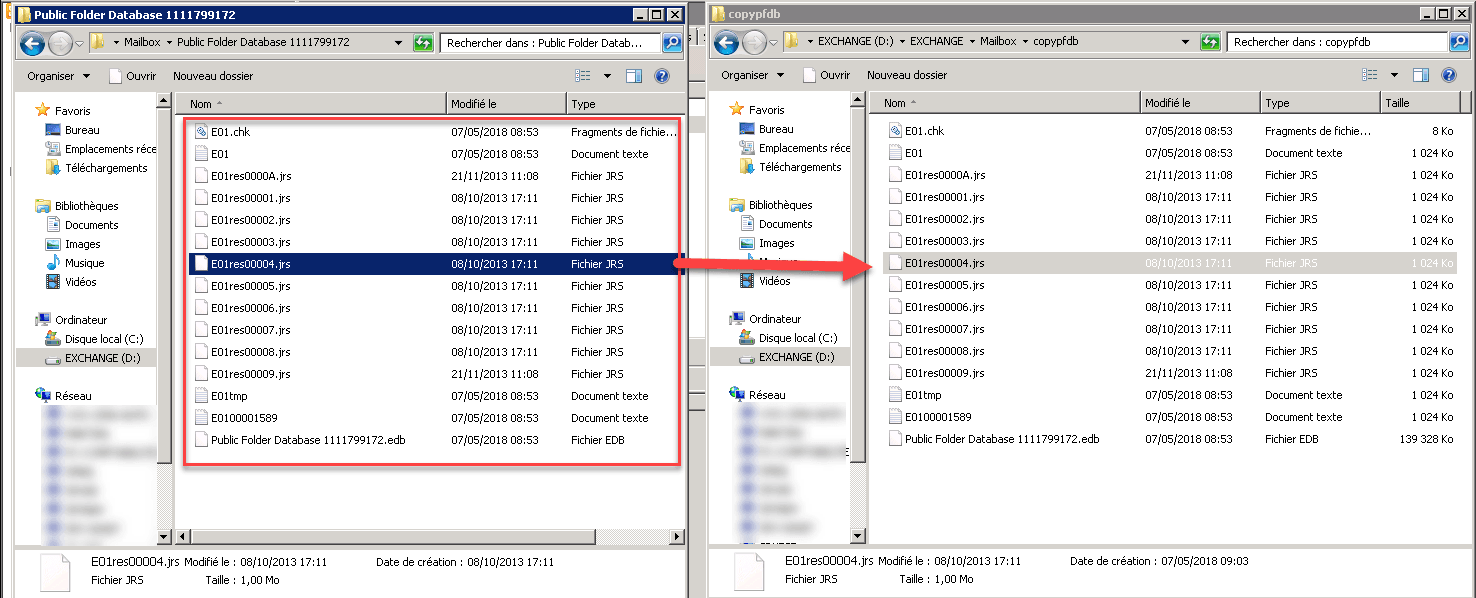
Create a new folder and move the contents of the folder to the new one. The source folder must be empty.
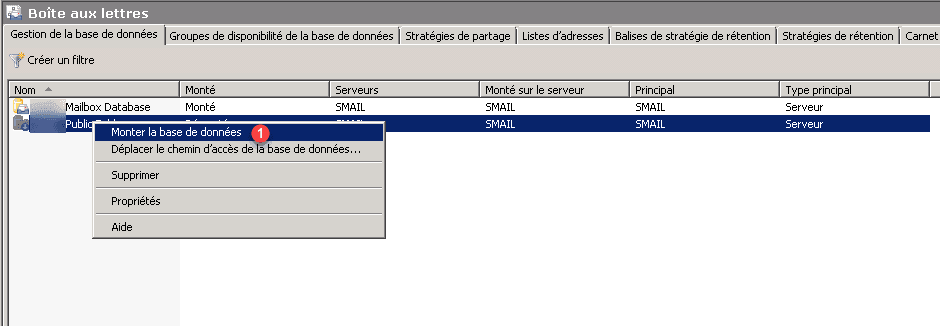
Return to the interface and mount the database, right click on it and click on Mount database 1.
Confirm the creation by clicking Yes for all 1.
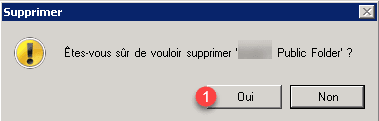
Redo a right click on the base and click on Delete 1.

Confirm the deletion by clicking on Yes 1.
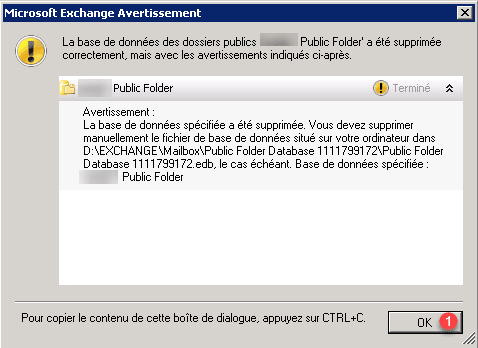
Confirm again by clicking Yes for all 1.

Click OK 1 on the delete confirmation window.
Disabling and deleting mailboxes
Disabling mailboxes
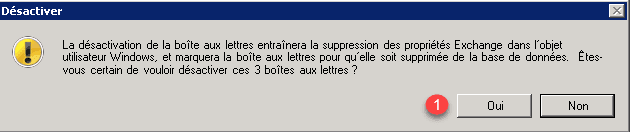
We must now deactivate all mailboxes.
From the Exchange console, go to the list of boxes: Configuration of recipient 1 -> Mailbox 2, select all users 3, right click and click on Deactivate 4.
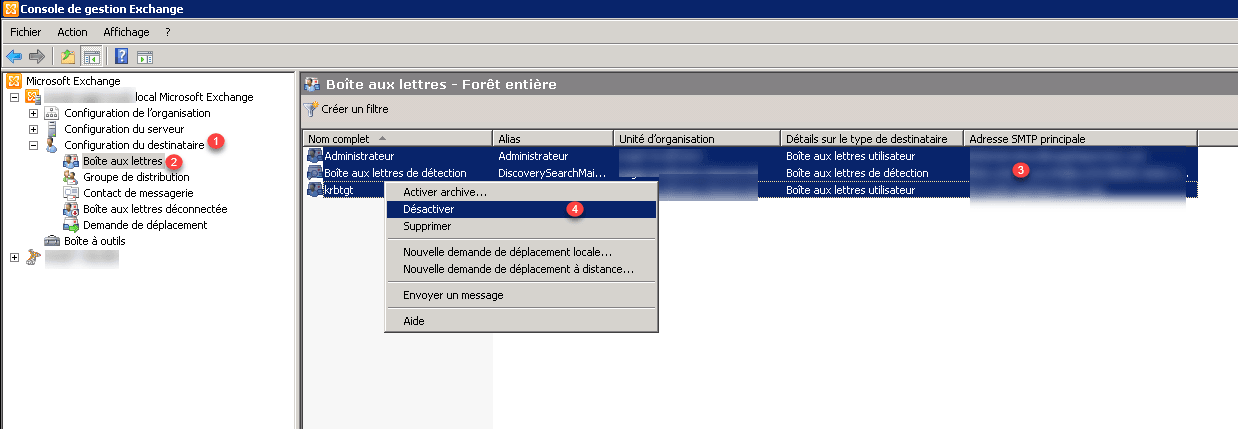
Do not click on Delete, this action also deletes the user from the Active Directory.
Confirm deactivation by clicking on Yes 1.
Removal of disabled mailboxes
To remove disabled mailboxes, open a PowerShell prompt and enter the commands below:
Get-MailboxStatistics –Database “VOTRE BASE DE DONNEES” | Where-Object {$_.DisconnectReason –eq “Softdeleted”} | ForEach {Remove-StoreMailbox –Database $_.database –identity $_.mailboxguid –MailboxState Softdeleted -Confirm:$False}
$mailboxes = Get-ExchangeServer | Where-Object {$_.IsMailboxServer –eq $true} | ForEach-Object { Get-MailboxStatistics –Server $_.Name | Where-Object {$_.DisconnectDate –notlike ‘’}} | select displayname, mailboxguid, database
$mailboxes | ForEach { Remove-Mailbox -Database $_.Database -StoreMailboxIdentity $_.MailboxGuid -confirm:$false }
If during the first command returns the following error s: Error: Pipeline not executed because a pipeline is already executing. This is due to the version of PowerShell which does not support commands with multiple pipes |.
Alternative solution :
$mbox = Get-MailboxStatistics –Database “VOTRE BASE DE DONNEES” | Where-Object {$_.DisconnectReason –eq “Softdeleted”}
$mbox | ForEach {Remove-StoreMailbox –Database $_.database –identity $_.mailboxguid –MailboxState Softdeleted -Confirm:$False}
$mailboxes = Get-ExchangeServer | Where-Object {$_.IsMailboxServer –eq $true} | ForEach-Object { Get-MailboxStatistics –Server $_.Name | Where-Object {$_.DisconnectDate –notlike ‘’}} | select displayname, mailboxguid, database
$mailboxes | ForEach { Remove-Mailbox -Database $_.Database -StoreMailboxIdentity $_.MailboxGuid -confirm:$false }
Repeat for each database.
Refresh the management console to make sure the mailboxes are deleted.
If mailboxes are still present, enter the command:
Get-MailboxStatistics -Database “VOTRE BASE DE DONNEES” | where {$_.DisconnectReason -eq "SoftDeleted"} | foreach {Remove-StoreMailbox -Database $_.database -Identity $_.mailboxguid -MailboxState SoftDeleted}Alternative commands:
$mailbox = Get-MailboxStatistics -Database “VOTRE BASE DE DONNEES” | where {$_.DisconnectReason -eq "SoftDeleted"}
$mailbox | foreach {Remove-StoreMailbox -Database $_.database -Identity $_.mailboxguid -MailboxState SoftDeleted}
Repeat for each database if necessary.
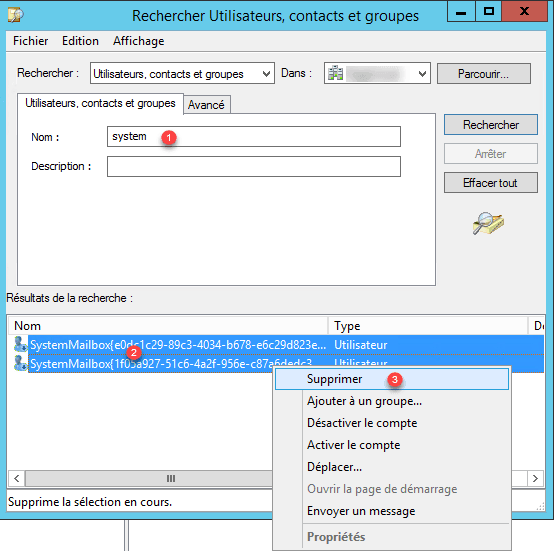
Deleting SystemMailbox accounts
On a domain controller and open the Active Directory Users and Computer console, search for accounts containing system 1. Select all SystemMailbox users * 2 then right click and click on delete 3.
Remove connectors
Remove the Send connectors using the following PowerShell command:
Get-SendConnector | Remove-SendConnectorTo delete the reception connectors, return to the management console, go to Server configuration 1 / Transport hub 2. Select the server 3 then the connector 4 and right click on it and click on Delete 5.
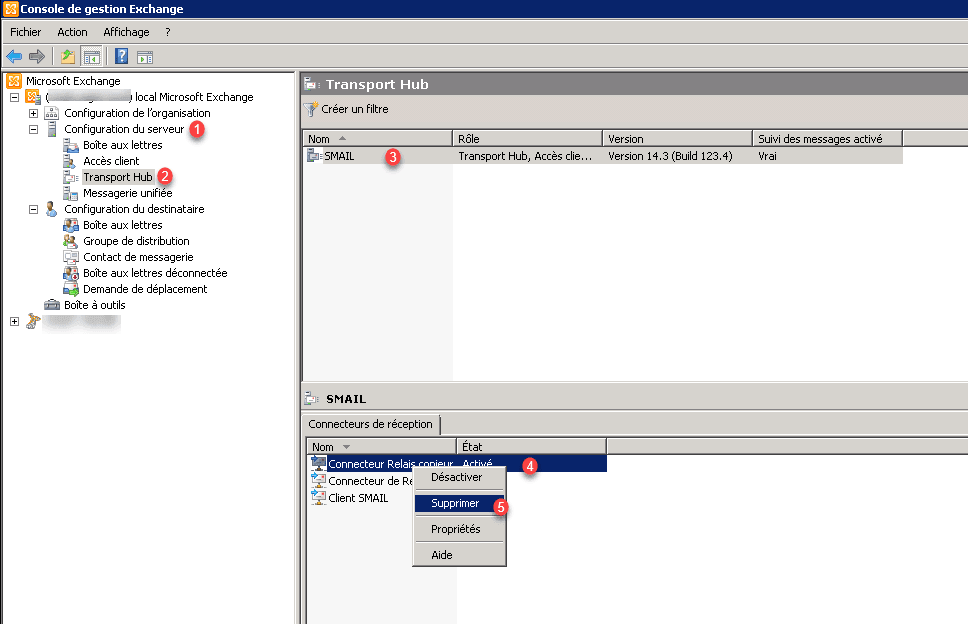
Repeat for all connectors and servers
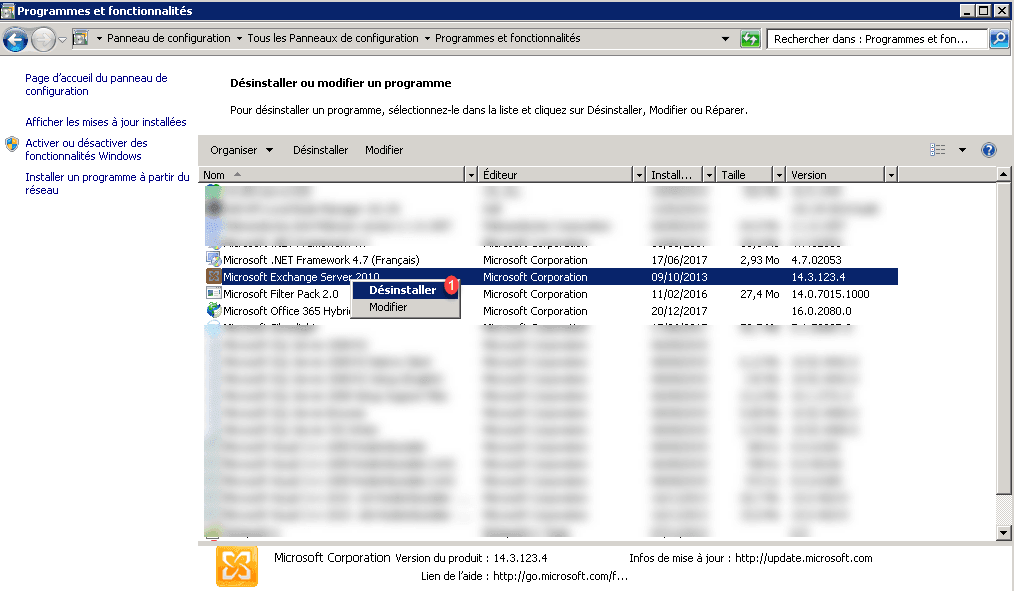
Uninstalling Exchange
Open the Control Panel -> Programs and Features, search for Microsoft Exchange Server 20XX and right click on it and click Uninstall 1.
When launching the wizard click on Next> 1.

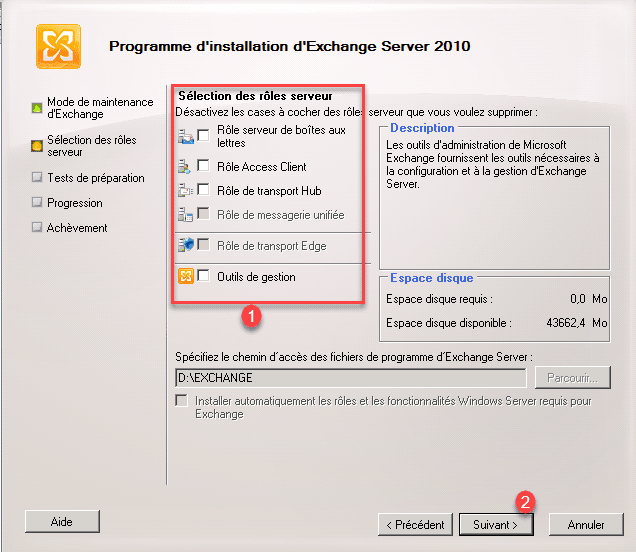
Uncheck roles 1 and click Next> 2.
Once the tests have been validated, click on Uninstall.

Click finish to close the wizard, Exchange is uninstalled.

ProxyAddresses attribute verification
In some cases, uninstalling Exchange empties the users’ proxyAddresses attribute.
From the Active DIrectory Users and Computers console, verify that the proxyAddresses attribute is present and not empty 1.
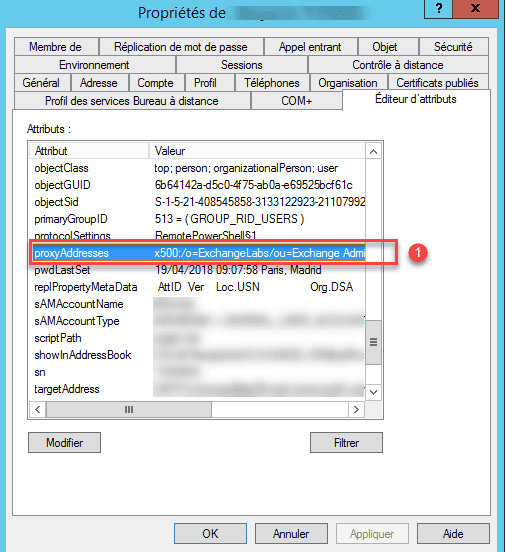
In an AD environment, wait a few hours for replication to take place on all DCs.
If the attribute is empty, use the script to re-inject the email addresses.
Uninstall Microsoft Office 365 Hybrid Configuration Wizard
From the control panel, launch the wizard to remove Microsoft Office 365 Hybrid Configuration Wizard.
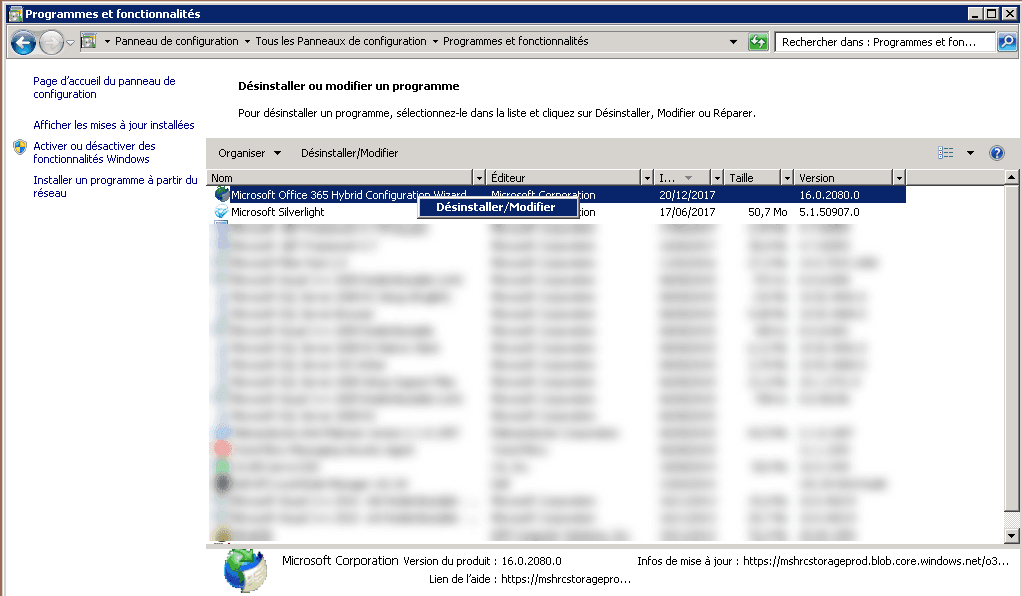
Choose to delete the application from this computer and click OK 1.

Relaunch Azure Ad Connect synchronization
Once you are sure that everything is good, restart AD Connect synchronization with the following PowerShell command :
Set-ADSyncScheduler -SyncCycleEnabled $TrueTroubleshooting
During preparation tests for uninstalling Exchange the following errors are possible :
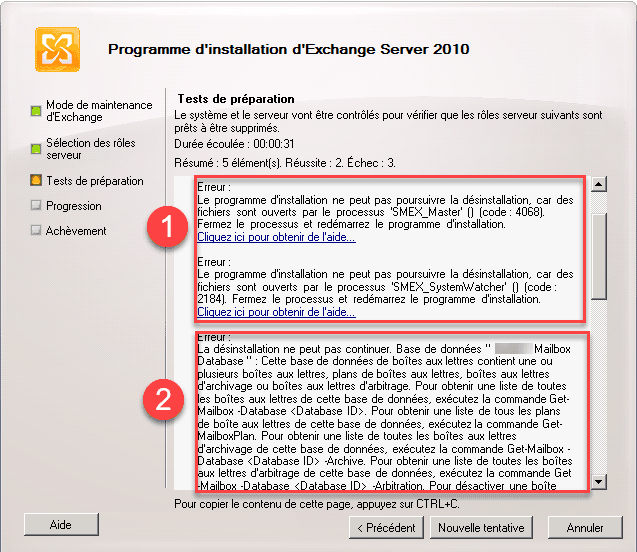
1 : Files are opened by the “SMEX_Master” process () (code: 4068) (Antivirus): I had to deactivate the antivirus.
2 : Error due to arbitration mailboxes, to resolve this error enter the powershell command below.
Get-Mailbox –Arbitration | Disable-Mailbox –Arbitration –DisableLastArbitrationMailboxAllowed