In this article, we will see how to deploy applications in MSI format using Group Policy (GPO) in an Active Directory environment.
There are two deployment modes :
- Assigned: Applies mainly to computers, program installation is forced.
- Published: applies only to users, this mode allows the installation of software at the request of the user, this one is published using control panel.
Before starting the implementation of the GPO, it is necessary to set up a sharing accessible to the computers and / or users according to the selected mode.
Table of Contents
Deploy in Assigned Mode
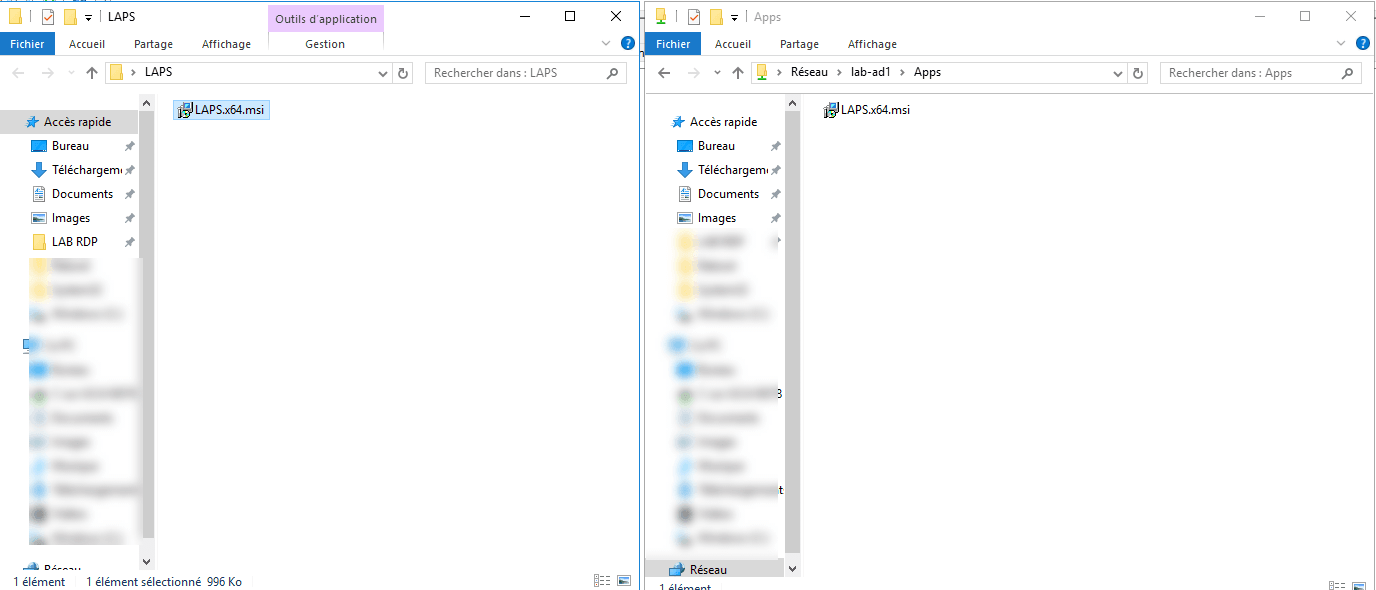
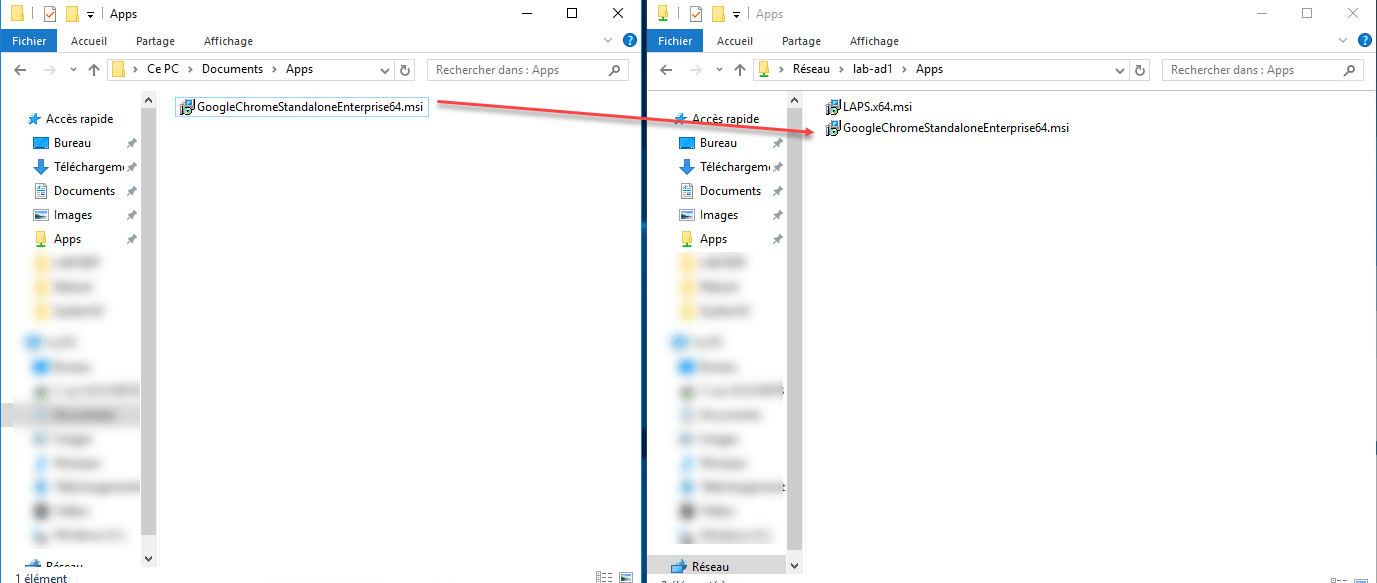
Copy the executable to shared folder.
From the Group Policy Management console, right-click on OU 1 where the policy will be applied and click Create GPO in this field, and link it here 2 .

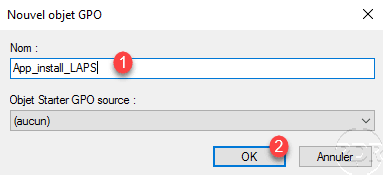
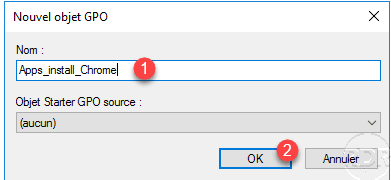
Name 1 the strategy and click OK 2 .
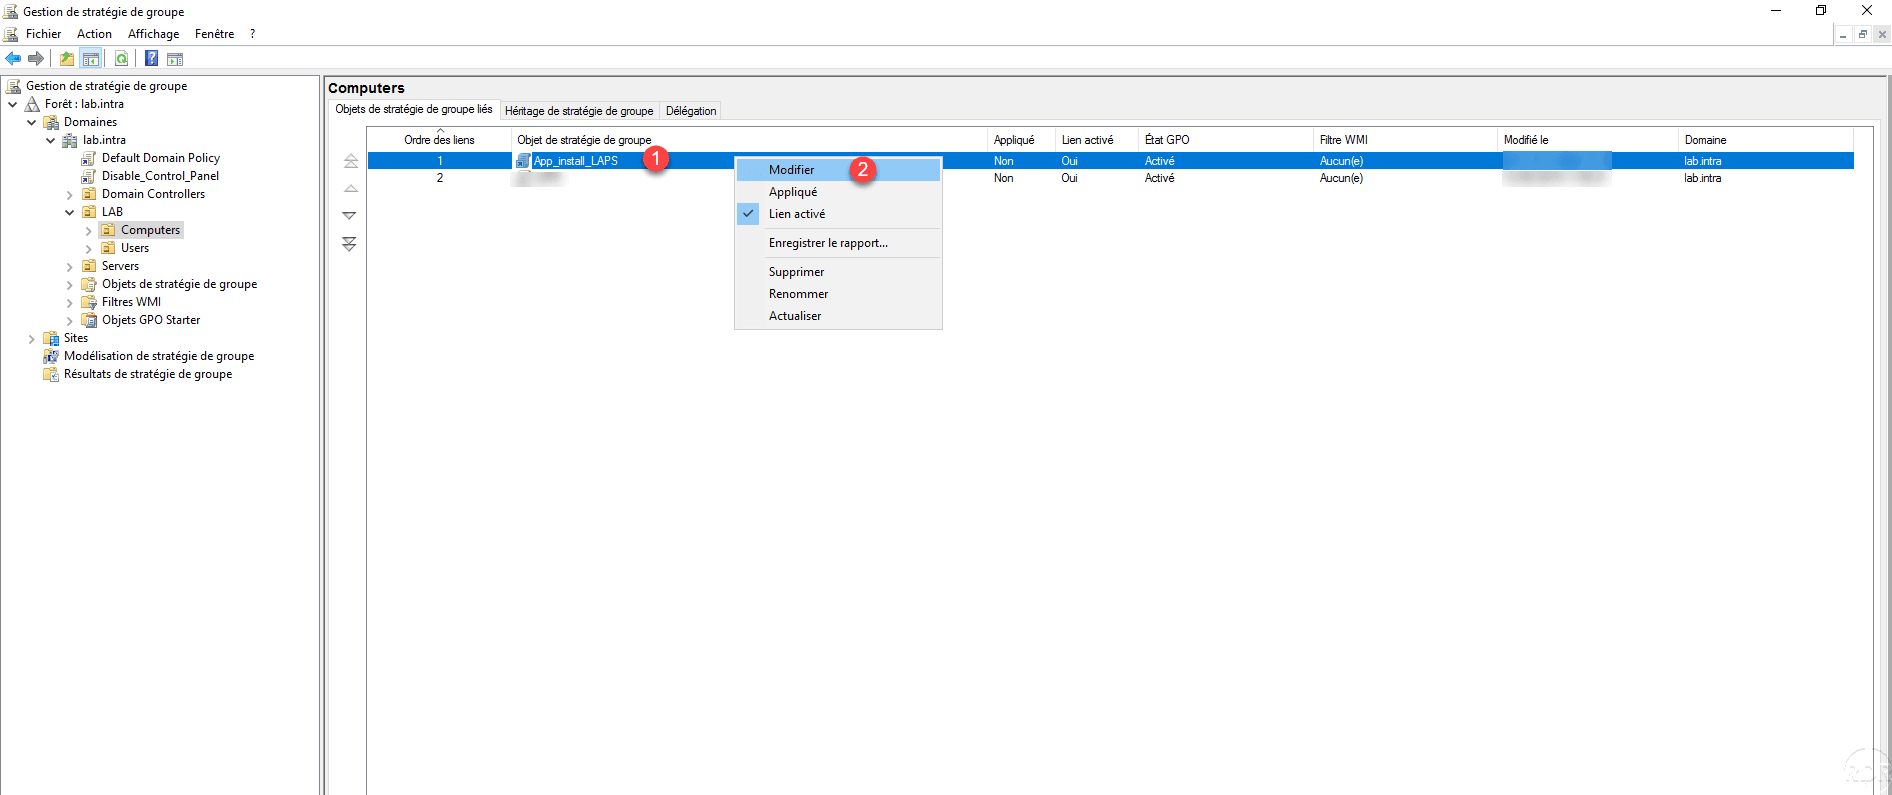
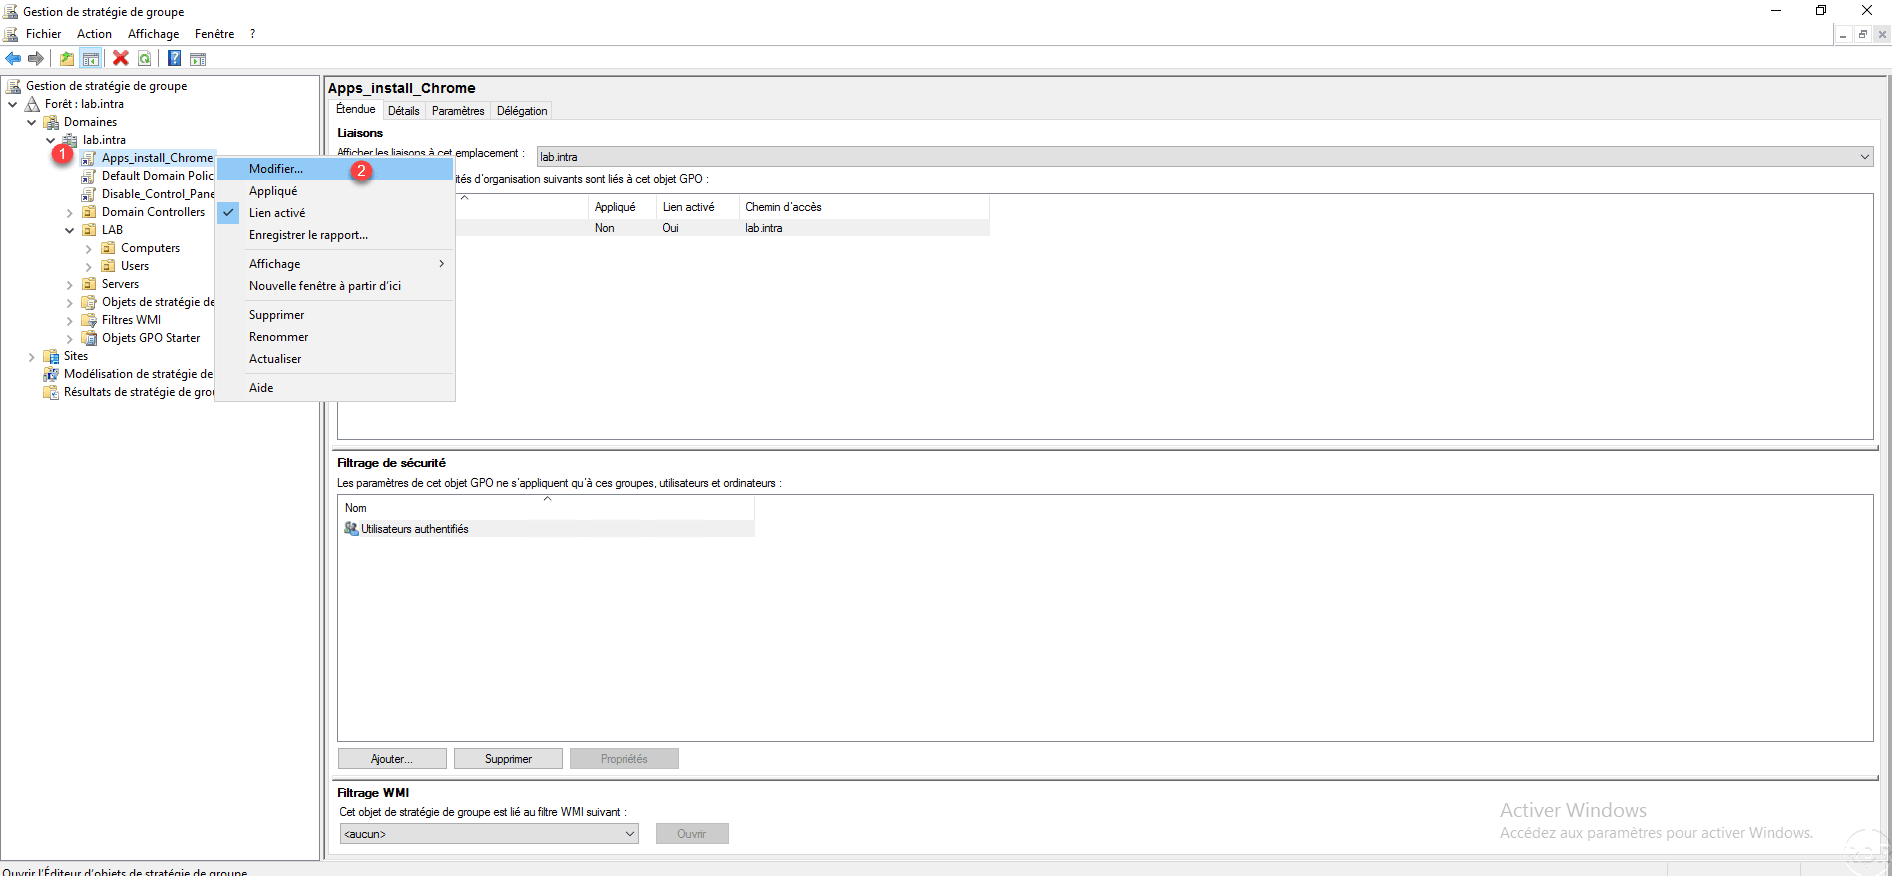
Once the strategy is created, right click on 1 and click on Edit 2 .
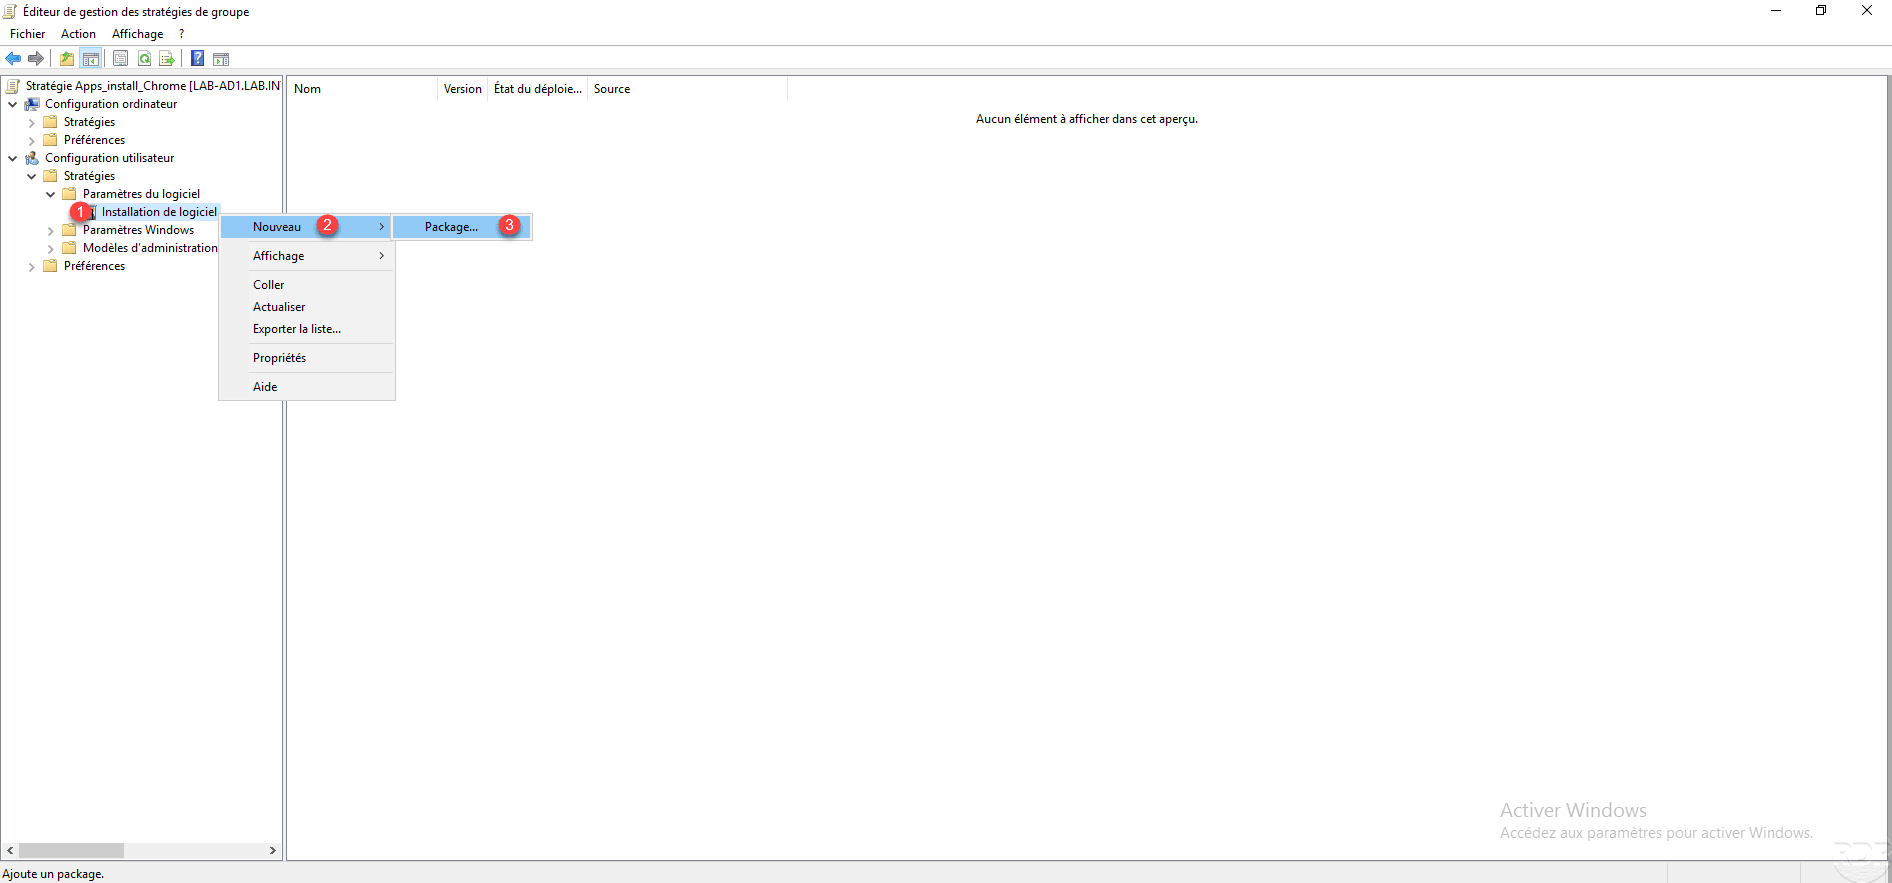
Go to Software Installation 1 found in Computer Configuration / Policies / Software Settings, right-click in the box on the left. Go to New 2 and click on Package 3 .

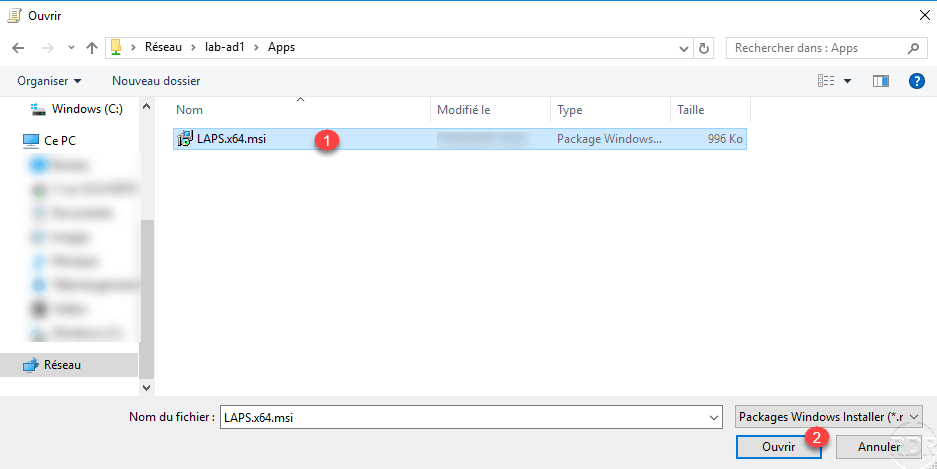
Get the file MSI 1 by its path UNC then click on Open 2 .
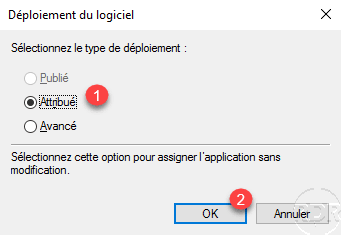
Choose the type Attributed 1 and click OK 2 .
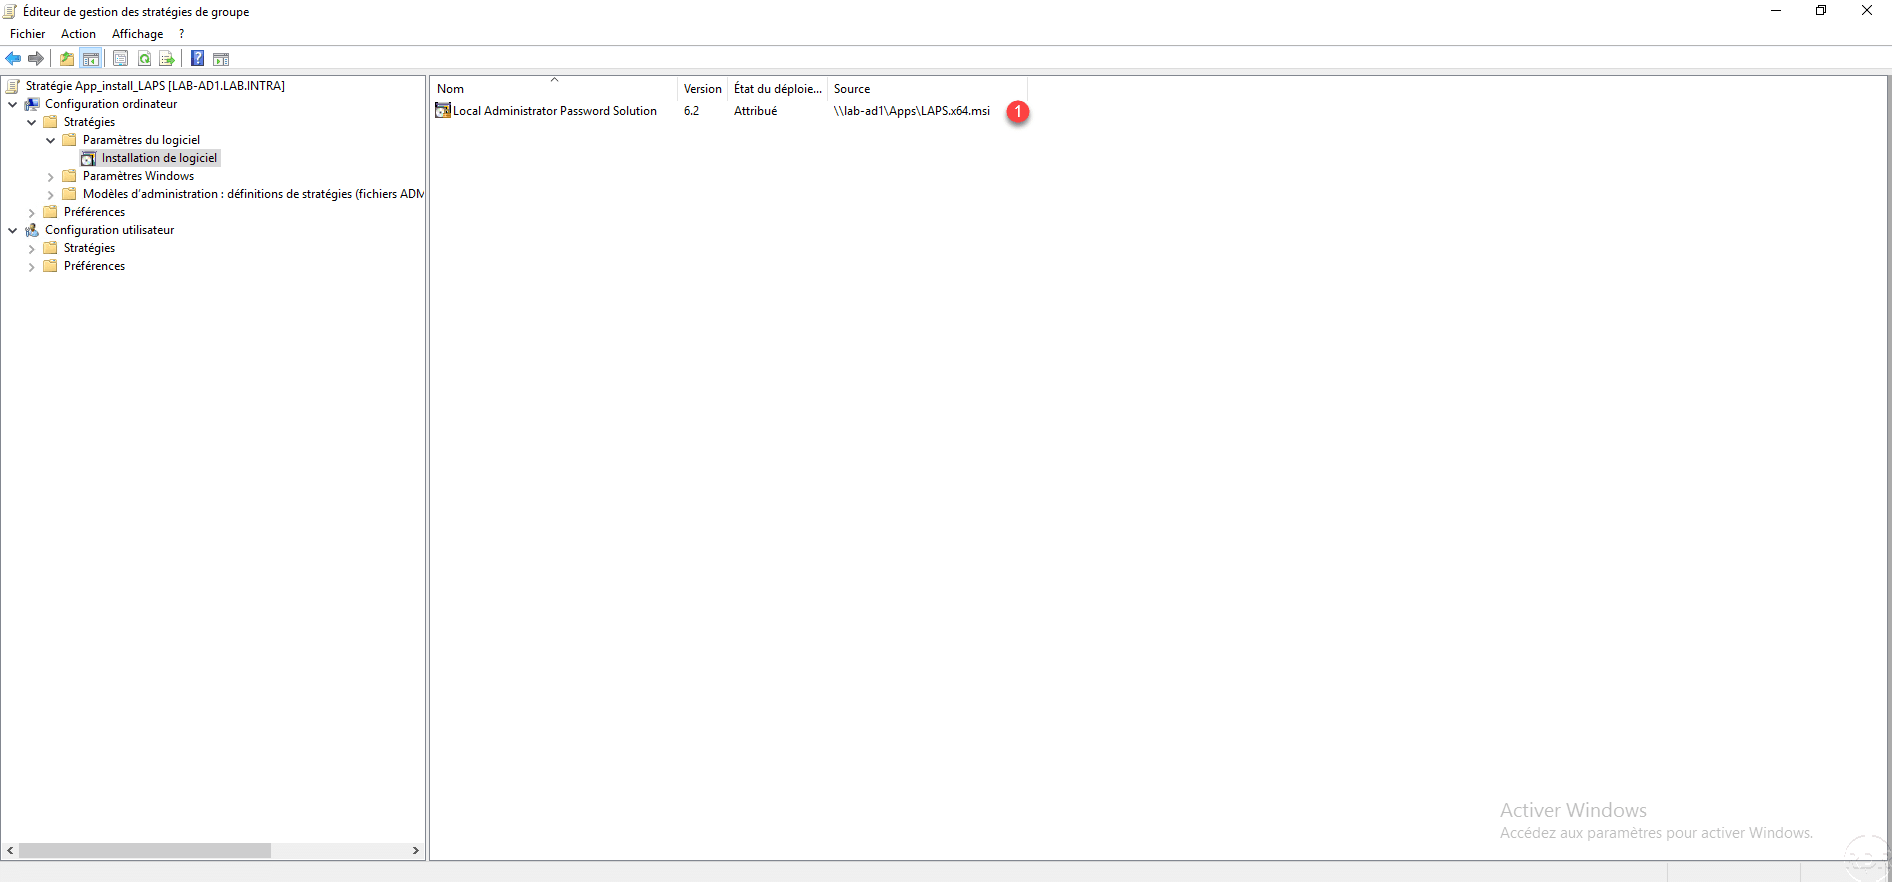
The package is added 1 to the deployment.
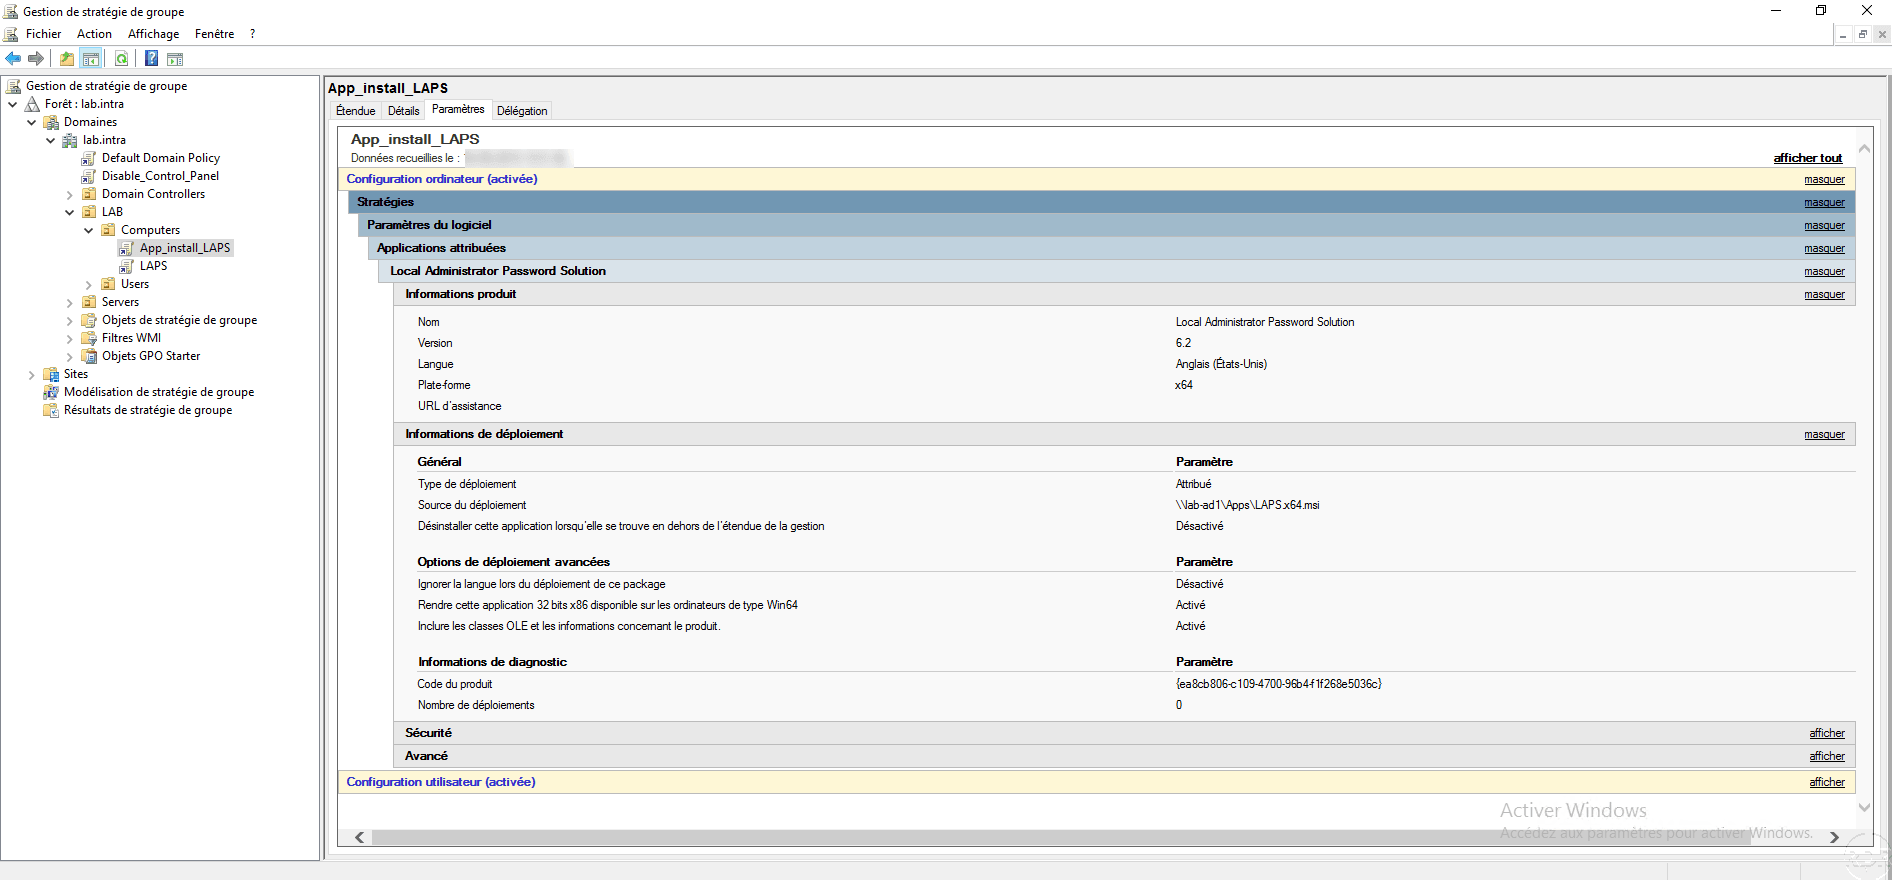
Summary of the strategy:
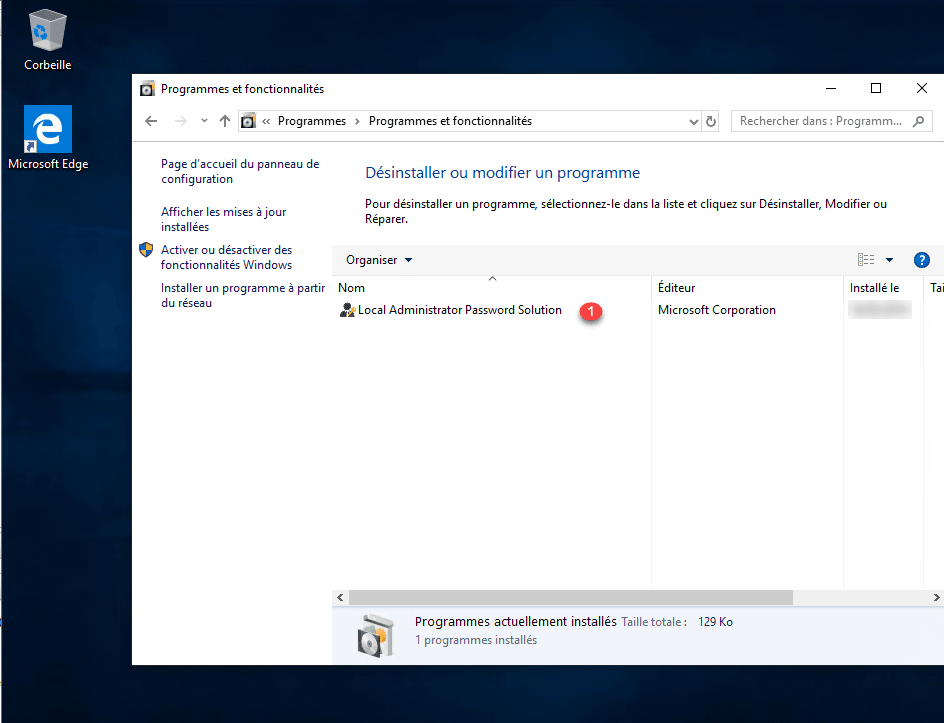
Restart a station in the target OU and check that program 1 is installed correctly.
It is also possible to see the traces of the installation by the event observer (ID: 1040/1042).

Deployment in Published Mode
The published mode deployment allows the user to install the application itself.
As with the assigned deployment, place the MSI file on a network share.
Depending on who can deploy the application right-click on target OU or directly at the root of domain 1 and click Create a GPO in this area, and link it here 2 .

Name 1 the strategy and click OK 2 .
Right click on the 1 strategy and click on Edit 2 .
Go to Software Installation 1 found in User Configuration / Policies / Software Settings, right-click in the box on the left. Go to New 2 and click on Package 3 .
Get the file MSI 1 by its path UNC then click on Open 2 .
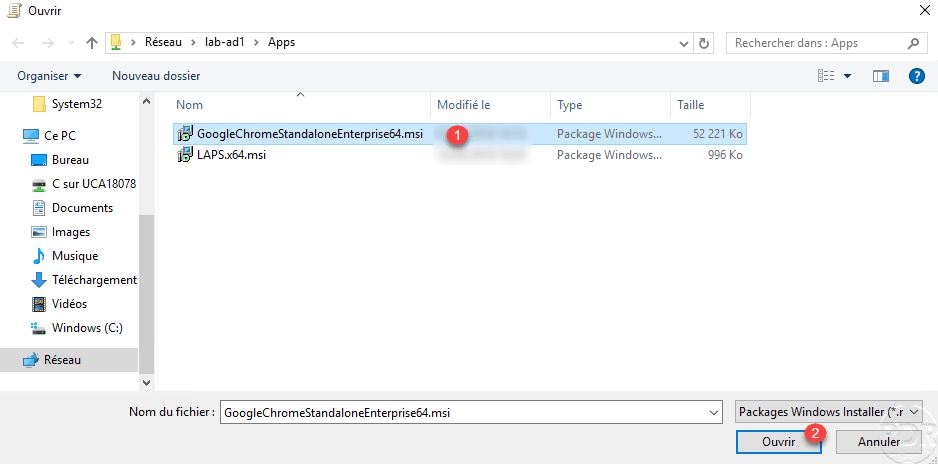
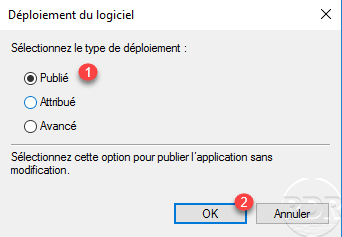
Choose published type 1 and click OK 2 .
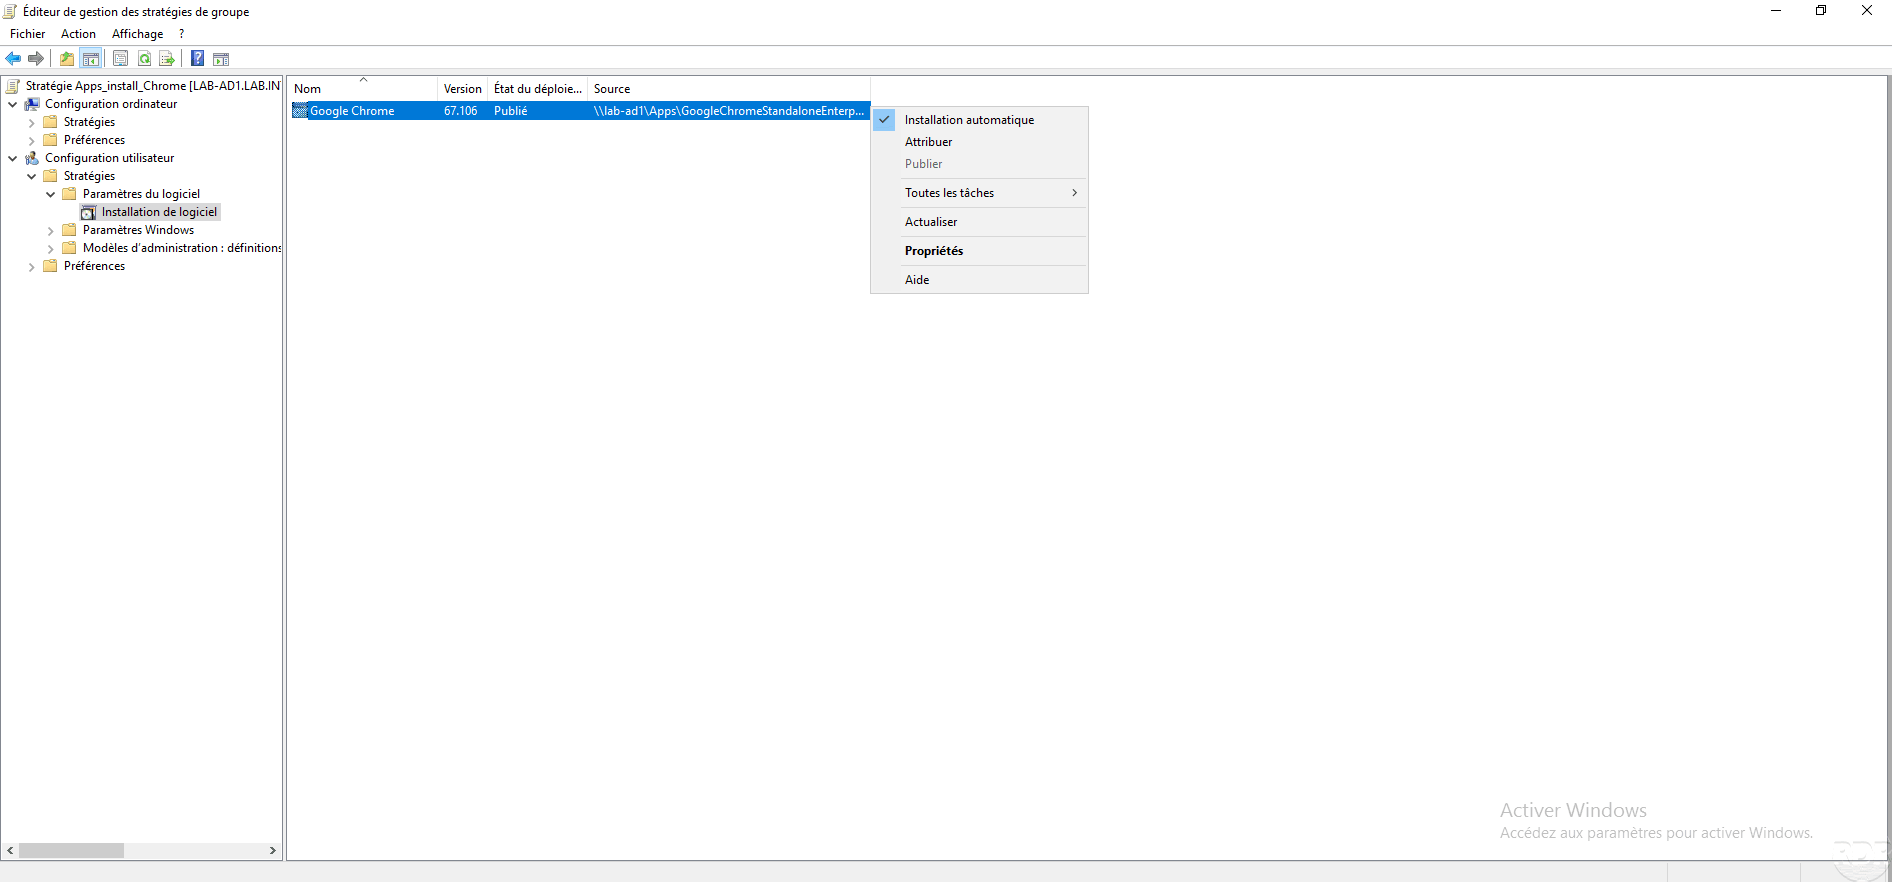
The application is available, by right clicking on it, we can see that it is configured to install automatically.
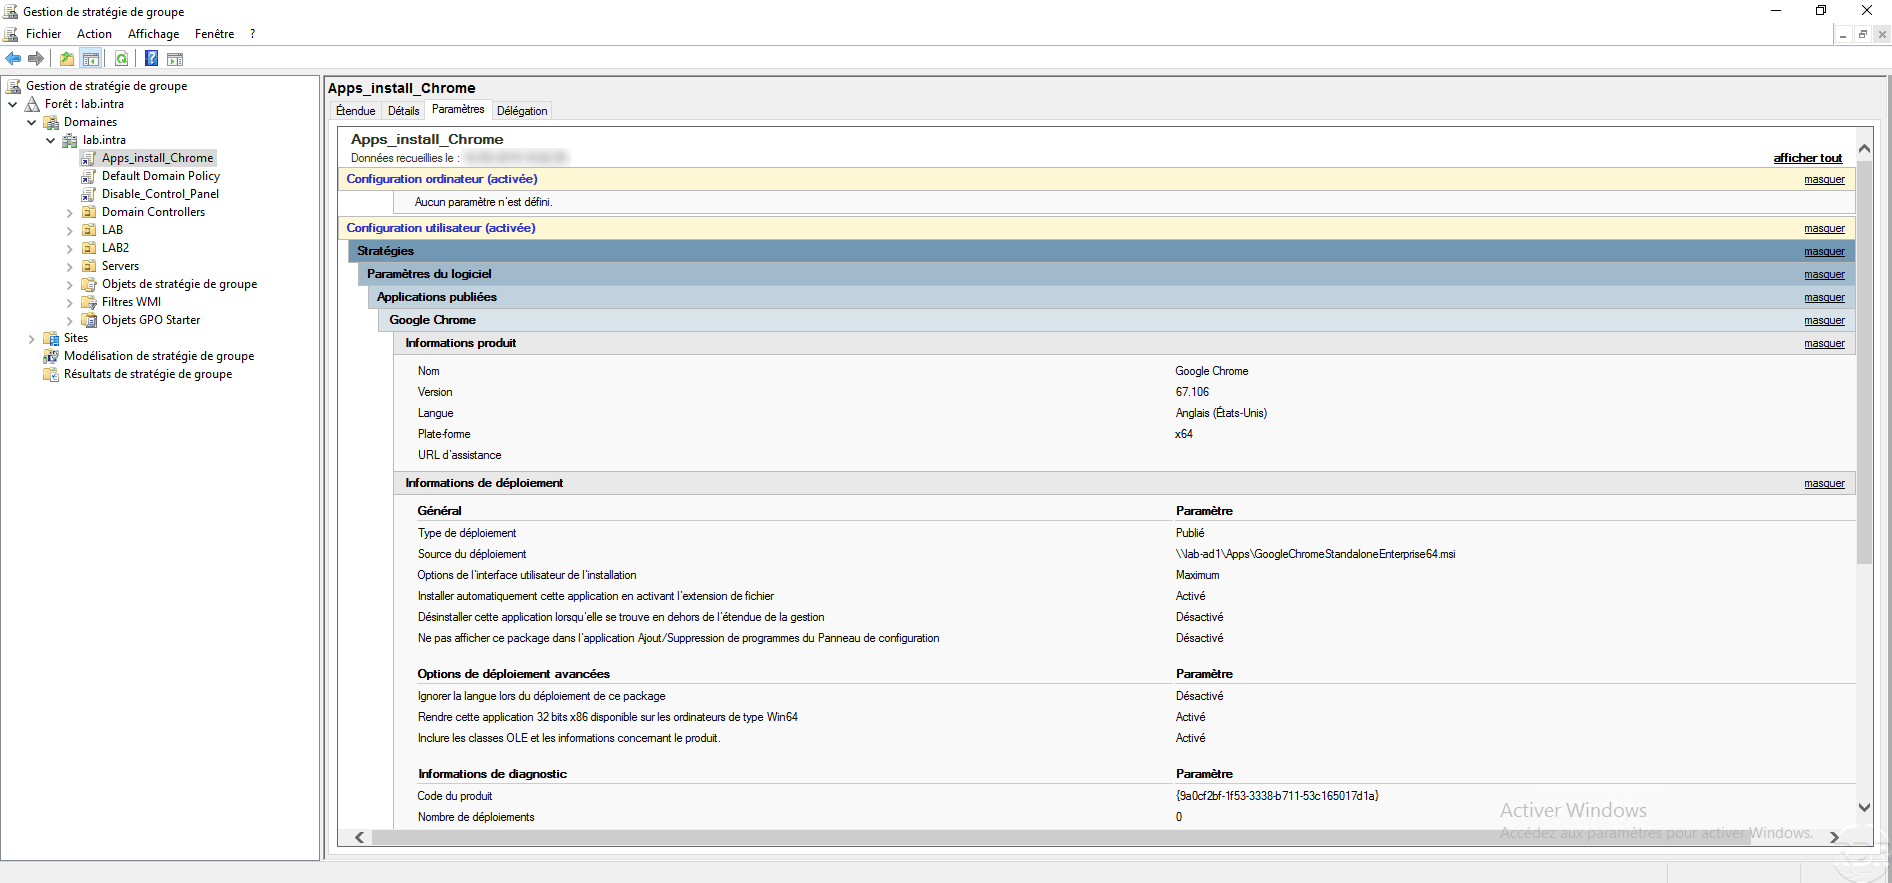
Detail of Group Policy:
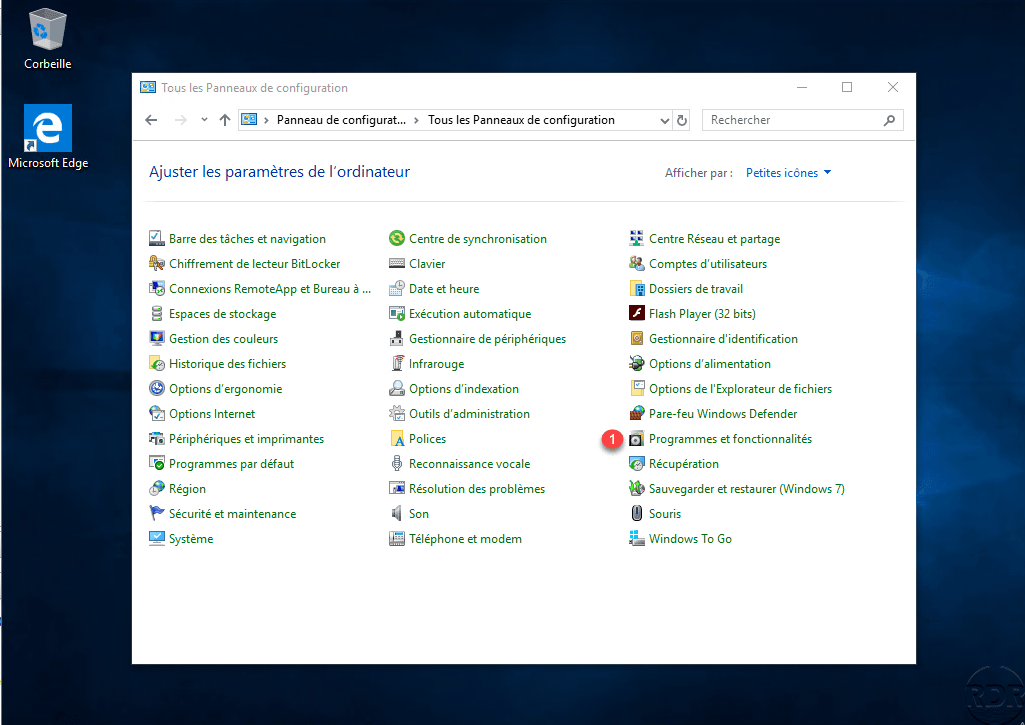
On a computer, open a user session to which the policy applies, go to the control panel and click on Programs and Features 1 .
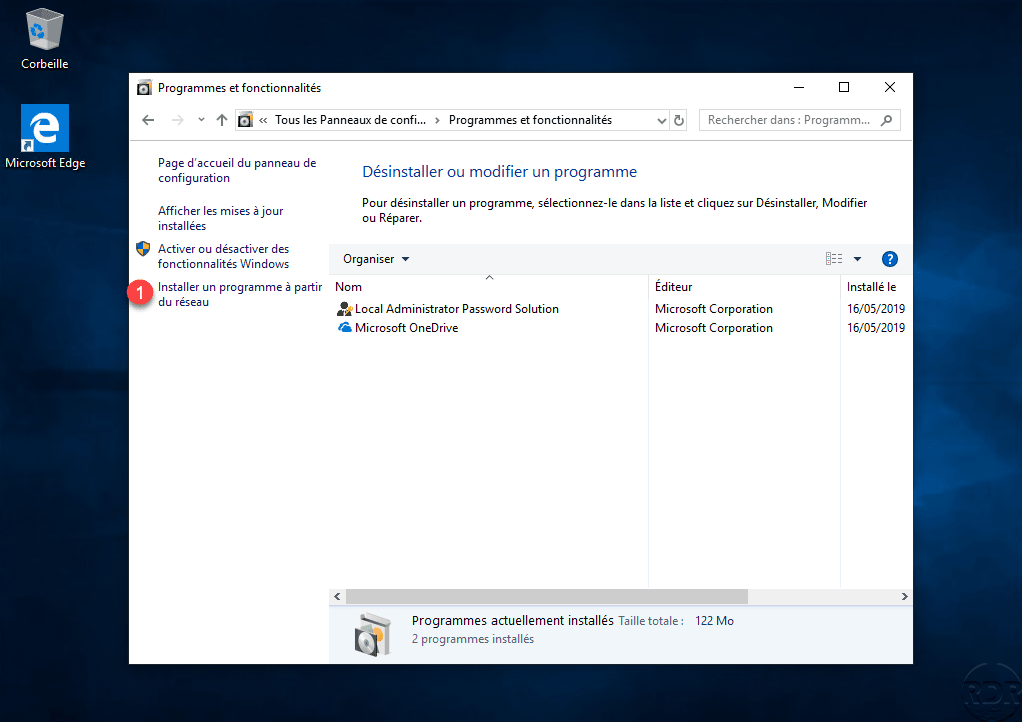
Click Install a program from network 1 .
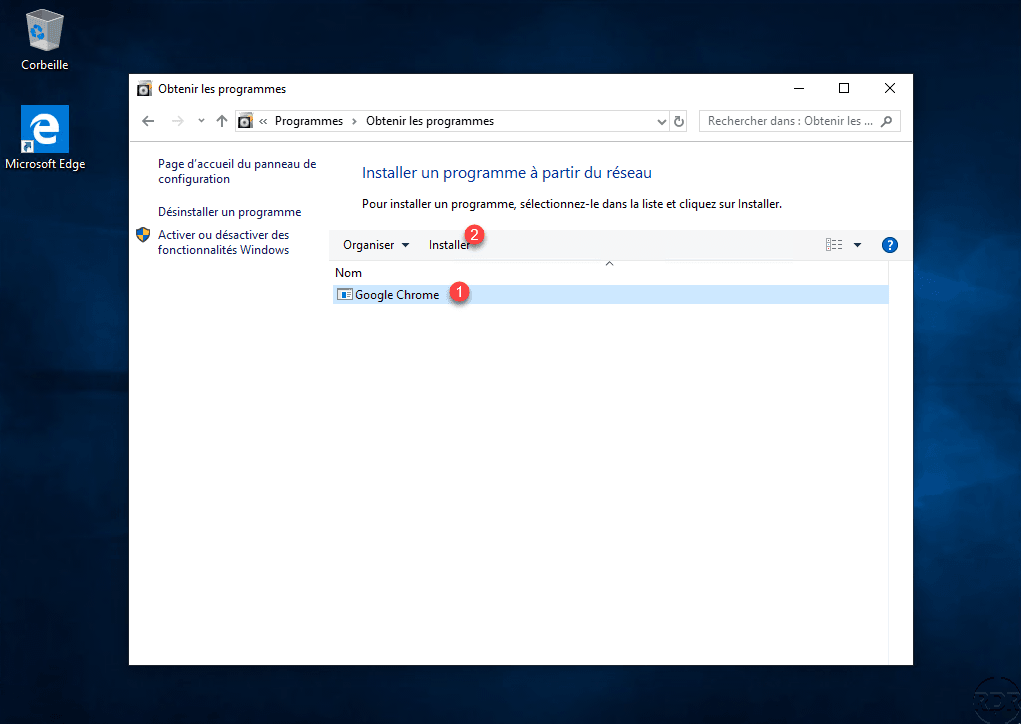
Here we find all published applications, select application 1 and click on Install 2 .
Wait during the installation …

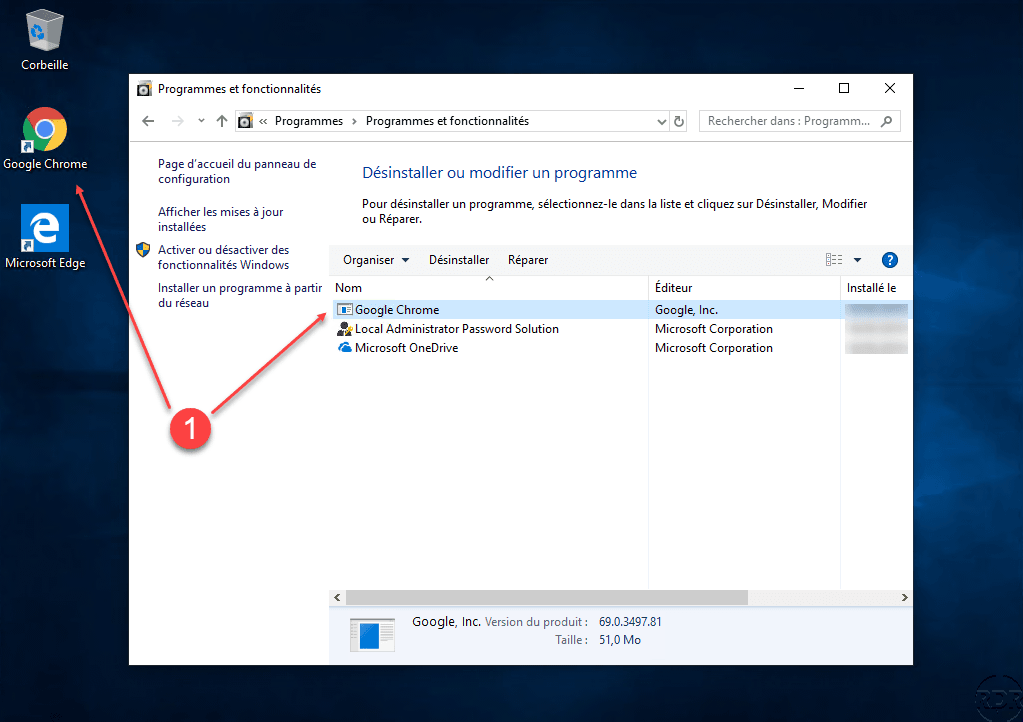
The program is installed 1 .
Updating an MSI by Group Policy
Now, I will explain to you how to update an MSI which is deployed by GPO.
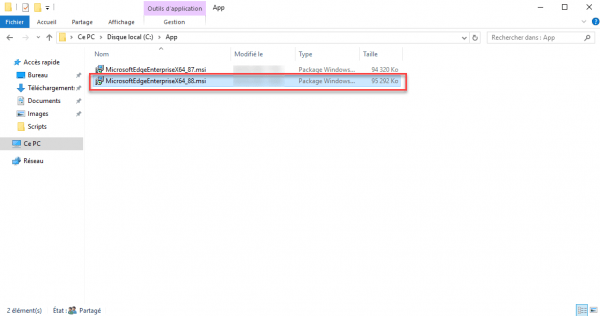
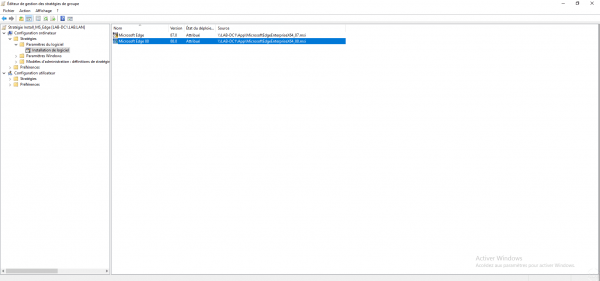
To illustrate this tutorial, we are going to update the Edge browser which is deployed in version 87 and upgrade it to 88.
In the shared folder, copy the MSI file 1.
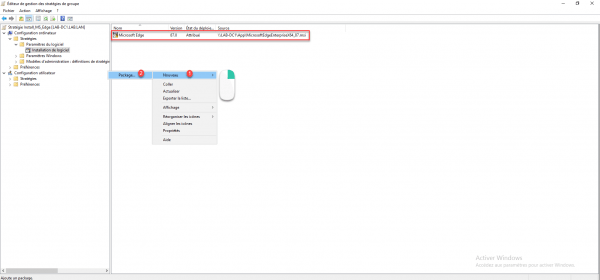
In the Group Policy where the previous version of the software is deployed, add a new package, to do so, right-click in the central zone and go to New 1 and click on Package 2.
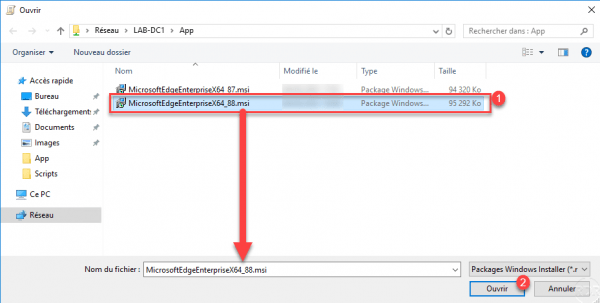
Select the MSI file 1 from the UNC path and click Open 2 to add it to the group policy.
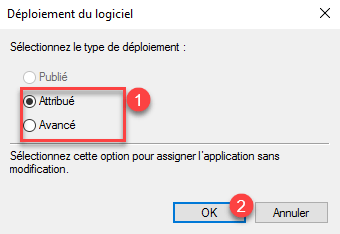
Select the type of deployment 1 and click OK 2.
The file is MSI is added to the policy.
Now that the MSI file is added to the group policy, it must be indicated that it can be used as an update.
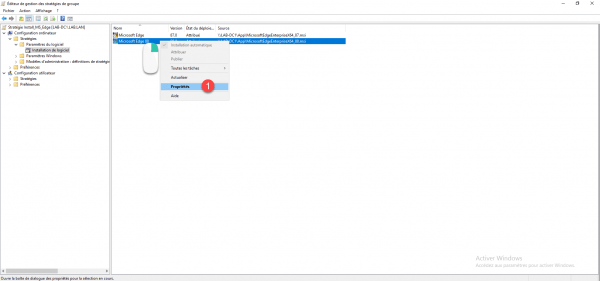
Right click on the file and click on Properties 1.
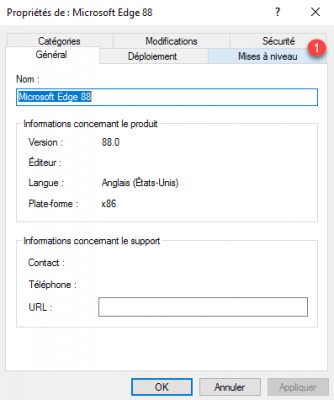
Go to the Upgrades tab 1.
From this tab, you can configure for which package the file is an update, click on the Add 1 button.
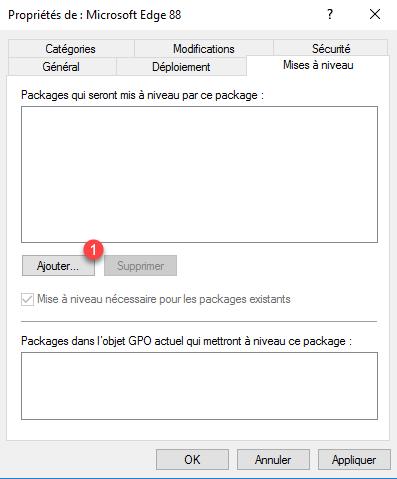
Now you have to configure the behavior of the upgrade. Select the group policy 1, then choose the application that will be upgraded 2, select how the upgrade will be performed 3 and click OK 4 to validate.
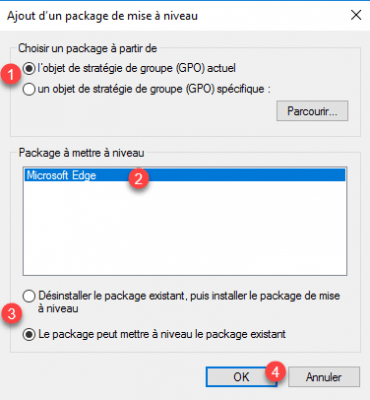
In the example of the tutorial, I select the current group policy, I indicate that the application to update is Microsoft Edge, that the upgrade can be done without uninstalling.
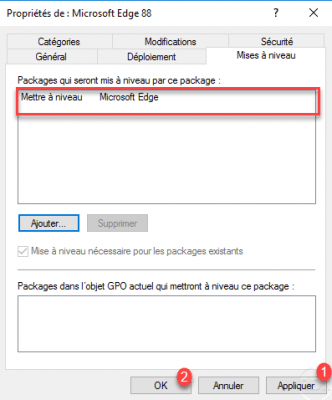
Back in the properties, we can see the upgrade, click on Apply 1 and OK 2.
The package icon may have a green arrow indicating the upgrade.
For some MSI, the upgrade is detected automatically
Remove an MSI application deployed by Group Policy
In the last part of this tutorial, we will see what happens when we remove an MSI deployed by GPO.
To delete a package, right click on it 1, then go to All Tasks 2 and click on Delete 3.
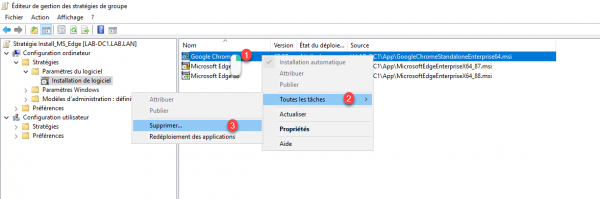
Then, you must select the behavior 1 and click on OK 2.
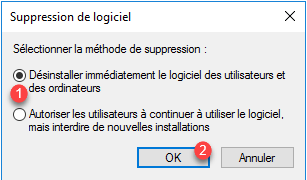
When deleting, you have two choices. The first will uninstall the software on the computer and users will no longer be able to use it and the second choice only stops the deployment, computers that already have the software to deploy remain installed and users can continue to use it.
