
In this tutorial, I will explain how to set up an authentication silo with Active Directory, but before going into detail, I will explain in a few words what an authentication silo is used for.
In fact it is quite simple, it allows to control on which computers a user can connect, the authentication silos are particularly used when we set up a hierarchy with third parties (T0/T1/T2) to restrict authentications to the right tier.
Authentication silos on Active Directory are also linked to authentication strategies which allow us additional settings such as the lifetime of Kerberos tickets.
If you are interested in authentication strategies in Active Directory, I covered the subject in this tutorial: Active Directory: authentication strategy
To illustrate this tutorial, we will set up an authentication silo to restrict the connection of the user Iron MAN to the computer LAB-CL-W11-1.
Since authentication strategies rely on claims, we will need to enable them in the domain.
Table of contents
Enable Kerberos Client Claims by Group Policy (GPO)
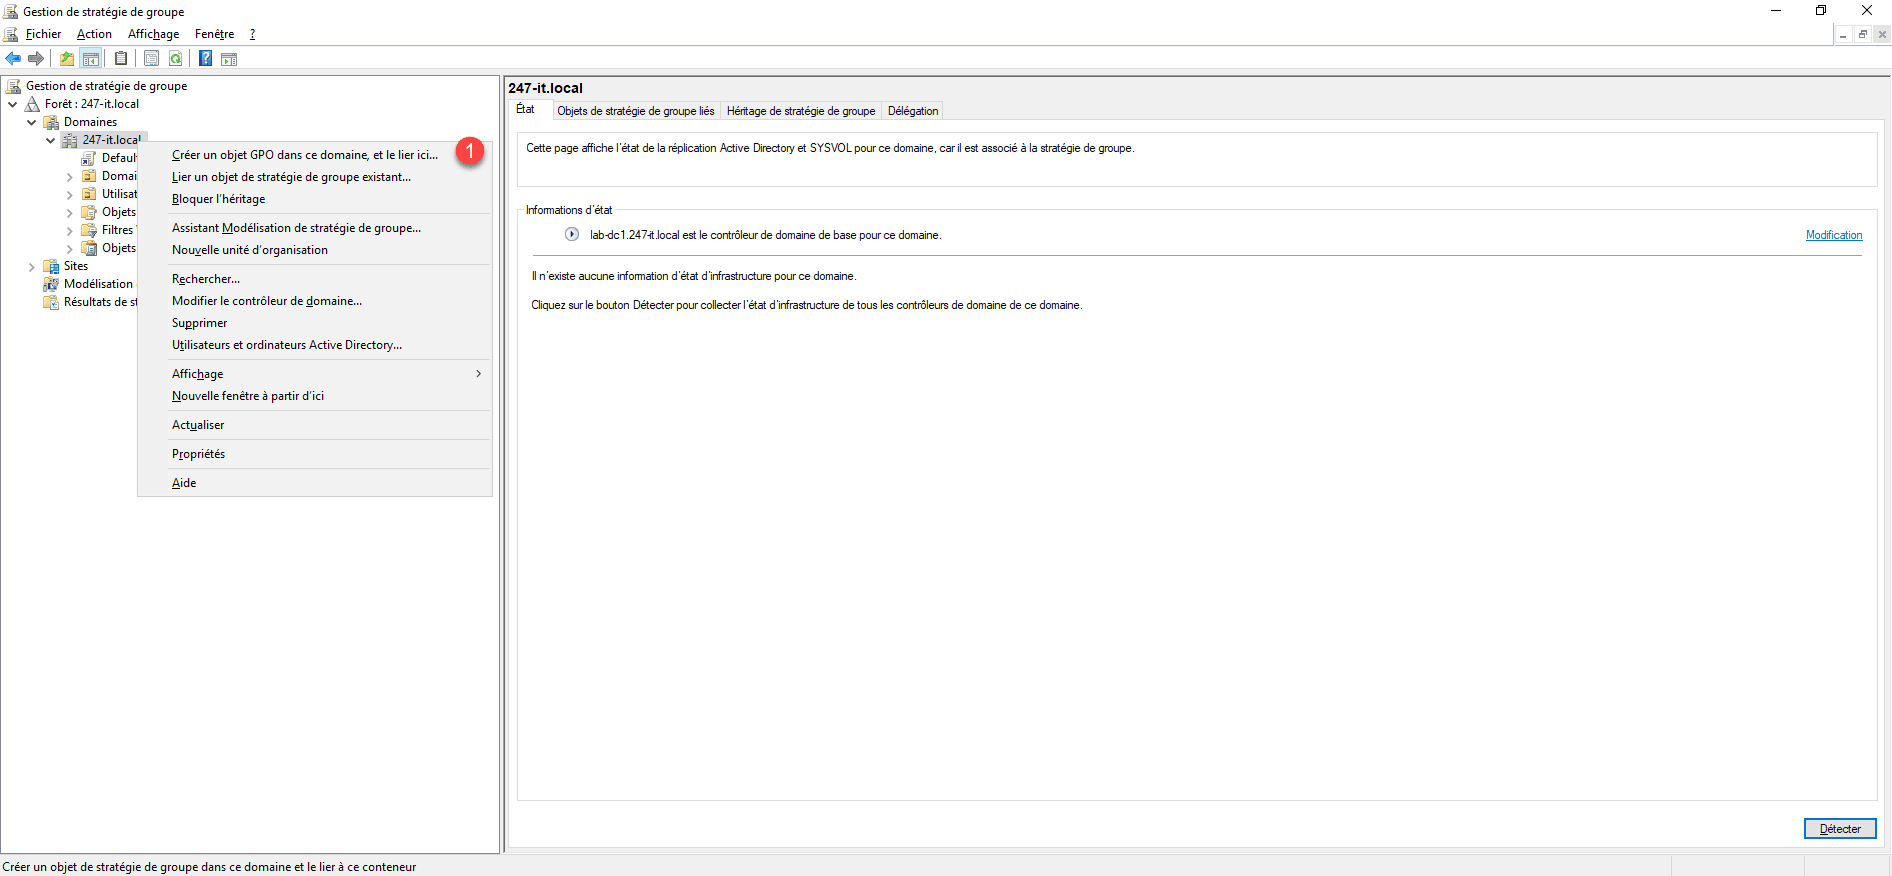
From the Group Policy Management Console, create a new policy at the root that will allow us to enable Kerberos claims.
On the root of the domain, right-click and then click Create a GPO in this domain, and link it here 1.
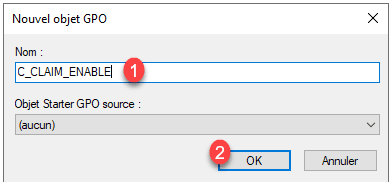
Name the GPO 1 and click OK 2 to create it.
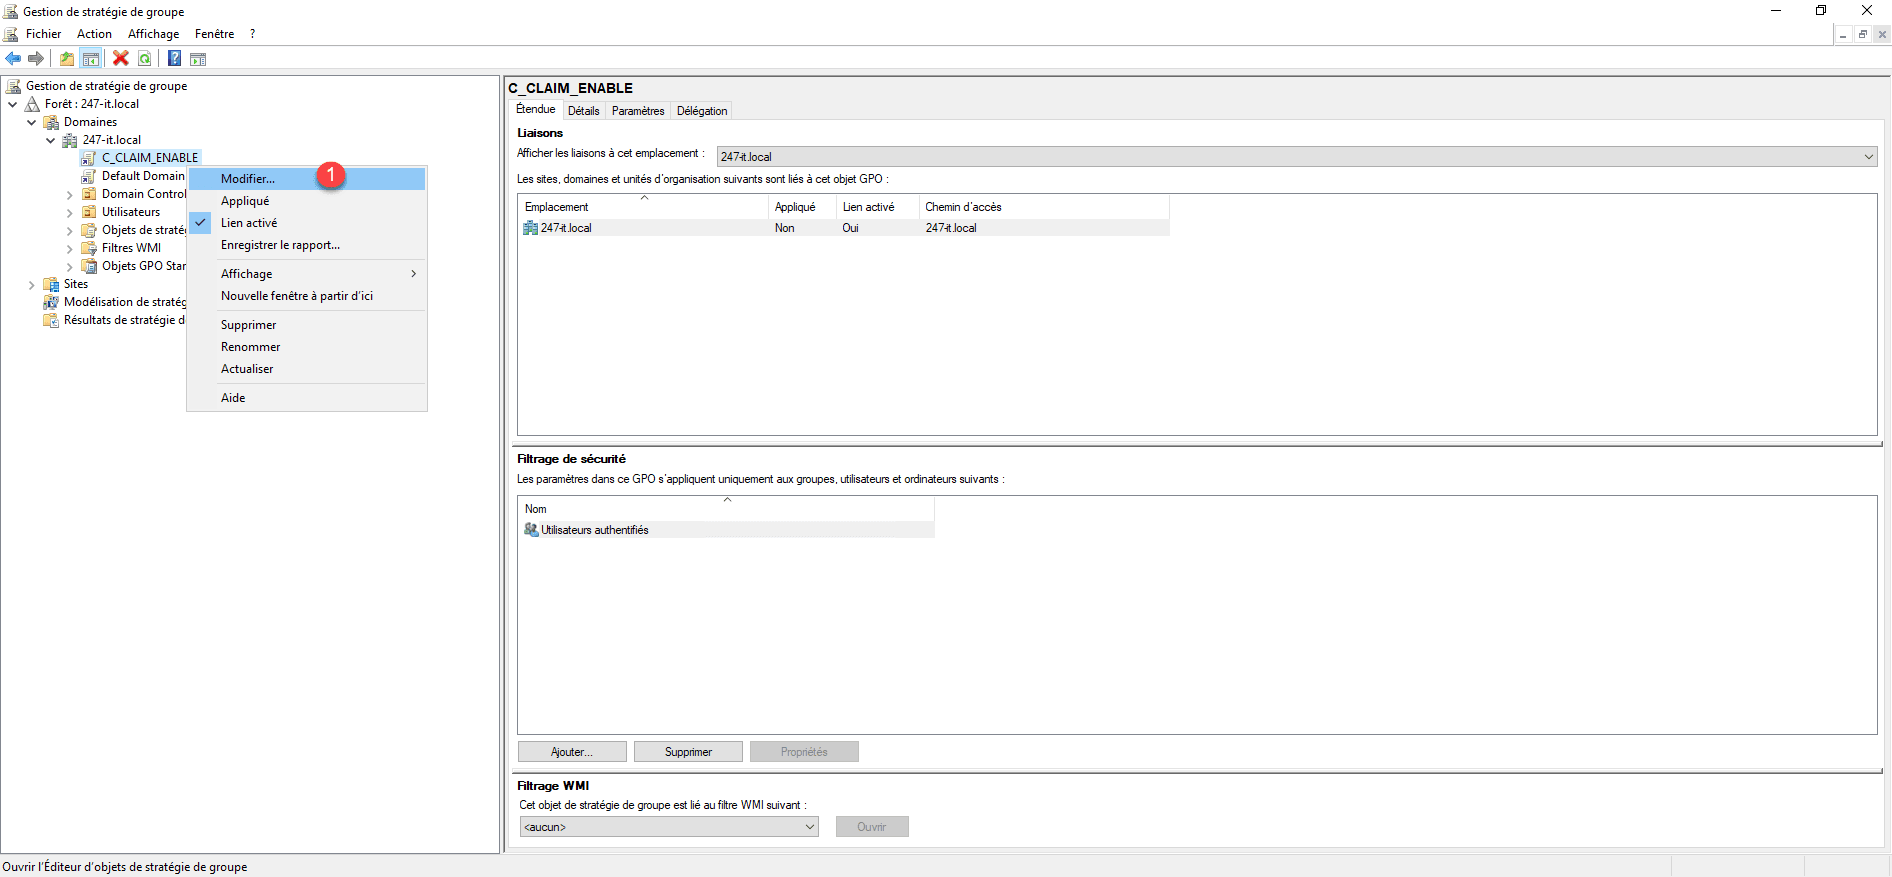
Right-click on the strategy you just created and click Edit 1.
Now we will configure settings which can be found in the following location:
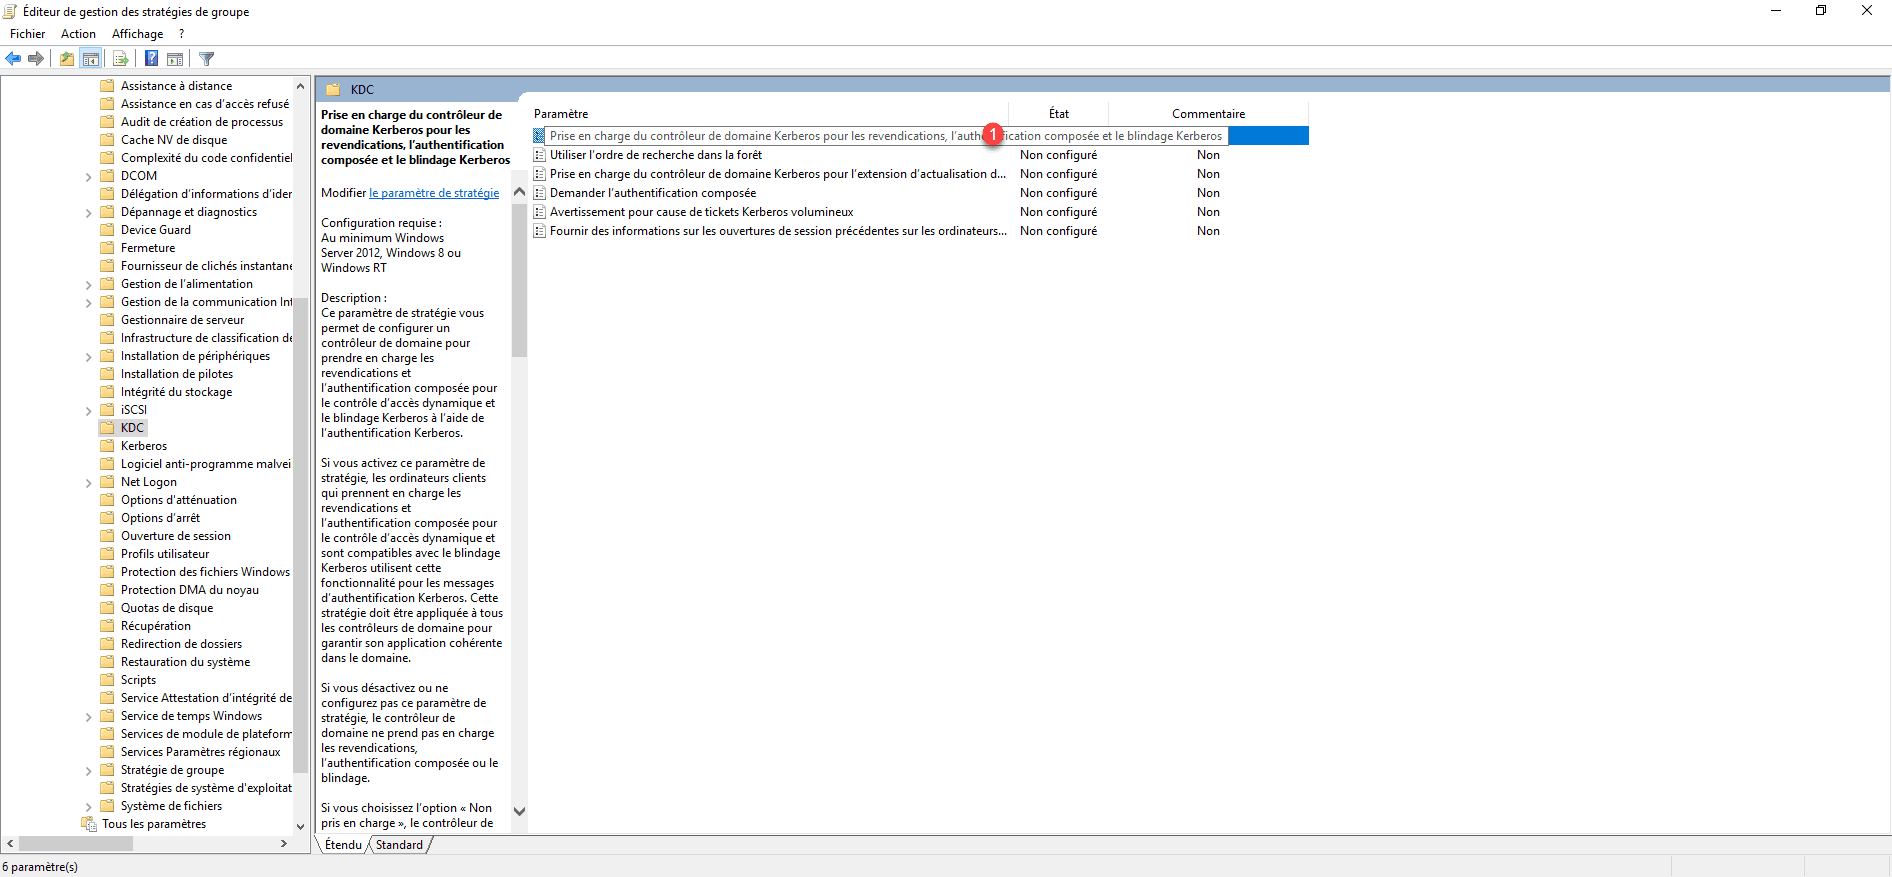
- Computer Configuration / Policies / Administrative Templates / System / KDC
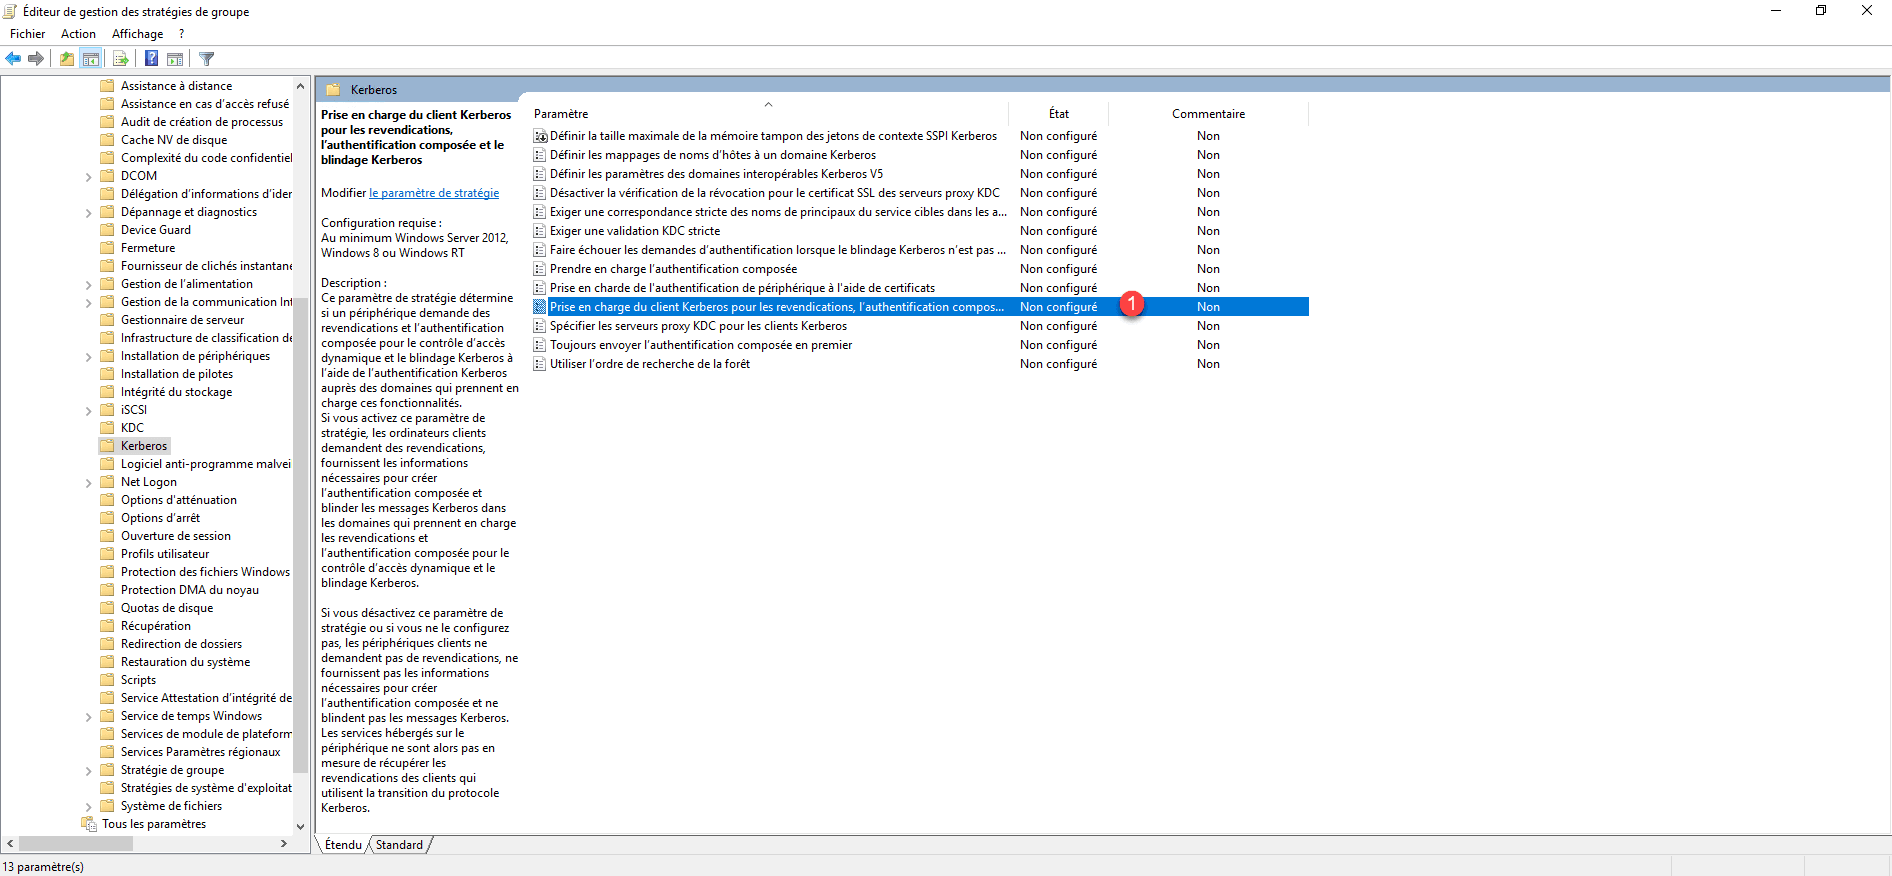
- Computer Configuration / Policies / Administrative Templates / System / Kerberos
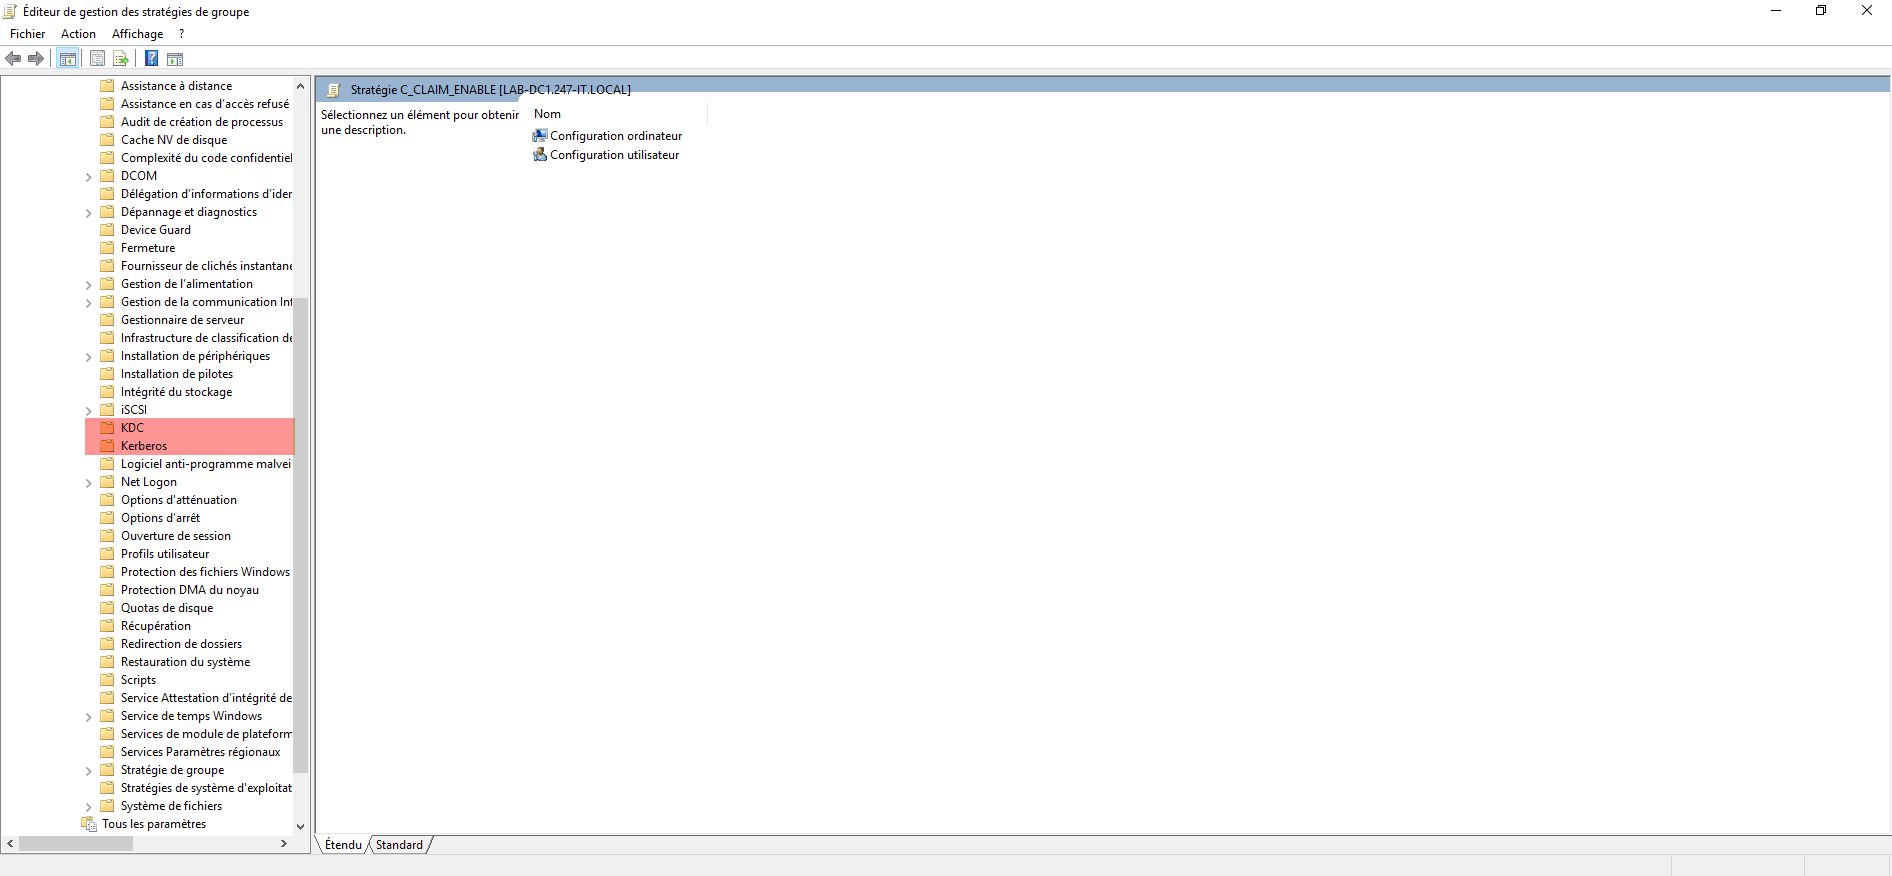
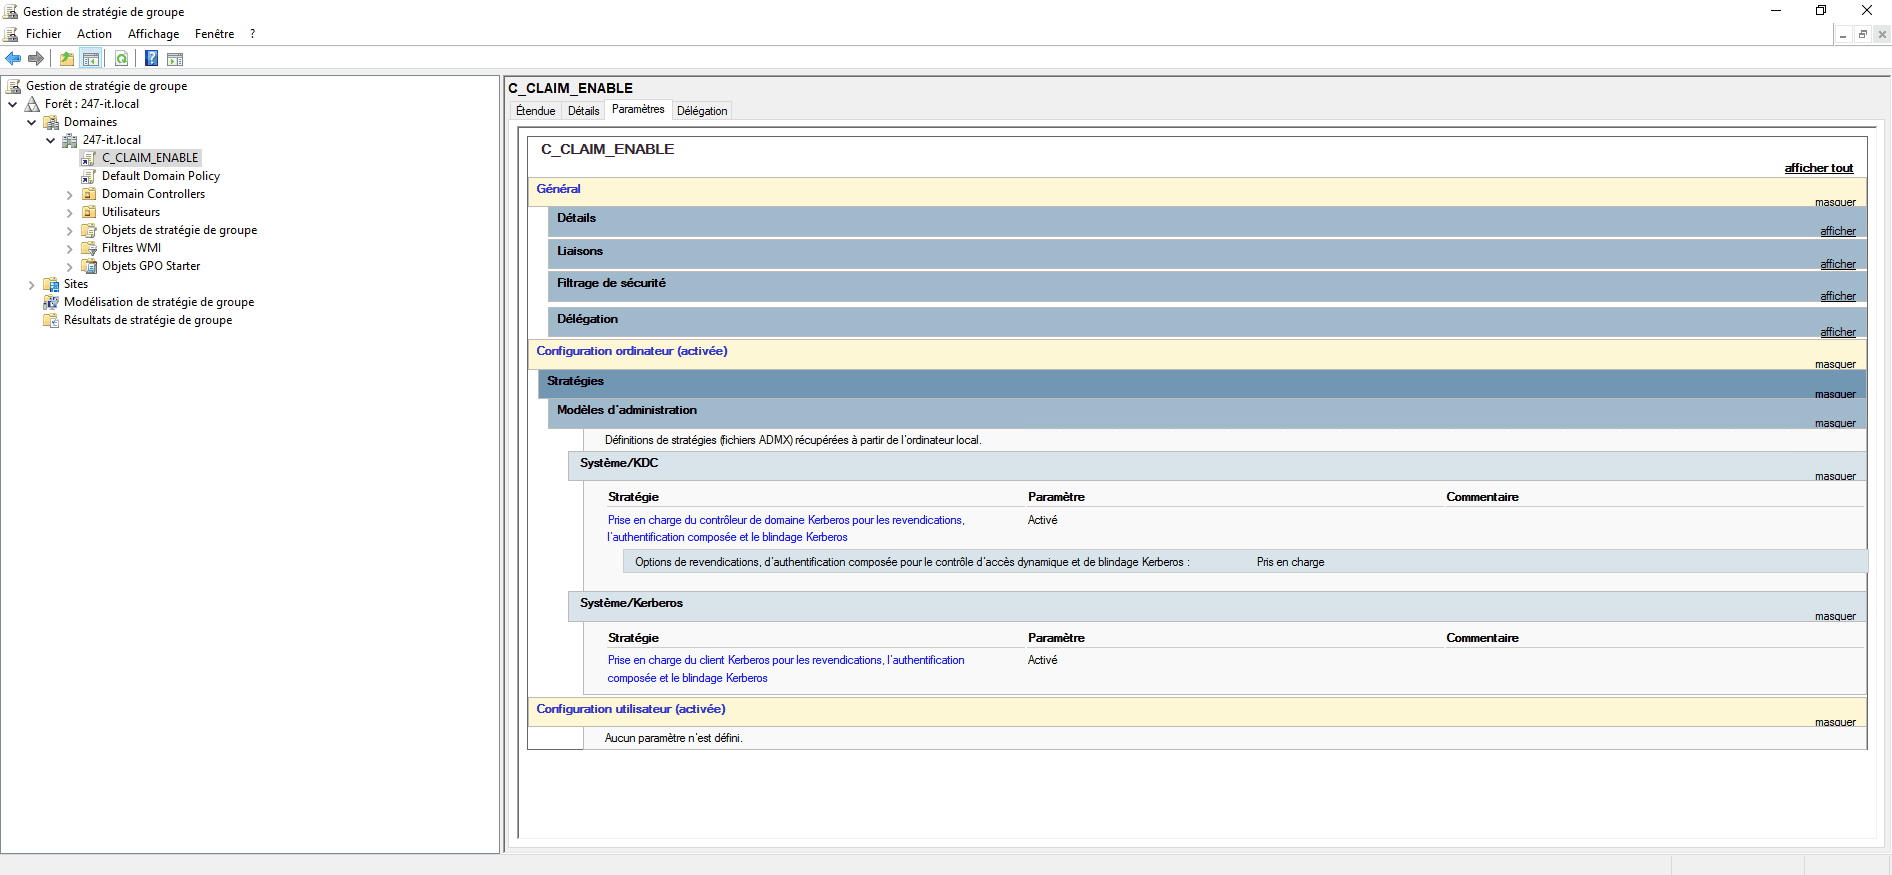
Go to the KDC folder and open the setting: Kerberos Domain Controller Support for Claims, Compound Authentication, and Kerberos Armoring 1.
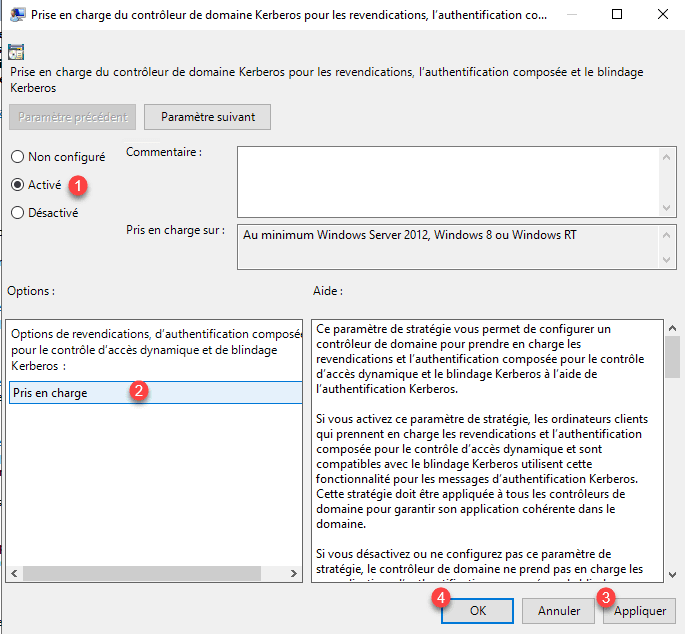
Enable 1 the settings, select the Supported option 2 then click Apply 3 and OK 4.
Go to the Kerberos folder and open the Kerberos Client Support for Claims, Compound Authentication, and Kerberos Armor 1 setting.
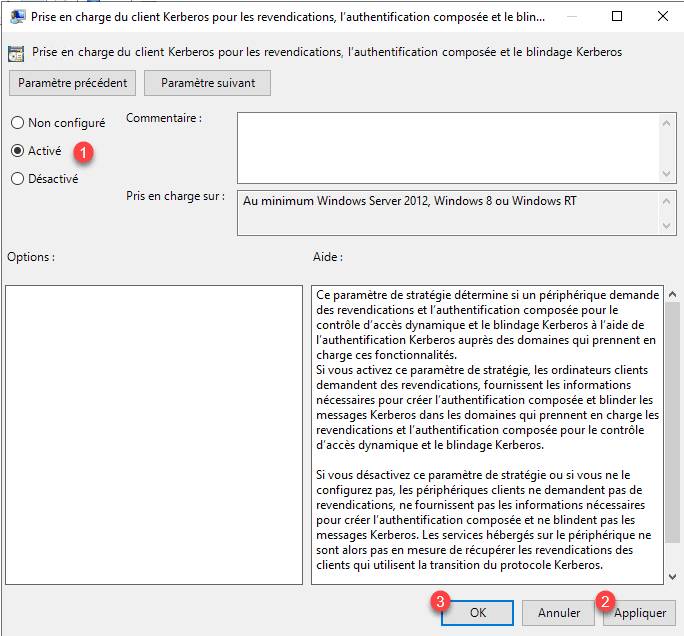
Enable 1 the Kerberos client support for claims, compound authentication, and Kerberos armoring setting and then click the Apply 2 and OK 3 buttons.
Close the Group Policy Editor, the policy is ready.
Configuring the authentication strategy
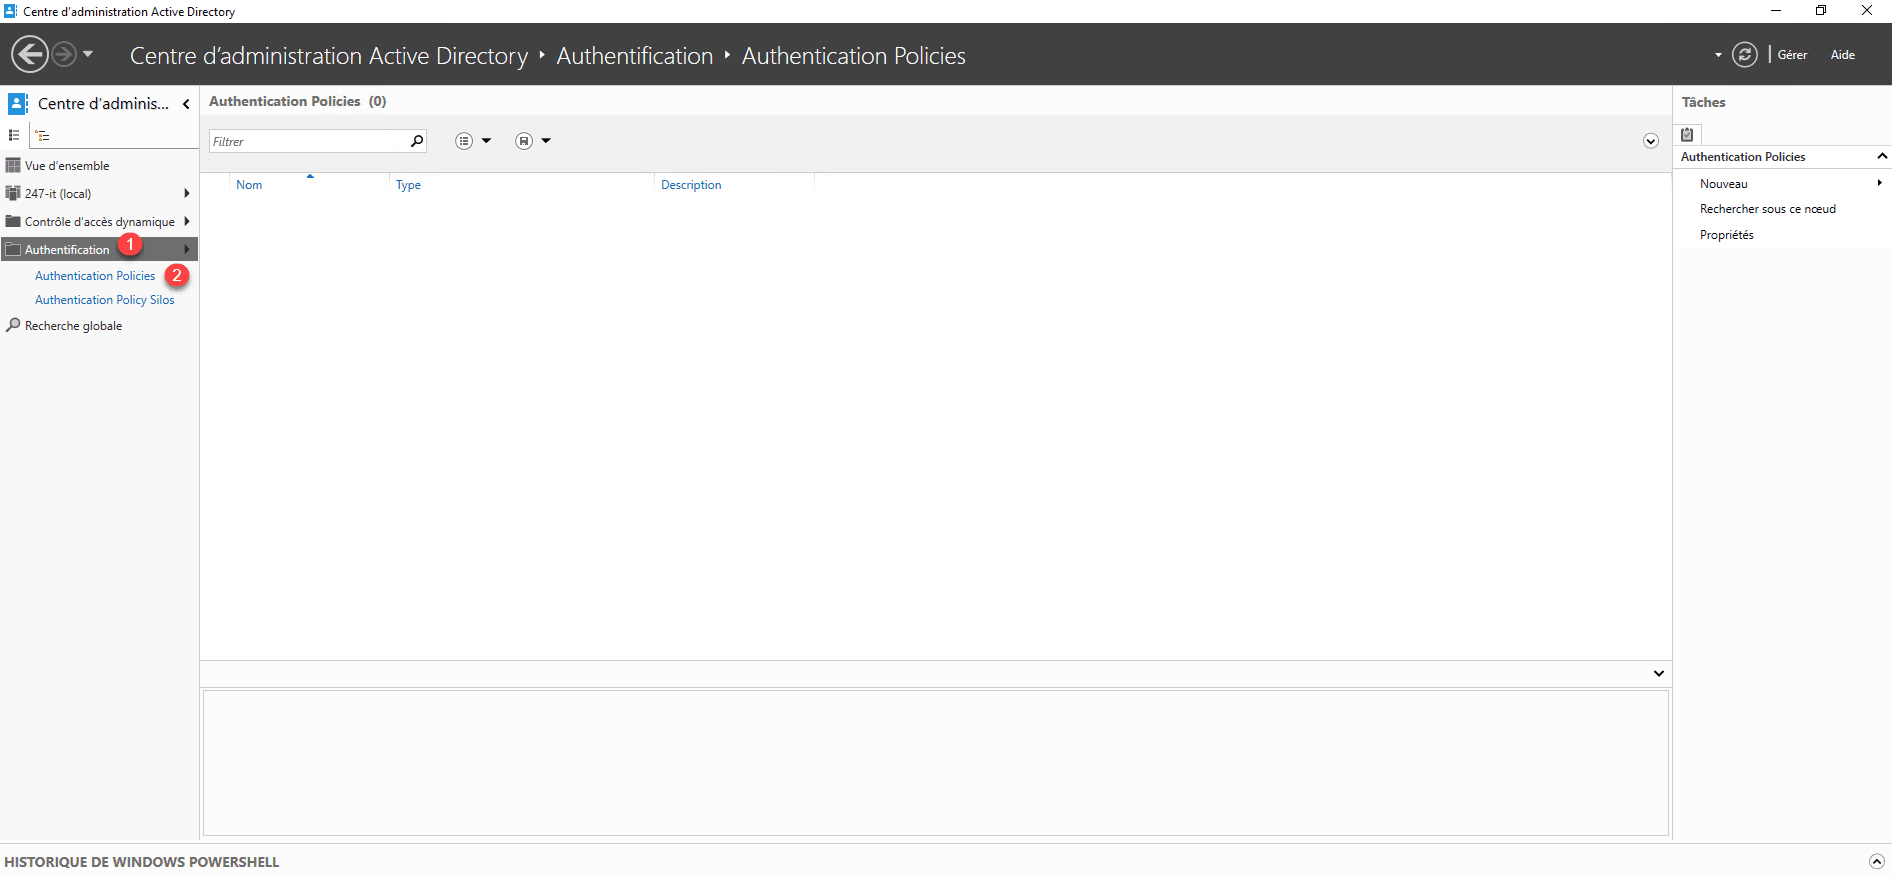
To work, we will first have to configure an authentication strategy. This configuration is done with the Active Directory Administration Center (ADAC) console.
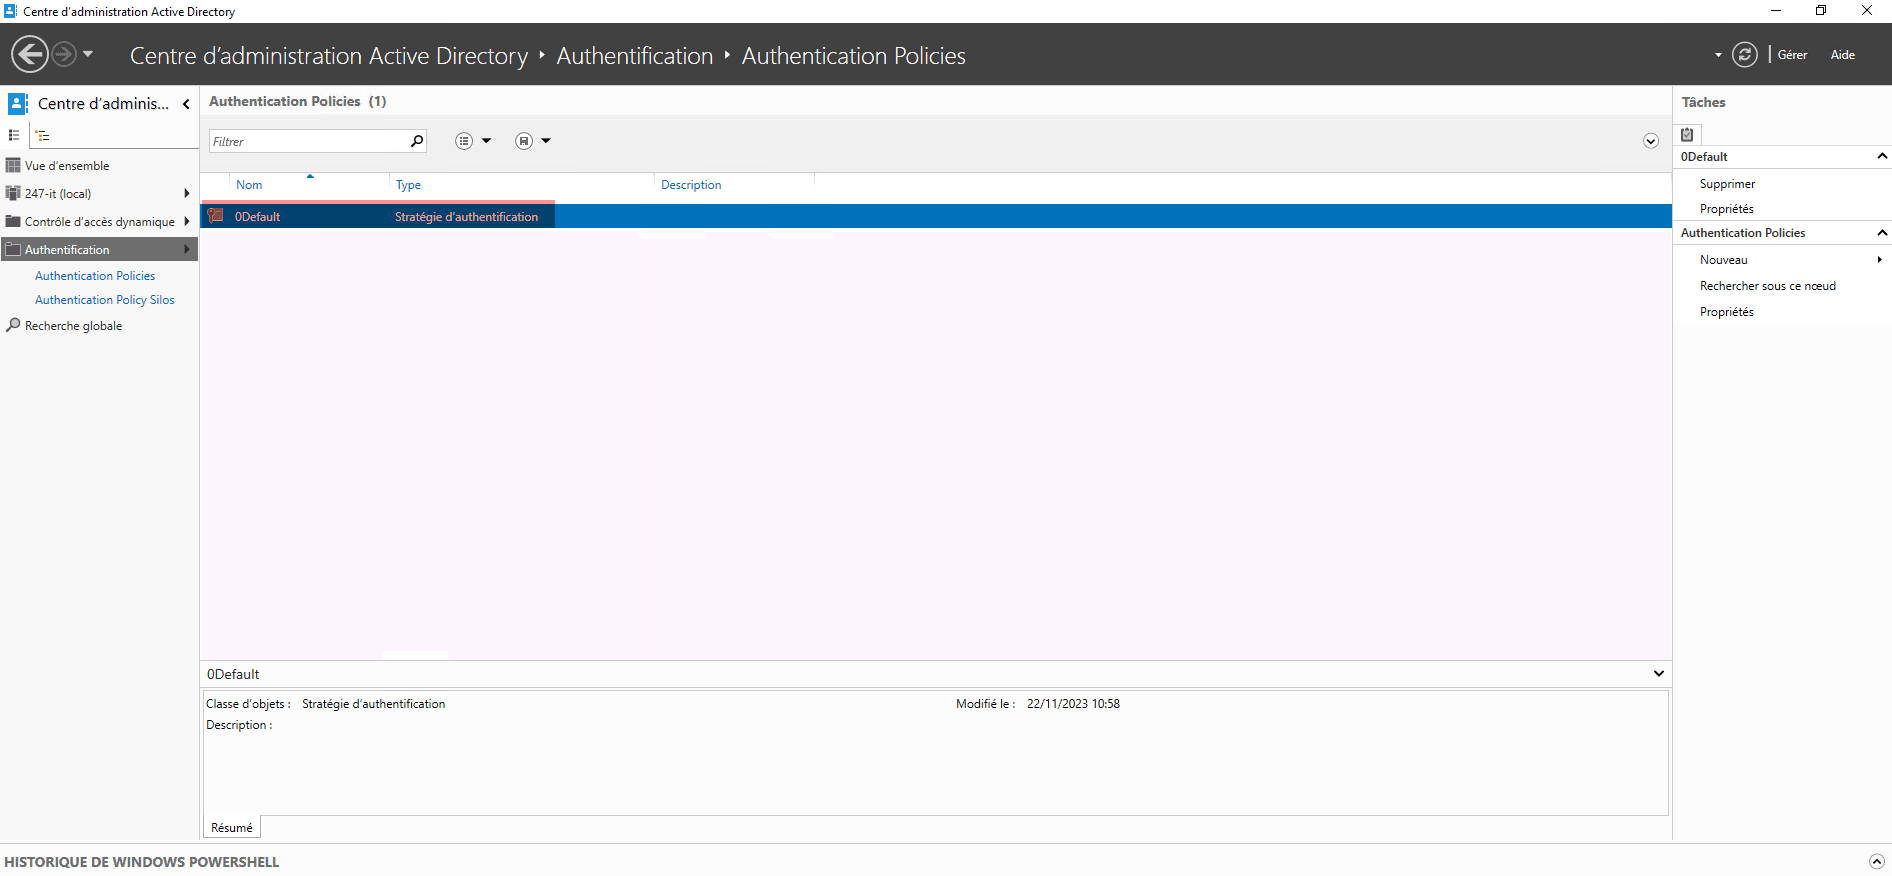
In the console, go to the Authentication 1 container then Authentication Policies 2.
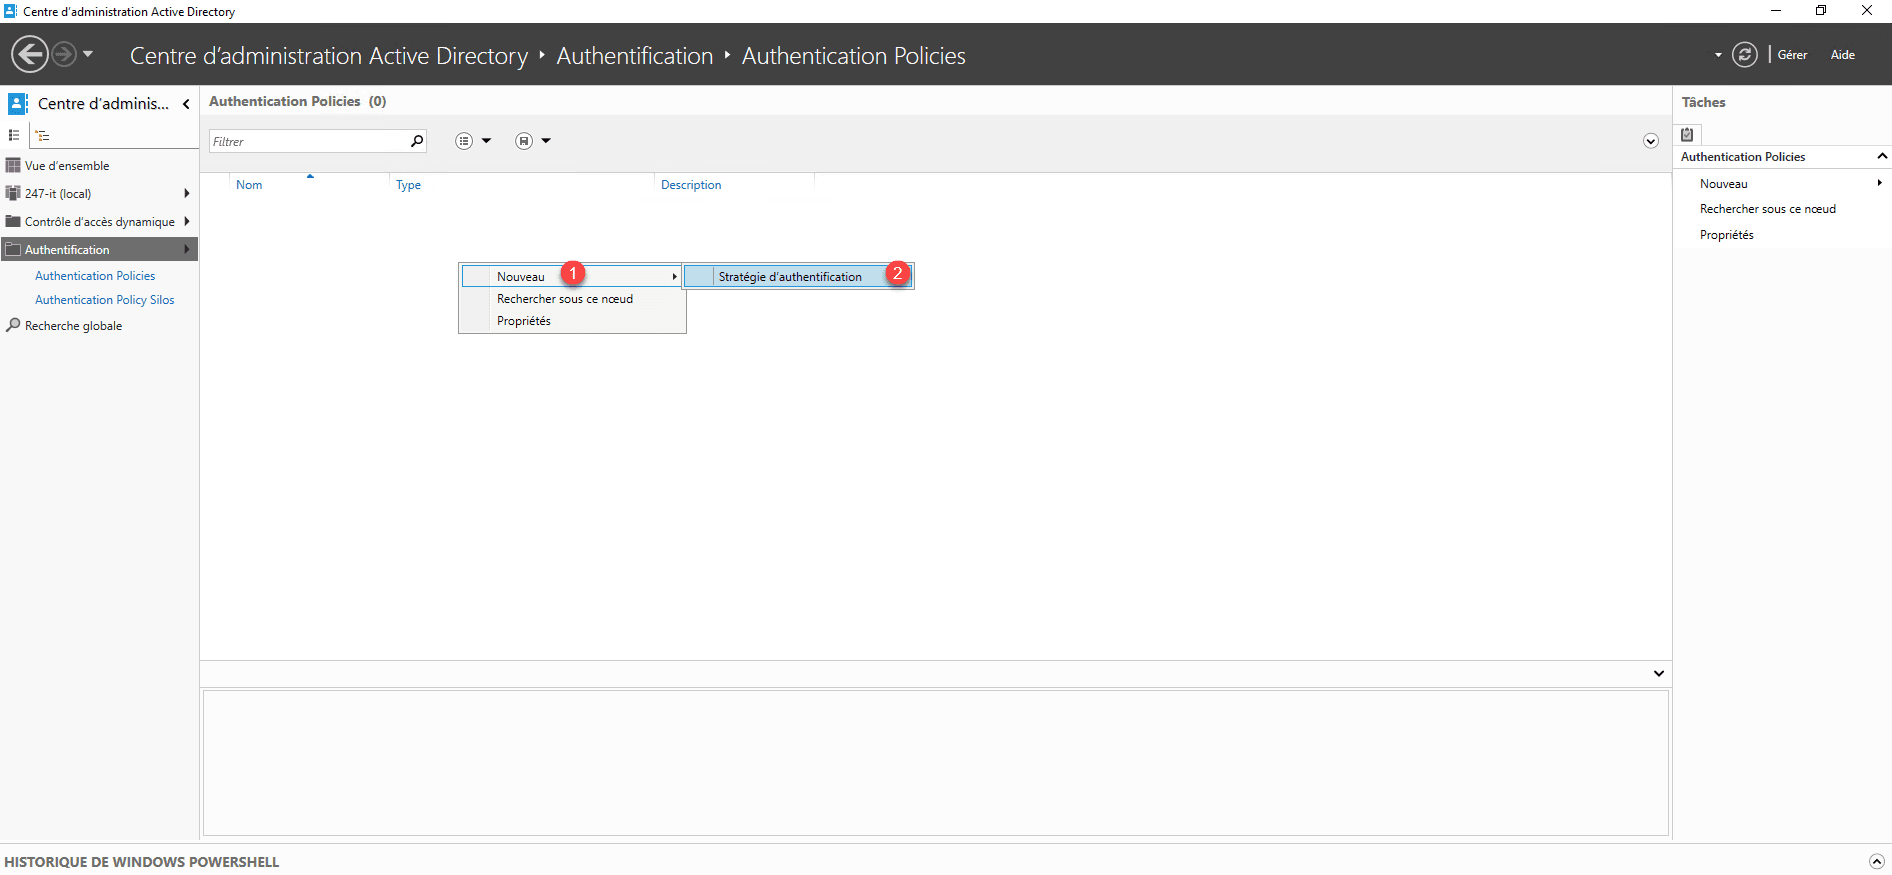
Right click in the central area and go to New 1 and click on Authentication Policy 2.
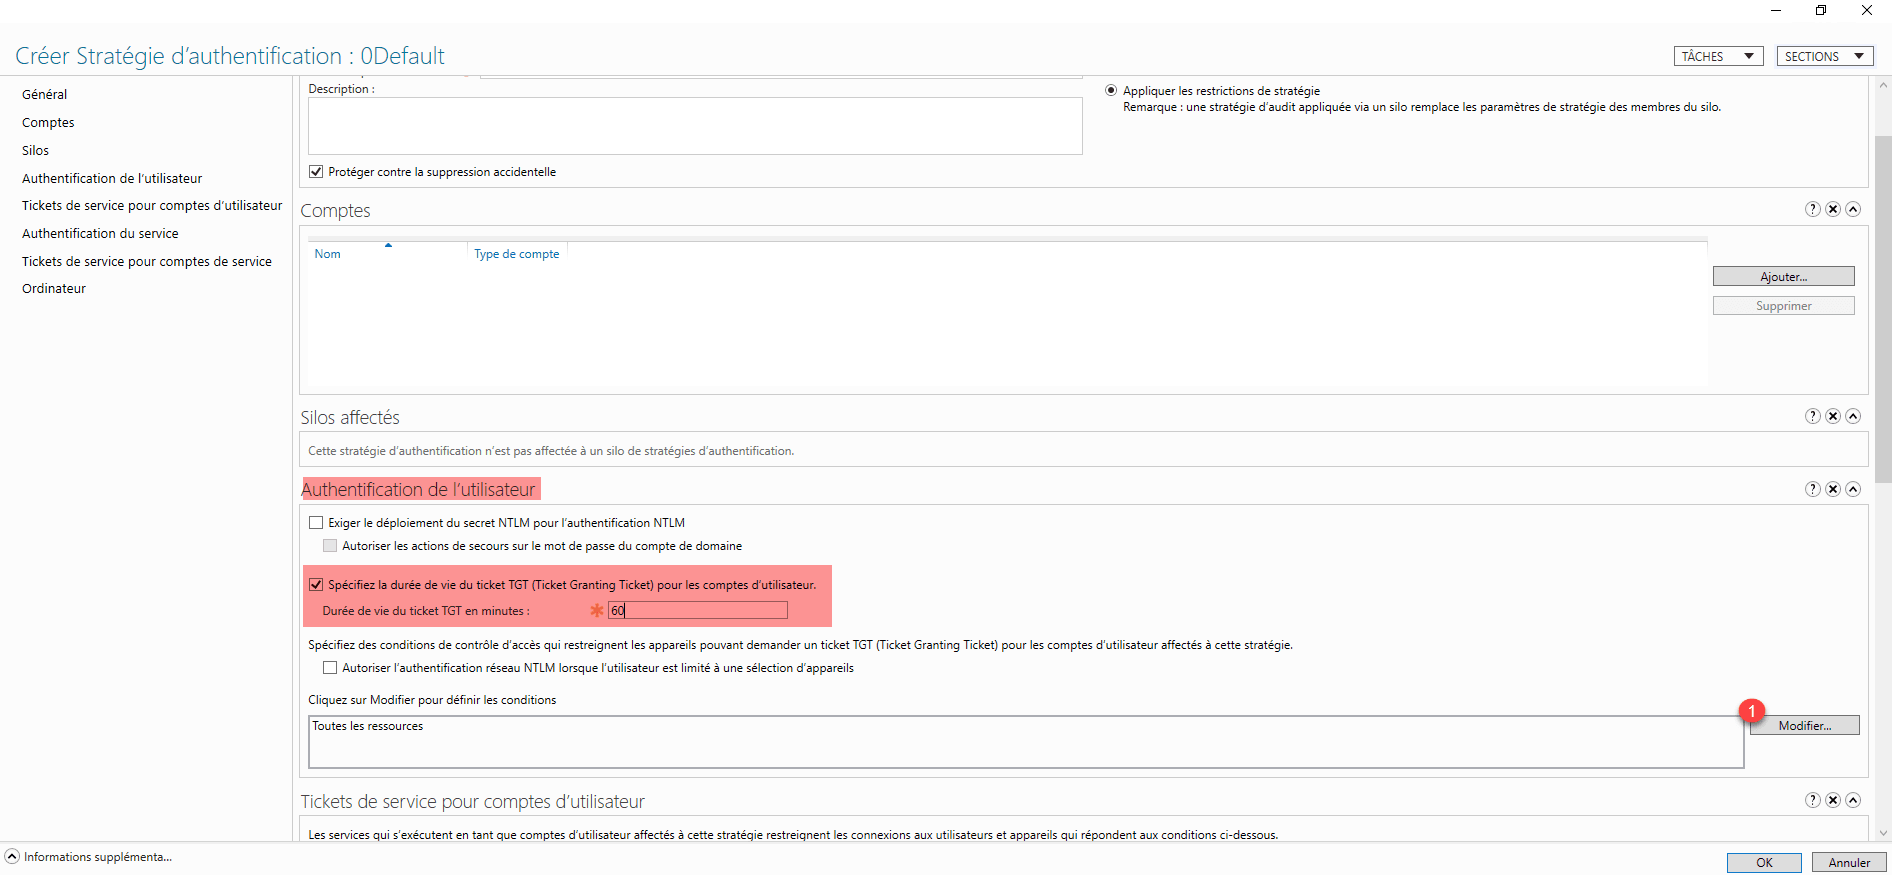
Name the authentication policy 1 and select Apply policy restrictions 2.

In the User Authentication section, we will change the Kerberos ticket lifetime to 60 minutes (this is optional) and click the Edit 1 button.
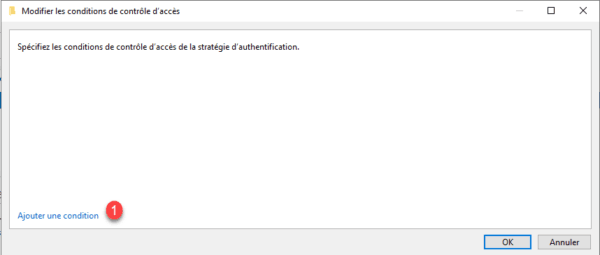
Here we will add a condition to our authentication strategy so that it is applied. Click on Add a condition 1.
Add the condition as in the screenshot below and validate by clicking on OK 1.
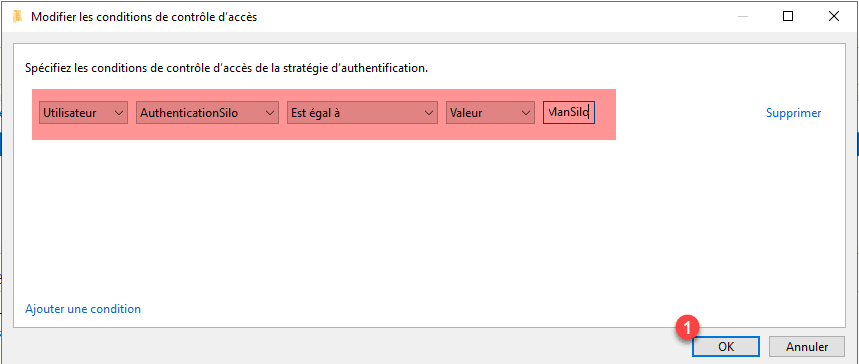
The condition indicates that the policy should apply if the user is part of the IronManSilo authentication silo.
The name of the silo is important here, we will have to name the silo that we will create after with name.
The condition is added 1, click OK 2 to create the strategy.
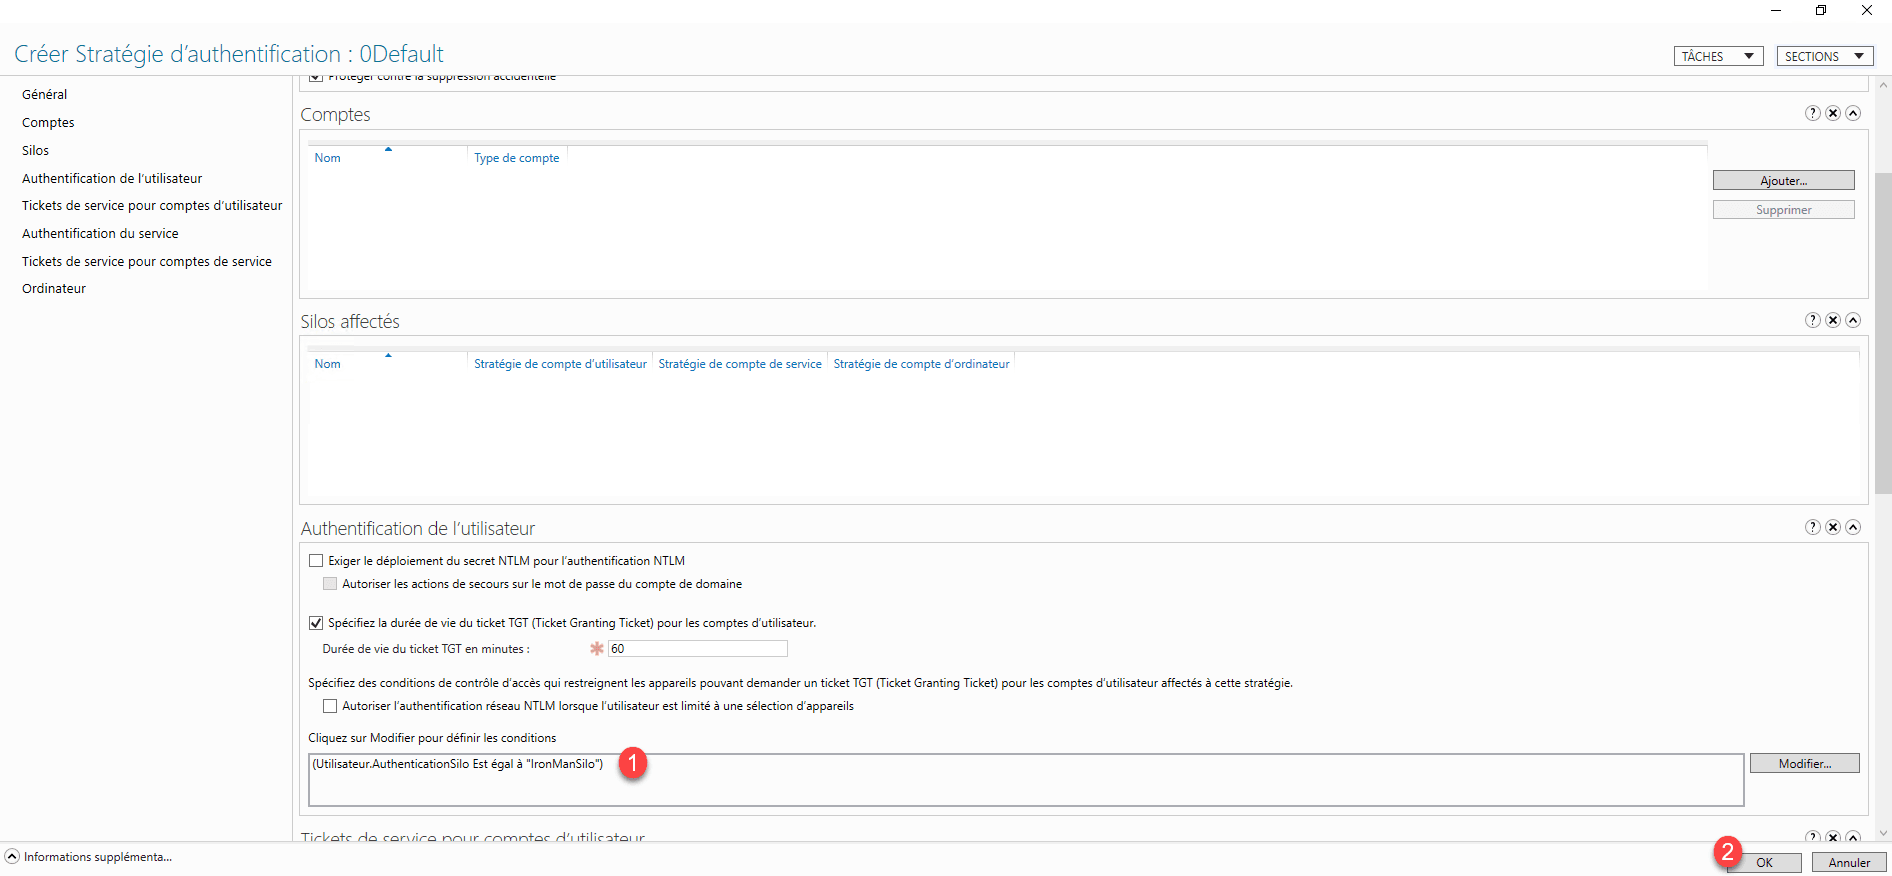
The strategy is created.
Configuring the authentication silo
Now we will create an authentication silo, this is where we will restrict access.
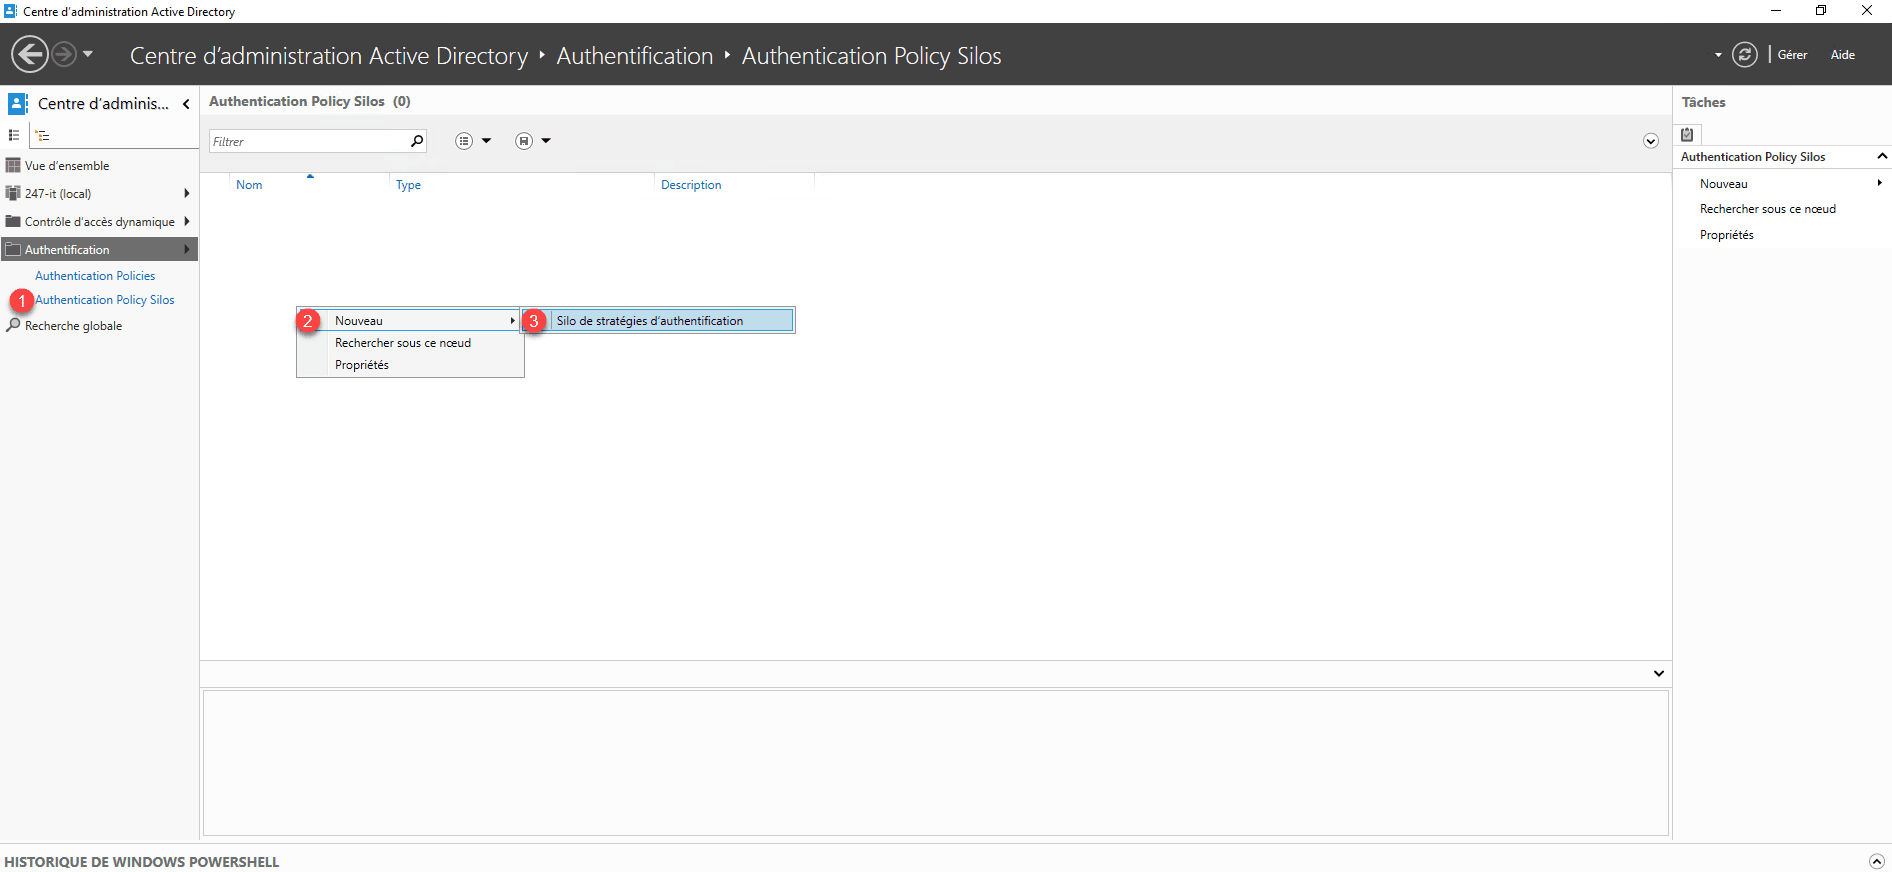
Still from the ADAC console in authentication, go to Authentication Policy Silos 1, right-click in the central area then go to New 2 and click on Authentication Policy Silo 3.
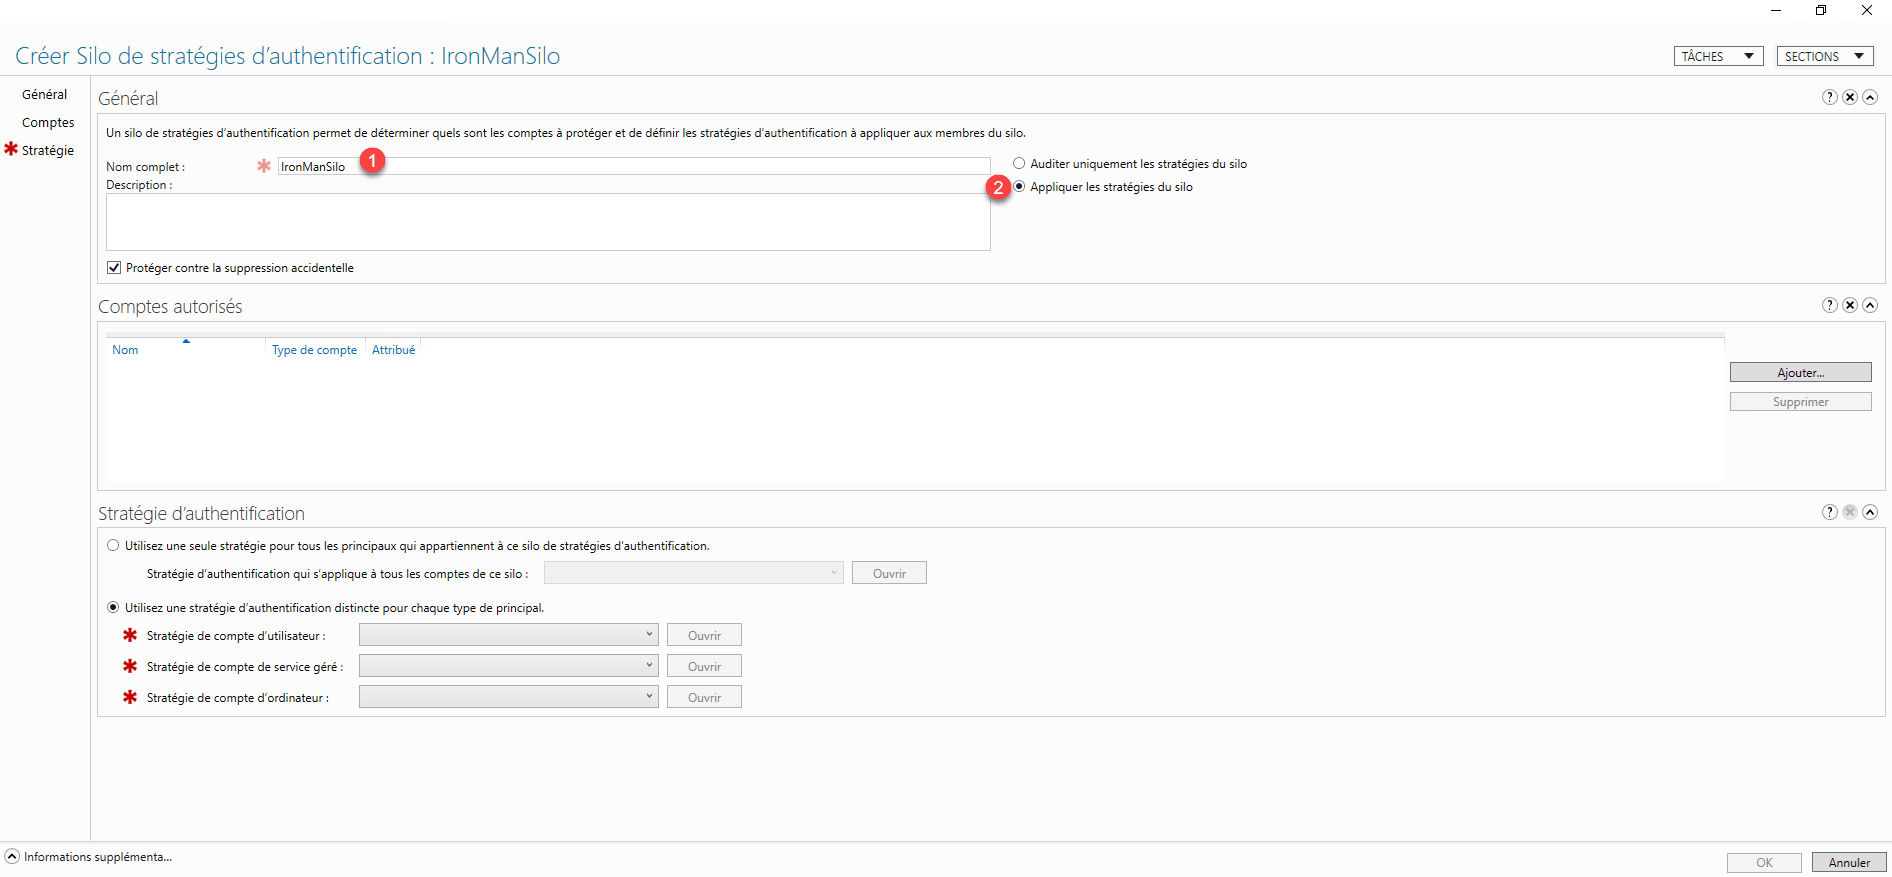
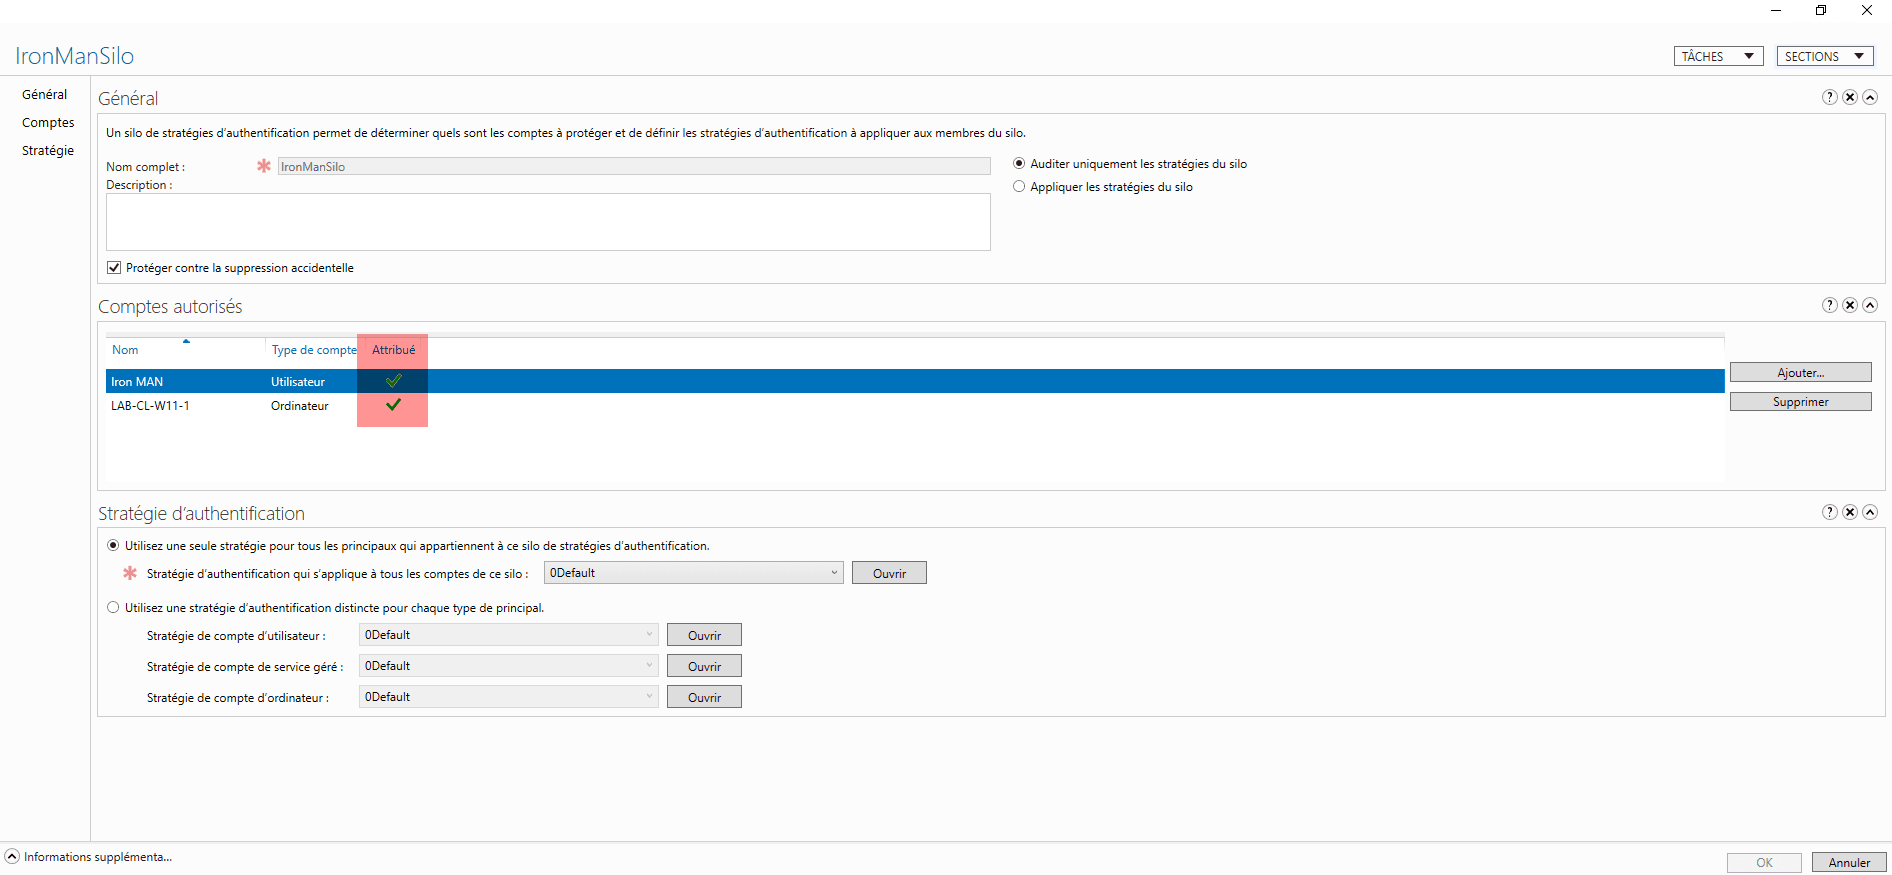
Name the silo 1 and select Apply silo policies 2.
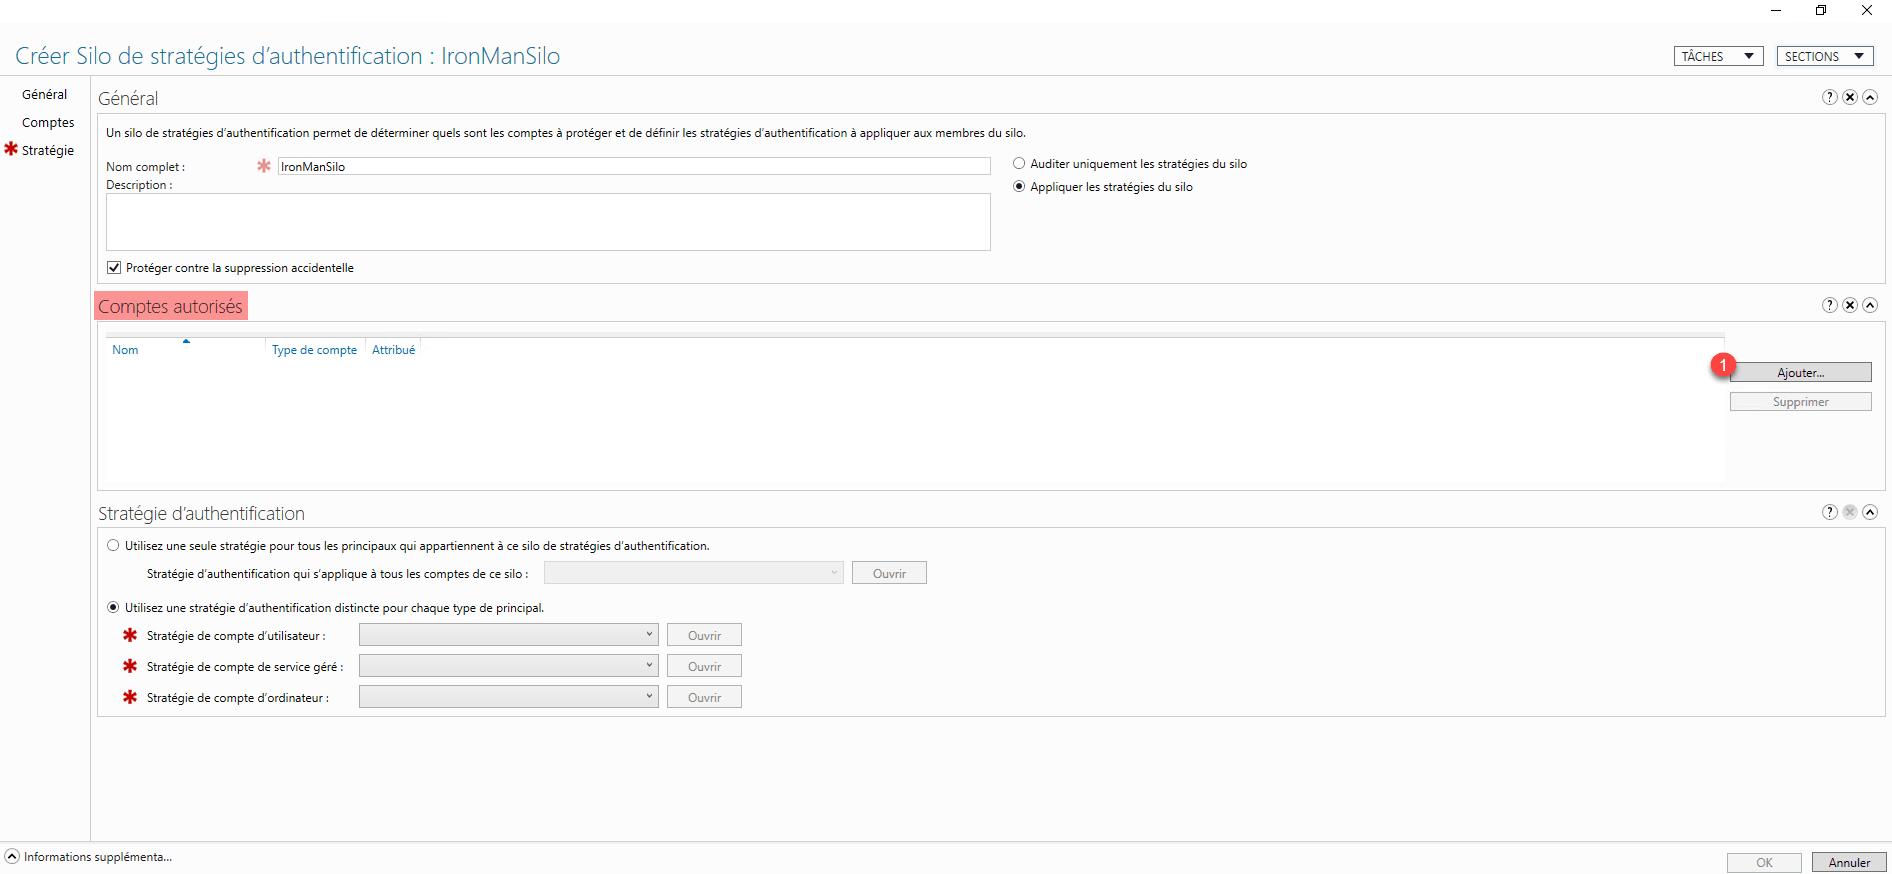
Then in the Authorized Accounts section, click on the Add 1 button to add the Active Directory objects to which the silo will be applied.
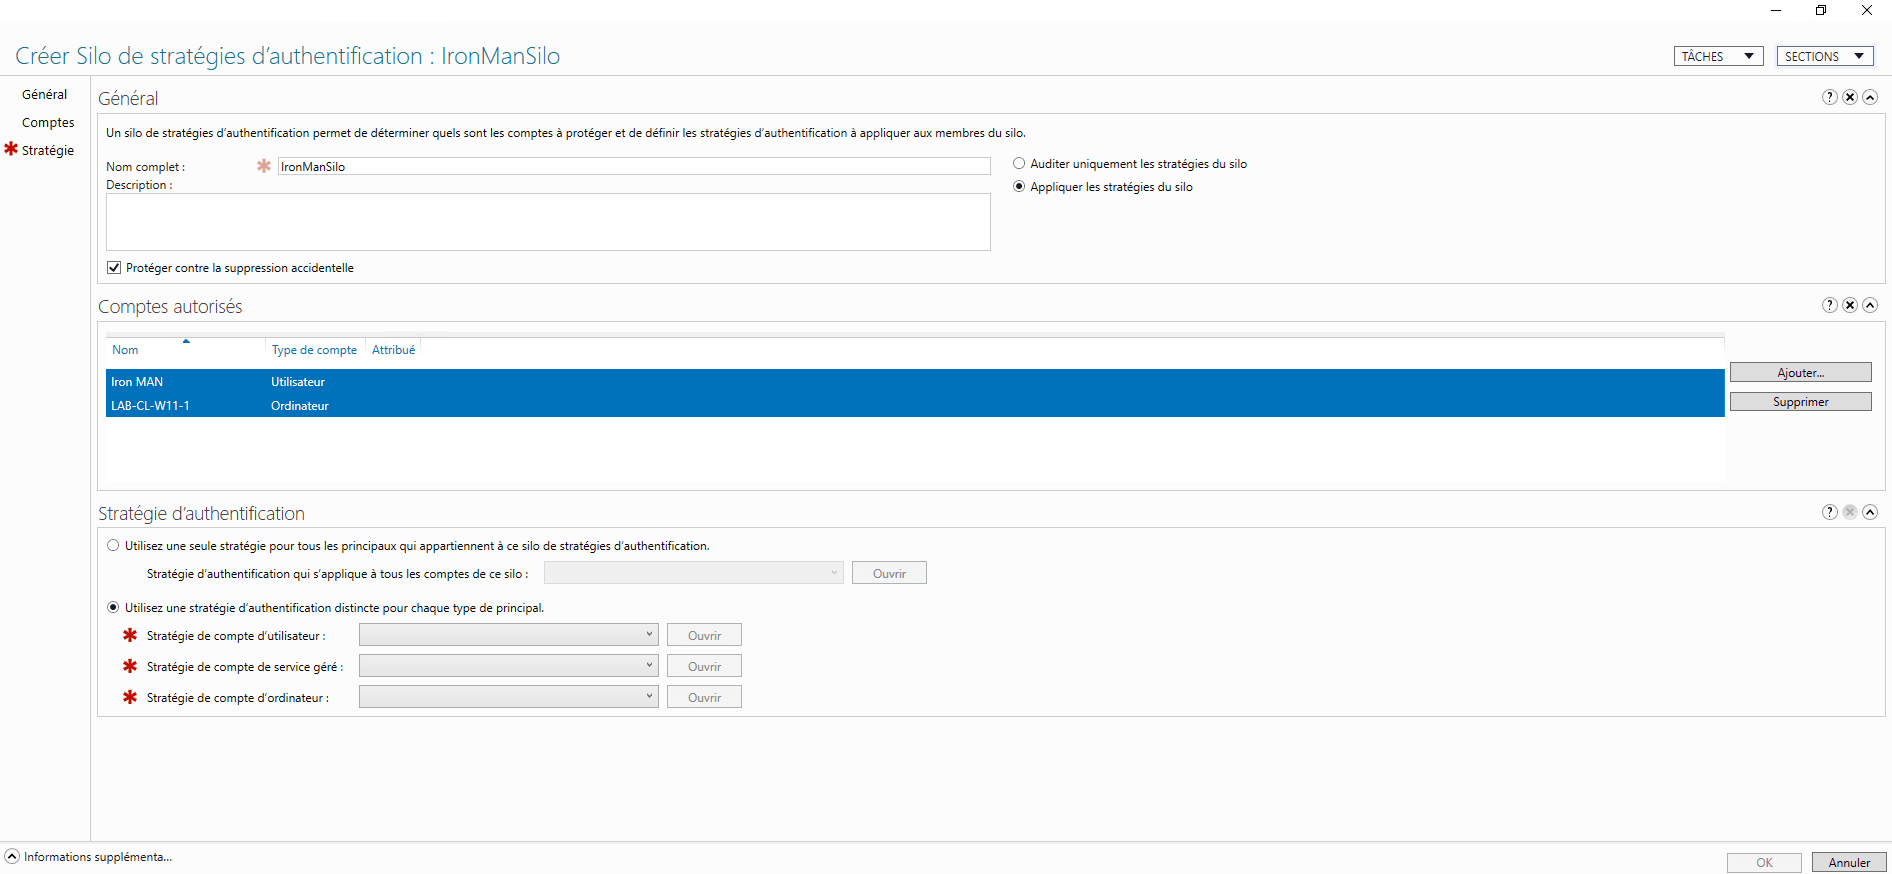
As you can see in the screenshot below, I added the Iron Man user account and the LAB-CL-W11-1 computer.
In the Authentication Policy section, select Use a single policy for all principals that belong to this authentication policy silo 1 and select the authentication policy that was created previously.
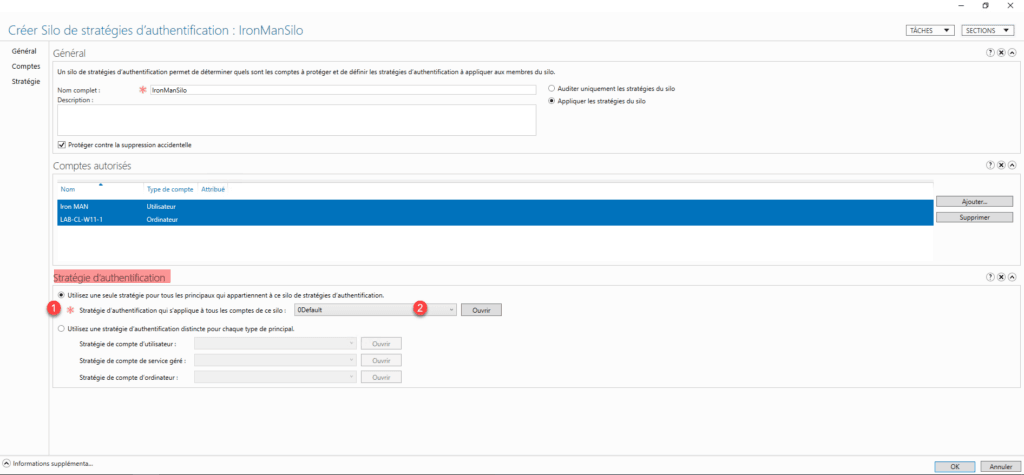
Validate the creation of the silo by clicking on the OK button located at the bottom right.
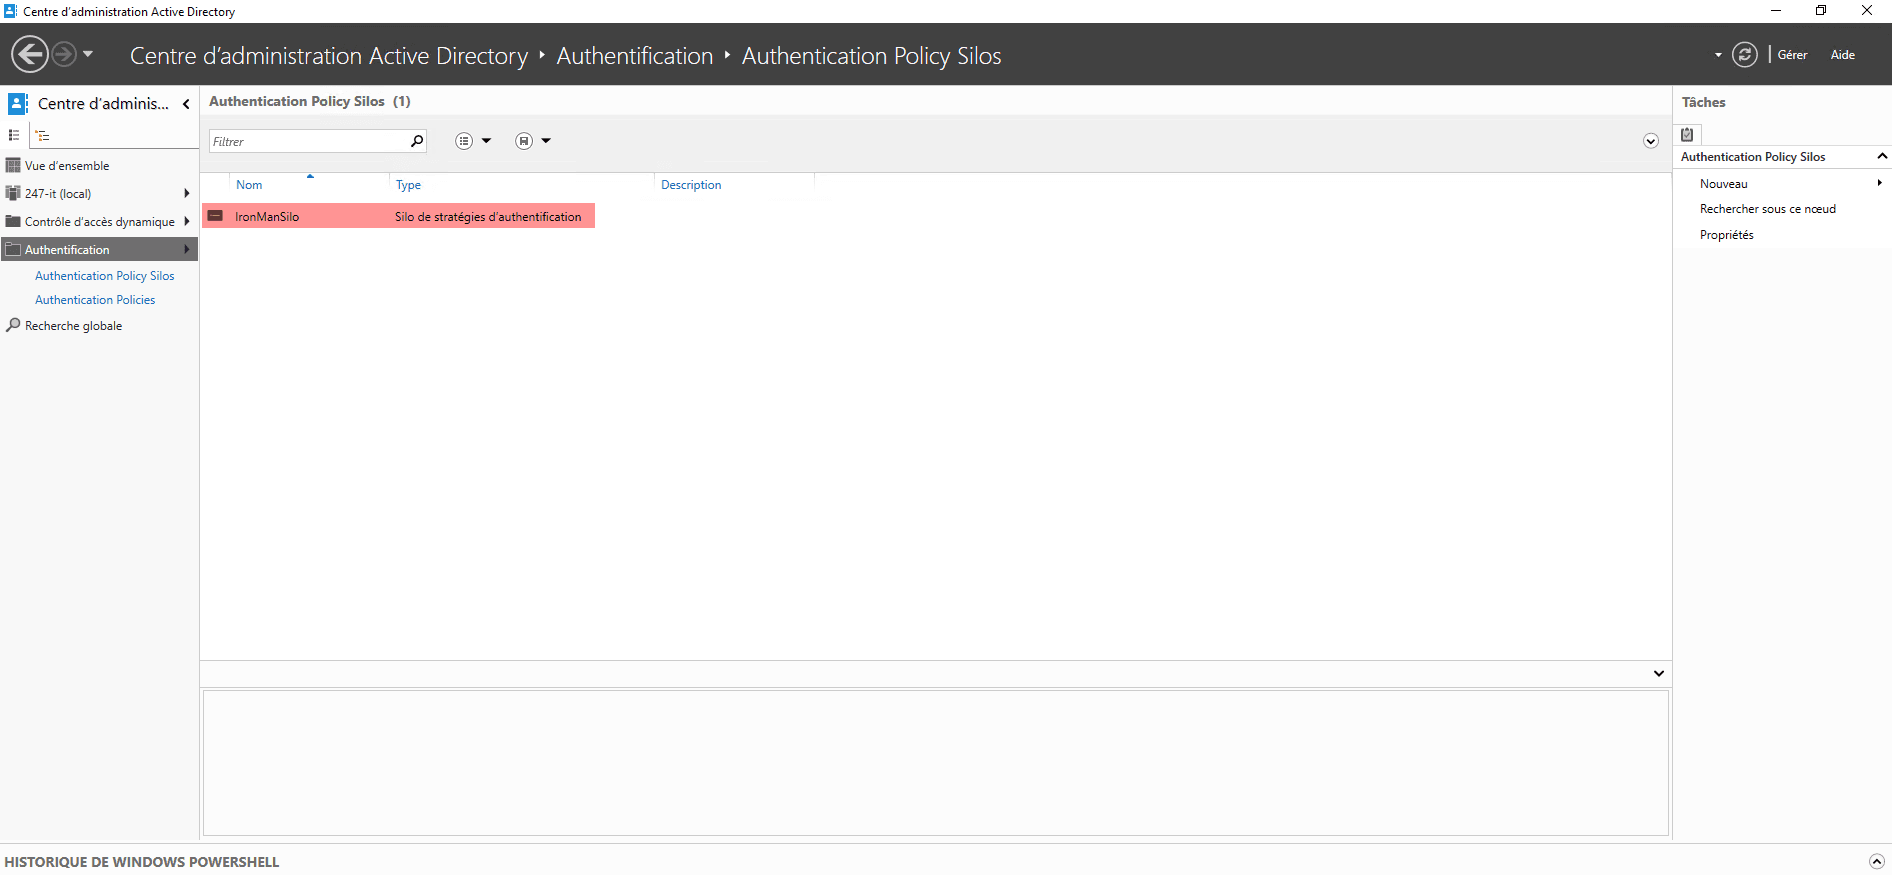
The authentication policy silo is created.
Assign Authentication Silo to Objects
For the authentication silo to be enforced, it must be assigned to the Active Directory objects that have been assigned to it.
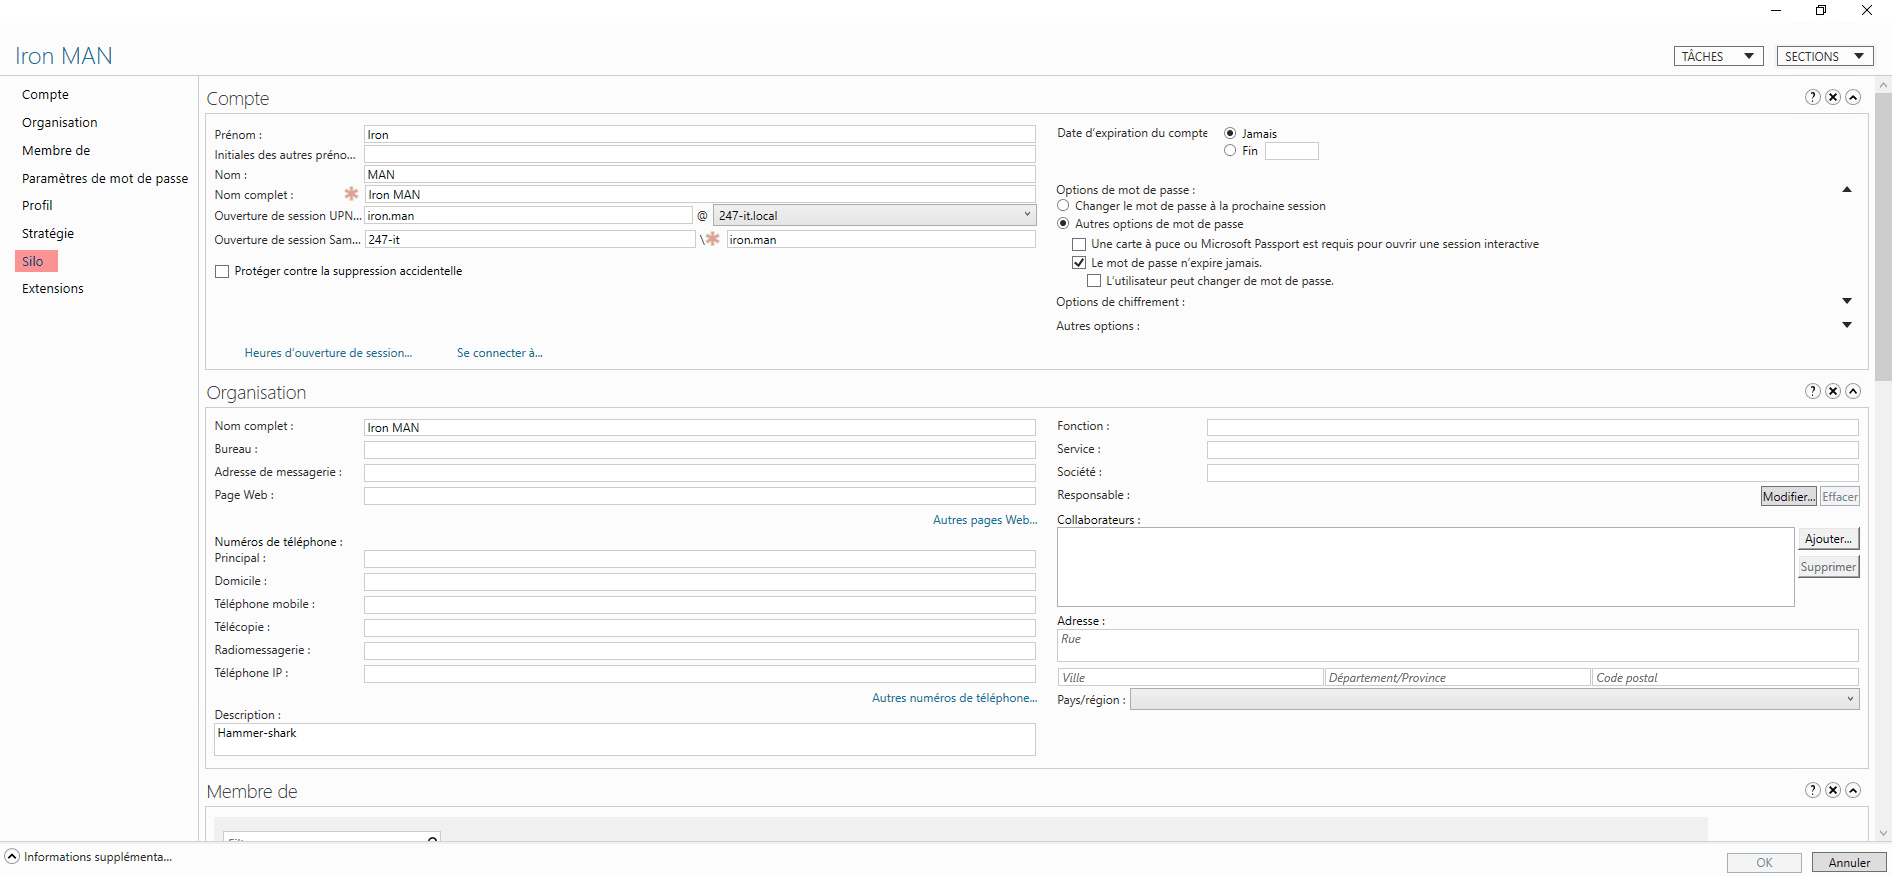
Still from the ADAC console, access the properties of an object, on the left click on Silo to go to the section.
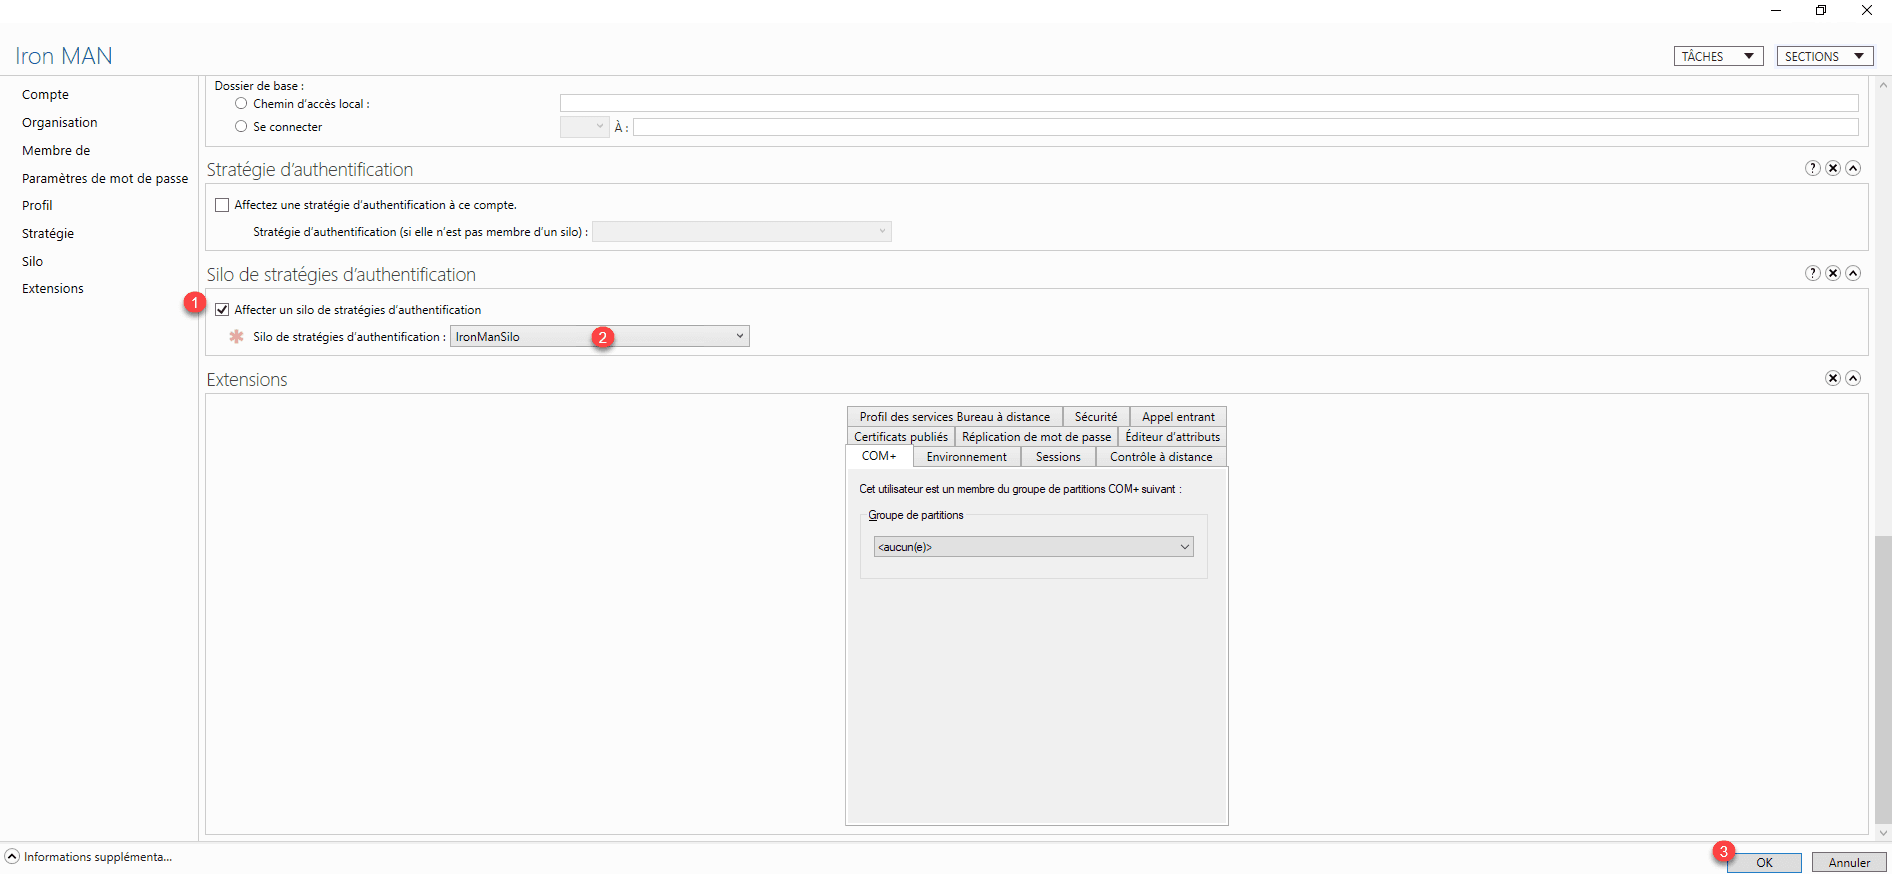
Check the box 1 Assign an authentication strategy silo and select the silo 2 and validate by clicking on OK 3.
For user objects, be careful to configure the silo and not the authentication strategy.
Repeat this operation for all accounts linked to the silo.
To validate that we have linked all the accounts to the silo, we can check it in the silo details by looking at whether the check mark is present in the assigned column.
Everything is now ready.
Test the authentication silo
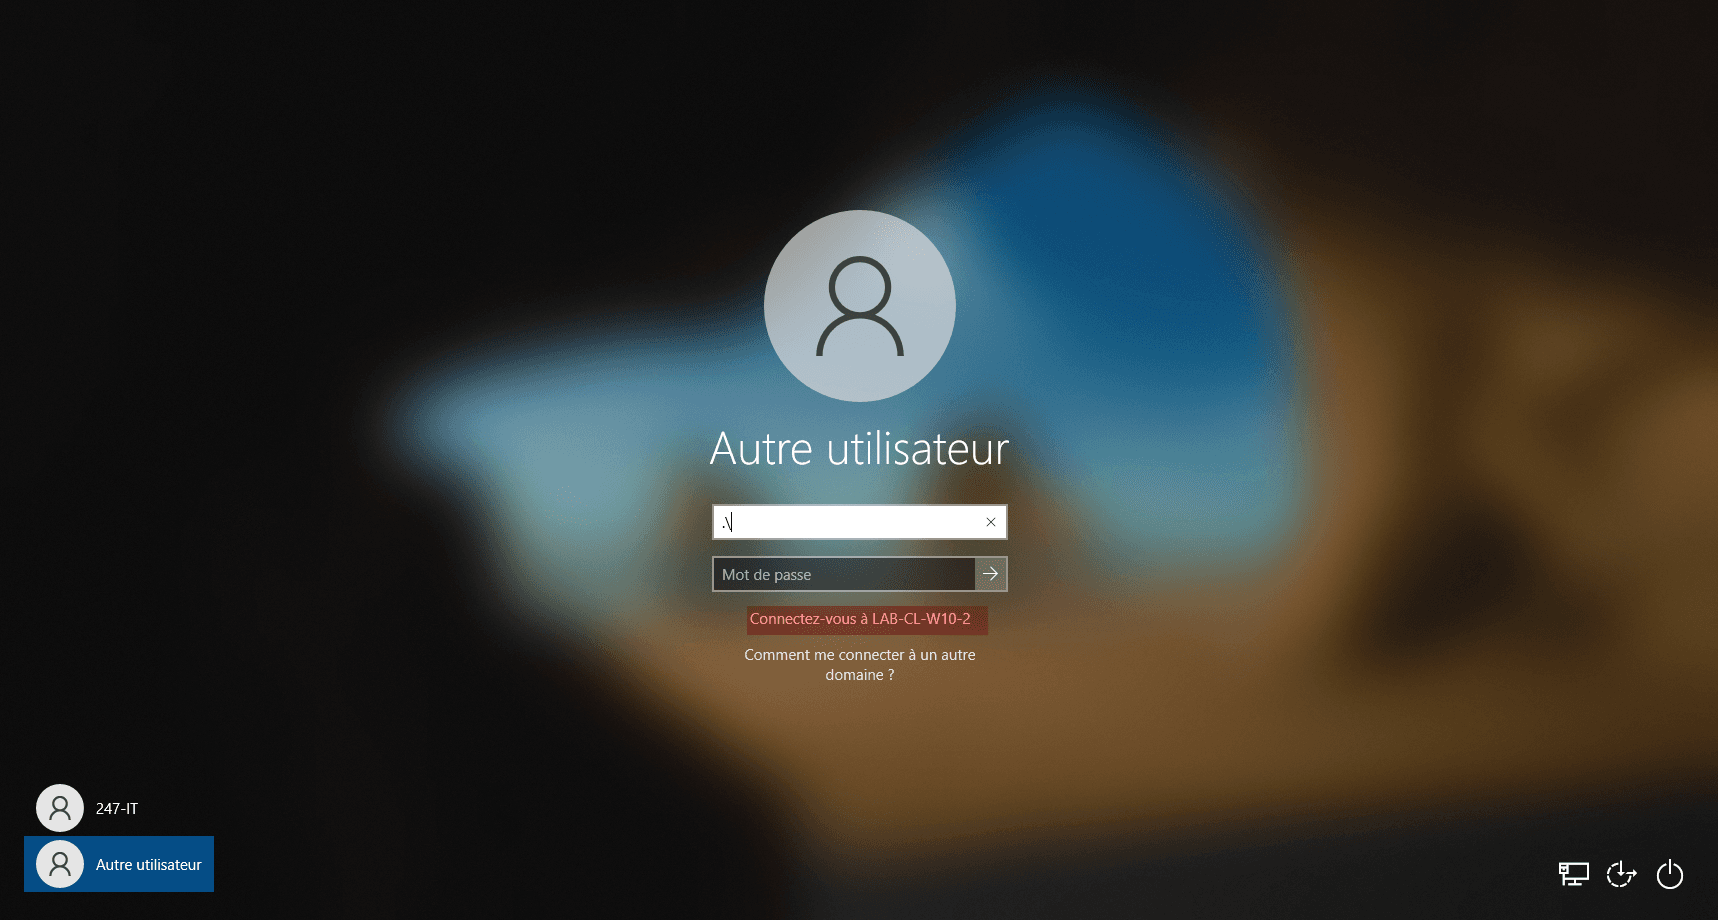
The easiest way to test our setup is to try logging in with the Iron Man account on a computer other than LAB-CL-W11-1.
To validate the operation, I will try to open a session on the LAB-CL-W10-2 computer.
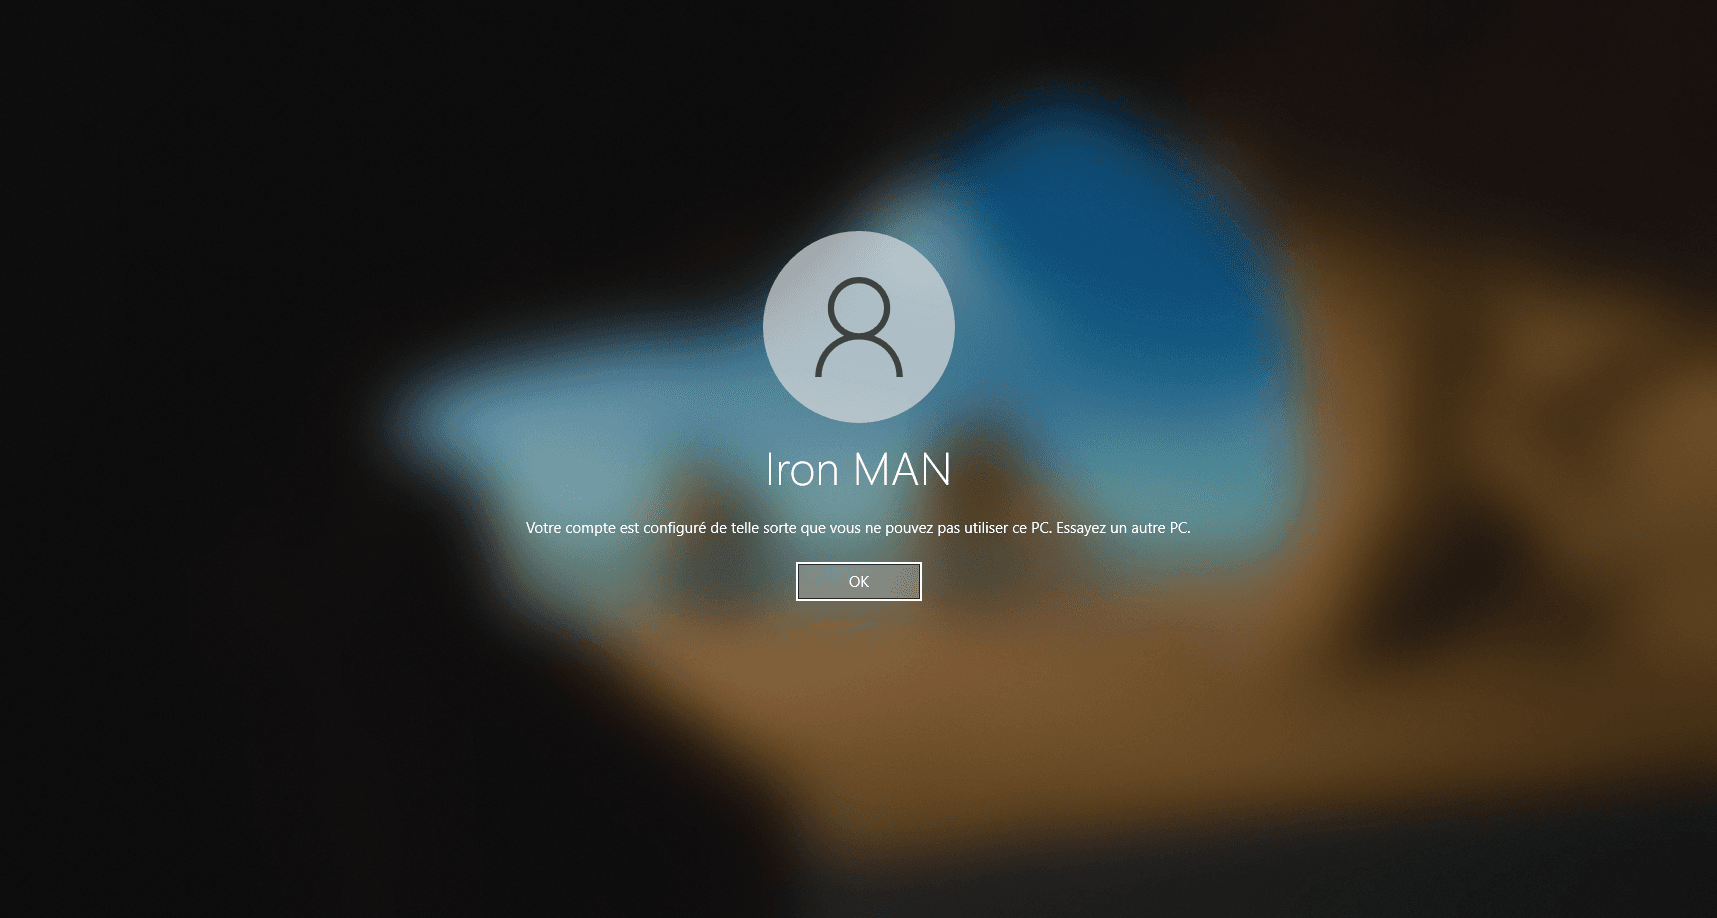
If everything works, you’ll see an error message: Your account is configured so that you can’t use this PC. Try another PC.
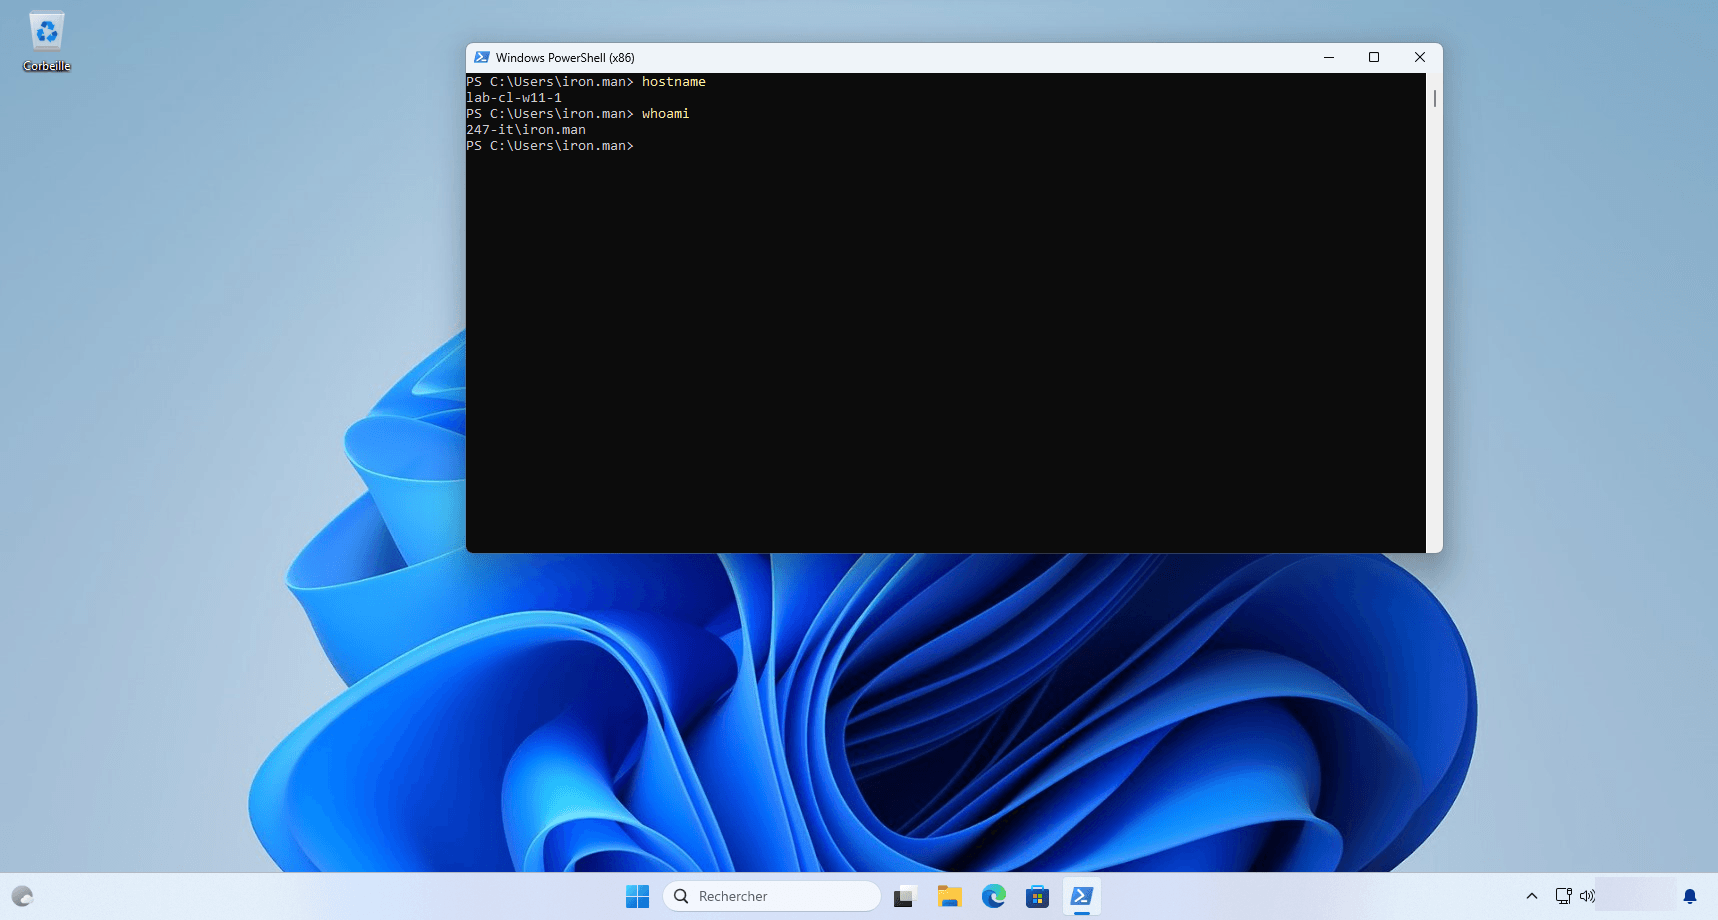
However, opening a session on the LAB-CL-W11-1 computer is authorized.
Enforcing the authentication silo can be time consuming at the domain controller level, for immediate enforcement a reboot is required which can be restrictive in production.
Troubleshooting: Accessing Event Viewer Recordings
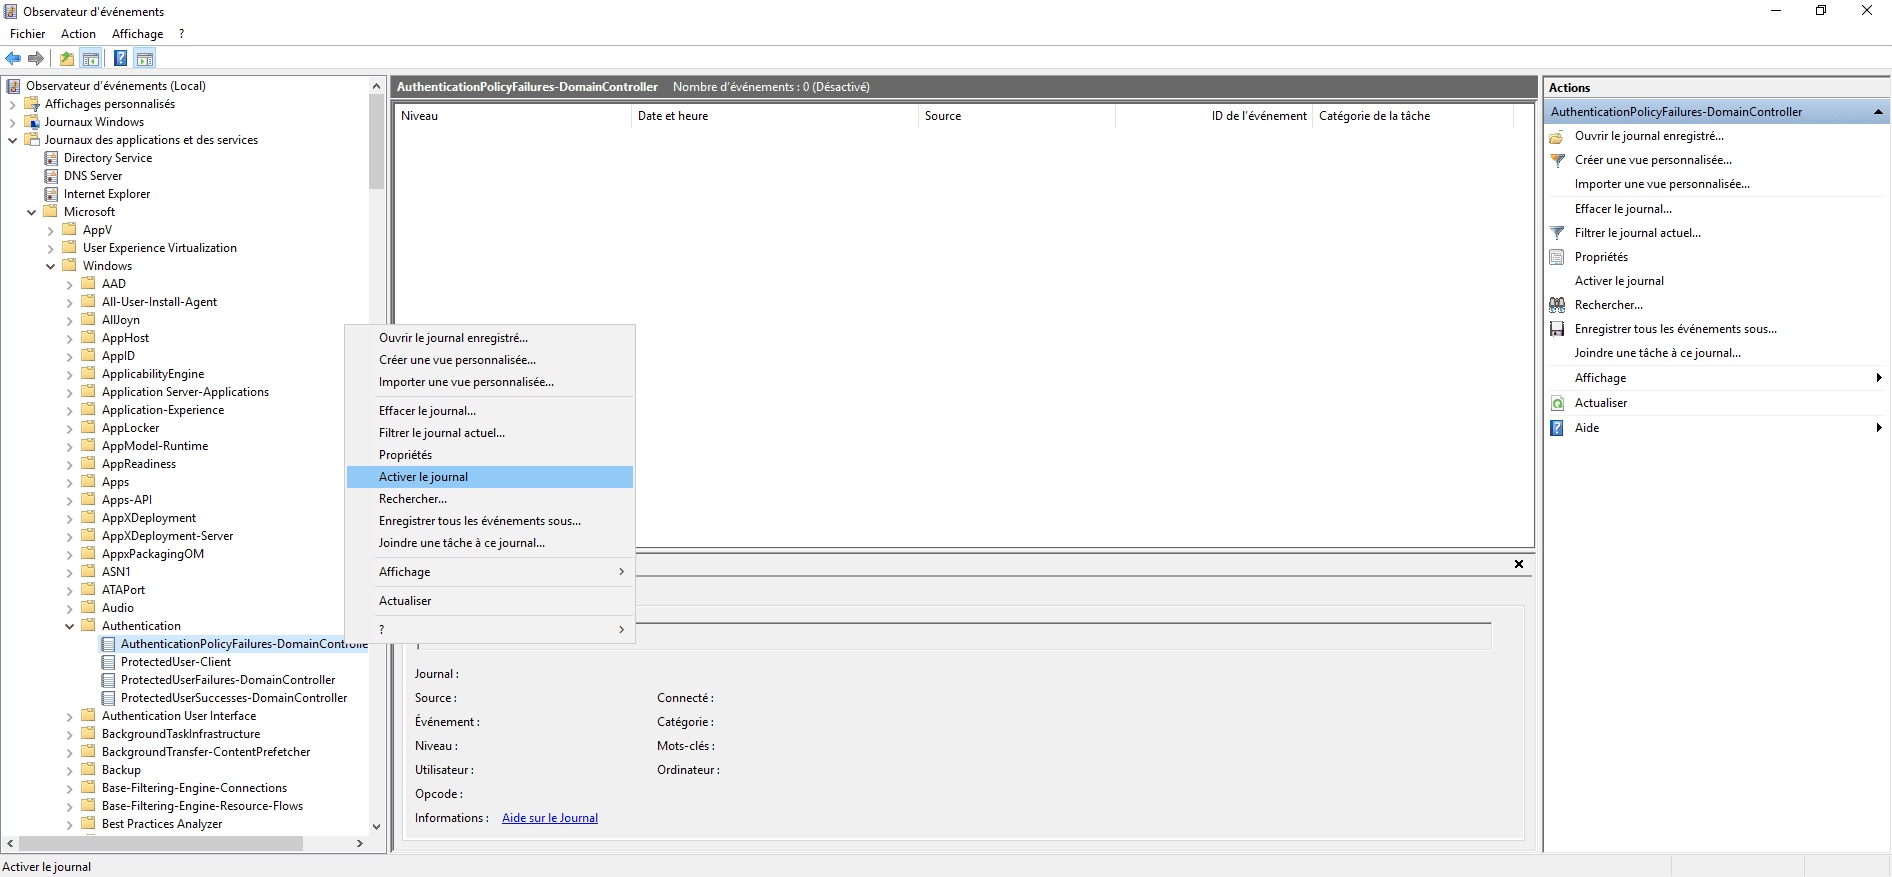
On domain controllers, you need to enable the AuthenticationPolicyFailures-DomainController log which is located: Applications and Services Logs / Microsoft / Windows / Authentication.
Right-click on the log and click Enable Logging.
When a user tries to log in to a computer where he is not authorized, a record is created with ID 105.
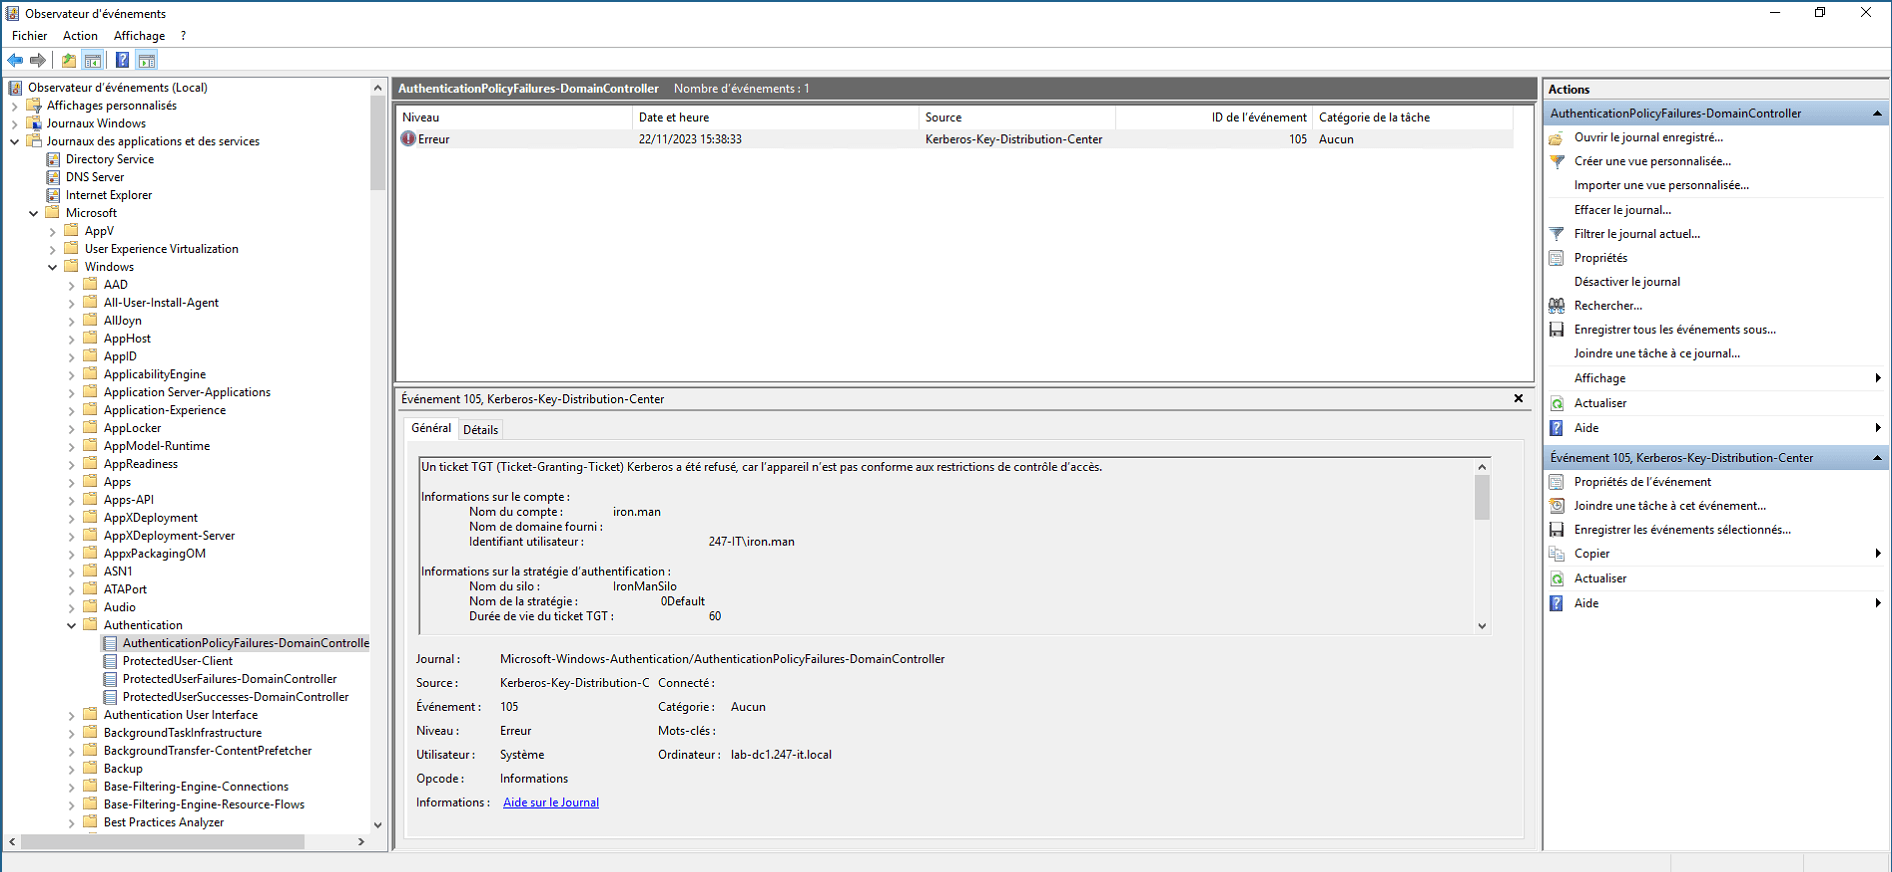
If you have a SIEM, it may be useful to report this event.
I hope this tutorial helped you understand how Active Directory authentication silos work.
