Presentation
In this tutorial, we will approach the notions of Active Directory sites as well as subnets.
Active Directory sites can optimize management in multi-site / network infrastructures by:
- Management of replication between domain controllers.
- Authentication of users on the local controller (s).
- GPO by sites
- …
There are two types of replication links:
- Intra-site : replication link between domain controllers in the same site
- Inter-site : Replication link between Active Directory sites, which is configured in the Inter-Site Transport node.
The lab:

Configuring sites and networks
Ideally, it is best to declare the Active Directory site before promoting to the server’s domain controller, which allows you to place it directly in the right place. It is quite possible to move the DC a posteriori.
In order for the domain controller to be placed directly in the correct site, it must have its final IP address linked to the site.
On a domain controller, open the Active Directory Sites and Services console.

We can see that on the console, several nodes are available:
- Inter-Site Transports : contains the various inter-site links as well as the protocol used for replication.
- Subnets : contains the different networks that are declared and then assigned to the site.
- Les sites : The nodes in blue (one per site) contain the parameters of the sites with the different servers (domain controller, transport edge …).

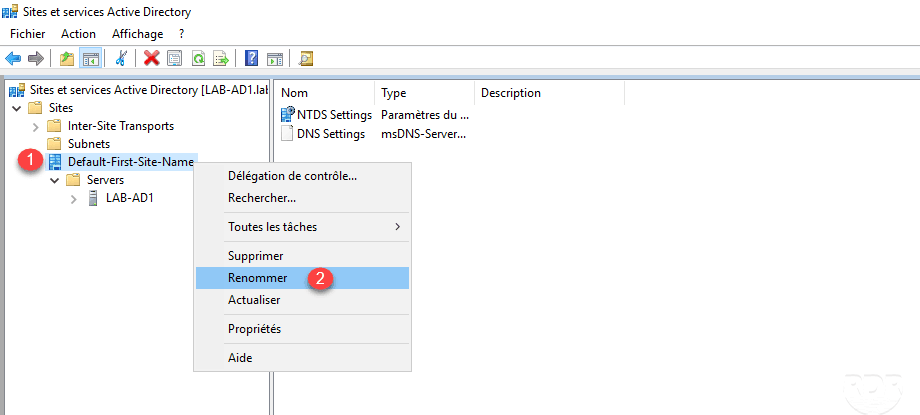
When creating the Active Directory domain, a default site is created (Default-First-Site-Name), the first step when implementing a multi-site architecture and renaming the site. To do this right click on the site 1 and click on Rename 2 .
The site is now renamed
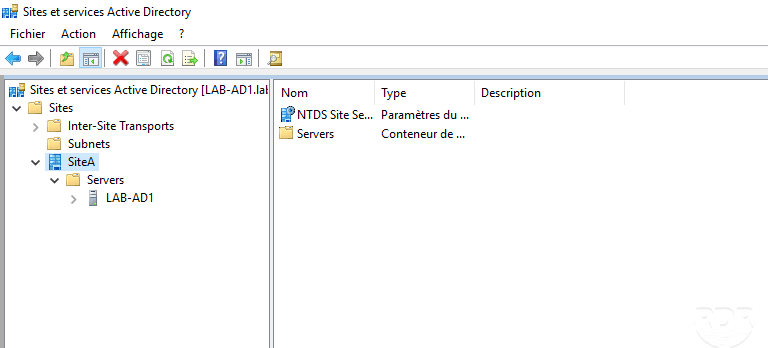
Now that the site is named correctly, we can declare it an IP network.
Add an IP network
The network declaration automatically places the servers in the correct site according to its IP.
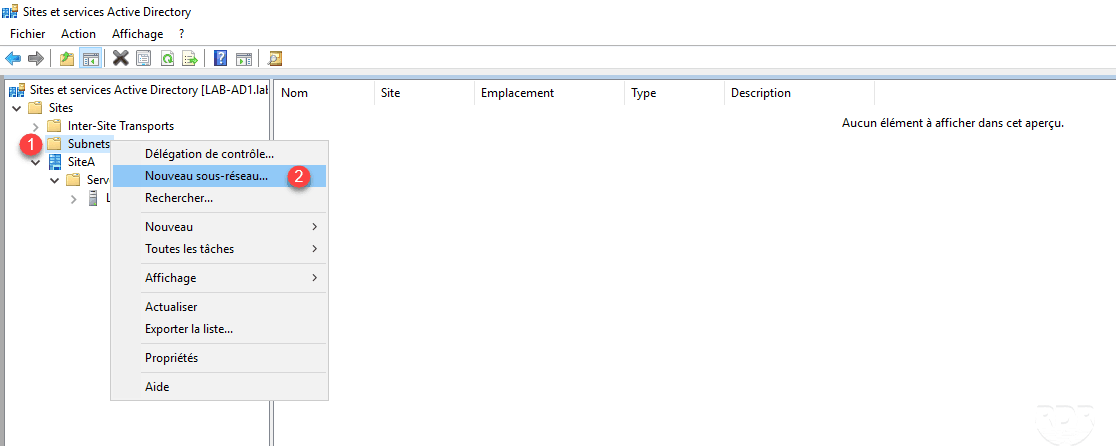
If you want to add an IP network, for another site than this one by default, it is necessary to add the site.
Right click on Subnets 1 and click on New Subnet 2 .
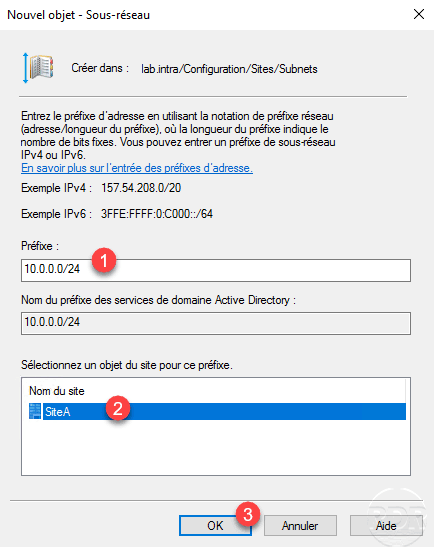
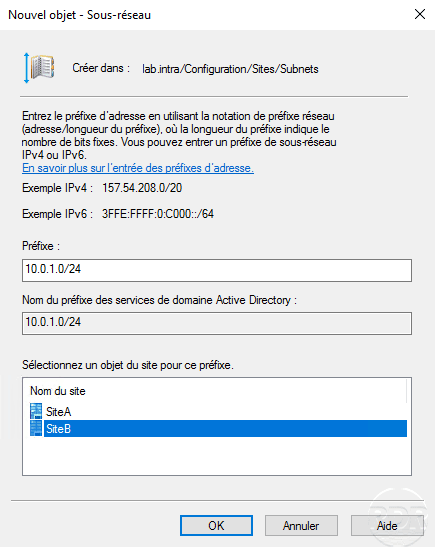
Enter the network address 1 then select the site 2 and click OK 3 to add the subnet.
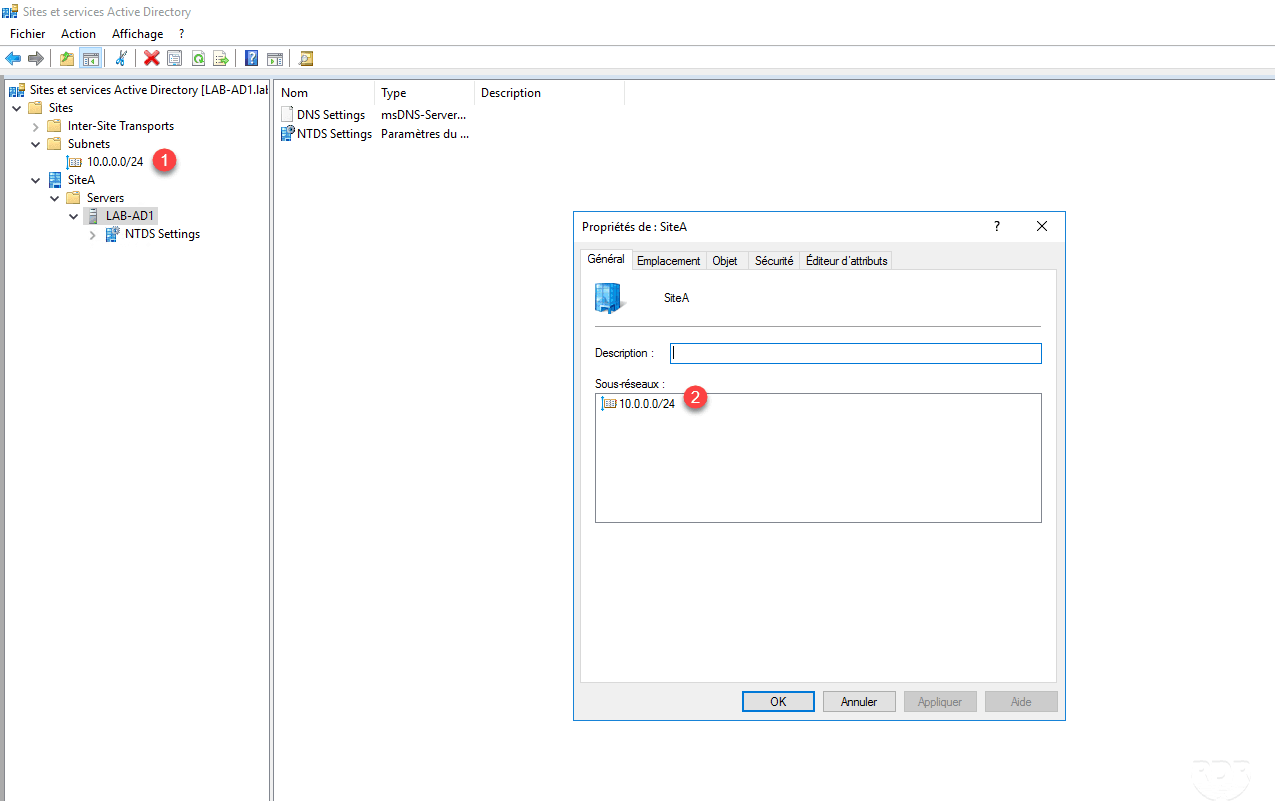
The subnet is added 1 . You can also see in the properties of the site the subnet or subnets assigned to it 2 .
Add a site
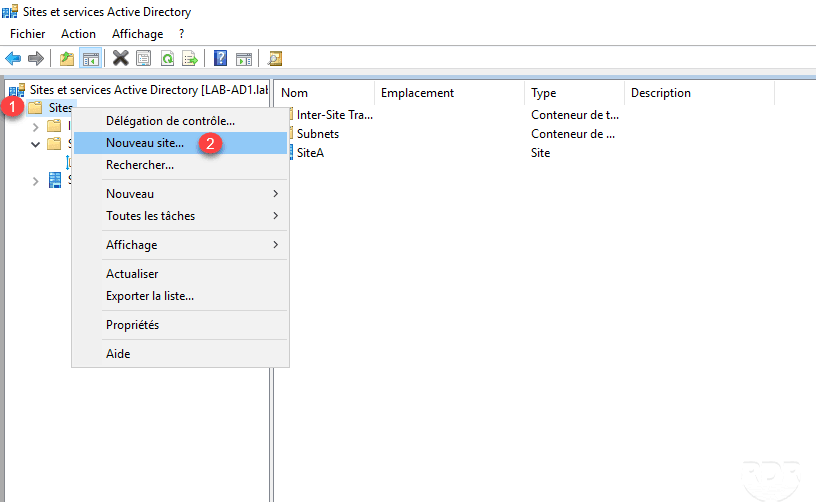
From the console, right click on Sites 1 then click on New site 2 .
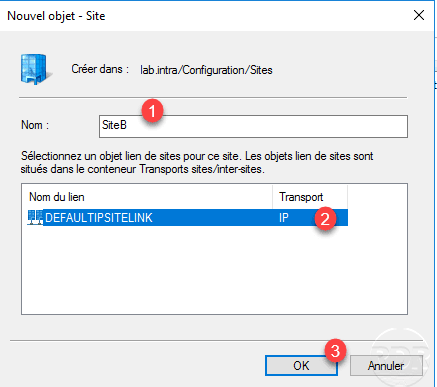
Enter the site name 1 , select a replication link object 2 and click OK 3 .
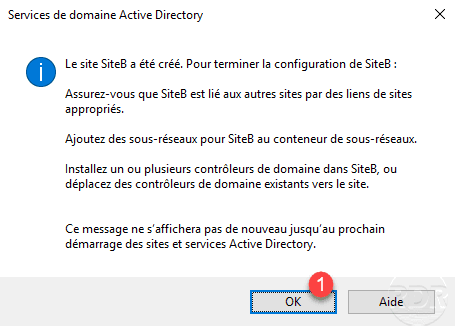
A confirmation message appears, click OK 1 to close it.
The site is added and available in the Active Directory Sites and Services console.
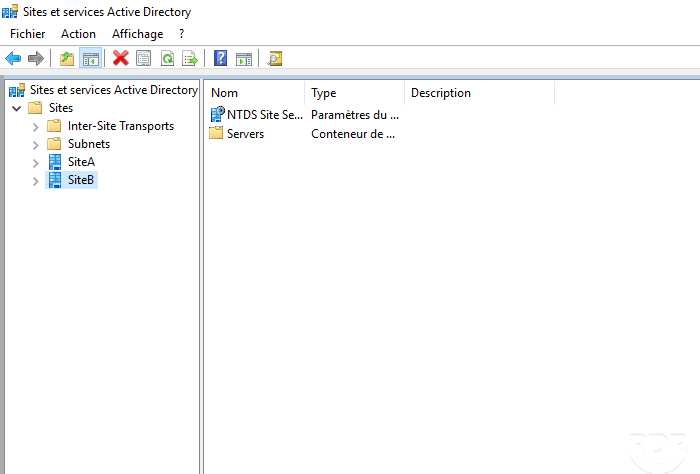
Now that the site is added, configure the subnet (s) linked to it.

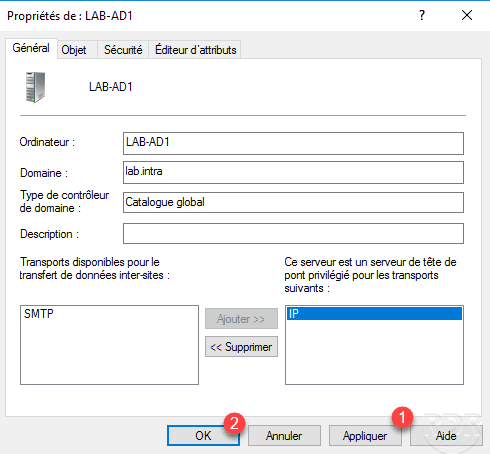
Configure a bridgehead server
A bridgehead server is a preferred domain controller for cross-site replication. It is useful to define a bridgehead server on the site that has multiple domain controllers to support replication from and to the domain controller and then replicate to its site controllers.
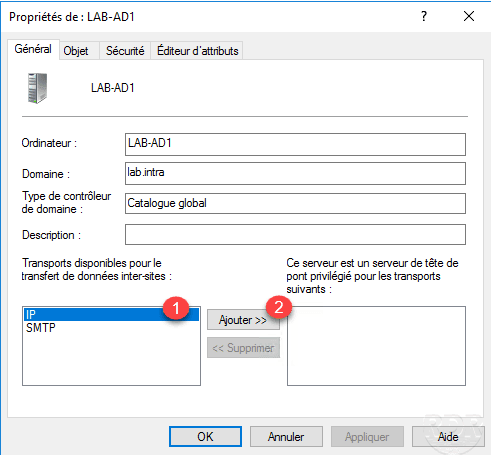
On server 1 , right-click and click Properties 2 .

Select the 1 protocol (s) then click on Add 2 .
Click Apply 1 and OK 2 to validate the configuration.
Add a replication link
When adding a domain controller, intra-site replication links are normally generated automatically.
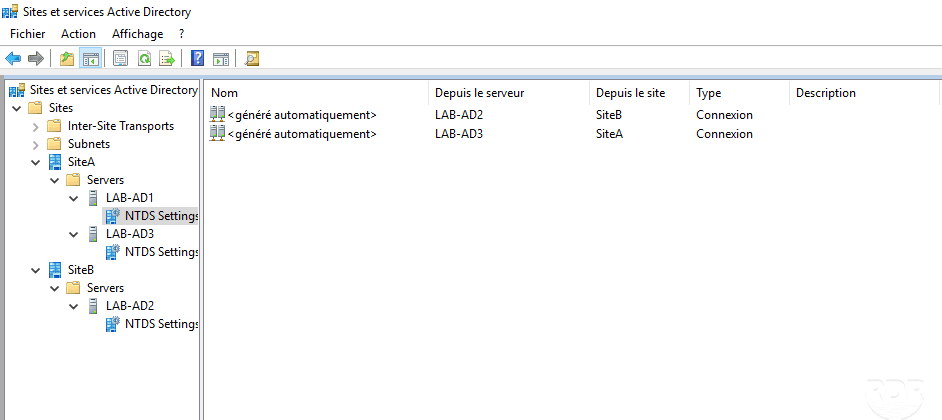
Because the LAB-AD1 server is a bridgehead for SiteA, there is no link from LAB-AD2 (SiteB) to LAB-AD3 (SiteA). If you still want to add a link manually this is possible.
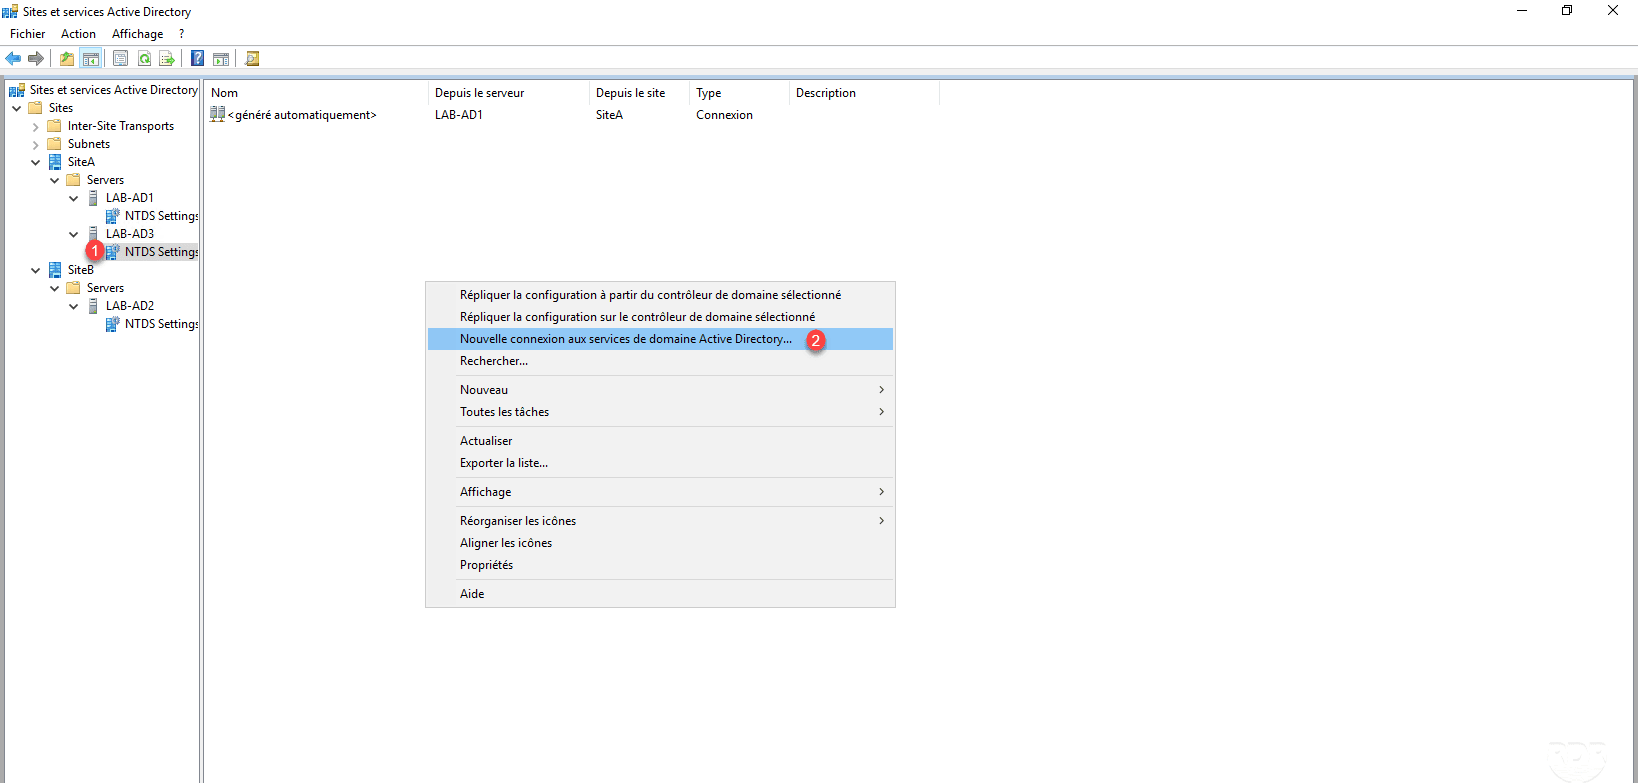
From the console, unroll the server node and go to NTDS Settings 1 . Right-click in the central area and click New Active Directory Domain Services Connection 2 .
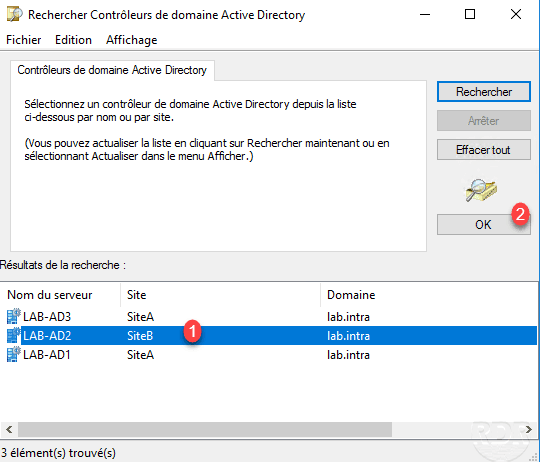
Select source controller 1 and click OK 2 .
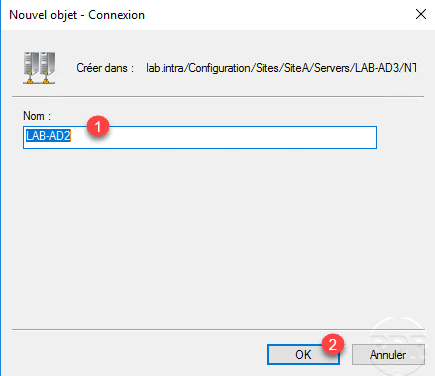
Name the link 1 and click OK 2 .
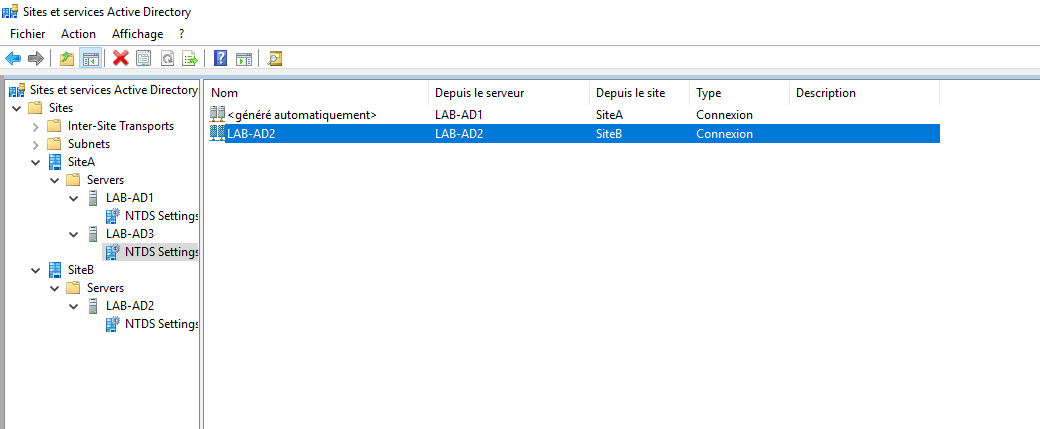
The replication link is added from the LAB-AD2 server to LAB-AD3.
Frequency and replication planning
The replication frequency is configured according to the type of link (Inter or Intra site).
Inter-Site
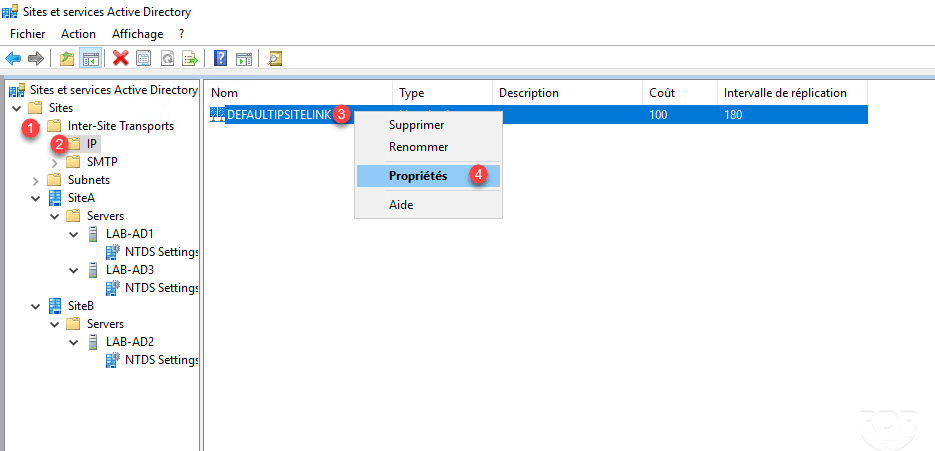
On the console go to Inter-Site Transports 1 / Link type 2 (IP) then right click on the link 3 and click on Properties 4 .
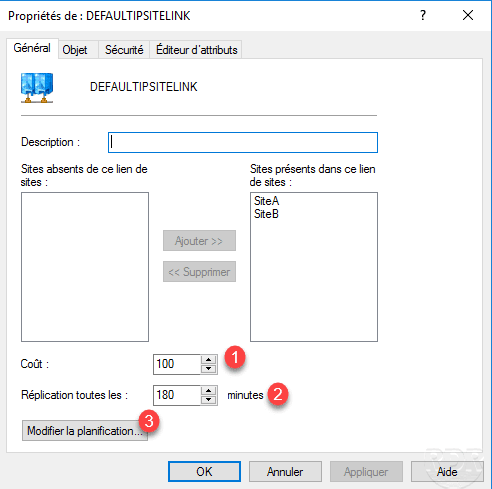
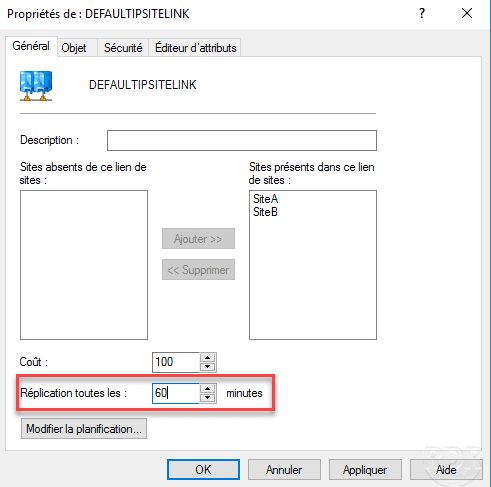
The configuration of the frequency and the planning is done from the General tab.
- Cost 1 : If multiple links are configured, it is possible to prioritize a link by changing the cost. The number to do the most is priority.
- Replication every XXX minutes 2 : corresponds to the replication frequency.
- The Change Schedule button 3 allows you to configure the hours when this one is active.

By going to see the properties of the inter-site replication link directly in NTDS Settings we can see the planning is done according to the Inter-Site Transport settings.
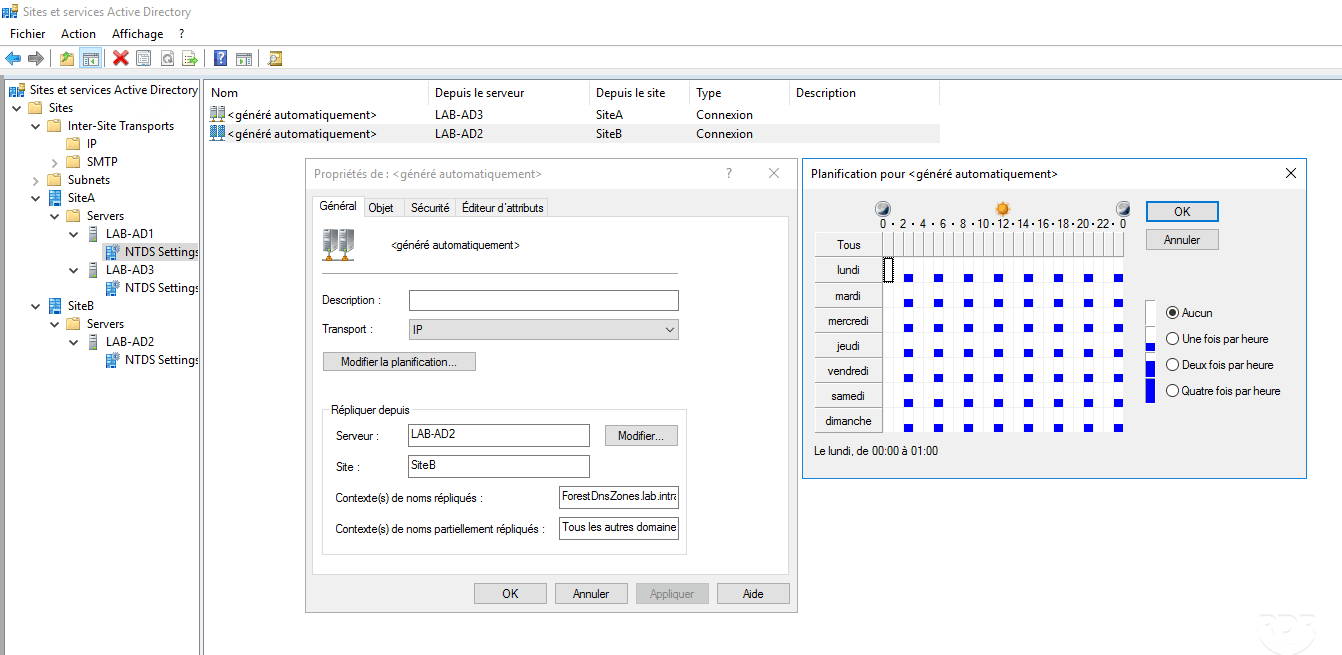
If we change the frequency in the link configuration in Inter-Site Transports to 60 minutes and we go back to see the link at the controller, we can see the replication schedule has been changed automatically.

The change is not instantaneous, it is possible to force it with the command
repadmin /kcc.
Intra-site
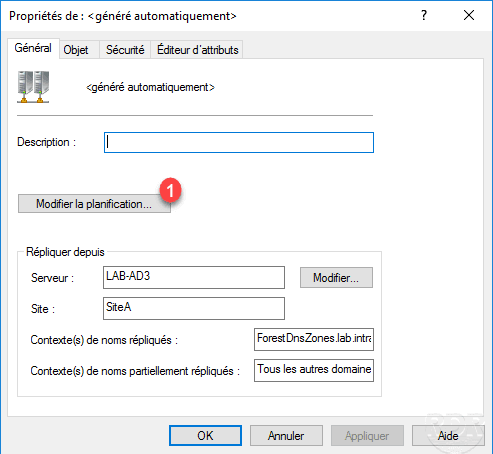
The frequency and scheduling of Intra-site replication is done directly at the link properties level in the NTDS Settings portion of the domain controller.

Click Change Schedule 1 .
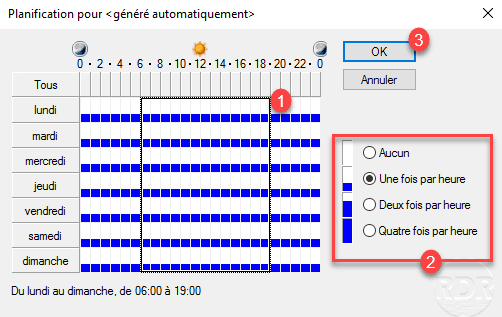
Select the range with modification 1 then select the number of replications per hour 2 and validate by clicking on OK 3 .
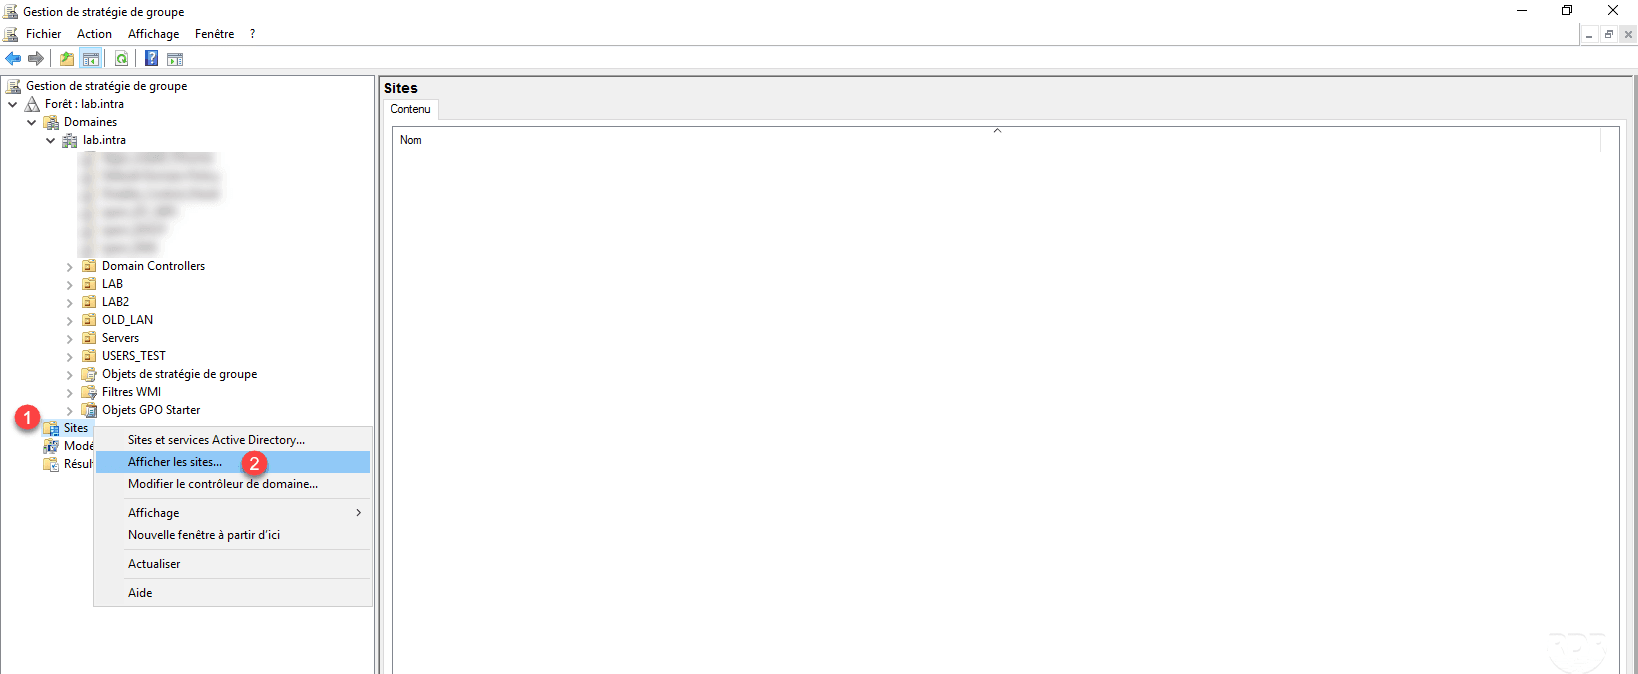
Use Group Policies by Sites
From the Group Policy Management console, right-click on Sites 1 and click on Show Sites 2 .
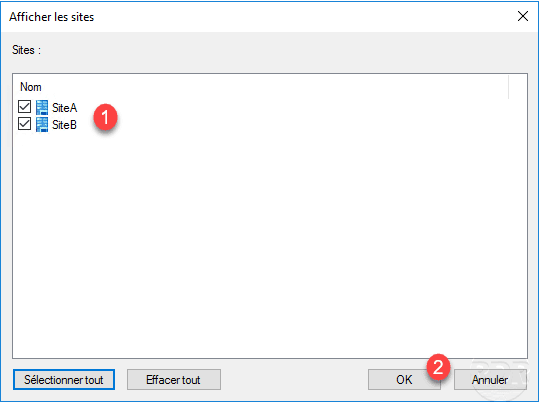
Choose sites to display 1 and click OK 2 .
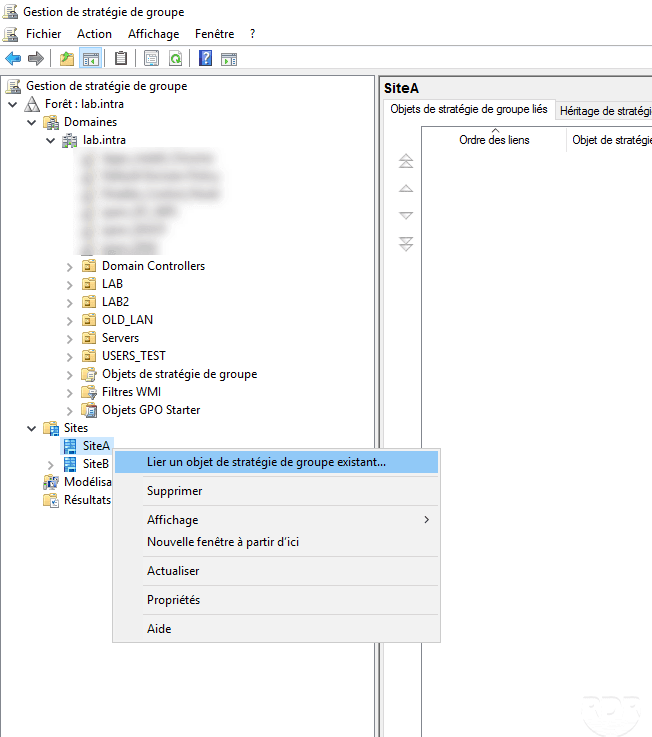
It’s now possible to link a GPO to a site, just right-click on the site and click Link an existing GPO.
Troubleshooting
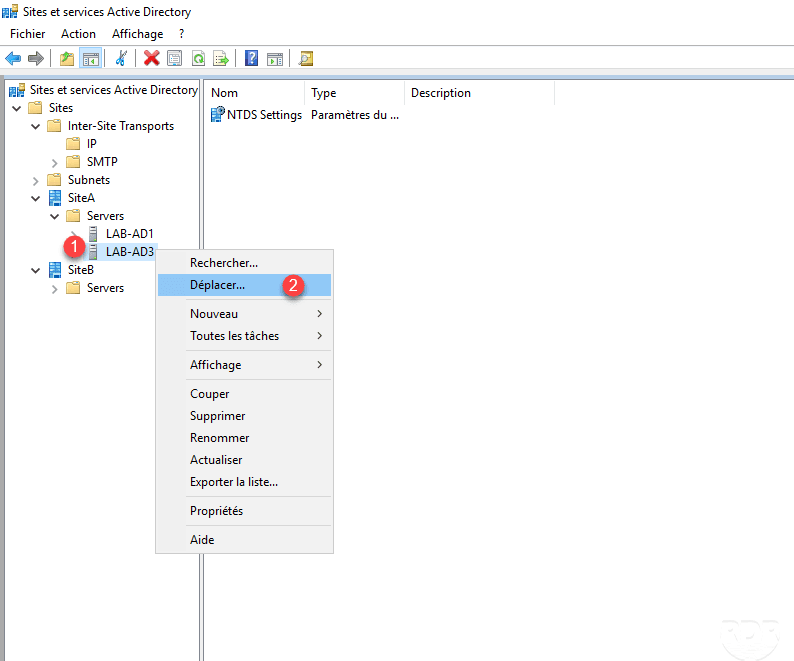
Move a domain controller
From the Active Directory Sites and Services console, right-click on the 1 controller to move and click Move 2 .
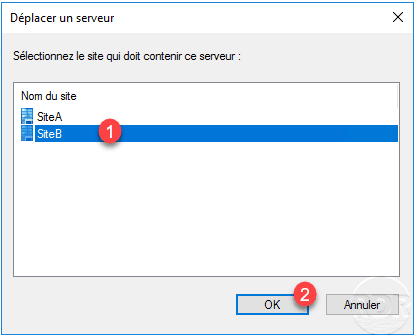
Choose destination site 1 and click OK 2 .
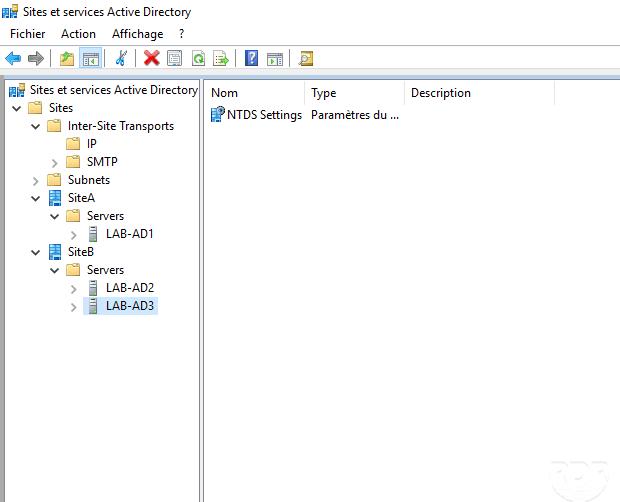
The server has been moved to the new site.
Check the status of replication
On a domain controller, open a command prompt and enter the command below to view the status of the controller replication.
repadmin /showrepl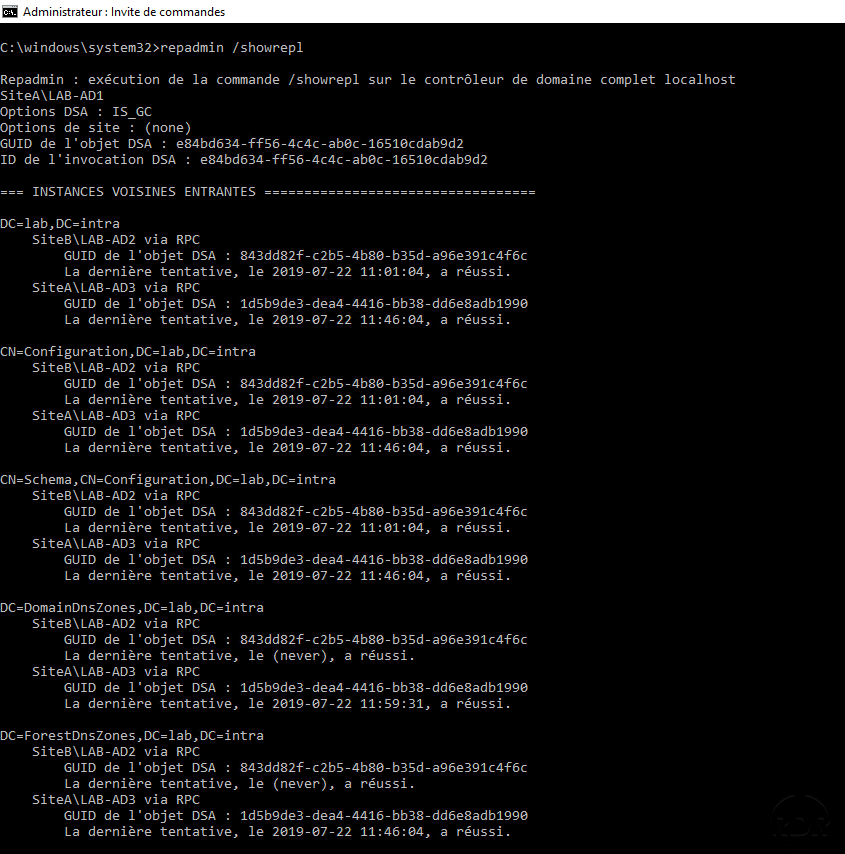
It is also possible to check the replication of a remote controller by specifying it from the command:
repadmin /showrepl 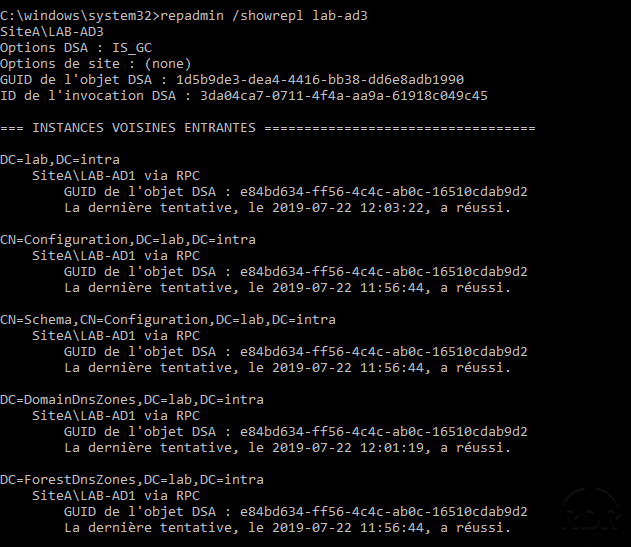
Force replication
Enter the following command to force Intra-site replication:
repadmin /syncall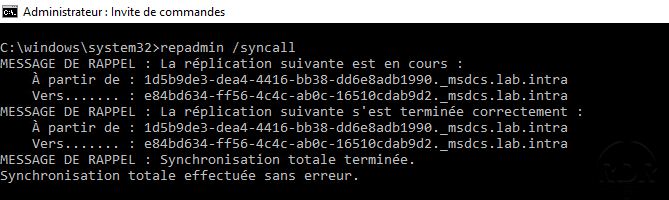
Enter the following command to force Intra-site and Inter-site replication:
repadmin /syncall /e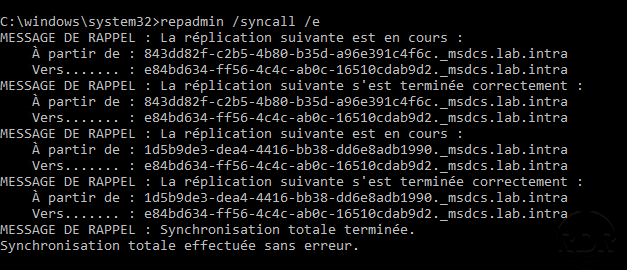
Enter the following command to force Intra-site and Inter-site replication on a remote controller:
repadmin /syncall /e 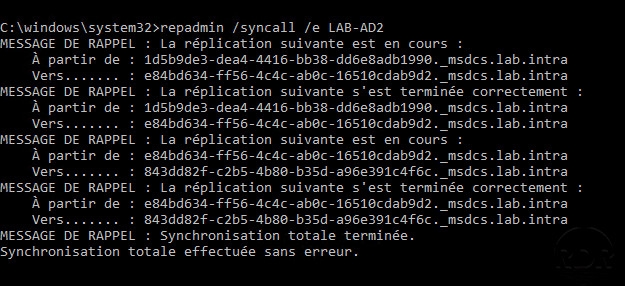
Regenerate replication links
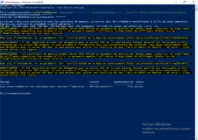
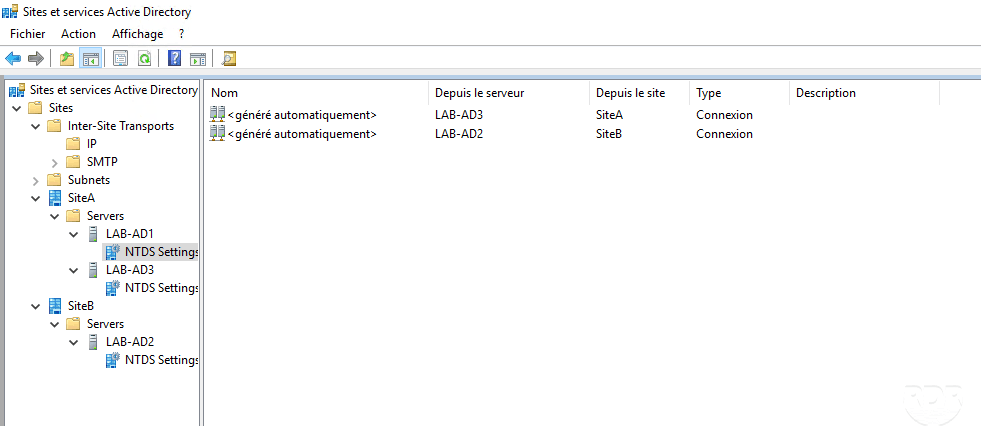
If by mistake, you delete the replication links automatically generate as on the screenshot below by panic …
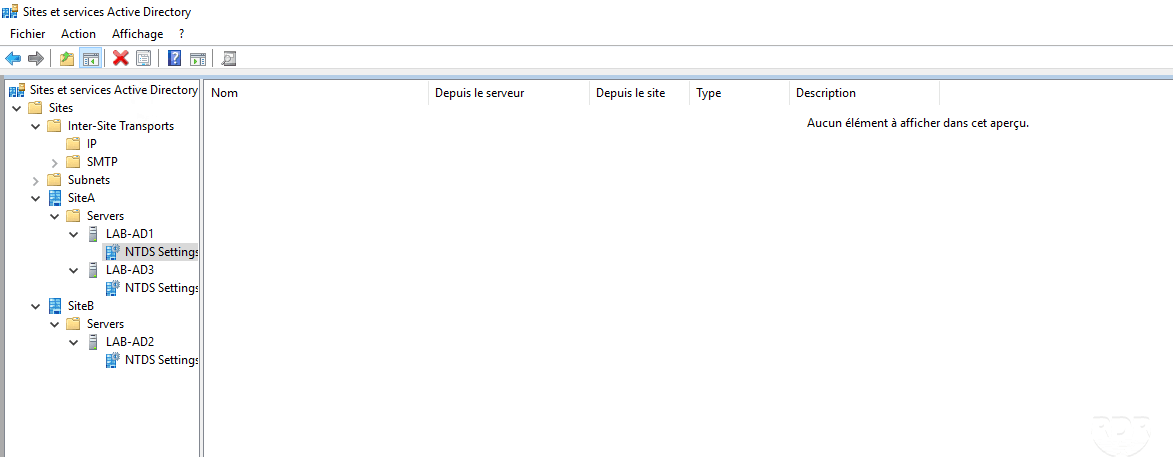
Open a command prompt on the domain controller and enter the command below:
repadmin /kcc
Replication links are available again.
Depending on the topology and the number of domain controllers, link generation may take several minutes.
This command is normally run every 15 minutes to check the replication topology.
Links:
Repadmin : https://docs.microsoft.com/en-us/previous-versions/windows/it-pro/windows-server-2012-R2-and-2012/cc770963(v=ws.11)
Design of the site topology : https://docs.microsoft.com/fr-fr/windows-server/identity/ad-ds/plan/designing-the-site-topology