In this tutorial, I will explain how to create a NAT switch (virtual switch) on Hyper-V.
Before getting into the technical explanations, I will explain in a few words, what a NAT switch is.
If you have already used another hypervisor such as vmware or virtualbox for example, this type of switch is available by default. It allows you to create an isolated network for virtual machines with Internet access.
On Hyper-V, this possibility is not available natively, but it is impossible with PoweShell to configure an internal virtual switch with the NAT option, which will allow your virtual machines to have access to the Internet while being ” isolated “from the network.
Table of Contents
Create an Internal switch
The first step will be to create an internal switch
1. Open a PowerShell command prompt as an administrator.
2. Pour créer un commutateur virtuel sur Hyper-V, on utilise la cmdlet New-VMSwitch.
New-VMSwitch -Name "NAT" -SwitchType Internal

We can check on the Hyper-V console that the virtual switch has been created and also see the network card on the computer.
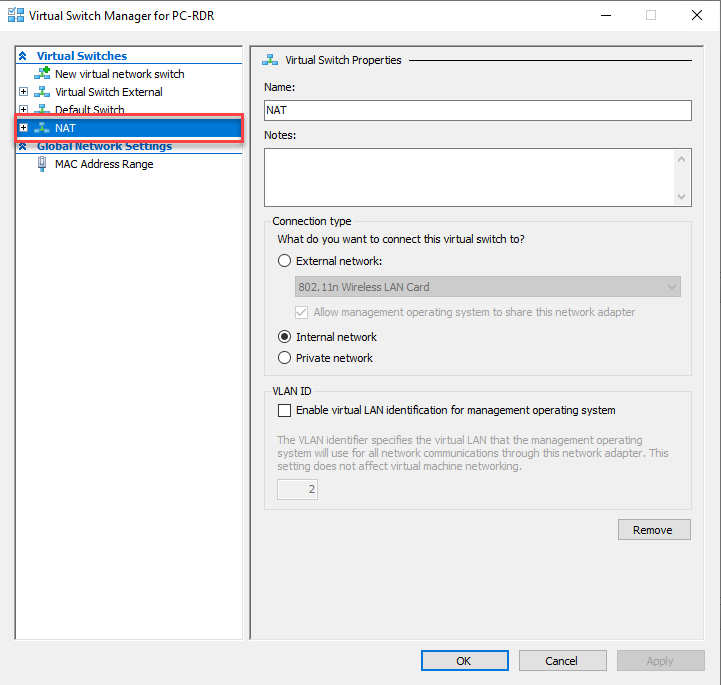

NAT Virtual Switch Network Configuration
Now that the network switch is created, the network linked to this virtual switch must be configured. This part is done in two steps, we will first configure the IP address of the network card on the Hyper-V host and then we will activate the NAT functionality.
To perform the configuration, we always use PowerShell.
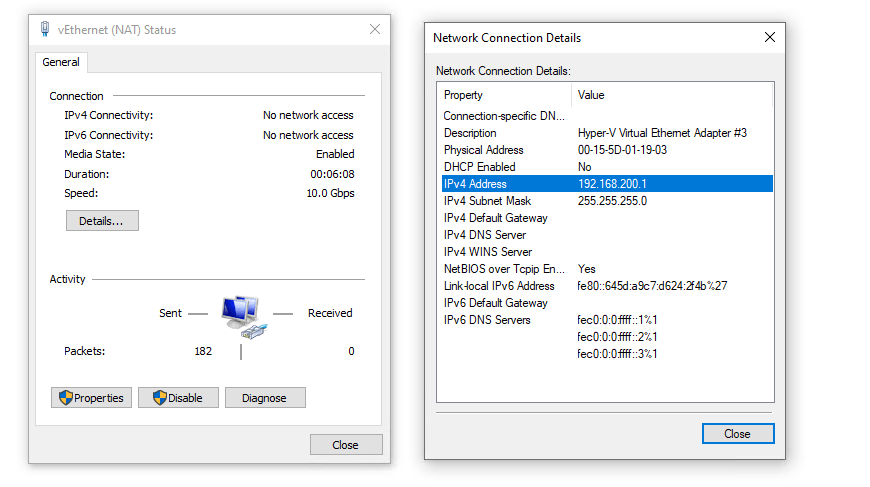
1. To configure the IP address on the network card of the Hyper-V host, you must use the New-NetIPAddress cmdlet indicating the IP address of the network card, the length of the subnet mask and the network card.
New-NetIPAddress -IPAddress 192.168.200.1 -PrefixLenght 24 -InterfaceAlias "vEthernet (NAT)"

It is possible to verify the configuration by looking at the details of the network card on the Hyper-V host.
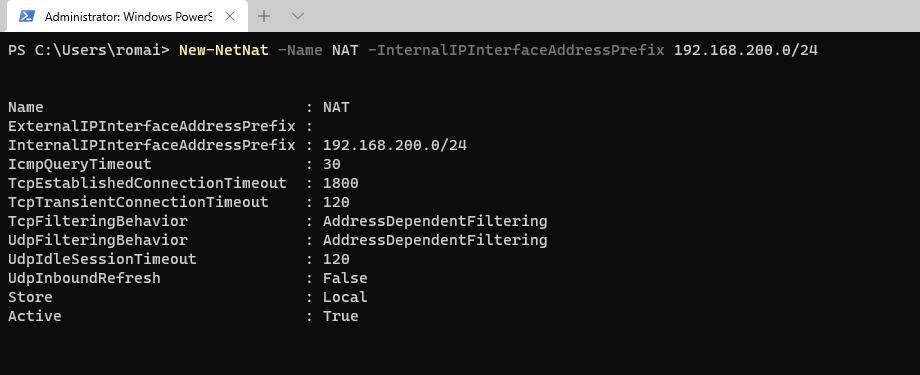
2. Now we are going to activate the NAT functionality for the network, for that we must use the New-NetNat cmdlet by indicating a name and the IP network.
New-NetNat -Name NAT -InternalIPInterfaceAddressPrefix 192.168.200.0/24
Now you know how to create a NAT virtual switch on Hyper-V. Unlike the other virtualization solution, Hyper-V does not integrate a DHCP server. You must configure the IP addresses of the virtual machines manually or create a Windows server with the DHCP role.
Use the NAT switch on a virtual machine in Hyper-V
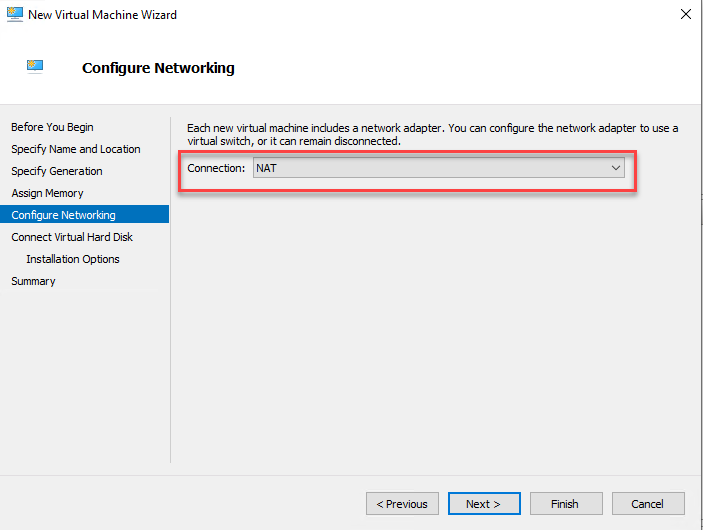
I will now explain how to use the virtual switch that we just created.
In the settings of the virtual machine, you must select the NAT virtual switch that was created.
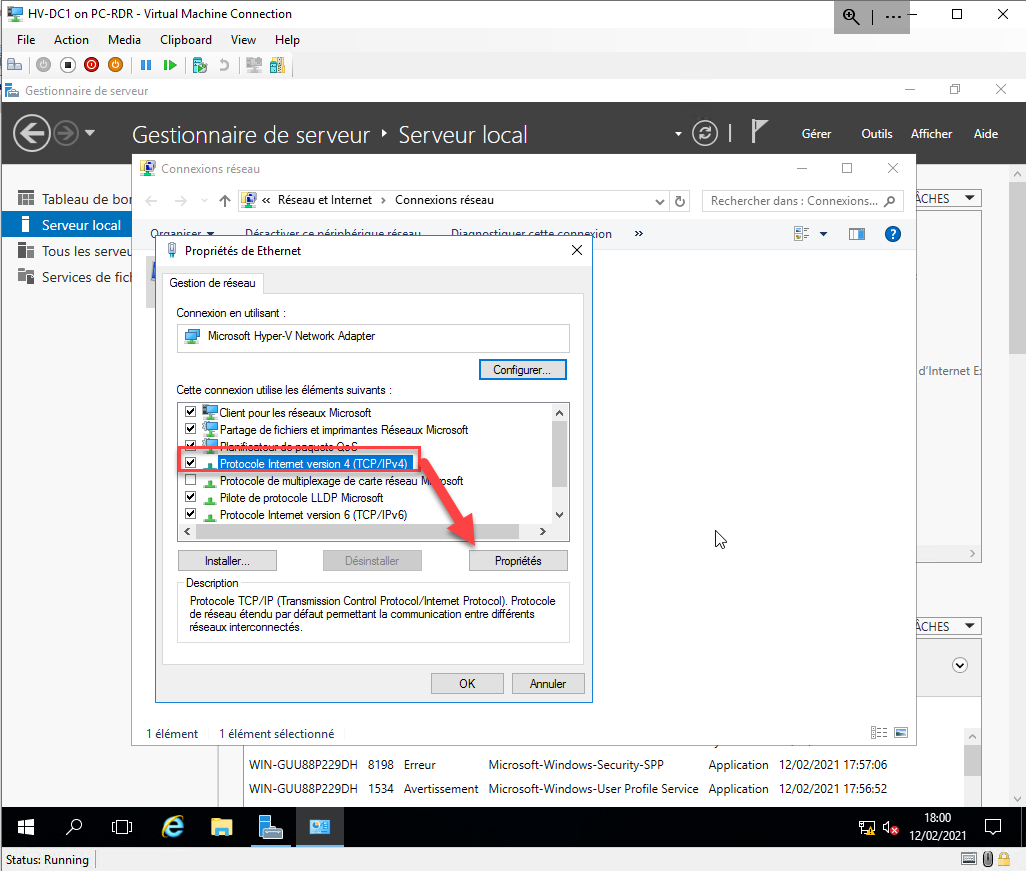
On the virtual machine, go to the configuration of the IPv4 protocol of the network card connected to the NAT switch.
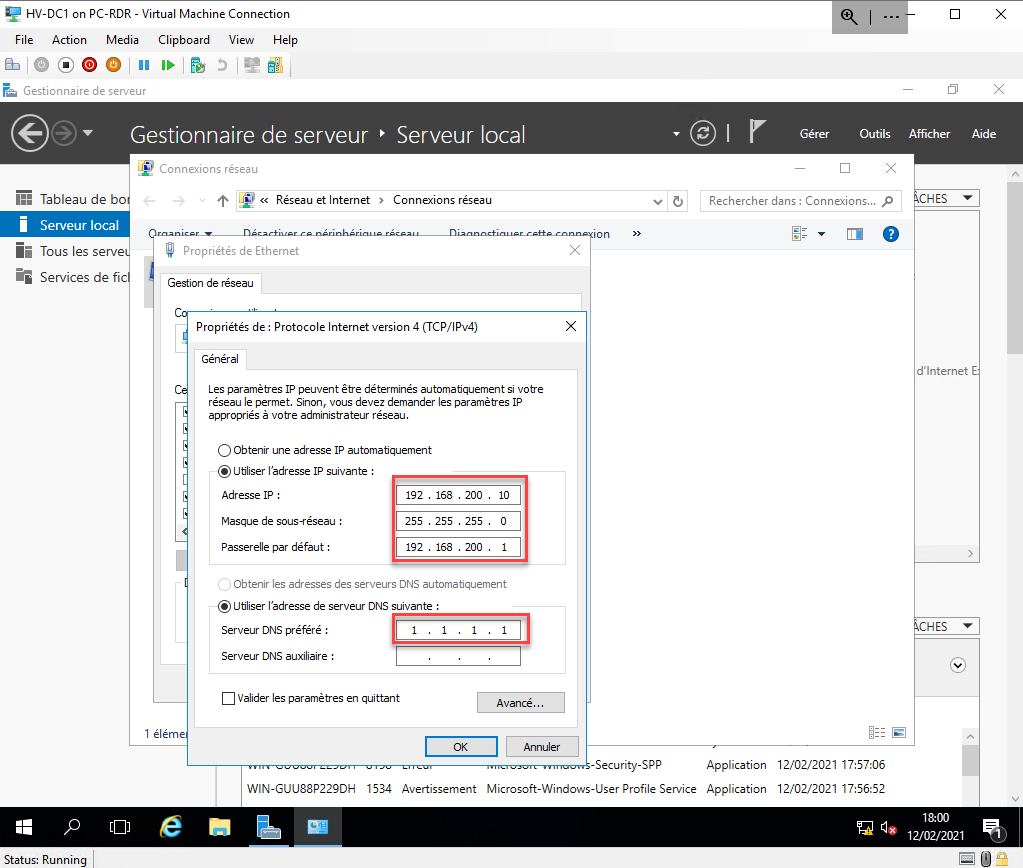
In the IPv4 properties, indicate a free IP address and the subnet mask, in default gateway indicate the IP address of the network card of the Hyper-V host and indicate a DNS server.
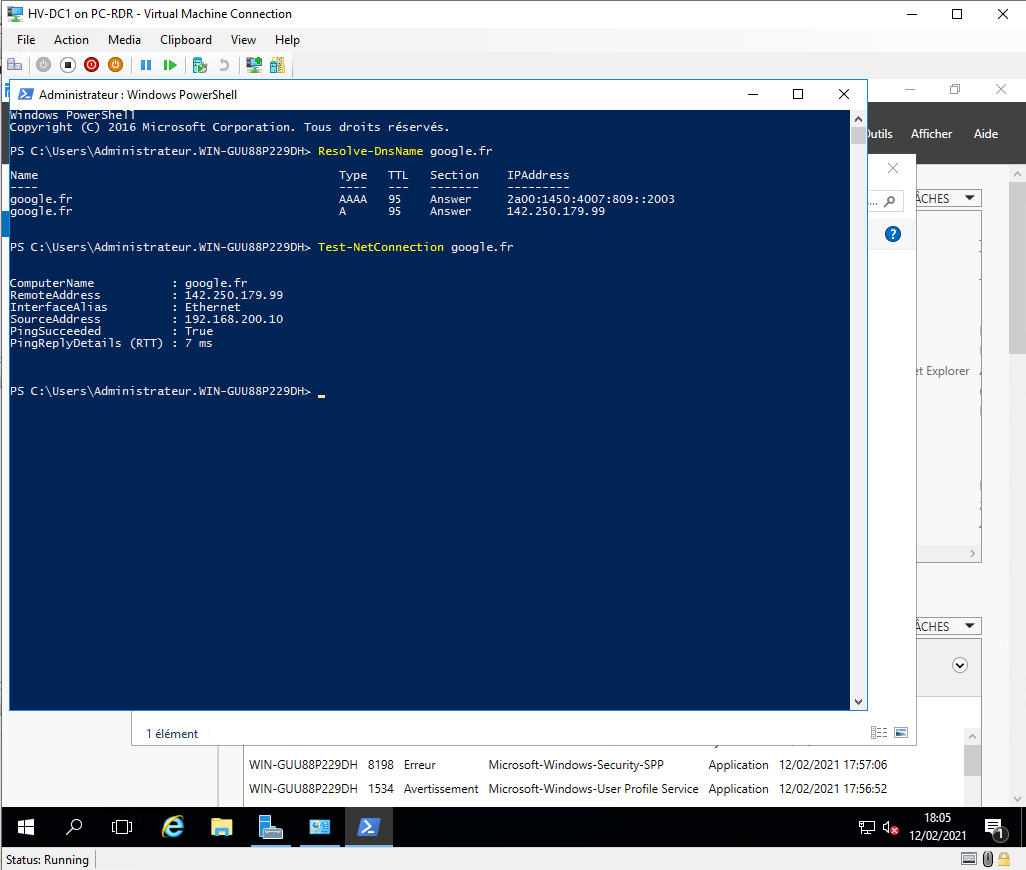
Test proper operation either by browsing the Internet or using the Resolve-DnsName and Test-NetConnection PowerShell cmdlets as in the screenshot below.
Using a NAT virtual switch on Hyper-V is the “simplest” solution to “isolate” virtual machines and allow them to access the Internet. Before this functionality was implemented, it was necessary either to go through a connection sharing or to install a virtual machine which had the role of router.
