In this tutorial dedicated to Windows Server 2025, I will show you how to share a folder from the graphical interface with Windows file explorer and from Server Manager, which allows centralized management of the different shares.
Then we will see how to optimize the configuration of shares with access-based enumeration.
To illustrate this tutorial, we will start with a case that can be found quite easily in companies, which are the service folders (Compatibility, IT) which allow work on documents within the same service.
Before we get into the game, I’m going to introduce you to SMB, which is the sharing protocol on Windows.
Table of Content
Introduction to the SMB protocol
SMB stands for Server Message Block, which is the Windows protocol that allows resource sharing (files and printers) under Windows; it uses ports 445 (DNS) and 139 (NBT).
Historically, under older versions of Windows, it was called CIFS for Common Internet File System.
A common mistake that people make when talking about SMB is to call it SAMBA, but SAMBA is the implementation of the SMB protocol under UNIX and Linux.
At the time of writing this tutorial, we are at version 3.1.1 of the SMB protocol which appeared on Windows 10 and Windows Server 2016.
In recent years, the SMB protocol has been the subject of much discussion, as it is often present in the various security flaws that have been revealed on Windows which allow either the theft of credentials and/or the taking of control of the computer.
The SMB protocol uses a client/server architecture, where the client sends requests to access a shared element (Folders, Printers).
The format for resource shares is as follows: \\server\shared-resource\….
If you would like to learn more about the SMB protocol, I invite you to read the Wikipedia page: https://fr.wikipedia.org/wiki/Server_Message_Block
Sharing a folder with Windows Server 2025
There are several ways to share a folder in Windows:
- File Explorer*
- Server Manager
- PowerShell
* There are also different ways to do this from the file explorer.
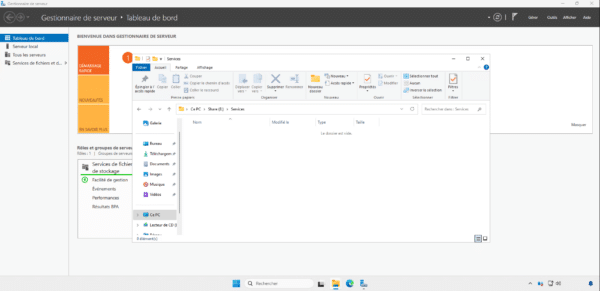
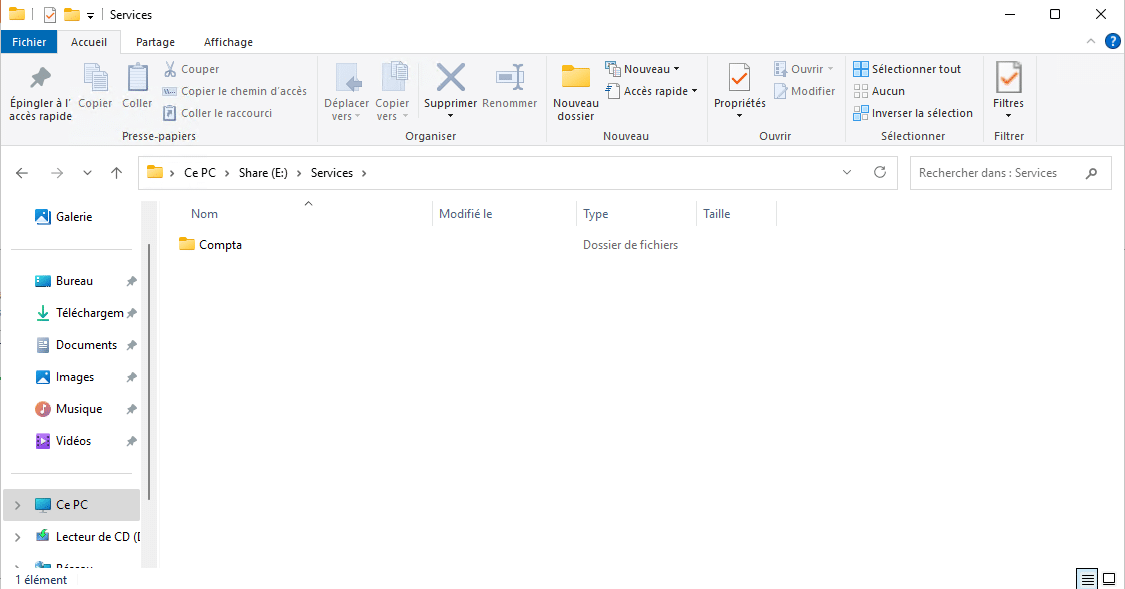
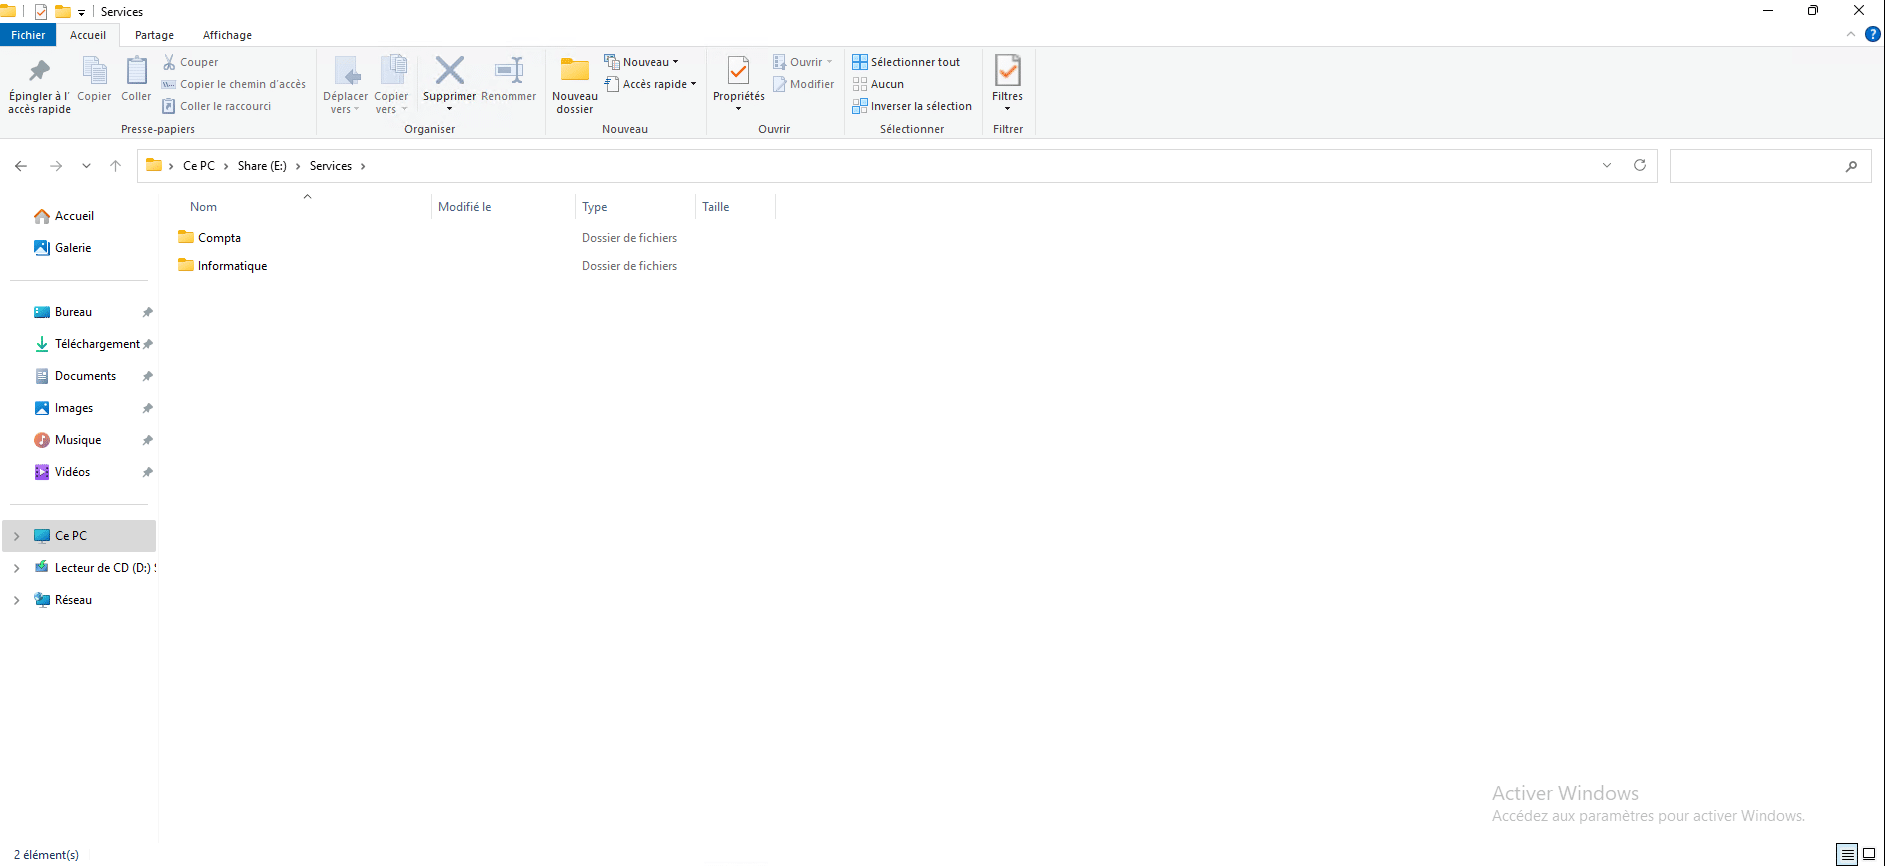
In this tutorial, we will have two ways of doing it, to begin, I created a Services folder on my Windows server, which will contain the different service folders that we will share.
The server used in this tutorial is a member of a domain Active Directory which will allow NTFS permissions to be applied to manage different access levels using groups.
Share a folder from File Explorer
This method is common to all operating systems, so it can also be applied to Windows 11.
To begin, create the folder that needs to be shared; here I created the Accounting folder.
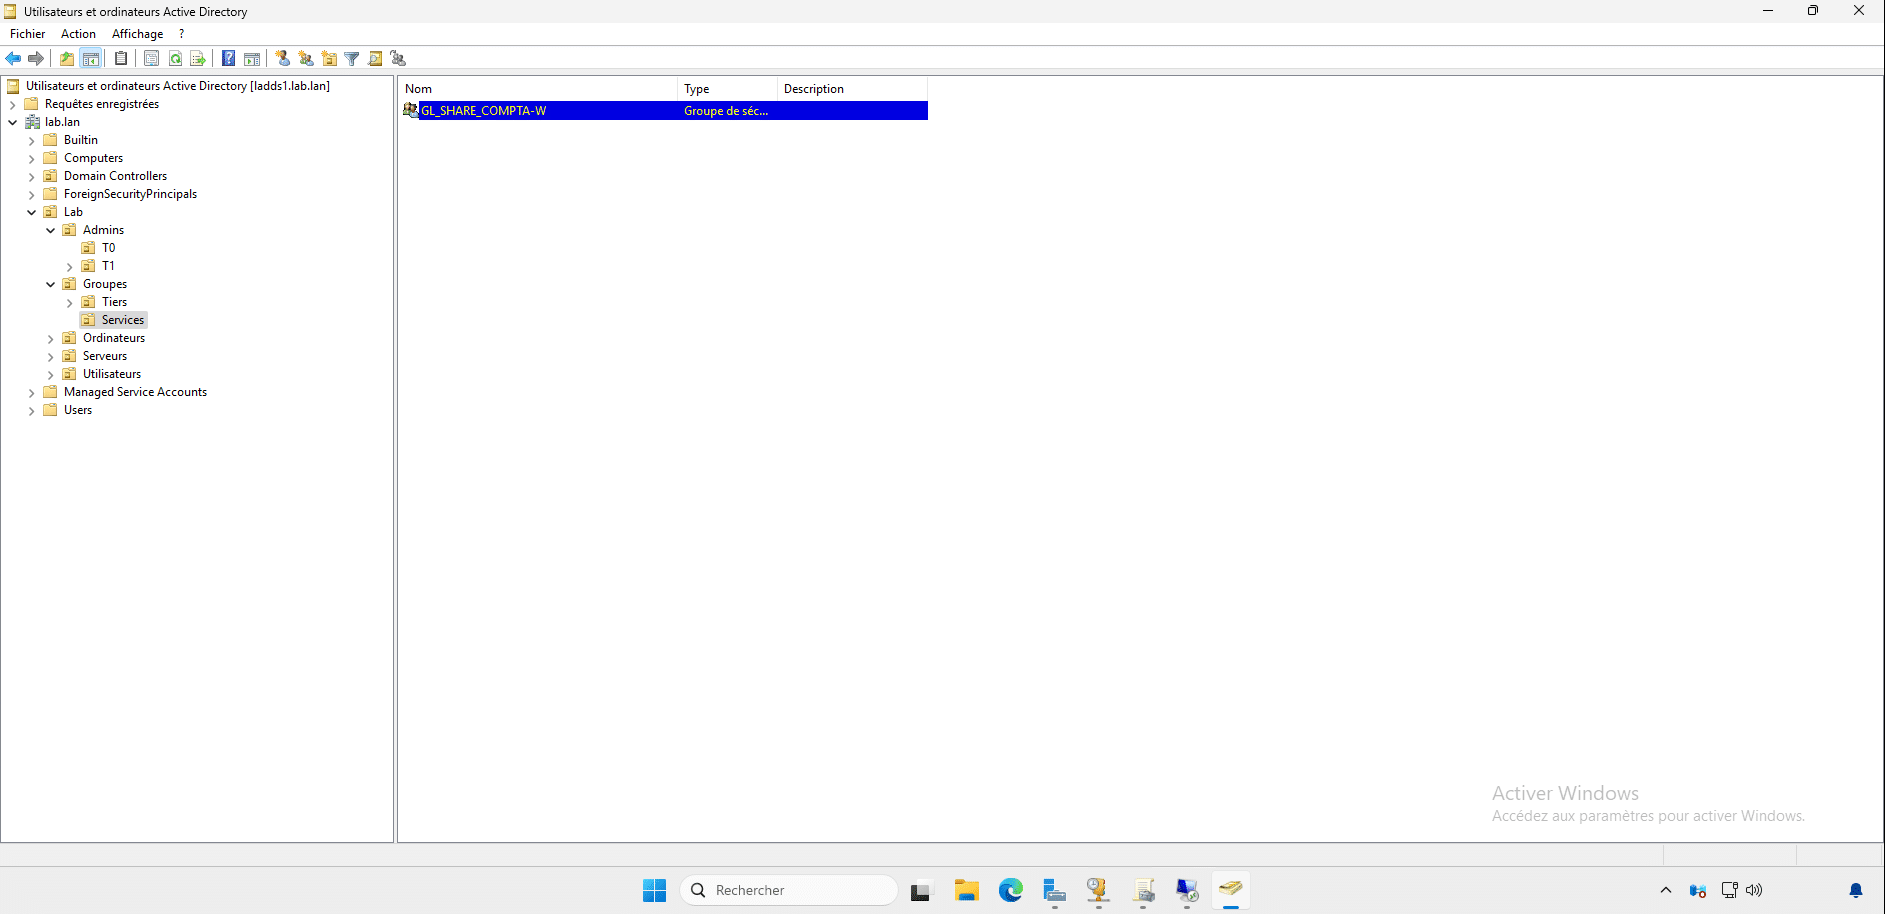
At the same time, I created the GL_SHARE_COMPTA-RW group which will allow the permissions to be applied.
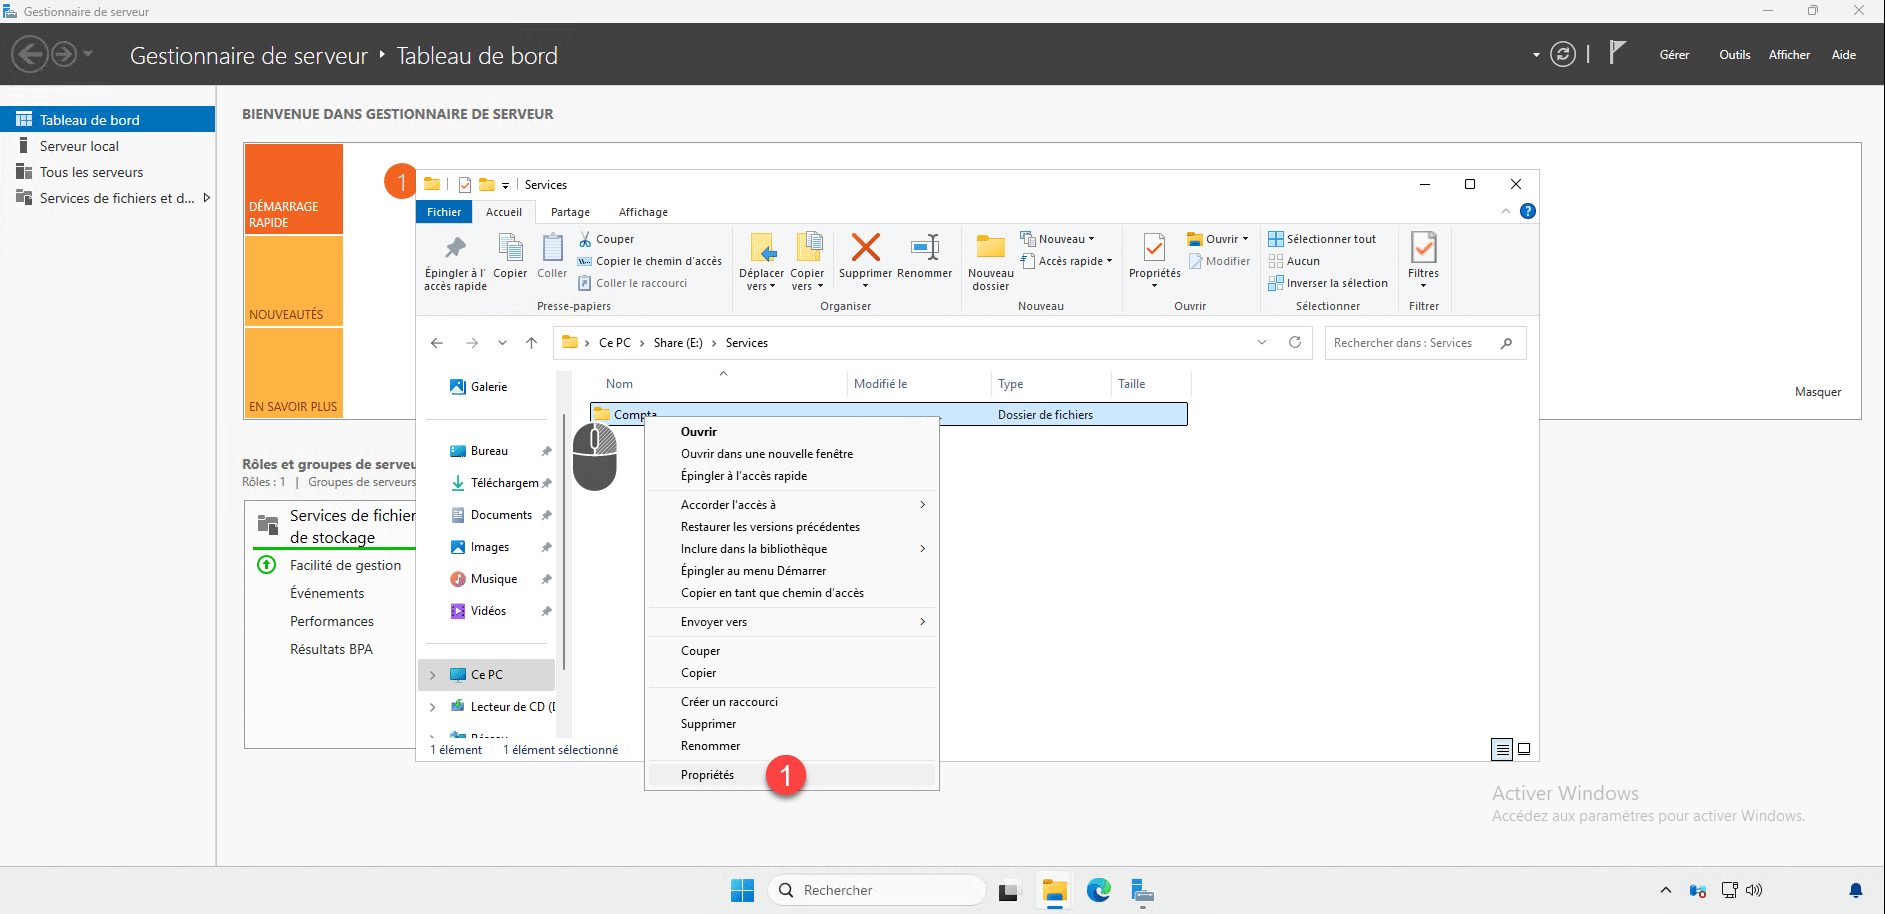
Right-click on the folder to share and then click on Properties 1.
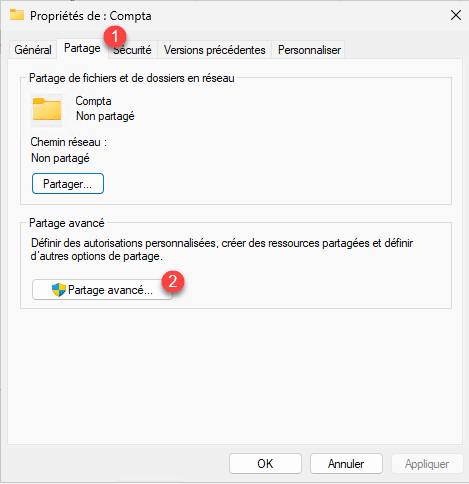
Next, go to the Sharing tab 1 and then click on Advanced Sharing 2.
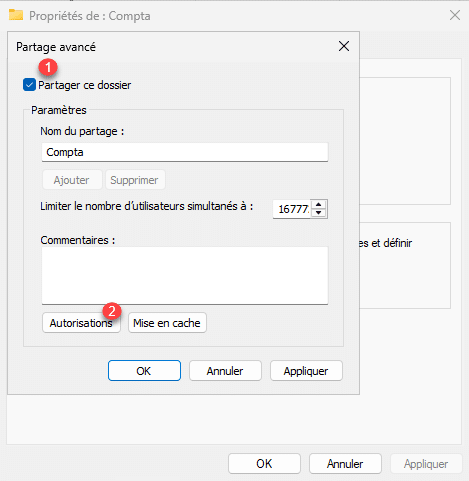
On the Advanced Sharing window, check the box Share this folder 1 then click on the Authorization button 2.
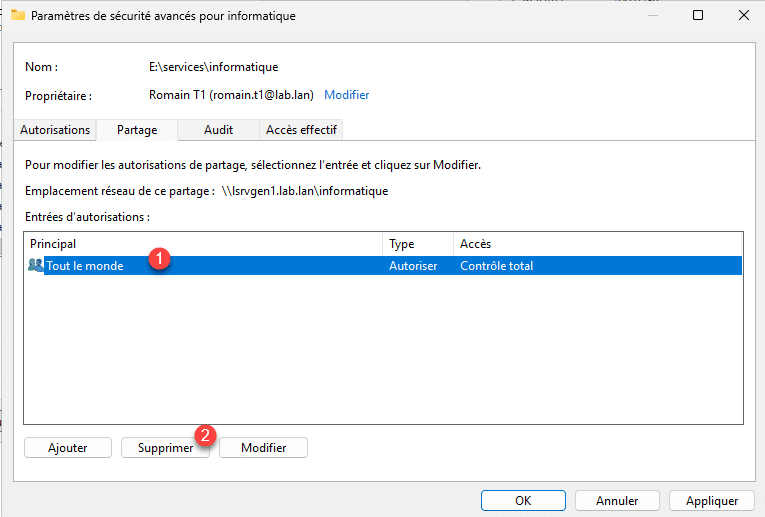
By default, read rights on the share are allowed for Everyone, which is not desired, select Everyone 1 then click on Delete 2.
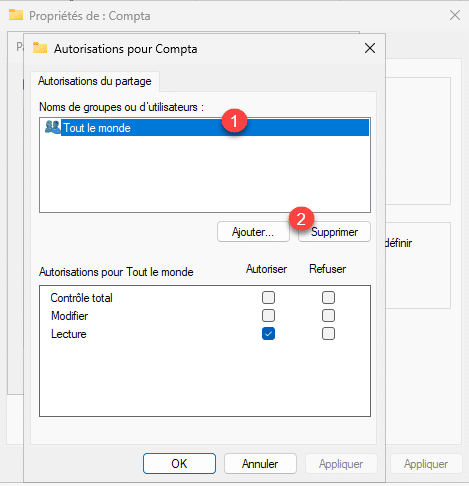
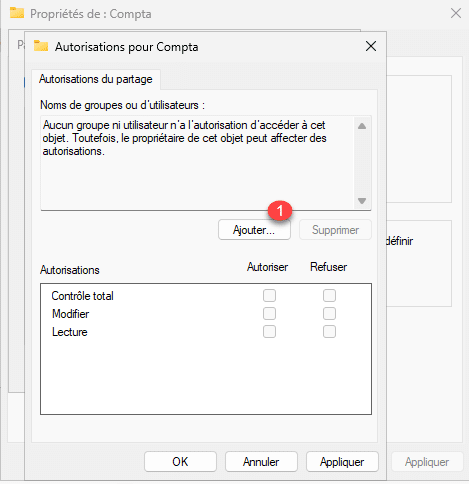
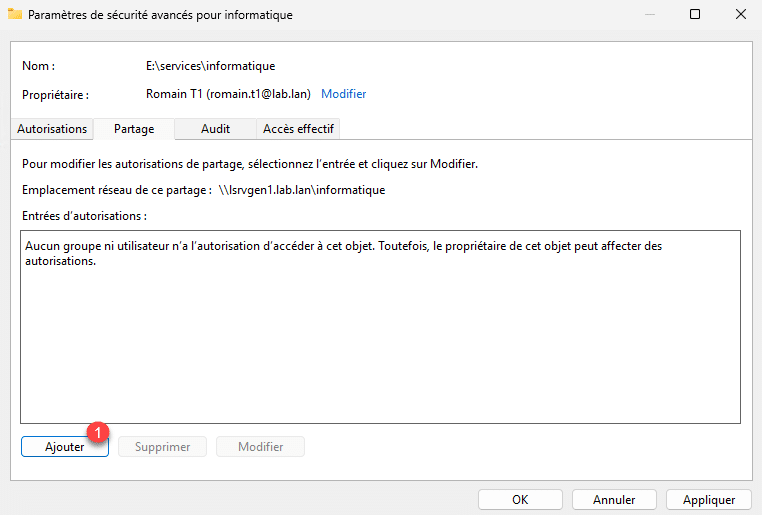
For now, there is no more authorization, click on the Add 1 button.
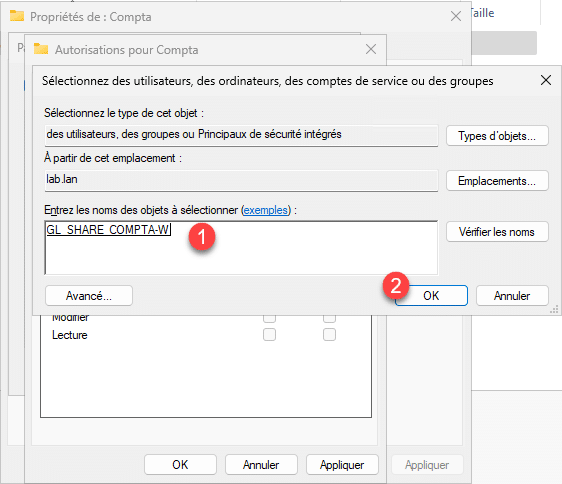
Select the group 1 which will have permissions on the share and then click on the OK button 2.
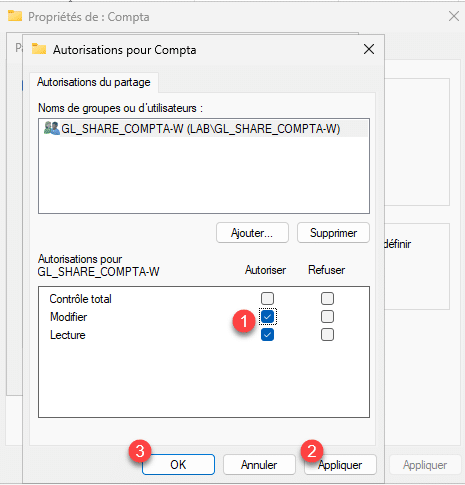
Configure the permissions 1 (here I will put the modification rights) for the group, then click on Apply 2 then on OK 3.
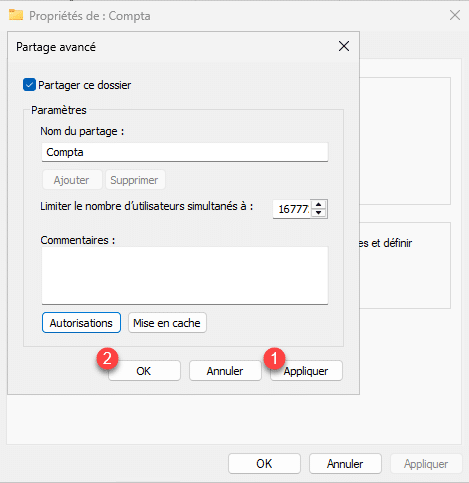
The SMB configuration of the share is complete, click on Apply 1 and OK 2.
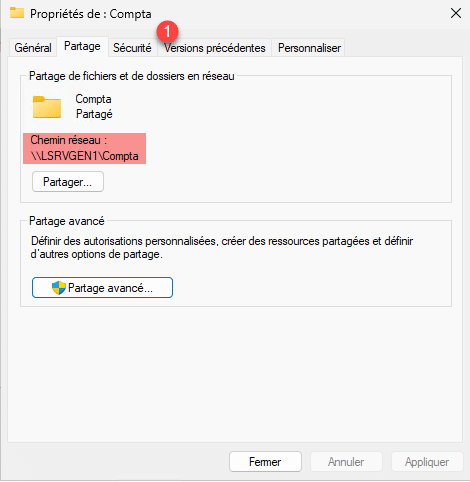
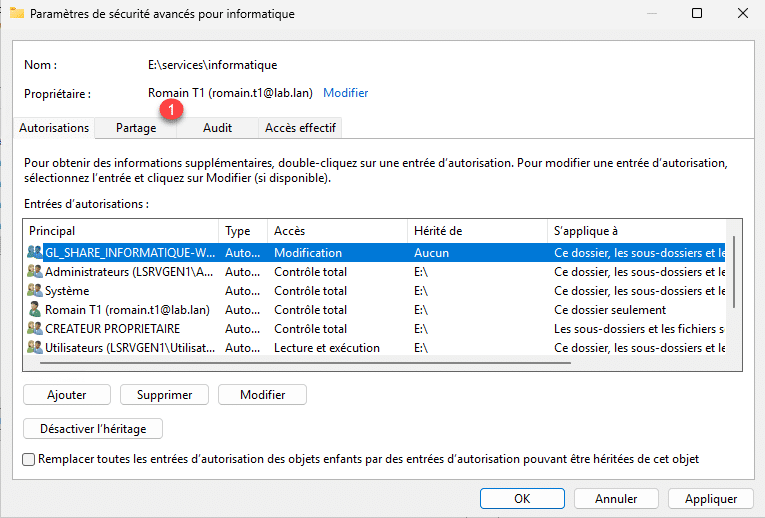
In the Properties, you can see that the folder is shared and the UNC path is displayed, then go to the Security tab 1.
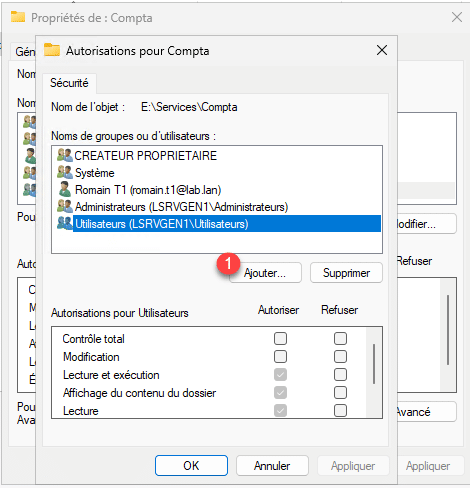
On the Security tab, you can see that the local Users group has read access to this folder. For now, we don’t want to modify these NTFS permissions. NTFS rights will only be relevant if a user logs on locally to the server, which shouldn’t be possible. However, we need to grant modify permissions to the Active Directory group that has been configured for share permissions. Click the Modify button 1.

A new window will open; click on the Add 1 button.
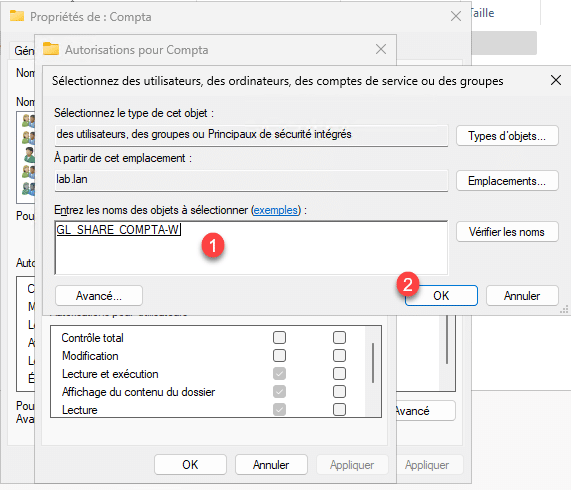
As with sharing permissions, select the Active Directory group 1 and then click OK 2.
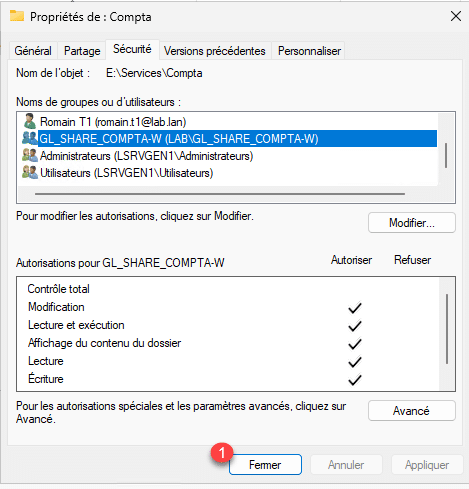
Configure the permissions 1 for the group and then click the Apply 1 and OK 2 buttons.

NTS permissions are configured, click on Close 1.
The File Explorer sharing setup is now complete.
Share a folder from the Server Manager
To illustrate this part of the tutorial, I will share the IT folder, which is located in the Services folder at the same level as the Accounting folder.
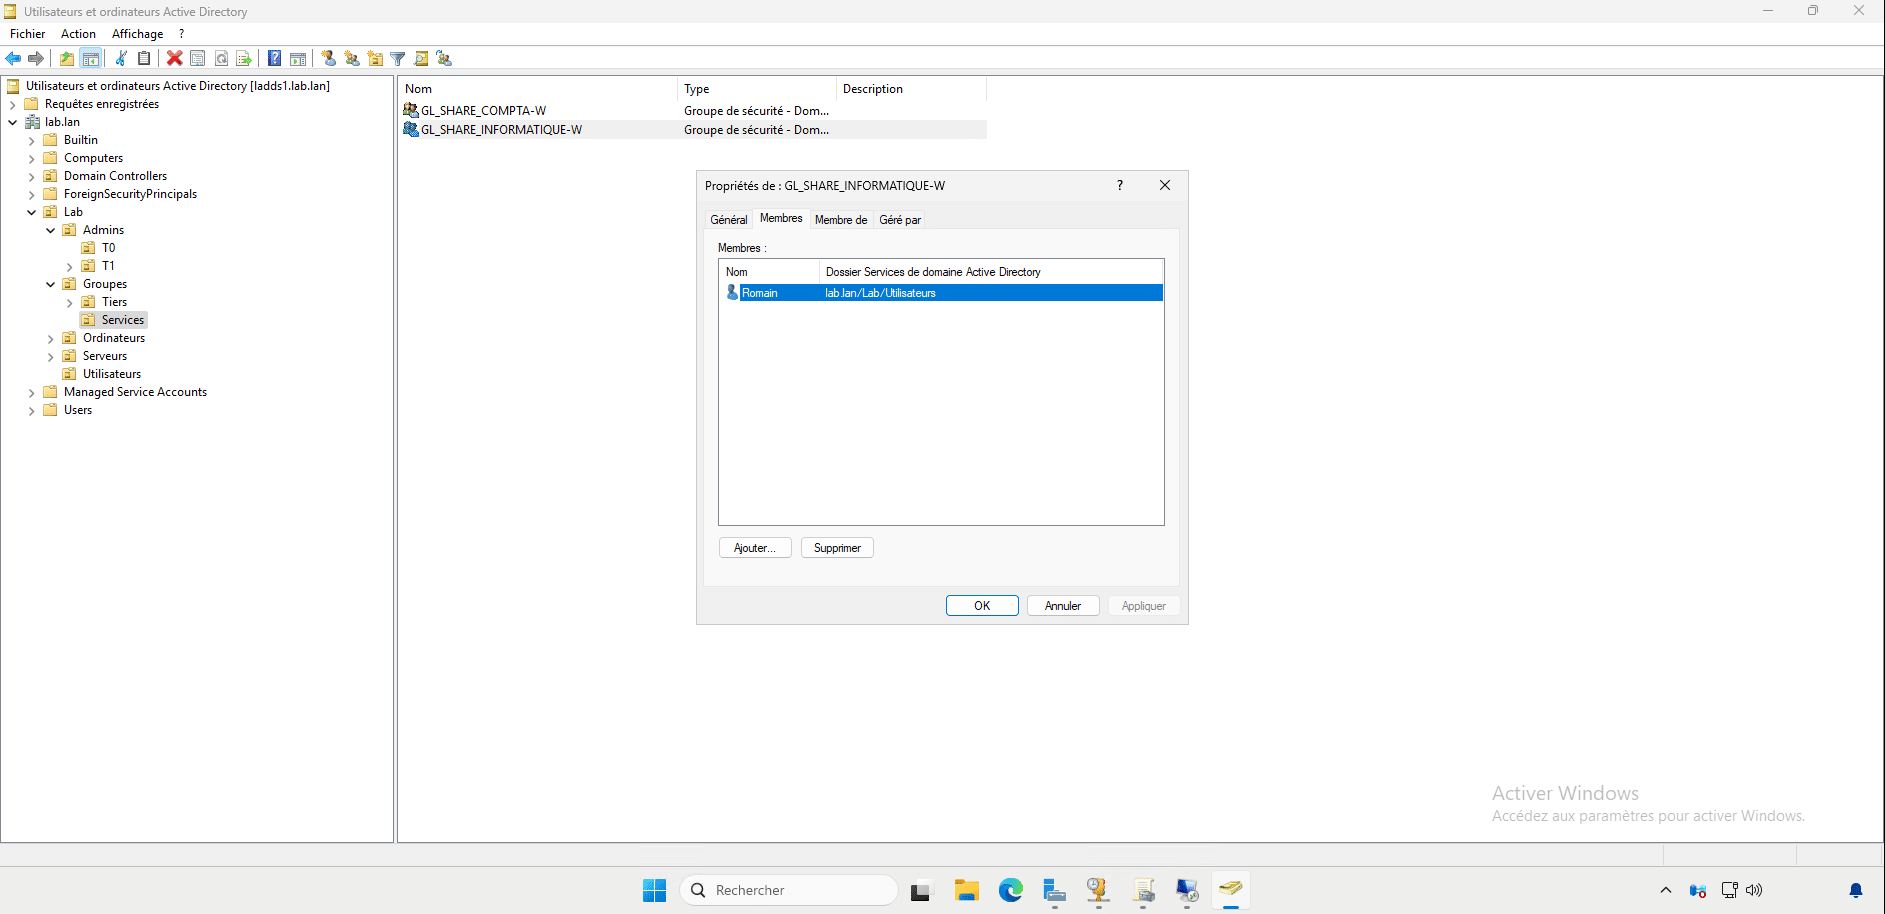
Here too, I created a dedicated Active Directory group.
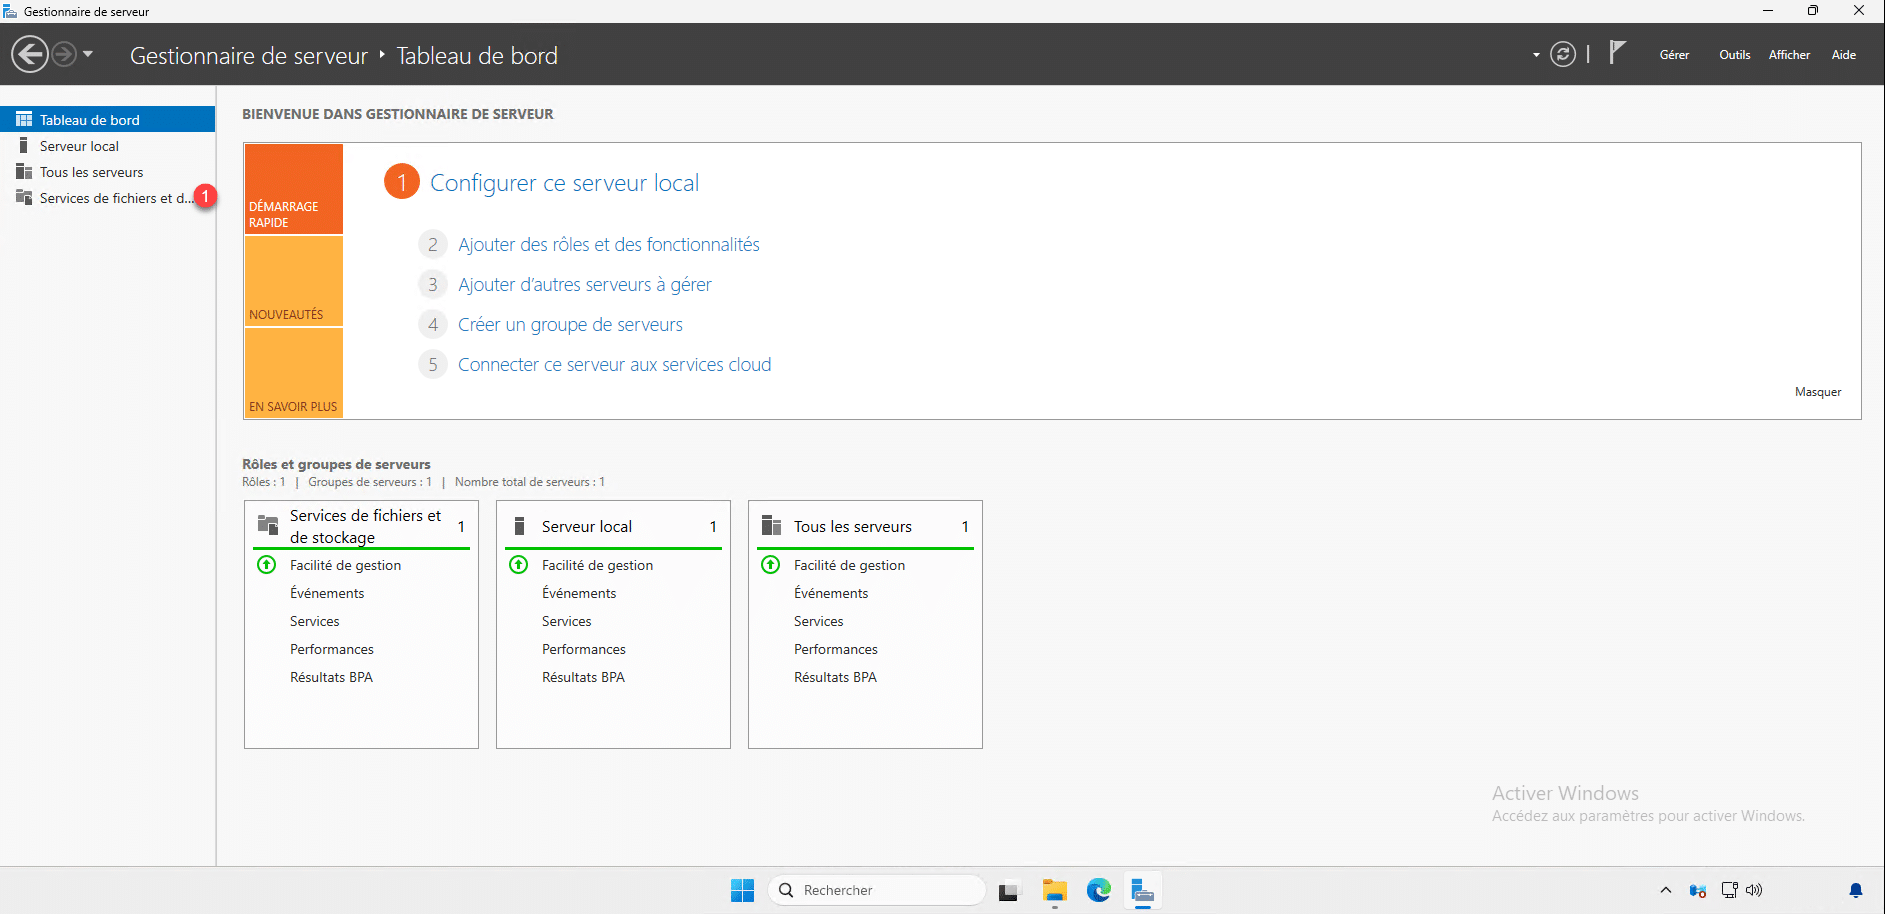
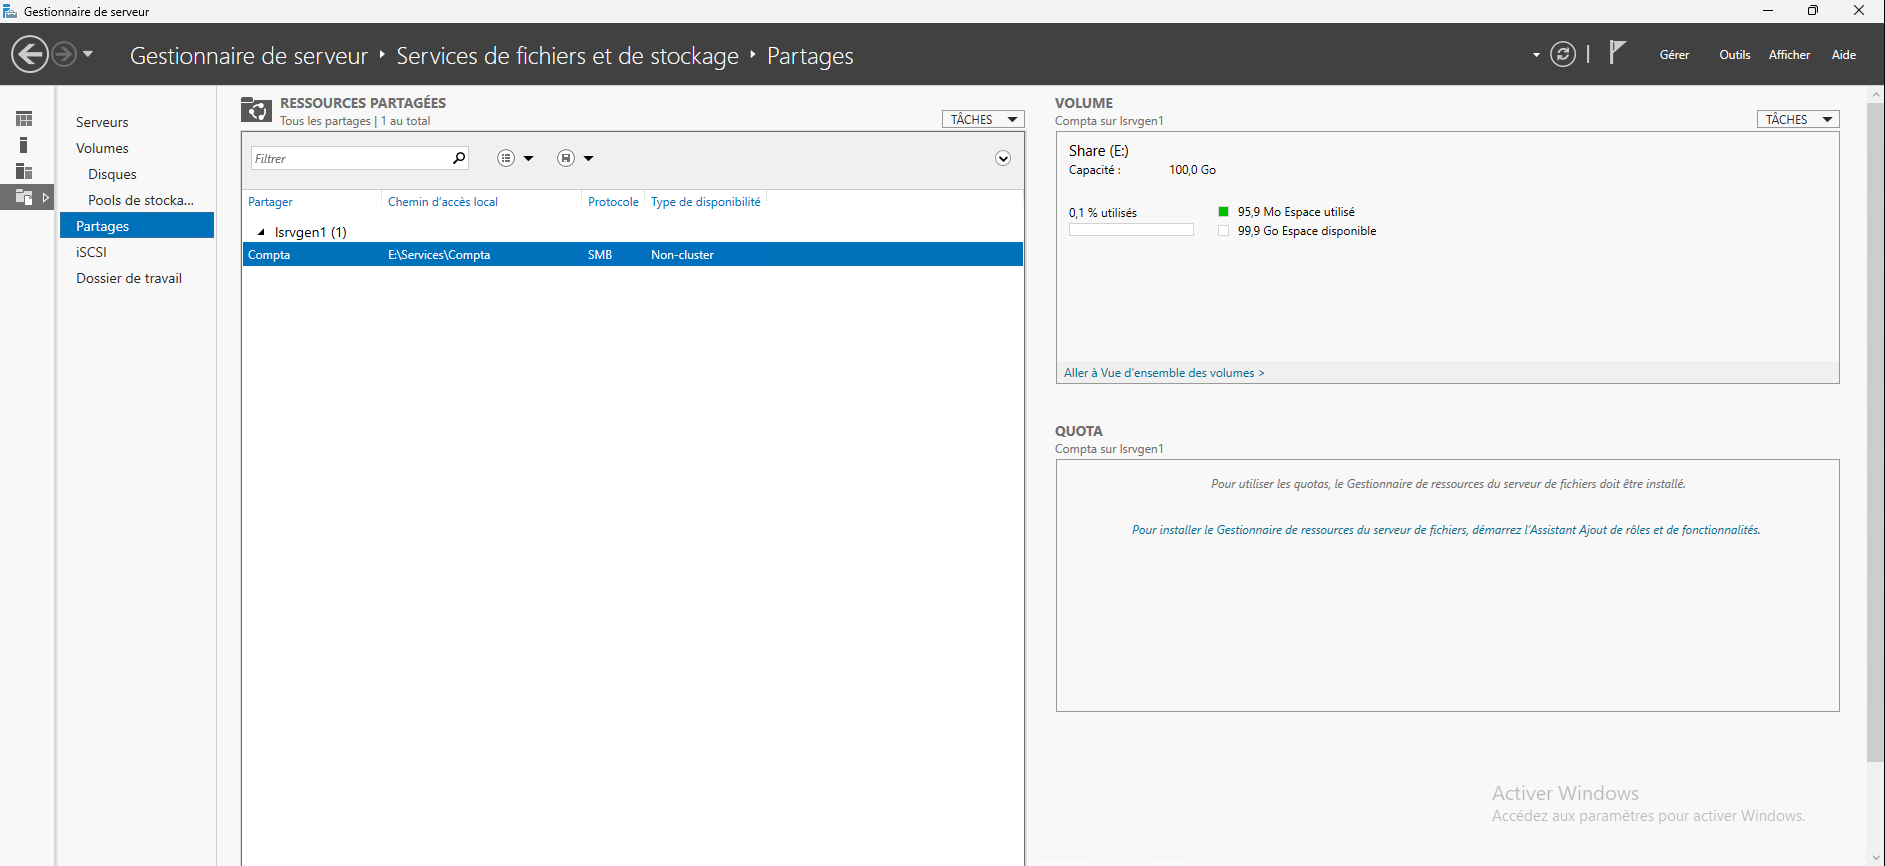
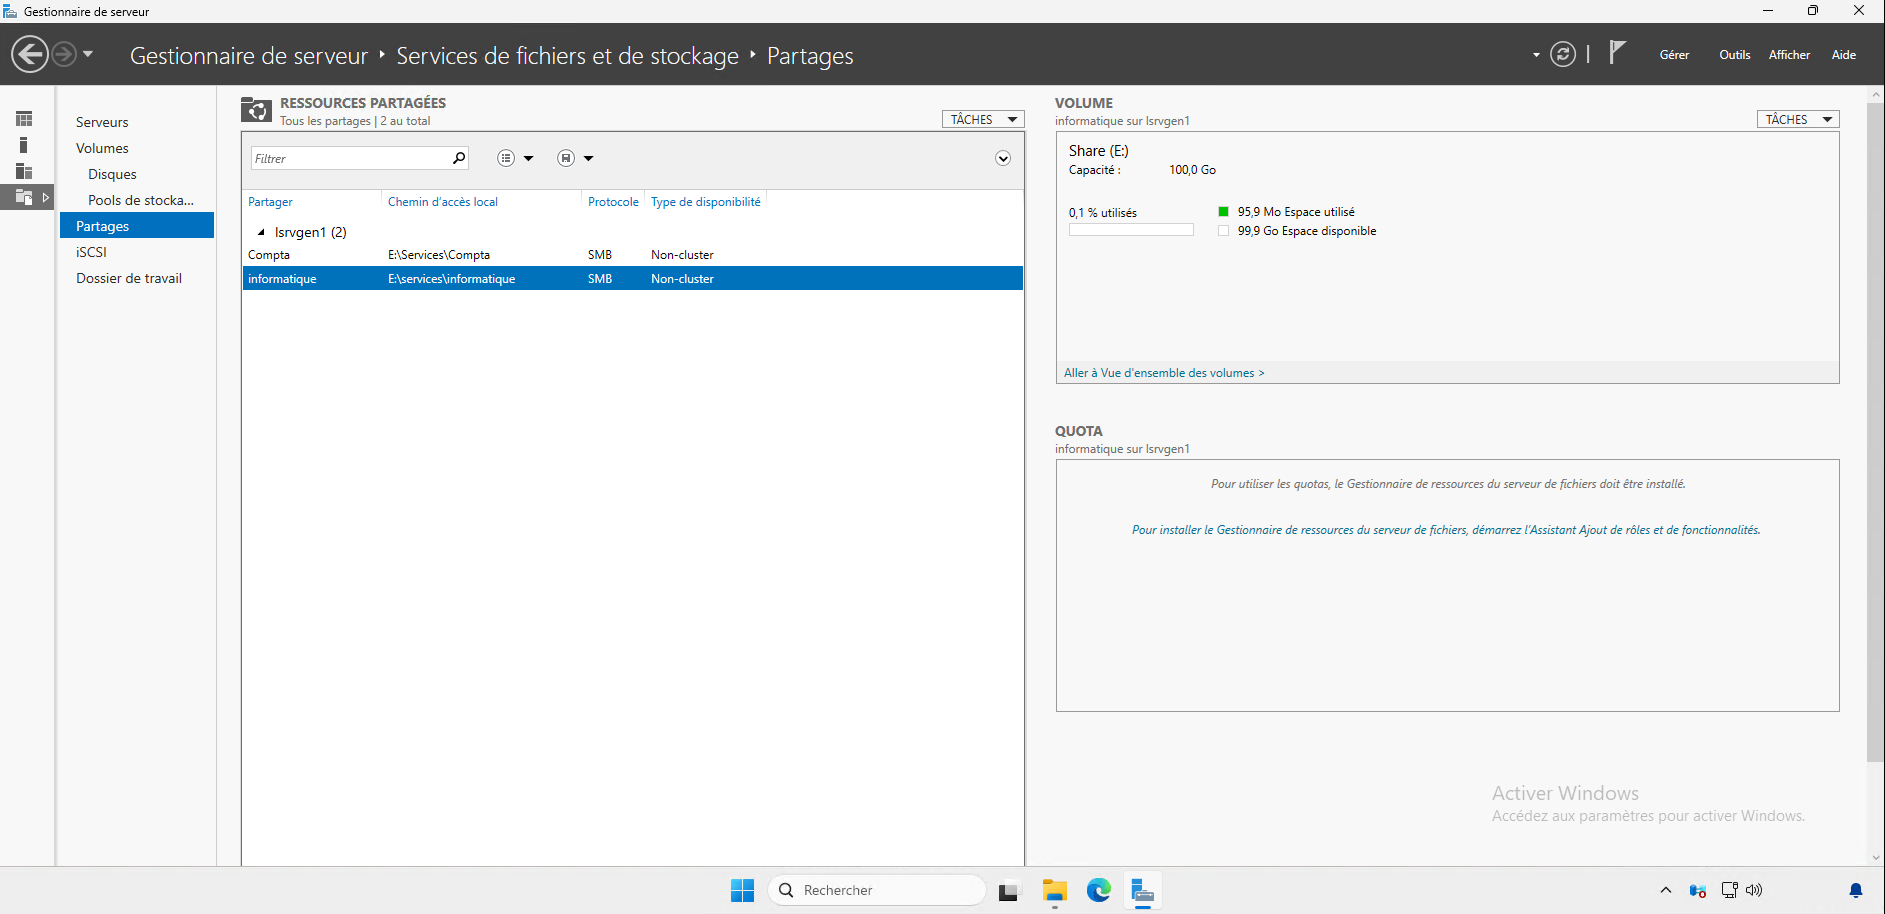
From Server Manager, click on File and Storage Services 1.
Next, go to Shares 1.
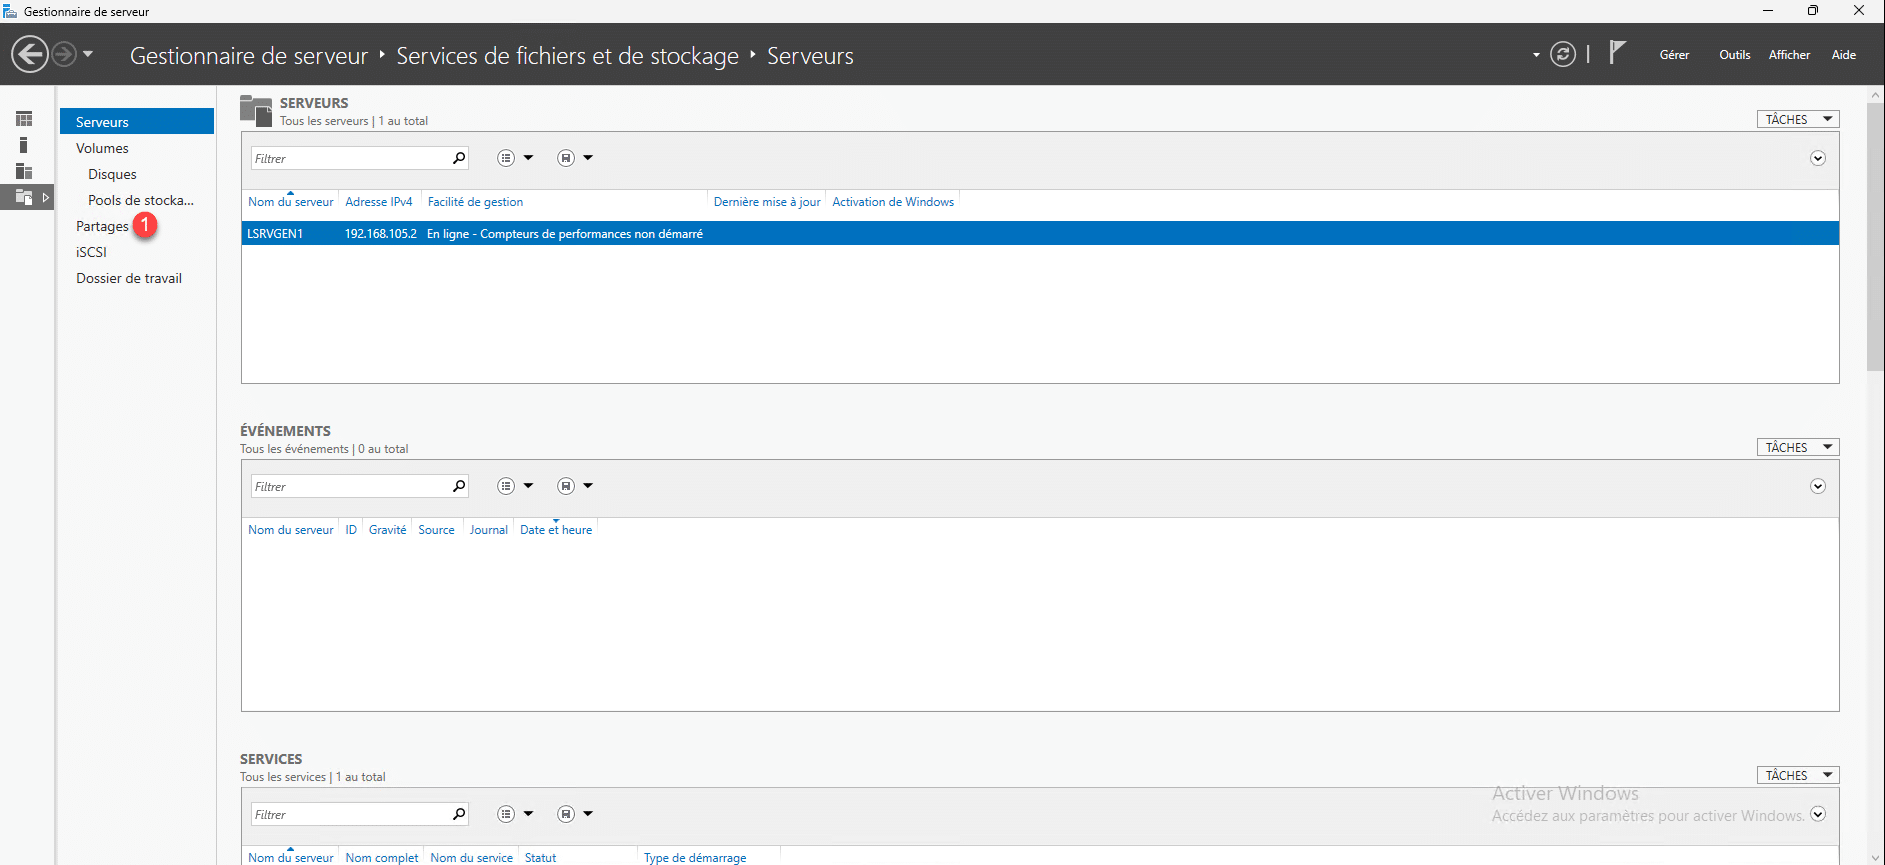
From this dashboard, we can manage the shares that are configured on the server, we can see the Accounting share that we created previously.
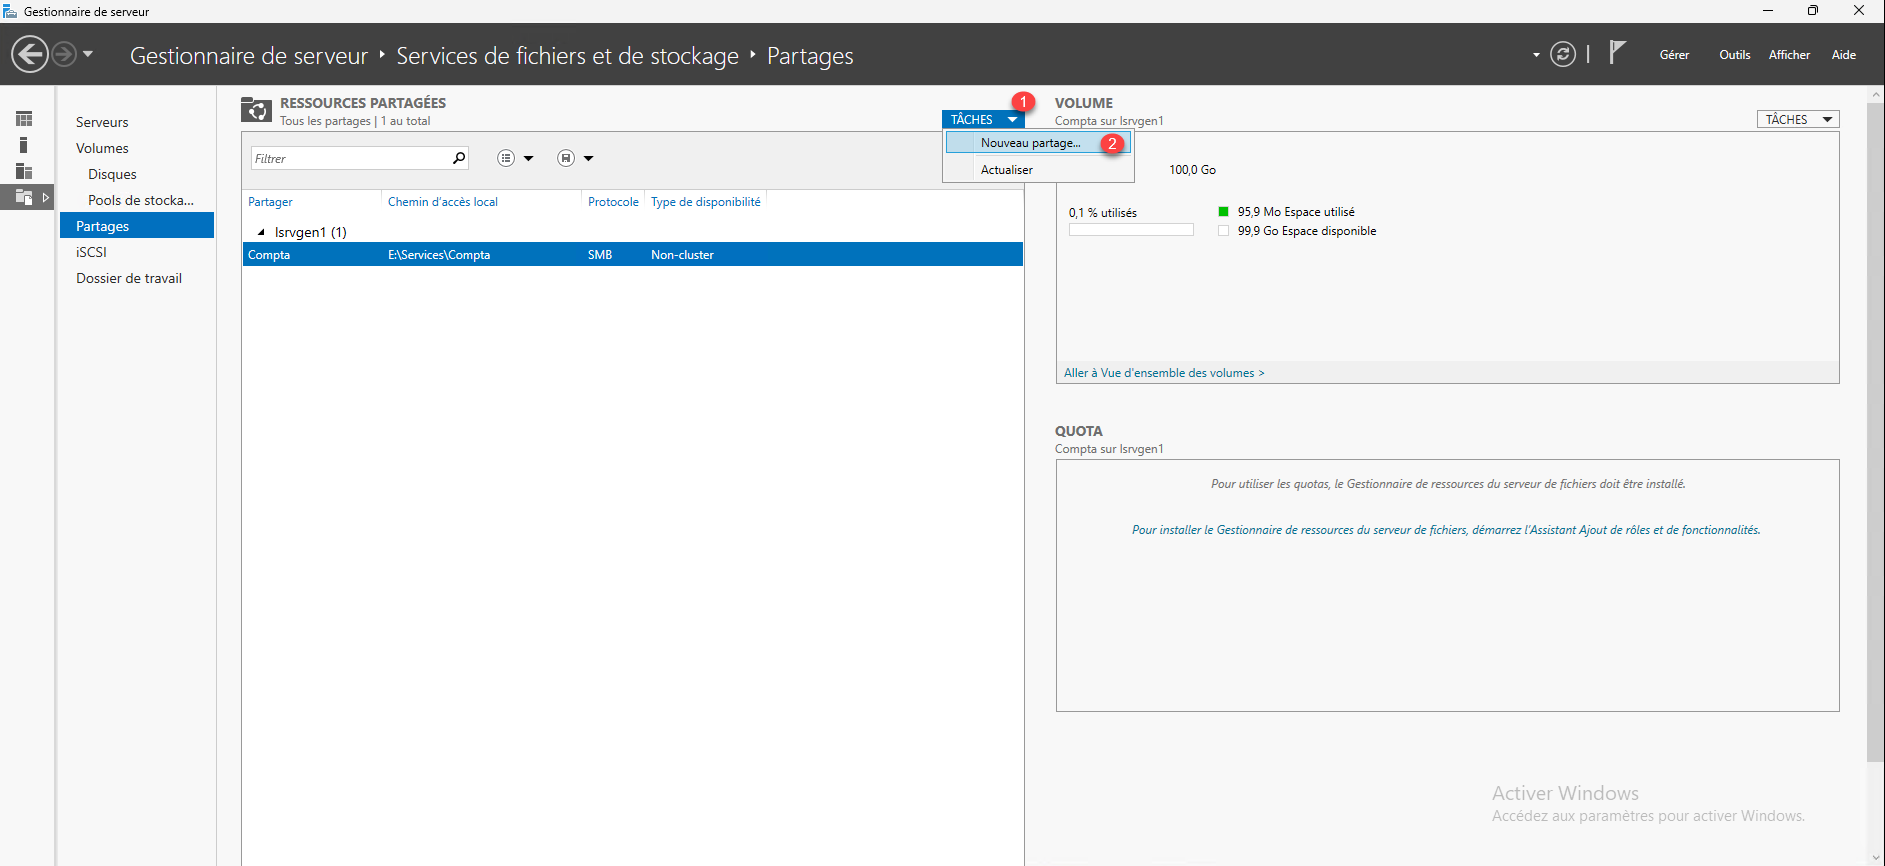
On the Server Manager, we will use a wizard that will guide us to configure the share, click on TASKS 1 then on New share 2.
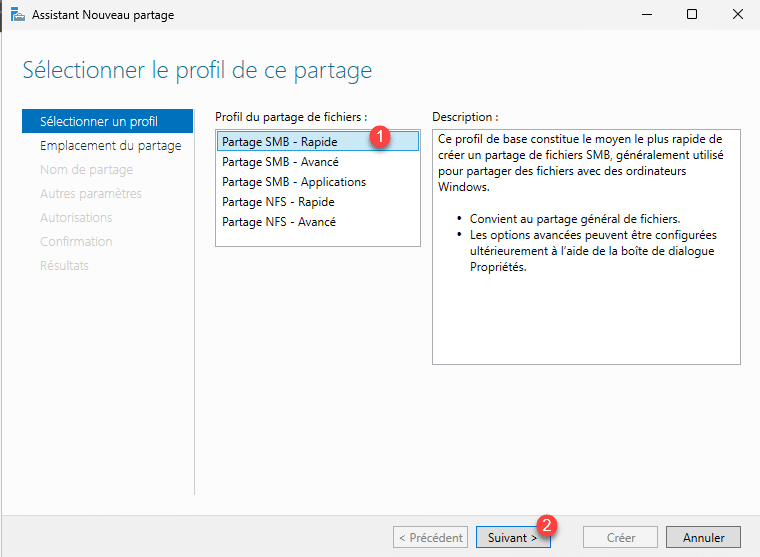
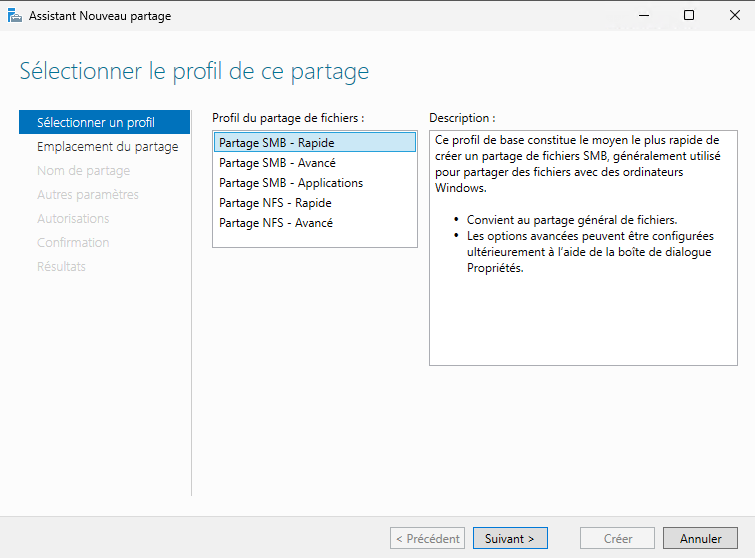
Leave the SMB Sharing profile – Fast 1 then click on Next 2.
To configure advanced sharing, you need to have the role FSRM Once installed, we will see this in a future tutorial.
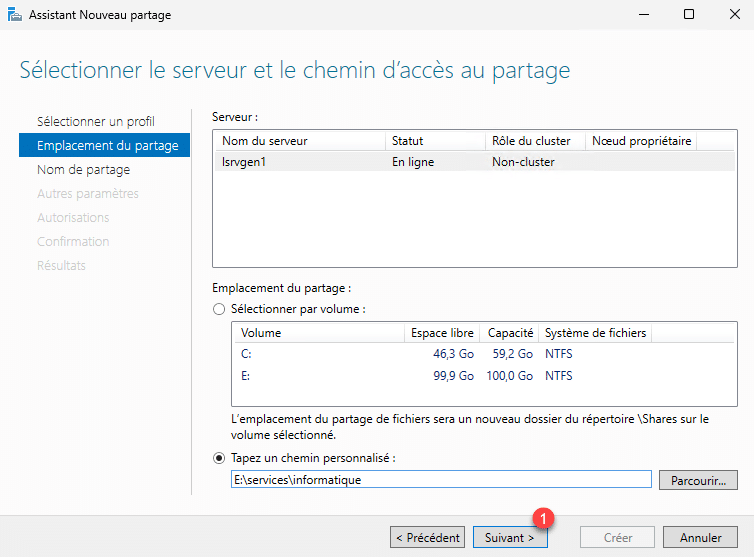
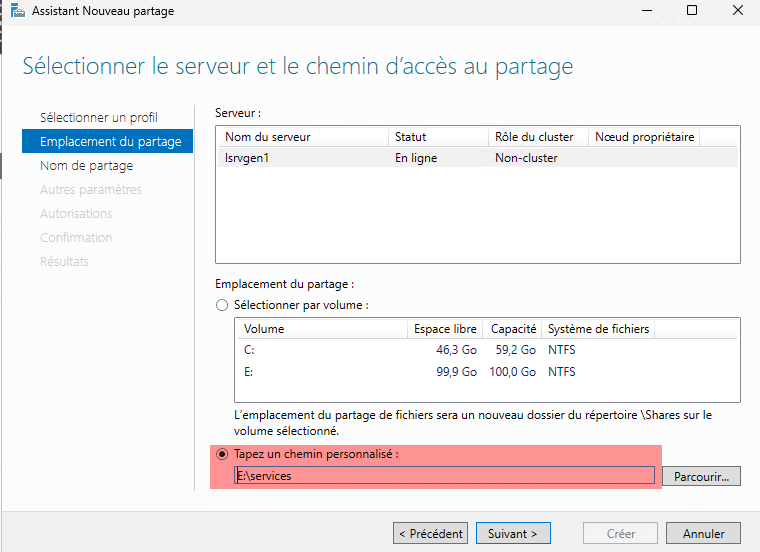
Here, you need to configure the Share location. As we have only one server to configure in the Server Manager, click on the Browse 1 button.
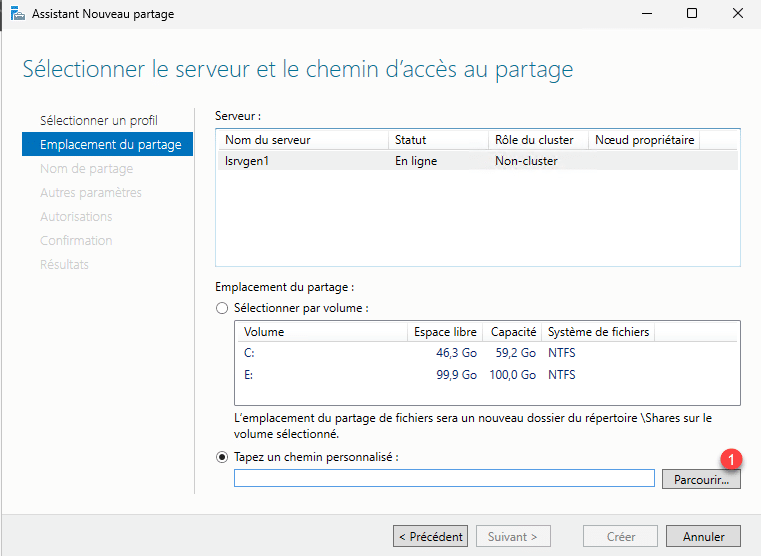
Select the folder 1 to share and click on the Select a folder 2 button.

With the folder selected, click on Next 1.
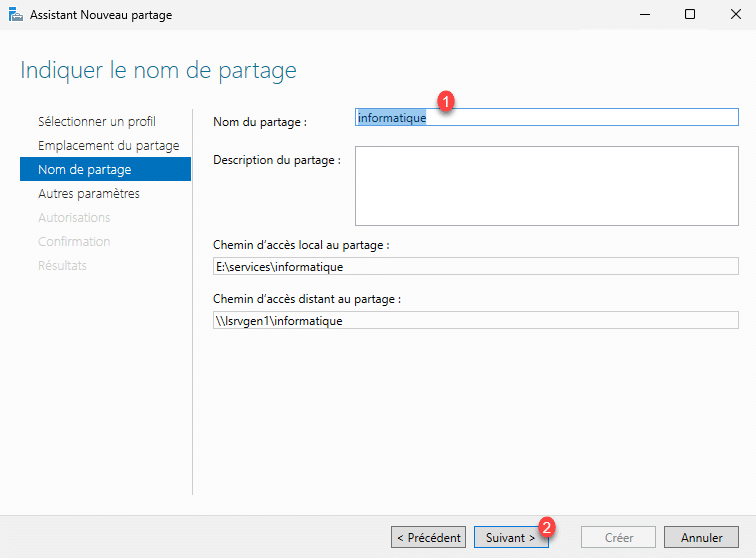
Enter the name of the share 1 then click on the Next button 2.
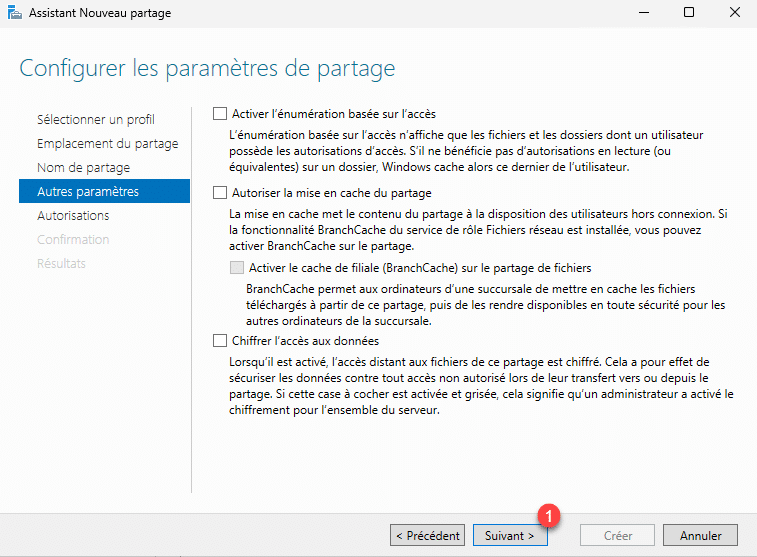
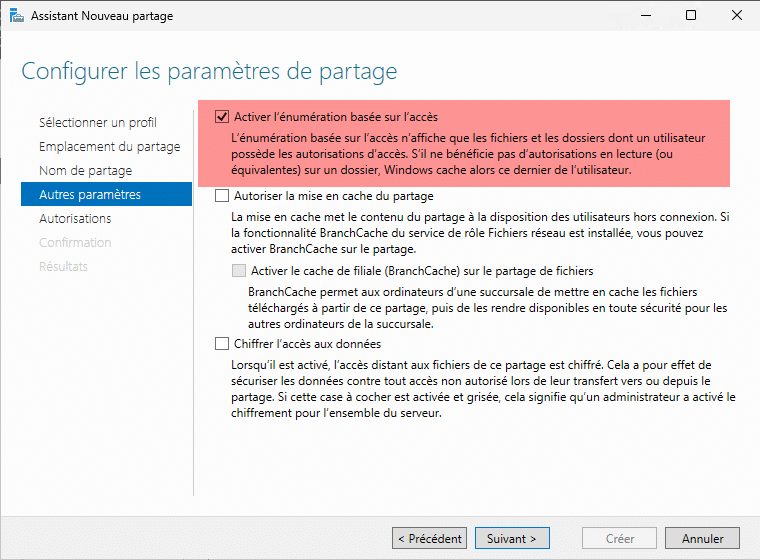
There are several options that can be configured for sharing:
- Access-based enumeration: allows you to display only the folders in a share for which the user has the necessary permissions. We will discuss this point later.
- Caching: allows a user to have an offline copy of the share on their computer; to avoid any problems, I disable this option.
- Encrypt data access: This forces data encryption between the client and the server. This will force the use of SMB 3. SMB 3 arrived with Windows Server 2012 and Windows 8. If your infrastructure allows it, meaning you have recent operating systems and other devices like copiers support the SMB 3 protocol, enable this option.
Then click on Next 1.
We will now configure the SMB and NTFS permissions, click on the Customize permissions button 1.
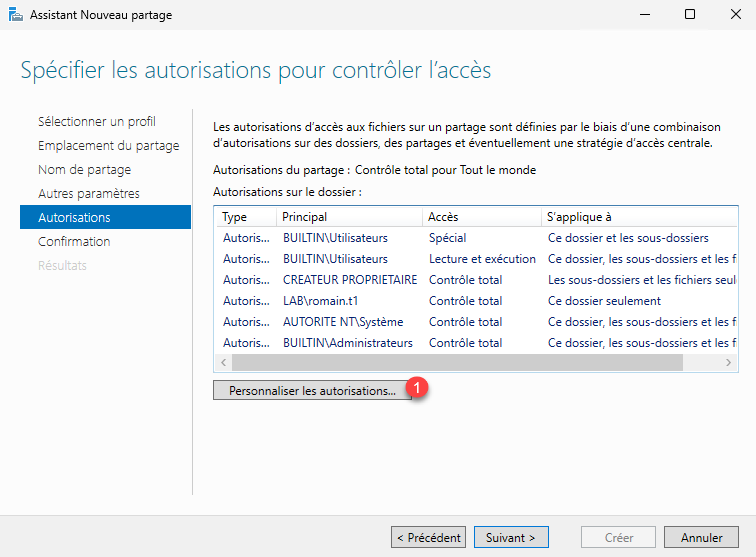
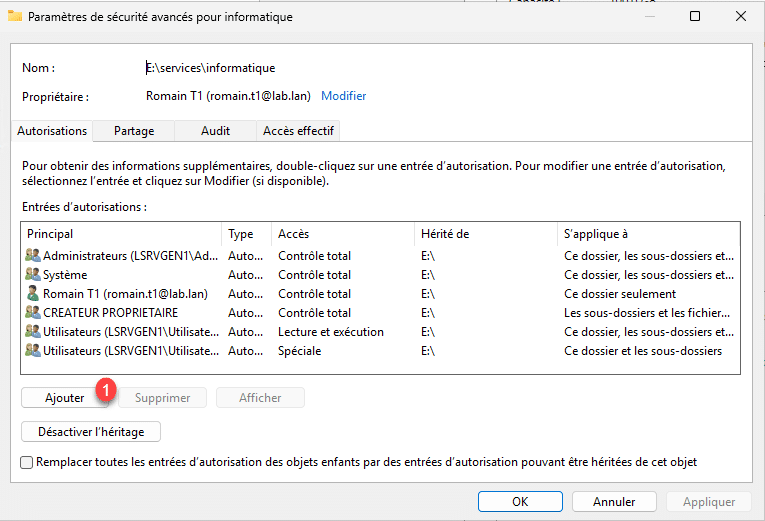
On the Authorization tab, we will manage NTFS rights, click on Add 1.
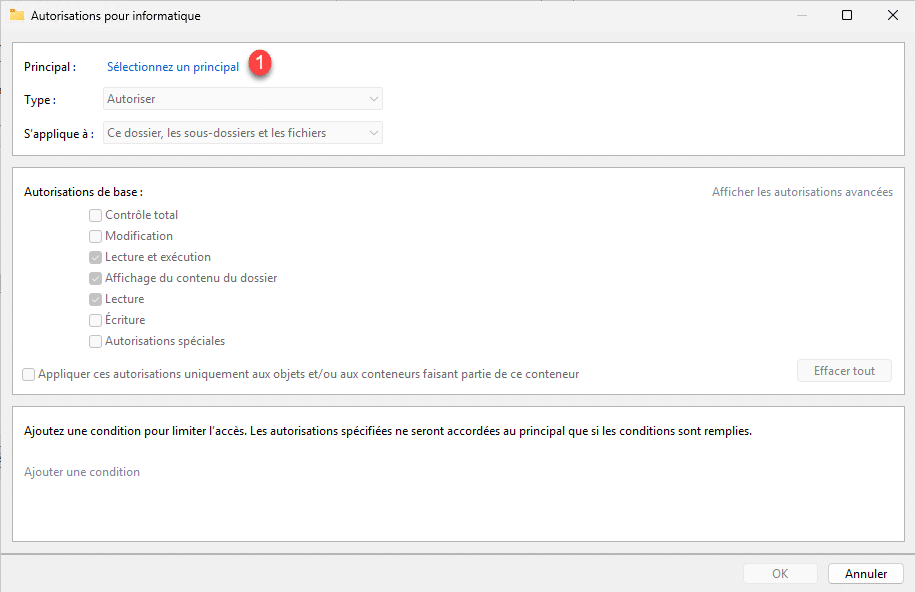
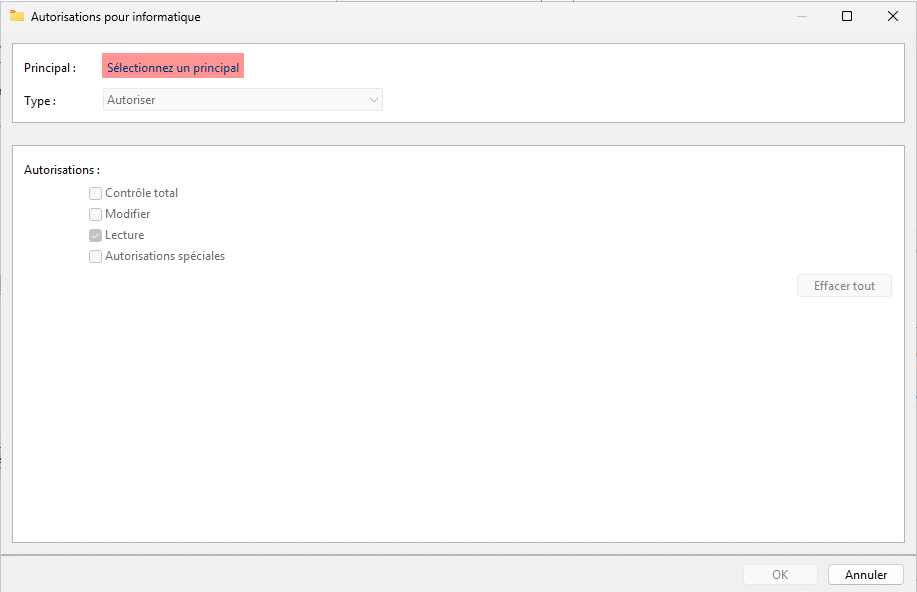
On the new window that opens, start by clicking on Select a main 1.
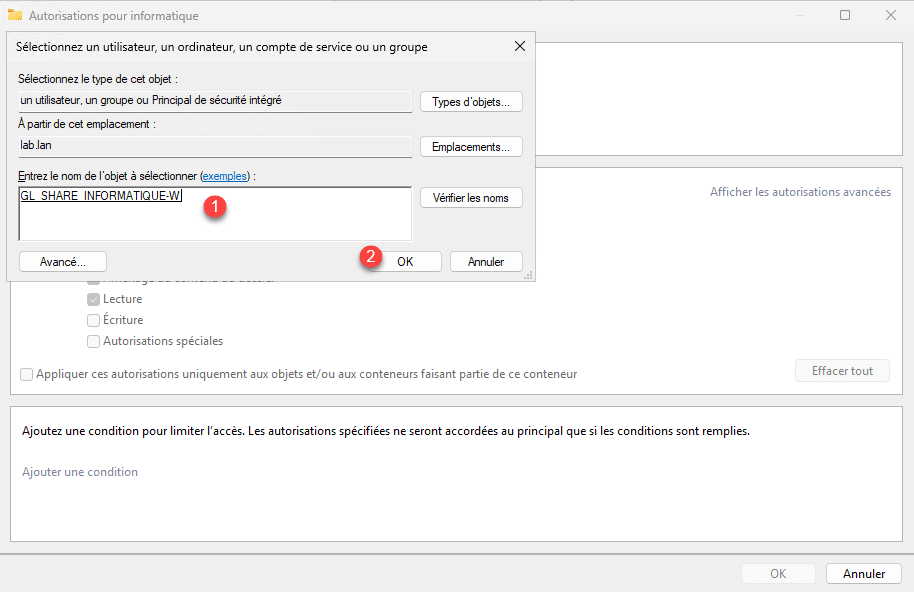
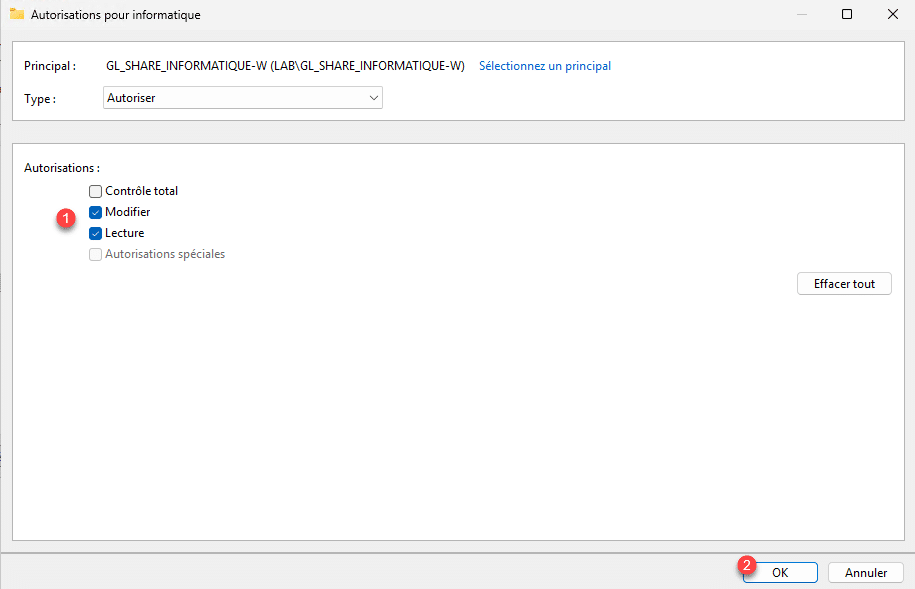
Select the Active Directory group 1 and then click OK 2.
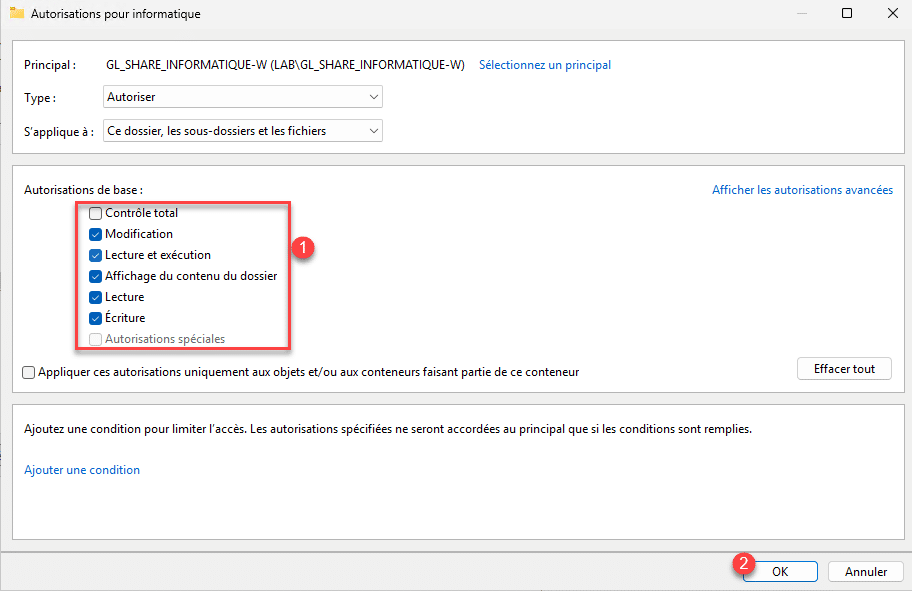
The group is selected, configure the permissions 1 then click OK 2.
NTFS permissions have been added, now go to the Sharing tab 1.
As you can see, by default, sharing is accessible to Everyone, which we do not want, select Everyone 1 and click on Delete 2.
We will now add the permissions for the Active Directory group, click on Add 1.
As with NTFS permissions, click on Select a principal, then select the Active Directory group.

Configure the sharing permissions 1 then click the OK button 2.
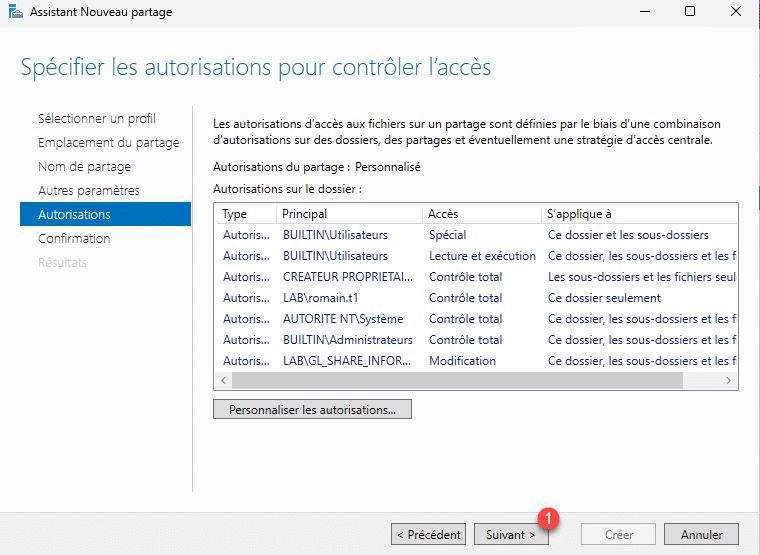
NTFS and SMB permissions are configured, click the Apply 1 and OK 2 buttons.

Back on the New Share wizard, click Next 1.
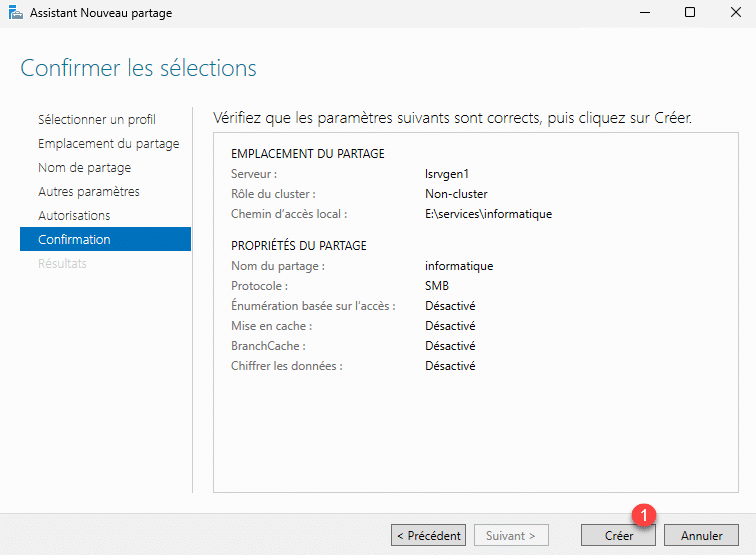
A summary of the sharing configuration is displayed, click on the Create 1 button.
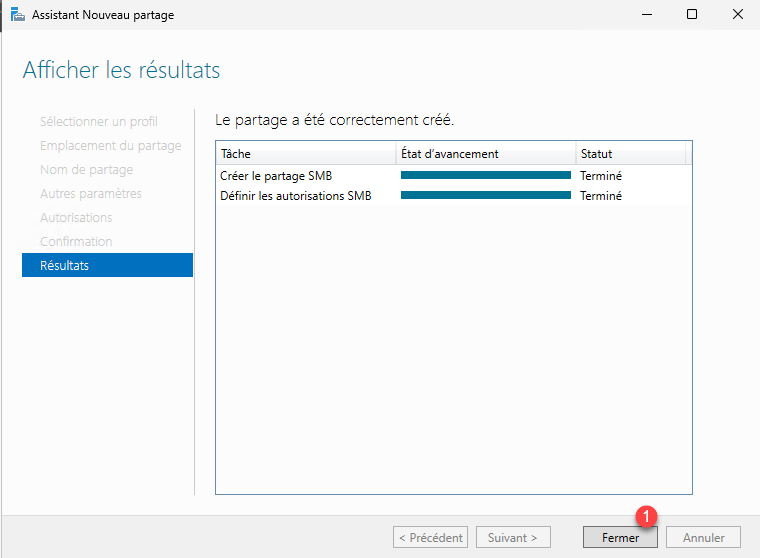
The share is created, click on Close 1 to exit the assistant.
In the list of shares on the Server Manager, we find the IT share that we just created with the wizard.
Access sharing
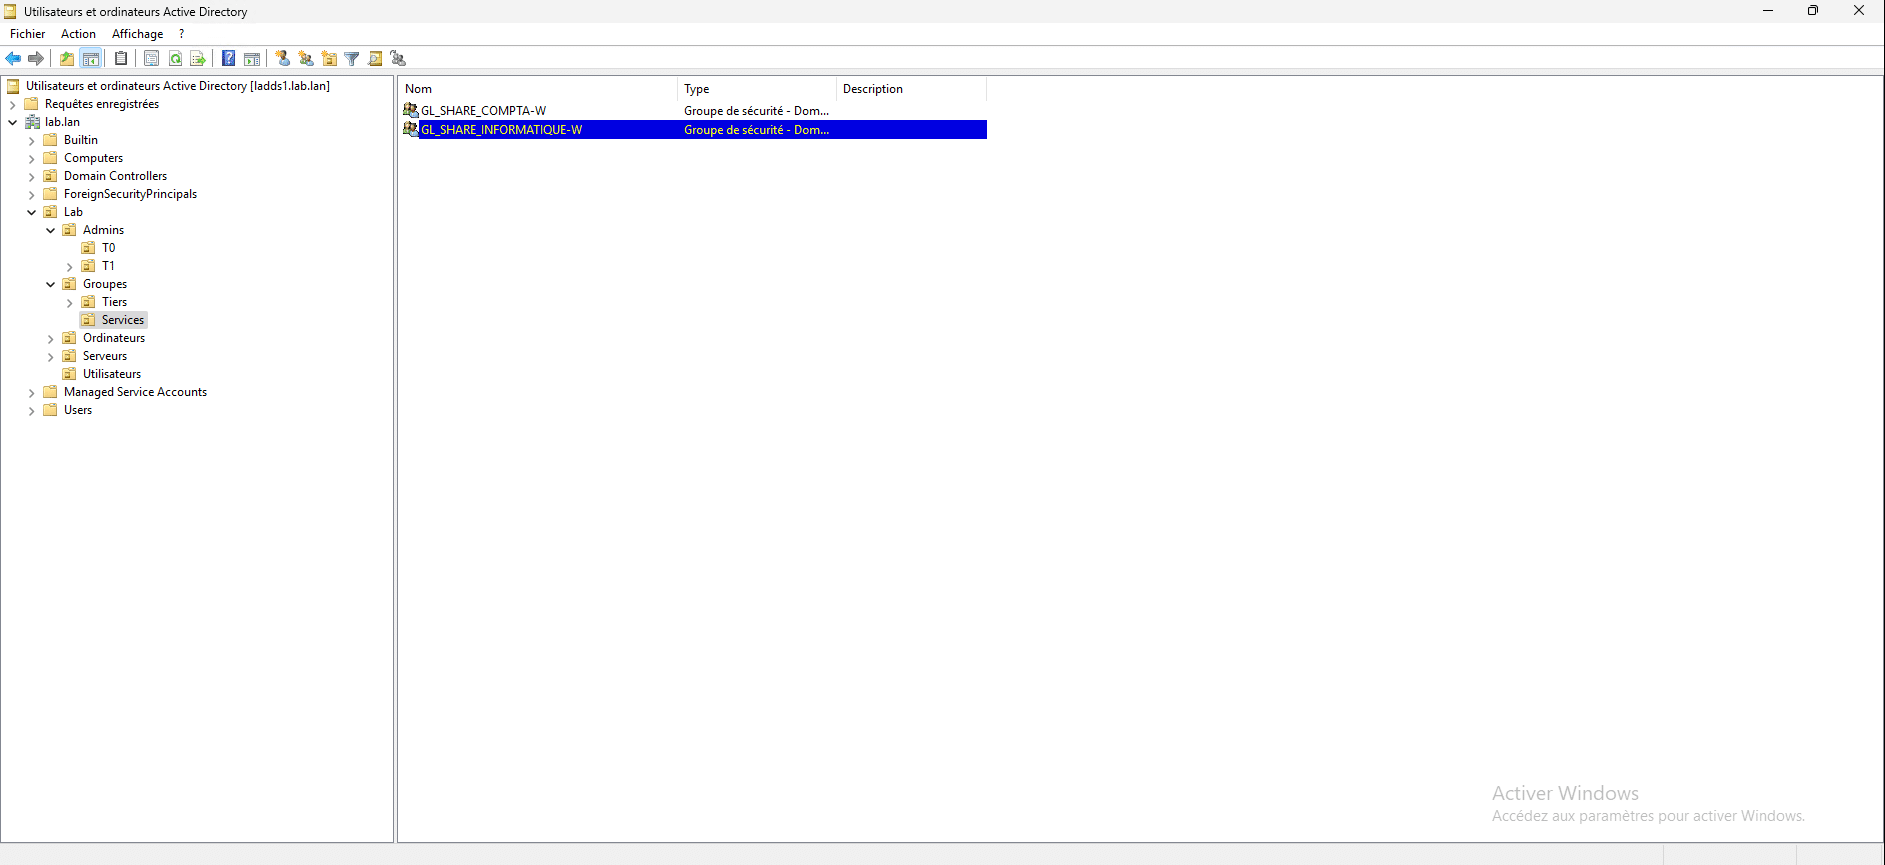
Now we will test access to the share we just created, for this I will use a client computer with Windows 11 and the user Romain who is a member of the GL_SHARE_INFORMATIQUE-W group which should allow me to access the shared folder Informatique but not the Compta folder.
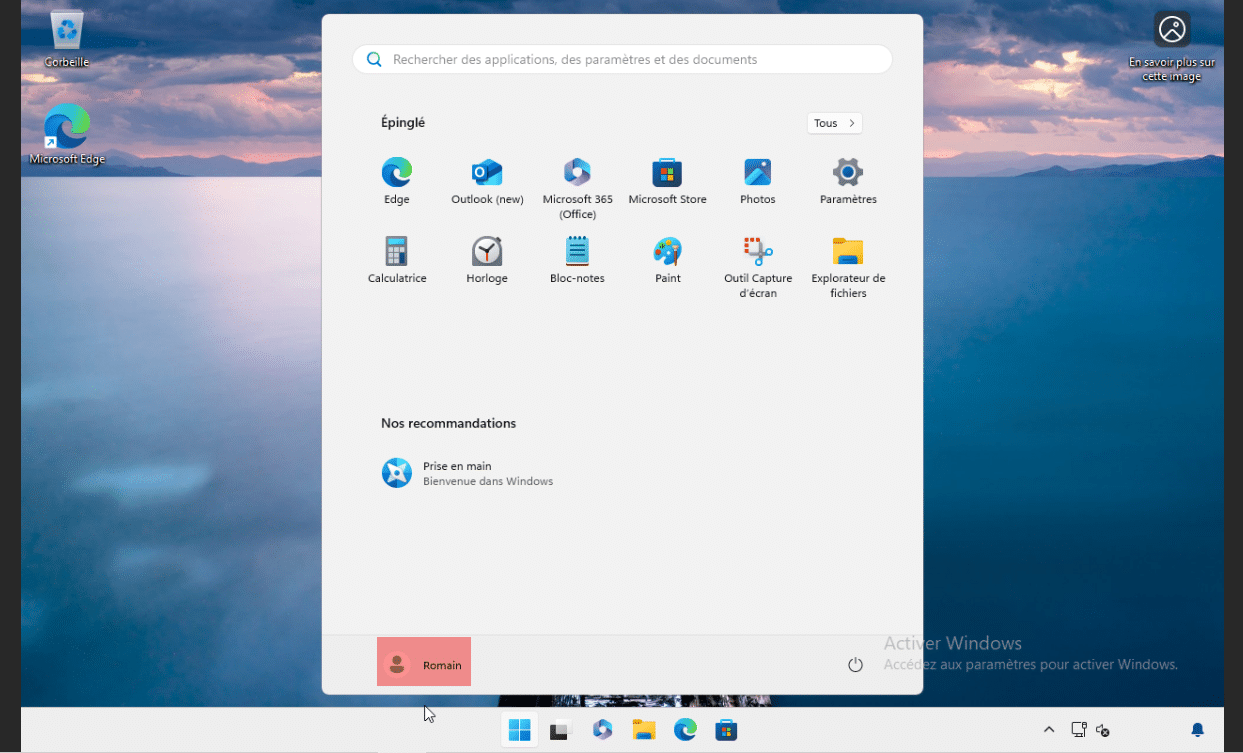
As you can see, I am properly connected with the user Romain.
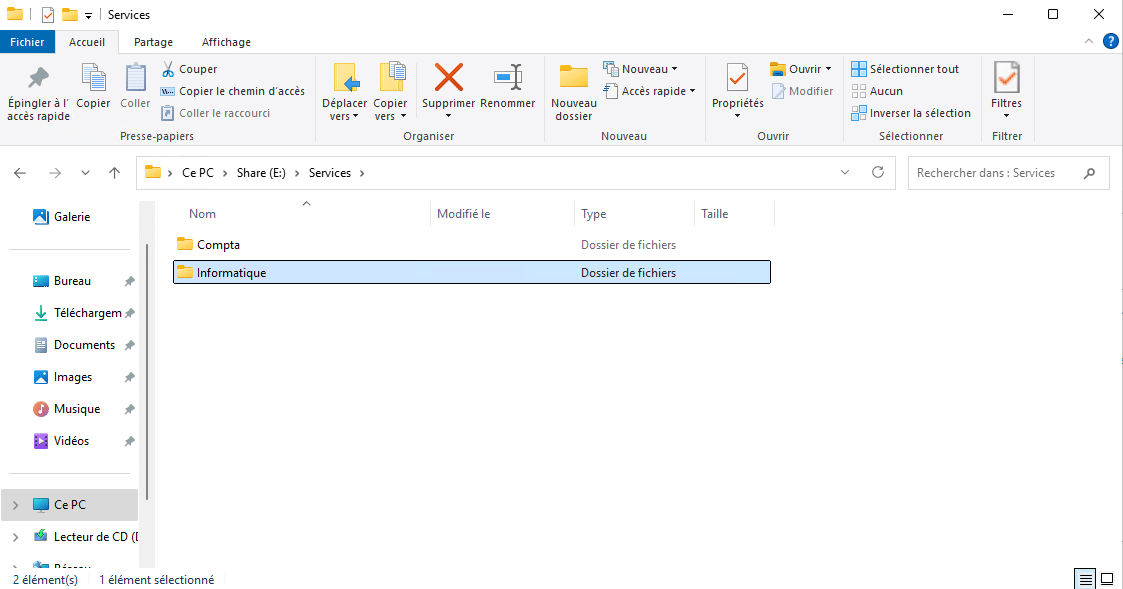
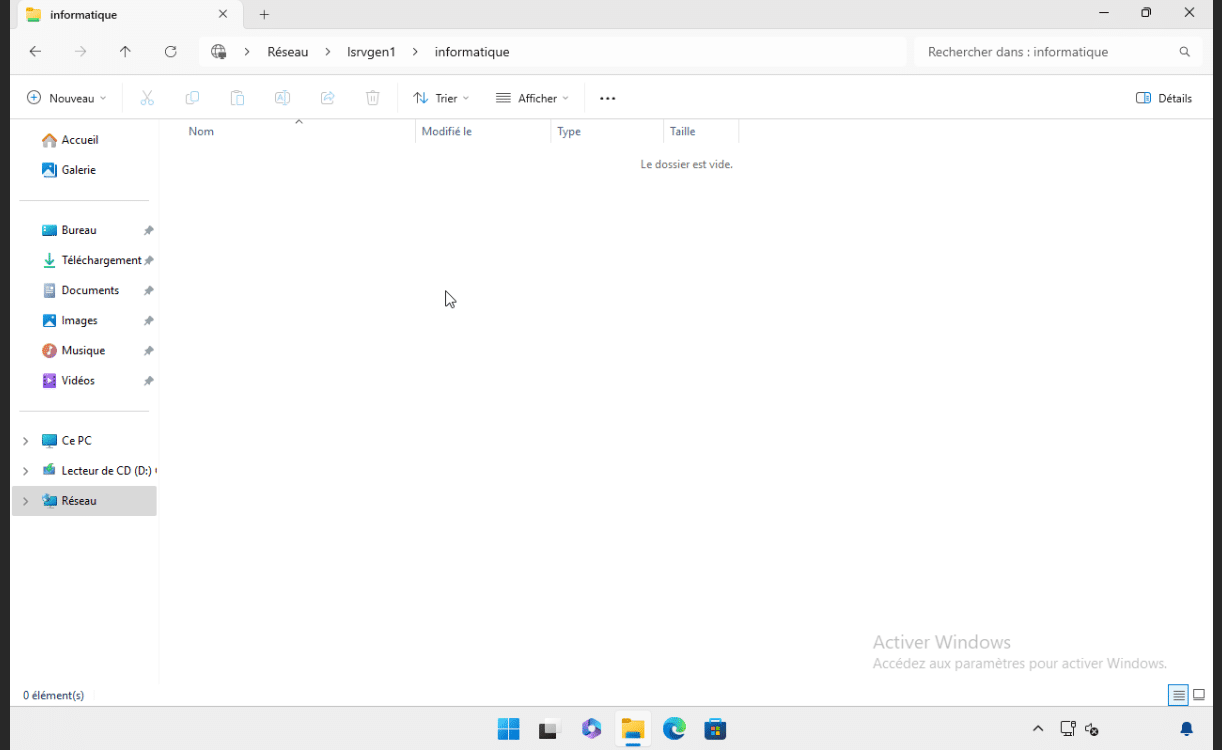
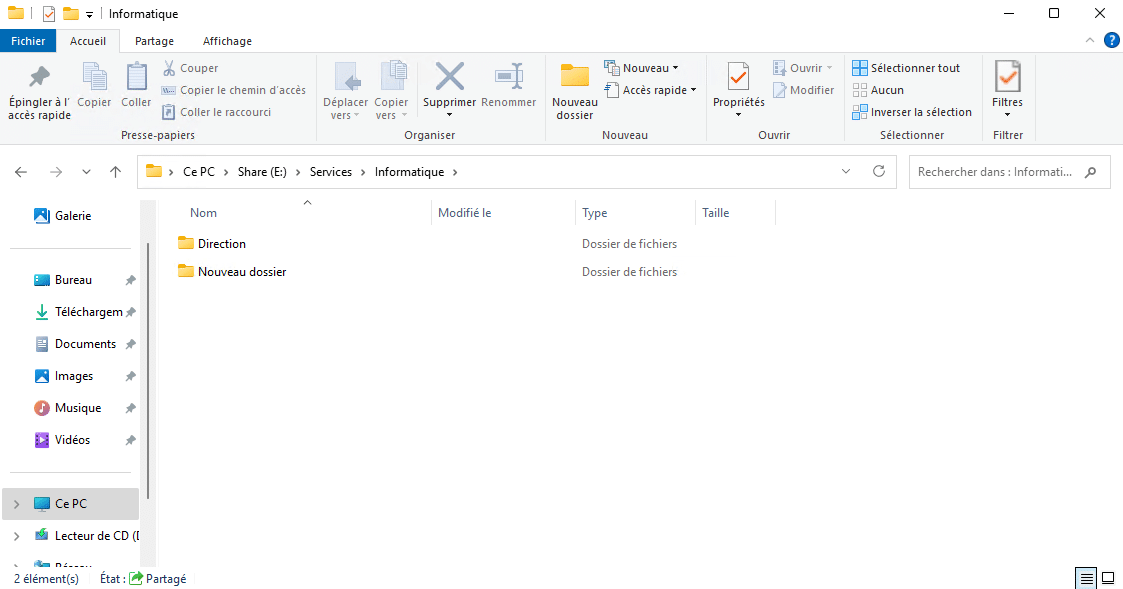
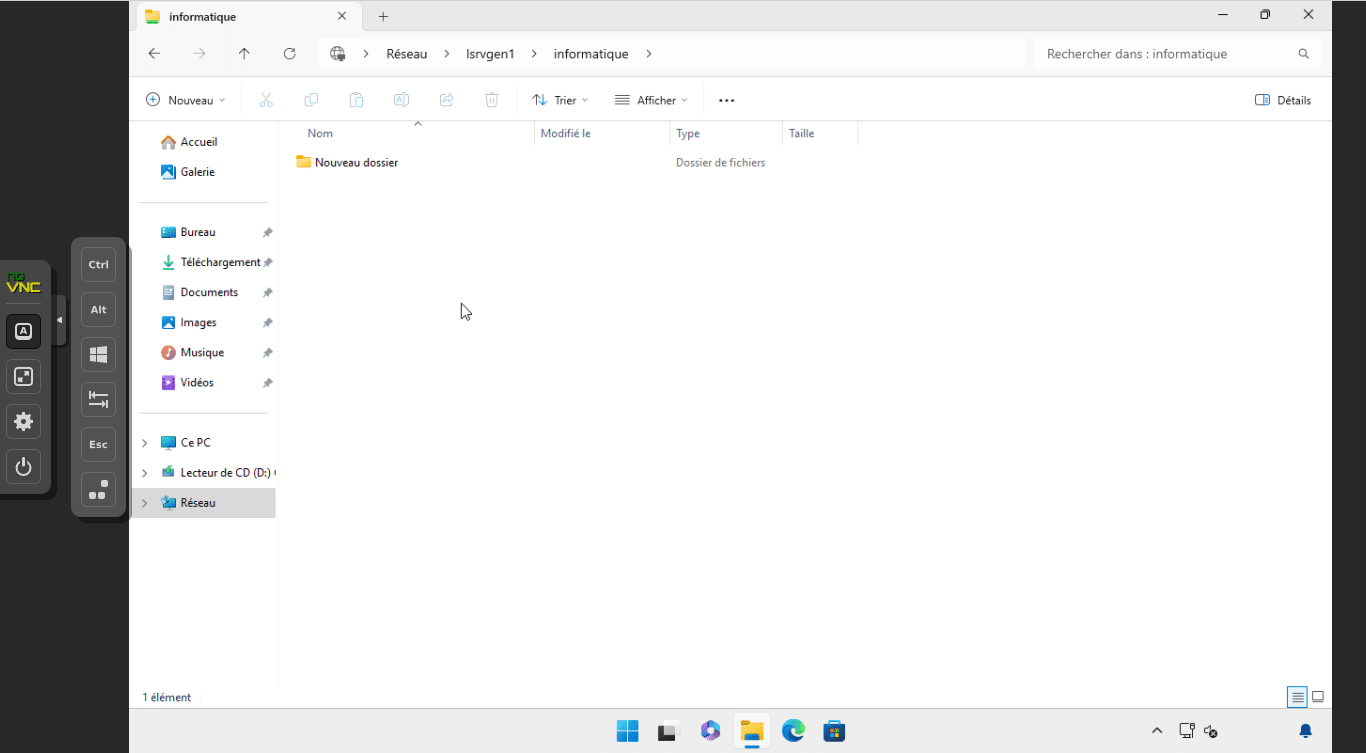
From Windows File Explorer, I navigate to the following address \\lsrvgen1 which is the name of the server, as you can see in the screenshot below, I can clearly see the two shares.
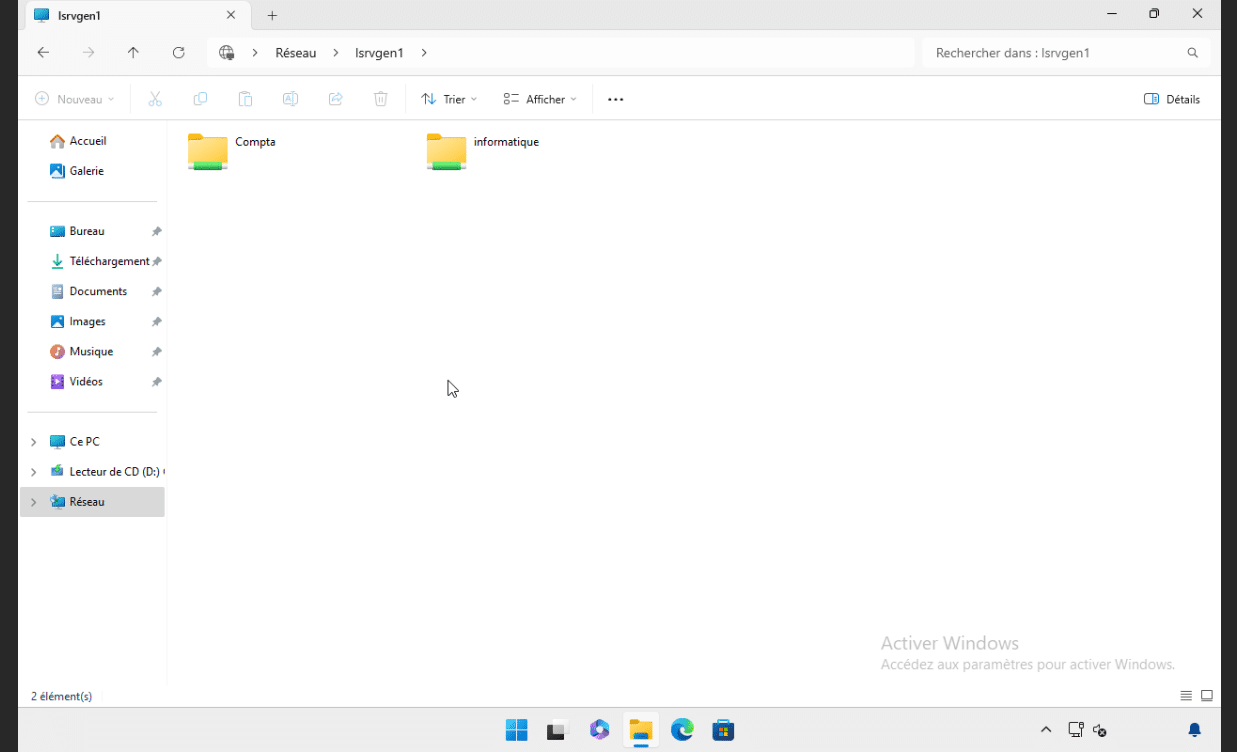
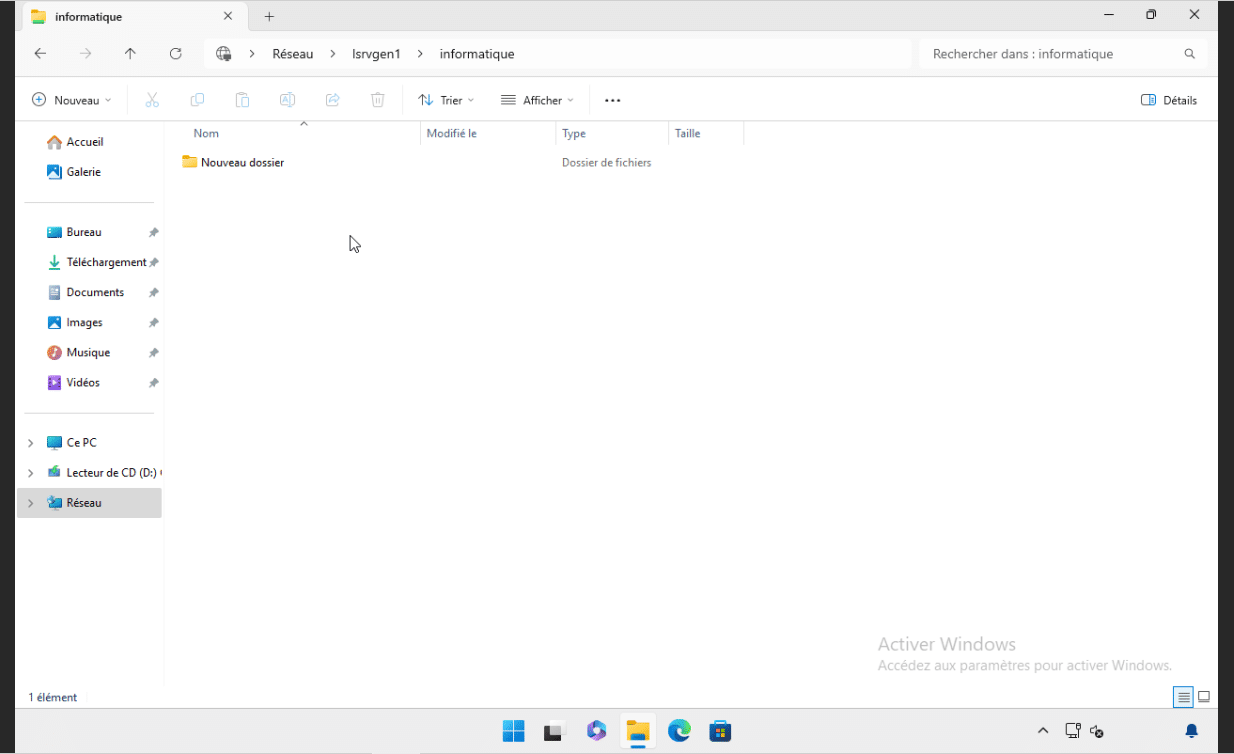
By clicking on Computer Science, I can access it and to test the rights, I will create a New folder.
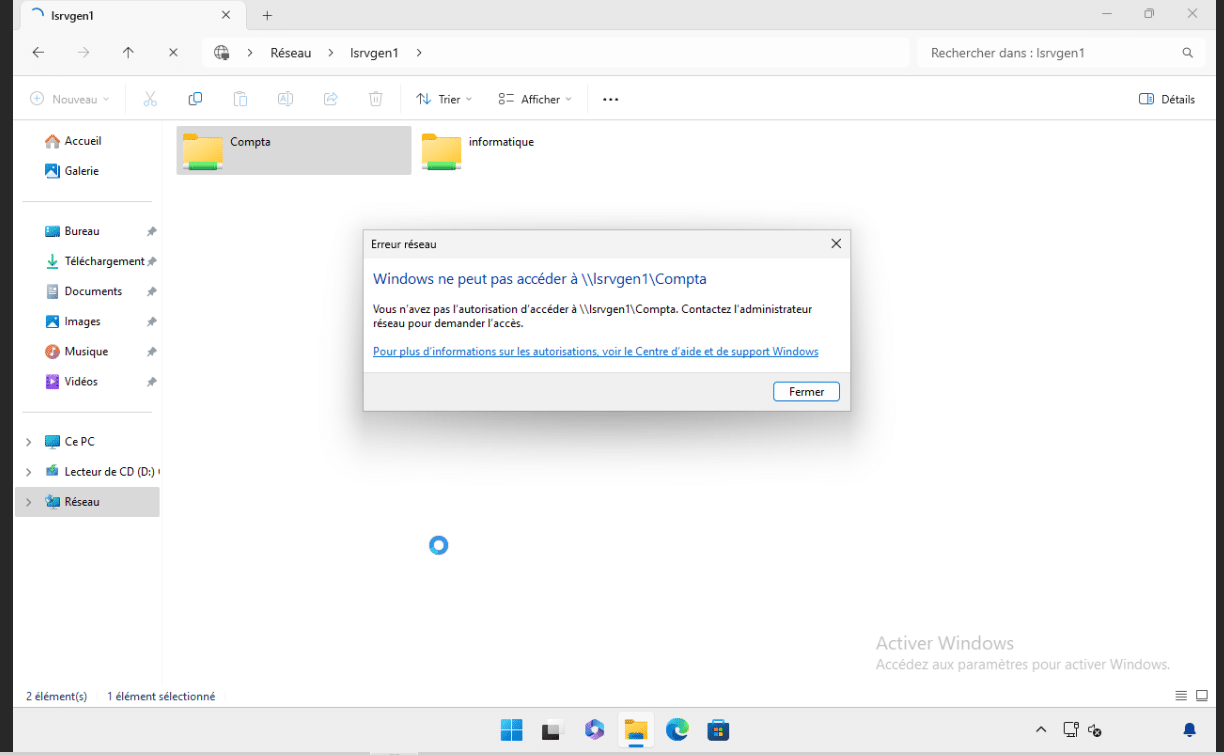
Back at the root level of the server, if I try to access the Accounting folder, I get an error message telling me that I do not have the permissions.
You know how to share a folder on Windows Server 2025.
Enable access-based enumeration
Now we will see how access-based enumeration works within a shared folder.
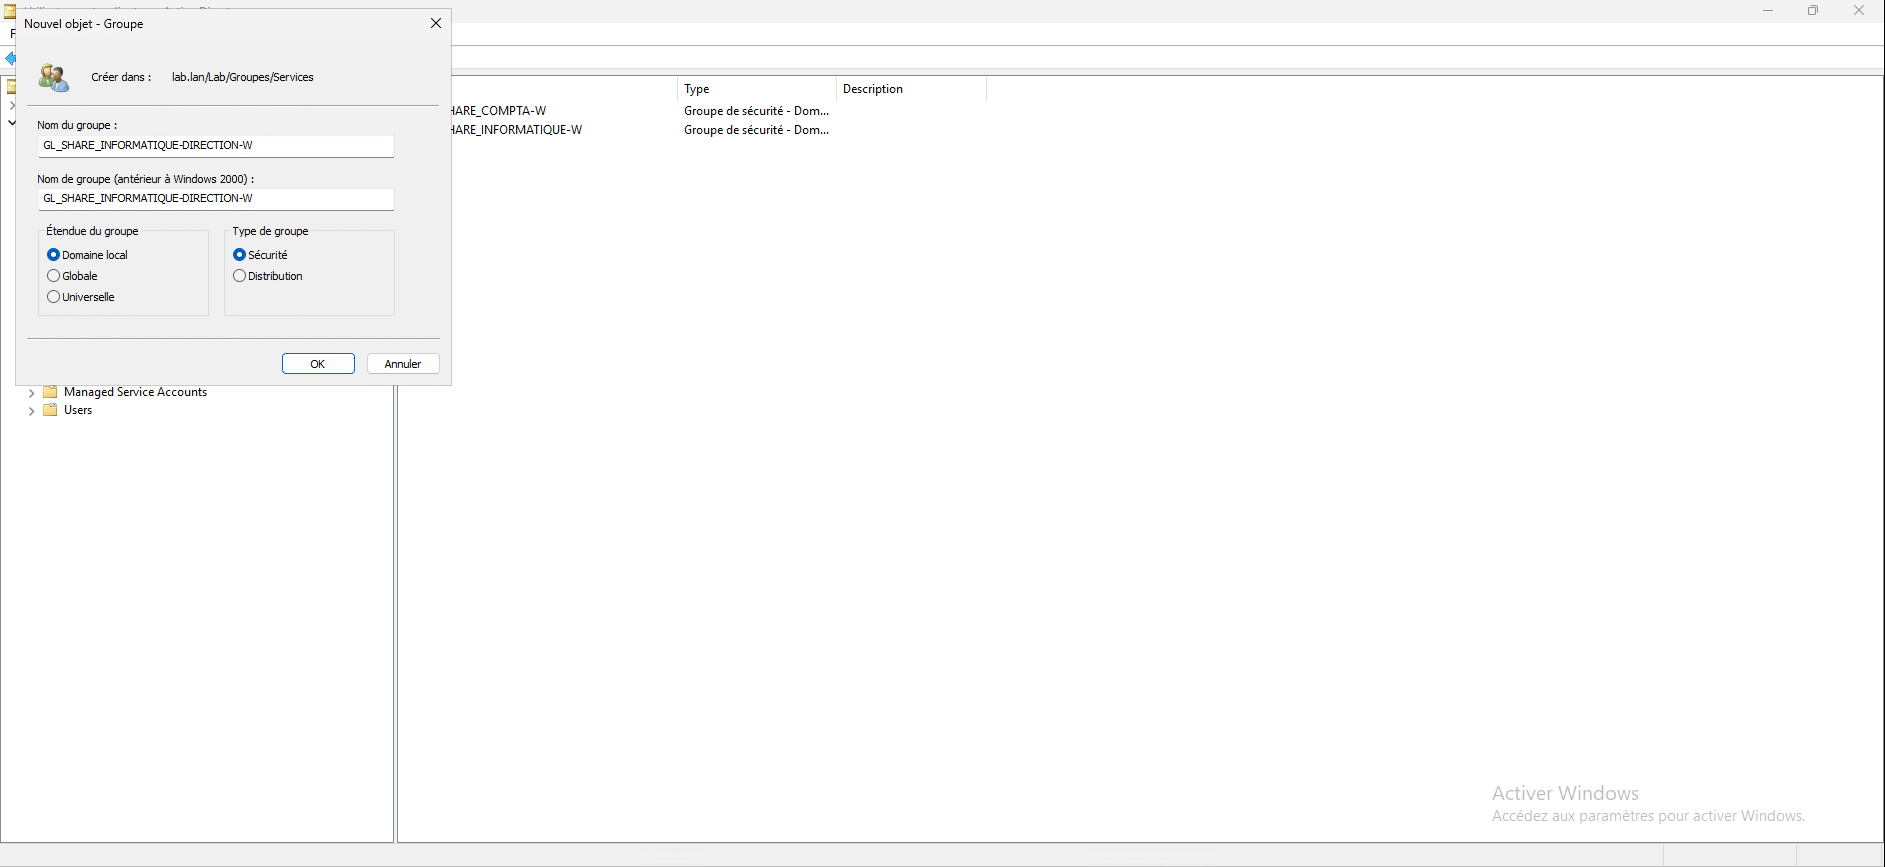
In the IT folder, we will create a subfolder called Management, which will only be accessible if you are part of a particular Active Directory group (GL_SHARE_INFORMATIQUE-DIRECTION-W), of which the user Romain is not a member.
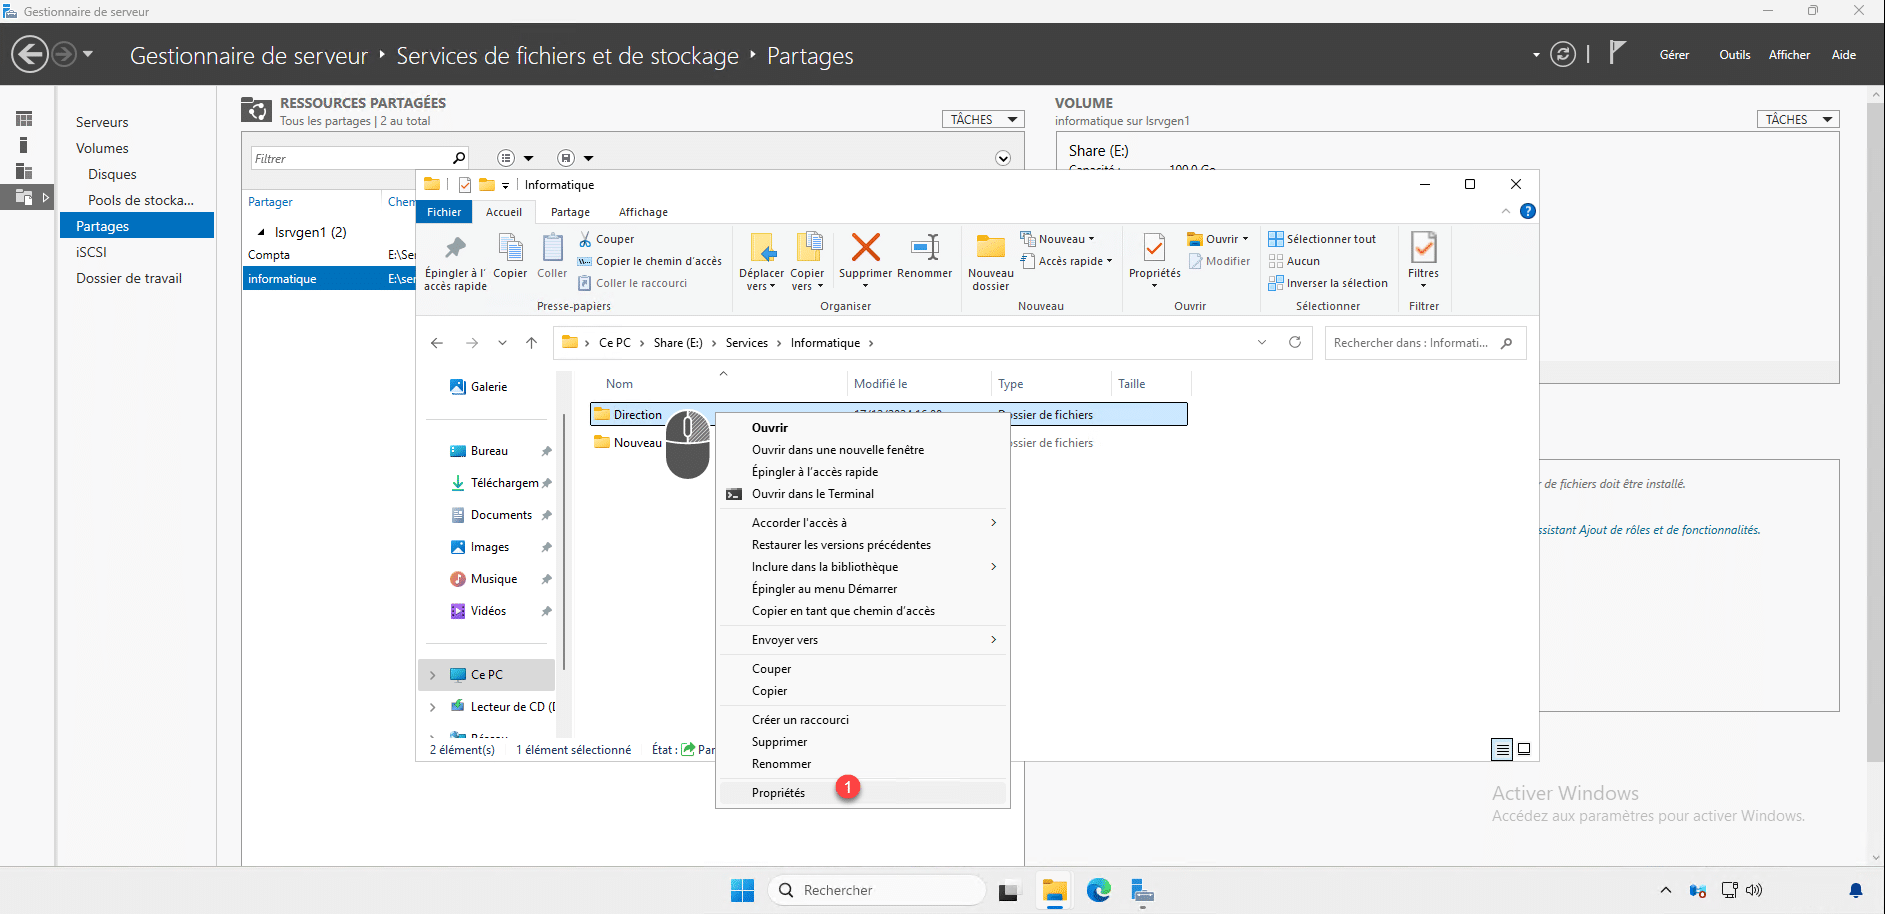
On the server, I create the folder “Direction”.
For the EBA to function correctly and for access to be properly restricted, it is necessary to configure the NTFS rights on this folder, right-click on the folder and then click on Properties 1.
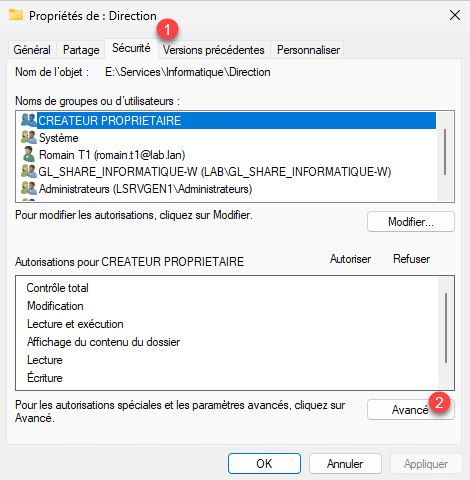
Go to the Security tab 1 then click on Advanced 2.
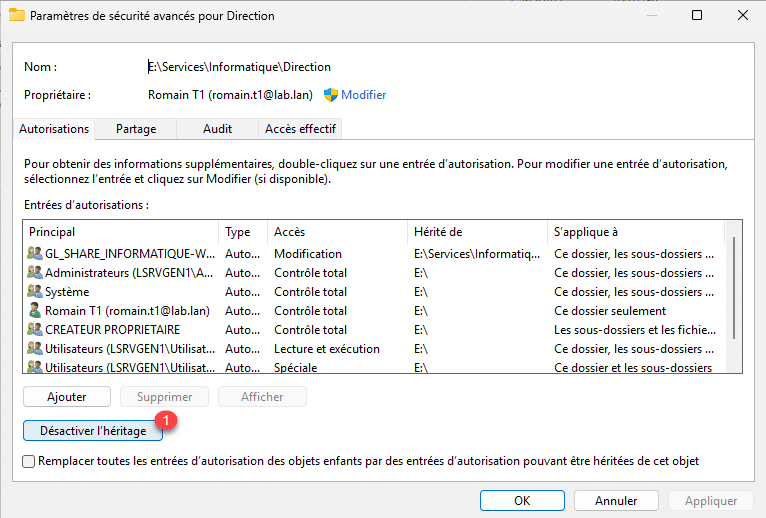
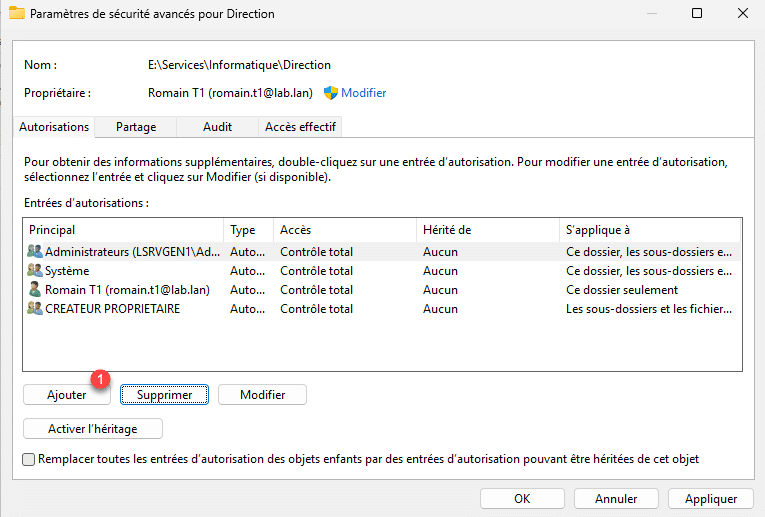
As you can see in the screenshot below, the folder inherits the permissions of its parent folder, and permissions are also granted to the local Users group, which includes the Domain Users group. Therefore, if we analyze the permissions, all domain users have read access, which is not what we want. Click on Disable Inheritance 1.
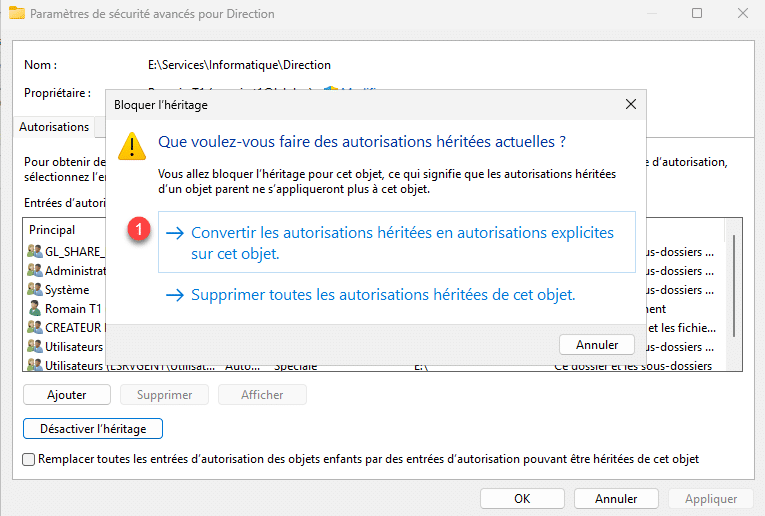
Click on Convert inherited permissions to explicit permissions on this object 1.
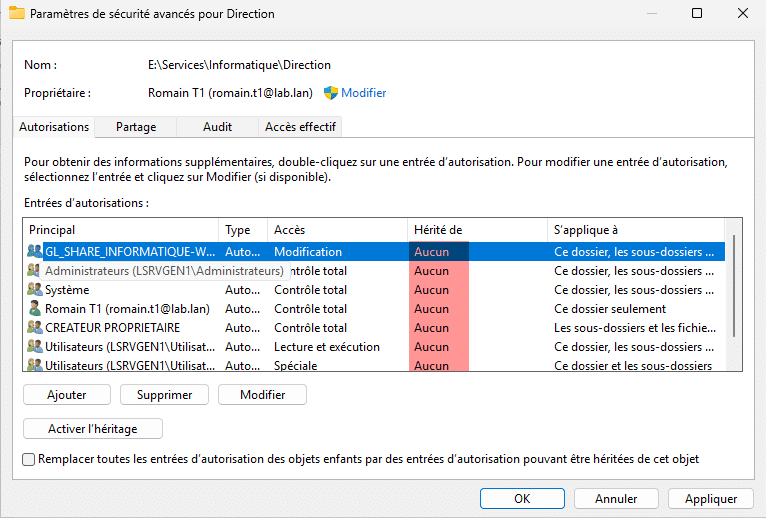
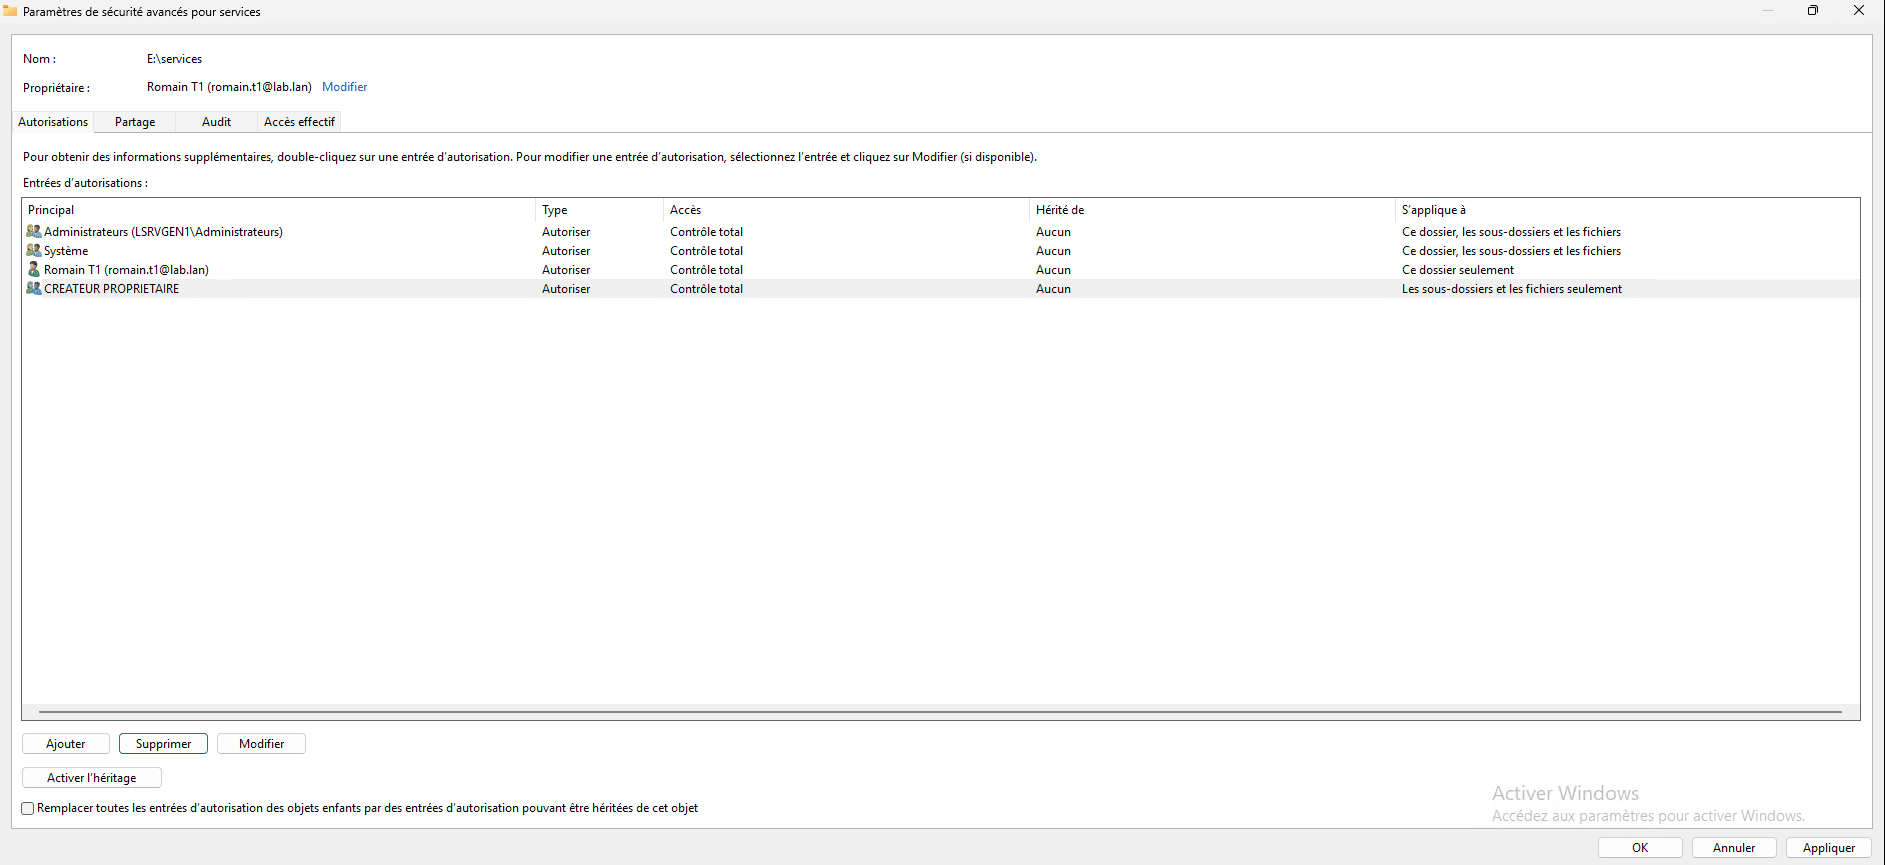
Now we can see that NTFS permissions are no longer inherited.
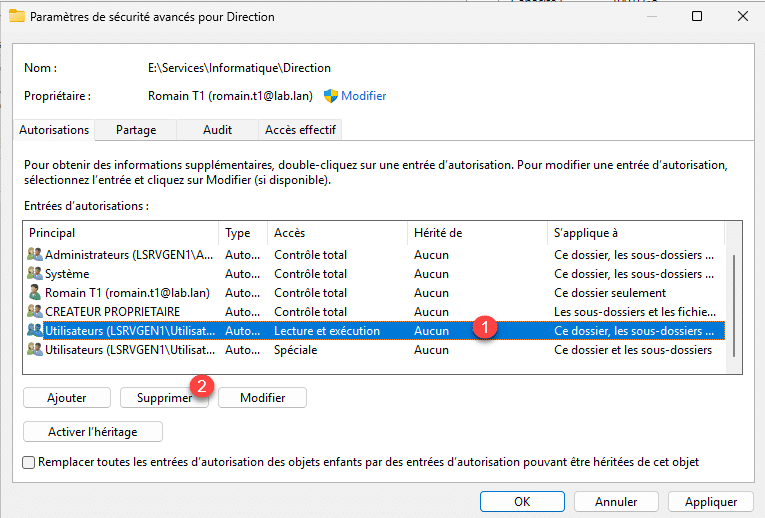
Now we are going to remove all the permissions that will allow access to users who should not have access, so we will remove the Users permissions and the GL_SHARE_INFORMATIQUE-W group.
Select an authorization 1 and click on Delete 2.
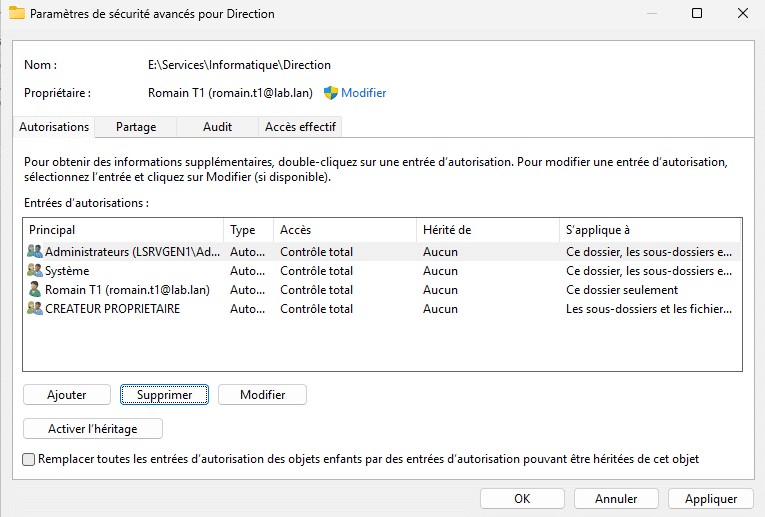
Repeat the process until you have something similar to the permissions below.
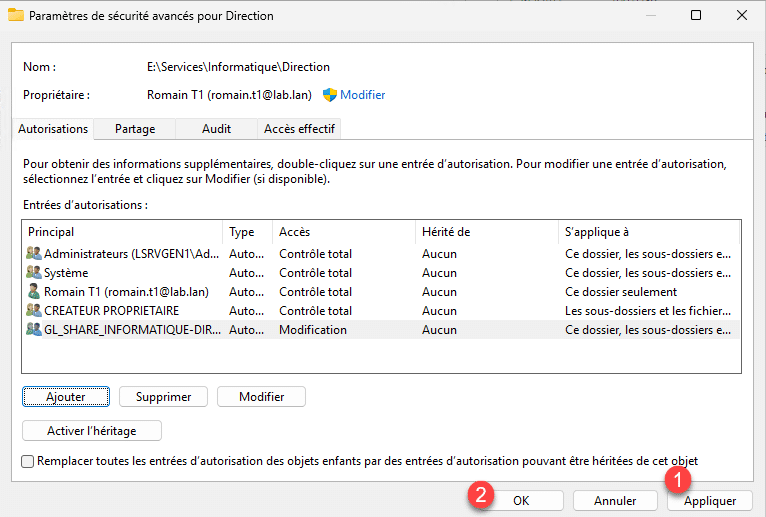
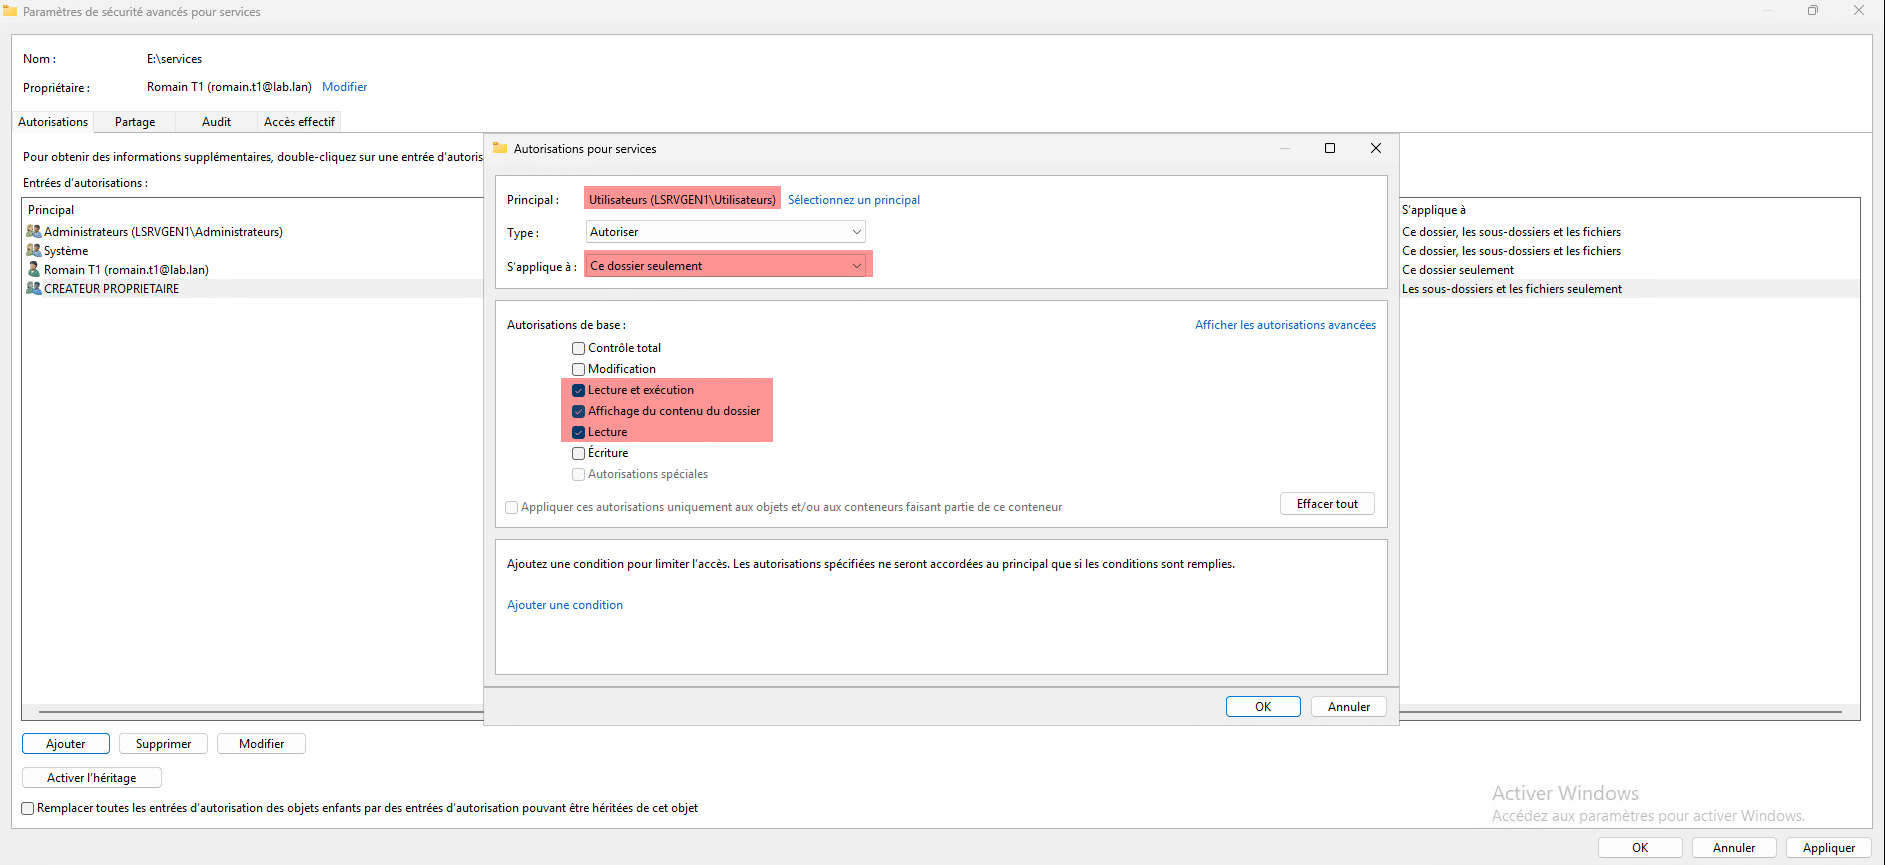
We will now add the permissions for the GL_SHARE_INFORMATIQUE-DIRECTION-W group, click on the Add 1 button.
Select the Active Directory group 1, configure NTFS permissions 2 and then click OK 3.

The group is added, click on Apply 1 and OK 2.
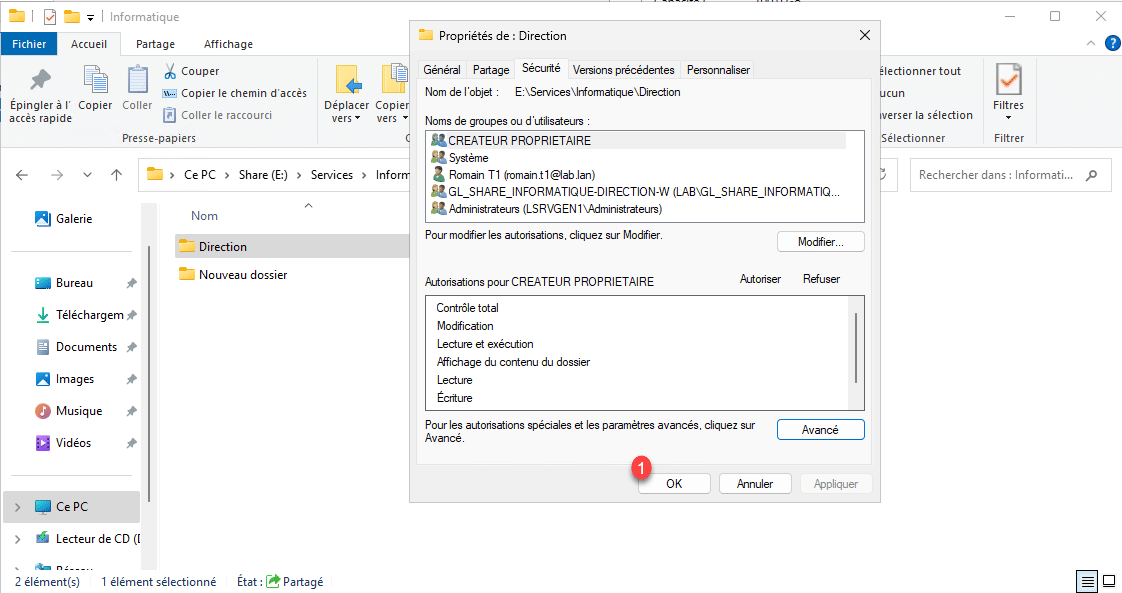
Close the Folder Properties window by clicking OK 1.
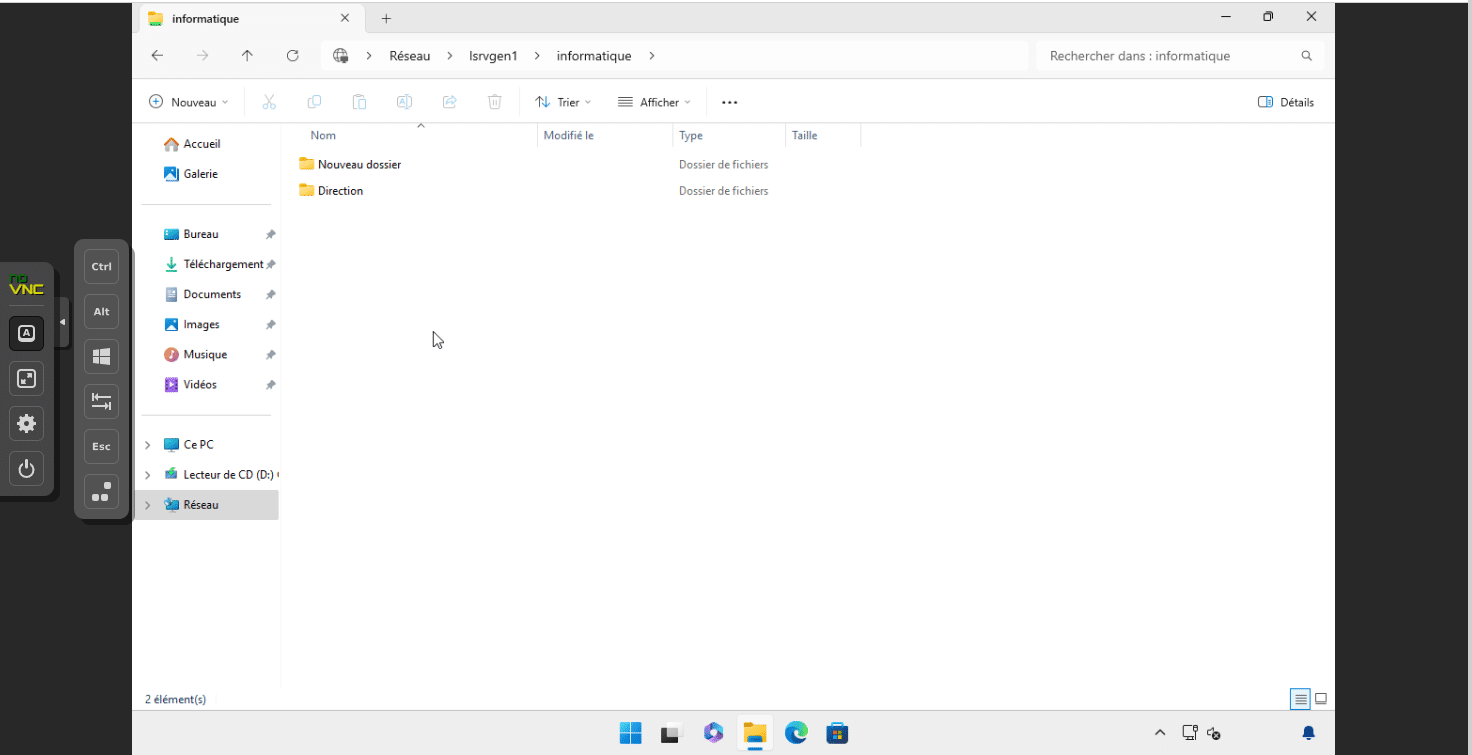
At this stage, from my user Romain, the folder is visible in the IT share, but I cannot access it because I am not part of the GL_SHARE_INFORMATIQUE-DIRECTION-W group.
Now we will activate EBA (Access-Based Enumeration) which will allow us to hide the folder in the IT share.
From Server Manager, right-click on the Share and then click on Properties.
In the sharing properties, go to Settings 1, check the Enable access-based enumeration box 2 then click Apply 3 and OK 4.

EBA is activated, now from my client workstation with my account, I no longer see the Management folder which is located in the IT folder, because I do not have access authorization.
Optimizing the sharing of service records
From the beginning, we saw how to create shared folders for company services; with only 2 services, we can create two shares, but generally in a company, there are more than two services.
In order to have something easier to maintain and be more efficient, we will share the services folder by enabling EBA so that users only see and access their service’s folder.
What we are going to do here is share the Services folder which will contain the folders.
As all the technical points have been covered previously, I will only give you the procedure to follow here.
On the service folders (Accounting and IT), you will need to disable inheritance and configure NTFS permissions in the same way as for the management folder which is in the IT folder, so that with EBA when a user accesses the Services share folder, they will only see their service folder.
To share the Services folder from Server Manager, click on TASKS and then on New share.

Select the SMB Sharing – Fast profile.
Indicate the location of the service folder.
Configure the share name.

In the sharing settings, enable access-based enumeration.
Regarding NTFS permissions, you will need to remove inheritance and all User permissions and add a User permission, which will only allow listing folders in the Services directory.
Continue following the assistant.
With this configuration, you will have a single shared folder and users will only be able to see and access the folders where they have explicit rights.
Folder sharing should now hold no secrets for you on Windows Server.
For security and confidentiality reasons, it is important to test your shares before deploying them and communicating them to users.
