Introduction
In this article, I will explain how to set up a backup plan with SQL Server.
In this tutorial, we will use the wizard available in SSMS to configure the database to save as well as the schedule and then we will modify the plan to indicate the location.
Prerequisites
- SQL Server (no Express backup plans do not work)
- A location to store backups, in the case of a network share, the computer object must have NTFS rights
- The SQL Agent must be started.
- Access to the server through the SQL Server Management Studio (SSMS) console.
Configuration of the backup plan
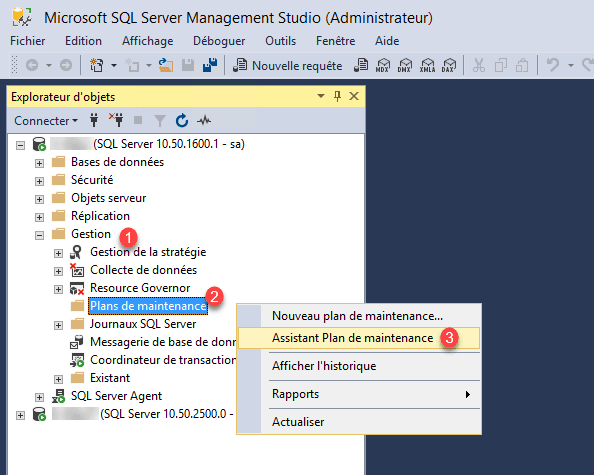
From the SSMS console, expand the Management folder 1 , then right click on Maintenance Plan 2 and click on Maintenance Plan Assistant 3 .
When launching the wizard, click Next 1 .

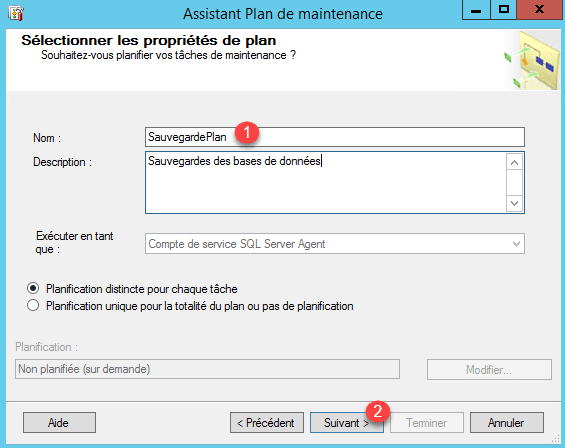
Name maintenance plan 1 , it is also possible to put a description if necessary. Click Next 2 .
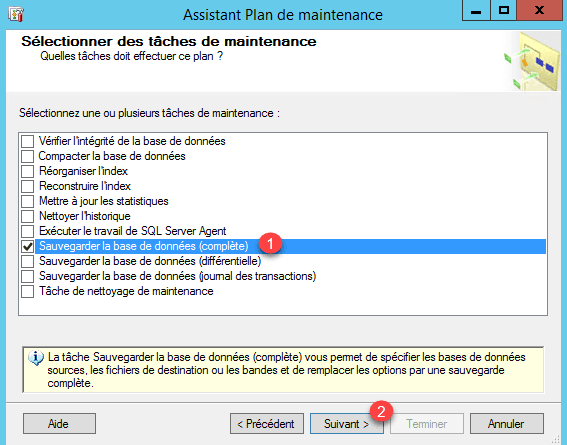
Choose the maintenance plan tasks, check the box Save the database (complete) 1 and click Next 2 .
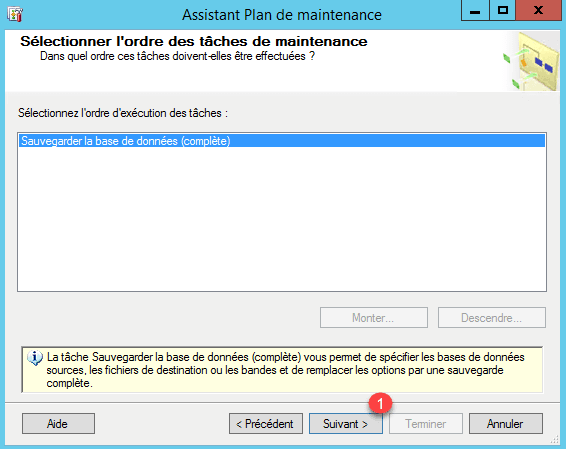
Click Next 1 . In the case where several tasks are configured one can choose the order of execution.
Click Select one or more 1 , check the databases to save 2 and click OK 3 .

Adapt the selection according to your environment, it is possible to choose the option All databases.
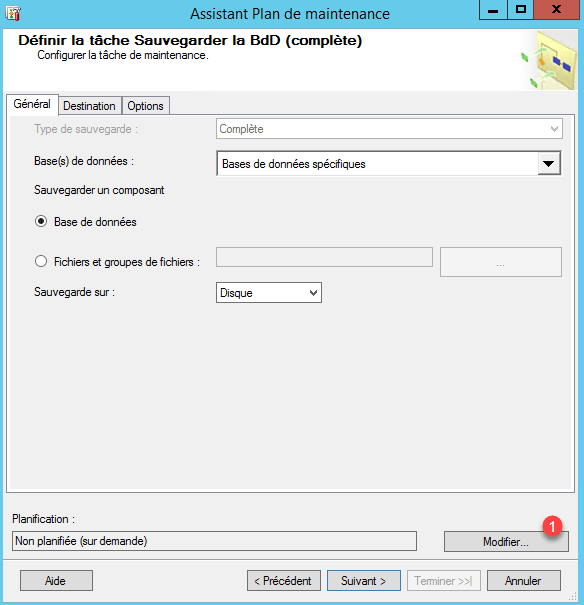
Click Edit 1 to configure the schedule.
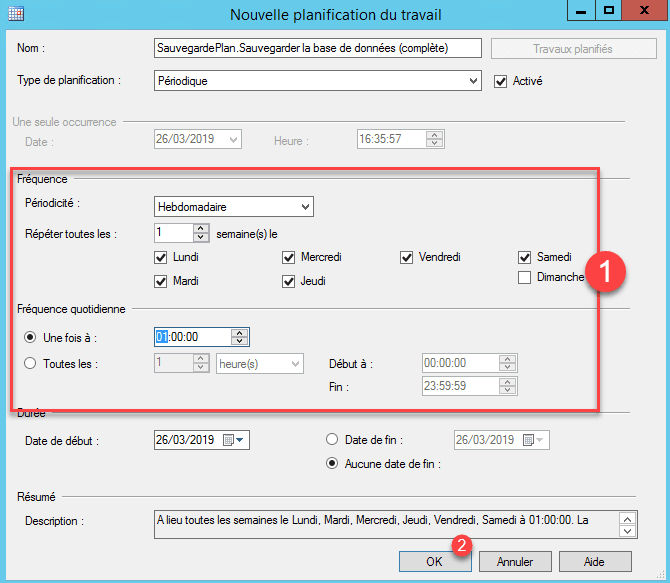
Configure the schedule to save 1 and click OK 2 .
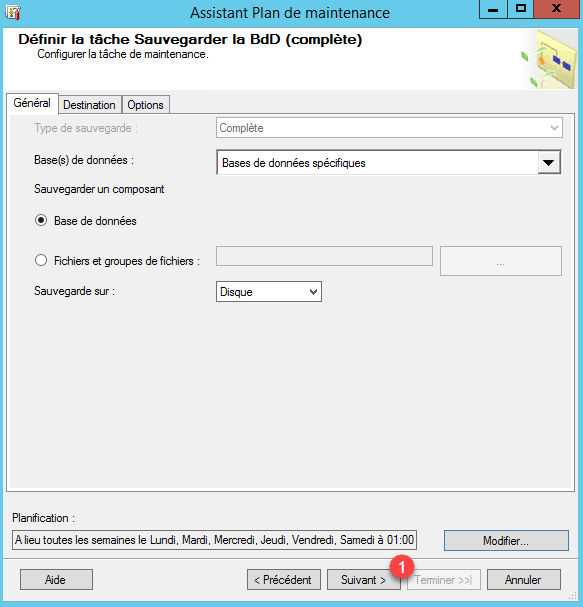
Now that the databases are selected and the schedule configured, click Next 1 .
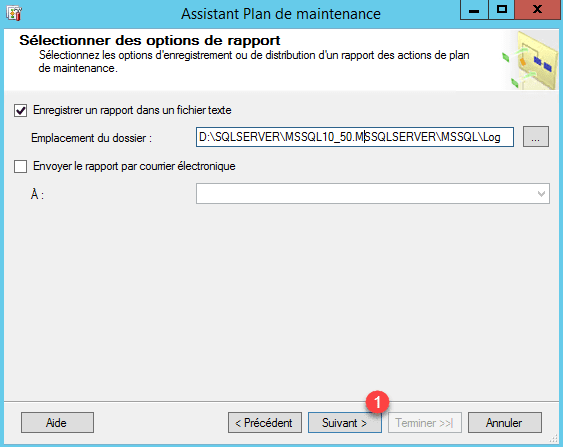
Configure reports as needed and click Next 1 .
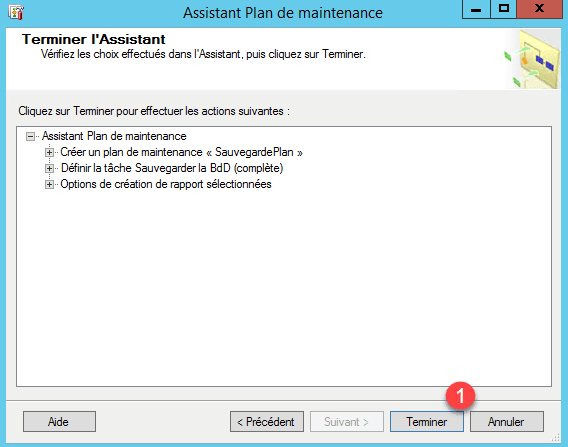
Click Finish 1 to create the maintenance plan.
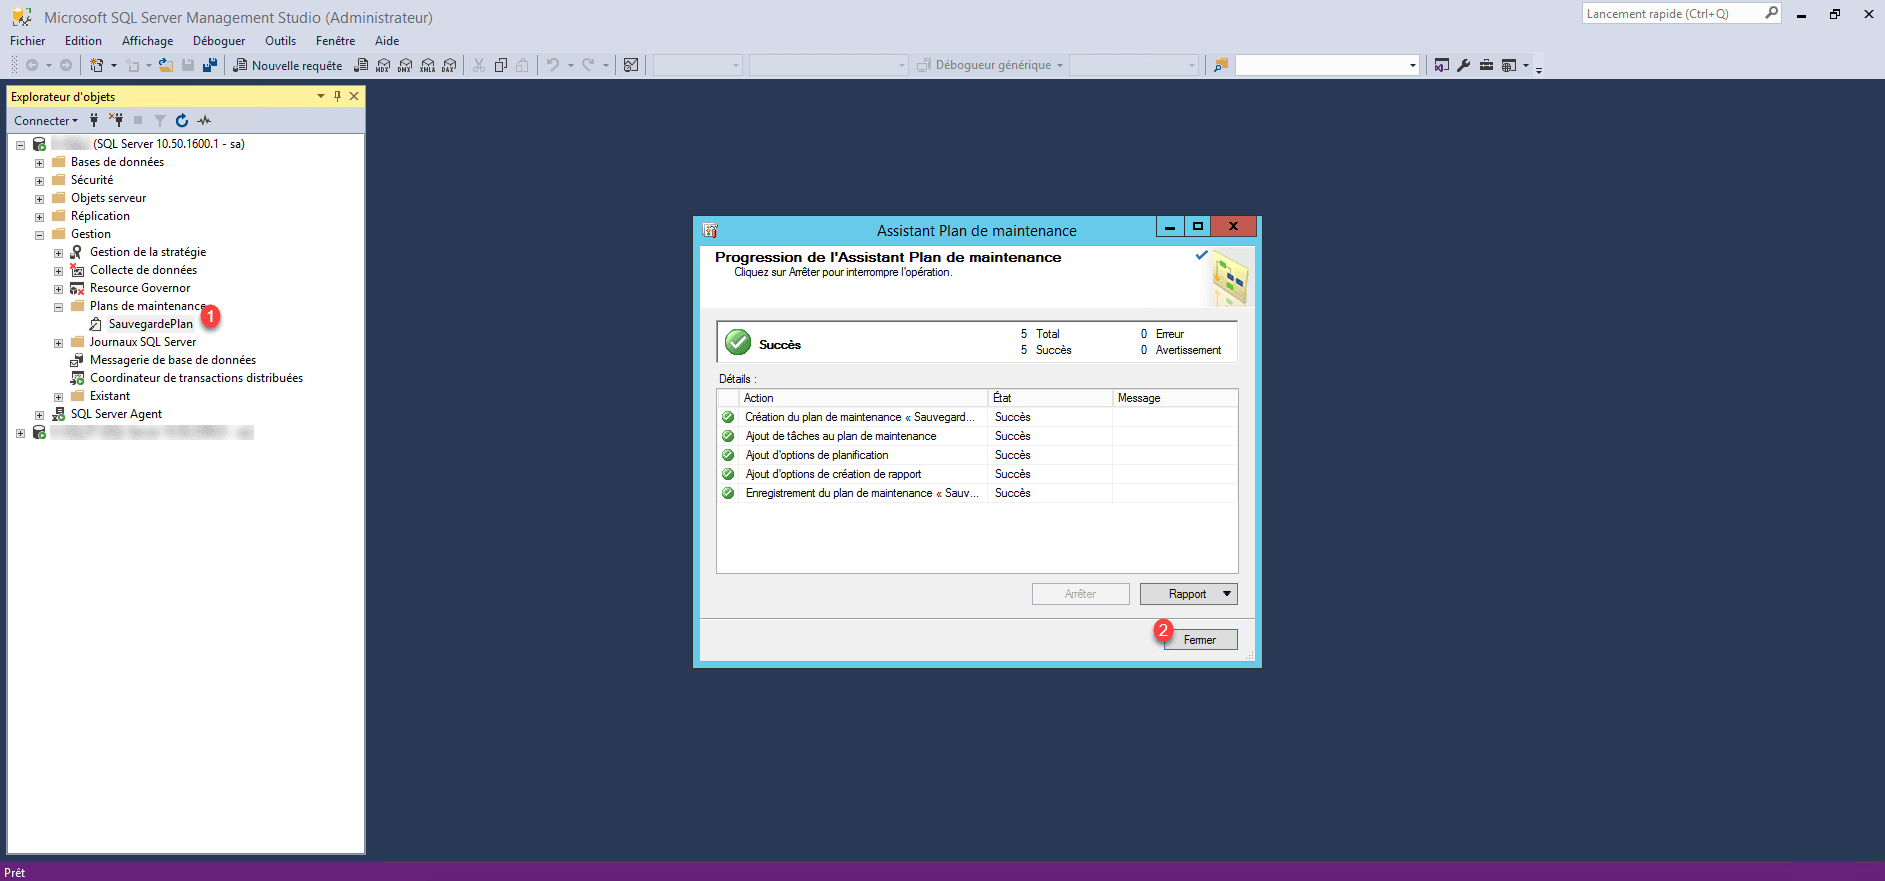
The maintenance plan is created 1 , click on Close 2 .
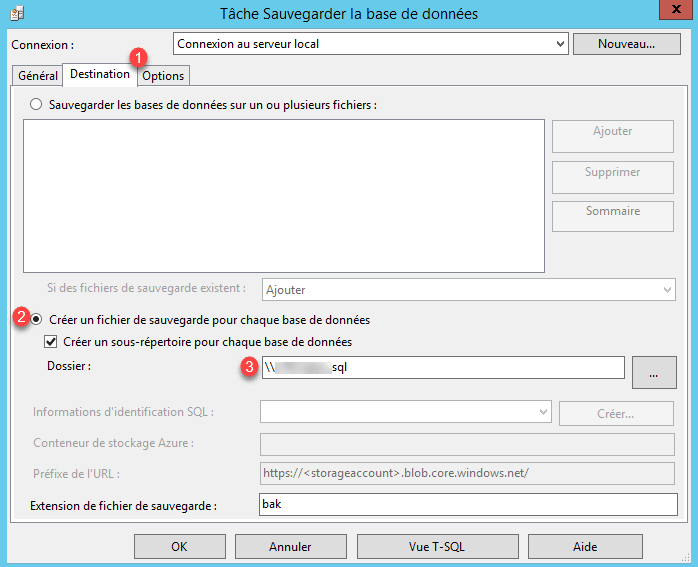
Now that the plan is created, we will configure the backup storage location. Open the plan by clicking on 1 and double click on the backup task 2 .

Go to the Destination tab 1 , choose the option Create a backup file for each database 2 . It is possible to create subfolders for each database. Then enter the UNC path of the network share 3 .
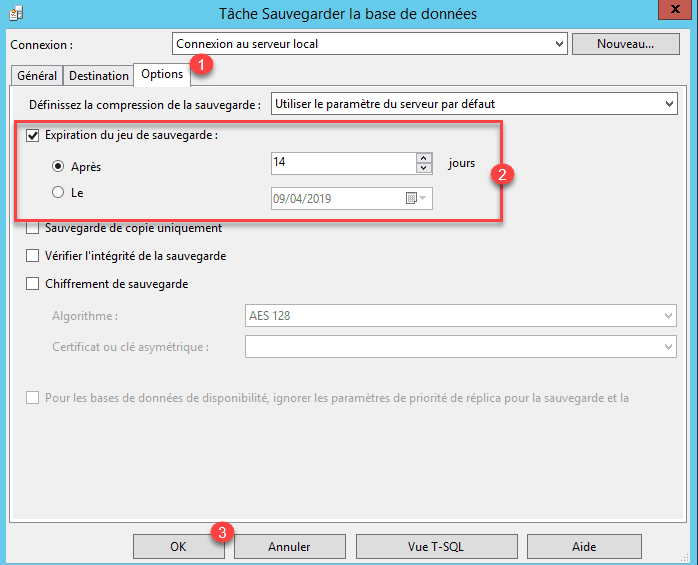
Then go to the Options tab 1 , configure the expiration of a backup set 2 and click OK 3 .
Save the maintenance plan by clicking on diskette 1 .

The databases will be saved according to the configured plan.
