DNS enable zone cleaning
In this “how to” tutorial, I will explain how to enable DNS zone cleanup on Windows Server.
The cleaning of areas is done in two steps:
– The first step is to configure the lifetime of the DNS records in the zone
– The second step is to activate cleaning at the DNS server level.
In the event that the zone is present on several DNS servers and it replicates on other DNS servers, it is only necessary to configure it on one server.
Open the properties of the DNS zone
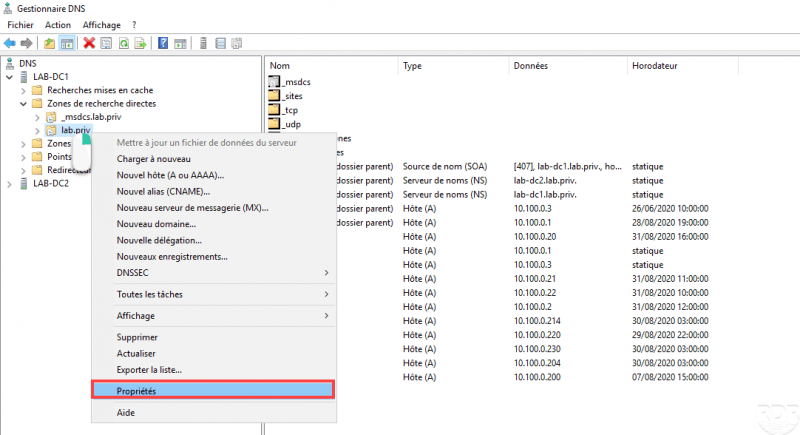
From the “DNS Manager” console, right-click on the zone and click on Properties.
Open the Aging properties of the zone
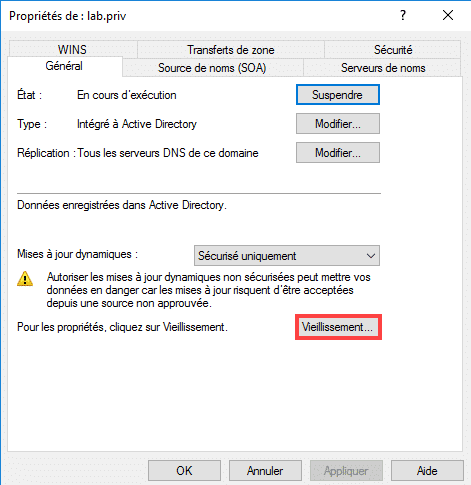
On the General tab, click on the Aging button.
Enable cleaning and configure intervals
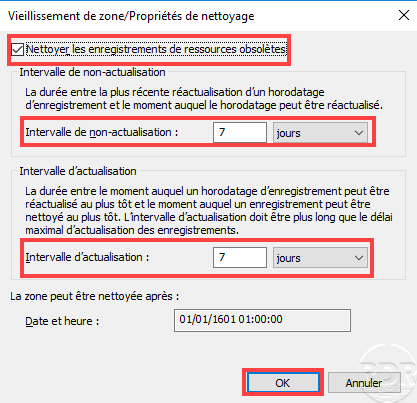
Check the Clean up obsolete resource records box, configure Intervals * and click OK.
Open the properties of the DNS server.

Right click on the server name and click on Properties.
Enable cleaning on the server and configure the delay
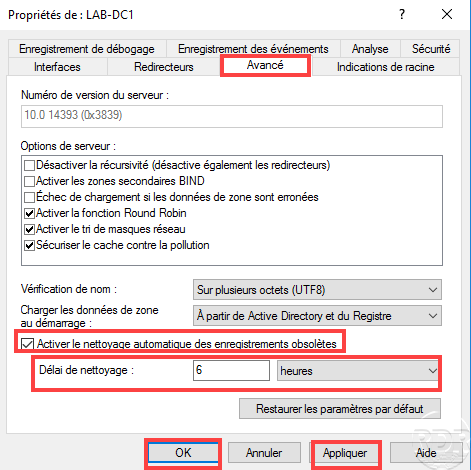
On the Advanced tab, check the box Enable automatic cleaning of obsolete records, configure the cleaning time (cleaning intervals) then click on Apply and OK.
DNS zone cleanup is configured, in the example above, the server performs a 6 hour cleanup of stale DNS records older than 14 days.
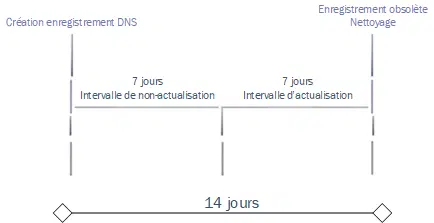
* Understanding intervals
When configuring aging, 2 intervals must be configured:
- Non-updating interval: which corresponds to a period during which the record cannot be updated at the time stamp, do not panic if a computer changes IP address, the record will be updated.
- Refresh interval: which corresponds to a period during which the timestamp of the recording can be updated.
Once the cumulative of the two intervals has passed, in our example 7 days + 7 days, if the record has not been updated during this period of 14 days, it is considered obsolete and can be cleaned.