In this tutorial, I will walk you through how to disable SMBv1 support add-on using Group Policy.
To disable full SMBv1 support, you must act on the two SMB components which are:
- The server who is the one who shares
- The client that allows the use of shared resources.
Disabling by group policy is done using a registry key or by the group policy security pack.
I advise you to only apply this policy to computers older than Windows 10, by default on Windows 10, SMBv1 support is disabled. To do this, use the WMI filters.
Table of Contents
Disabling SMBv1 by registry keys
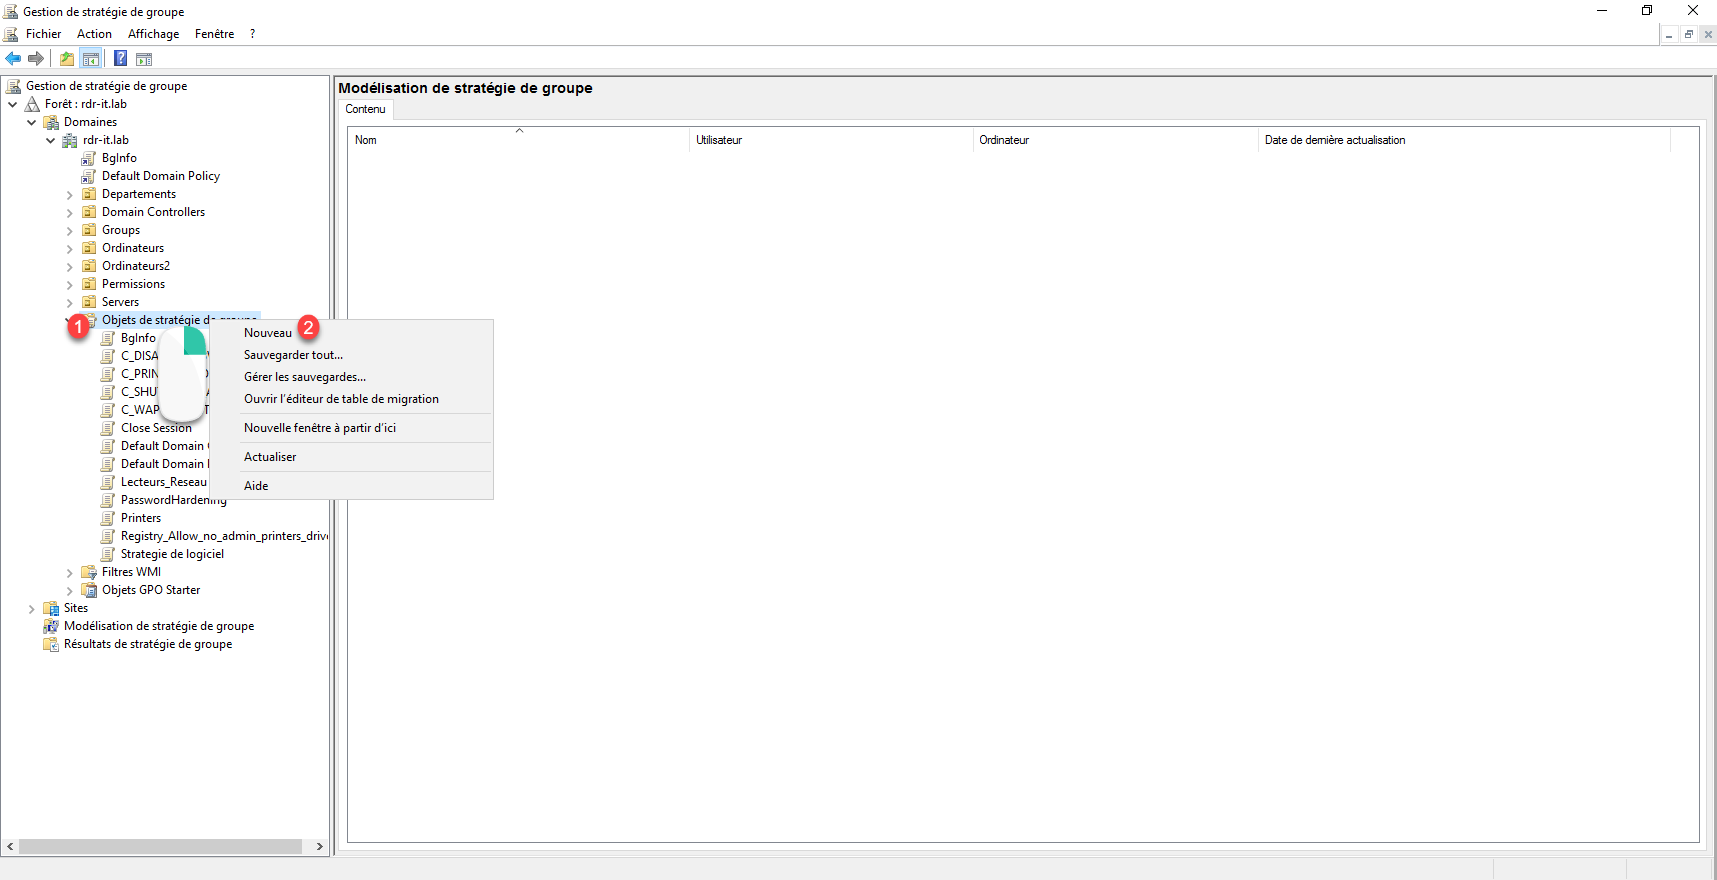
Open the Group Policy Management console.
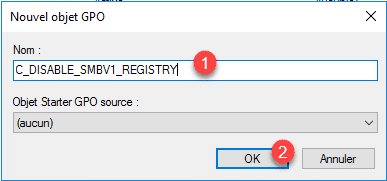
Right-click on the Group Policy Objects container 1 and click New 2.

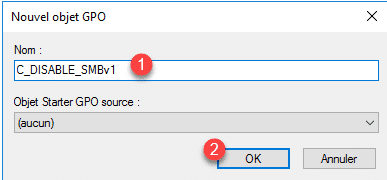
Name 1 the group policy then click on OK 2 to create the object.
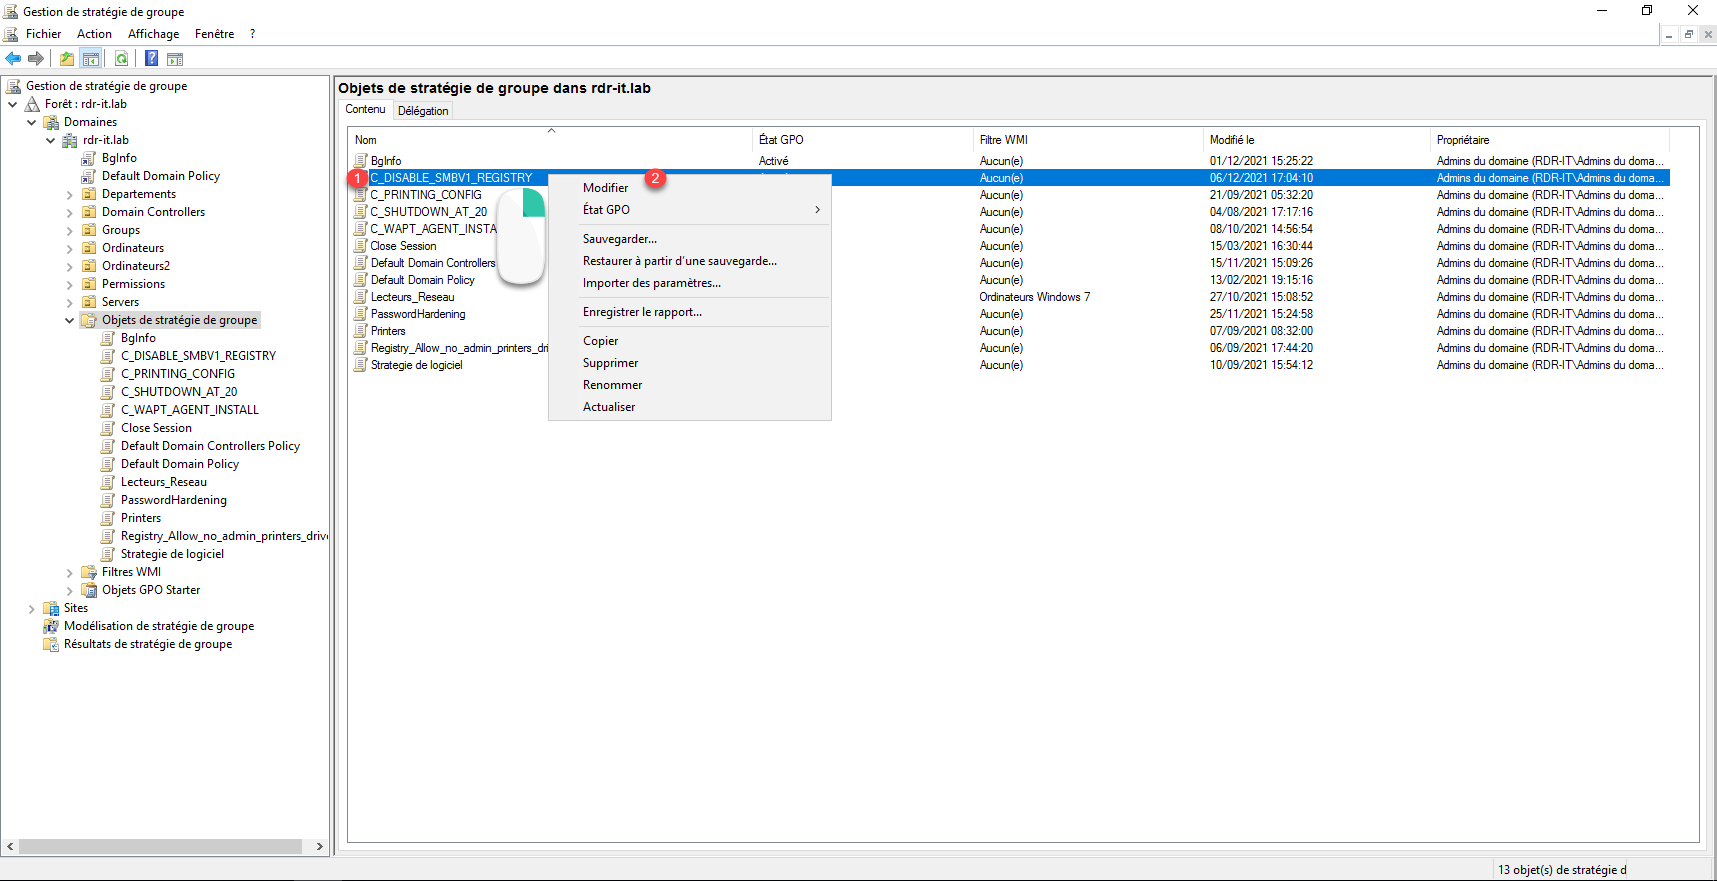
Right-click on Group Policy 1 and click Edit 2.
Go to the following location: Computer Configuration / Preferences / Windows Settings / Registry 1.
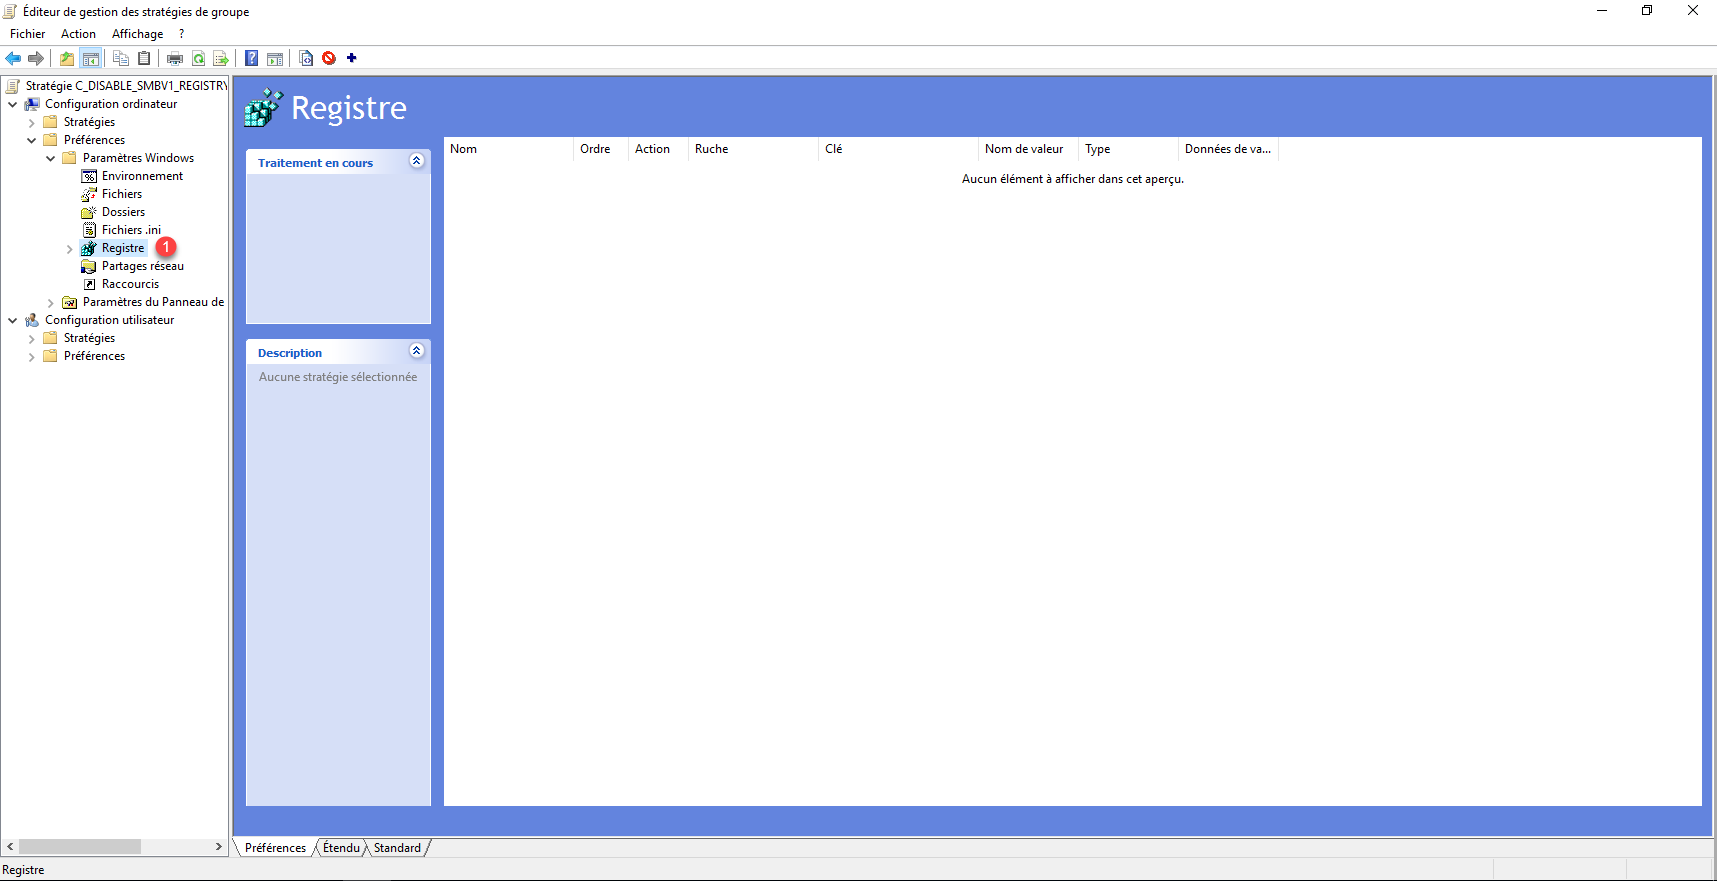
Here we will apply the registry keys at the computer and non-user levels, because we are modifying the behavior of the computer.
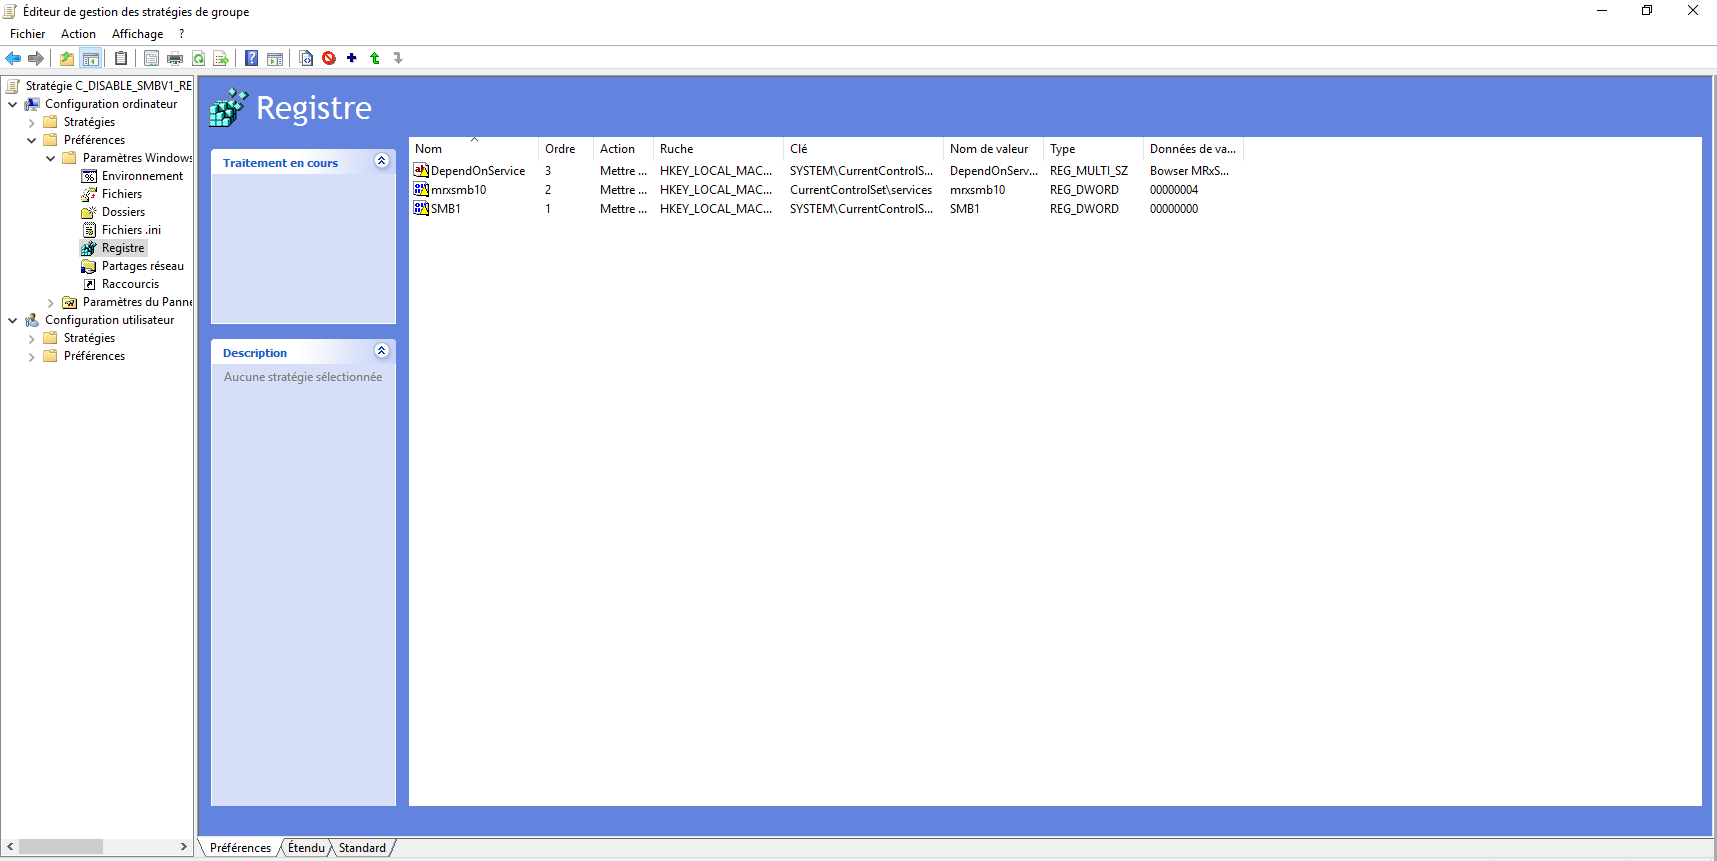
We are now going to create 3 registry keys, the first allows to deactivate the SMBv1 protocol of the server part and the other two will deactivate the SMBv1 client.
For each registry key that will be created, right click in the central area and go to New 1 and click on Registry Item 2.
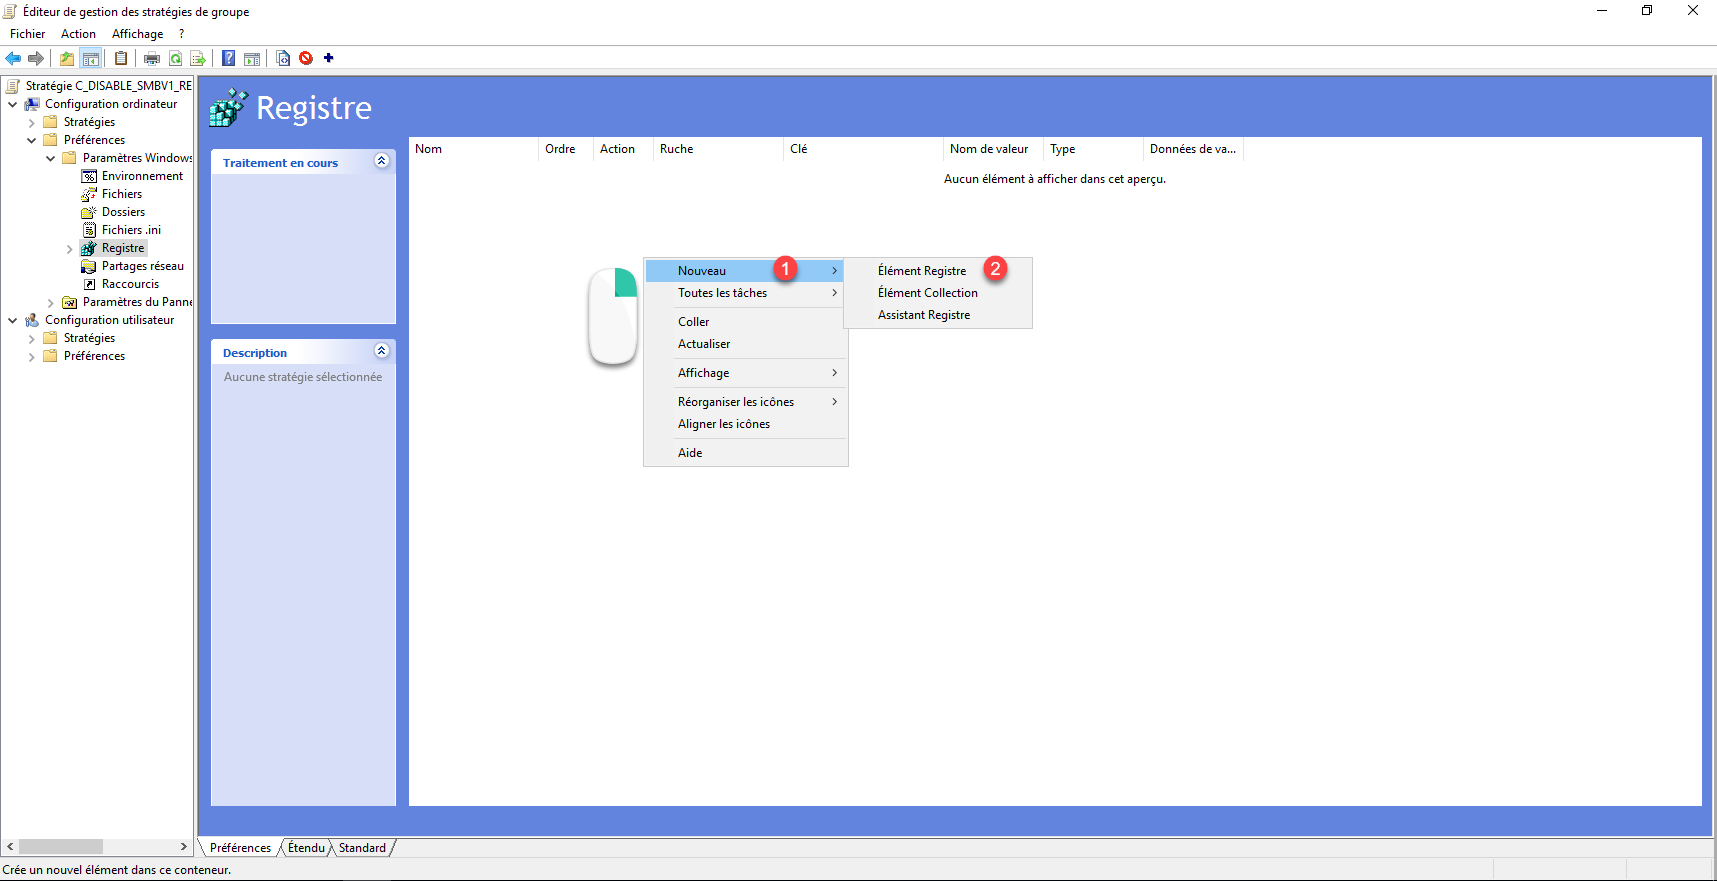
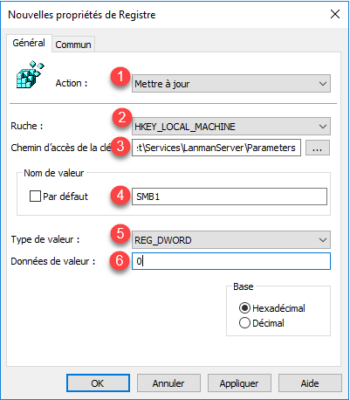
Configuring the first key to disable the SMBv1 server.
| Champ | Valeur | |
|---|---|---|
| 1 | Action | Update |
| 2 | Hive | HKEY_LOCAL_MACHINE |
| 3 | Key path | SYSTEM\CurrentControlSet\Services\LanmanServer\Parameters |
| 4 | Value name | SMB1 |
| 5 | Value type | REG_DWORD |
| 6 | Value data | 0 |
Validate by clicking on OK.
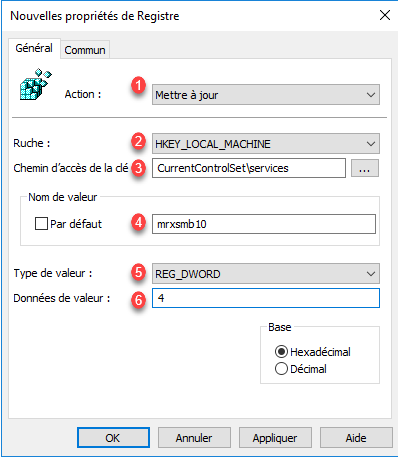
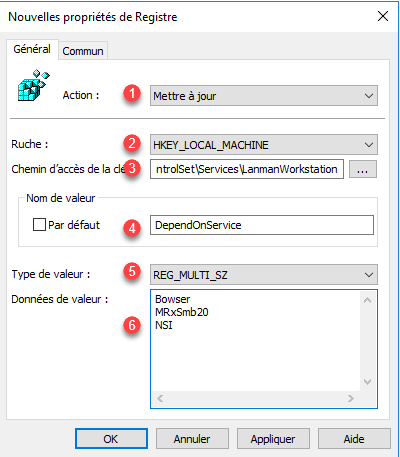
The next two will allow us to disable the SMBv1 client.
| Champ | Valeur | |
|---|---|---|
| 1 | Action | Update |
| 2 | Hive | HKEY_LOCAL_MACHINE |
| 3 | Key path | CurrentControlSet\services |
| 4 | Value name | mrxsmb10 |
| 5 | Value type | REG_DWORD |
| 6 | Value data | 4 |
| Champ | Valeur | |
|---|---|---|
| 1 | Action | Update |
| 2 | Hive | HKEY_LOCAL_MACHINE |
| 3 | Key path | SYSTEM\CurrentControlSet\Services\LanmanWorkstation |
| 4 | Value name | DependOnService |
| 5 | Value type | REG_MULTI_SZ |
| 6 | Value data | Bowser MRxSmb20 NSI |
The 2 registry keys are created:
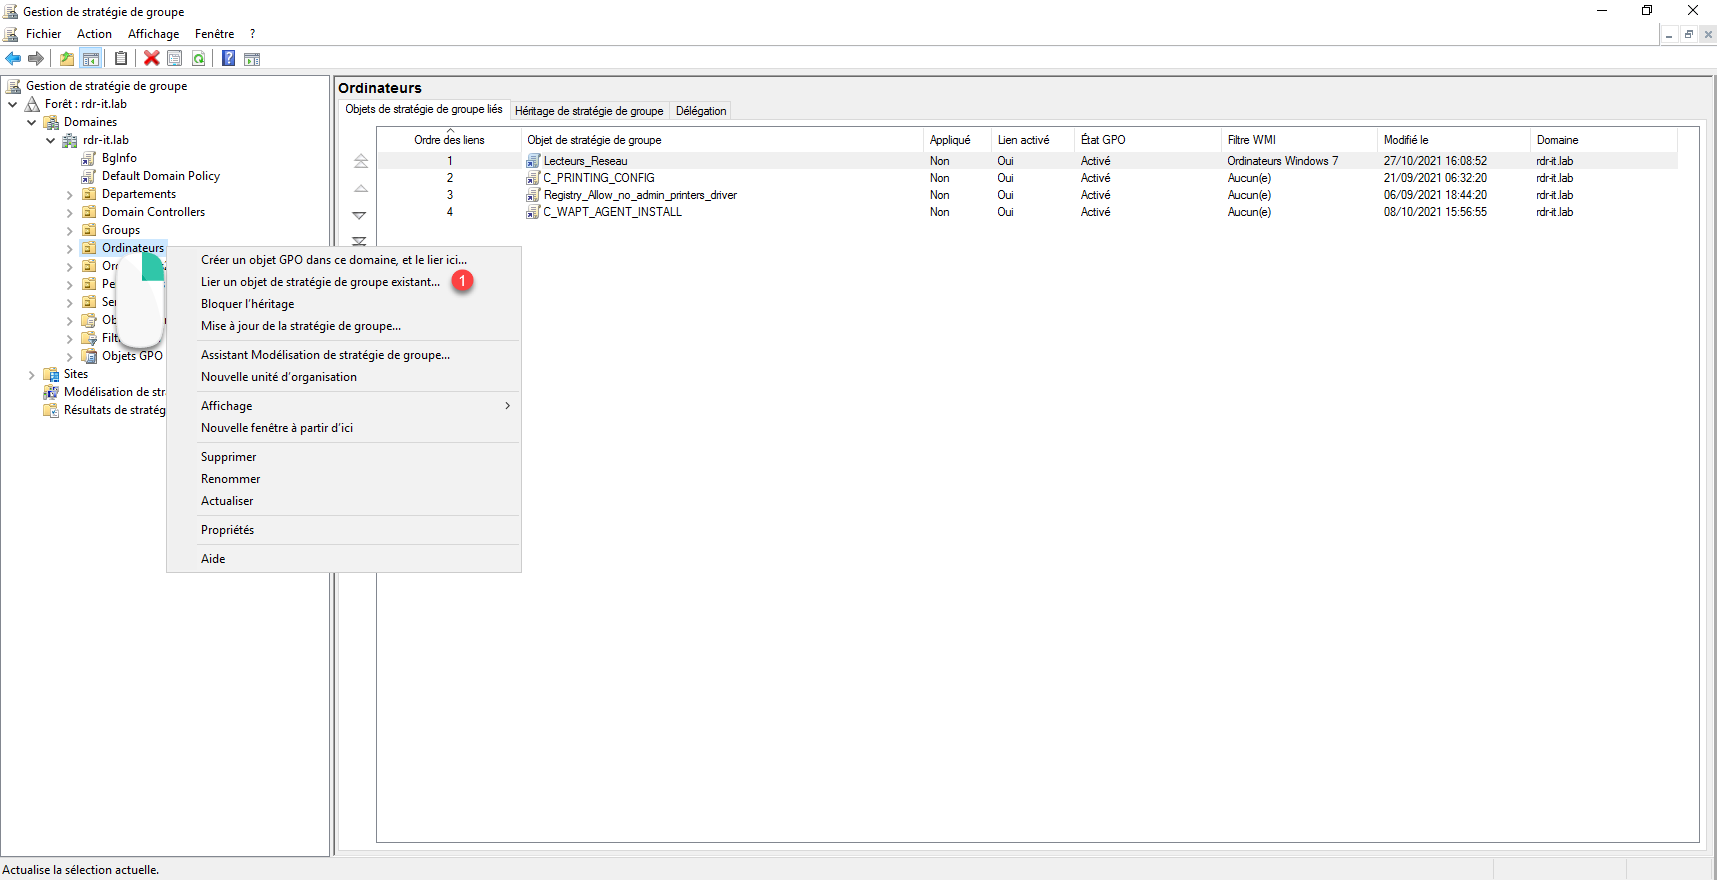
Now we need to link the group policy.
Right-click where you want to link it and click Link Existing GPO 1.
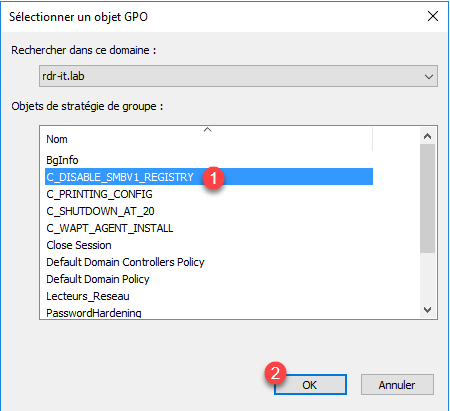
Select Group Policy 1 which disables SMBv1 and click OK 2.
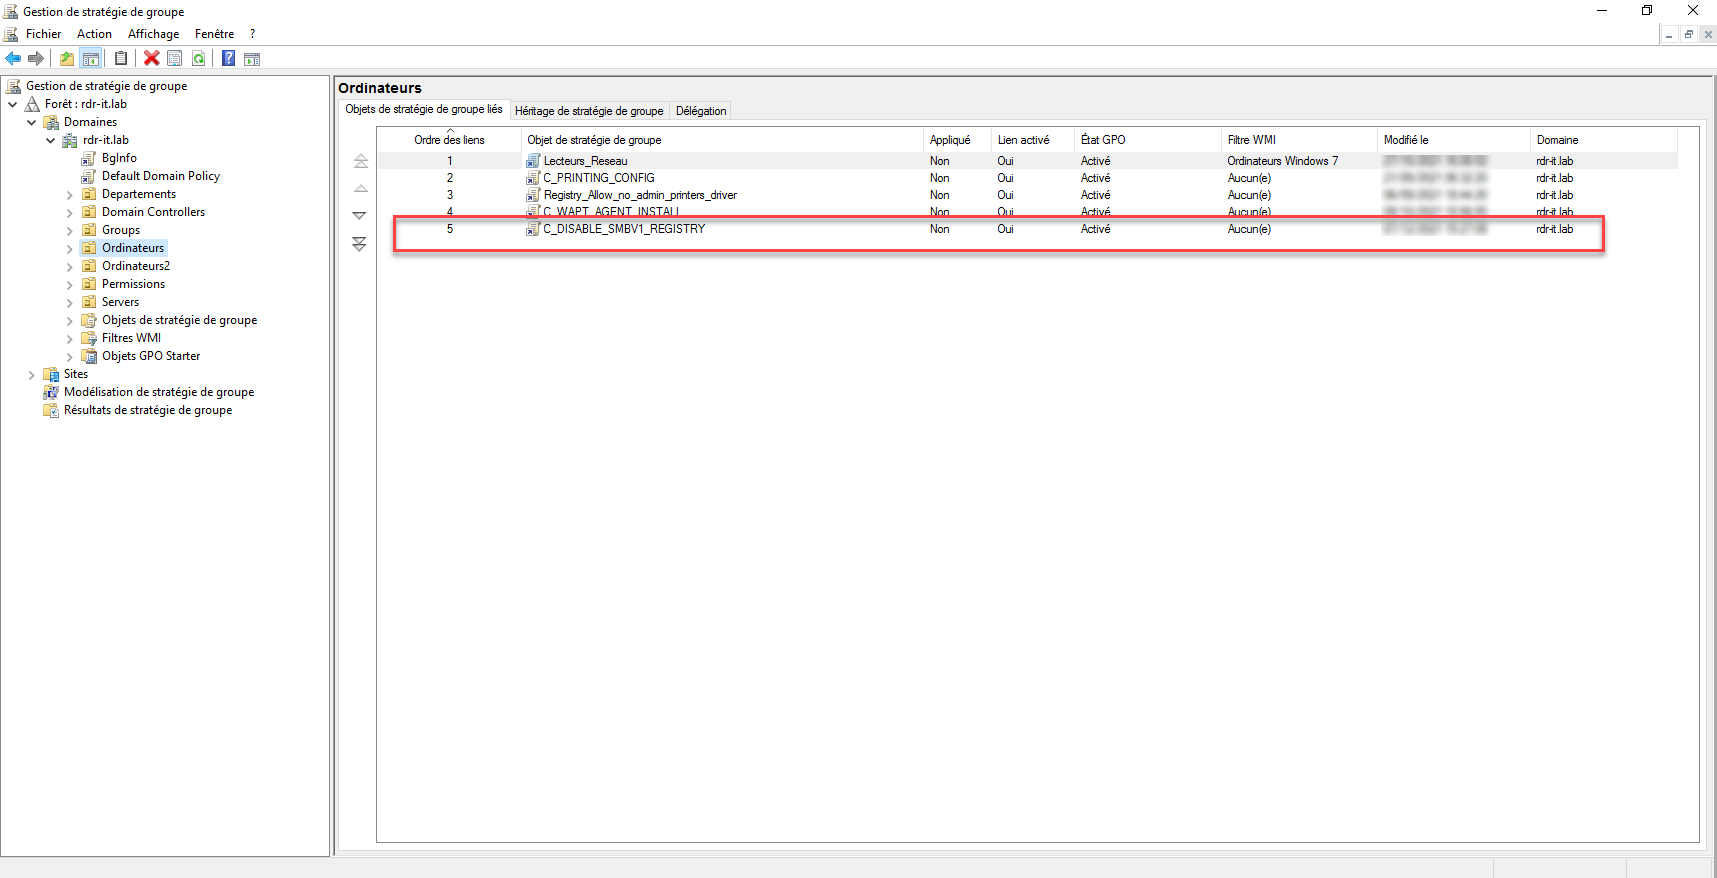
The strategy is linked.
Once the policy is applied, the SMBv1 server and client will be disabled. A reboot is required.
Before deploying this strategy at the domain level, I advise you to test on a sample computer.
Disable SMBv1 with Microsoft Security Compliance Settings
Little known, Microsoft provides several tools to harden the security of your environment under the name of Microsoft Security Compliance Toolkit 1.0 available here : Download Microsoft Security Compliance Toolkit 1.0 from Official Microsoft Download Center
Start by downloading the latest Security Baseline archive (zip), at the time of writing this tutorial the file is: Windows 11 Security Baseline.zip
Install Group Policy definitions (admx/adml files) located in the Templates folder on the domain controller(s) or in your central store.
Launch the Group Policy Management console, on the Group Policy Objects container 1, right-click and click New 2.
Name the Group Policy 1 and click OK 2.
Right click on the GPO you just created 1 and click on Modify 2.

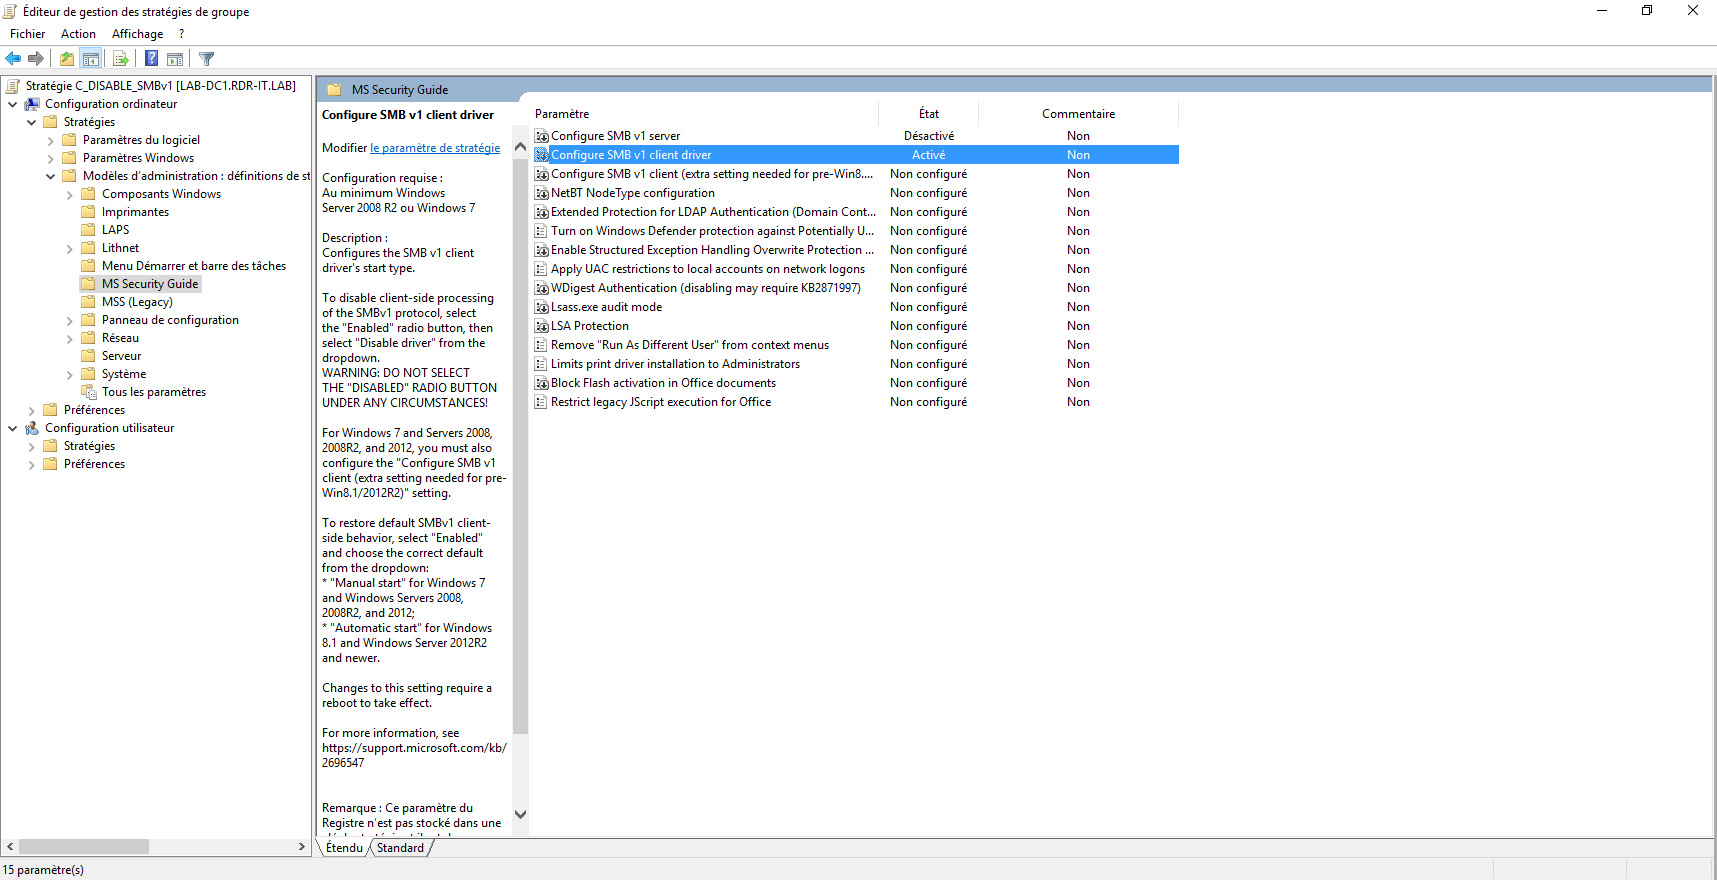
Go to the following location: Computer Configuration / Policies / Administrative Templates / MS Security Guide 1.
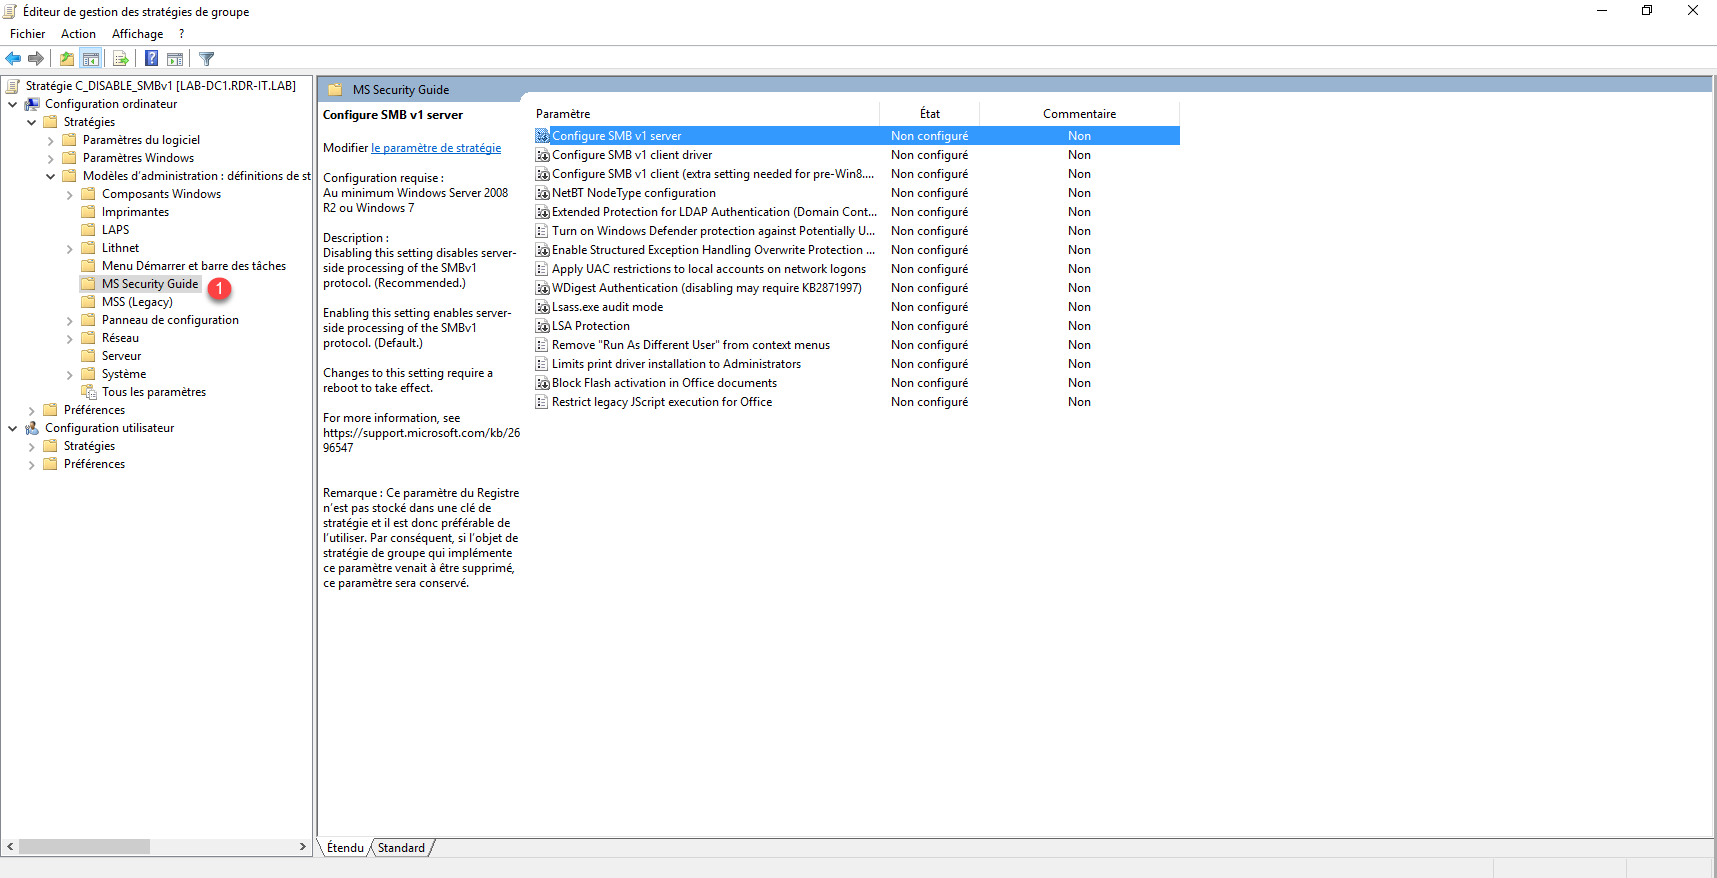
Here we find different parameters that increase the level of Windows security.
Double-click Configure SMB v1 server 1 to access the setting.
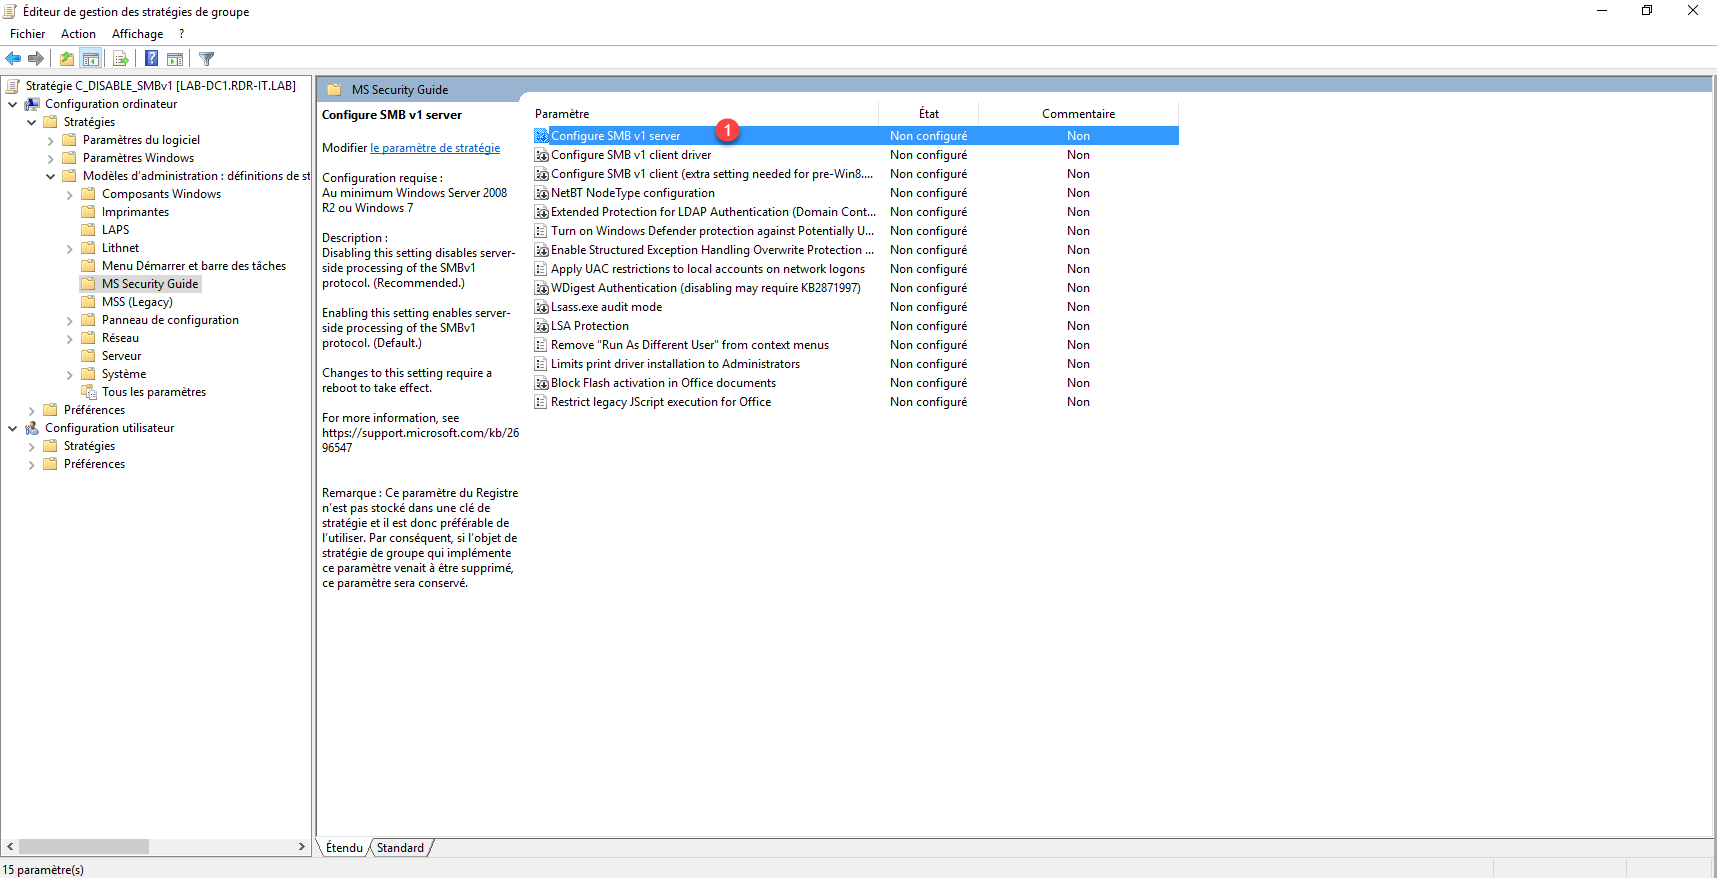
Select Disabled 1 then click Apply 2 and OK 3.

This setting allows you to disable the SMBv1 protocol from the server.
Open the Configure SMB v1 client driver 1 setting by double-clicking it.

Choose Enabled 1 and select Disable driver (recommended) 2 then click on the Apply button 3 and OK 4.

This parameter acts on the SMB client.
The settings are configured.
Close the editor.
It is now necessary to link the group policy so that it is applied, as for the registry key, I advise you to do a test of your group policy.
Right-click where it should be linked and click Link an existing GPO 1.
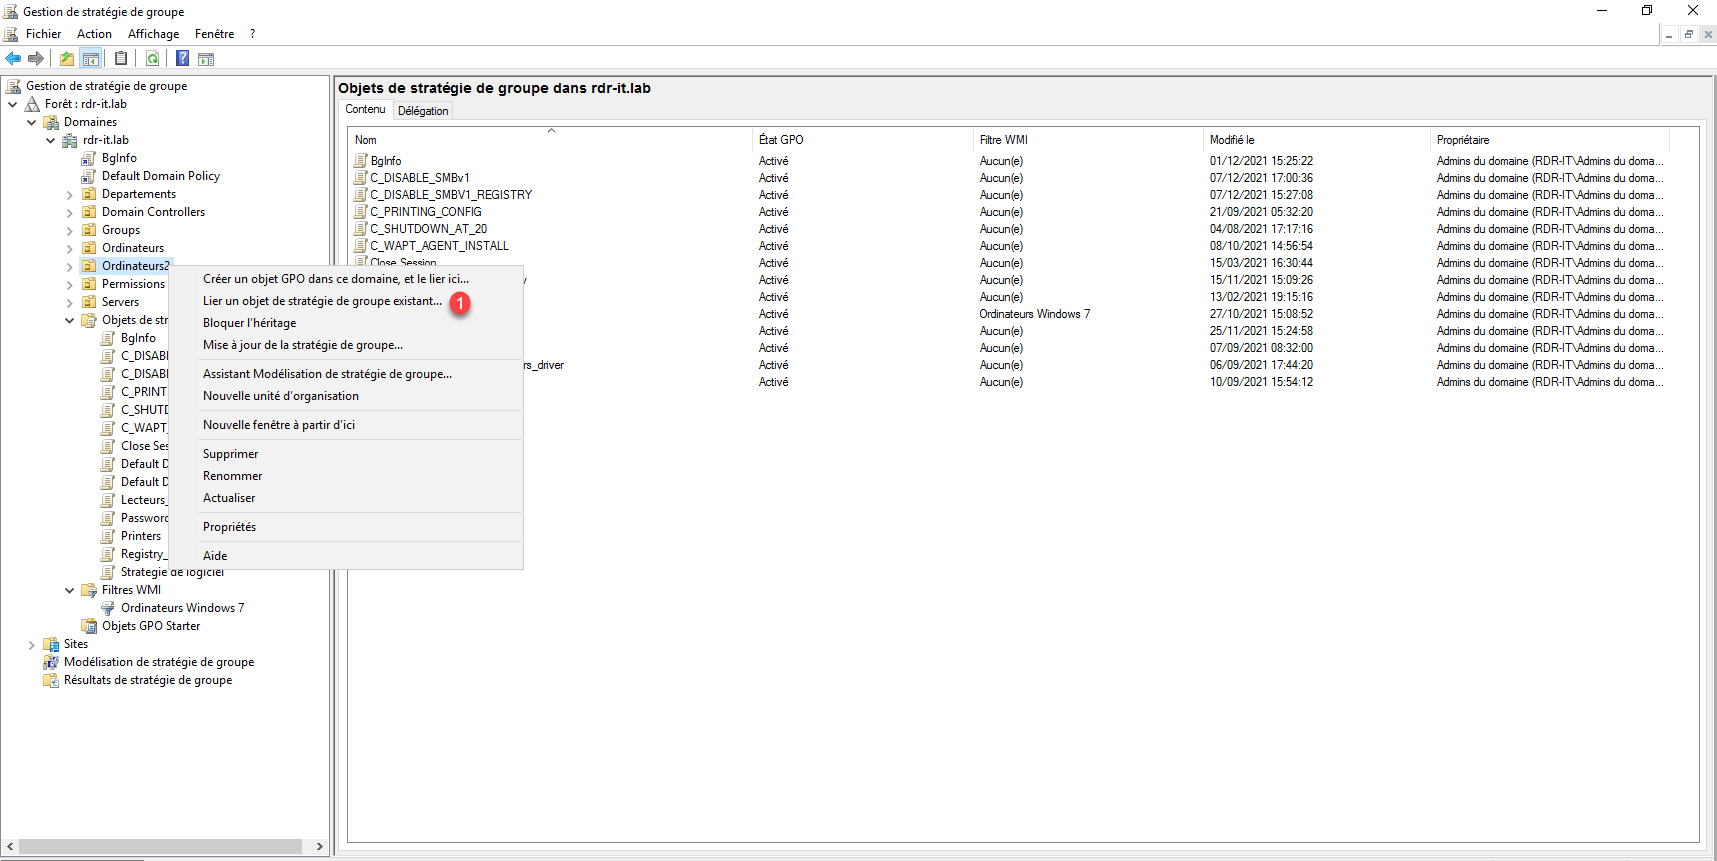
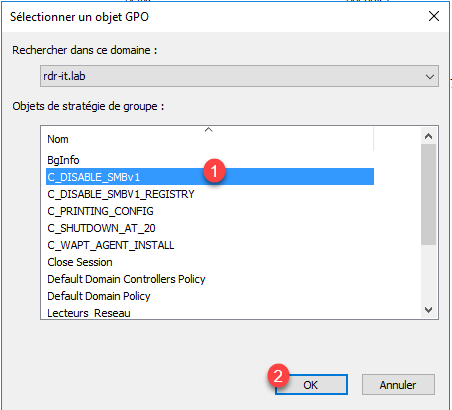
Select Group Policy 1 and click OK 2.
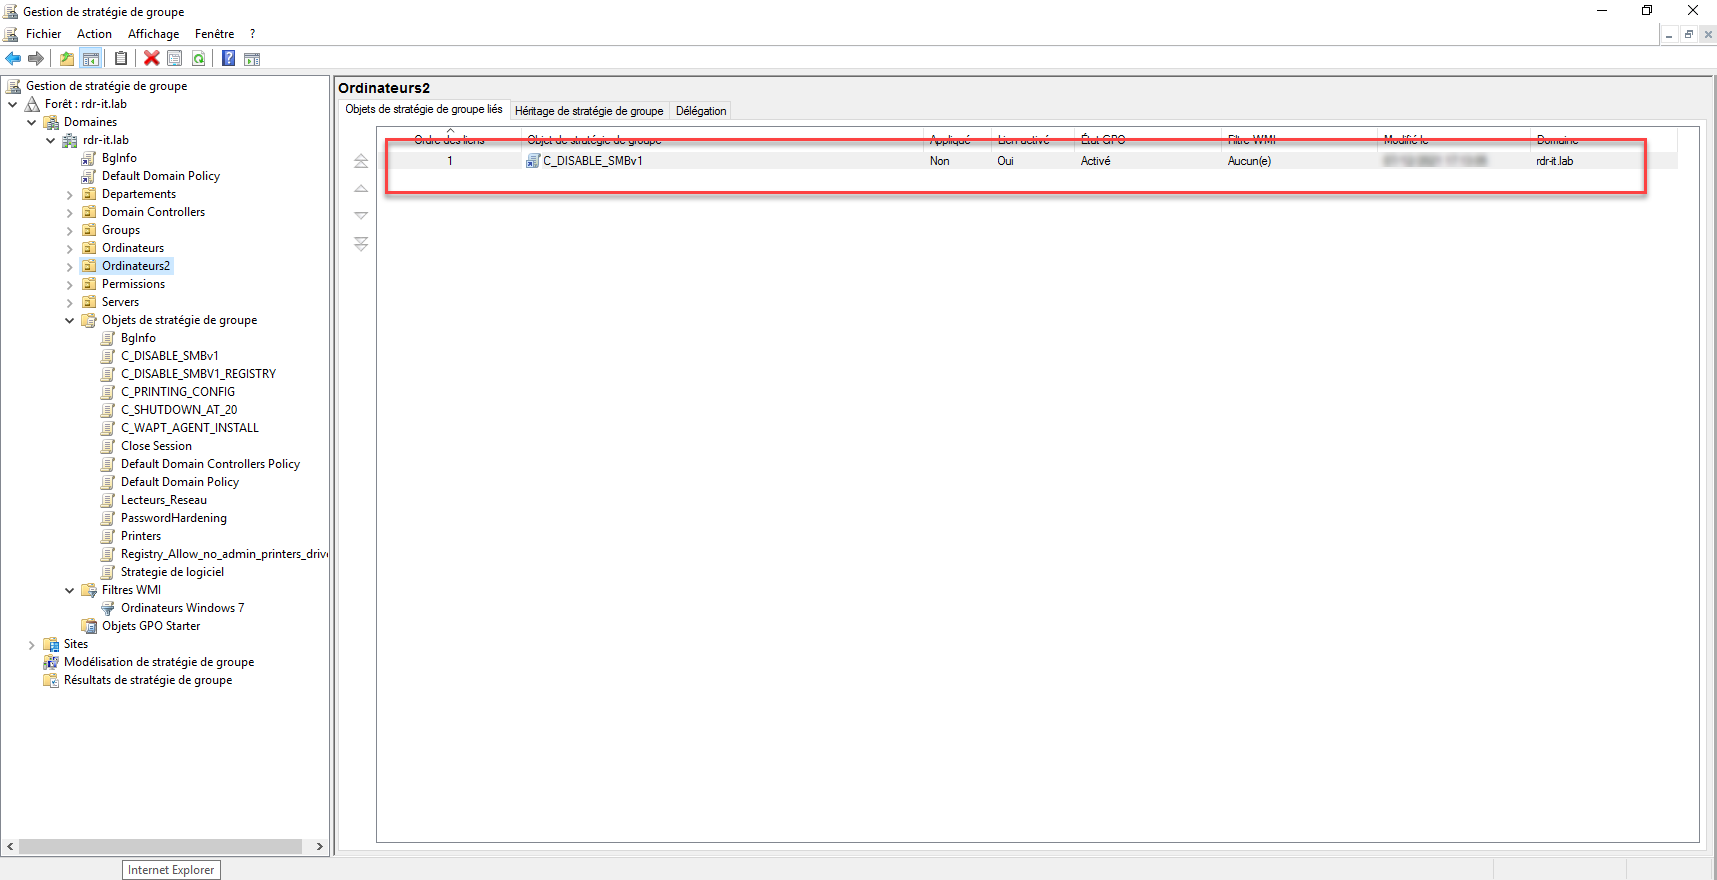
Group Policy is linked.
At the next restart when the GPO will be applied, the SMBv1 protocol (Server and client) will be disabled.
You now know how to disable the SMBv1 protocol automatically using Group Policy in an Active Directory environment.
