Dans ce tutoriel « Comment », nous allons voir comment installer l’IDE de Microsoft Visual Studio Code sur Ubuntu.
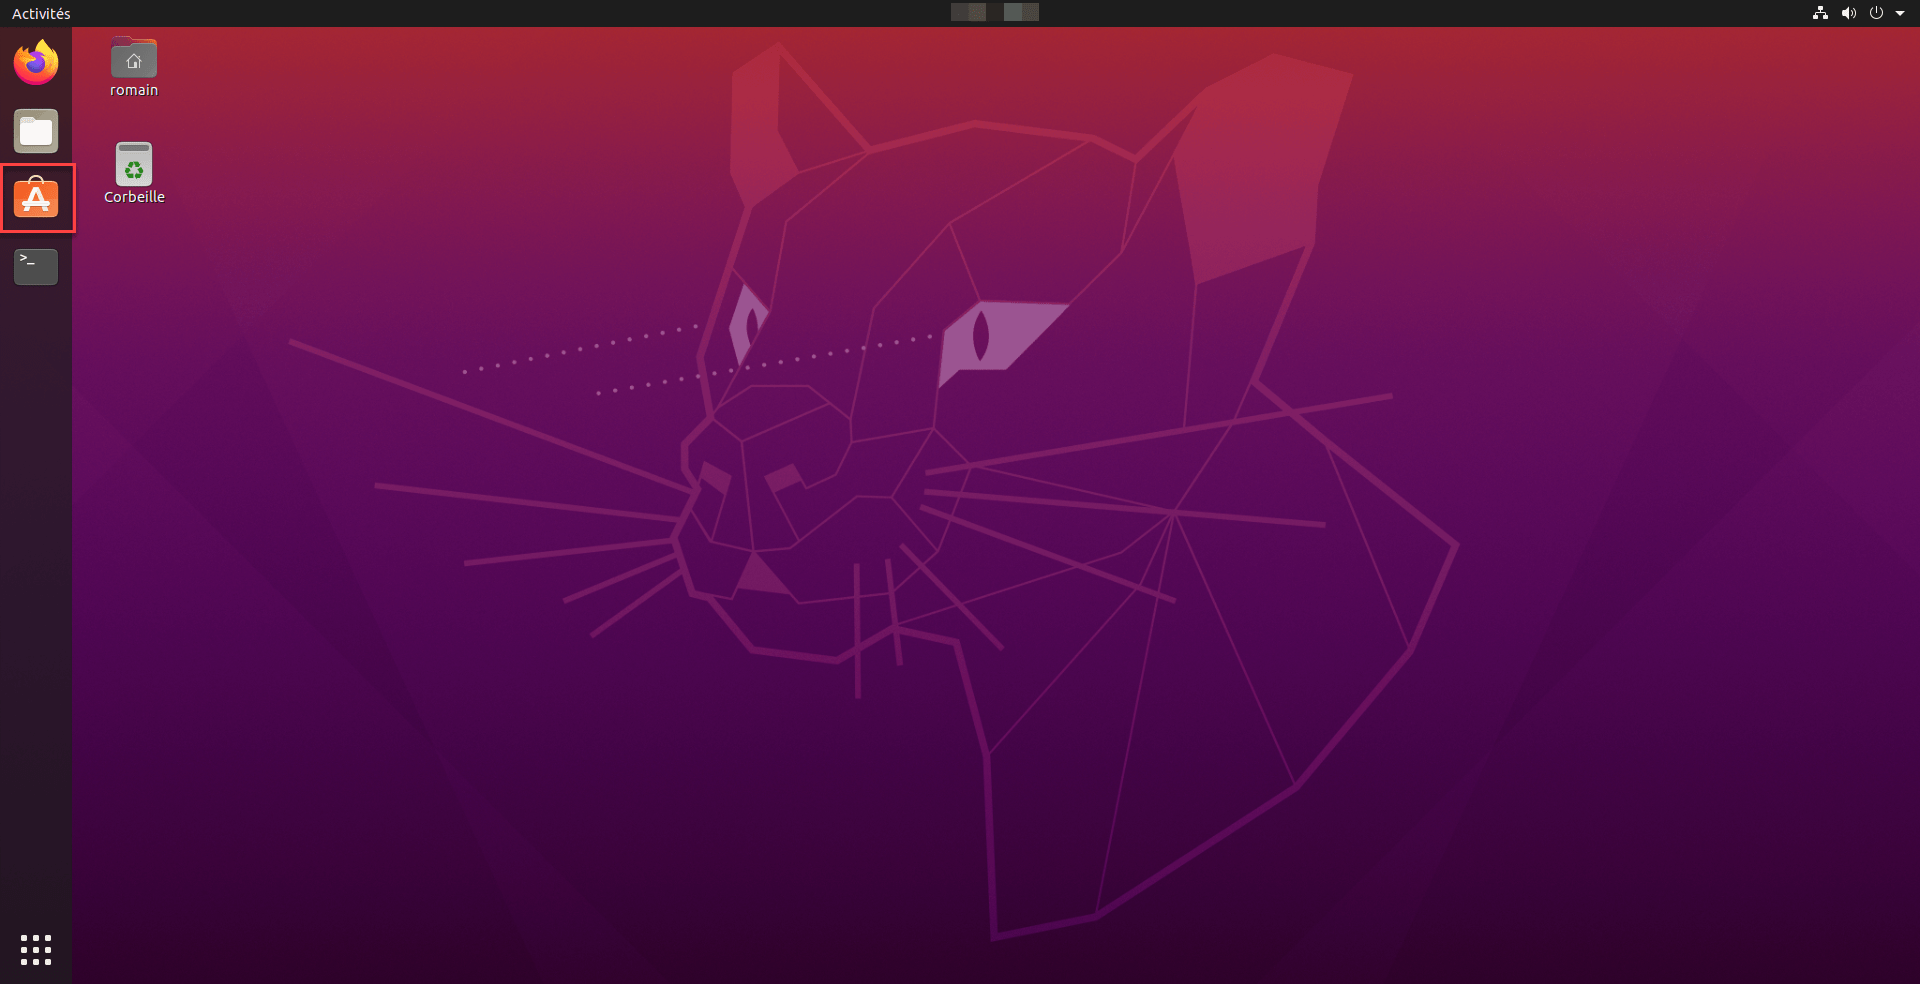
Ouvrir Ubuntu Software
Depuis le bureau Unity, ouvrir le gestionnaire d’application Ubuntu.
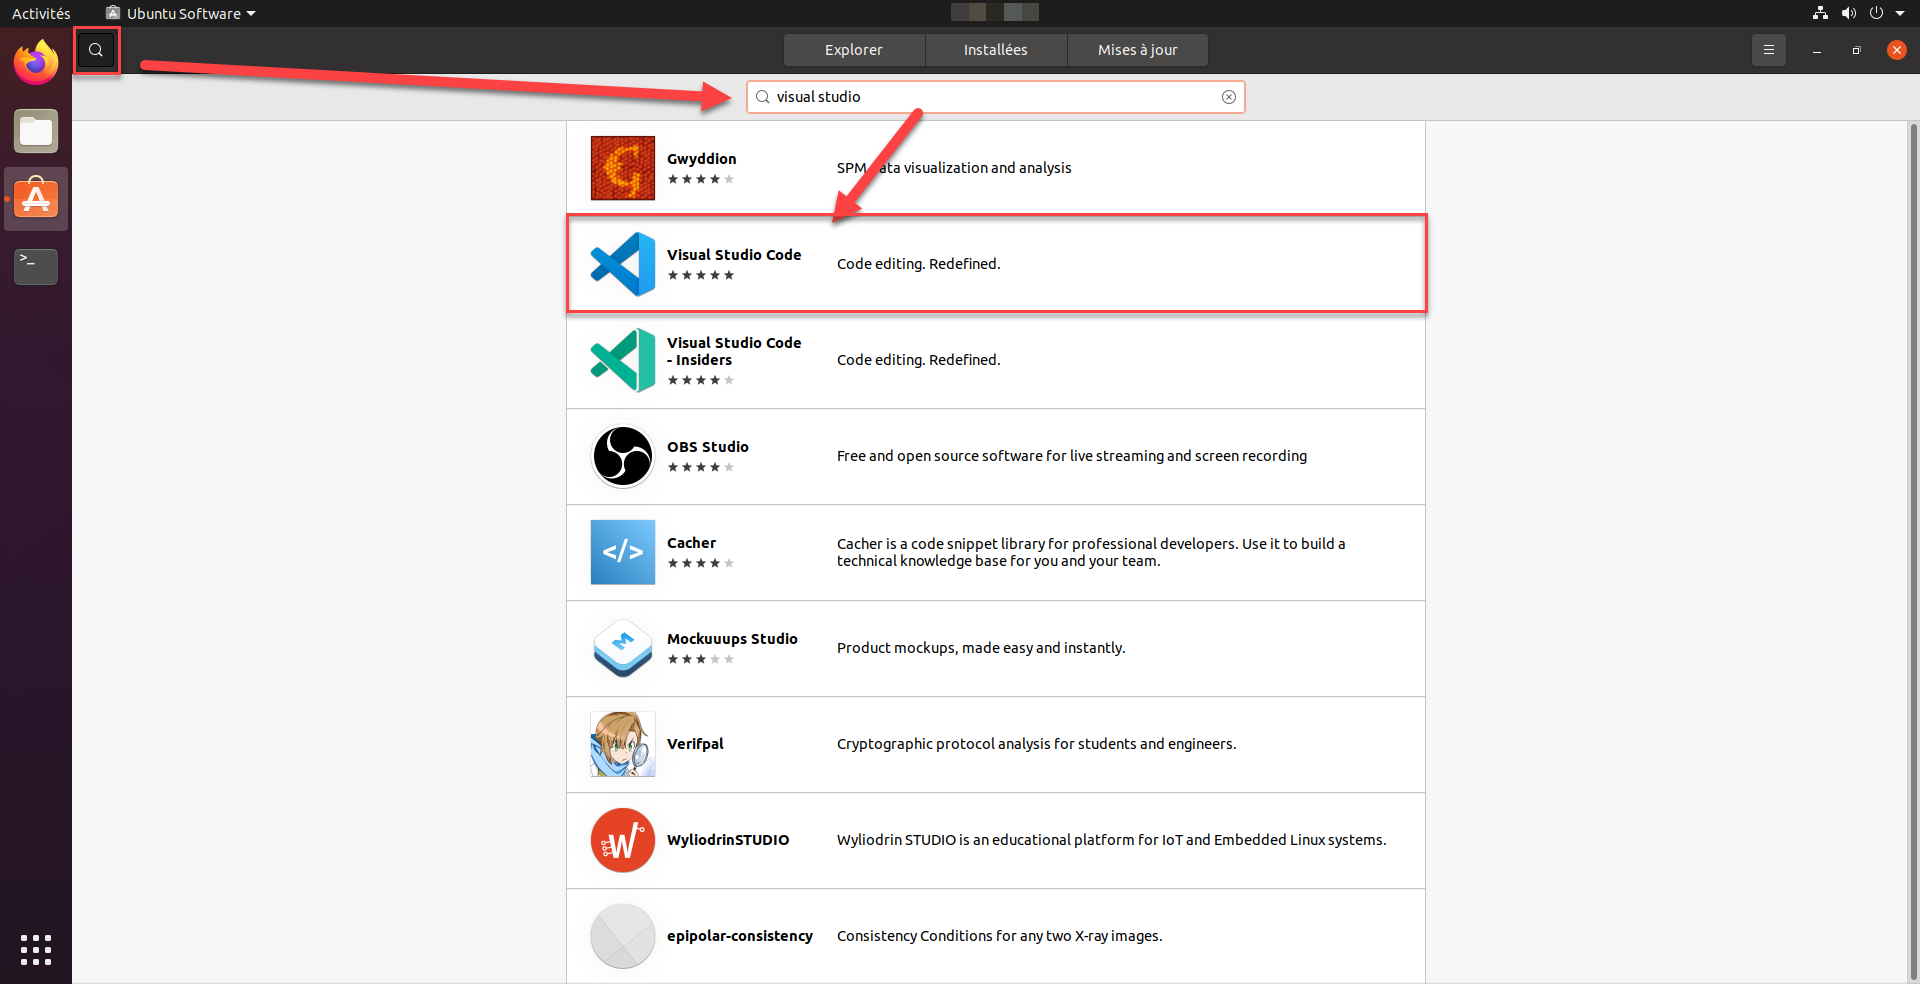
Rechercher Visual Studio Code
Cliquer sur la loupe, pour accéder à la zone de recherche, entrer visual studio et cliquer sur l’application VIsual Studio Code.
Installer Visual Studio Code
Sur la page de l’application, cliquer sur le bouton Installer.

Entrer le mot de passe de votre session
Entrer le mot de passe de votre session et cliquer sur S’authentifier.

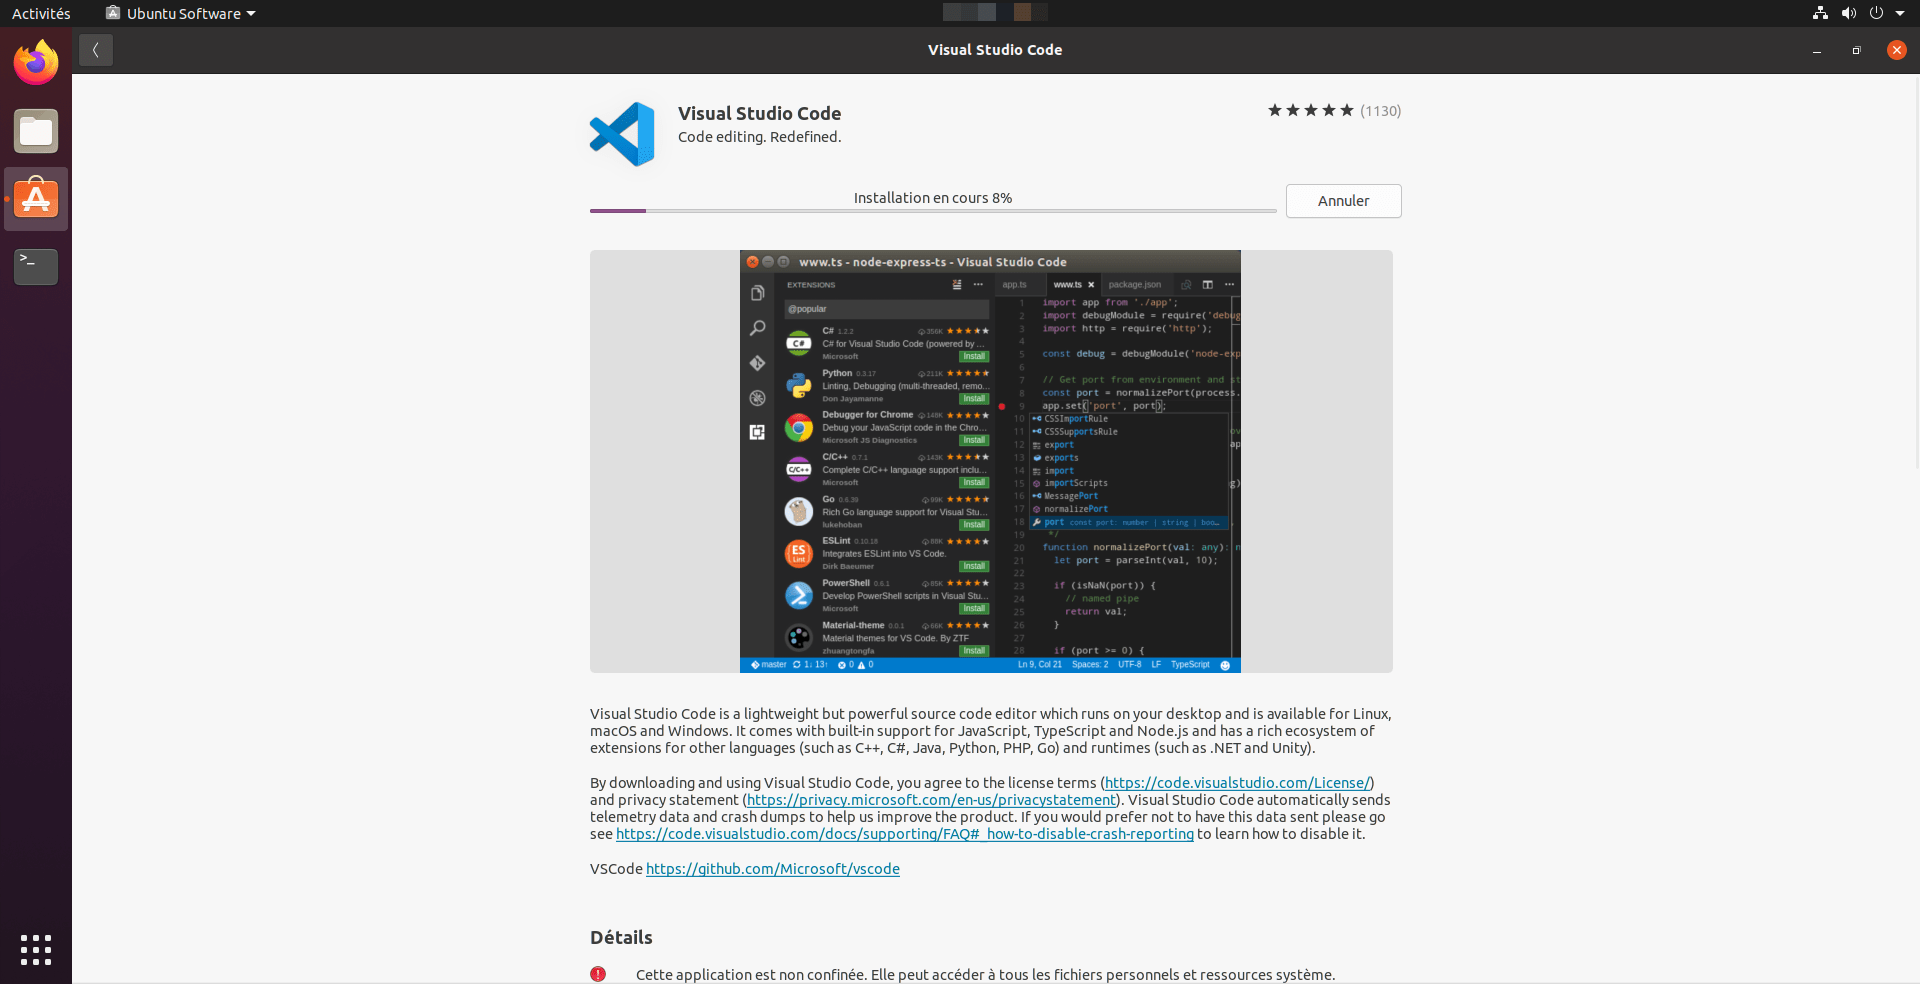
Patienter pendant l’installation de Visual Studio Code sur Ubuntu
Patienter durant le téléchargement et l’installation de l’application.
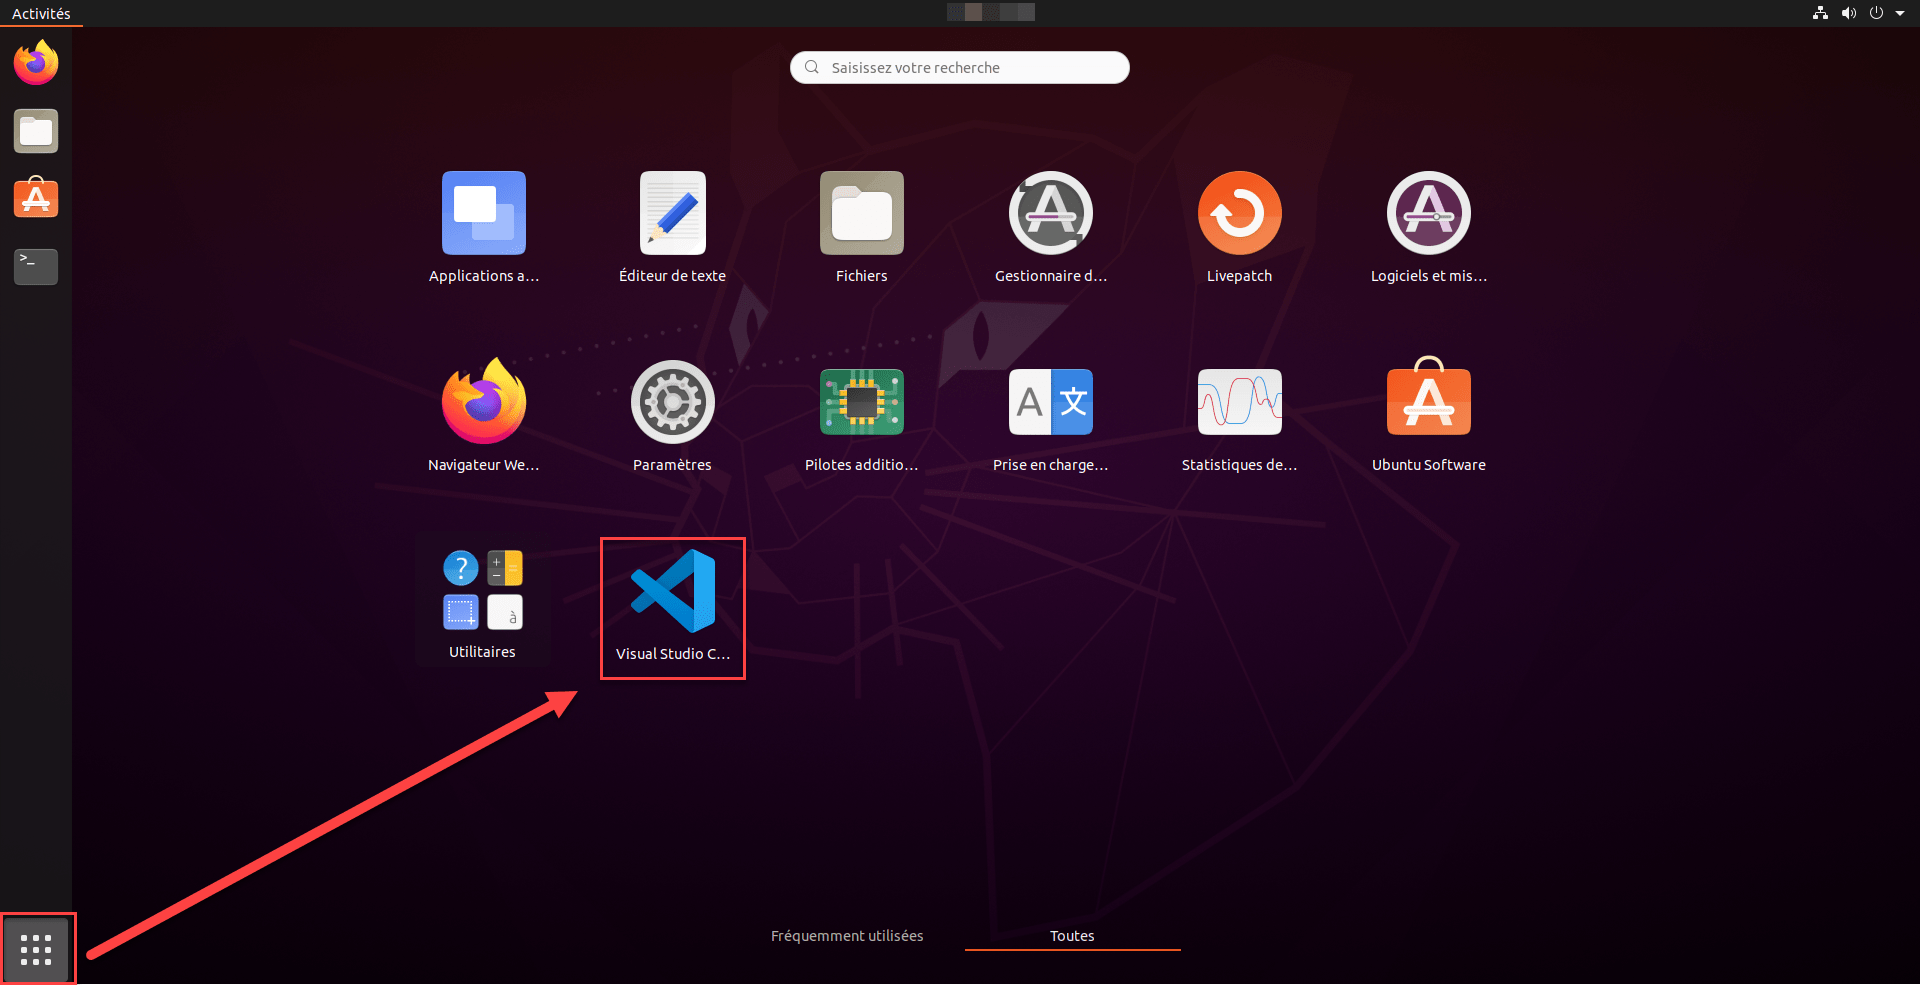
Ouvrir Visual Studio Code
Une fois l’installation terminée, fermer Ubuntu Software, cliquer sur l’icône Application pour accéder aux programmes et cliquer sur l’icône Visual Studio Code.
Commencez à coder
Vous pouvez coder avec Visual Studio Code sur Ubuntu.

