Table of Contents
Introduction
In this tutorial, I will explain how to apply quotas on a file server with the File Server Resource Manager.
A quota is a quantity (volume) of disk space allocated to a folder, it can be applied for audit purposes (conditional), it can be exceeded or strict (unconditional).
By default, it is possible to apply quotas at the disk level, to apply a quota at the level of a folder, it is necessary to install the Resource Manager role of the file server.
Quotas can be used to limit the space available in personal folders or on a share for example.
Create a quota template
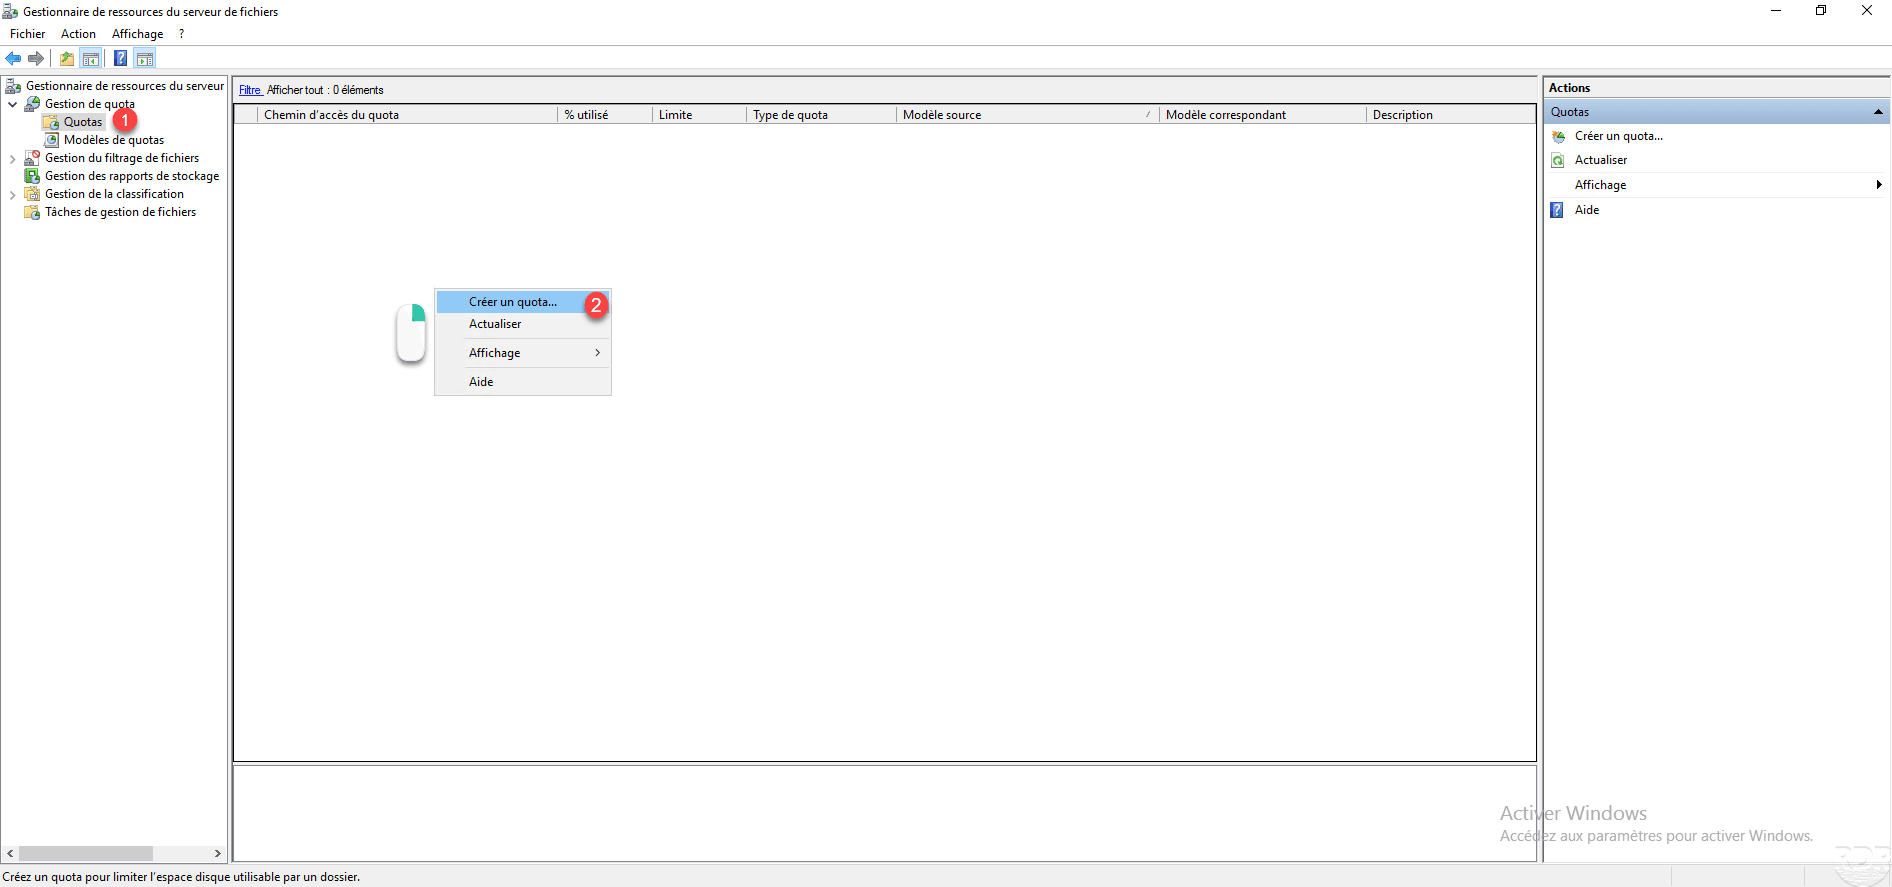
The first step will be to create the quota in the administration console of the File Server Resource Manager. Open the console and go to the Quota management node 1.
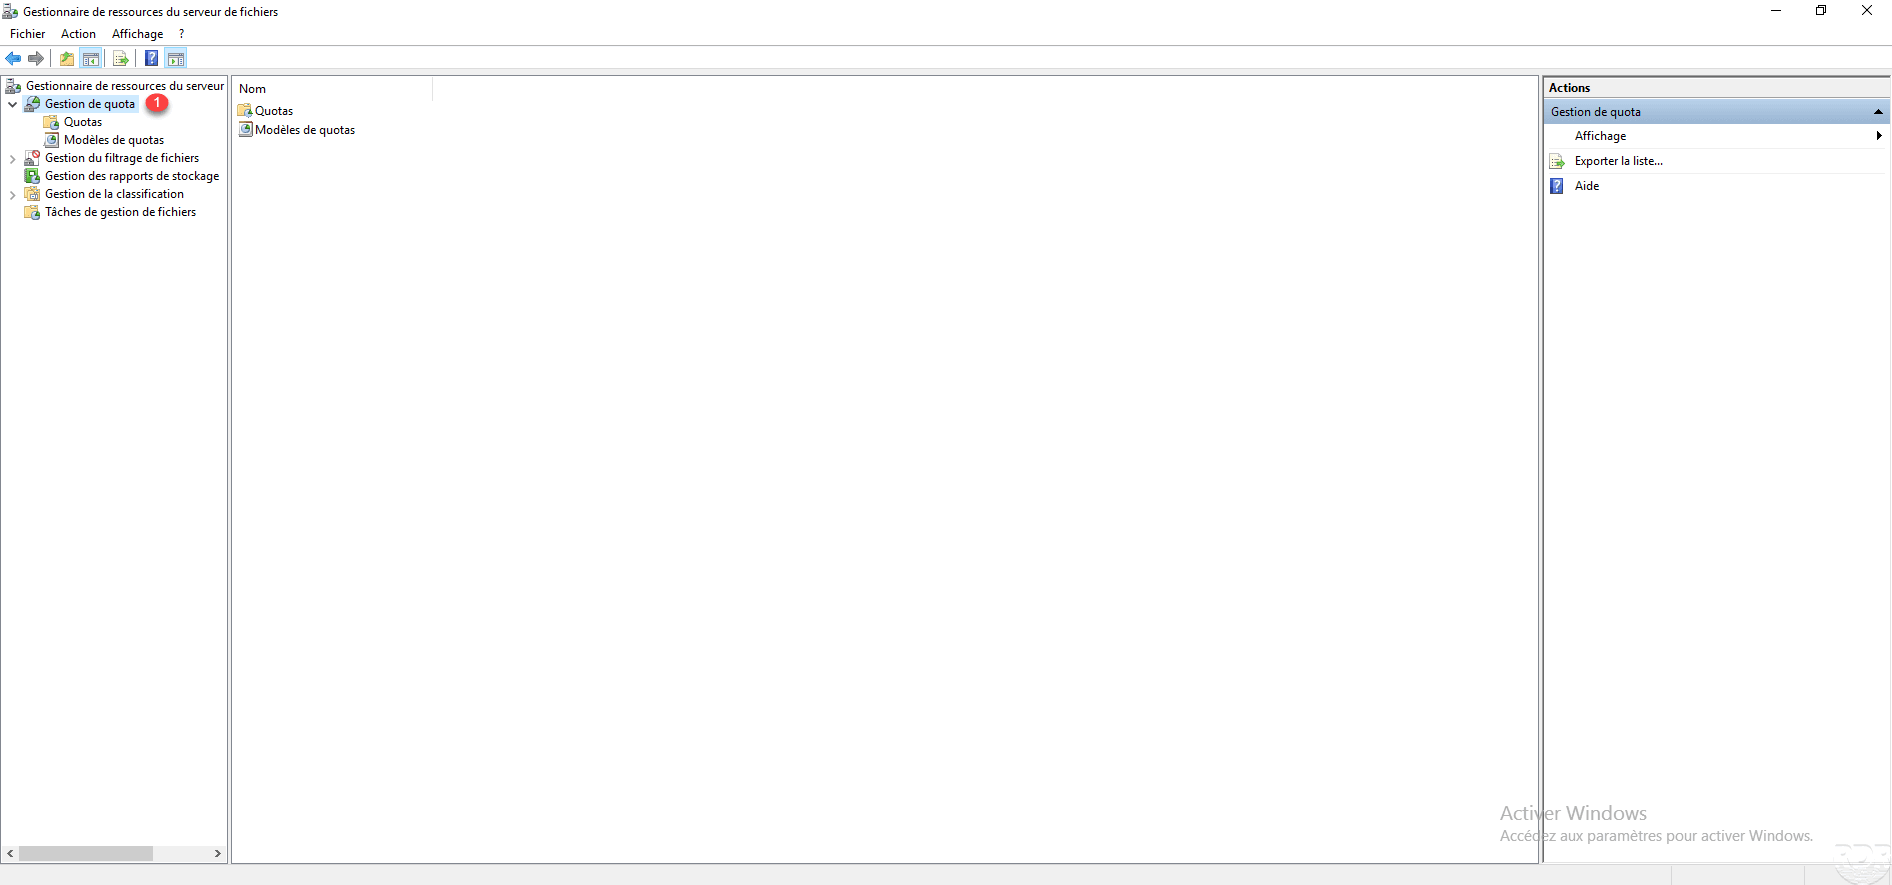
On the screenshot above, we can see that the node contains two folders :
– Quotas: contains all the quotas applied on the server to folders.
– Quota models: contains the models that can be applied, by default several models are available.
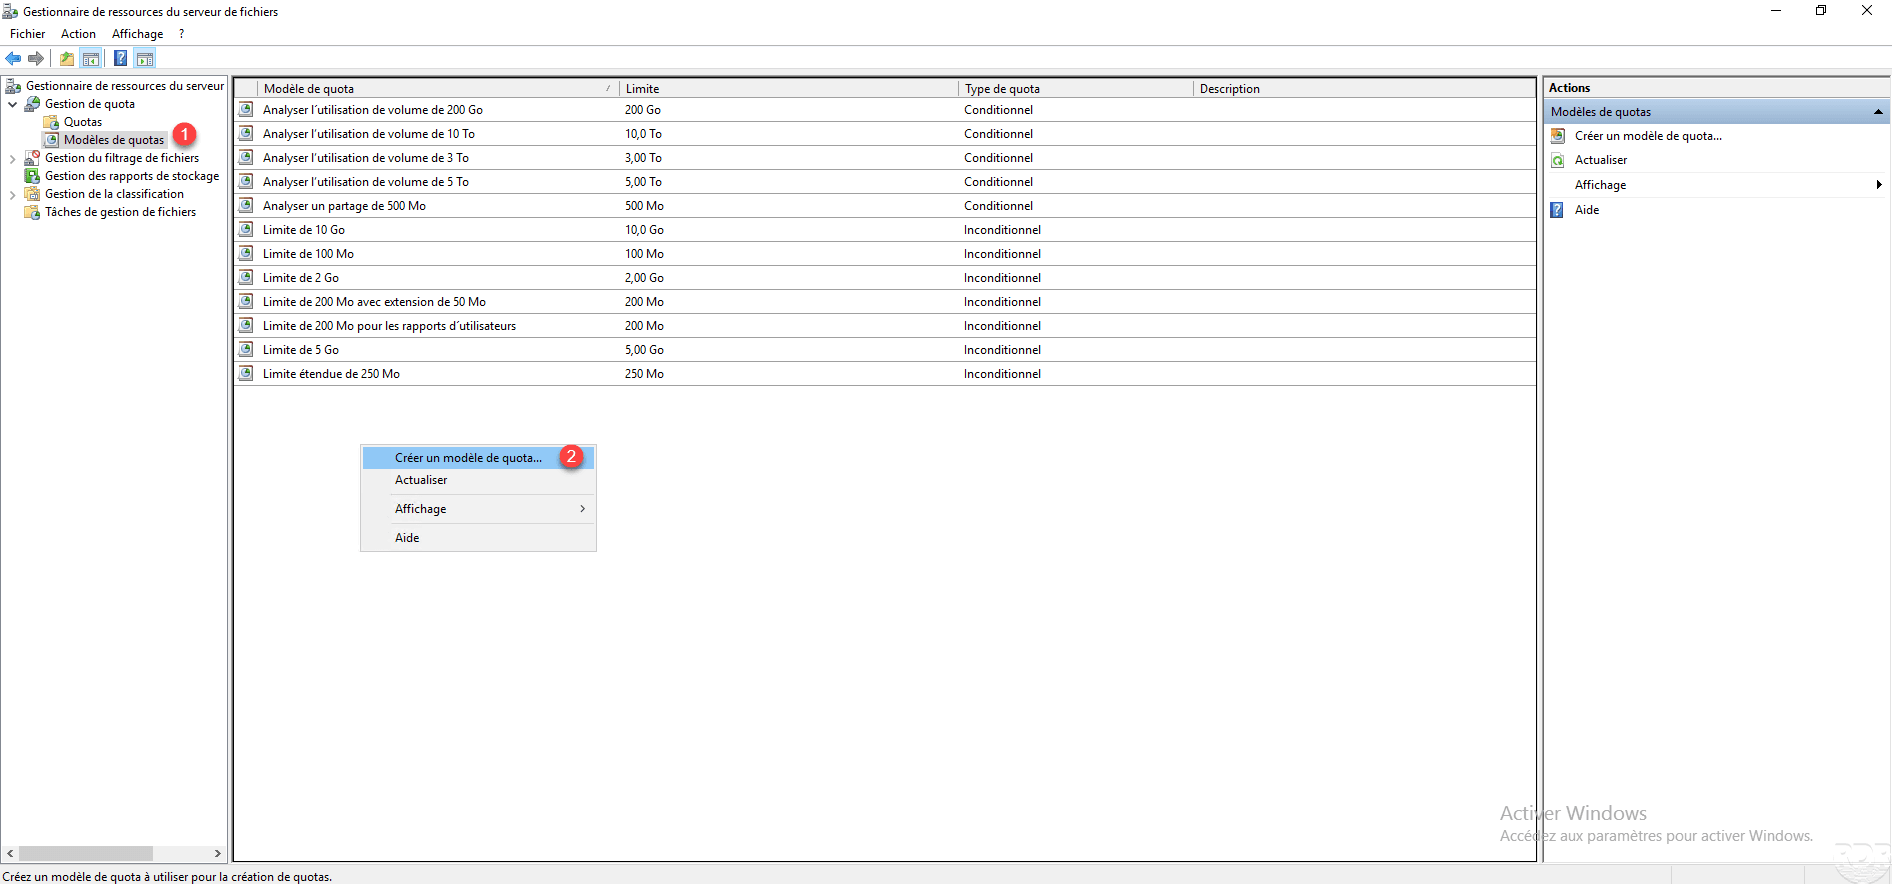
Go to Quota templates 1 and in the central area, right click and click on Create quota template 2.
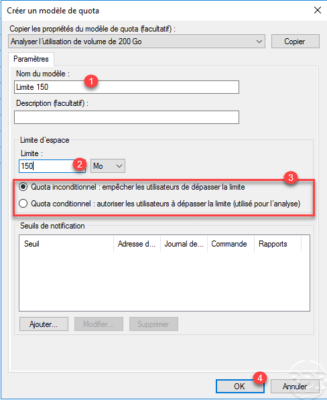
Configure the new quota by indicating the name of the model 1, the limit 2, choose the type (unconditional or conditional) 3 and click OK 4 to create it.
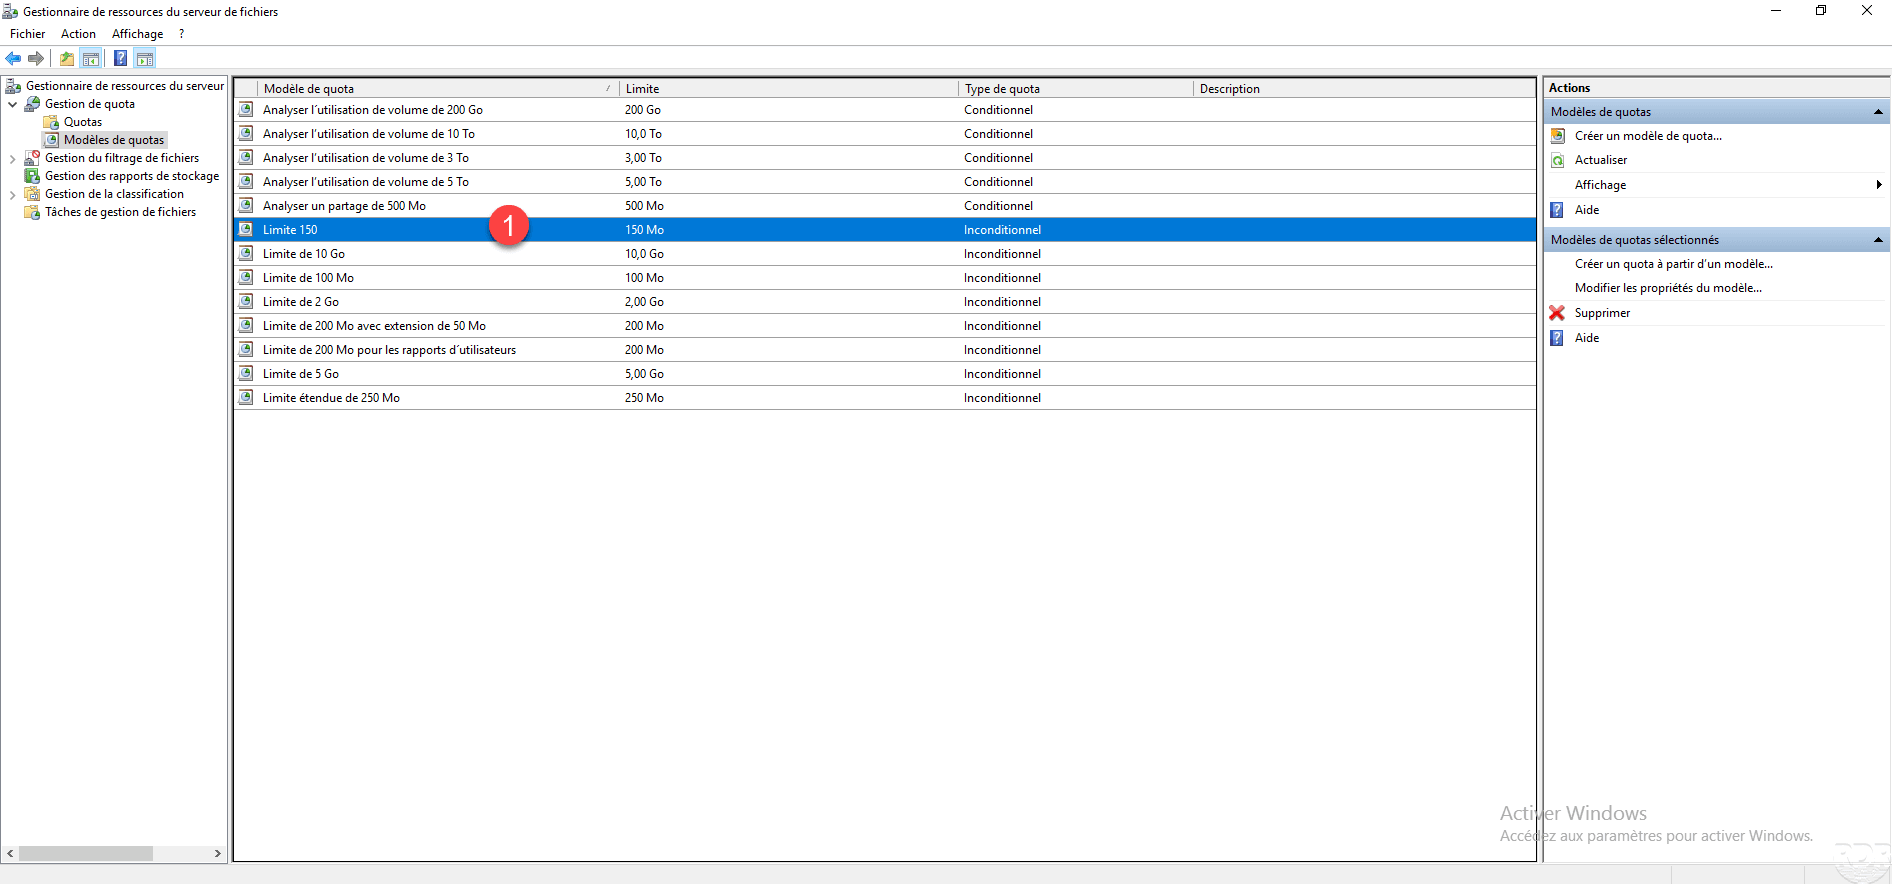
The model 1 is added to the list.
Apply a quota
In this part, we will see how to apply a quota on a folder.
The application of a quota can be done in a way :
- On a folder in a global way, the quota will be applied to all the elements (files and folders) containing it, this type of application is made on a share for limited size.
- On the sub-folders at the first level individually, this type of application is made on the locations of profiles for example.
Applying a quota to a folder – sharing
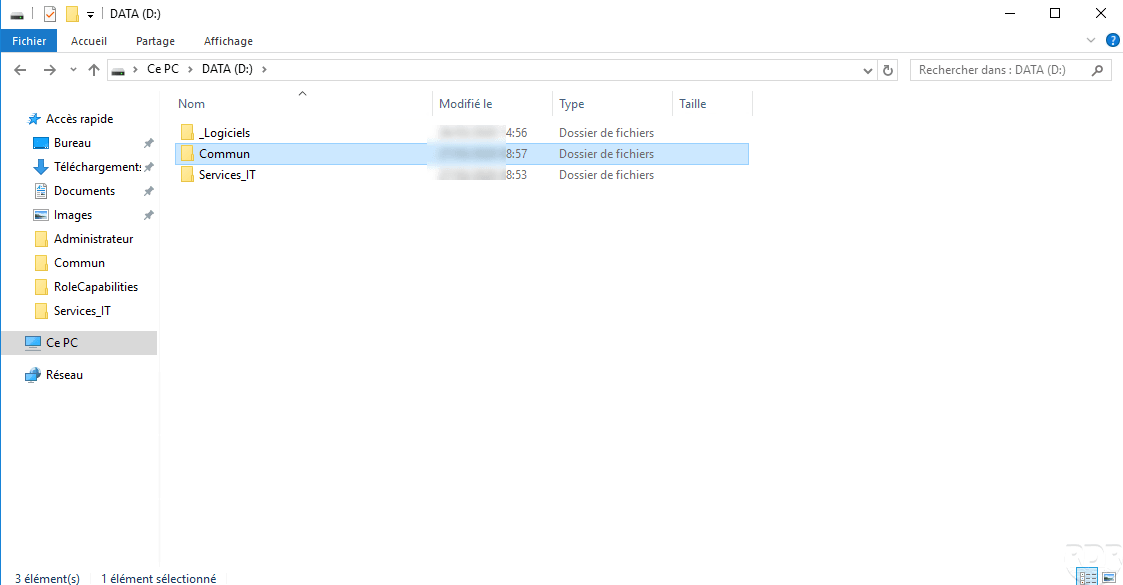
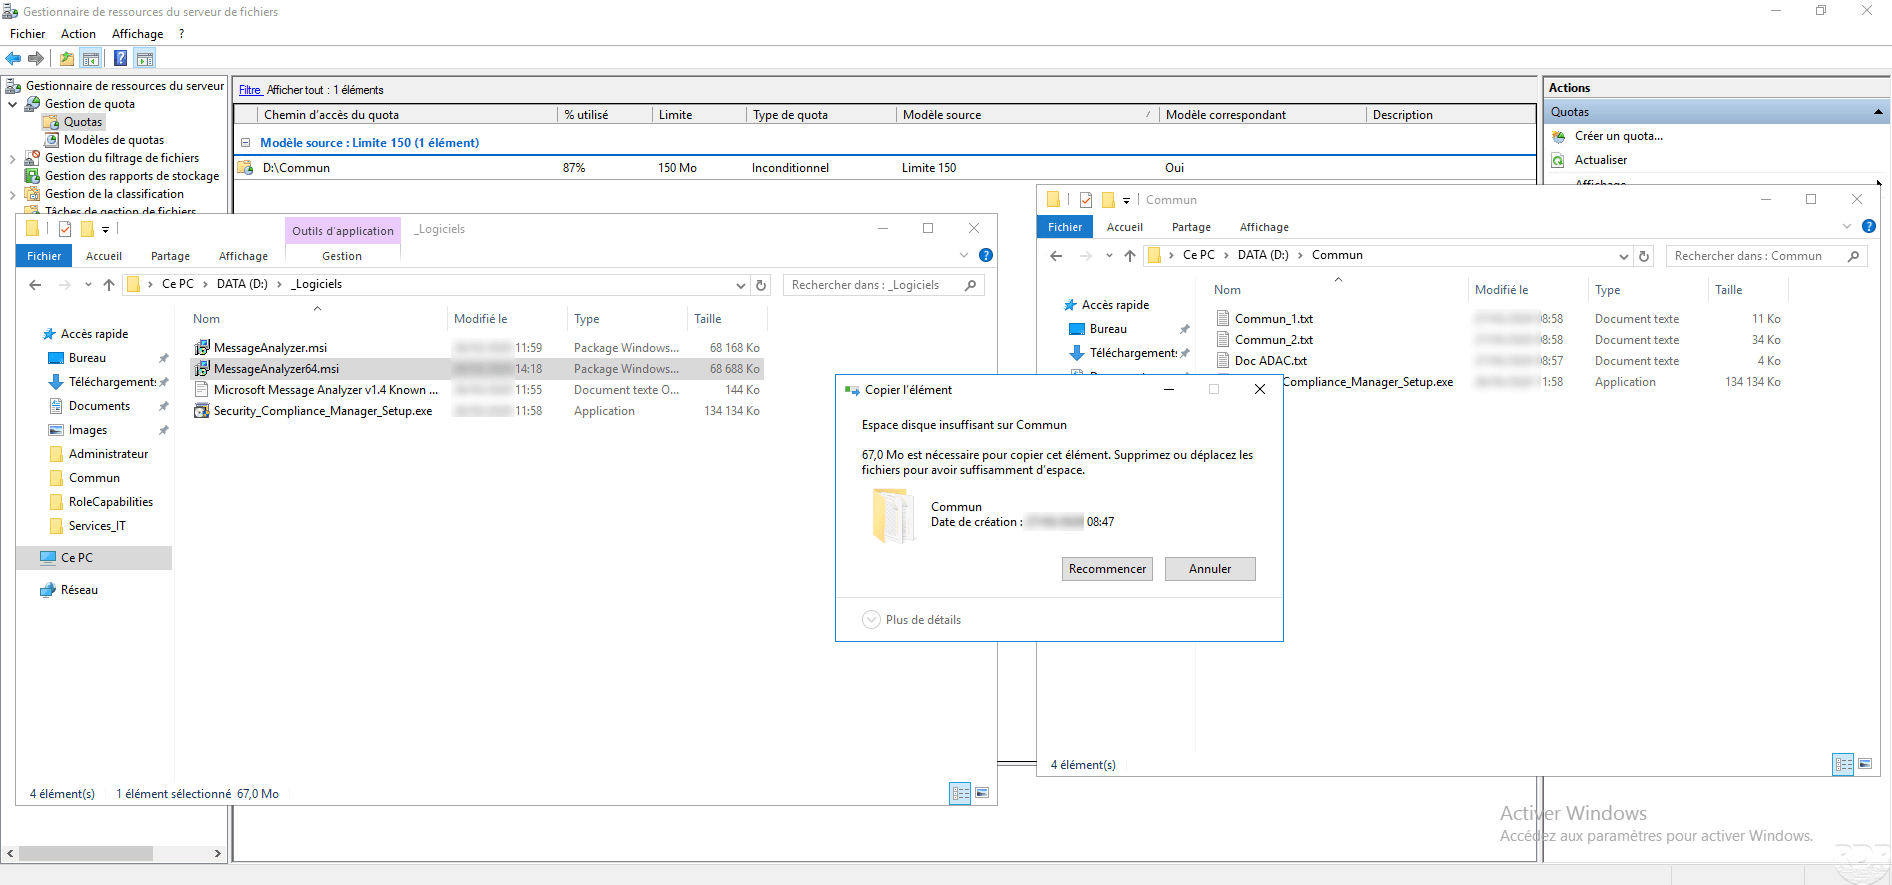
To illustrate the tutorial, we will apply the quota to the Common 1 folder (global sharing for the whole company).
From the FSRM console, go to Quotas 1, right click in the central area and click on Create a quota 2.
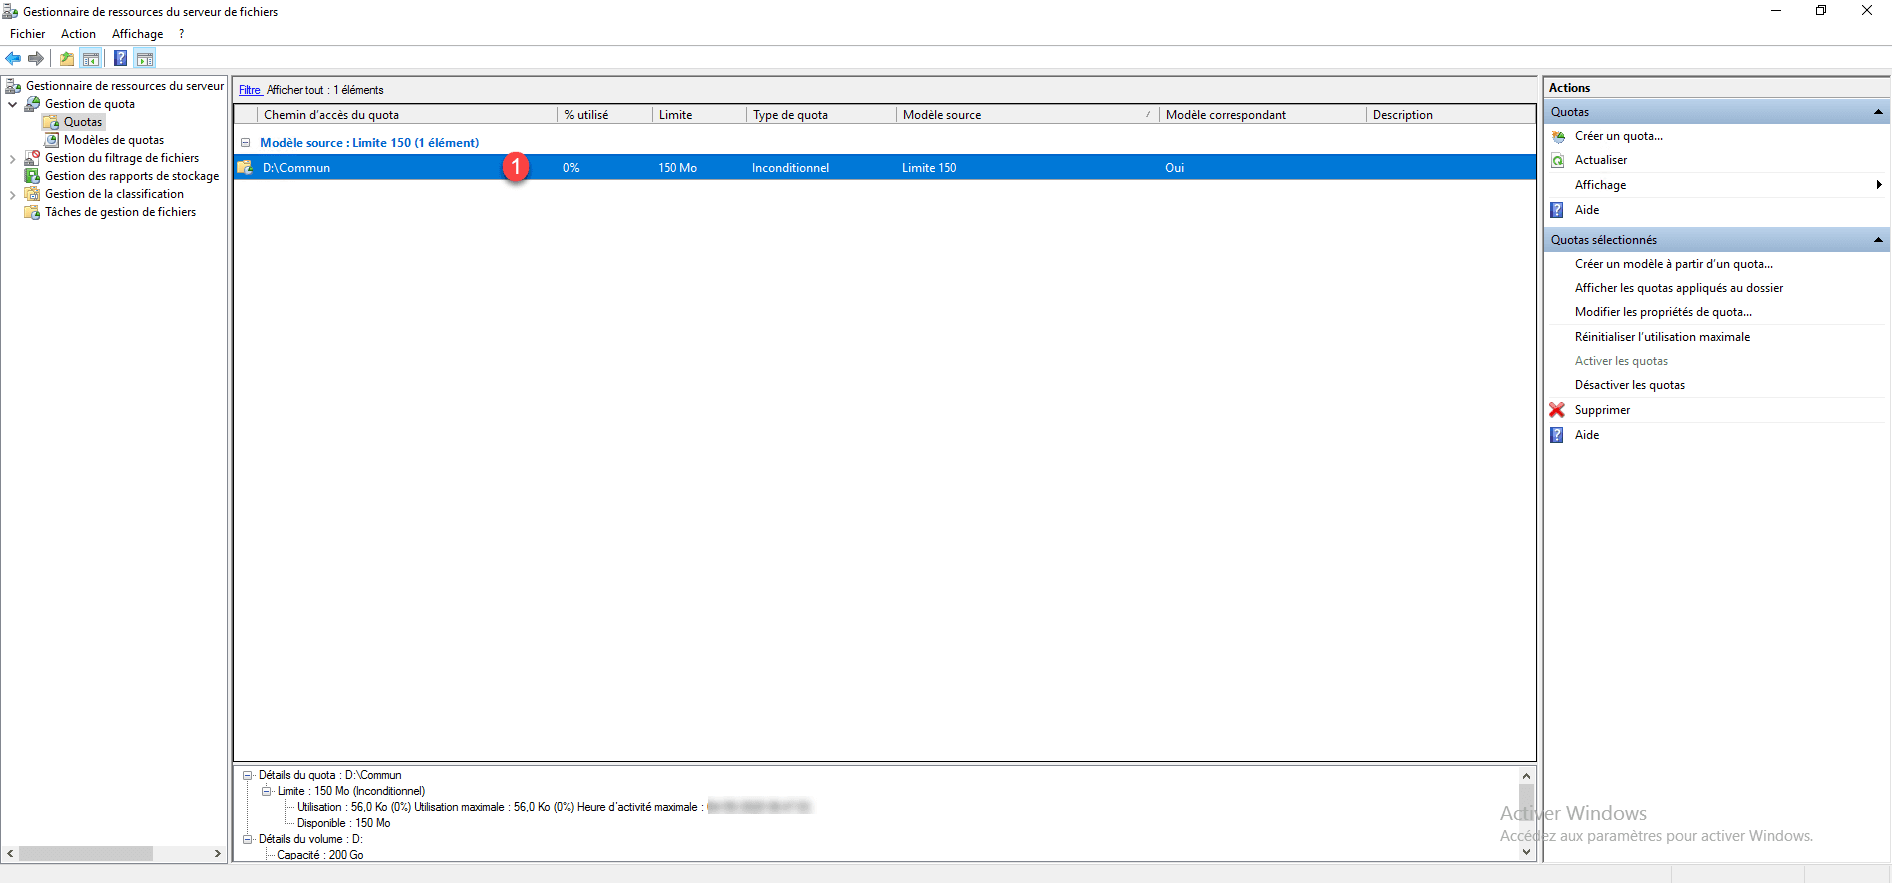
In the quota creation window, indicate the path 1 where it is applied, select Create a quota on the path 2, choose the model 3 and click on Create 4.

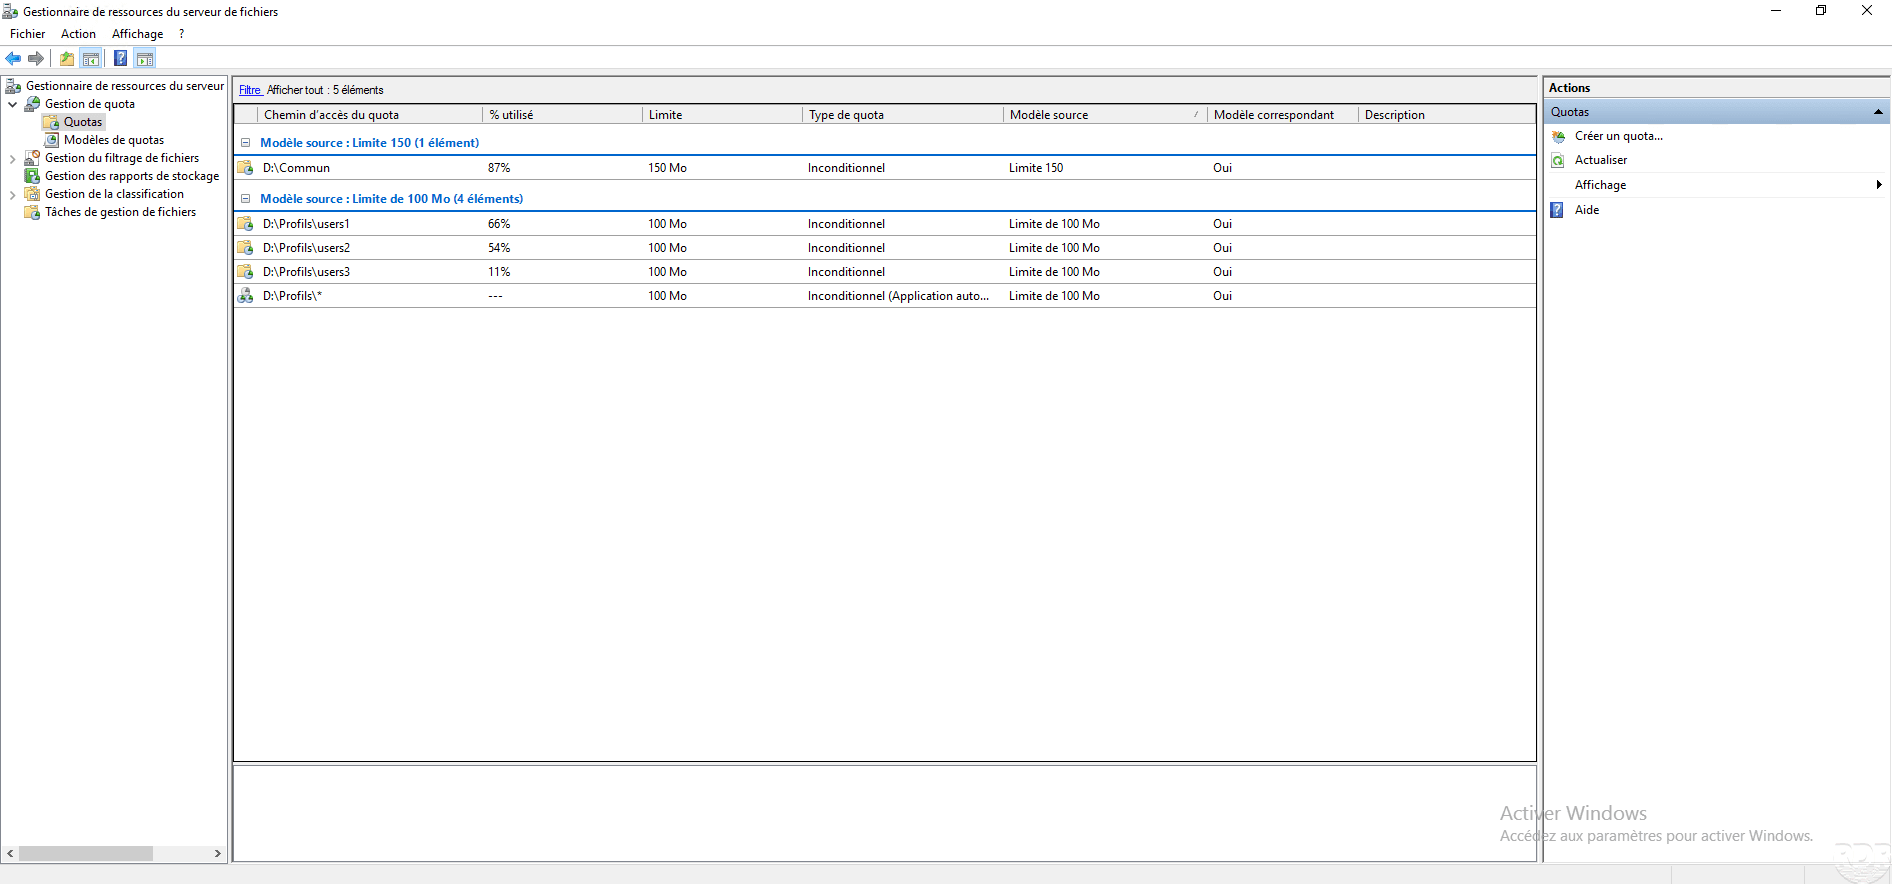
The quota 1 is added to the file server and we can see from the list, the percentage used.
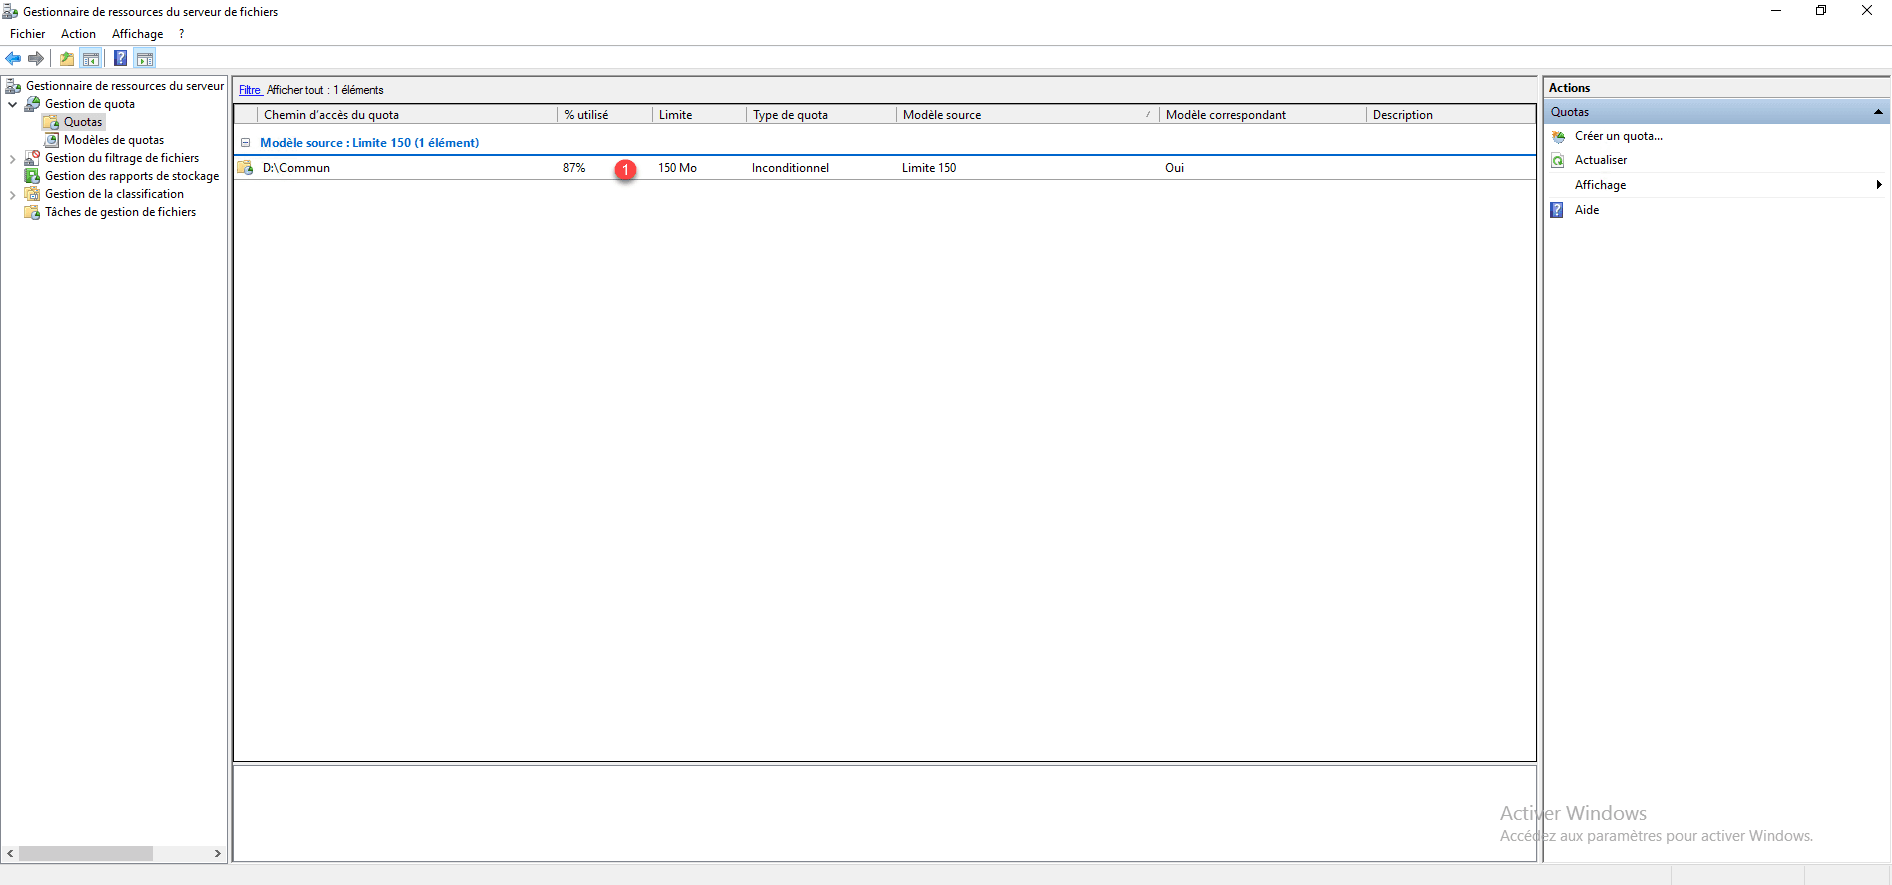
In order to test the quota, copy a file to the folder and refresh the console to see the percentage 1.
To check the blocking, copy another file of a size sufficient to exceed the quota, an error message is displayed indicating that the disk space is insufficient.
Apply a quota to a set of subfolders – profile folders
The other common use of quotas is limiting the size of the user profile.
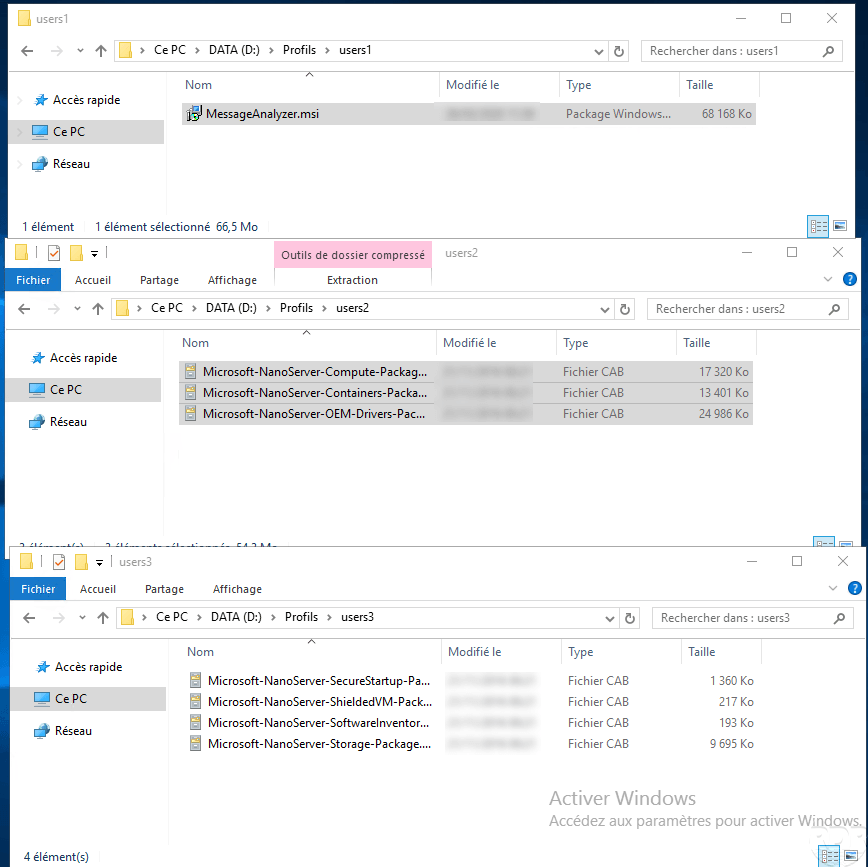
To illustrate the application of this use, I created a Profiles folder, which contains 3 folders, one per user. The goal is that each user has an individual limit.

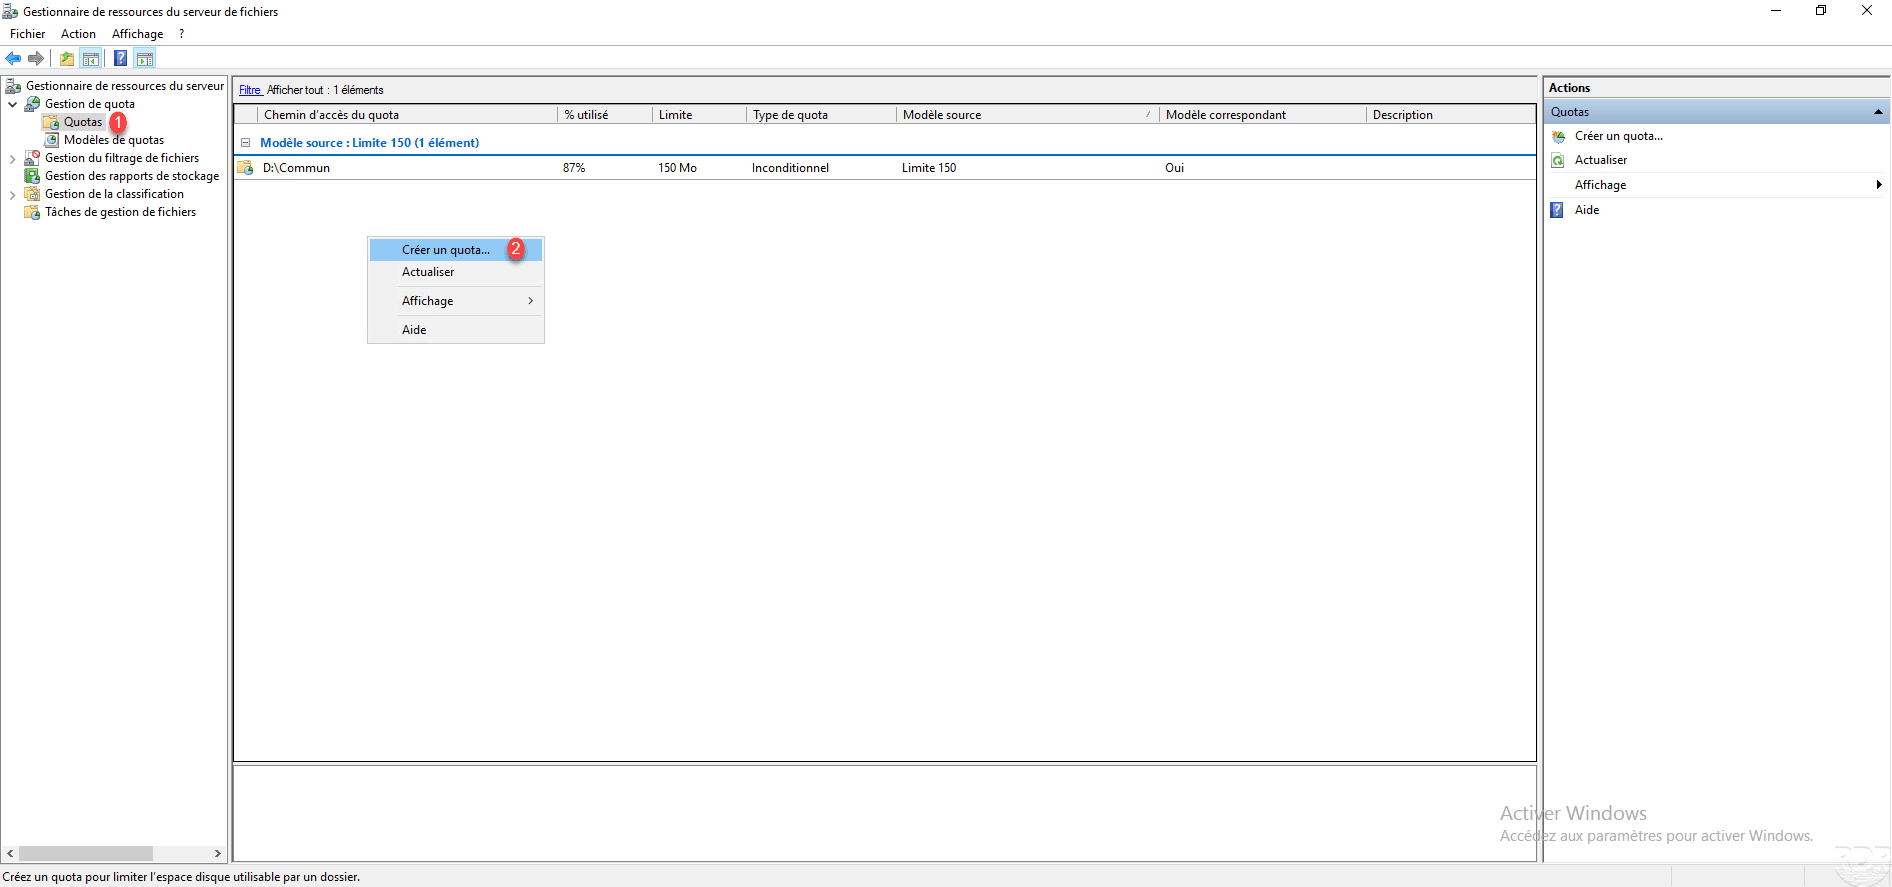
From the administration console of the File Server Resource Manager role, go to Quotas 1, right click in the central area and click on Create quota 2.
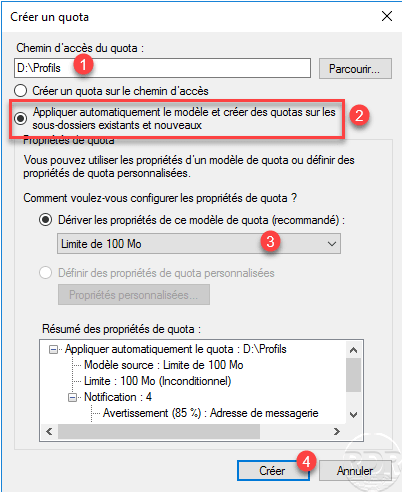
Choose the root folder 1, choose the option Automatically apply the template and create quotas on existing and new subfolders 2, then select the quota template 3 and click on Create 4.
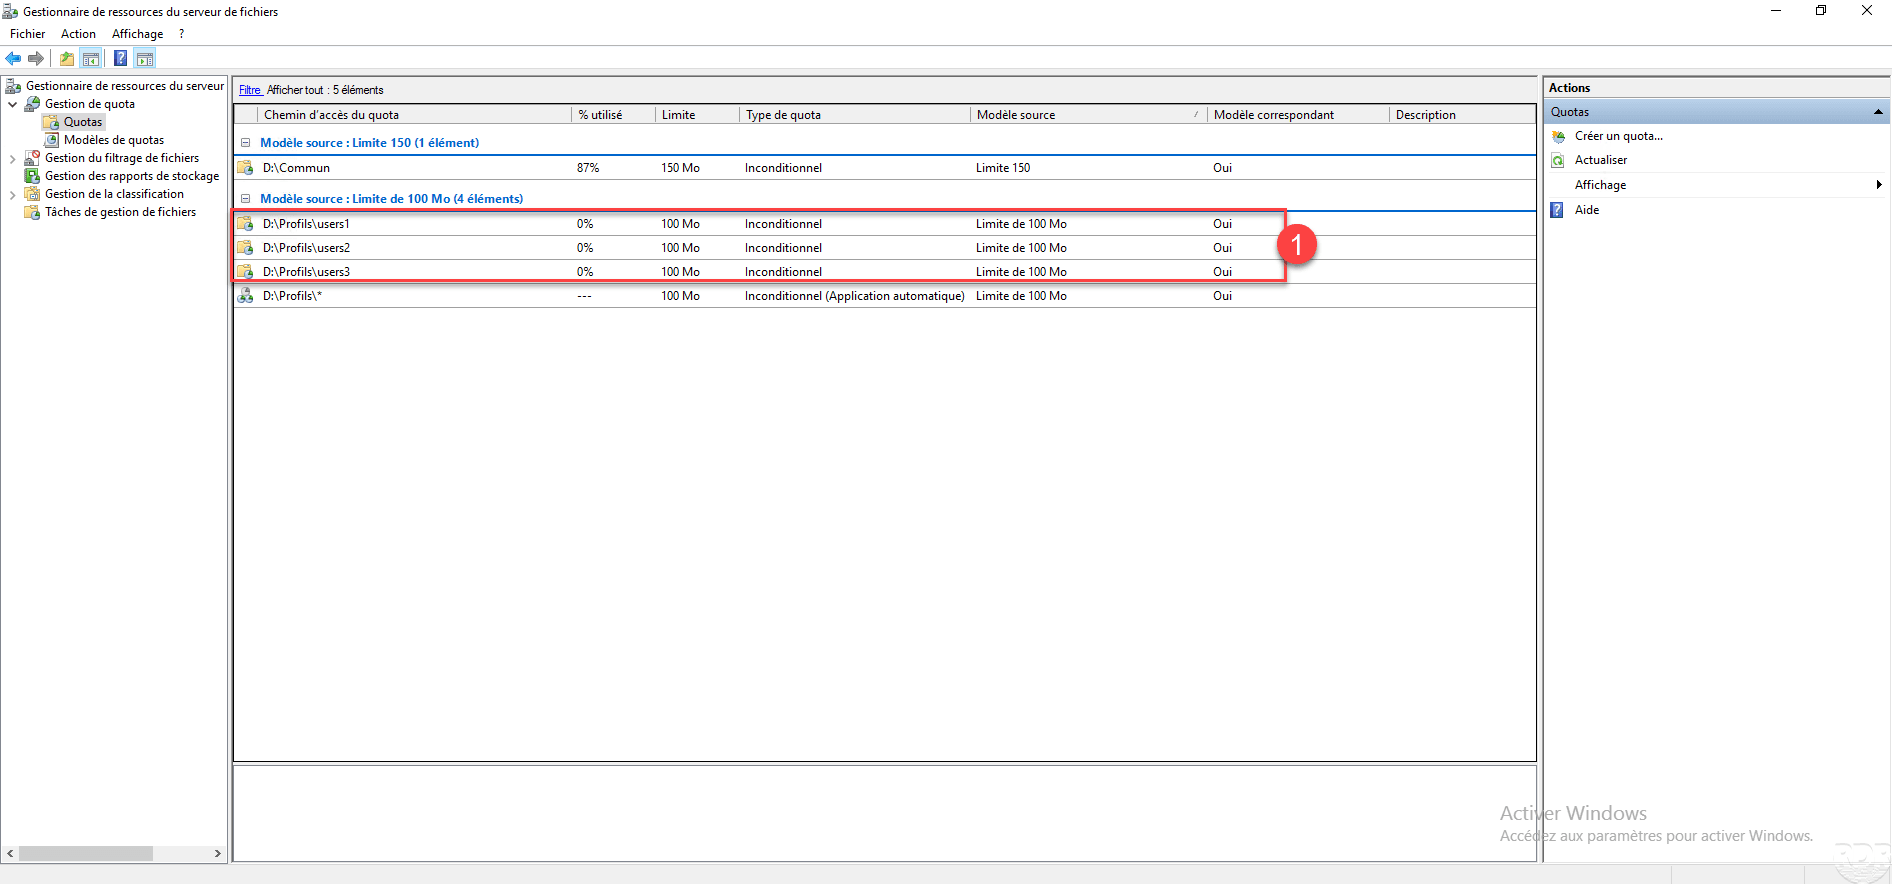
The quota is created 1.

Refresh the console to see the quota by sub-folders 1.
After depositing different files in the user profiles, update the console for evolution.
Quotas can be managed using Cmdlet Powershell.
