Table of Contents
Introduction
In this tutorial, we will see how to modify the subnet mask of a DHCP scope on Windows Server.
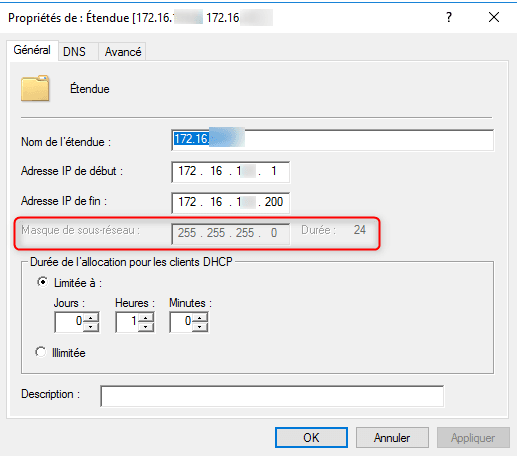
If we look in the properties of the scope, we realize that it is not possible to modify the subnet mask.
The “modification” of the DHCP scope is done in several stages:
- Exporting the DHCP scope configuration
- Modification of the configuration with the new subnet mask
- Deleting the DHCP scope
- Importing the configuration
Preparation
Before modifying the scope and the subnet mask, the change must be prepared.
The first step is to validate the new scope and make sure that the change of subnet mask will not collide with an existing scope.
If we take the example of the range 172.16.123.0/24, which limits the number of addresses available to 254 and we want to double the number of addresses available, we will therefore switch to a mask in / 23 which will give the range 172.16.122.0 – 172.16.123.255 and not the range 172.16.123.0 – 172.16.124.255.
To guide you in calculating the IP range, several calculators are available on the Internet:
- List the equipment with fixed IP addresses to change the subnet mask.
- Check the routing equipment (Routers / Switchs / Firewall ….).
- Reduce the duration of DHCP leases on the beach.
- Schedule the change at a time when the load is light.
Modify the subnet mask
Manipulations are to be done from the Powershell command prompt in administrator, you can either use Powershell cmdlets or the netsh utility.
If Windows is in a language with accented characters, it is imperative to use a PowerShell command prompt even for netsh commands, the export of the configuration contains accented characters which are not supported by a command prompt classic.
Manipulations are to be done on the DHCP server.
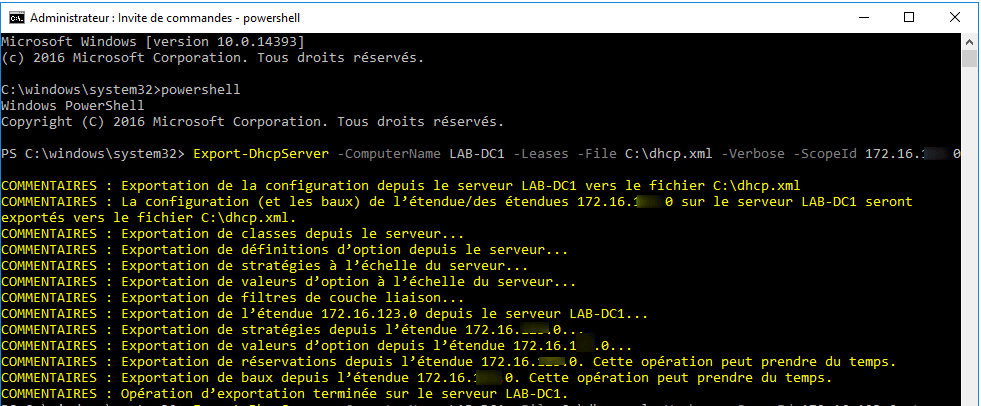
Export the scope configuration
Netsh :
netsh dhcp server \\NAME-SERVER-DHCP scope 172.16.X.X dump > C:\dhcp.txt

PowerShell :
Export-DhcpServer -ComputerName NAME-SERVER-DHCP -Leases -File C:\dhcp.xml -Verbose -ScopeId 172.16.X.X
Modify the scope configuration
Netsh : open the configuration file and modify the scope mask, then save the modifications.
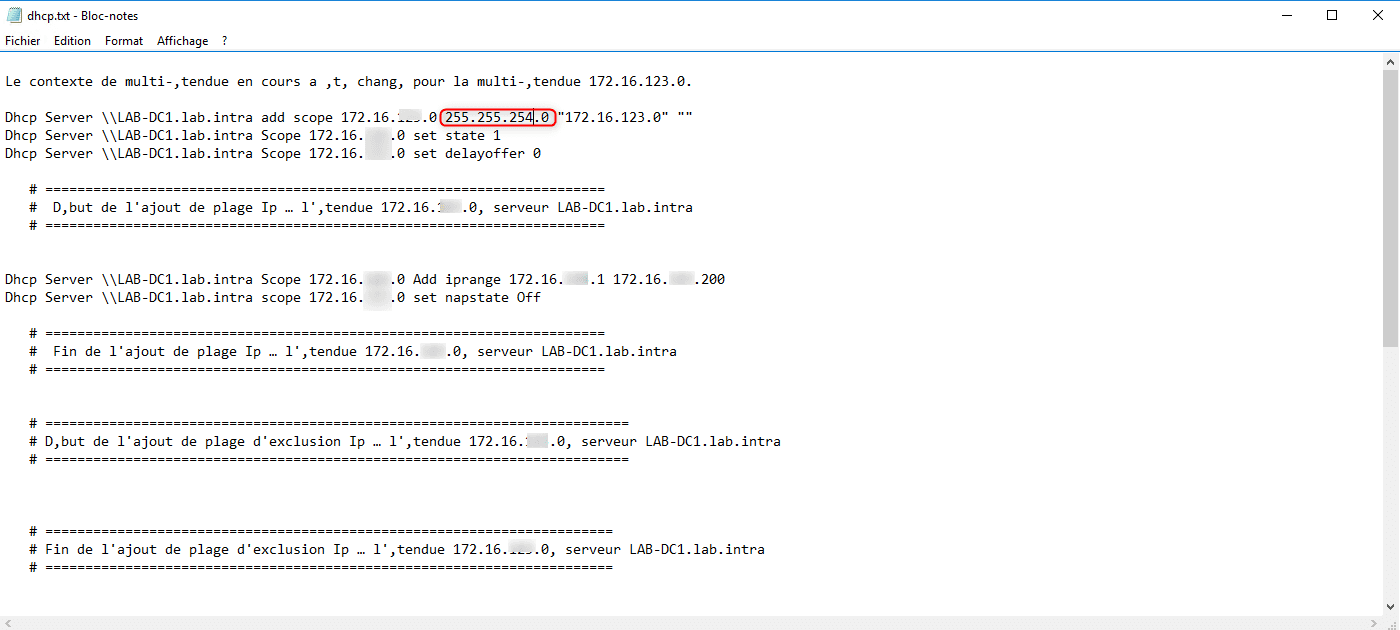
PowerShell: open the configuration file and modify the scope mask, then save the modifications.

Delete scope
You must now delete the scope of the server before importing the modified configuration file.
Right click on the range 1 and click on Delete 2.

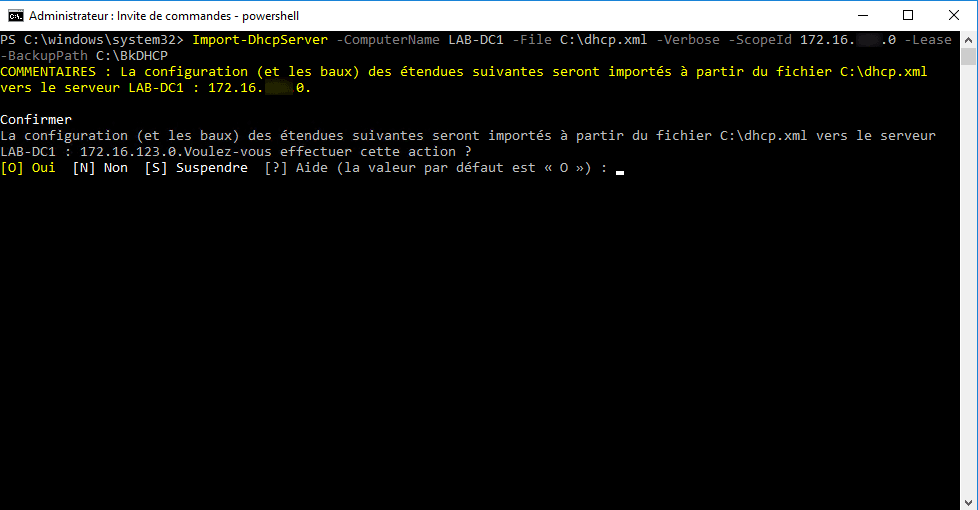
Import new scope configuration
Netsh :
netsh exec c:\dhcp.txt

PowerShell :
Import-DhcpServer -ComputerName NAME-SERVER-DHCP -File C:\dhcp.xml -Verbose -ScopeId 172.16.X.X -Lease -BackupPatch C:\BkDHCP
Confirm the import by confirming the action.
Validate the import of the scope
Check in the console that the scope is imported.

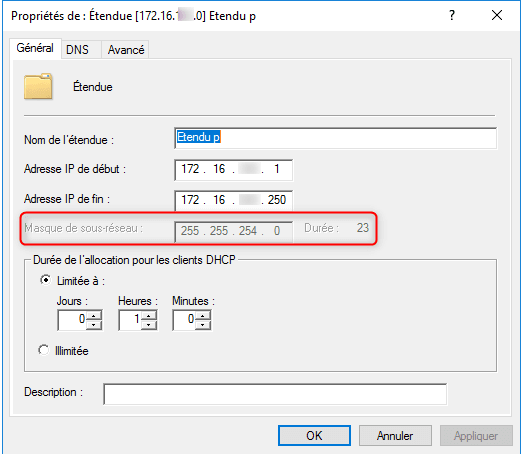
Check in the properties that the new mask is properly applied.
Conclusion
If you are using a DHCP failover configuration, you must reconfigure the scope failover.
All you have to do is modify the equipment with a fixed configuration.

Import-DhcpServer -ComputerName NAME-SERVER-DHCP -File C:\dhcp.xml -Verbose -ScopeId 172.16.X.X -Lease -BackupPatch C:\BkDHCP
there is a pb in BackupPatch, it’s a typo -> BackupPath