In this article, I will tell you about the Query Monitor plugin for WordPress, which will allow you to (re) take control of WordPress sites by analyzing behavior and applying optimization
Table of Contents
Introducing Query Monitor
Query Monitor is a WordPress development and optimization debugging plugin. Contrary to what the name of the plugin indicates, Query Monitor does not limit to SQL queries, it lets you know how the whole page was generated:
- HTTP request, rewrite rule, GET variable …
- SQL queries
- JS scripts and CSS sheets that were used
- Theme and template, you will be able to see which theme files have been searched and used
- Conditions that are validated, very useful for development …
- …
Query Monitor is the developer tools panel for WordPress. It allows debugging of database requests, PHP errors, hooks and actions, block editor blocks, queued scripts and stylesheets, HTTP API calls, etc. .
It includes advanced features like debugging Ajax calls, REST API calls, and user ability checks. It includes the ability to reduce much of its output by plugin or theme, allowing you to quickly determine which plugins, themes, or features are performing poorly.
Query Monitor strongly focuses on presenting its information in a useful way, for example by showing aggregated database queries grouped by plugins, themes or functions responsible for them. It adds an admin toolbar menu showing a preview of the current page, with full debugging information displayed in panels once you select a menu item.
Description officielle traduire en français
Install Query Monitor
The installation of the plugin is “relatively” simple, it is available on the office repository.
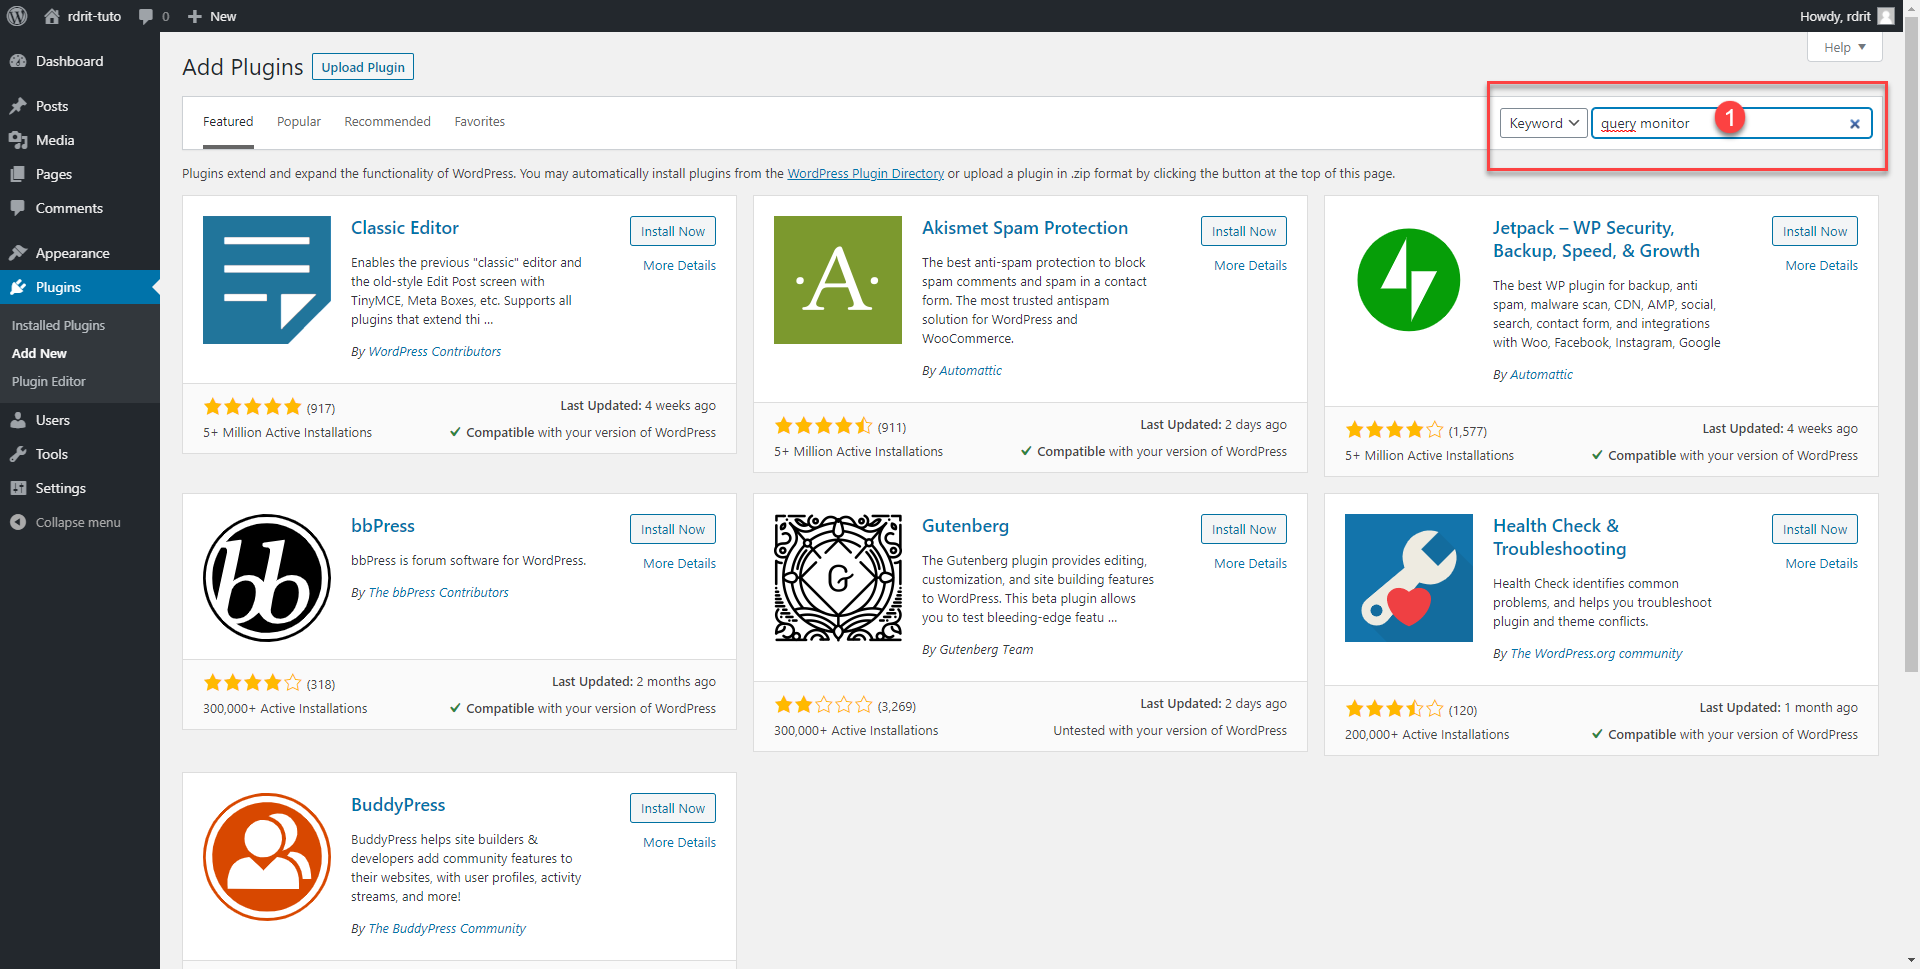
From the WordPress administration, go to Plugins 1 and click Add New 2.

In the search box, enter query monitor 1 and wait for the search result
Once the research is done, find the Query Monitor plugin and click on the Install Now 1 button.

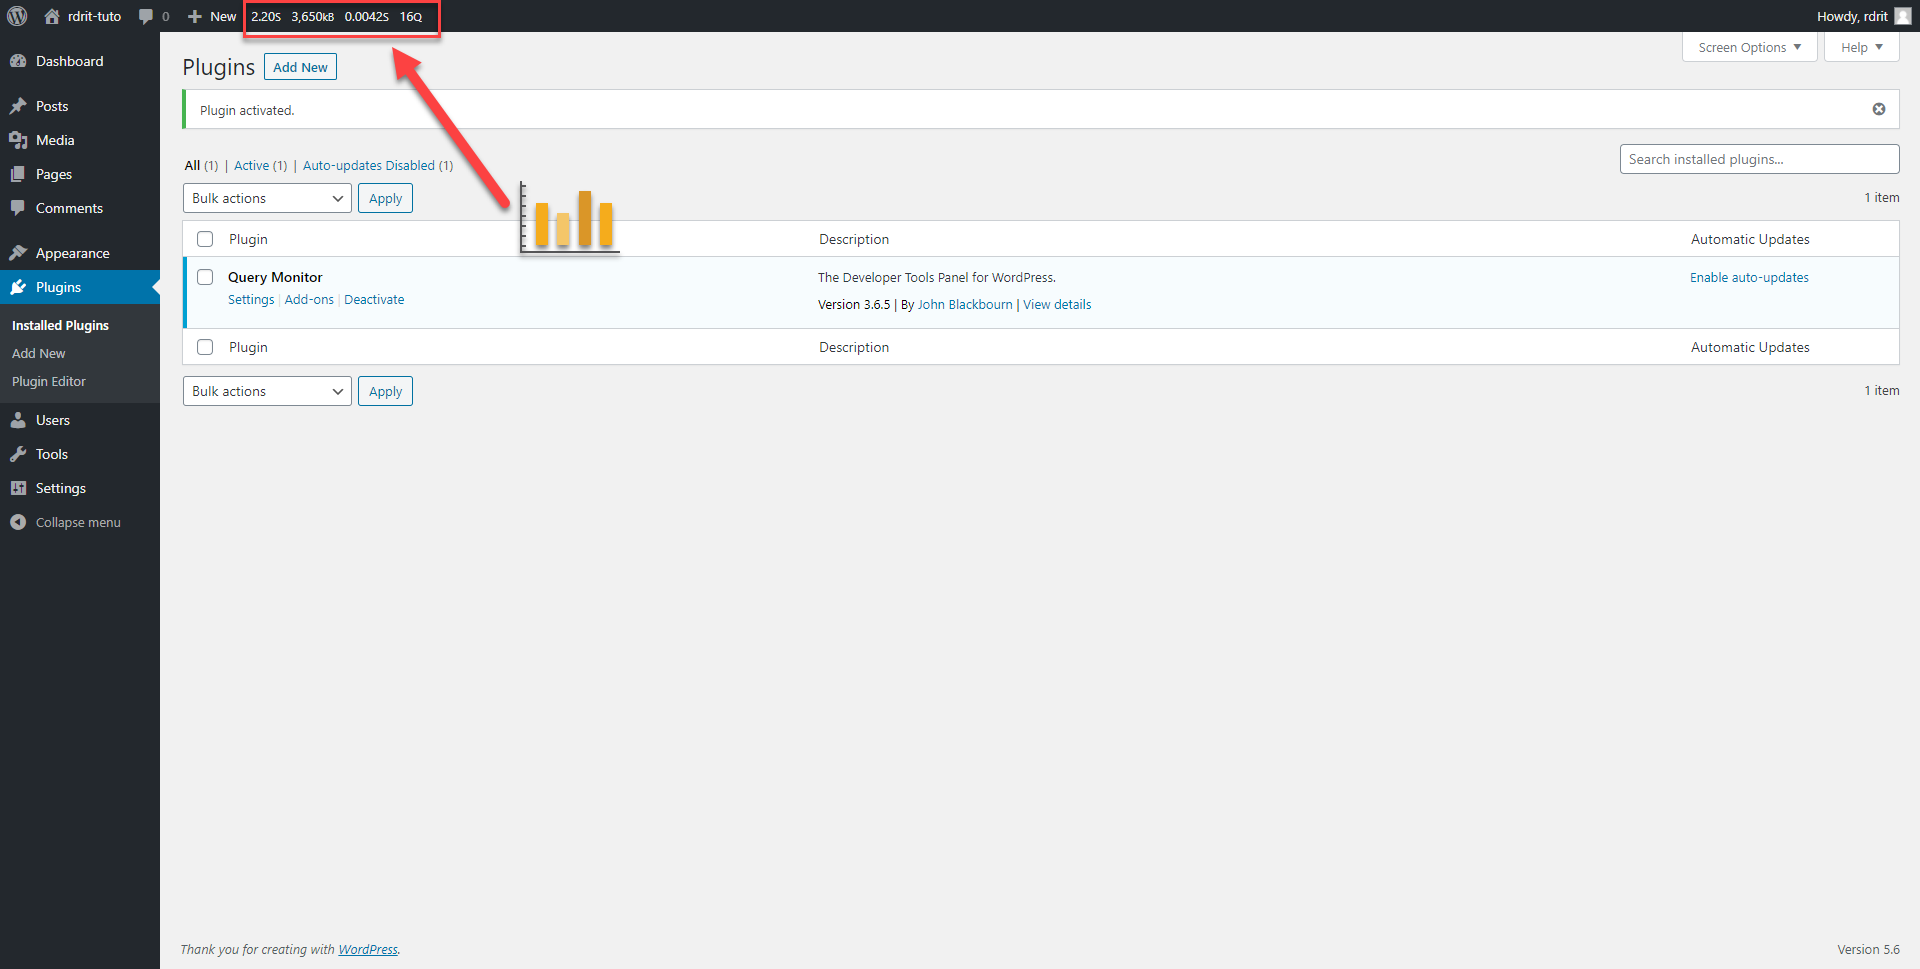
Query Monitor installed, you must now activate it, click on the Activate 1 button.

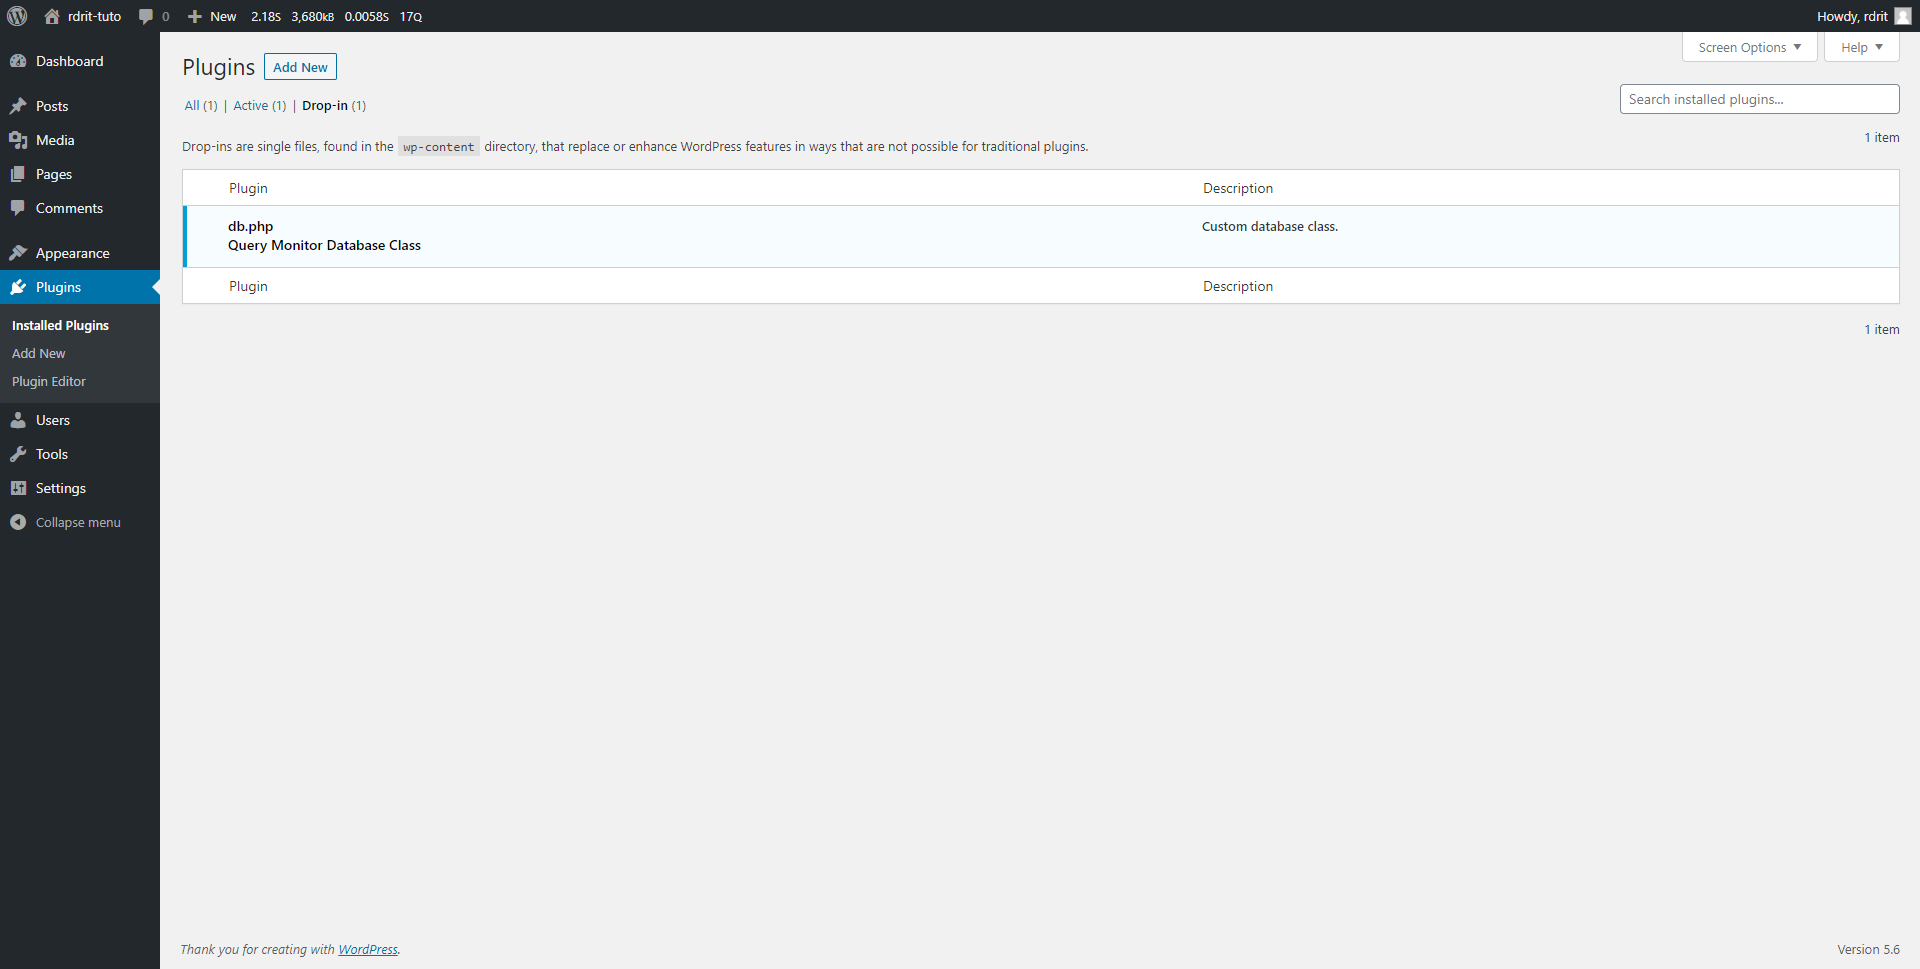
When the plugin is activated, WordPress redirects us to the management page of installed plugins, we can see that Query Monitor is installed and activated 1. In terms of filters, a new one is available Advanced (Drop-in) 2.
If you don’t have the advanced filter, I explain in the troubleshooting part of the tutorial how to solve the problem

We can see that Query Monitor adds a set of custom functions for accessing the database, which will let us know what is happening.
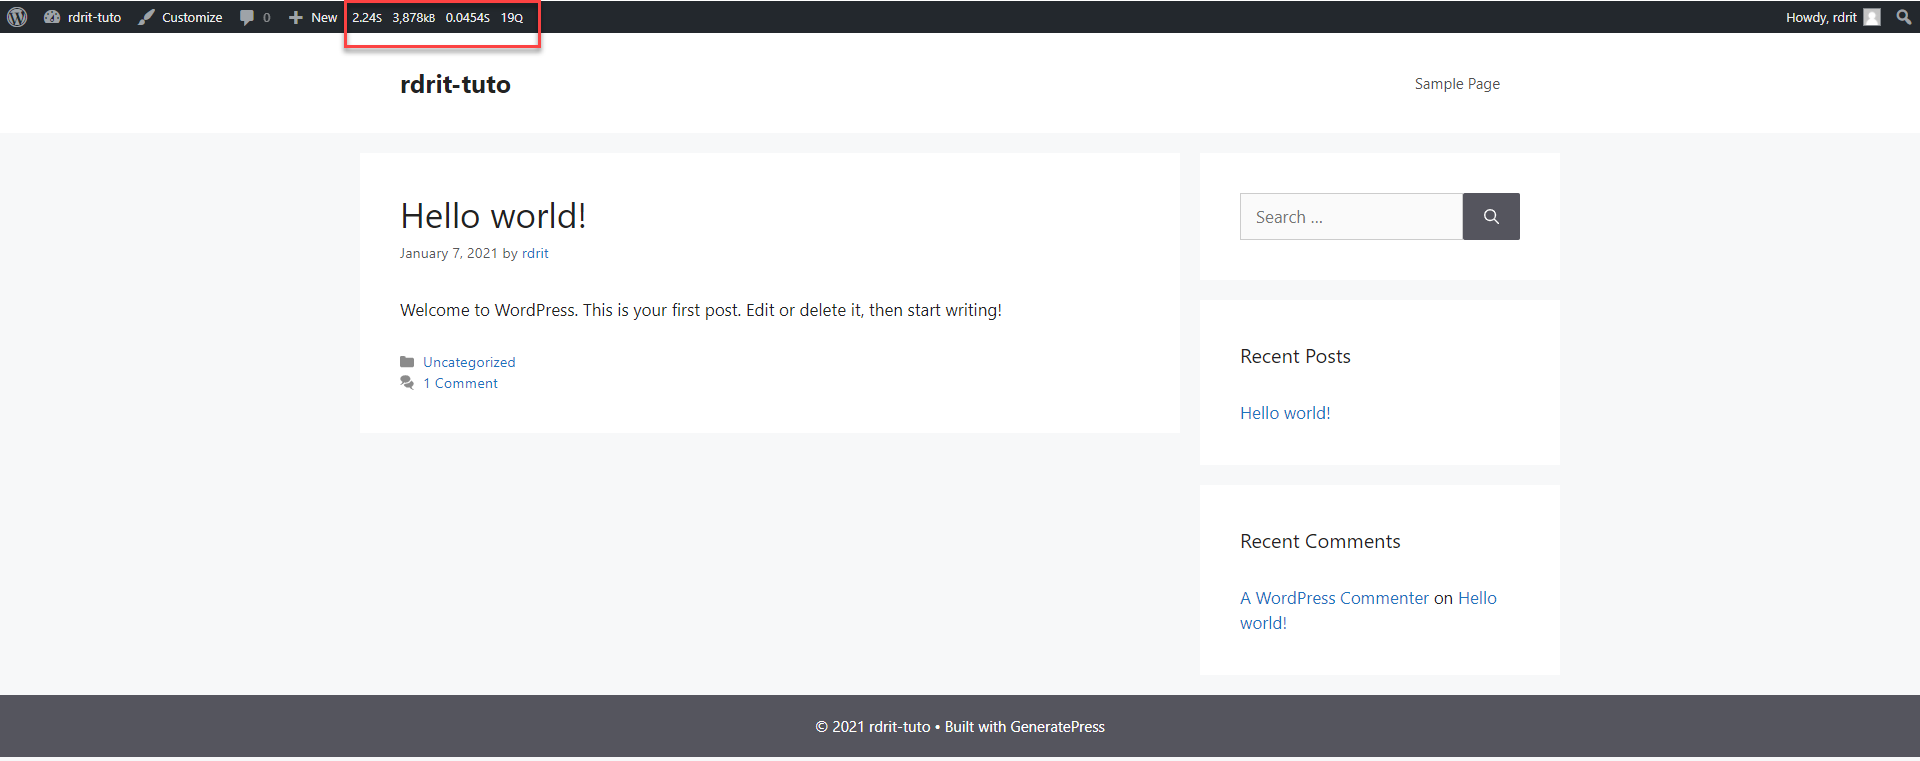
If you are an observer, you should normally have seen that in the administration bar statics are displayed indicating in particular the time of generation of the page by PHP, the time that the SQL queries took and the number of requests.
Getting started with Query Monitor
Now that the Query Monitor extension is installed, I’ll walk you through its getting started so you know what’s going on on page generation and see how to use the plugin to help you customize your site and optimize it.
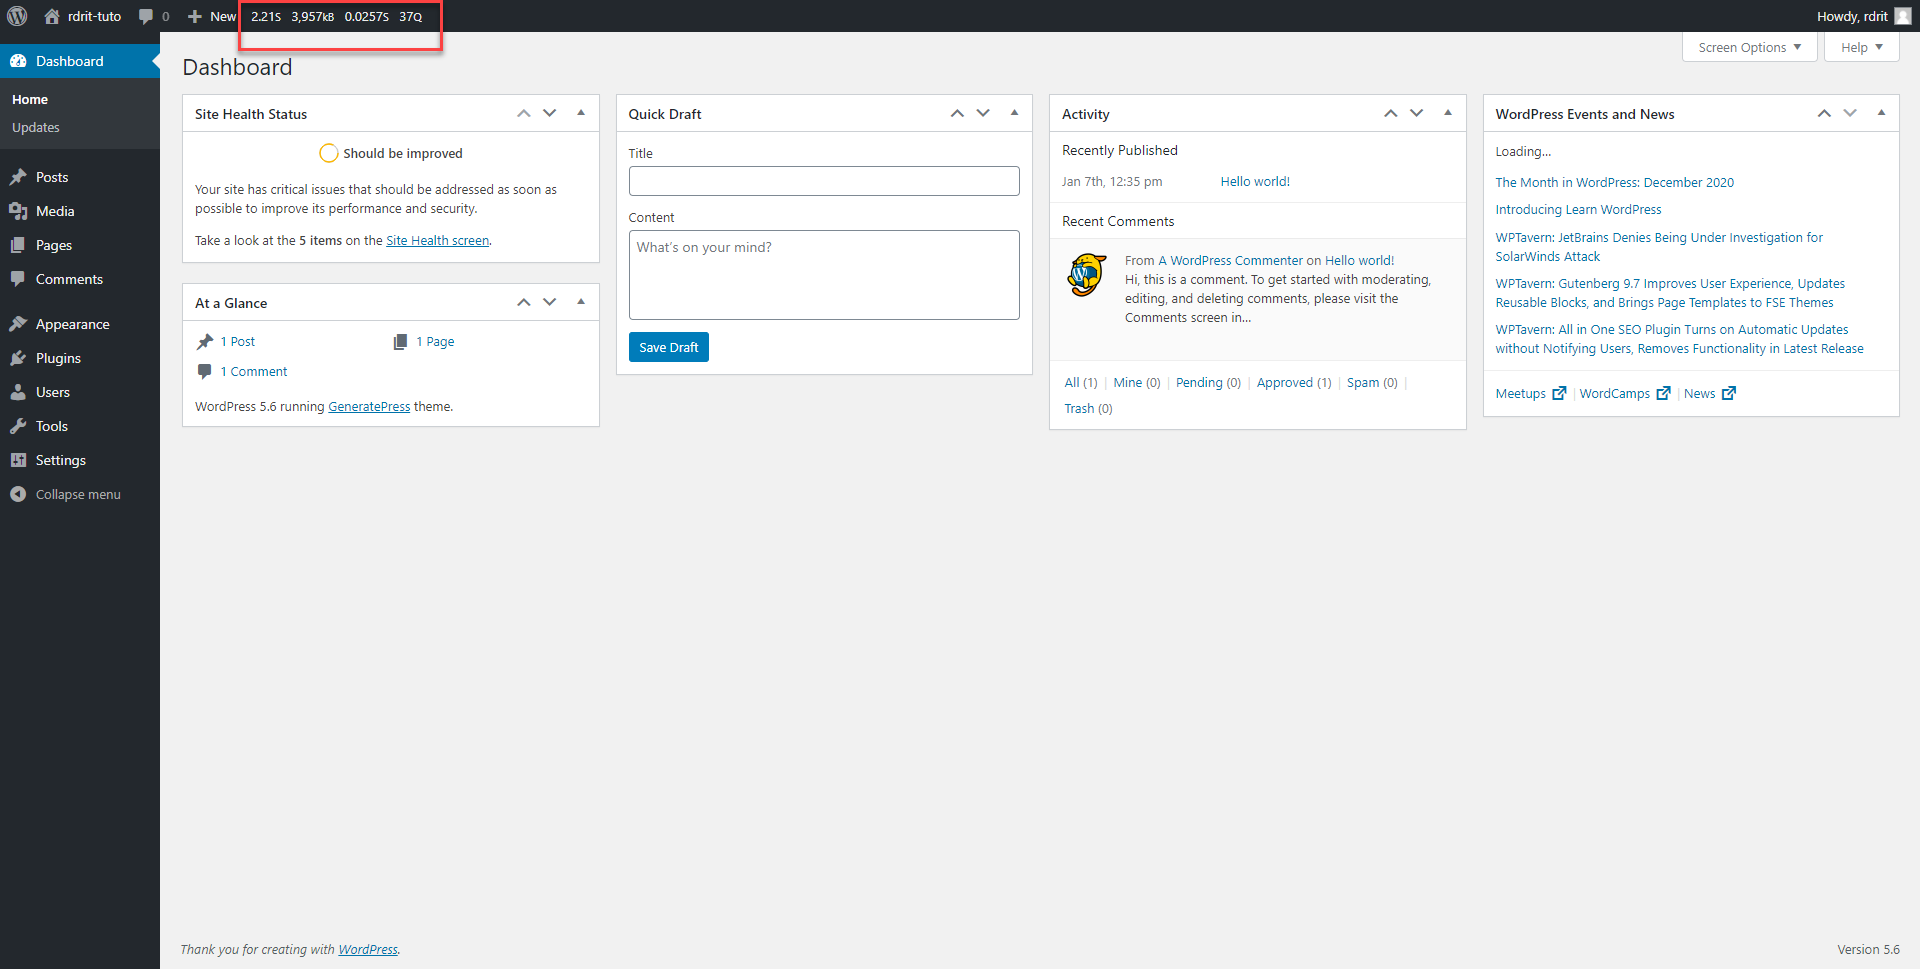
As we could see at the end of the installation, the plugin adds statistical information in the admin bar which is available on all pages whether in the administration or on the front part of the site.
To access the detailed information of Query Monitor, there are two solutions.
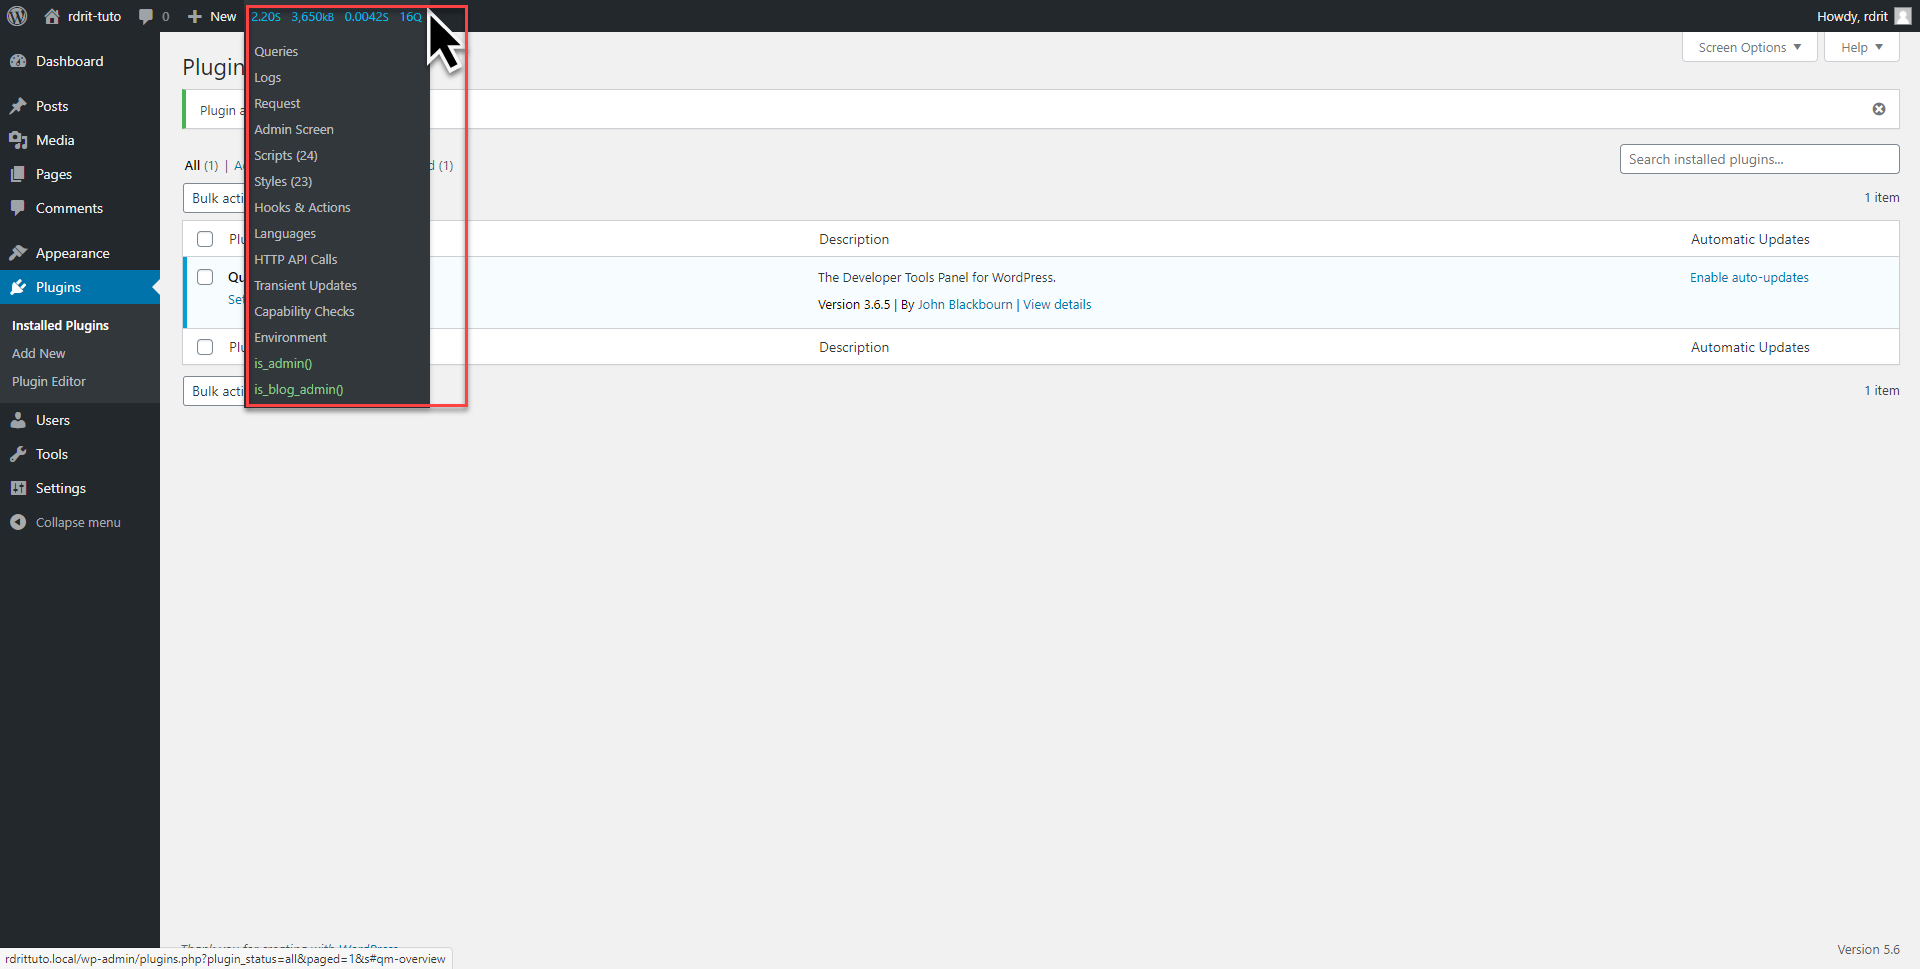
The first is to hover the mouse cursor over the statistics to display the different options and click on the items you want to see.
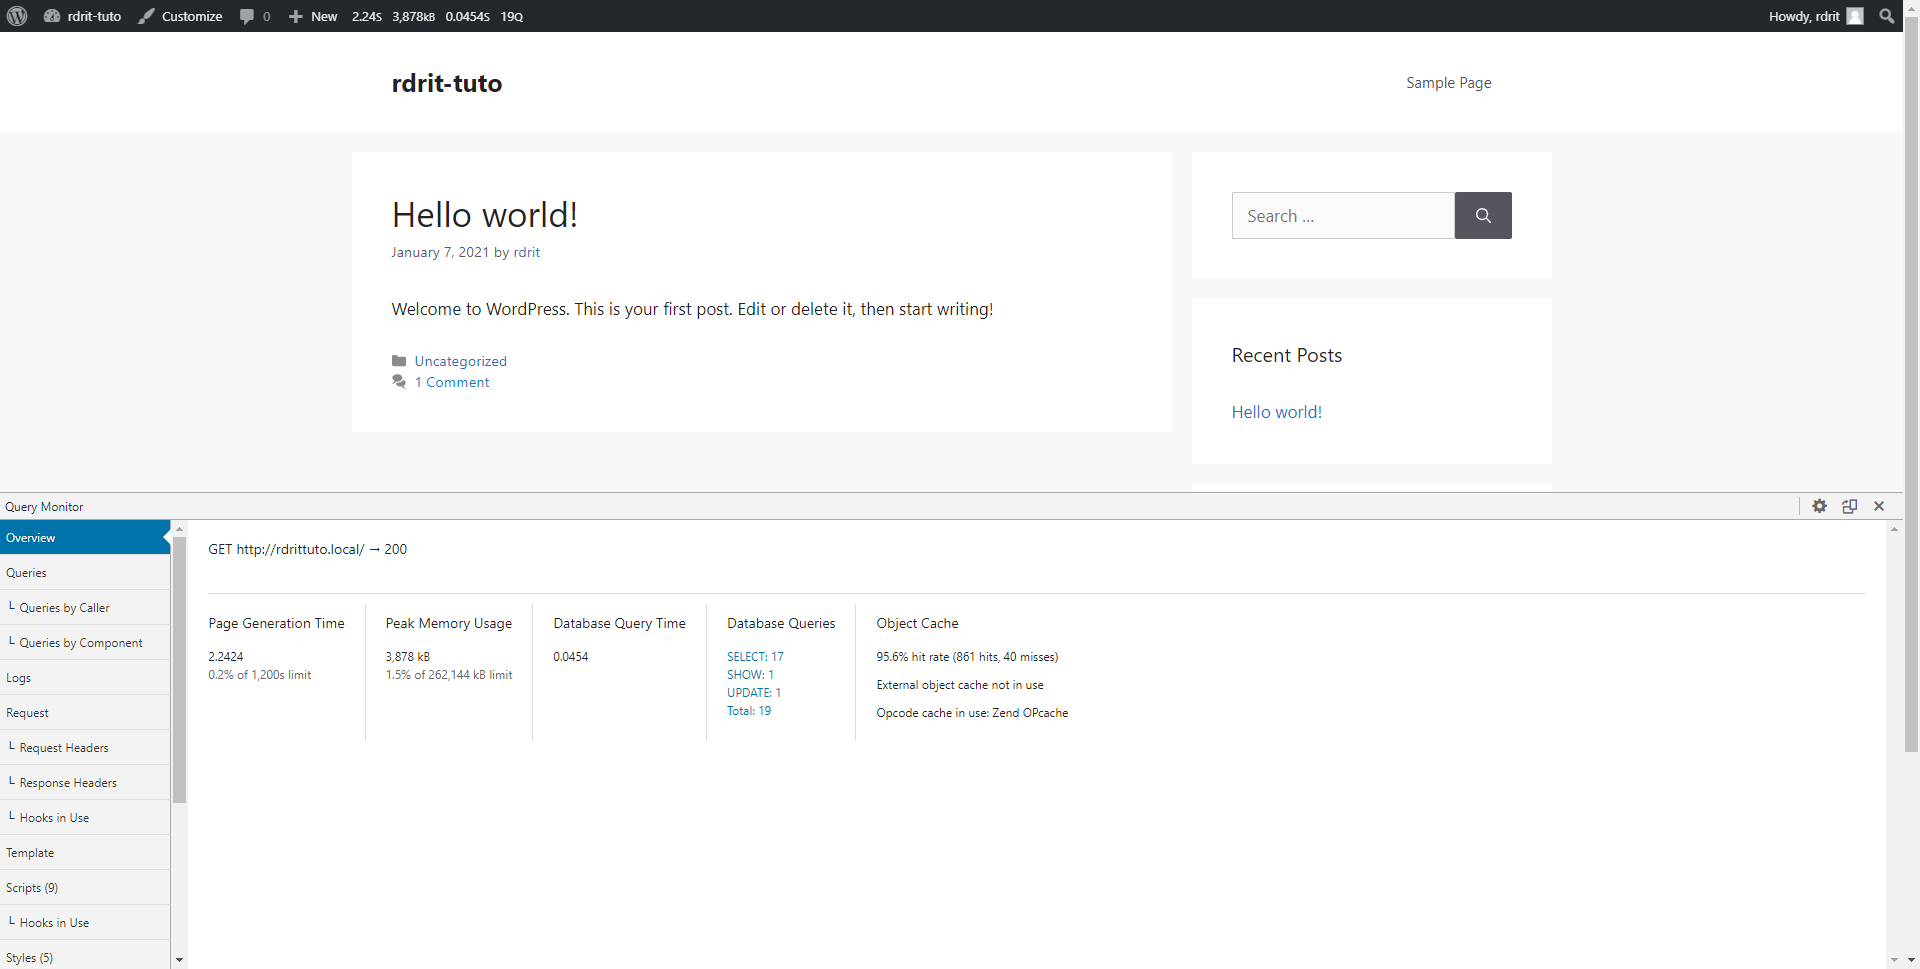
The second solution is to click on the statistics 1 to display the “monitoring” insert 2.

I will now explain to you each monitoring element that can be recovered with Query Monitor.
You will also find other examples of using Query Monitor in various tutorials available on the site.
Overview
In this part, we have a summary of the page generation statistics with the generation time at PHP level, the memory used by the page call, the time that the SQL queries took and the distribution of the type of queries. and also the use of the object cache at the PHP level.
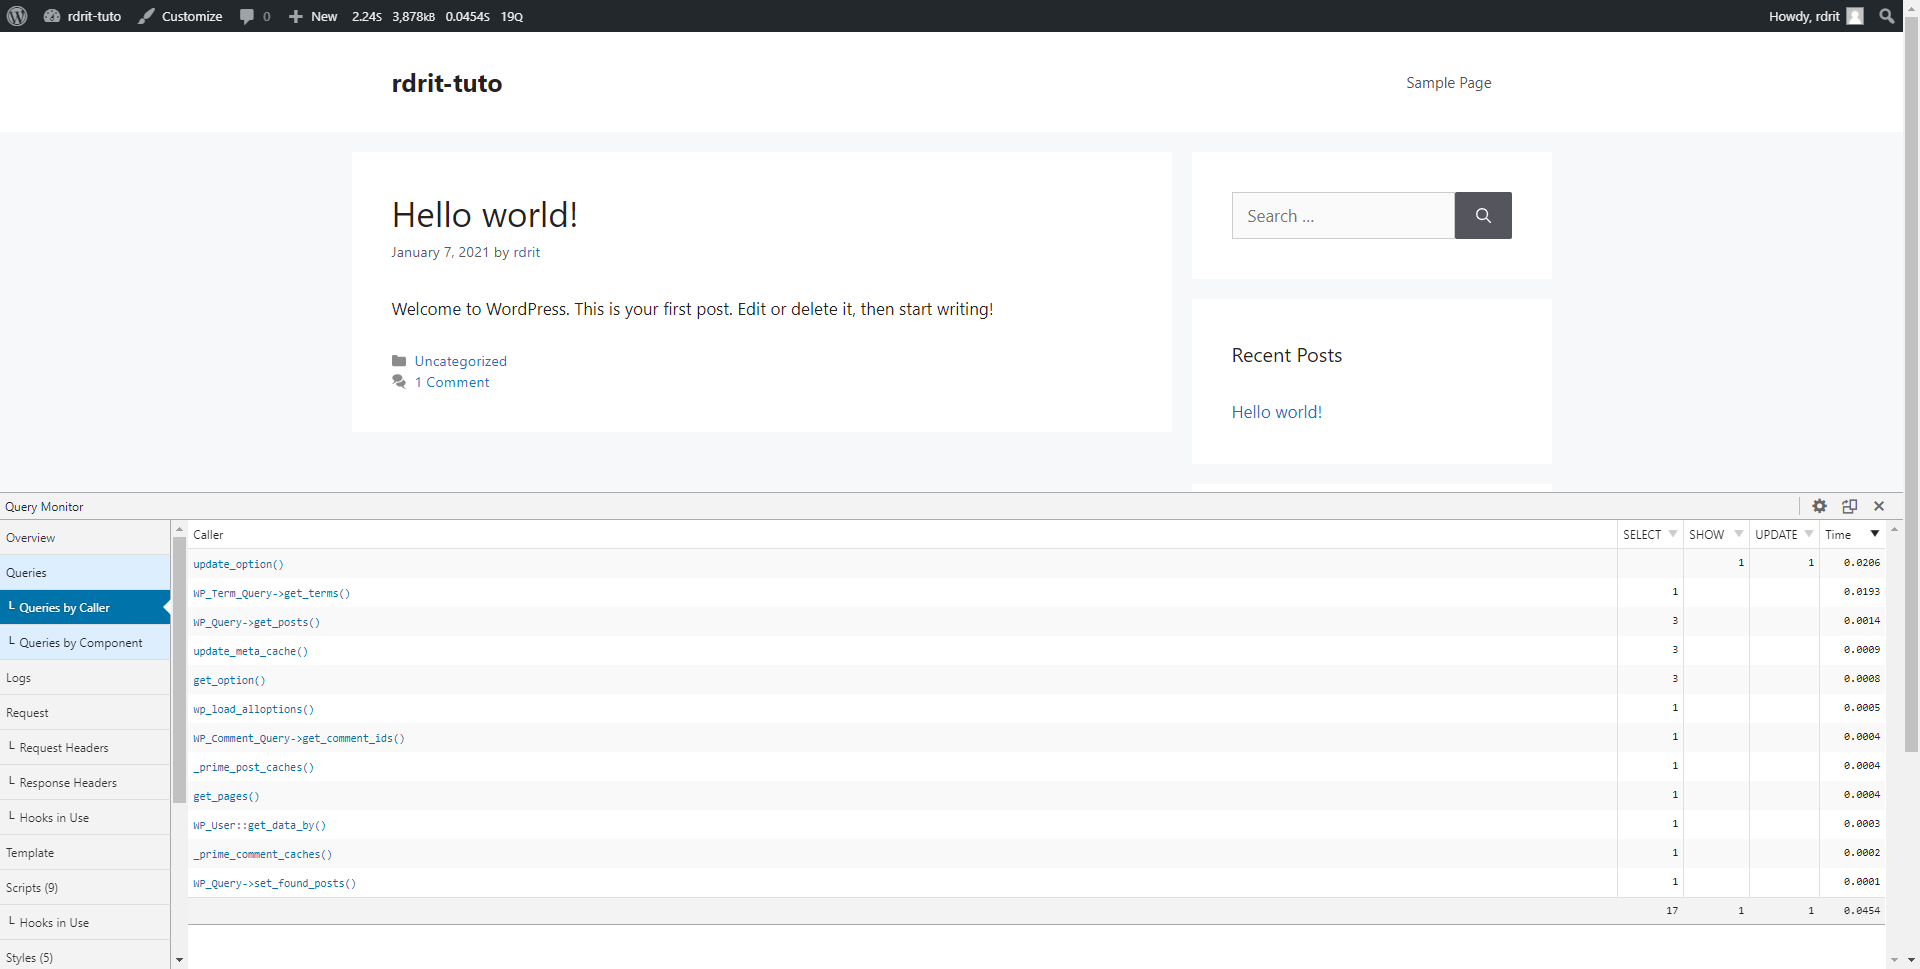
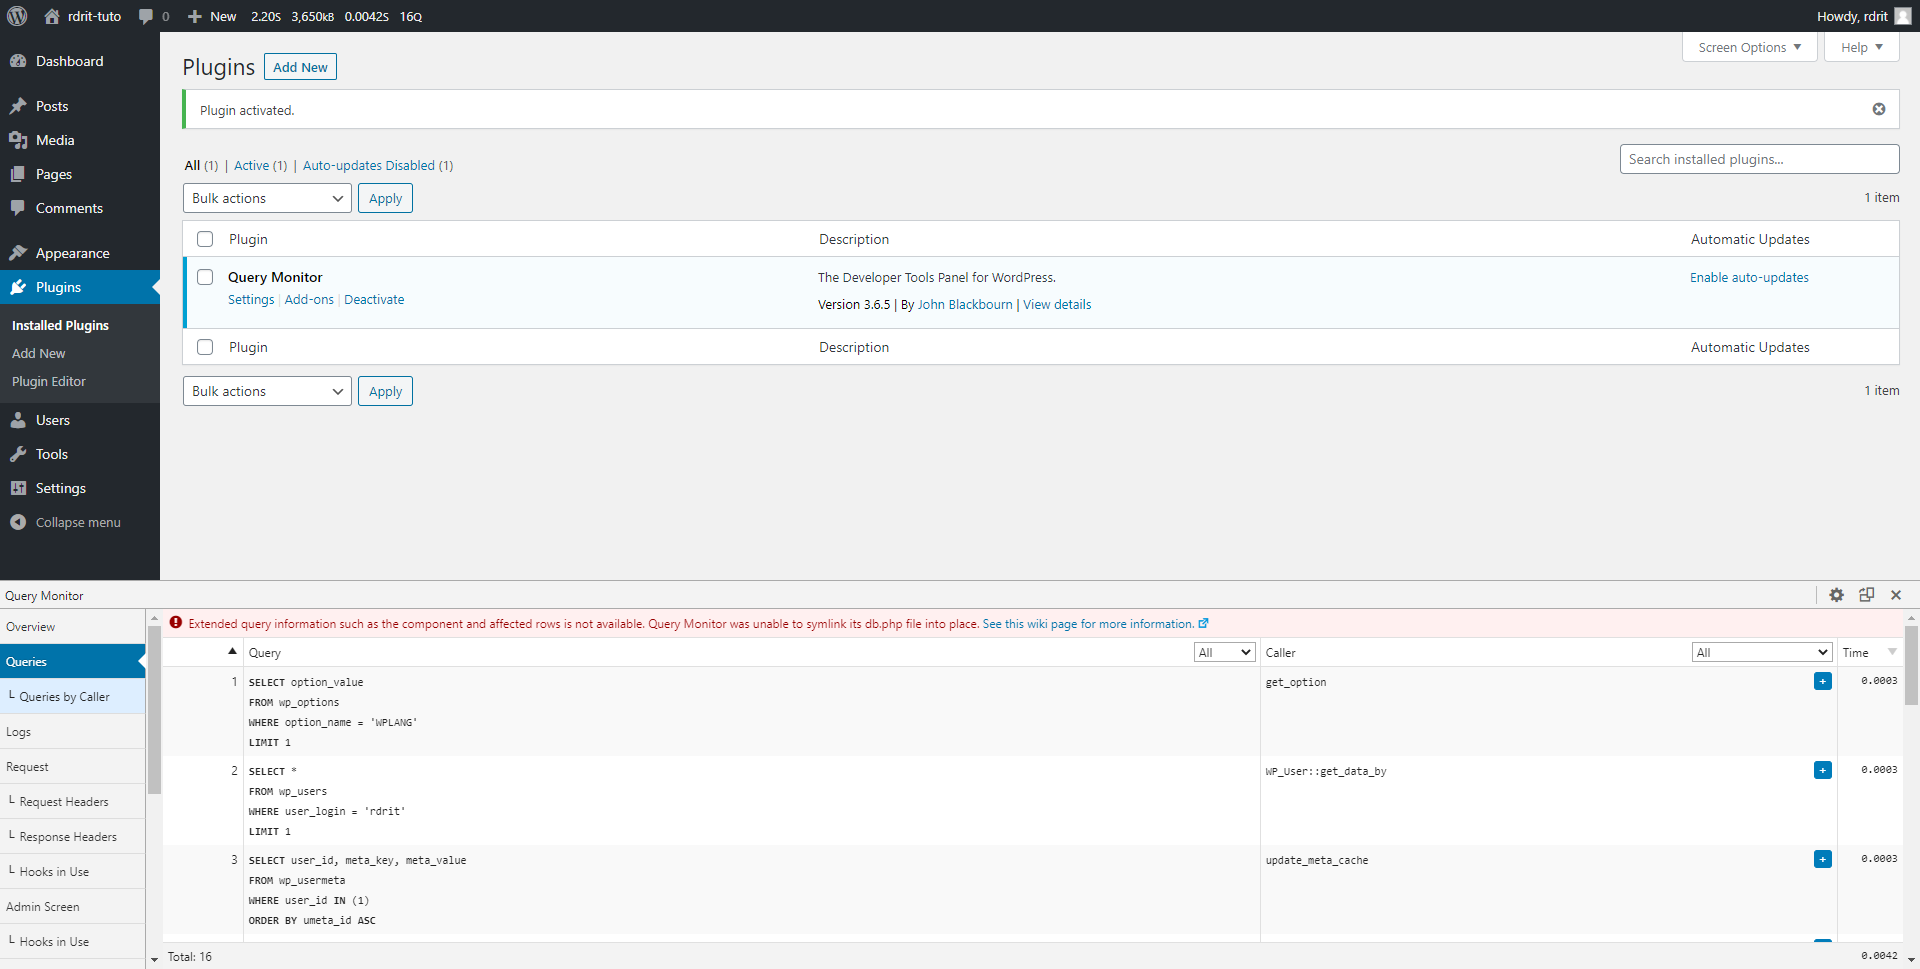
Queries
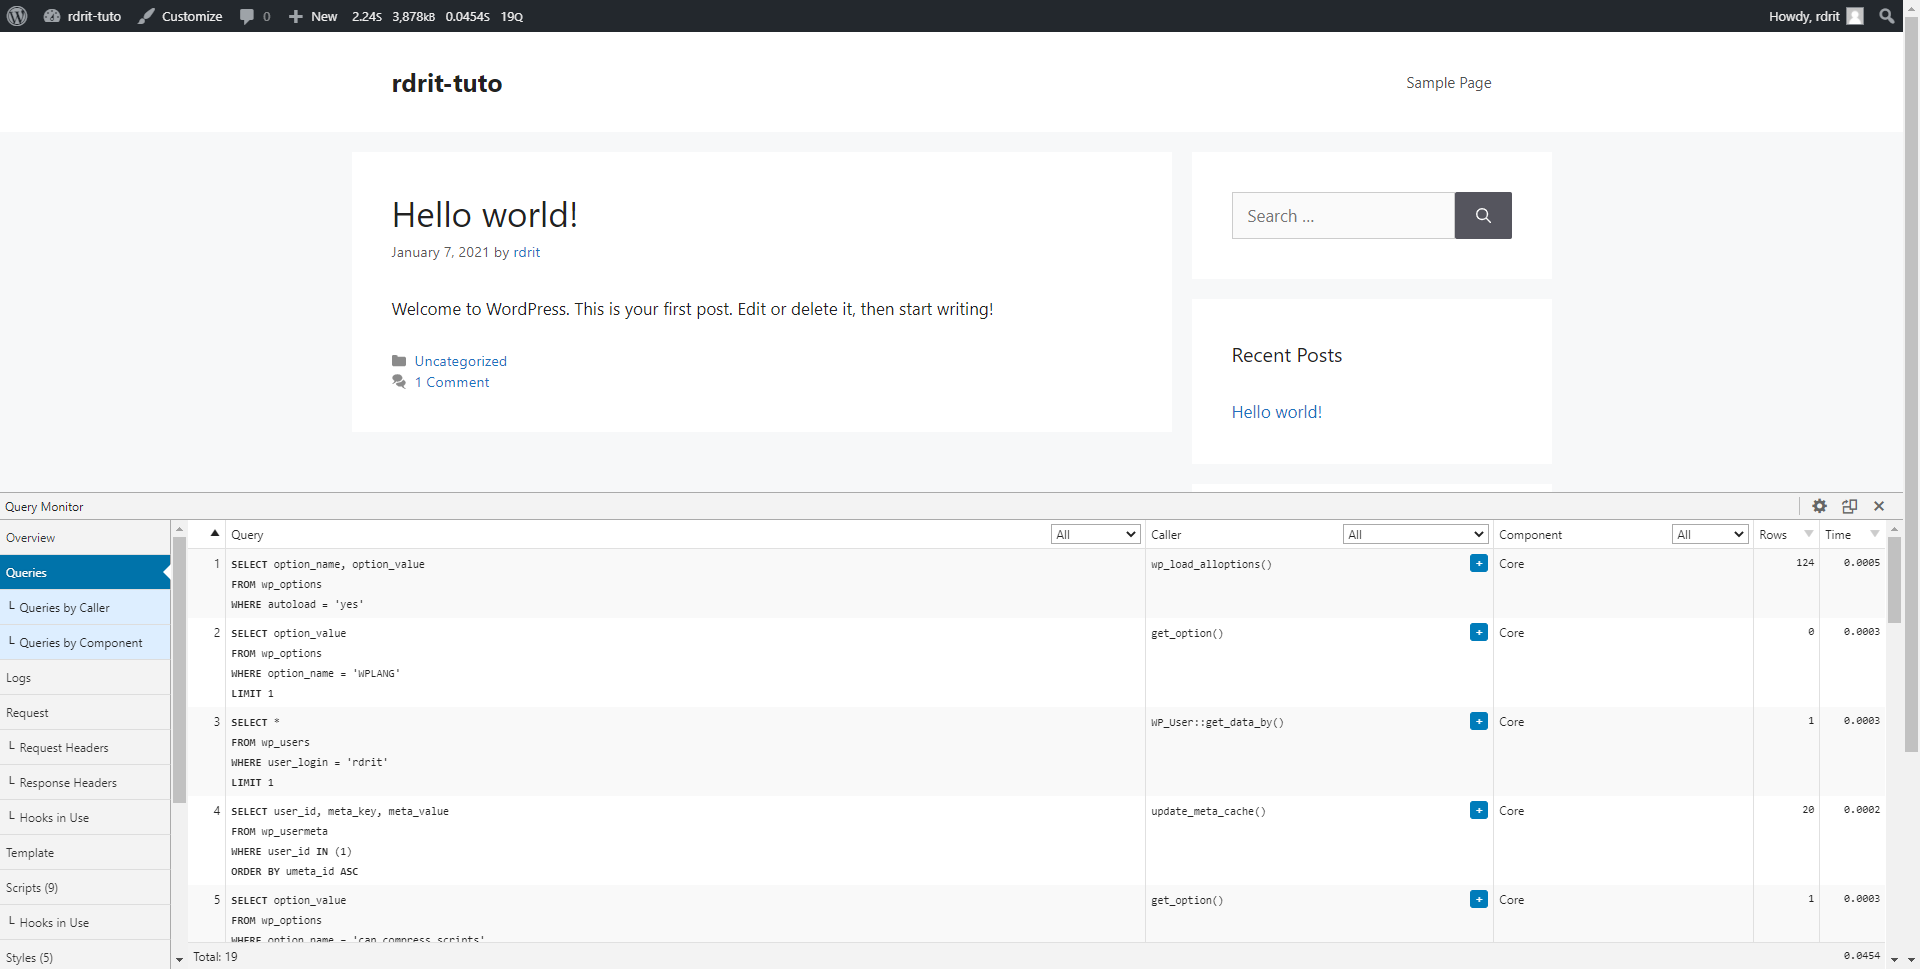
In the Queries section, we can see all the SQL queries executed to generate the page, we can see the following information per query :
- The raw SQL query
- The function that calls the request (Caller)
- The component that triggered (Component), it can be the WordPress core, plugins, themes …
- The number of rows that the query will return.
- The execution time of the query.
It is possible to filter each element and / or to go to the Queries by Caller / Queries by Component sub-elements which groups by elements.

This part is very useful for following SQL queries in order to find “slow” queries and then act on them by adding an index in the database or putting a cache system.
For developers it can also see the requests of their plugins.
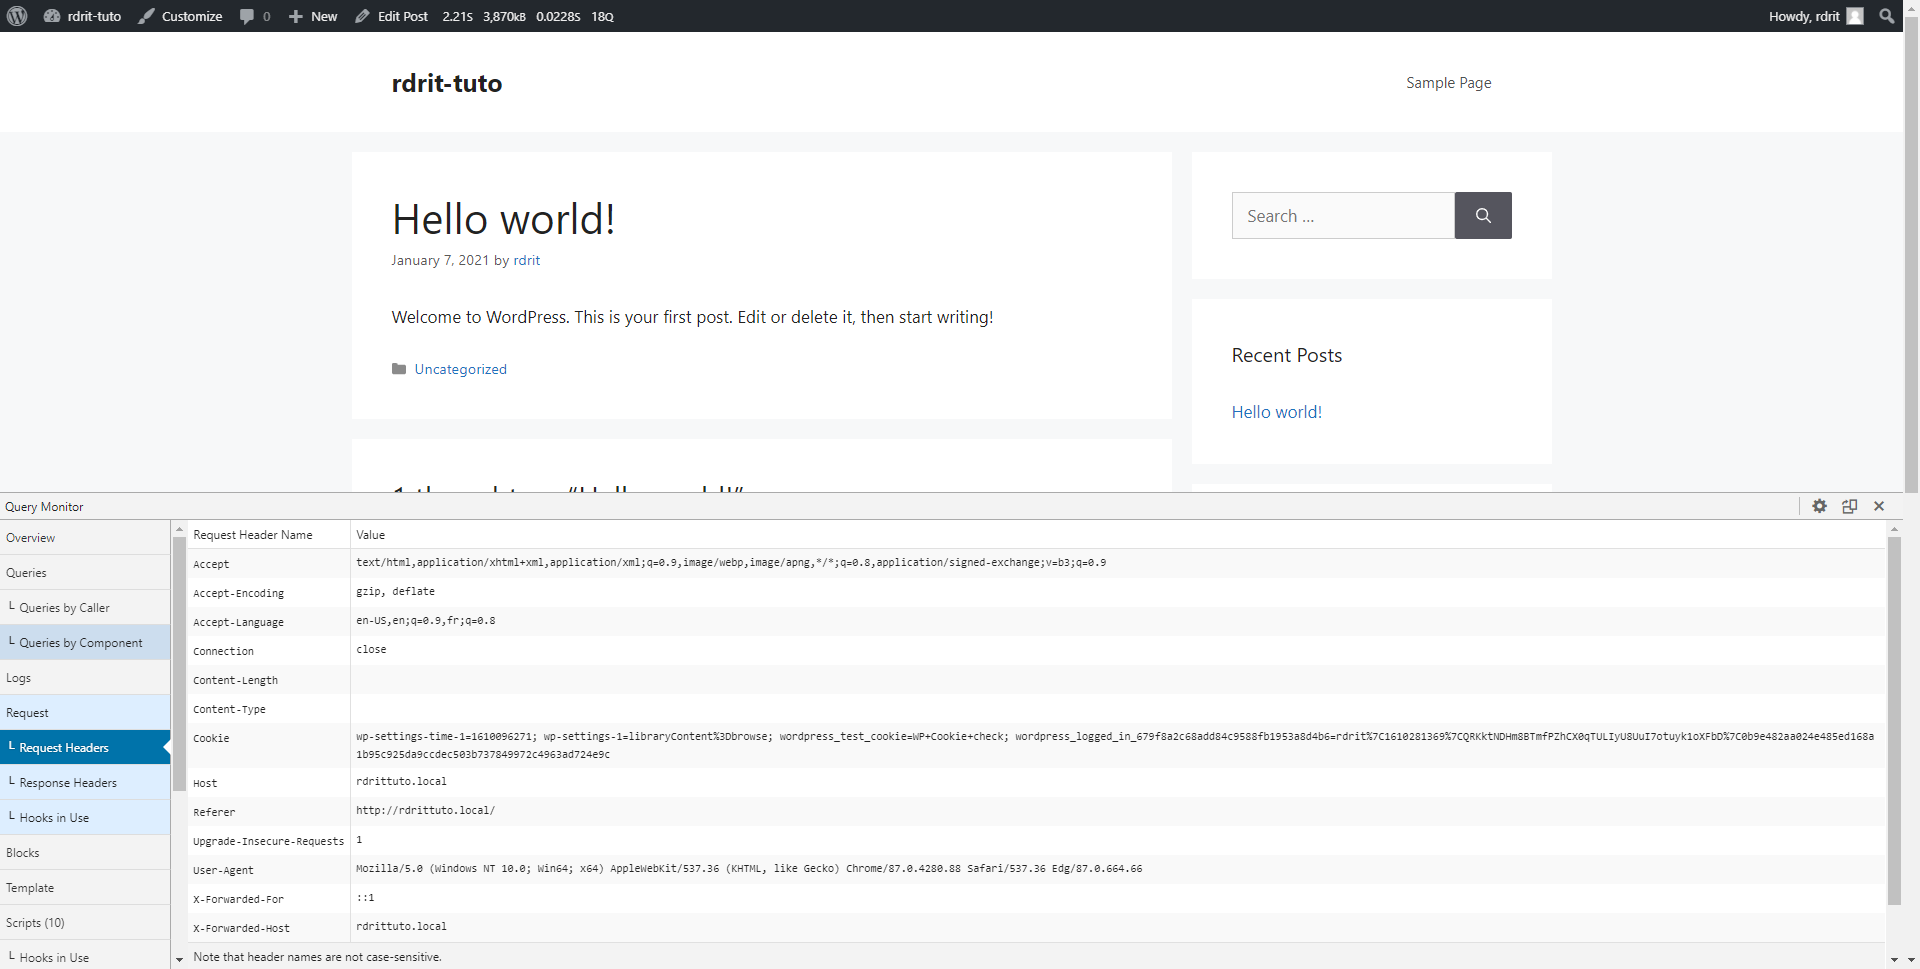
Request
In this part, you will mainly find two pieces of information, information (headers) about the HTTP request that was sent to the server with the response, the rewrite rules used and the WordPress Main query that was used for generate the page.

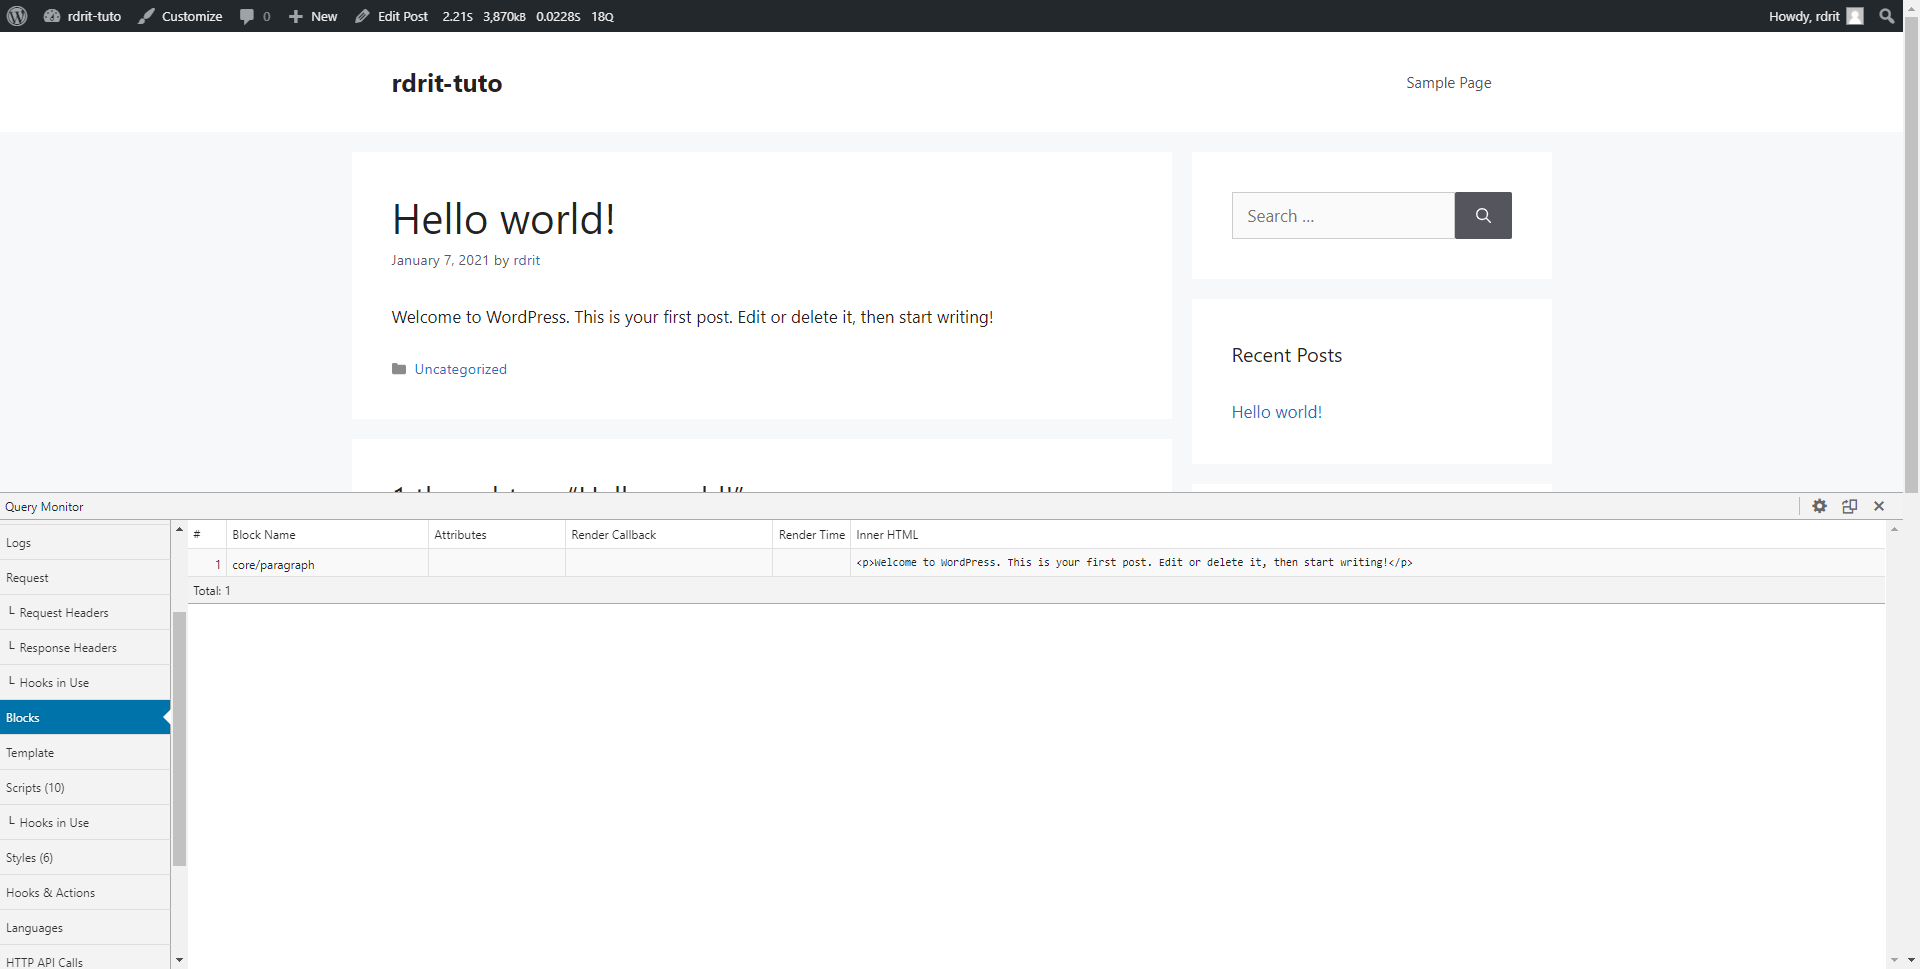
Blocks
In the Blocks part, you can see all the gutenberg blocks on the page.
Template
The Template part is very practical when you want to customize your site, we find the information on the theme, the template file used to generate the page (and also the search files that can be used), the other template files called by the function get_template_part.
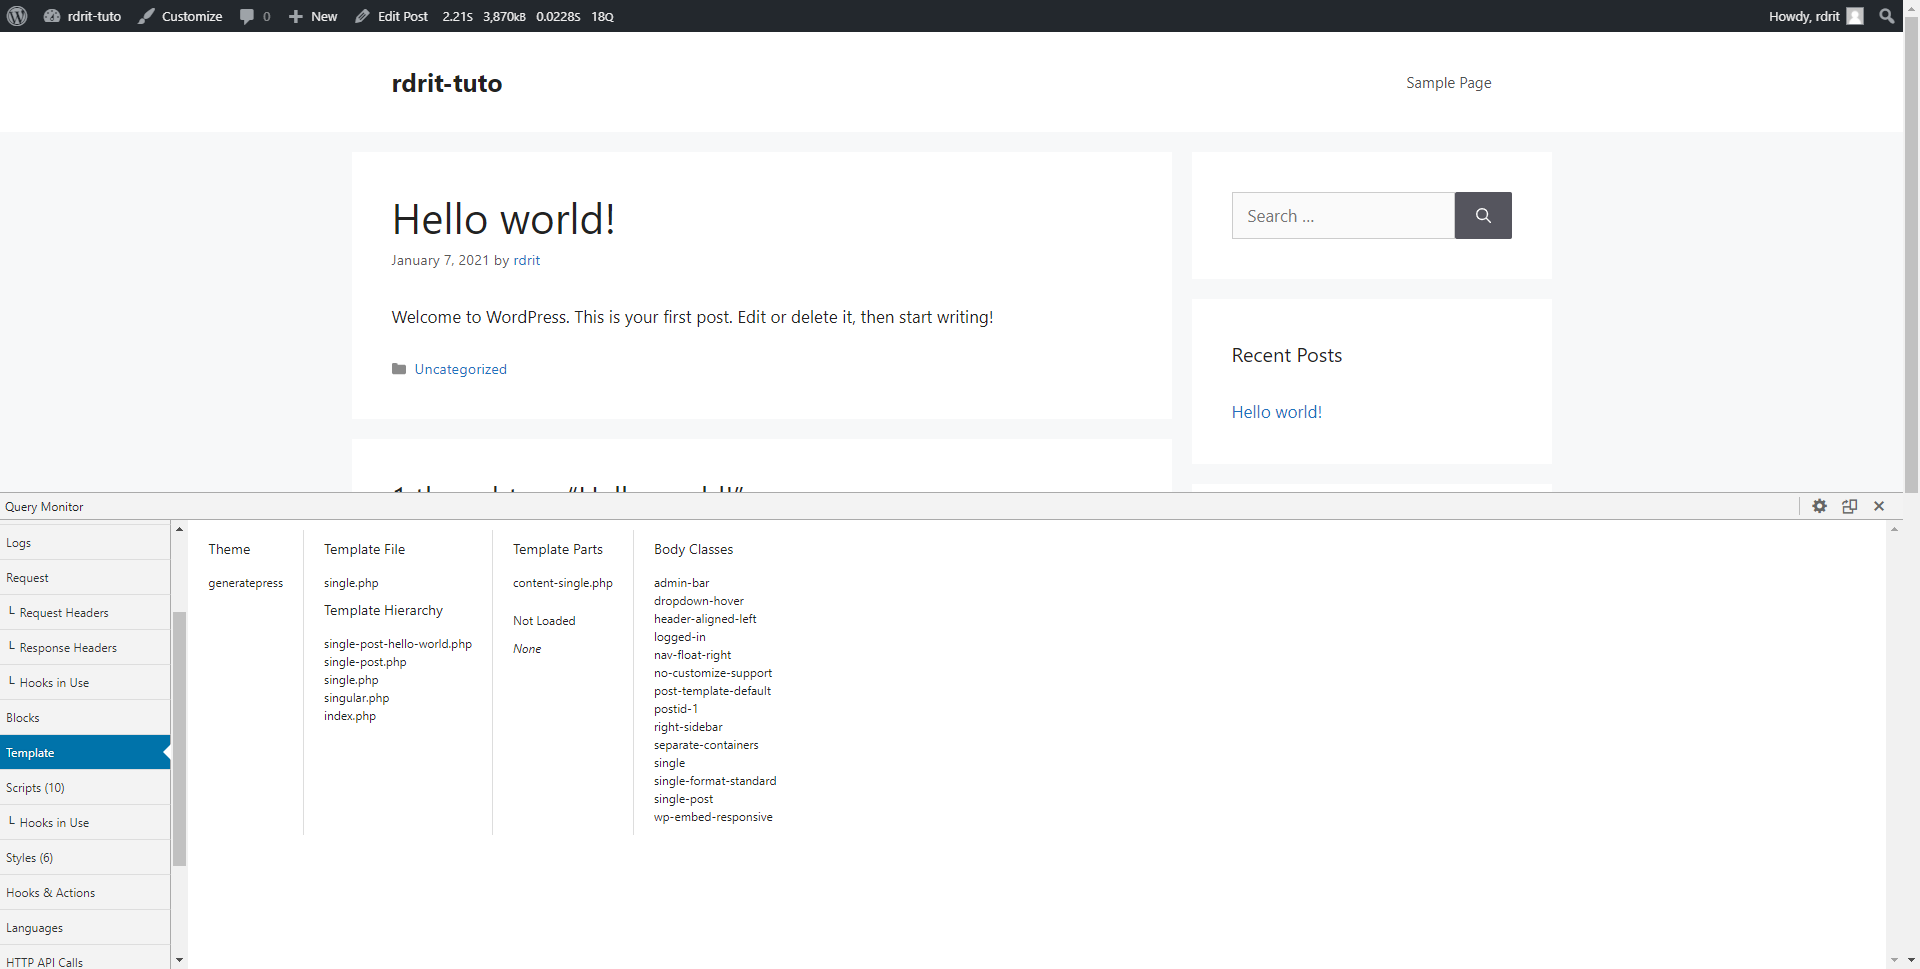
If you want to learn more about template management, here is a link to the WordPress office documentation : Template Hierarchy | Theme Developer Handbook | WordPress Developer Resources, an infographic explains how WordPress searches for the template file.
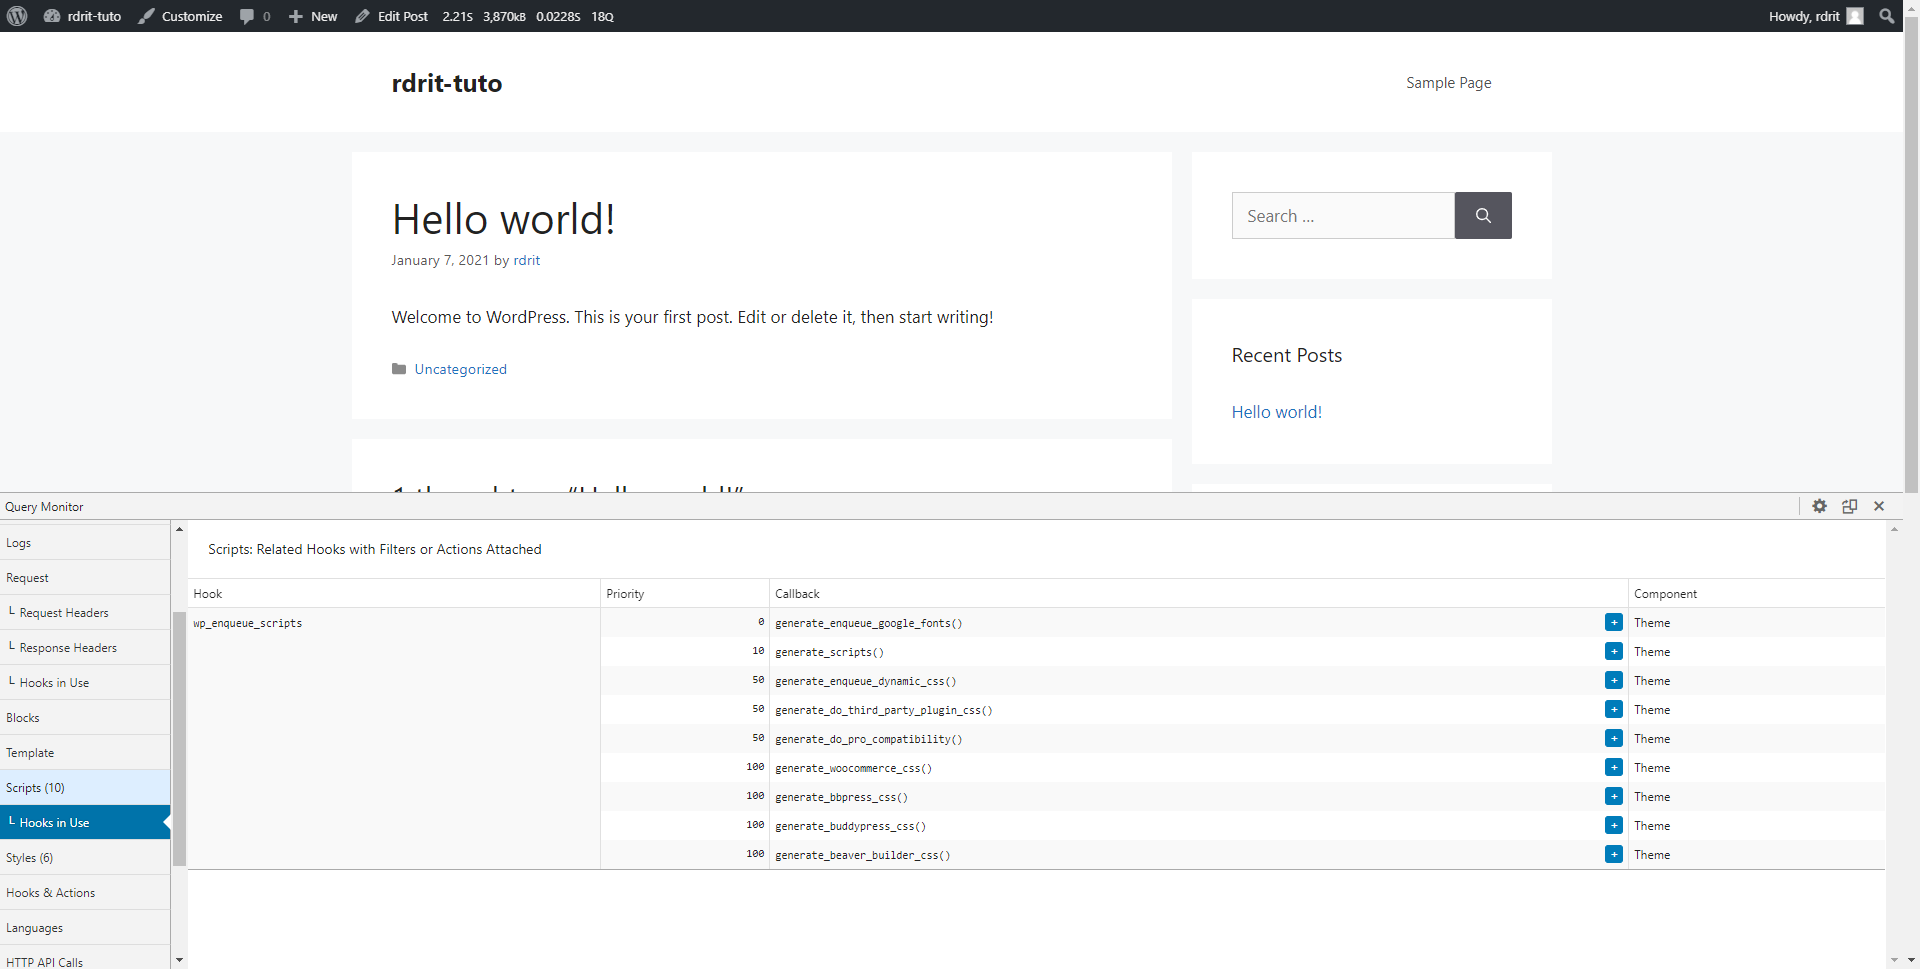
Scripts & Styles
In these parts, you can see all the JavaScript scripts and the different CSS style sheets that are used on the page and the hooks (hooks) used to include them.
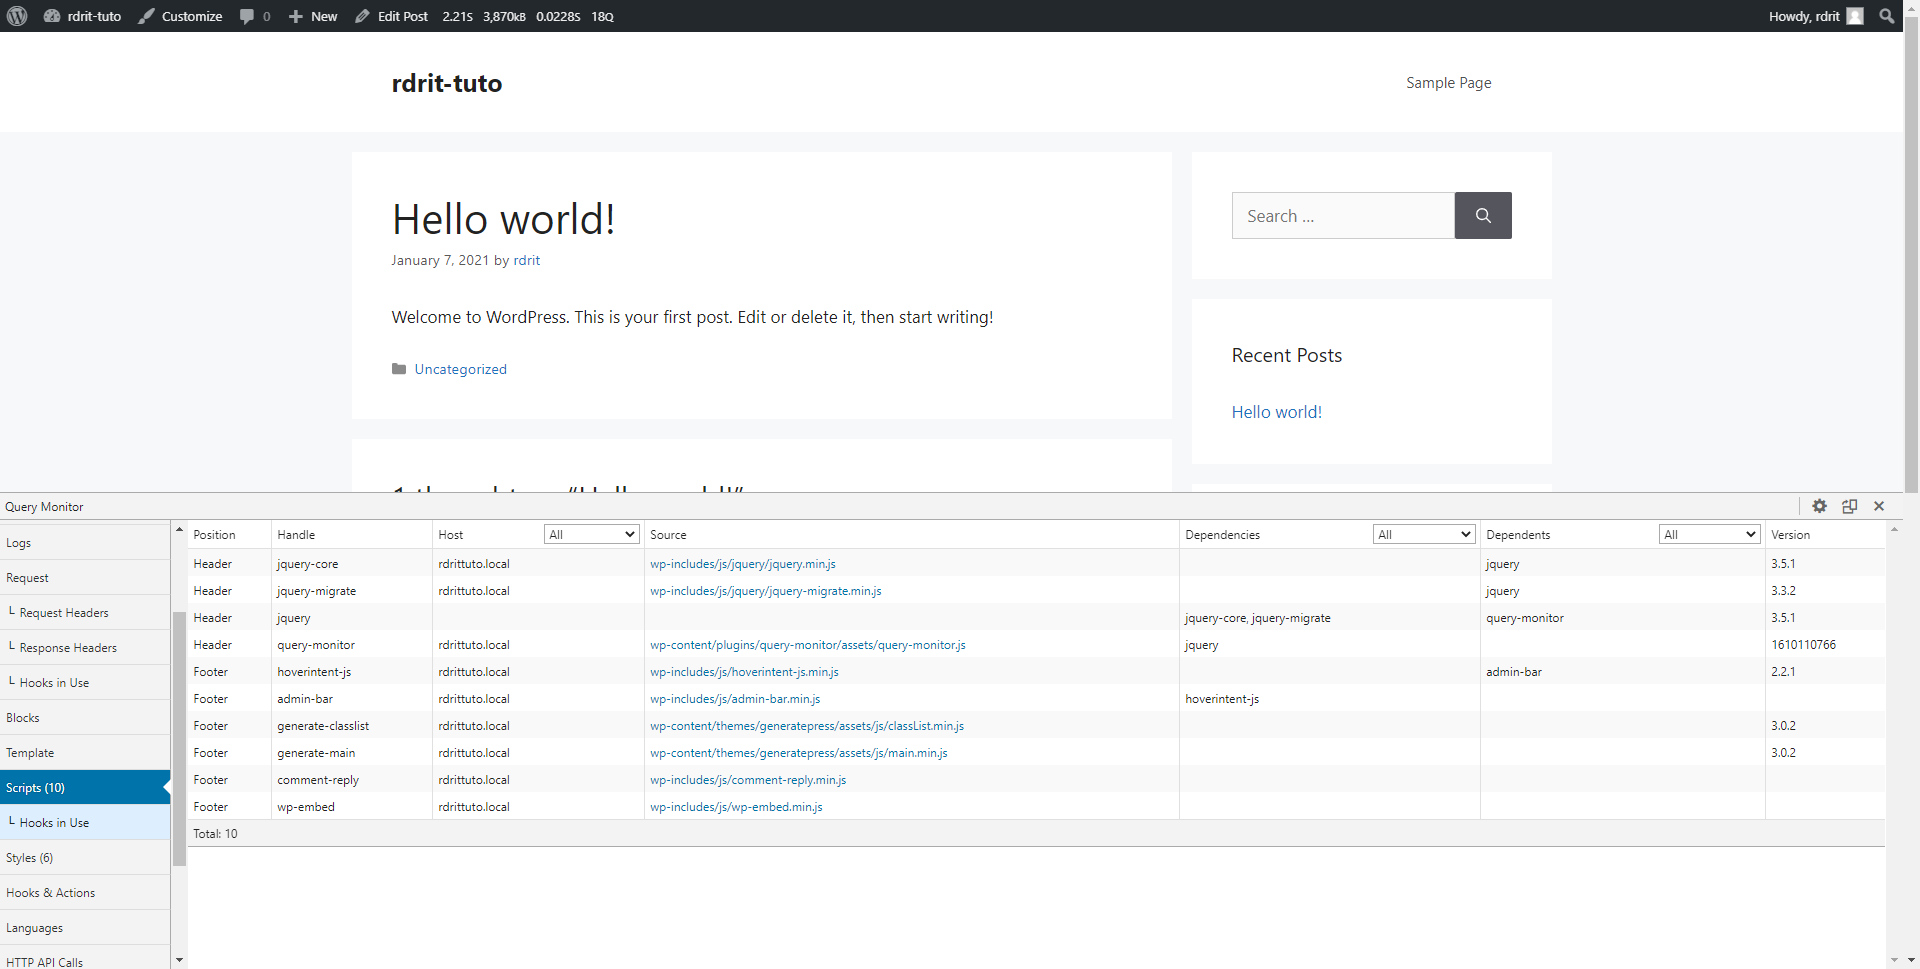
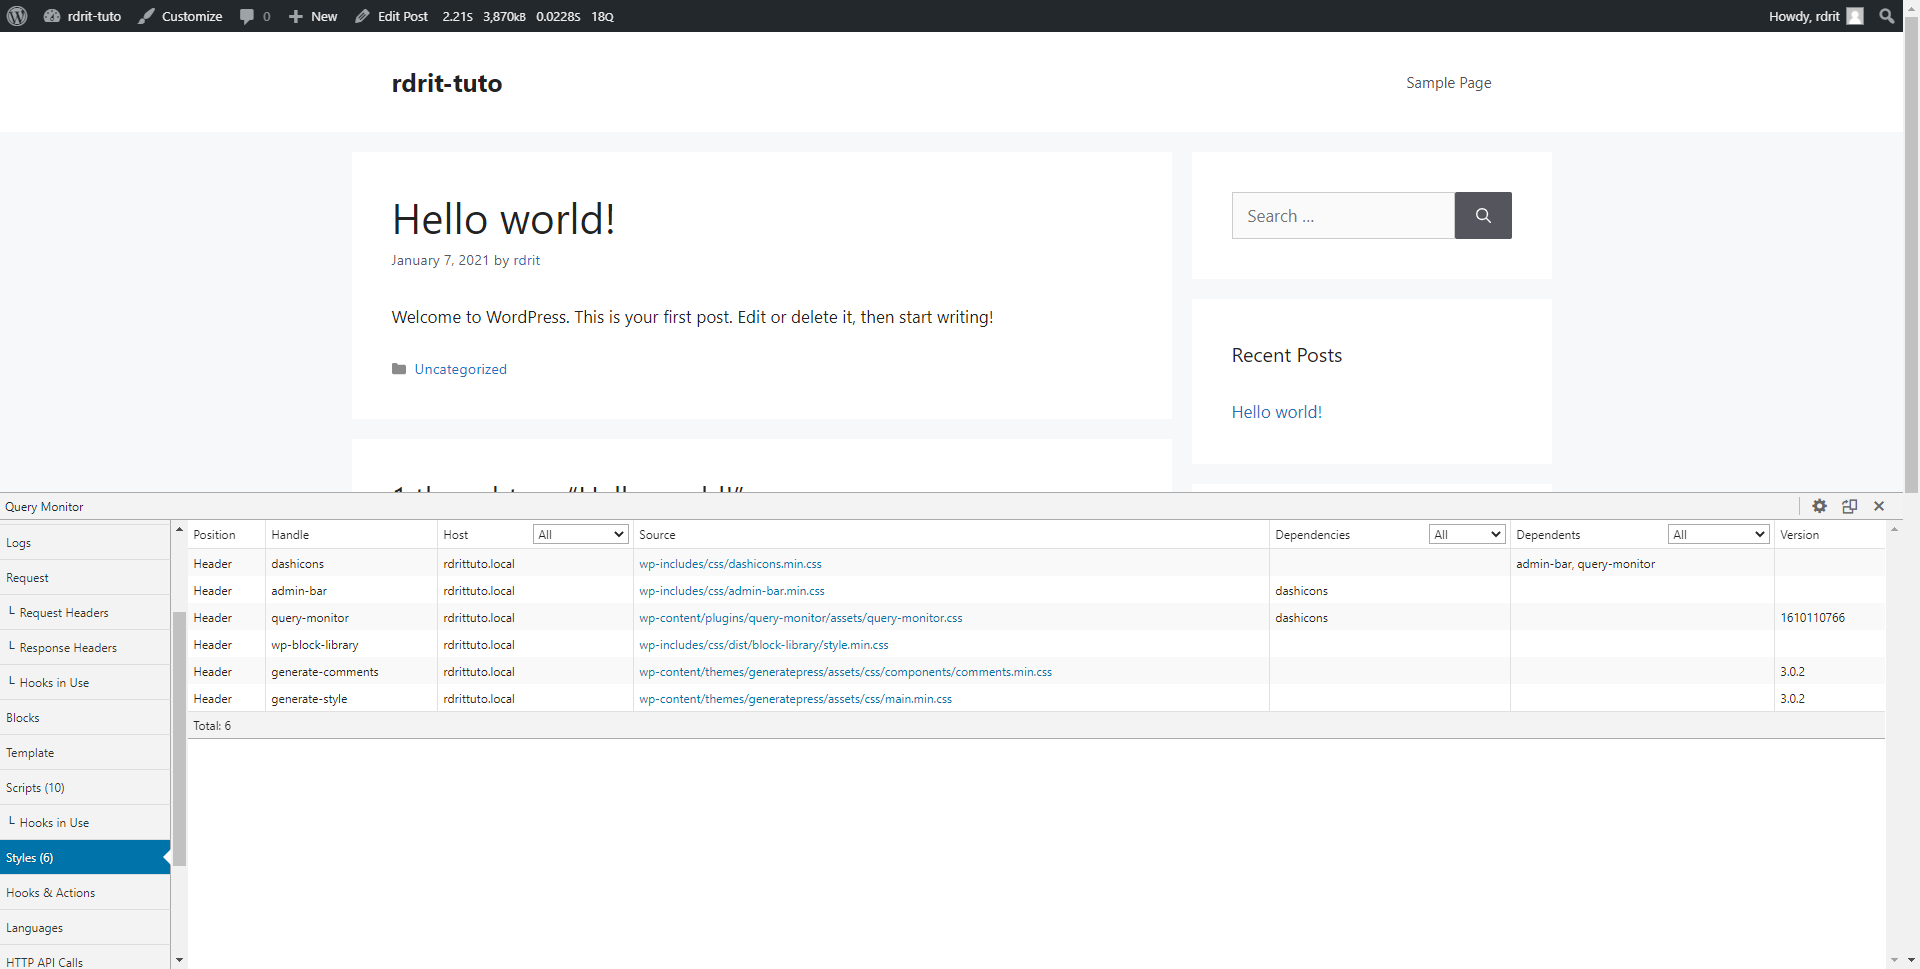
We will see it in other tutorials dedicated to WordPress, but this part of Query Monitor is very useful when you want to customize your site and also for its optimization.
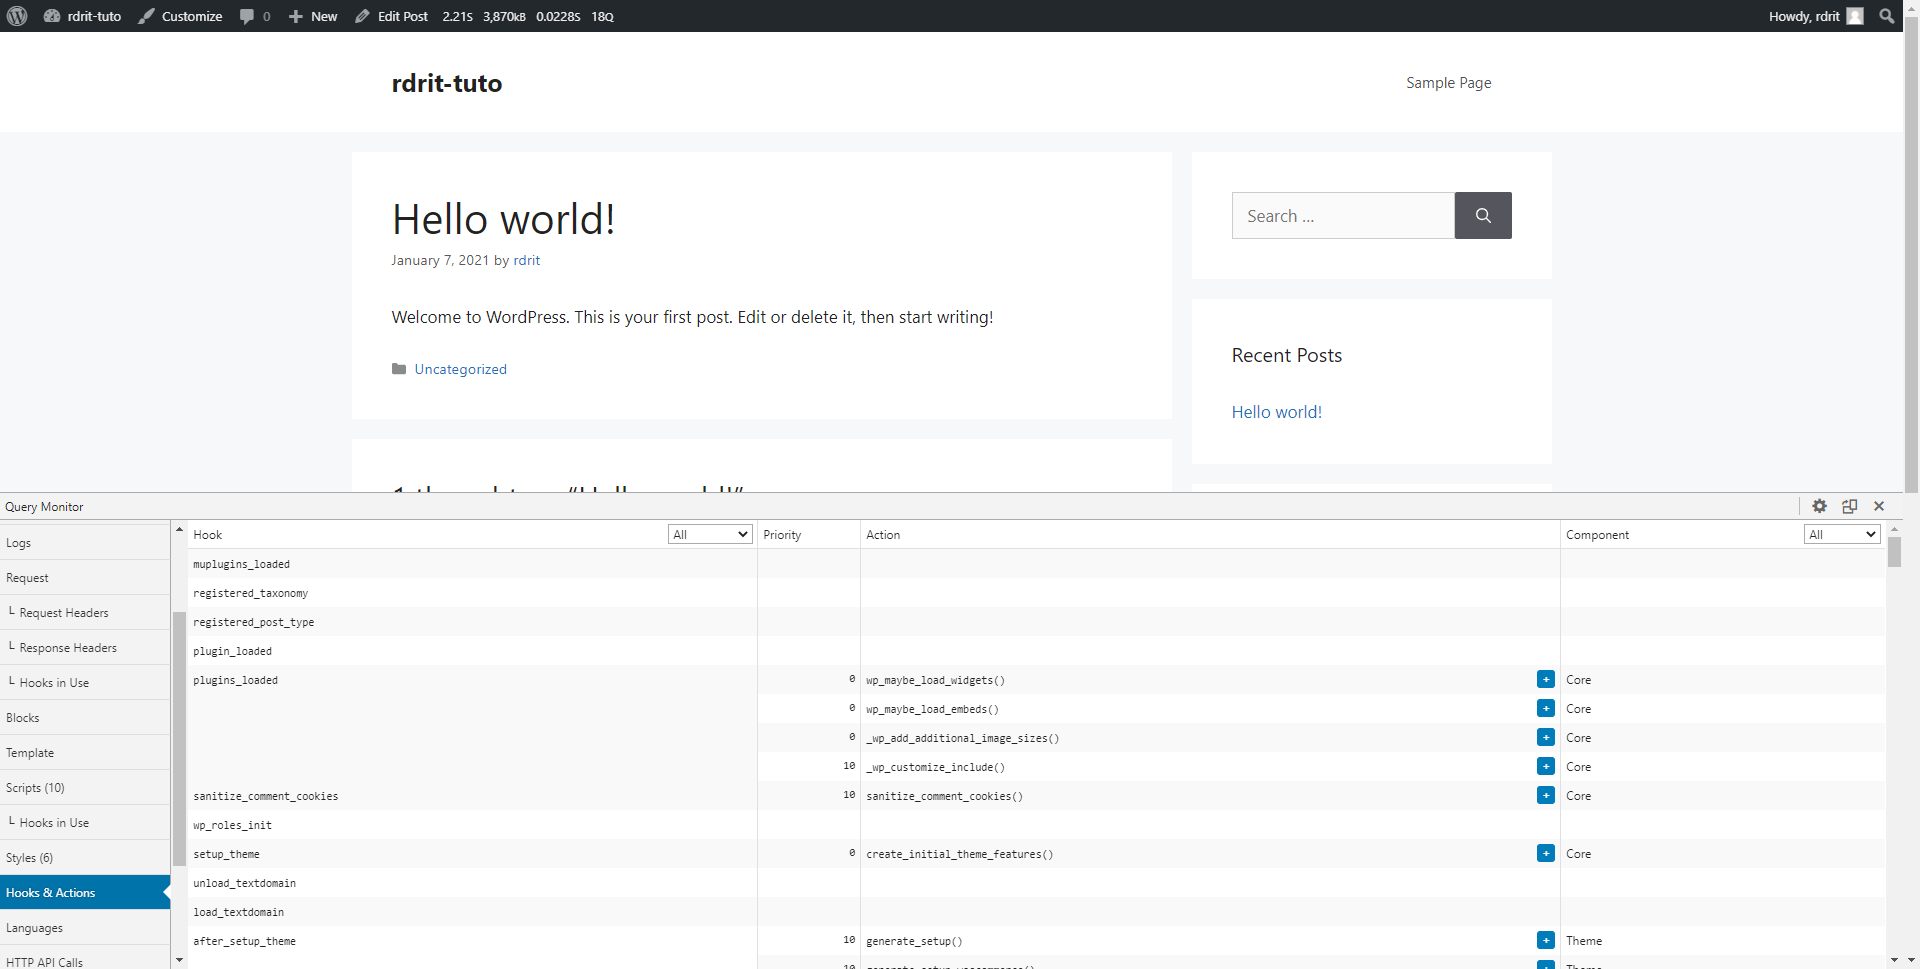
Hooks & Actions
We find here all the hooks used, when we customize WordPress this section is useful for debugging purposes.
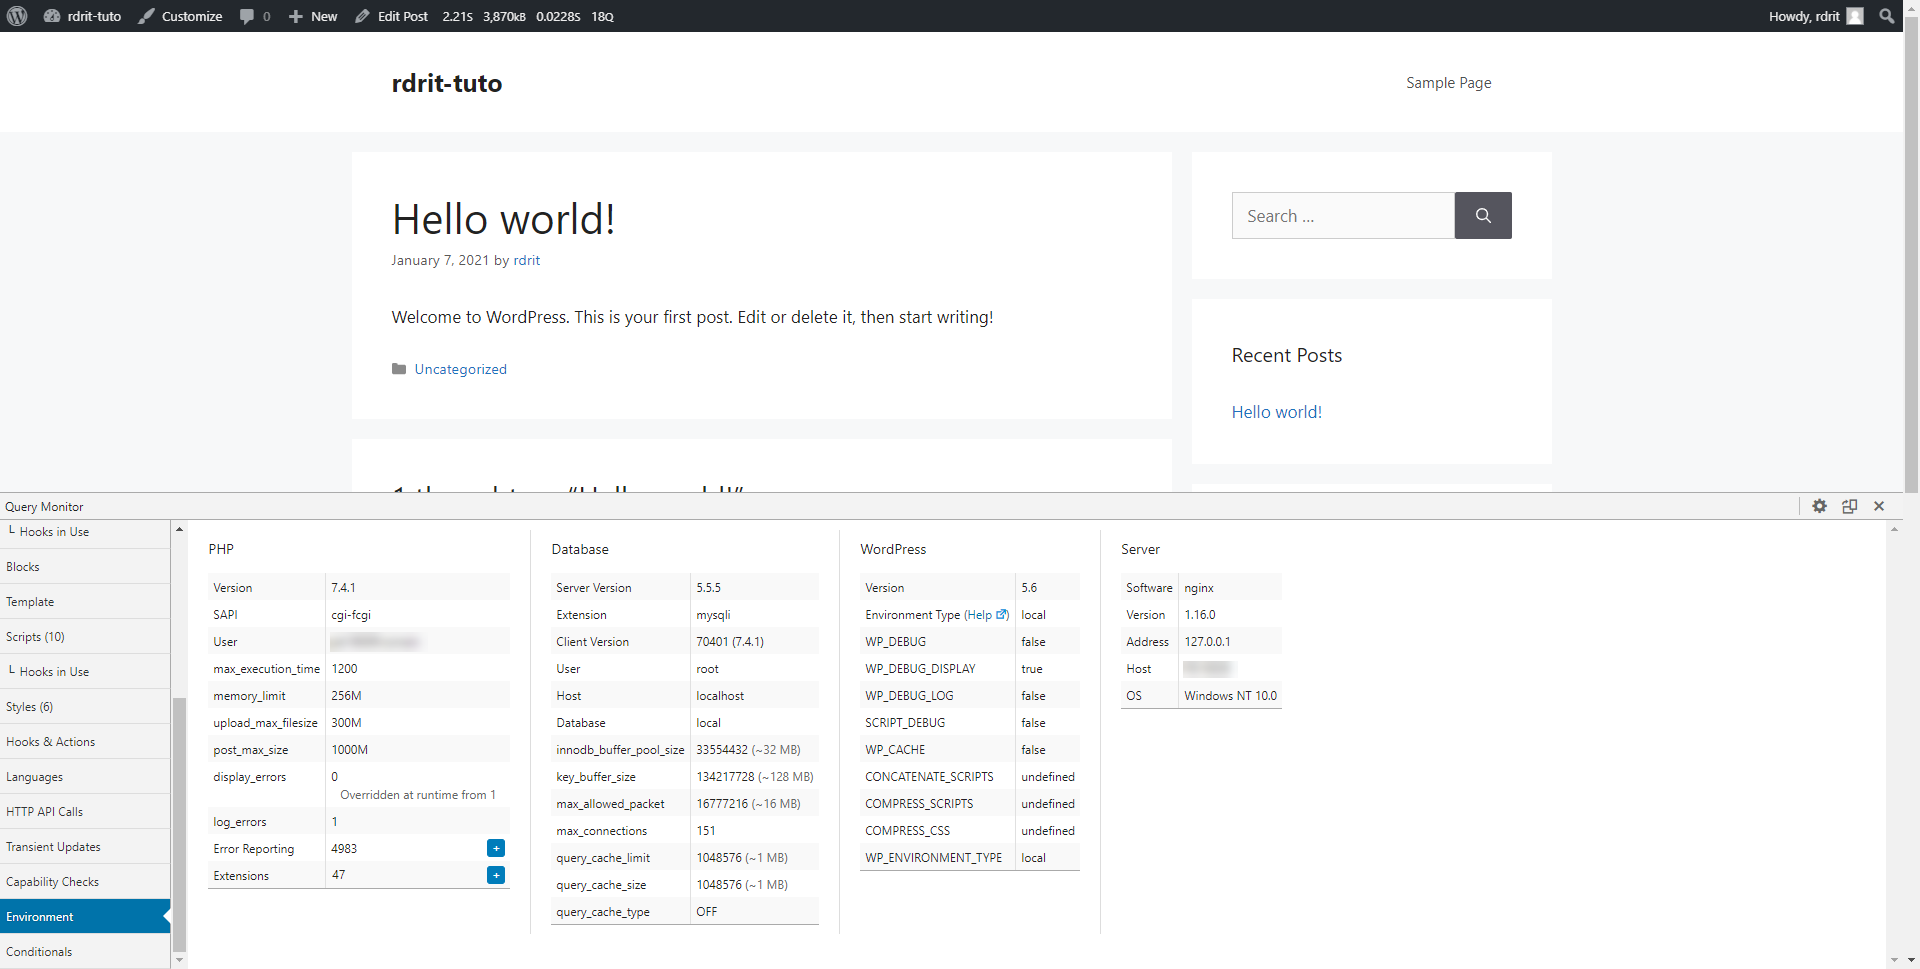
Environnement
In the Environment part, we find several information on the WordPress environment, the version of PHP with part of its configuration, information on the database, information on the version of WordPress as well as part of its configuration and web server information.
Conditionals
This part is mainly used when you want to customize and optimize WordPress and choose when to perform a function.

I will come back to the use of this part in the tutorial on optimizing WordPress to load or unload scripts and styles.
I spent two / three parts which are little used, but you can go and see for yourself.
Troubleshooting
Symbolic link to the db.php file
When activating the Query Monitor extension, a symbolic link is made to the db.php file. In some cases, the link is not made, there are a multitude of reasons (which I will not list).
If the link is not made, in the Queries section, a message is displayed on a red background as in the screenshot below and the advanced plugin (drop-in) is not available.
To solve the problem, you can refer to this page: db.php Symlink · johnbillion/query-monitor Wiki (github.com).
Conclusion
Query Monitor is a must-have plugin to customize and optimize WordPress thanks to all the information it returns on how the page was generated.
Personally, I use it on all WordPress installations to optimize and customize my sites.
