After watching several tutorials on Authentik, today I’d like to take things a step further by walking you through a complete migration from Keycloak. In this guide, we’ll see how to transfer users and groups from a Keycloak realm to Authentik using a PowerShell script I wrote earlier.
The goal is to provide you with a simple, repeatable, and fully automatable method for switching your identity management without unnecessary complexity.
Table of Contents
Prerequisites
- A Windows computer with PowerShell installed (version 5.1 or PowerShell 7+).
- An Authentik environment that has already been deployed, regardless of the method (Docker, Kubernetes, VM…).
- Administrator access to Keycloak.
- Administrator access to Authentik, to be able to create users and groups via the API.
Tutorial Objectives
The goal of this guide is to show you how to automatically migrate:
- Users from a Keycloak realm to Authentik
- The associated groups, along with their hierarchy and memberships
What the script does not do
To keep things simple and focused on identities, the script does not cover the following:
- Migration of applications (clients) from Keycloak to Authentik
- Migration or recreation of providers/authentication methods in Authentik
- Reconfiguring applications to use Authentik instead of Keycloak
These steps will need to be performed manually or using other scripts or tools, depending on your architecture.
How to Migrate Your Keycloak Users and Groups to Authentik
To get started, download the script available at this link: Sync-Keycloak-to-Authentik.ps1
Open the script and modify the following variables to match your environment:
# Variables principales
$KeycloakBaseUrl = "https://keycloak.domain.tld"                            # Url de Keycloak
$KeycloakRealm = "realm"                                                    # Royaume Keycloak a synchroniser
$KeycloakClientId = "admin-cli"
$KeycloakUsername = "admin"                                                 # Compte admin de Keycloak
$KeycloakPassword = "password"                                              # Mot de passe du compte admin de Keycloak
$KC_Token = ""

$AuthentikBaseUrl = "https://authentik.domain.tld"                          # Url d'Authentik
$AuthentikToken = "authentik-token"                                         # Cle API
$AuthentikDefaultPath = "goauthentik.io/sources/realm"                      # Chemin ou les comptes seront cree ex : goauthentik.io/sources/<realm-name>
Key variables to configure:
| Variable | Description |
|---|---|
$KeycloakBaseUrl | Keycloak server URL |
$KeycloakRealm | Keycloak realm to synchronize |
$KeycloakClientId | Client used for authentication (e.g., admin-cli) |
$KeycloakUsername | Keycloak admin account |
$KeycloakPassword | Keycloak admin account password |
$AuthentikBaseUrl | Authentik server URL |
$AuthentikToken | Authentik API token |
$AuthentikDefaultPath | Path in Authentik where users should be created |
$TokenRefreshInterval | Number of iterations before regenerating the Keycloak token |
$Transcript | Logging enabled (True/False) |
$TempPath | Temporary folder for logs |
$TranscriptLogFile | Name of the generated log file |
Once you’ve configured the variables in your PowerShell script (Keycloak URL, token, Authentik URL, API keys, realm to export, etc.), you can easily start the migration.
The script will automatically:
- Retrieve users from the Keycloak realm
- Retrieve groups and their structure
- Recreate these elements in Authentik via the API
One of the advantages of this script is that it can be run multiple times without any issues.
It performs the necessary checks to prevent duplicates:
- A group that has already been migrated will not be recreated
- An existing user will not overwrite existing data
- Only missing items will be added
This allows you to perform the migration in stages or rerun the script if adjustments are needed, without any risk to your environment.
External ID Management and OpenID Provider Configuration
In some environments, applications do not rely on email addresses or usernames to identify an account, but instead use an internal identifier specific to the identity provider.
When migrating from Keycloak, it may therefore be necessary to preserve this unique identifier to ensure that applications continue to correctly recognize users.
Why Use the Keycloak ID as a Unique Identifier?
Every user in Keycloak has an internal ID—a stable, immutable UUID.
This migration script synchronizes this identifier to Authentik as an External ID in order to:
- Preserve a user’s unique identity on the application side
- Prevent the creation of new, unrecognized accounts
- Ensure seamless continuity after the switch to Authentik
Thus, an application that used the Keycloak ID to identify a user will be able to continue functioning with Authentik.
Limitation: only for applications using the internal ID
This section applies only to applications that rely on the identity provider’s internal ID as the reference identifier.
In many cases, the unique identifier used is simply:
- the email address,
- or the username.
For these applications, no additional configuration is required.
Configure Authentik to use: external_id
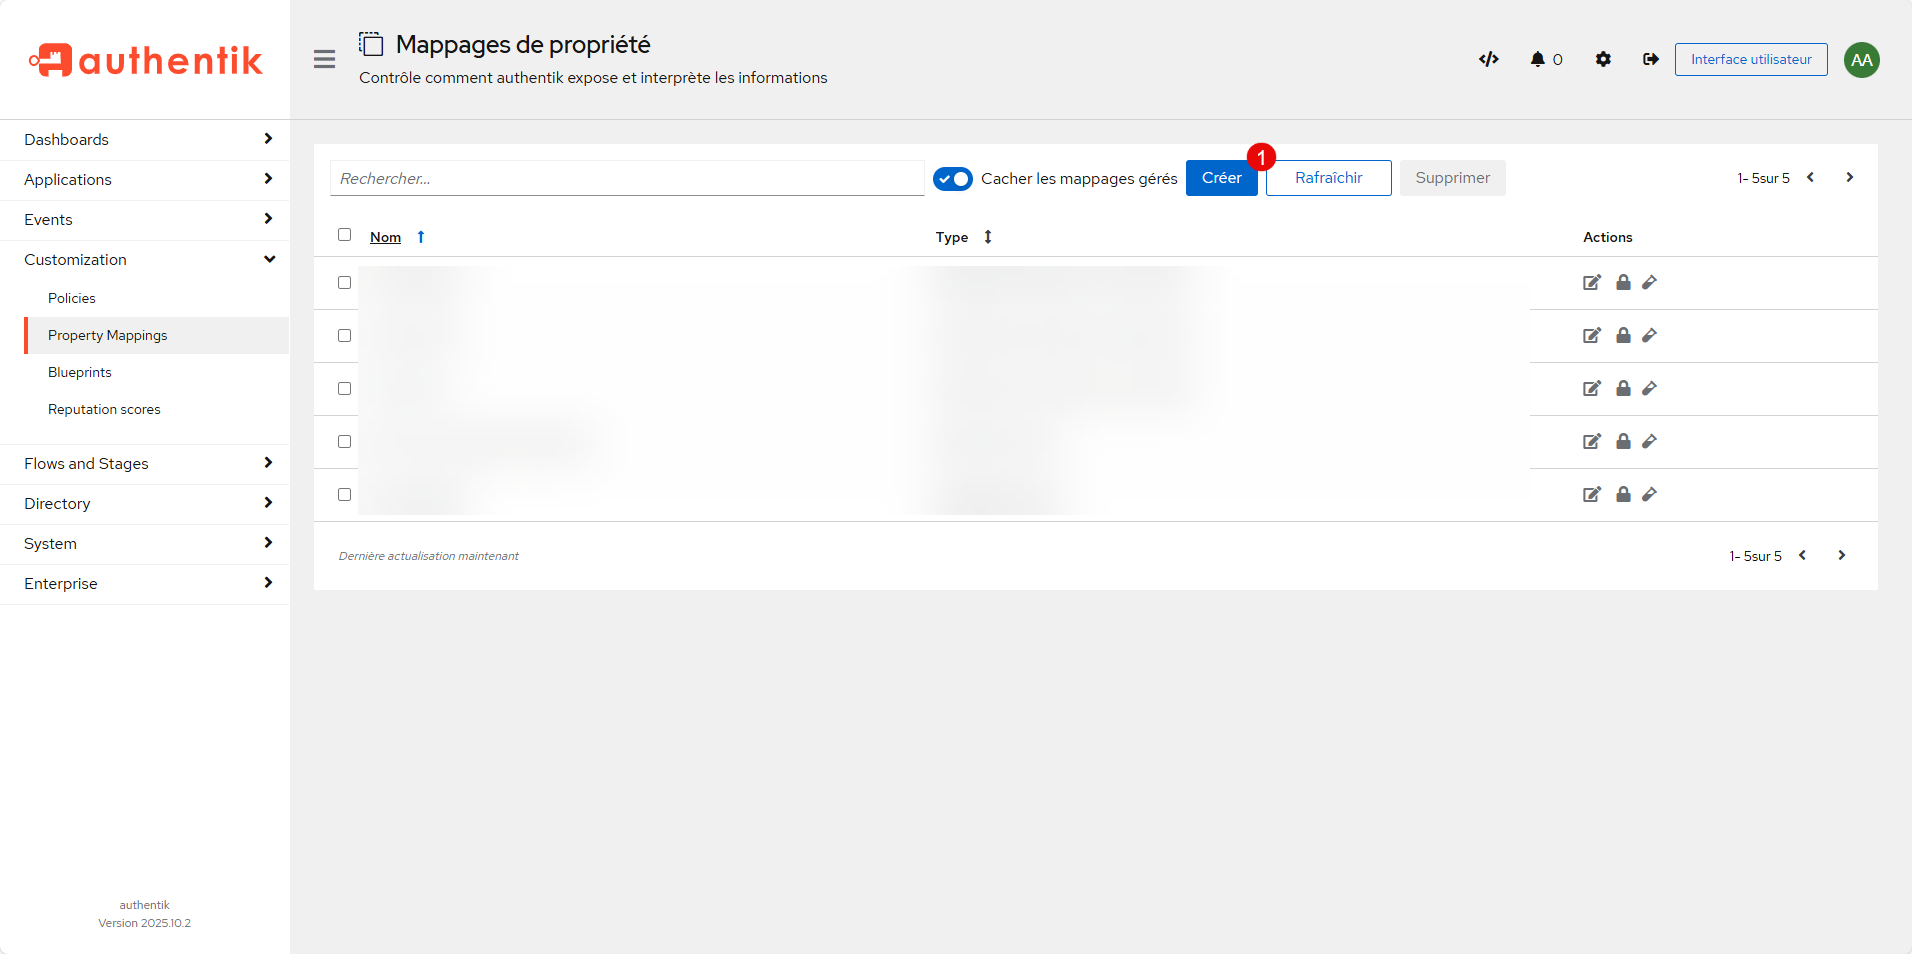
From the Authentik administration interface, expand the Customization menu, go to Property Mapping, and click the Create button 1.
Then create the property as shown in the screenshot below; the scope name must be openid.
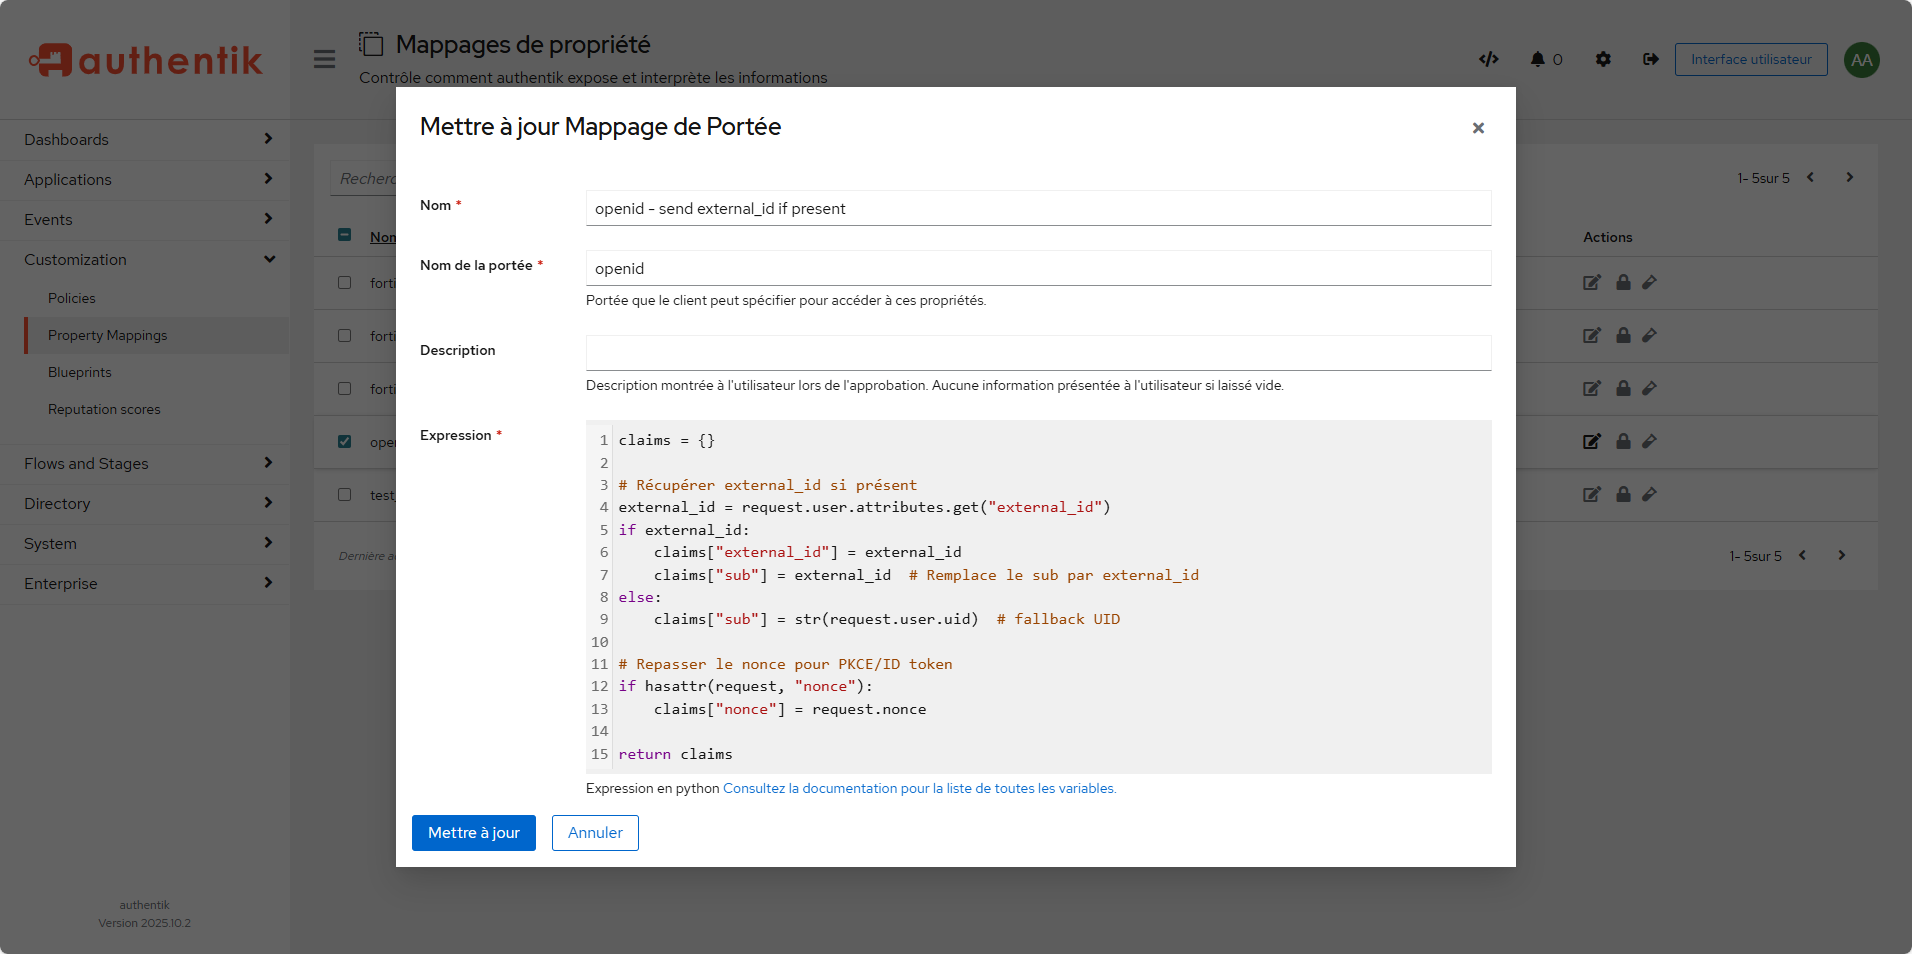
The expression:
claims = {}

# Récupérer external_id si présent
external_id = request.user.attributes.get("external_id")
if external_id:
    claims["external_id"] = external_id
    claims["sub"] = external_id  # Remplace le sub par external_id
else:
    claims["sub"] = str(request.user.uid)  # fallback UID

# Repasser le nonce pour PKCE/ID token
if hasattr(request, "nonce"):
    claims["nonce"] = request.nonce

return claimsCopier📋 Copier
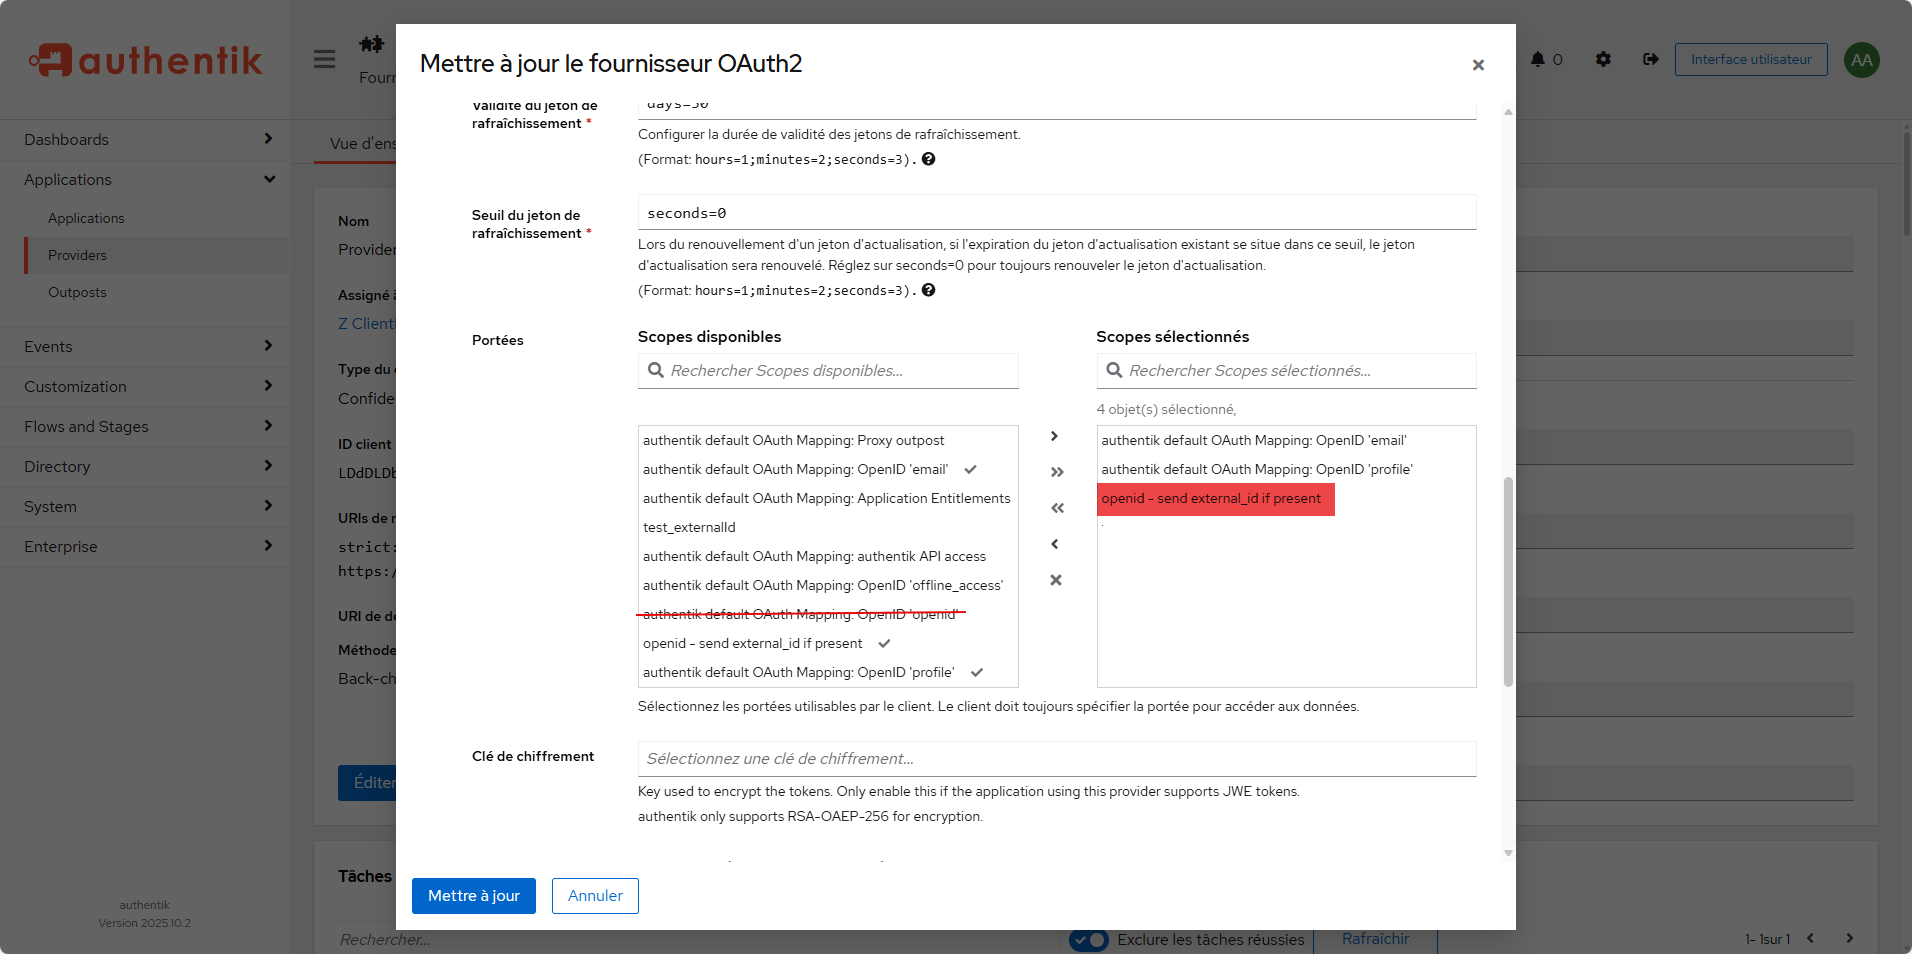
Next, in the application’s OpenID provider configuration, under the Advanced Protocol Settings section, remove the “Authentik default OAuth Mapping OpenID ‘openid’” and add the scope you just created.
Conclusion
Migrating your Keycloak users and groups to Authentik may seem complex at first, but with a well-designed PowerShell script, the process becomes simple, fast, and repeatable.
By using the Keycloak ID as the External ID and correctly configuring the OpenID provider in Authentik, you ensure seamless continuity for your applications and centralized identity management.
This method allows you to secure your data, minimize errors, and maintain control over your identity environment while taking advantage of Authentik’s modern features
FAQ
Le script peut-il écraser des utilisateurs existants dans Authentik ?
Non. Le script effectue des vérifications pour éviter les doublons. Les utilisateurs ou groupes déjà présents ne seront pas recréés.
Est-ce que les mots de passe sont migrés ?
Non. Les mots de passe ne sont pas transférés. Les utilisateurs devront soit réinitialiser leur mot de passe via Authentik, soit se connecter via un provider externe si configuré.
Peut-on migrer plusieurs royaumes Keycloak avec le même script ?
Oui, mais chaque royaume doit être traité séparément et les variables du script ajustées pour chaque migration.
Le script migre-t-il les applications et les providers OpenID ?
Non. Seuls les utilisateurs et groupes sont migrés. La configuration des applications et providers doit être réalisée manuellement.
Que faire si une application utilise l’e-mail comme identifiant au lieu de l’ID Keycloak ?
Dans ce cas, aucune action spéciale n’est nécessaire. Authentik pourra utiliser l’e-mail comme identifiant unique pour l’application.