Table of Contents
Presentation
In this tutorial, we will see how to set up an SMTP server with Windows Server. This feature allows you to send e-mails either directly over the Internet or to transfer to another SMTP server such as Exchange or Office 365.
The SMTP server is often used with copiers for scan to mail functionality or by email notification (GLPI) applications.
Installation
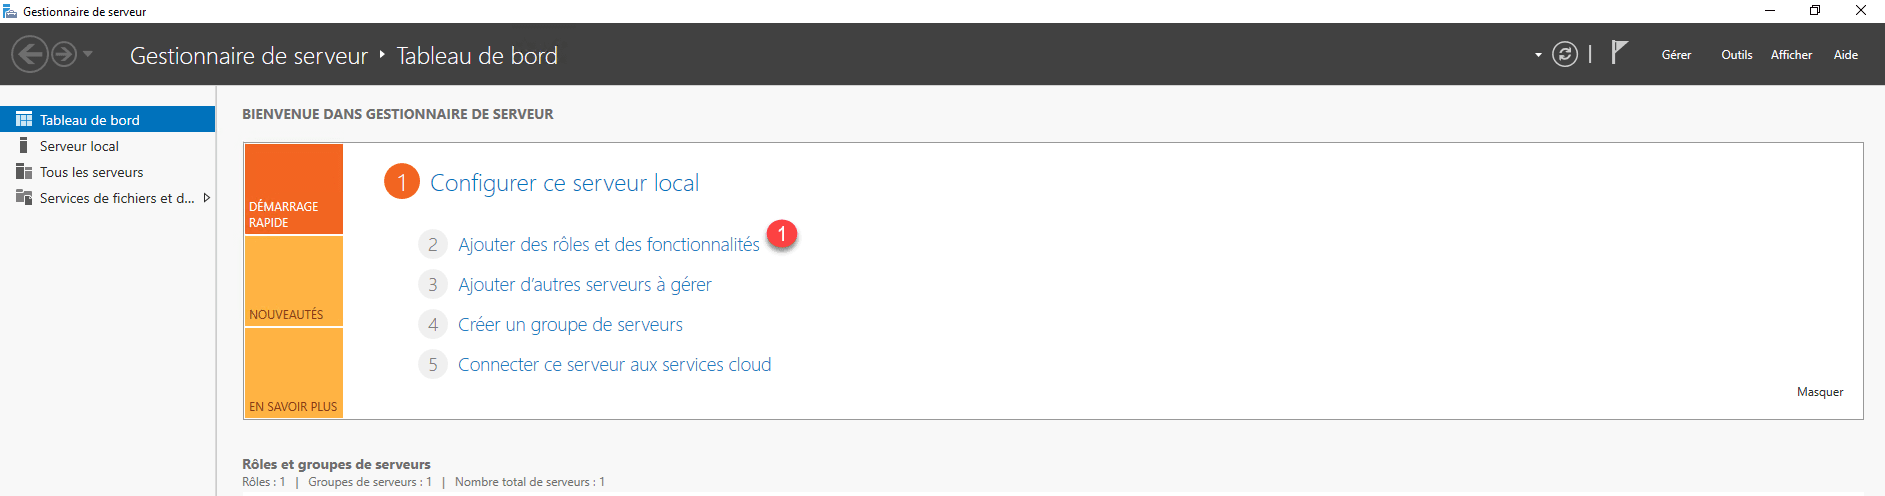
From the server manager, click Add Roles and Features 1 .
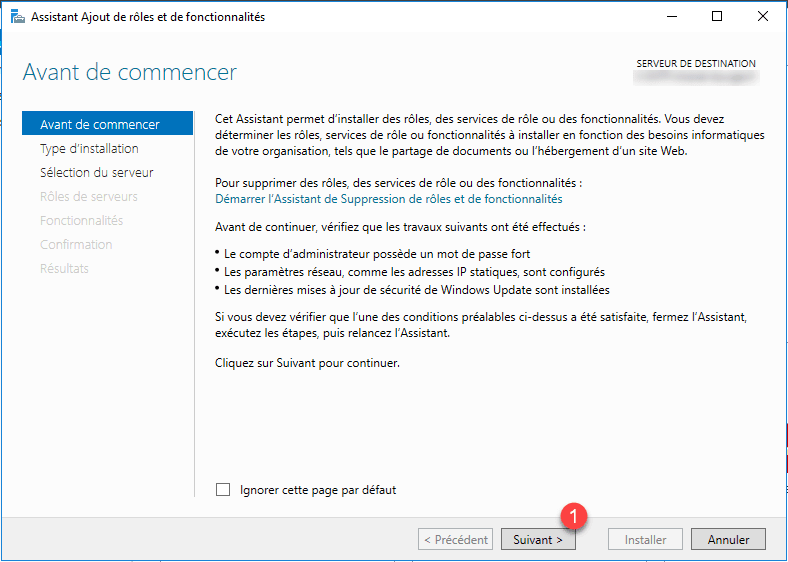
When launching the wizard, click Next 1 .
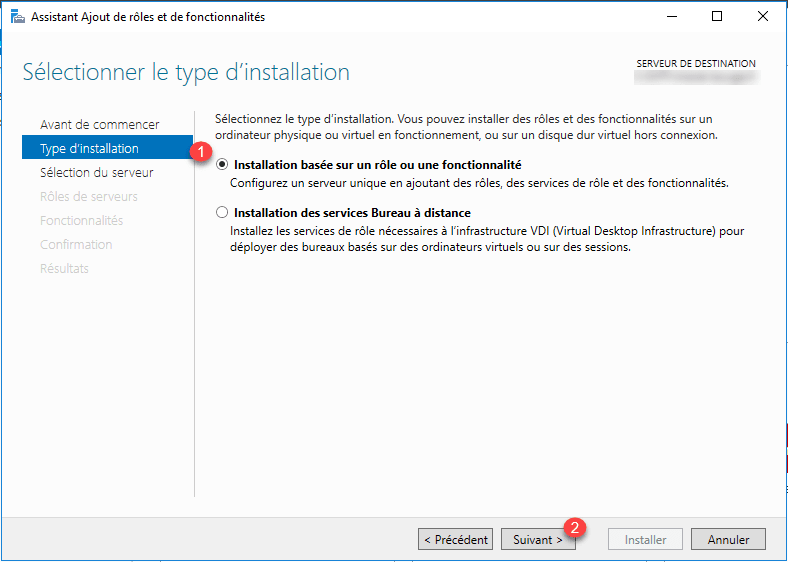
Choose the Role Based Installation option or 1 feature and then click the Next 2 button.
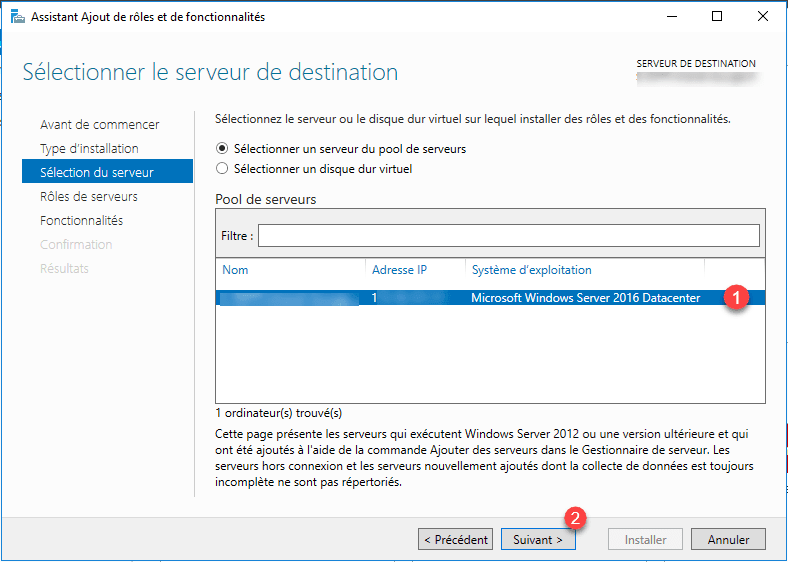
Select the server where the installation is to be done 1 and click Next 2 .
Skip the list of roles by clicking Next 1 .

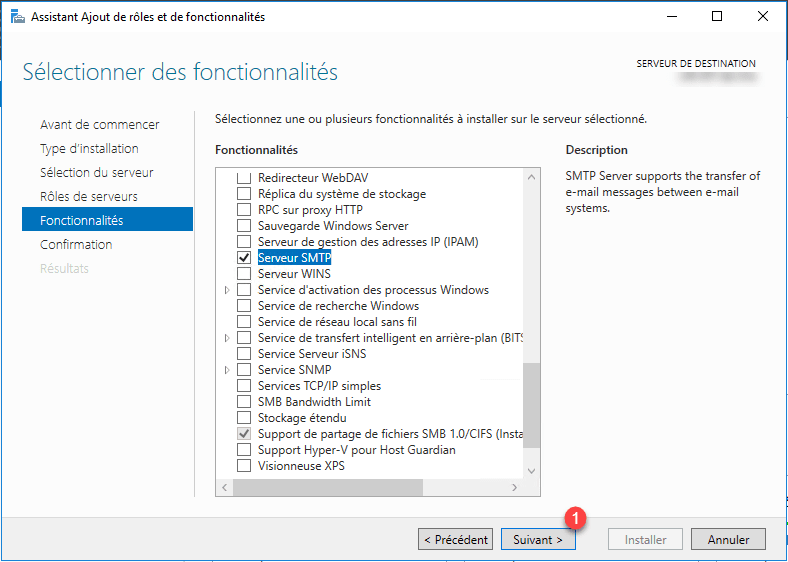
Check the box for SMTP Server 1 .
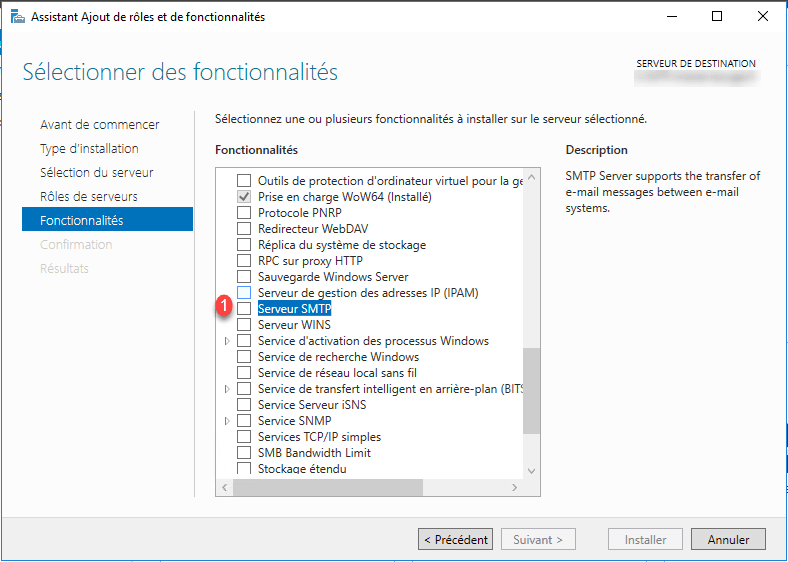
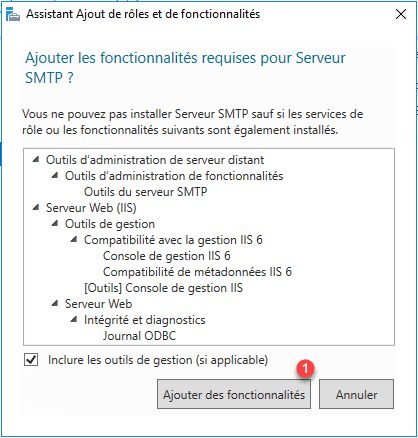
Click Add Features 1 to install dependencies and the Admin Console.
Click Next 1 to go to the next step.
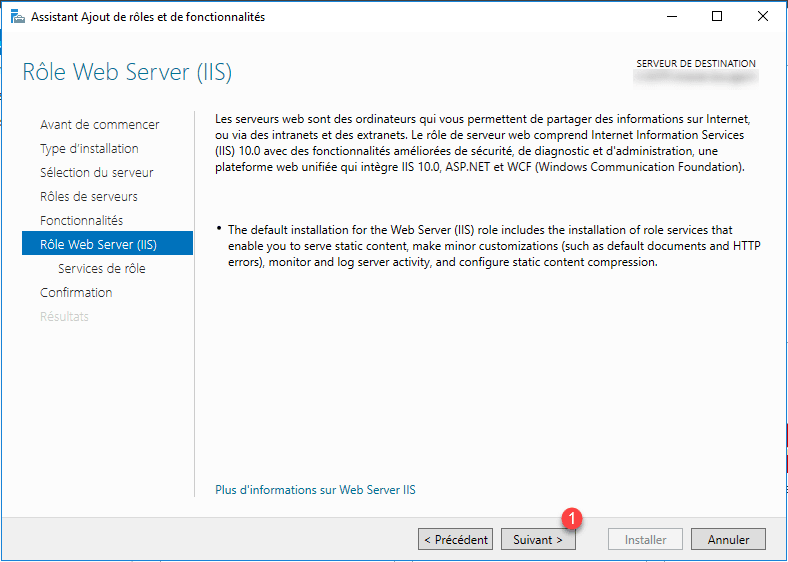
Pass the summary of the IIS role by clicking Next 1 .
Also click Next 1 to pass the additional services of the IIS role.

Click on Install 1 .
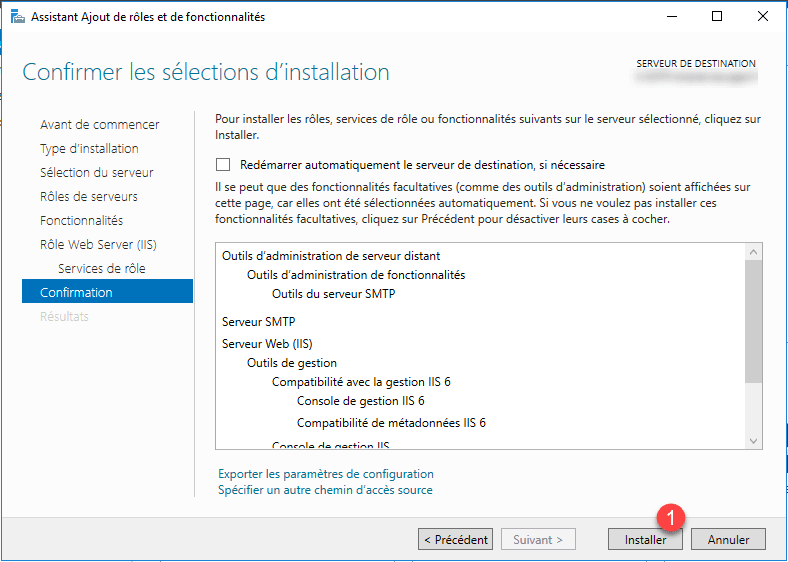
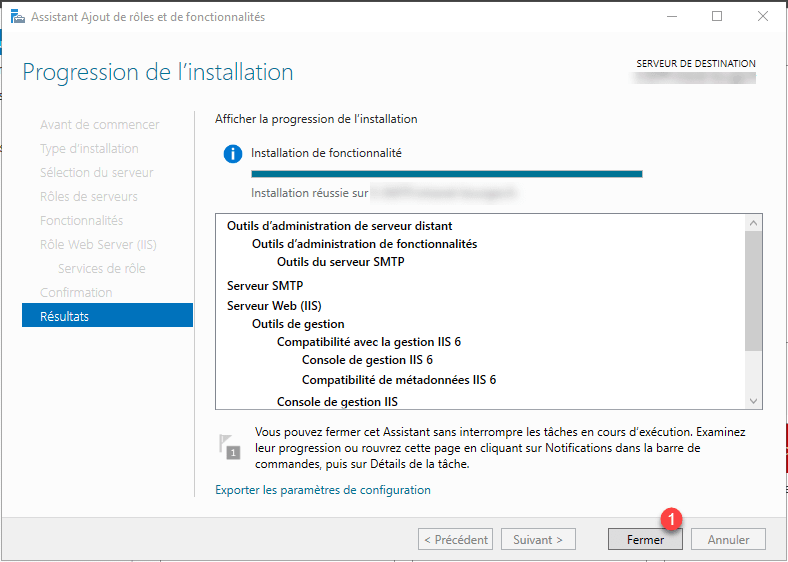
Wait while installing the SMTP server …

The installation completed, exit the wizard by clicking Close 1 .
SMTP server configuration
Now that the SMTP server is installed, it must be configured. The configuration given in the tutorial will allow any computer to send messages through the service. It is obviously necessary to adapt to your situation the configuration.
By default, the message is sent by reading the MX record (s) of the receiving domain. In the configuration we will also see how to send the message to another SMTP server to relay.
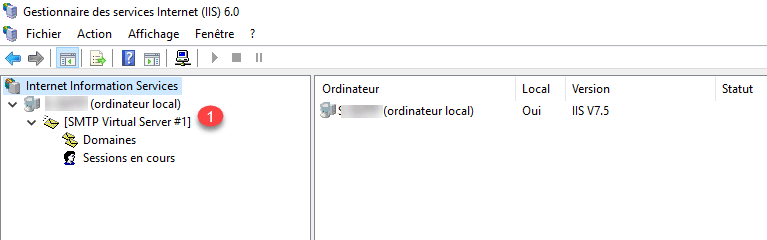
Administration is through the Internet Information Services (IIS) 6.0 console that is available through the Start menu or Administrative Tools.

By default during installation an SMTP server is created 1 .
It is possible to create multiple virtual SMTP servers that will be differentiated either by a different IP address or by using a different port.
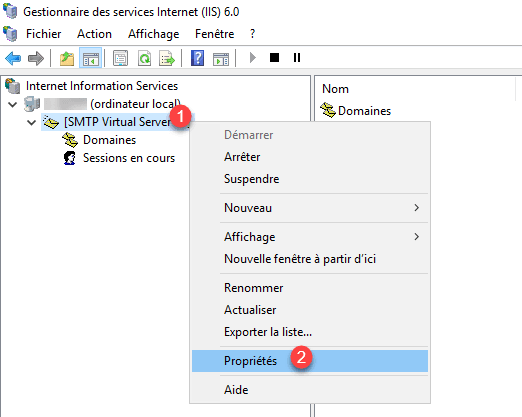
To access the properties of the server already present, right click on 1 and click Properties 2 .
The restart of the SMTP server is done in two stages, first it is necessary to stop this one then to start it.
From the General 1 tab, you can choose the IP address of the virtual server and enable logging.

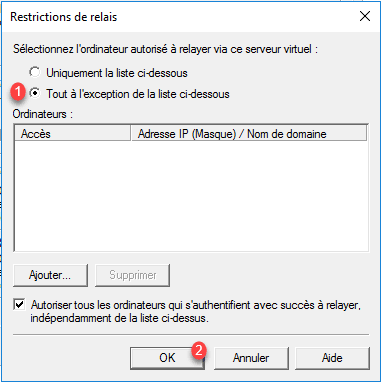
On the Access tab 1 you can choose who can access the SMTP server. This is where we will give free access to the service. Click on Relais 2 .

Choose the All option except the list below 1 and click OK 2 .
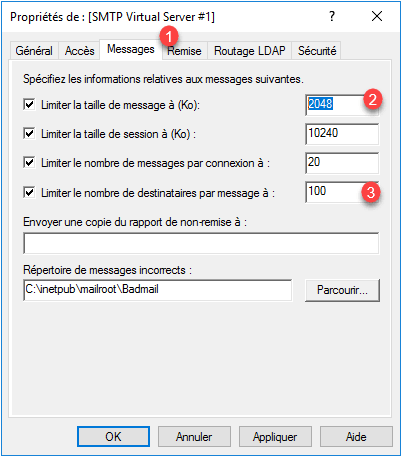
Back to the Access tab, apply the changes then click on Connection and verify that the configuration is identical to the relay. On the Messages tab 1 there are several important settings such as message size 2 or number of recipients per message 3 .
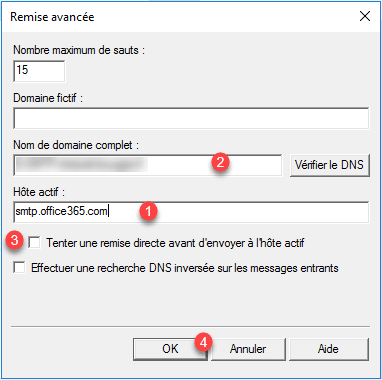
To configure the gateway through another SMTP server, go to the Discount tab 1 and click Advanced Settings 2 .

In active host 1 enter the IP address or FQDN name of the relay server (here office 365). It is also here that you can change the name of the server that will be present in the message header 2 . In the case where an active host is configured, check that the box Attempt direct delivery before sending to the active host is unchecked 3 . Validate the parameters by clicking OK 4 .
Your SMTP server is now ready to send e-mails. Remember to restart the virtual STMP server when you make changes.
