Table of Contents
Presentation
Nested virtualization is a feature available on Hyper-V from Windows Server 2016 and Windows 10, which enables virtualization options in a virtual machine.
To put it simply, nested virtualization allows virtualization in a virtual machine.
There are also some prerequisites :
- The Hyper-V host must be on Windows Server 2016/2019 or Windows 10 1607 or more.
- The virtual machine must be under Windows Server 2016/2016 or Windows 10 1607 or more.
- Intel processor with VT-x and EPT technology.
In order to make the tutorial more explicit, the captures were made on a Windows Server 2016 host and a virtual machine on Windows 10.
Enable nested virtualization on Hyper-V
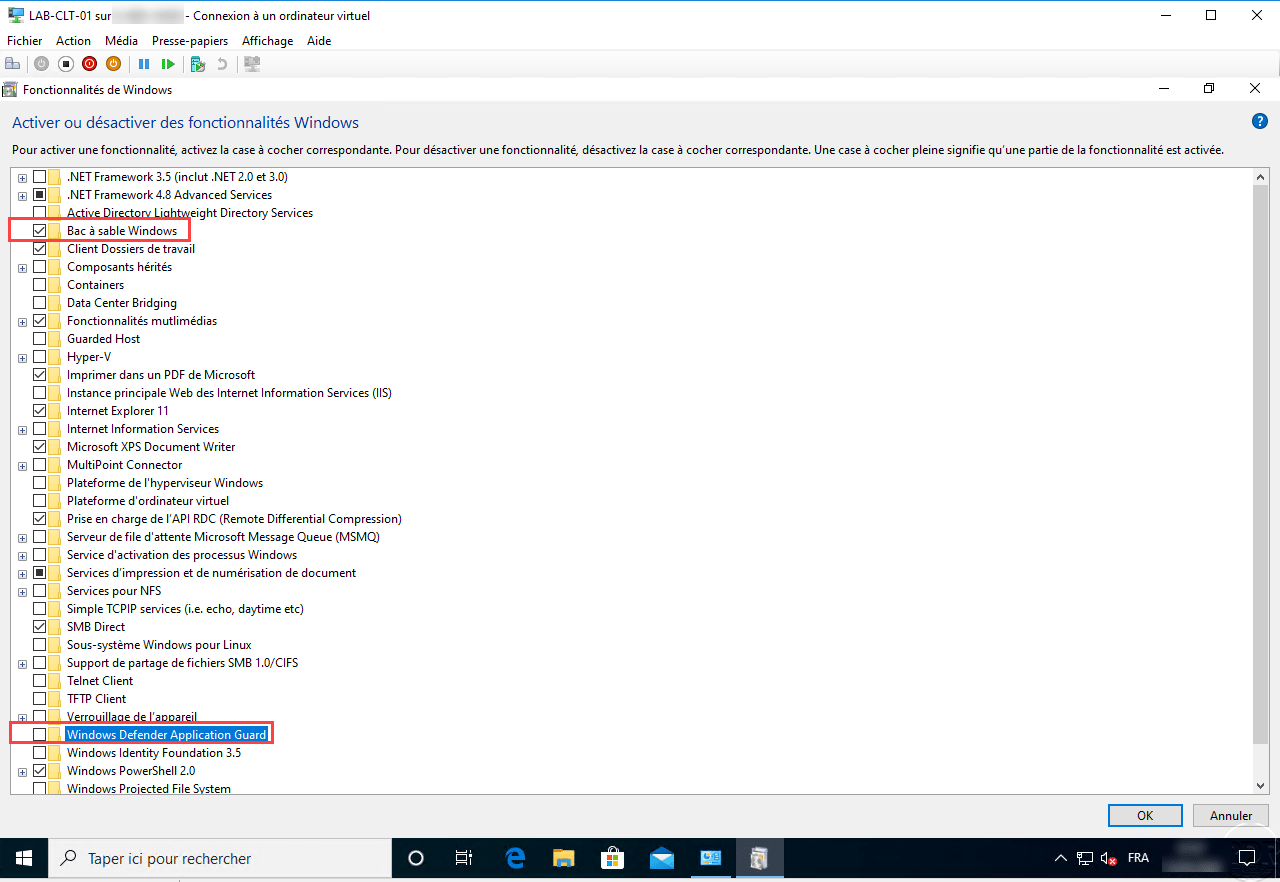
On the screenshot below, we can see that the functions related to virtualization are not available (Windows Sandbox, Hyper-V Platform and Windows Defender Application Guard).

Now we will see how to activate the nested virtualization, firstly, you have to turn off the virtual machine where it must be activated.
On the Hyper-V host, open a PowerShell command prompt in administration enter the command below to activate nested virtualization:
Set-VMProcessor -VMName NOM_DE_LA_MACHINE_VIRTUELLE -ExposeVirtualizationExtensions $True
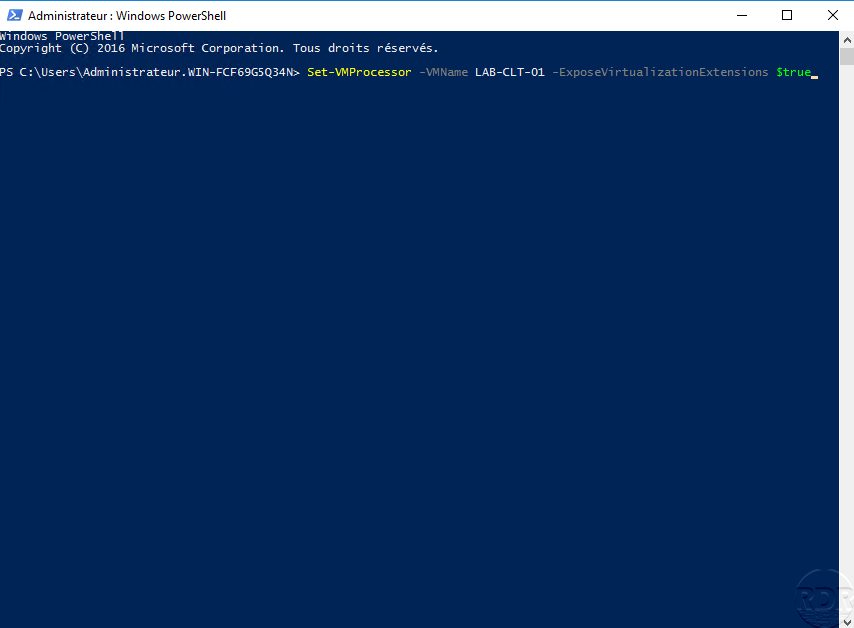
That’s all, it only remains to start the virtual machine.
We can see on the screenshot below, that it is now possible to activate the functionalities related to virtualization in a virtual machine.
Conclusion
To conclude this tutorial in which case to use nested virtualization:
- For testing / lab purposes
- Activate the sandbox or Defender Application Guard in a VDI environment.
It is not recommended to use nested virtualization with Hyper-V in a production environment.
Lien : https://docs.microsoft.com/fr-fr/virtualization/hyper-v-on-windows/user-guide/nested-virtualization
