In this article, we will see how to install GLPI (Free Management of IT infrastructure).
GLPI is an open source solution that offers businesses a complete information system management (ITSM) solution.
Features :
- Help-desk: incident and request management
- Automatic inventory of IT assets using plugin (FusionInventory, OCS NG).
- License management
- Project management
- Financial management: budget and depreciation of equipment
- …
Table of Contents
Prerequisites
To run GLPI need the following:
- A web hosting preferably dedicated with:
- Apache or IIS
- PHP
- MySQL or MariaDB
Installing GLPI
Download the latest version of GLPI from the official website: http://glpi-project.org/ then unzip the archive.
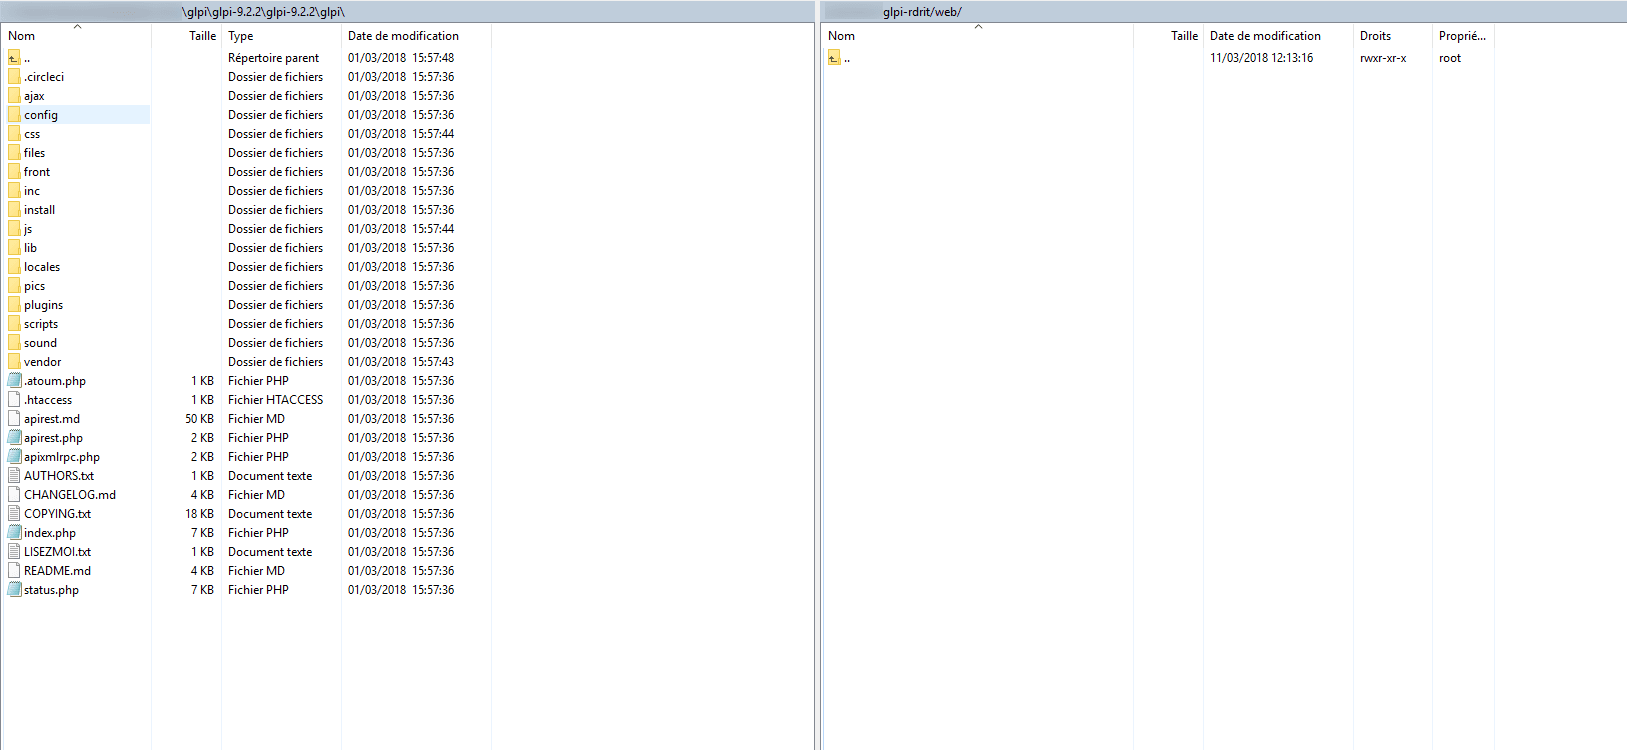
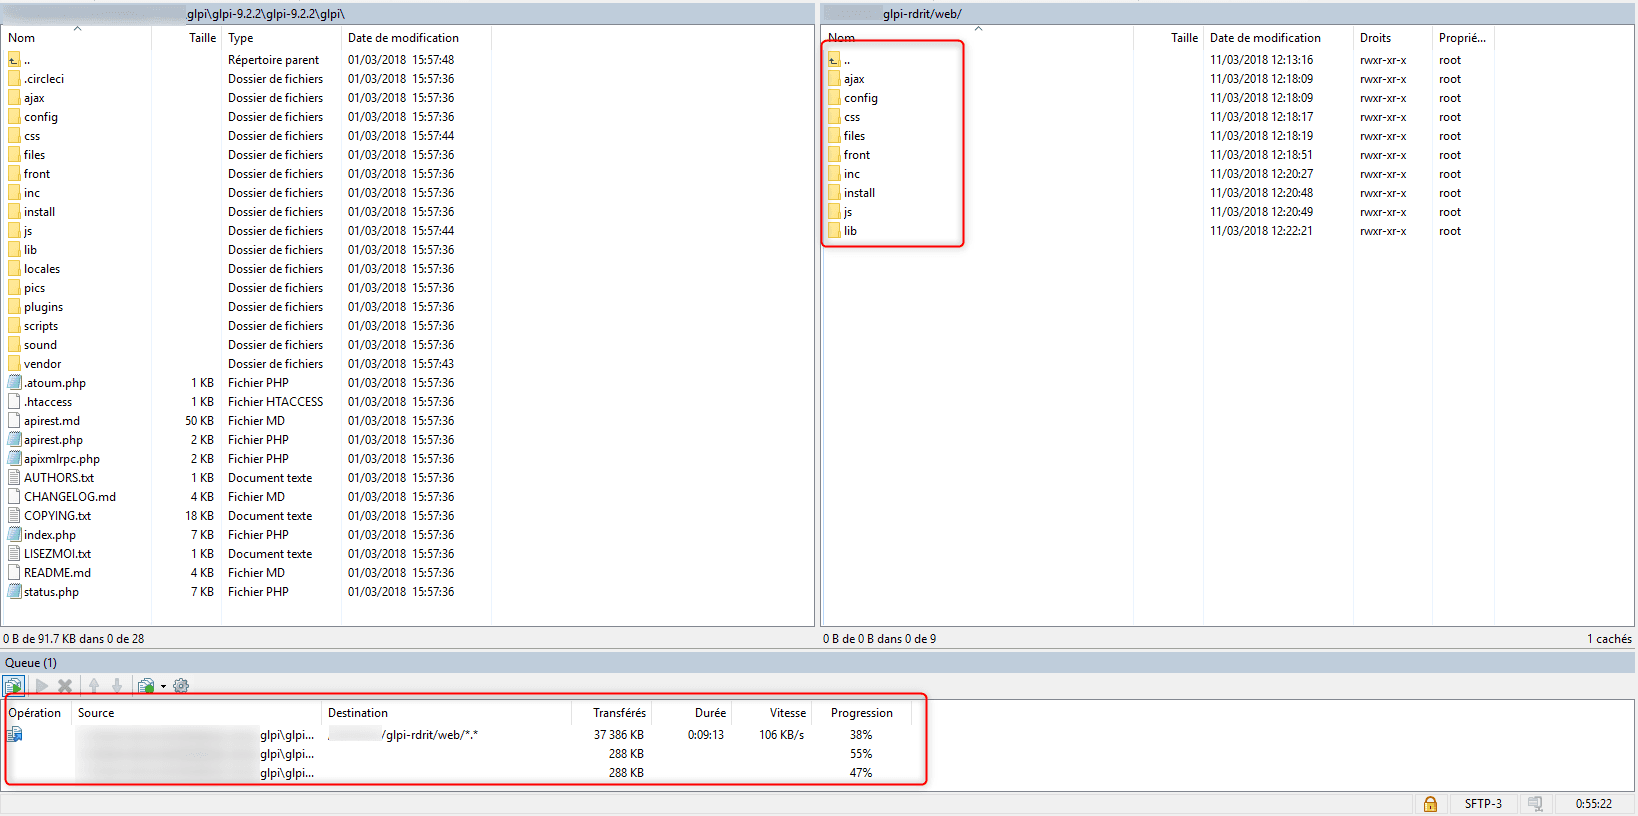
Send the contents of the archive to the server that will host.
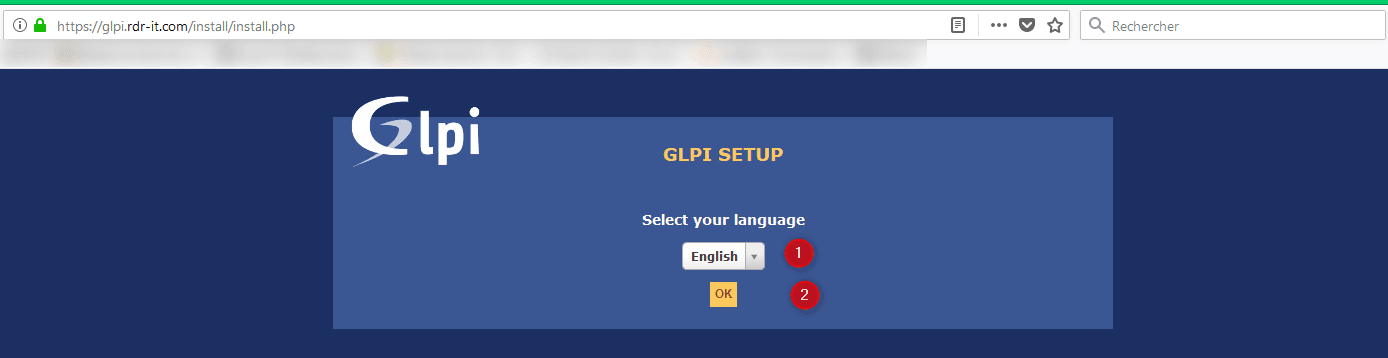
Launch an internet browser and enter the URL or IP address of the server.
Select the language 1 of the wizard, which will also be the language configured by default in GLPI and Click OK 2 .
Check the box “I have read and ACCEPT the terms of the license set out above.” 1 then click on the button Continue 2 .

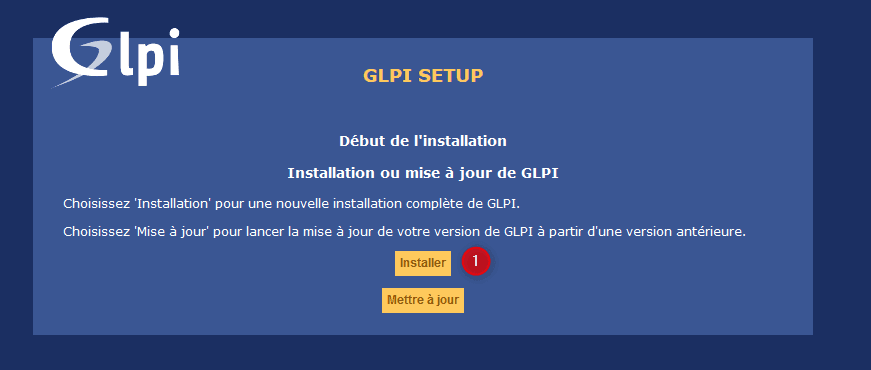
Click on Install 1 >.
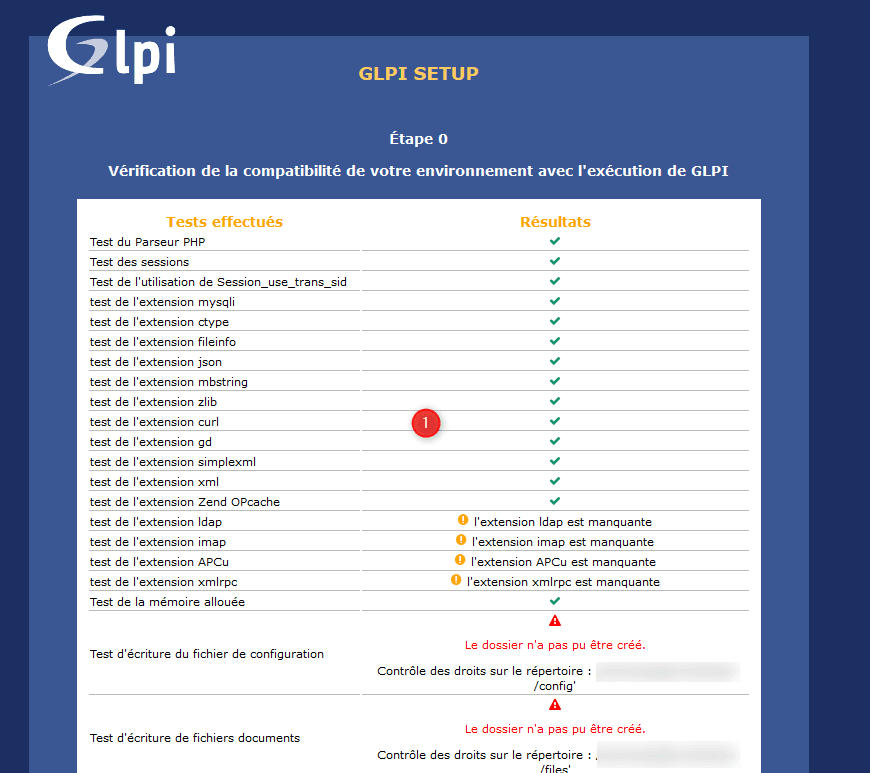
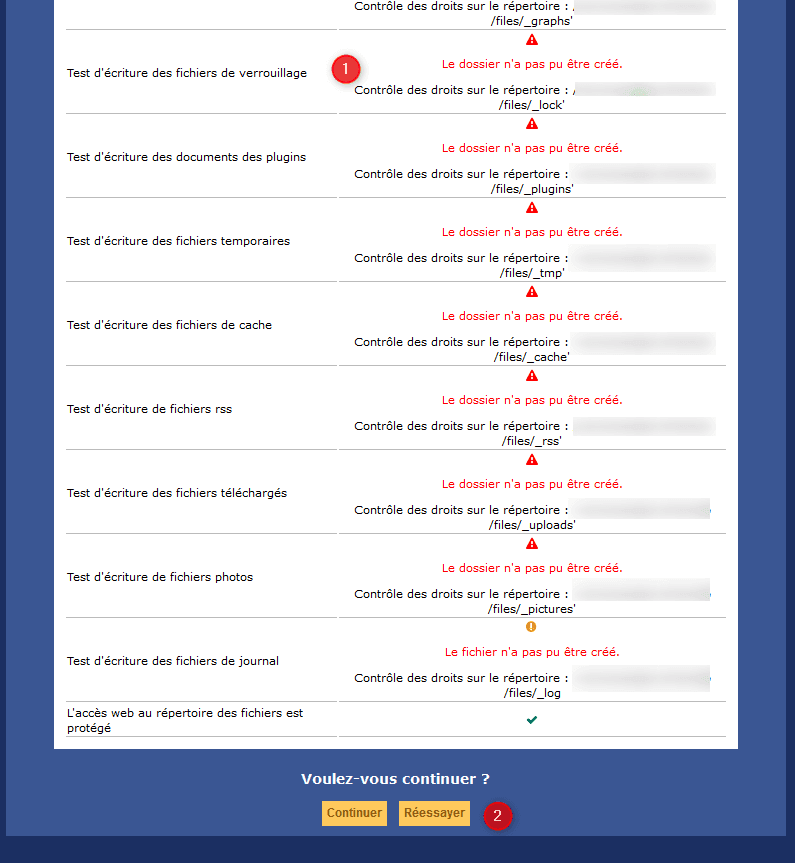
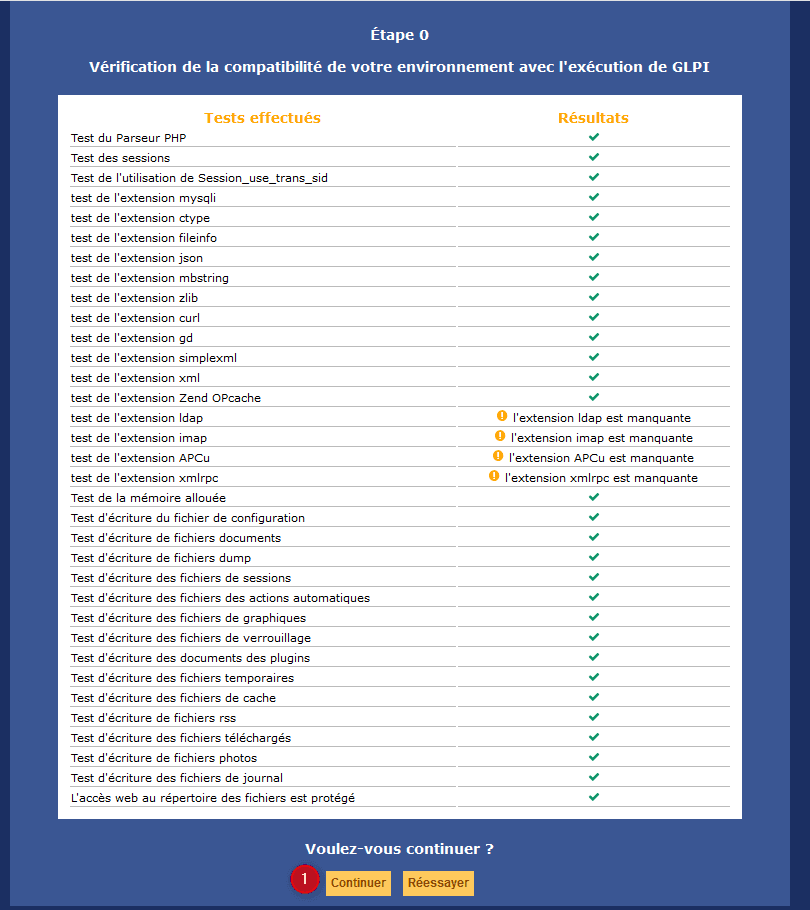
The script checks the prerequisites 1 , if there are any errors, correct them and click Retry 2 to make sure that the web server is compliant to use GLPI.
Once the configuration is validated, click Continue 1 .
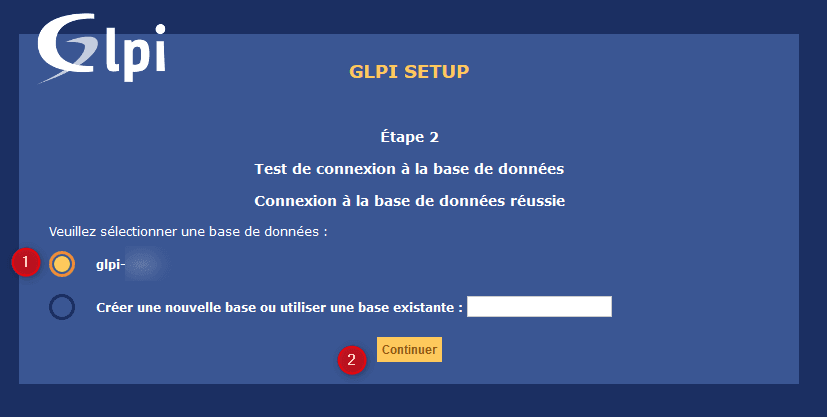
Enter the connection information to the database server: 1 Database server, 2 User, 3 Password and click Continue 4 .

Select database 1 and click Continue 2 .
It is also possible to create a new database, for this the configured user must have the necessary rights (CREATE DATABASE).
The creation of the database may take a while.
The database is initialized, click Continue 1 .

To send usage information leave the box marked 1 . Click on Continue 2 .

Click Continue 1 .

Click on Use GLPI 1 .
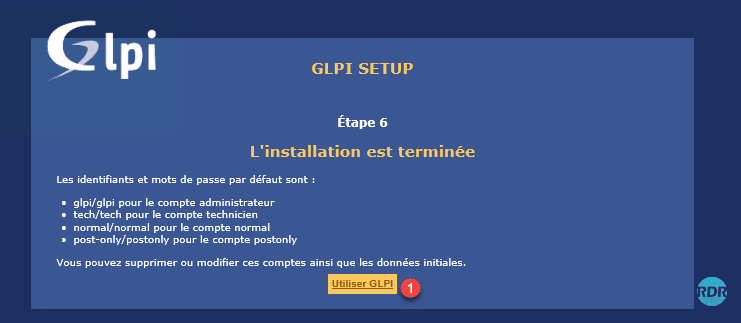
GLPI is now installed.
Basic configuration of GLPI
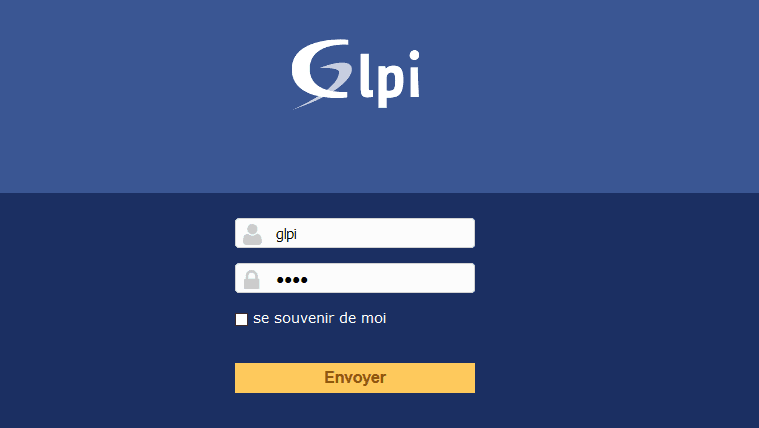
Log in with the default identifiers glpi / glpi.
An alert message appears about the Install folder and the default users.

Delete the install folder
Go to the installation folder on the WEB server and delete the install folder.
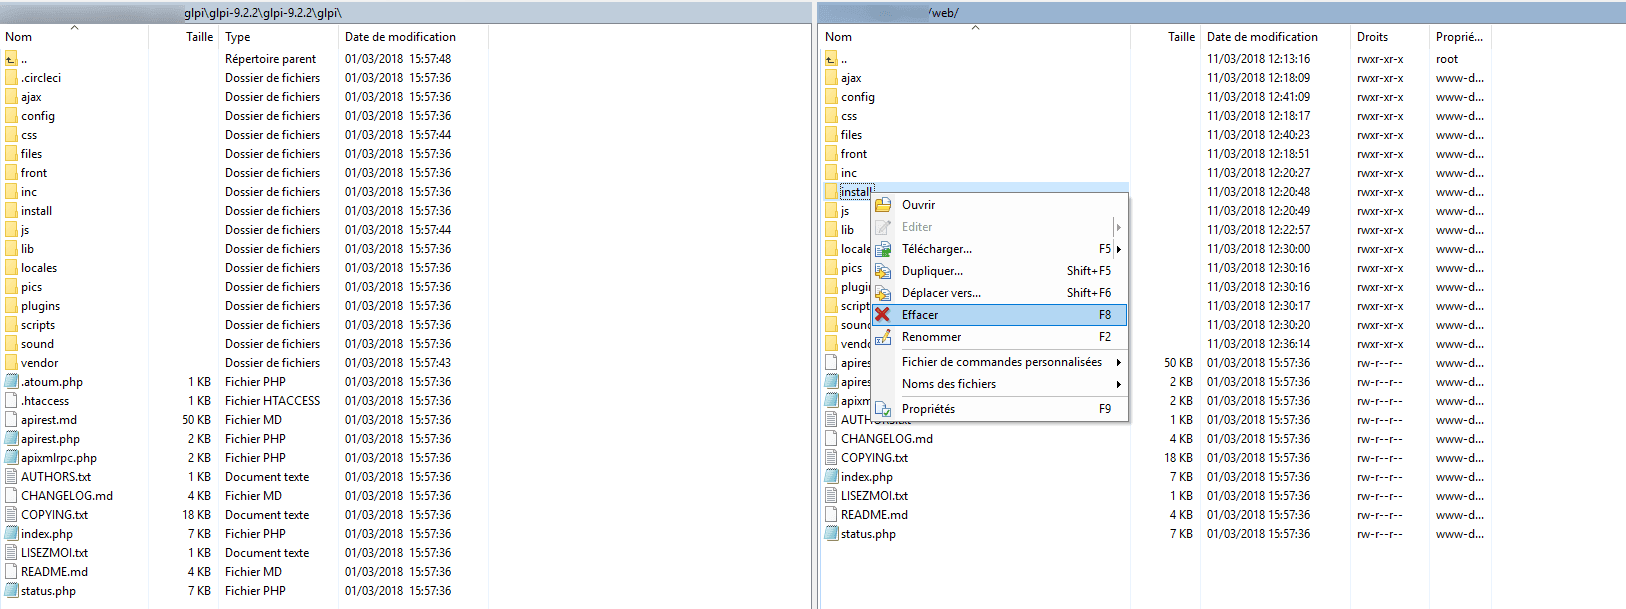
Return to GLPI and refresh the page. The alert for the installation folder should no longer be displayed.

Disable default users
To disable the accounts, we will use the bulk modification feature of GLPI. This feature allows you to edit a large number of items at one time.
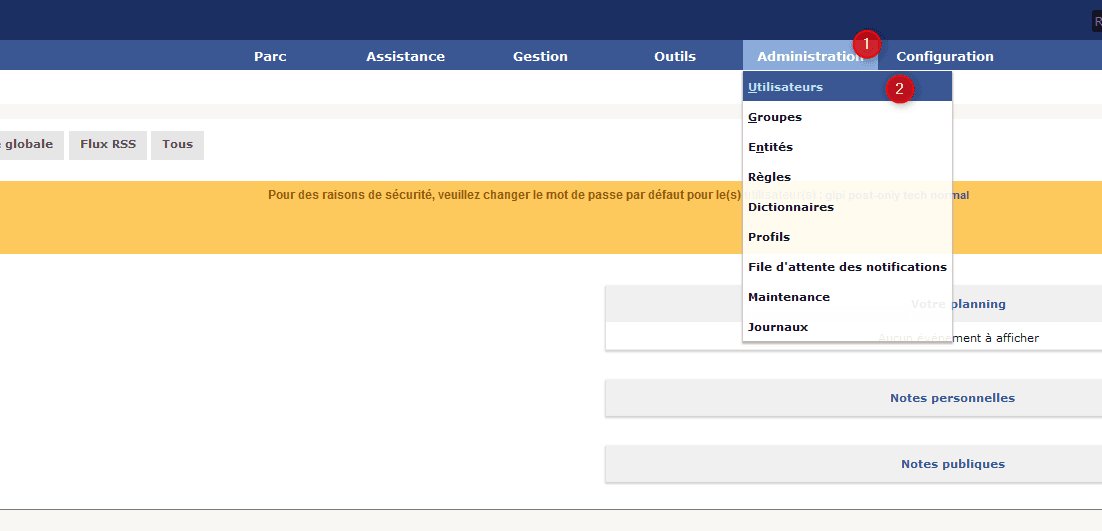
From the navigation menu go to Administration 1 and Users 2 .
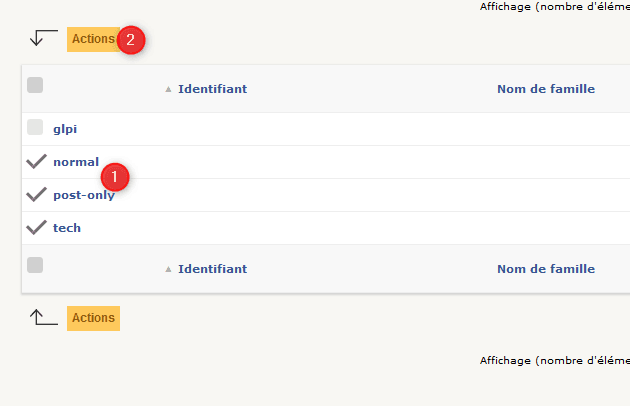
Select all users except GLPI 1 then click on the Actions button 2 .
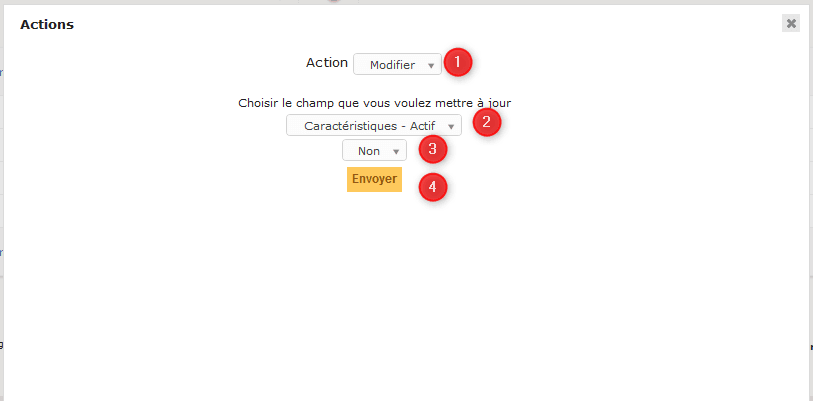
Select the action Modify 1 , choose the element to modify: Characteristic Active 2 , set the value: NO 3 and click on Send 4 to apply the change
Users are disabled.

Returning the home page, it should remain only the alert on the user glpi.
Change the password of the user GLPI
Access the account details by clicking on the logged in user 1 . Enter the new password 2 (2x times) and click the Save button 3 .

Configuring the sending of e-mail
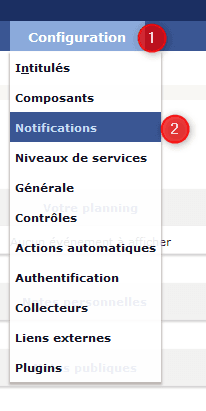
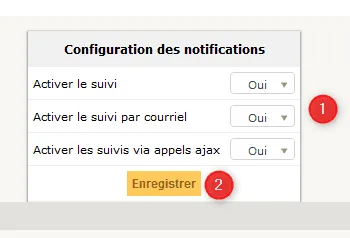
From the navigation menu go to Settings 1 / Notifications 2 .
Enable notifications 1 and click Save 2 .
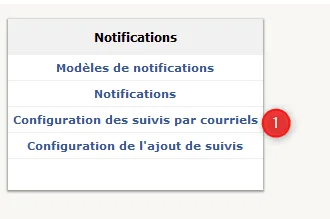
Once the page is reloaded, click on Click on Configuration of follow-ups by emails 1 .
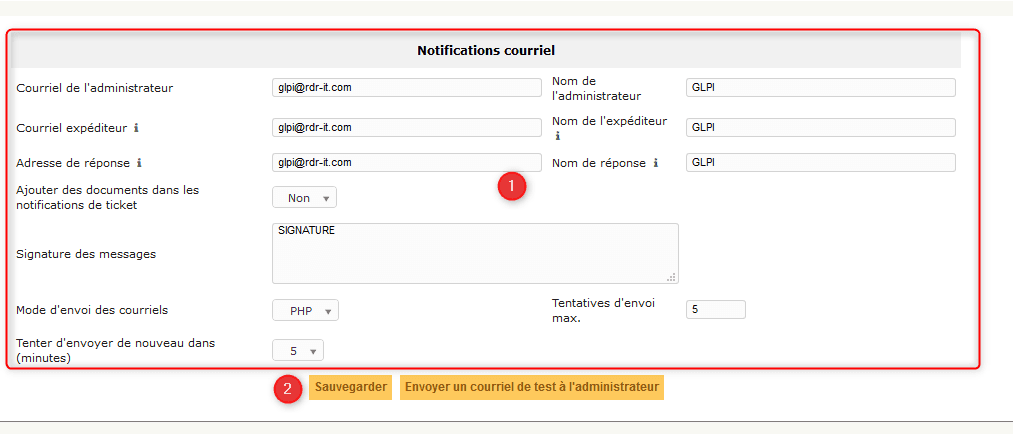
PHP
Fill in the form 1 leaving PHP for the Send Mode.
SMTP
Exemple d’une configuration d’un serveur SMTP avec GLPI. (FR)
