Sometimes, for testing purposes, it is necessary to disable the real-time antivirus protection. Here’s how to do it with disable defender on Windows 10.
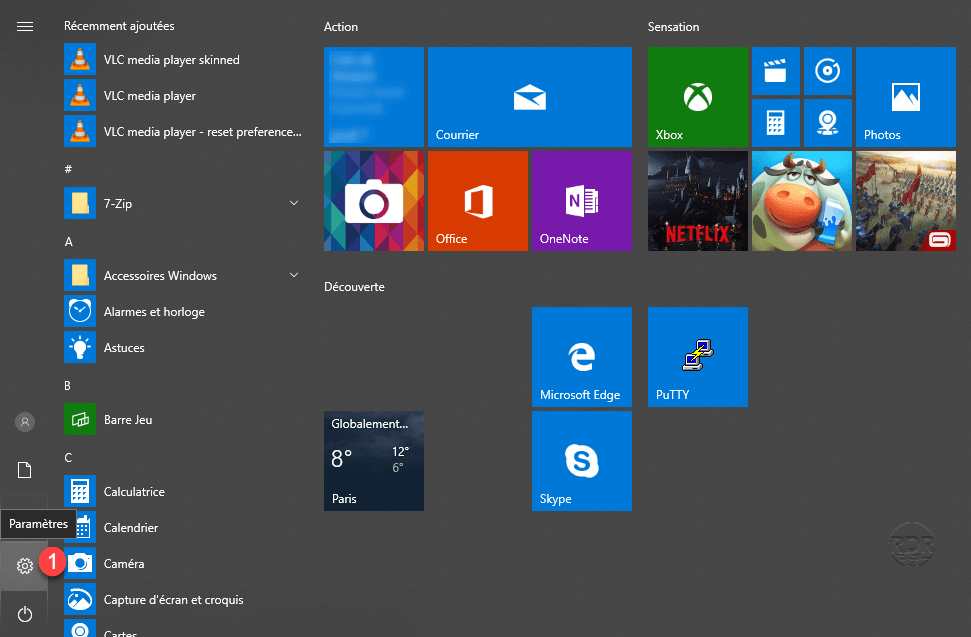
1. Open the “1” settings of Windows 10 accessible through the start menu.
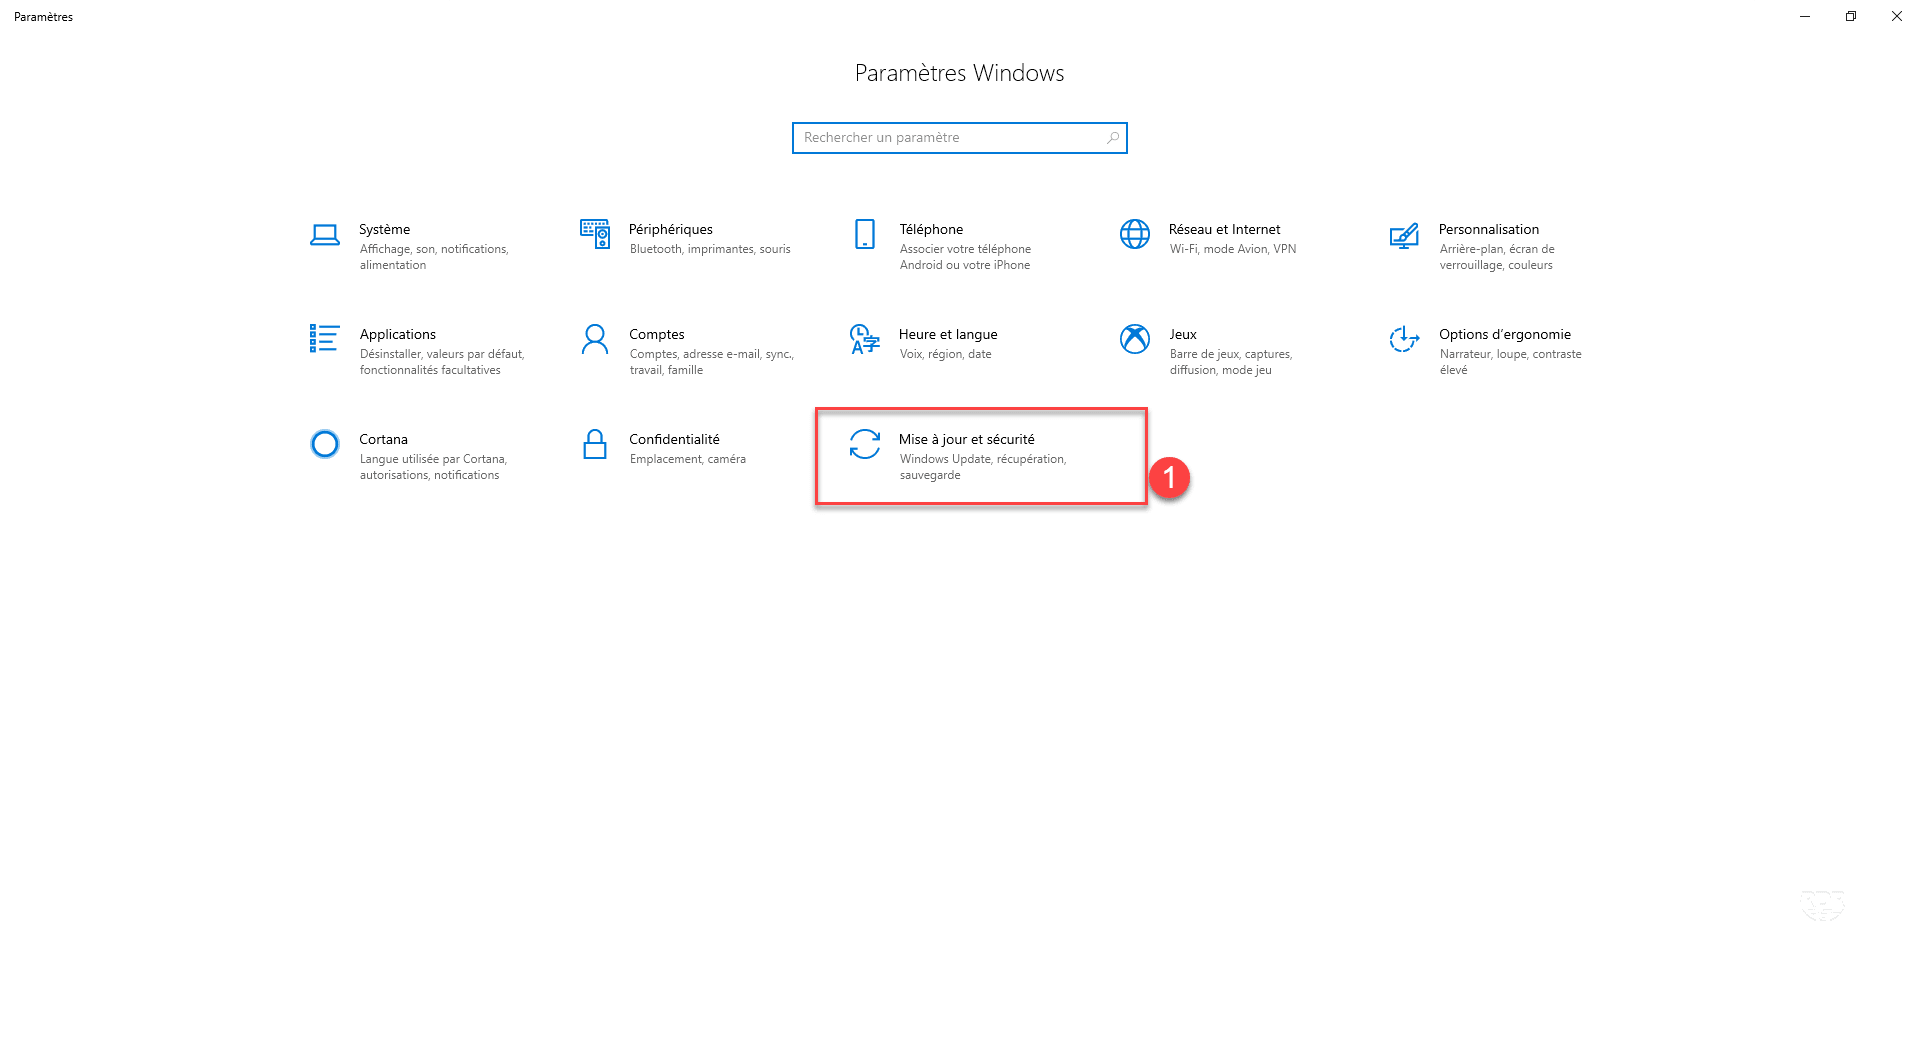
2. Click Update and Security 1 >.
3. Go to Windows Security 1 and click on Open Windows Security 2 .

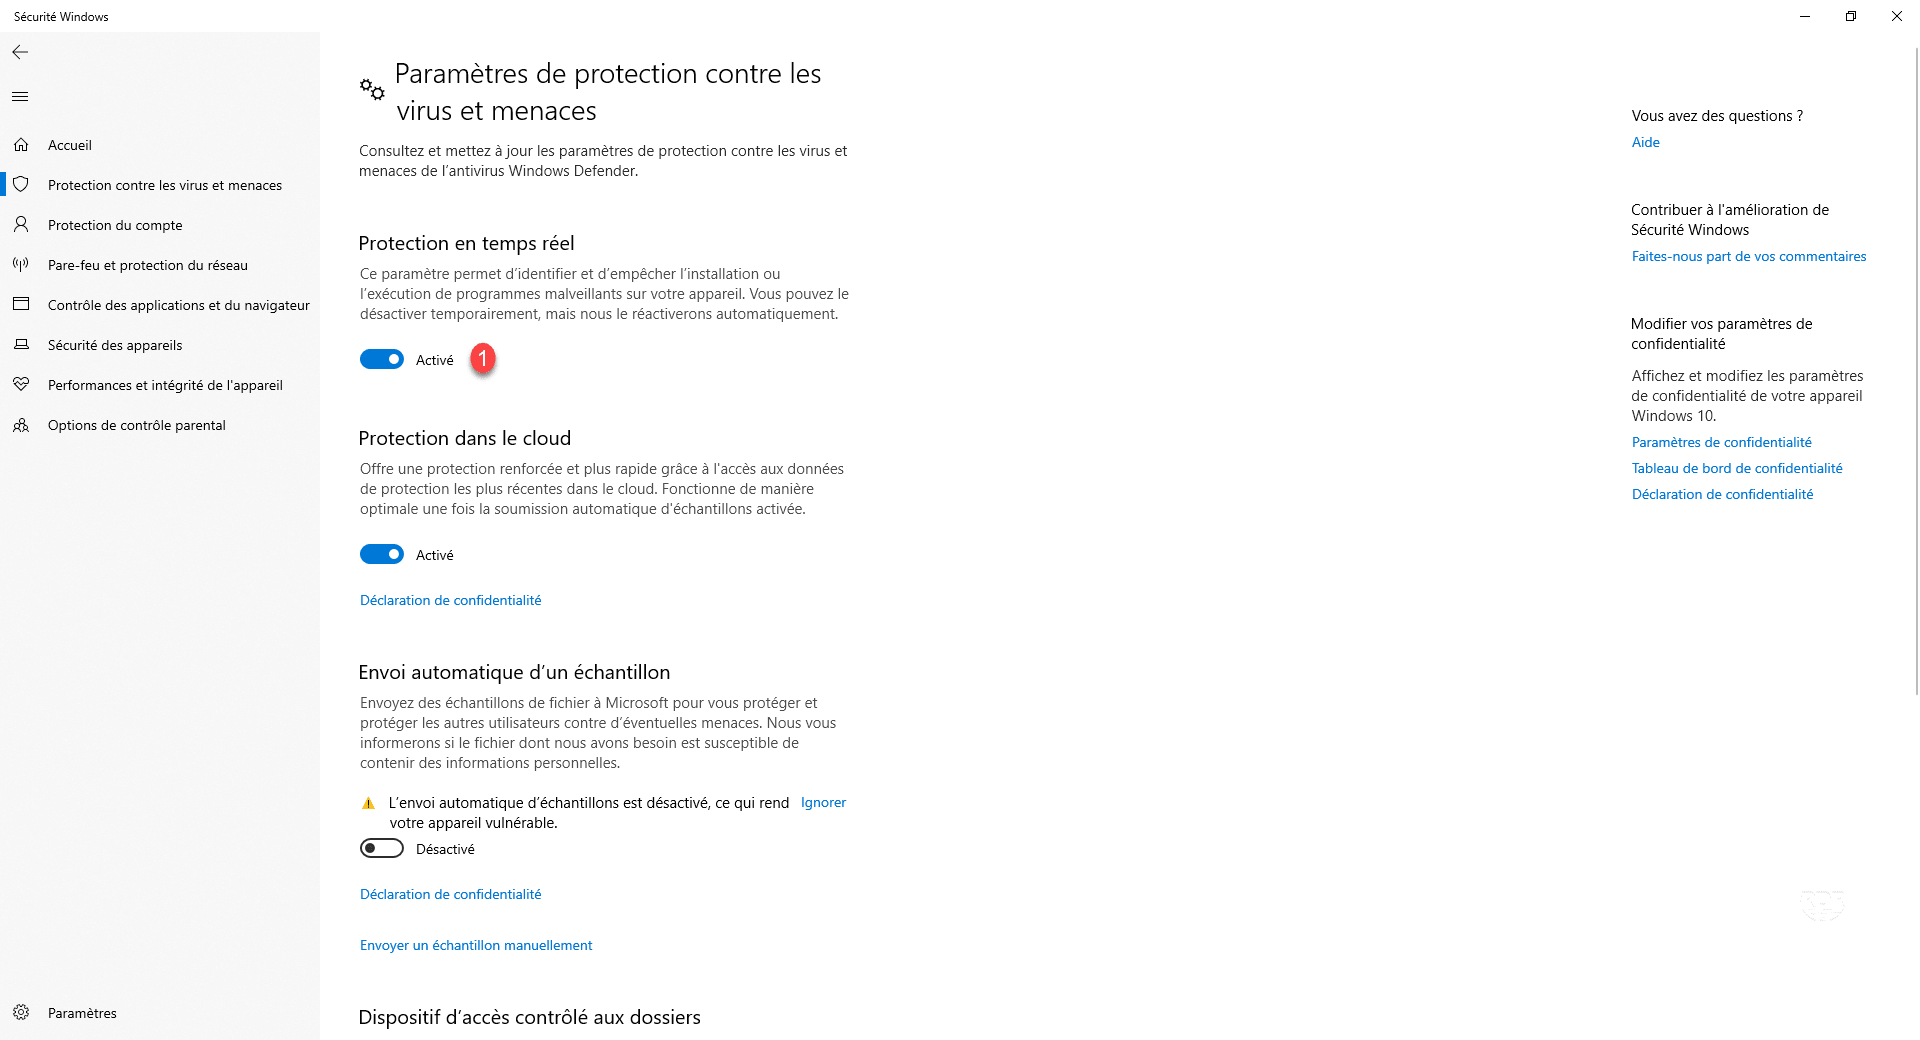
4. Go to Virus Protection 1 and click on Manage Settings 2 .

5. Click the Enabled selector on the Real-Time Protection to switch its status to off.
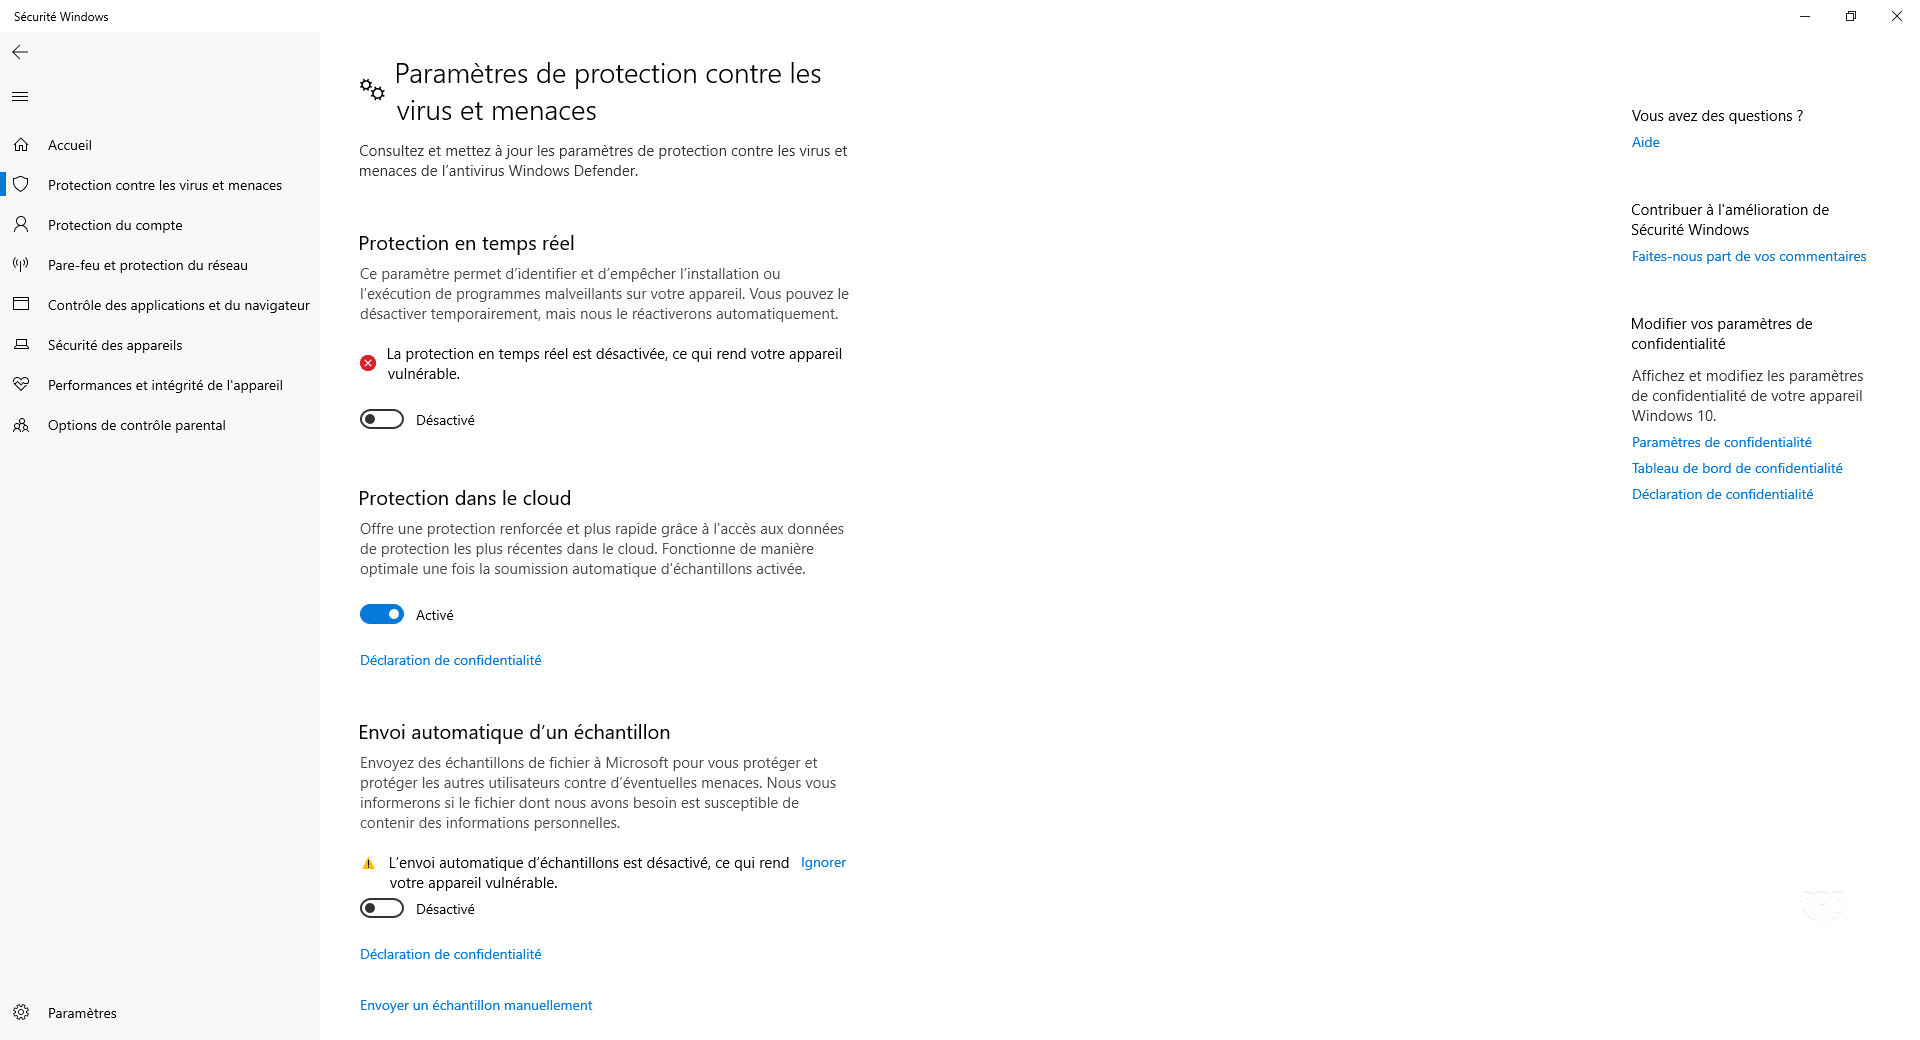
6. Real-time defender protection is now disabled.
Once the tests are complete, re-enable Defender’s real-time protection.
