As a follow-up to the article: Deploy a RDS Windows 2012 R2 / 2016/2019 farm, we will see in this tutorial how to configure the high availability service broker.
This configuration is optimized for clients use as address of connection to the RDS services, the address of the broker. The tutorial: Connecting to Remote Desktop Session Host servers by the Broker explains how to create an RDP file for this type of configuration.
Target infrastructure:
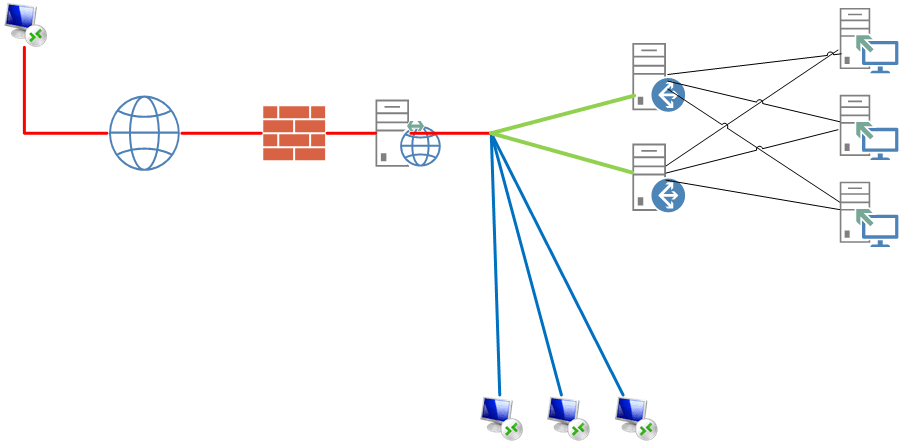
Explanation:
When connecting to the RDS farm, the client is configured to initiate the connection to contact the broker service and it redirects the request to one of the remote desktop session host servers.
Table of Contents
Prerequisites
Before embarking on the configuration of the high availability service several prerequisites are required.
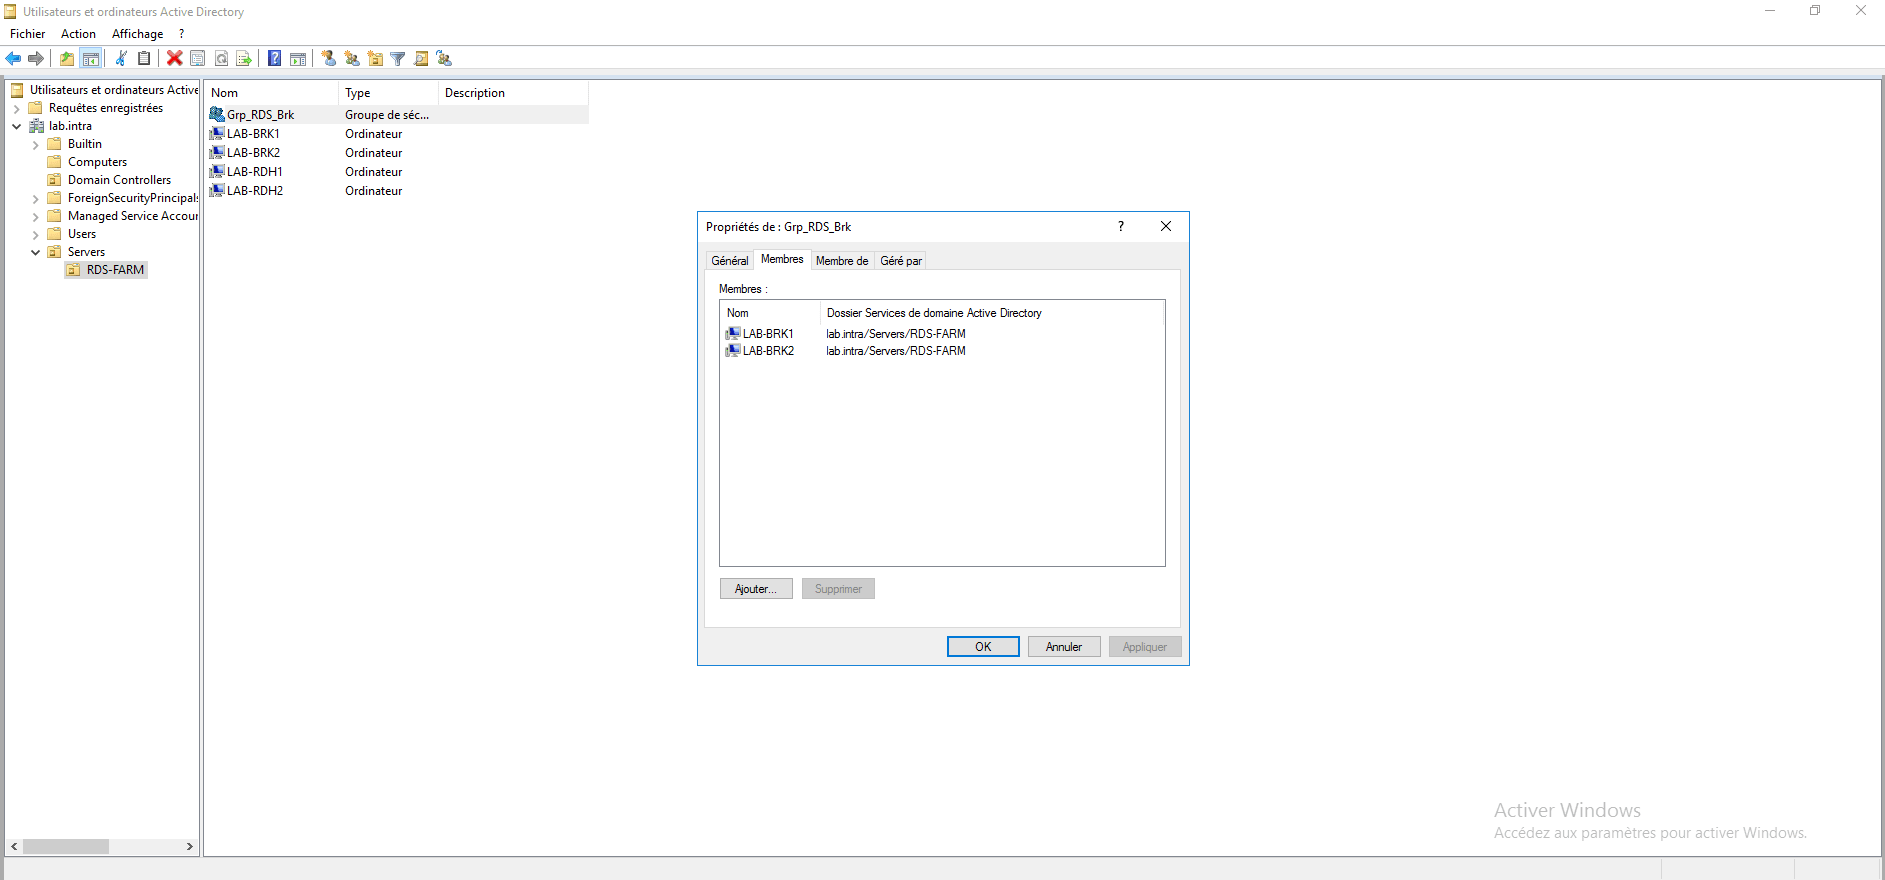
Active Directory Group
Create an Active Directory security group and put the broker broker members.
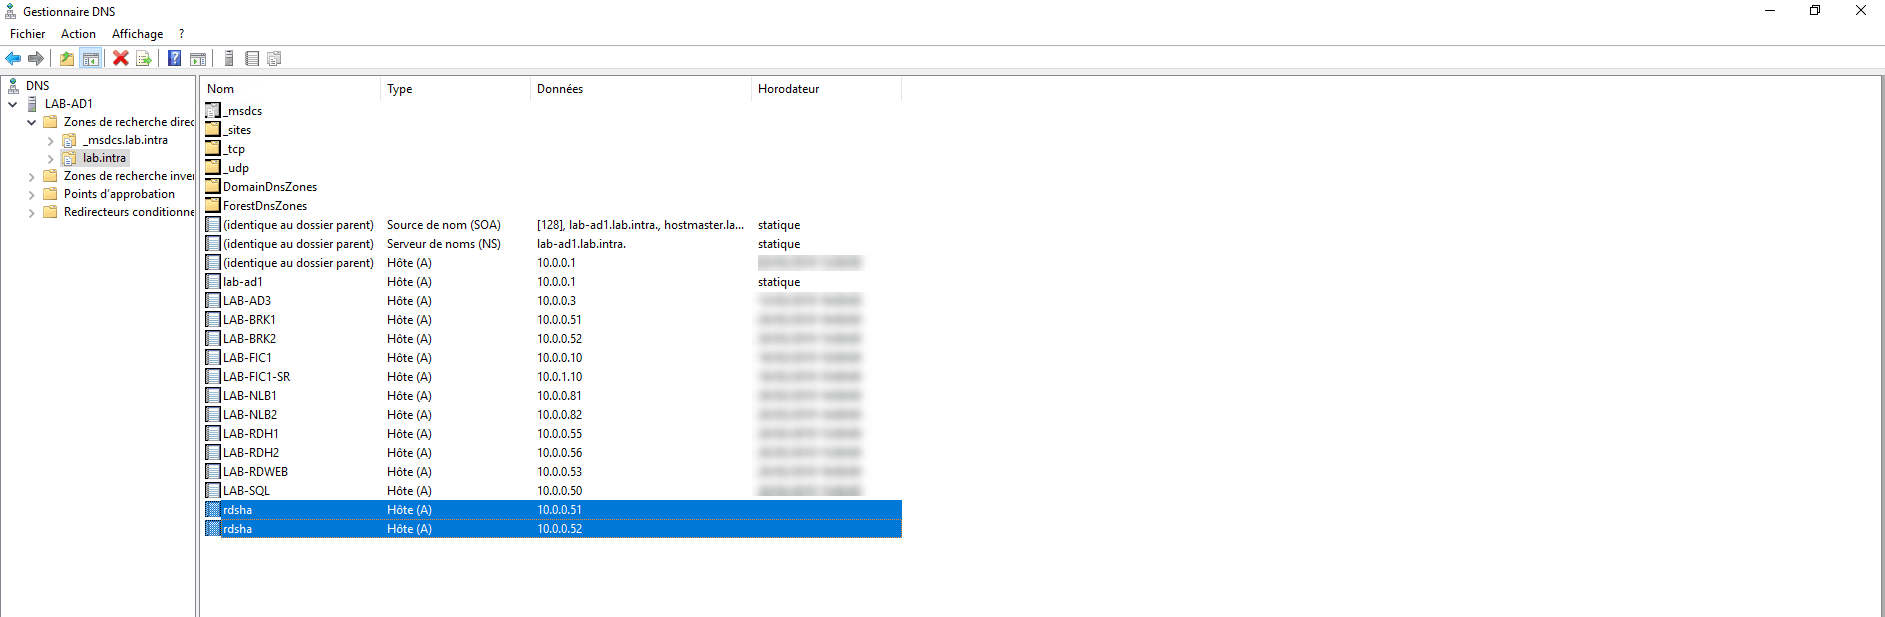
DNS registration
Create a common DNS record for broker servers for client configuration.
SQL Server
In order for the servers having the broker service to access the same information, it is necessary to set up an SQL server.
For the realization of this tutorial, I installed a SQL Express 2016 SP2 server, which I configured with remote access. I have also installed SQL Server Mangement Studio to administer the instance.
Configure the connection for brokers servers
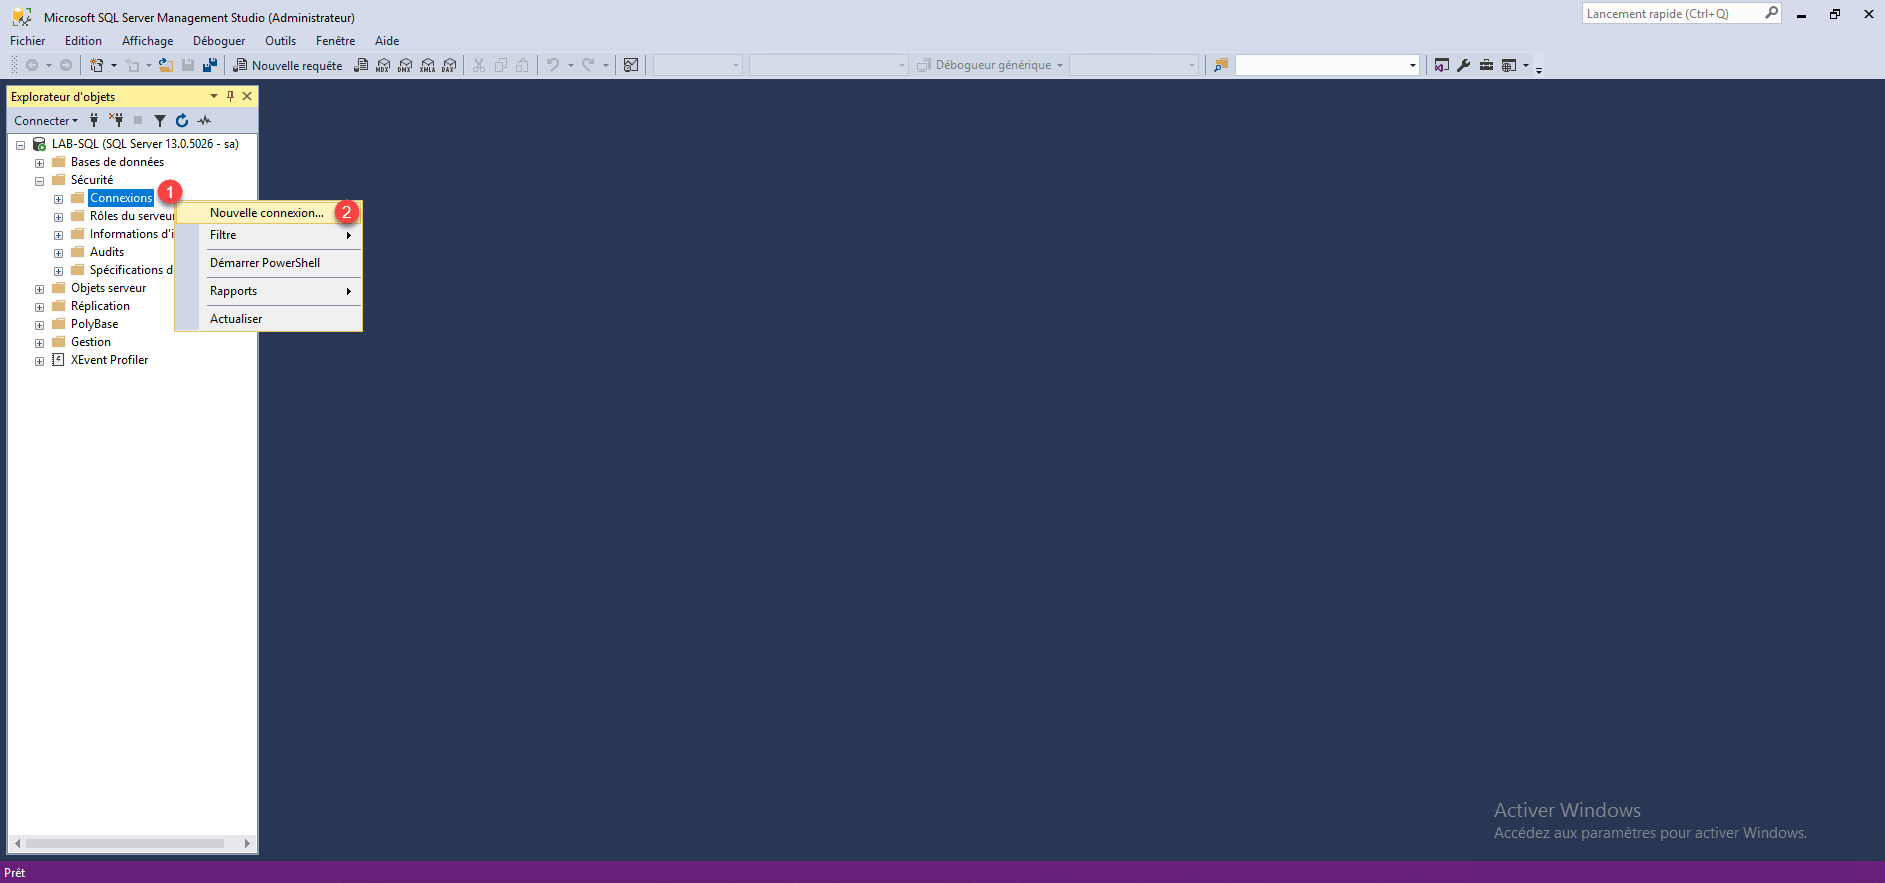
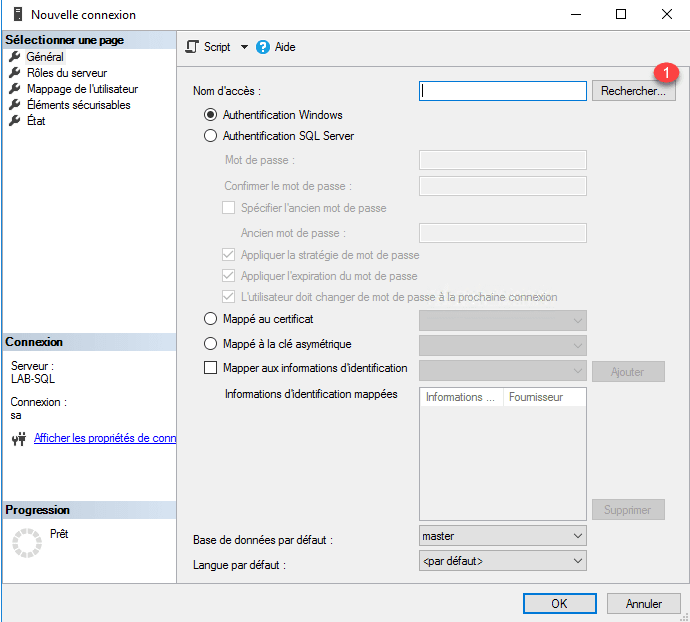
1. From SSMS, right-click on Connections 1 and click on New Connection 2 .
2. Click on Search … 1 .
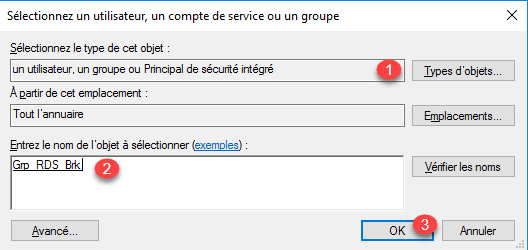
3. In the object types, add groups 1 then add the server group previously created 2 and click OK 3 .
4. Then go to Server Roles 1 and check dbcreator 2 and click OK 3 to add the connection.

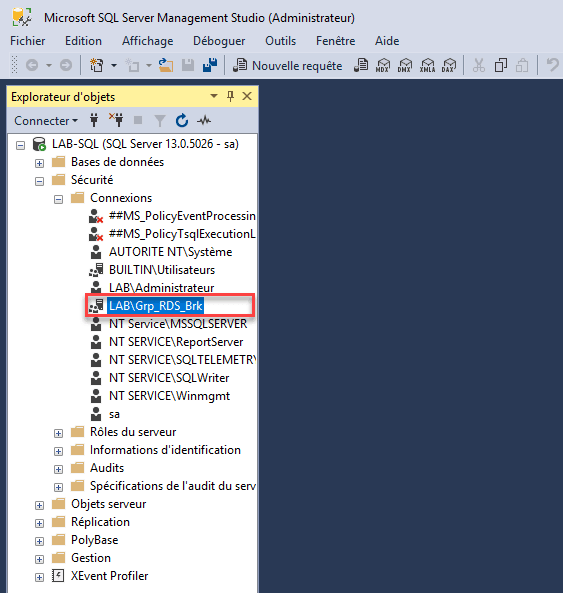
5. The connection is added to the list.
Configure the database
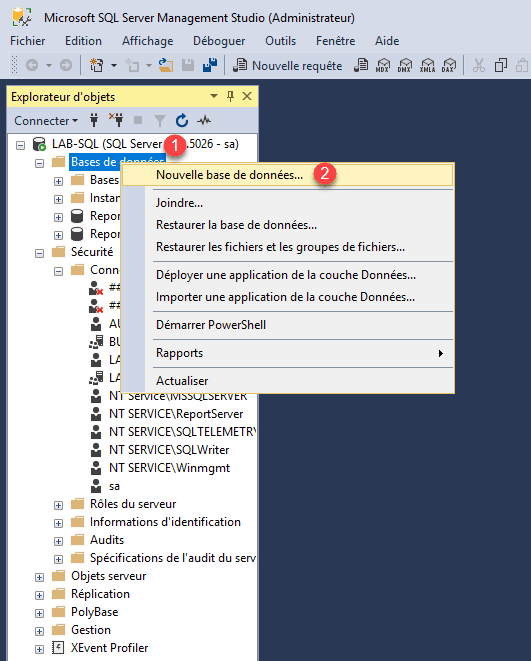
1. Right click on Databases 1 and click on New database 2 .
2. Enter the name of the database 1 and click OK 2 .
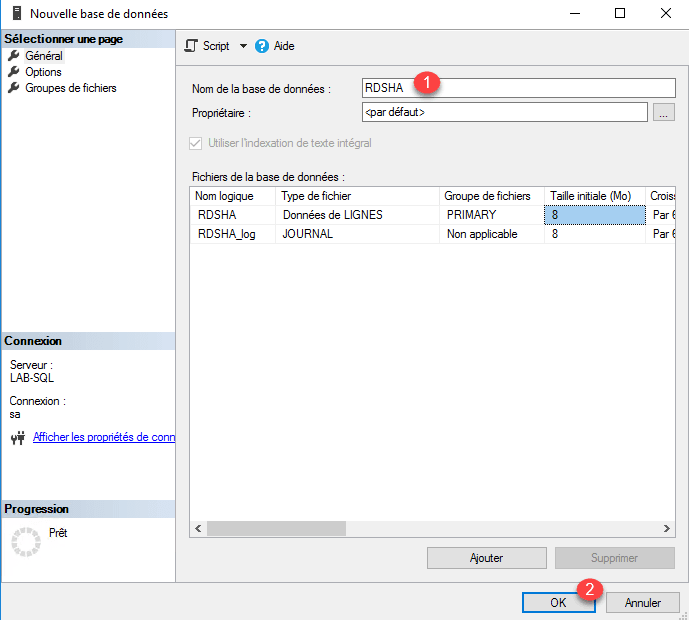
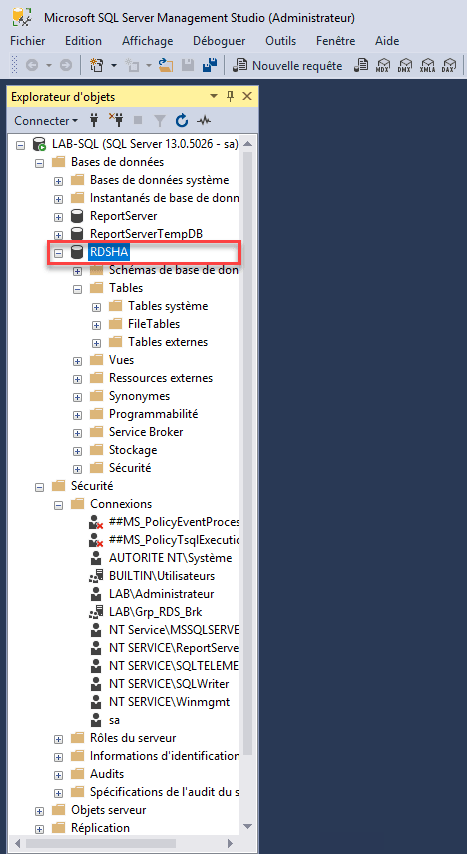
3. The database is added.
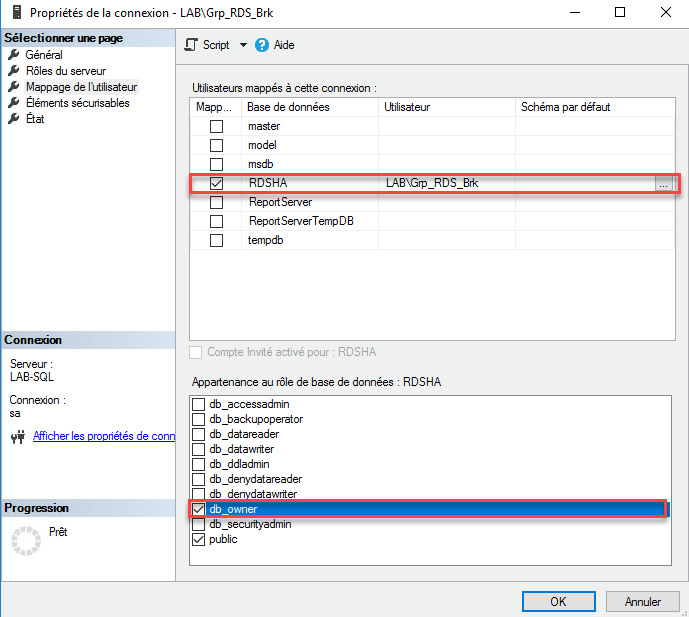
4. Modify the previously created connection for connecting brokers by adding the db_owner role to the database for the broker service.
Broker Servers
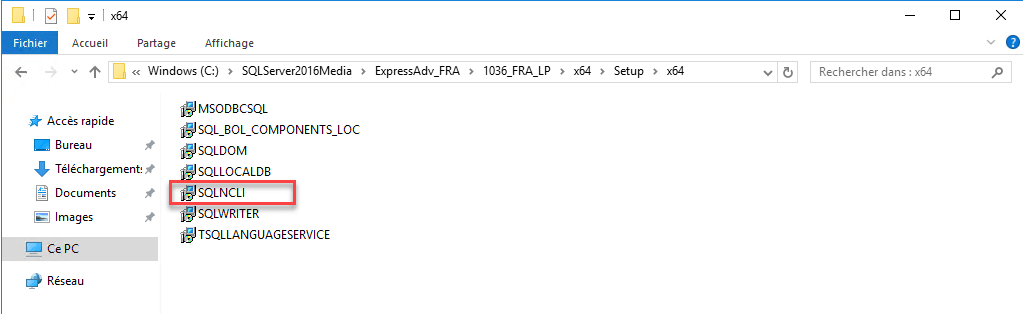
On each broker server, you must install the native SQL client (sqlncli.msi). It is available in SQL Server sources.
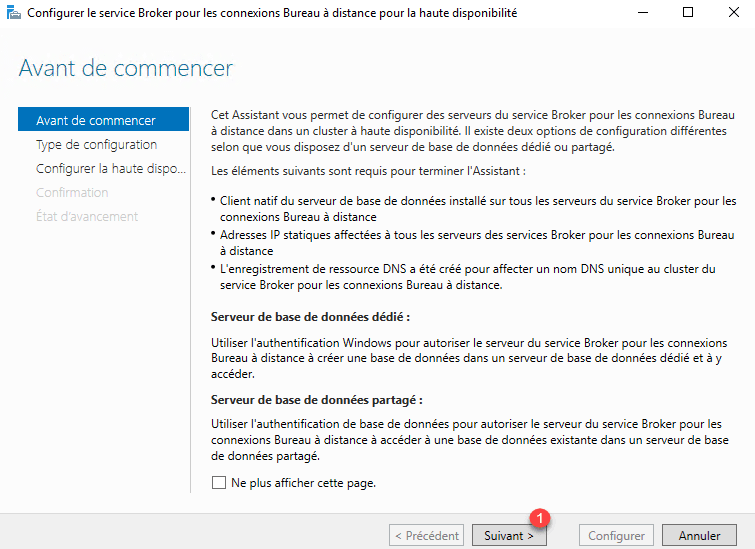
Configure high availability
1. From the server manager where the farm was configured, go to the deployment overview, right-click Service Broker 1 and click Configure High Availability 2 .

2. When launching the wizard, click Next 1 .
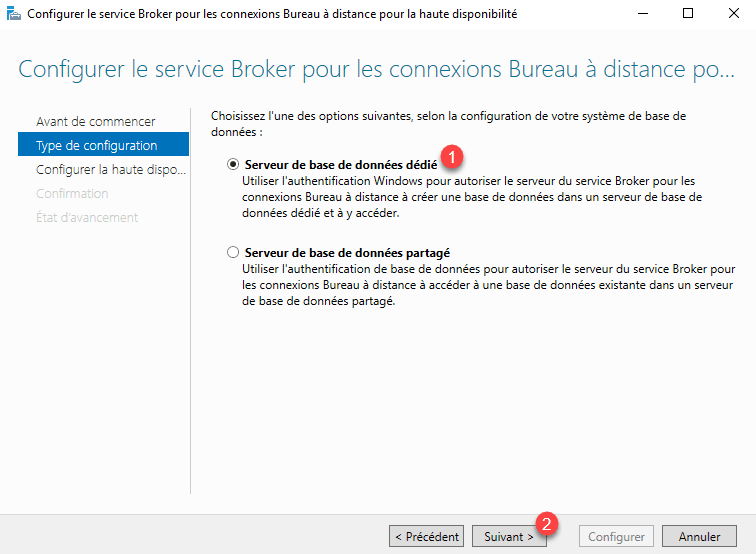
3. Select Dedicated database server 1 and click Next 2 .
4. Enter the DNS name for access to servers 1 and the connection string for database 2 then click Next 3 .
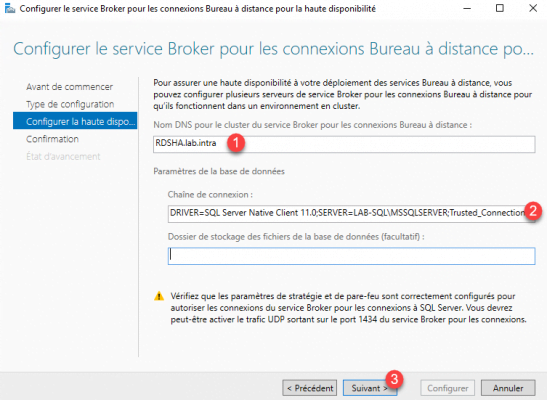
DRIVER=SQL Server Native Client 11.0;SERVER=<!SERVER!>;Trusted_Connection=Yes;APP=Remote Desktop Services Connection Broker;DATABASE=<!DATABASE!>5. Confirm the transition to HA by clicking Configure 1 .

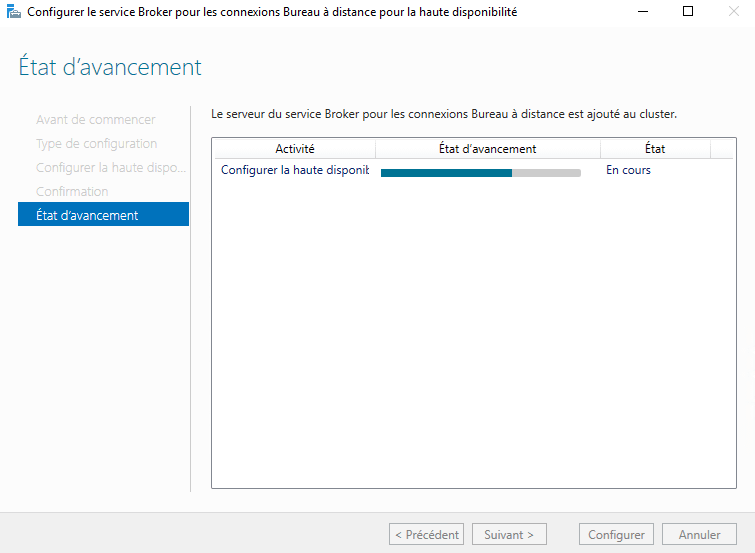
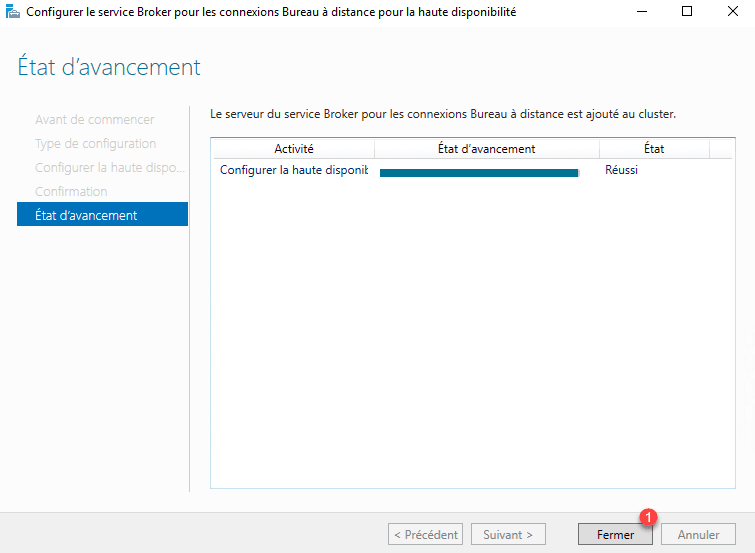
6. Wait while setting up …
7. Once configured, click Close 1 .
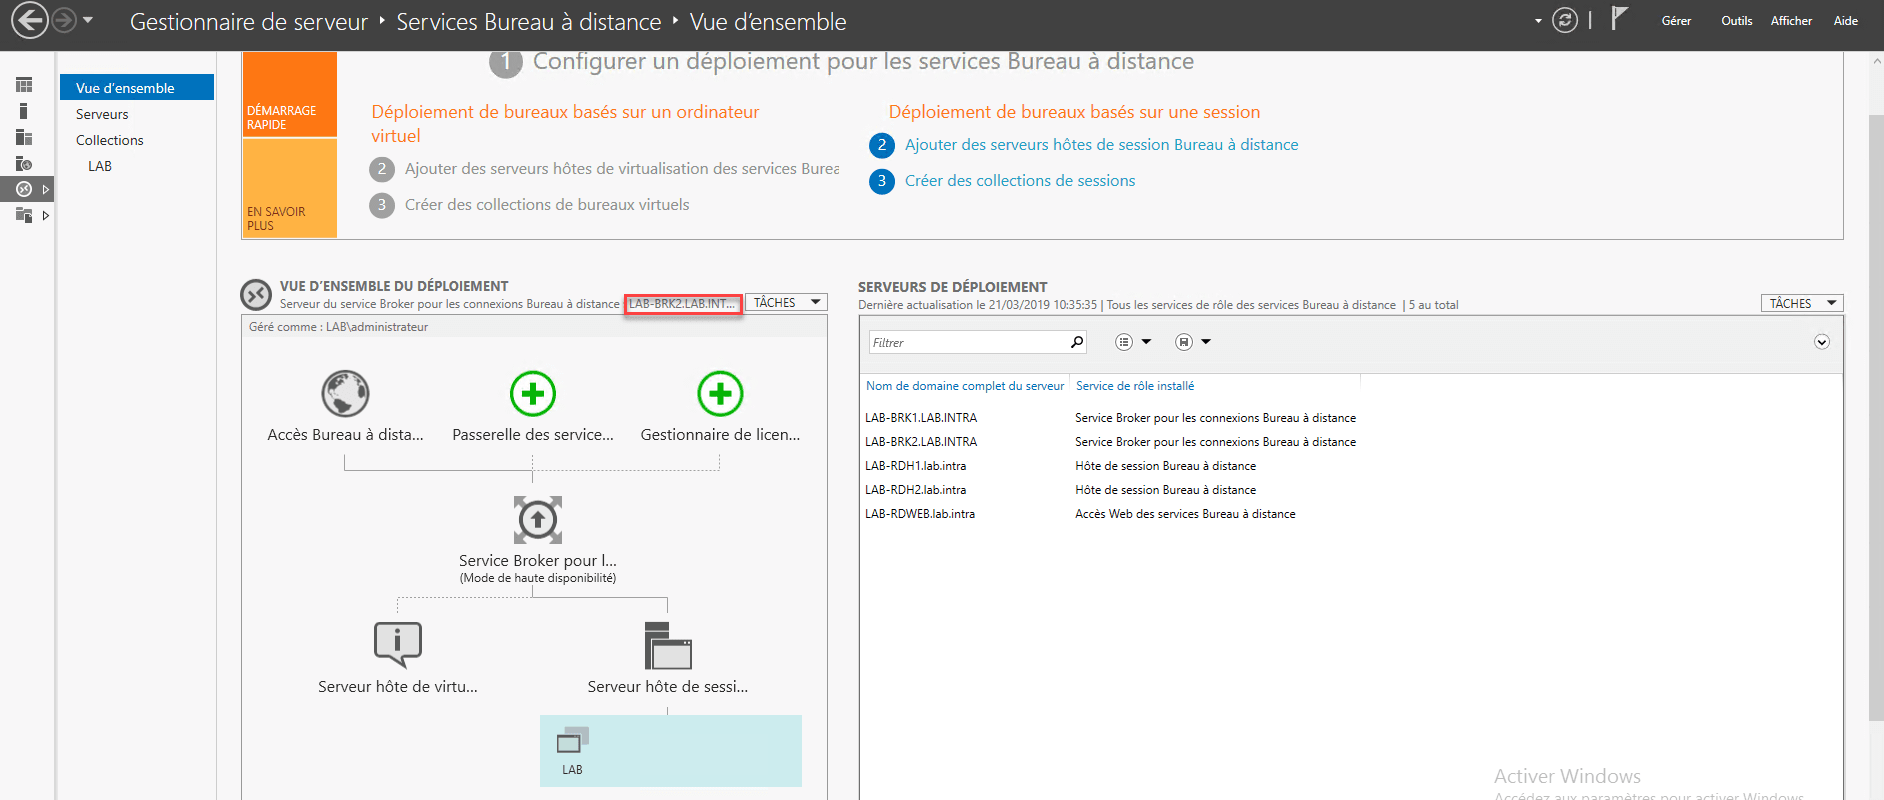
8. In the deployment overview, we see that the broker service is in high availability.
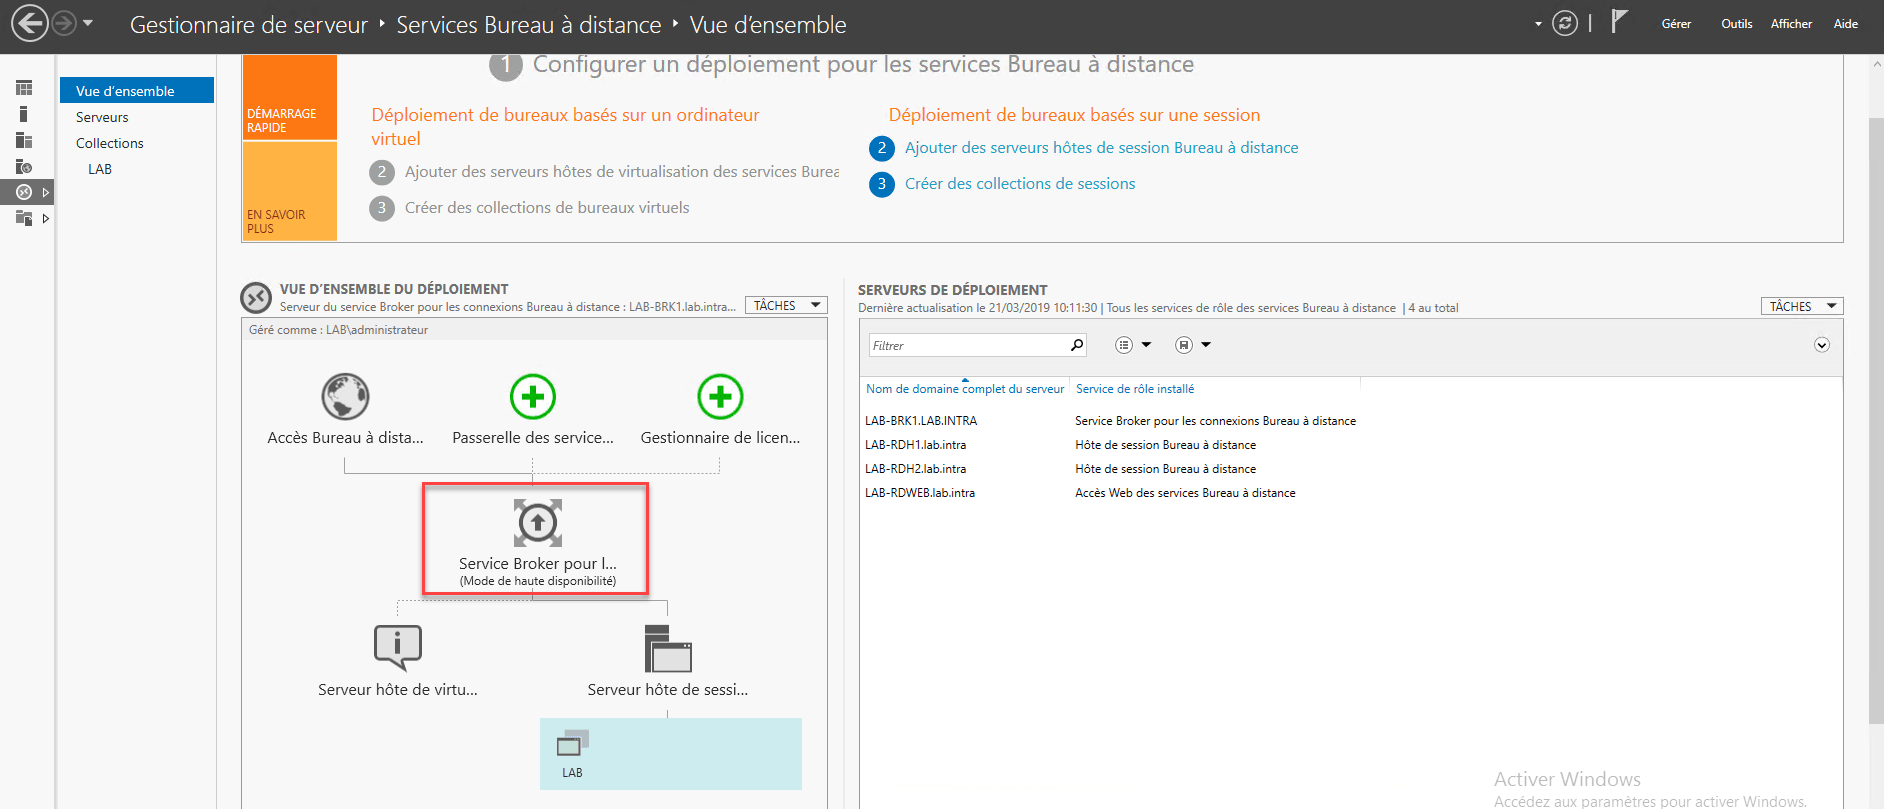
We also see that the database has been powered.
Now that the broker service is configured to be in high availability, we will see how to add a server.
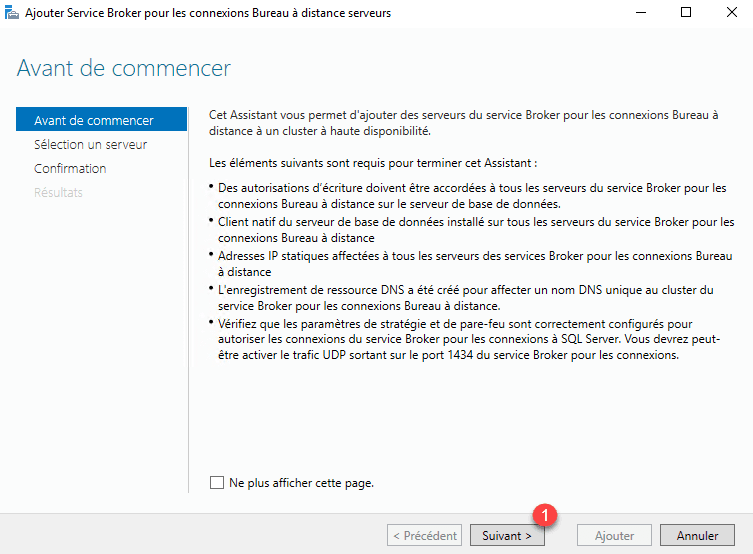
Add a server to the broker service
1. Add the server in Server Manager if it is not done.
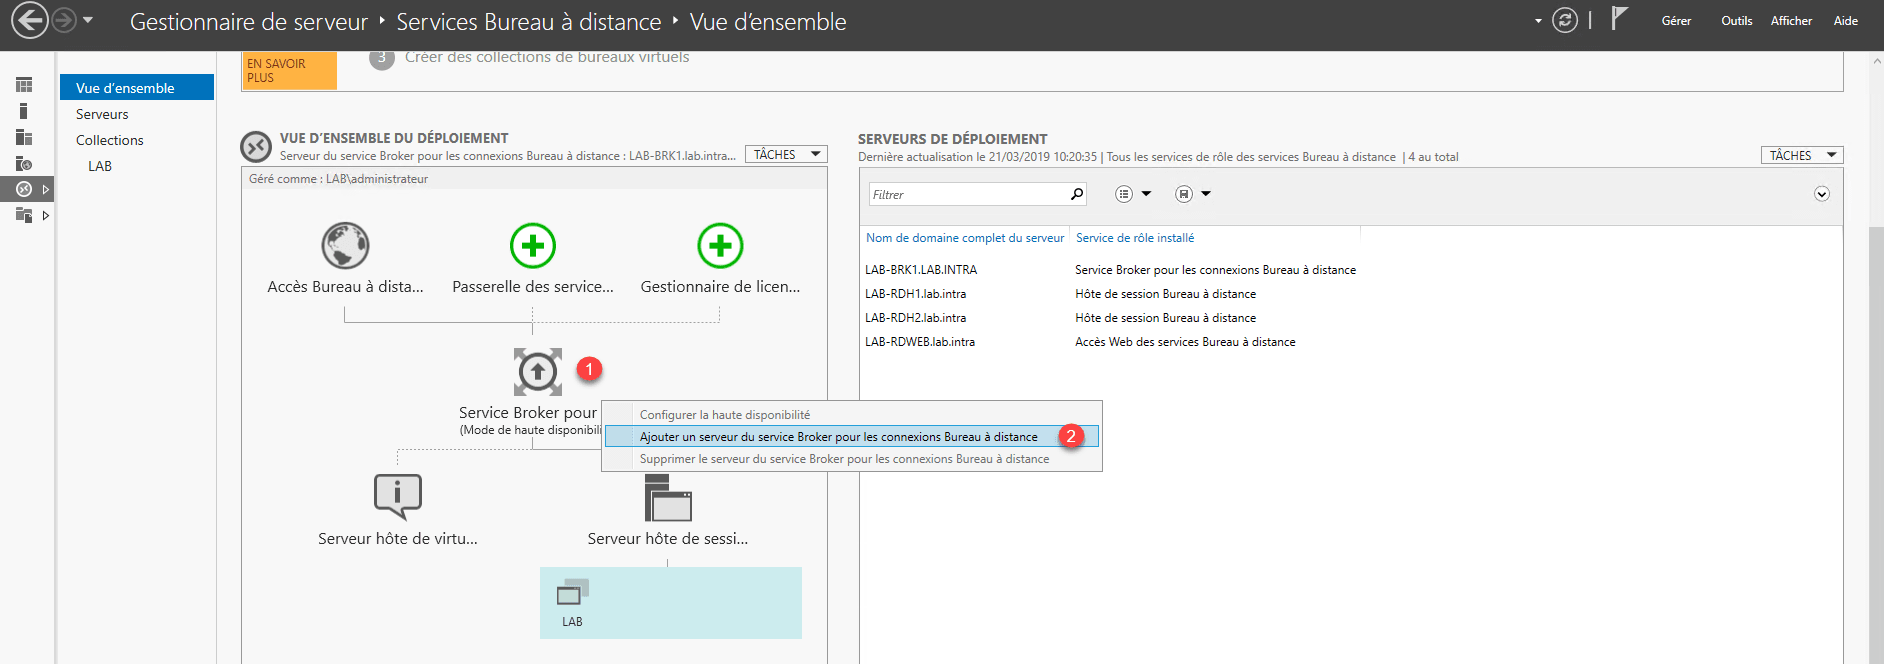
2. From the Remote Desktop Services overview, right-click Service Broker 1 Click Add Remote Desktop Connection Broker 2 .
3. When launching the wizard, click Next 1 .
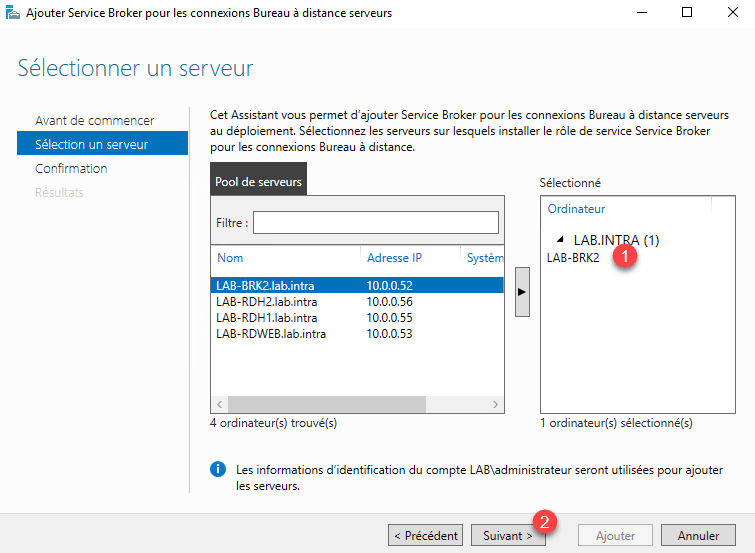
4. Select the server and add it to the list of selected servers 1 then click Next 2 .
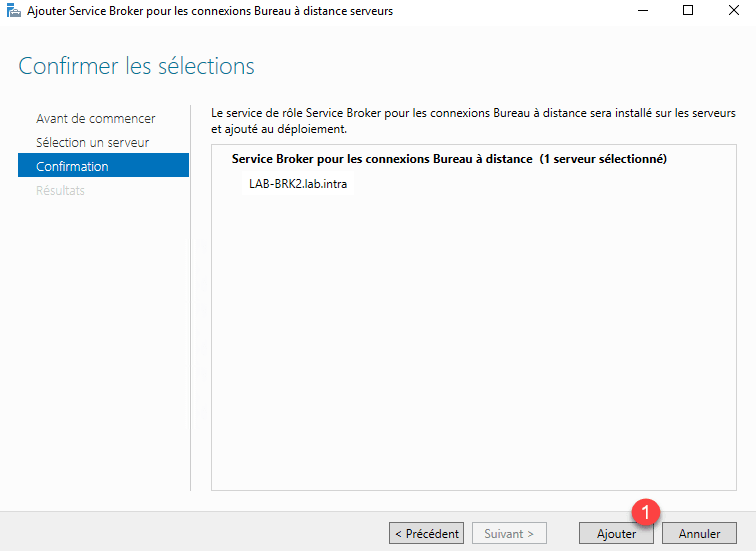
5. Confirm by clicking Add 1 .
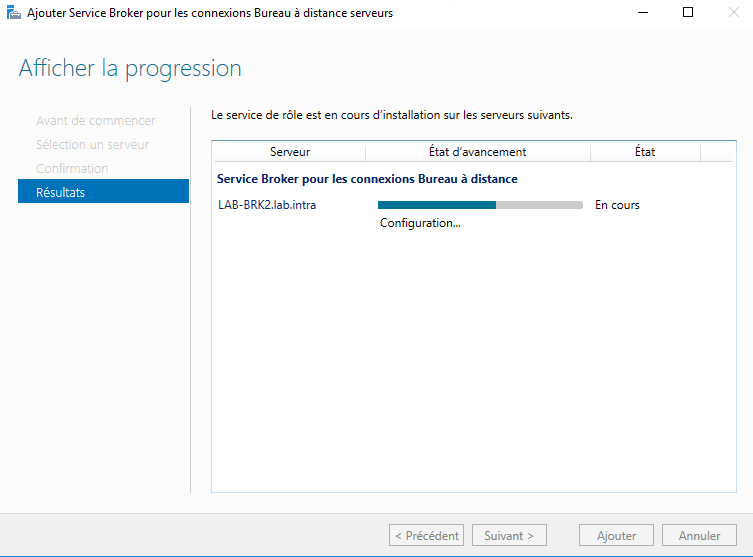
6. Wait during the installation of the features and the configuration of the service broker.
7. The server is added to the broker service, an alert message appears at the bottom indicating that the certificate must be configured for the broker service servers. Leave the wizard by clicking Close 1 .

8. The server is added.

Configure the broker service certificate
If you already have a certificate installed on the first broker server, just apply it to the one just added.
For the tutorial, we will create a self-signed certificate that we will apply to both servers.
1. Open the deployment properties, go to Certificates 1 and click Create Certificate 2 .
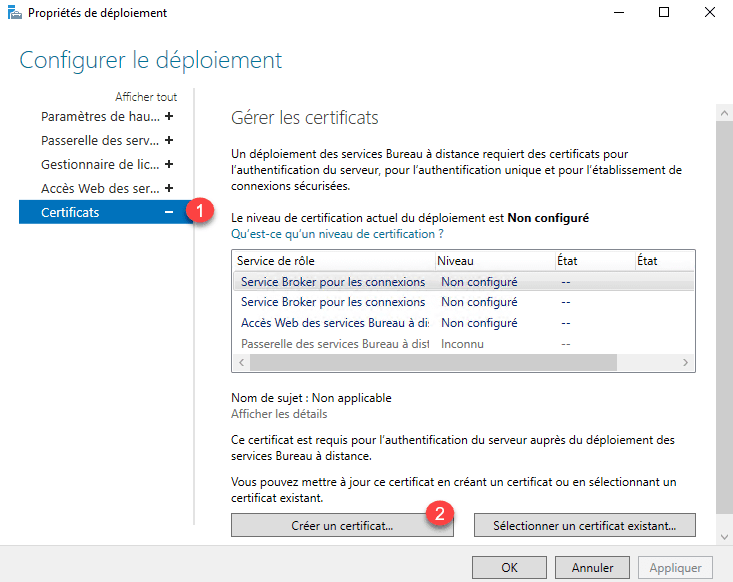
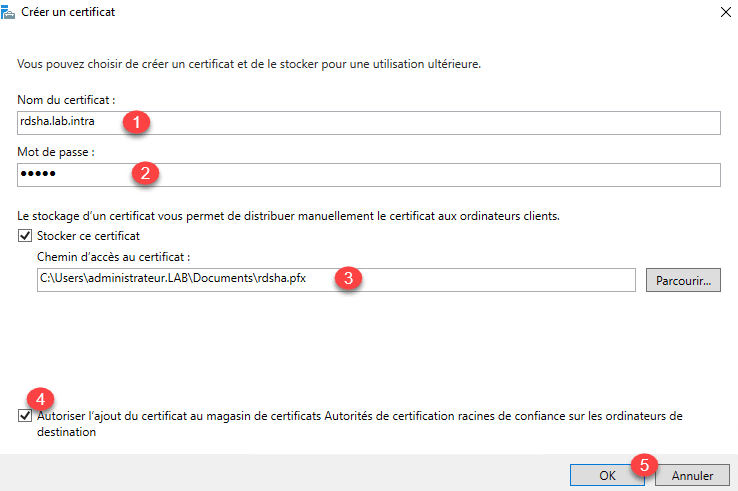
2. Enter the fqdn name of the certificate 1 , the password 2 , indicate the path and the name of the file to register 3 . Check the box 4 to add the certificate to the store and click OK 5
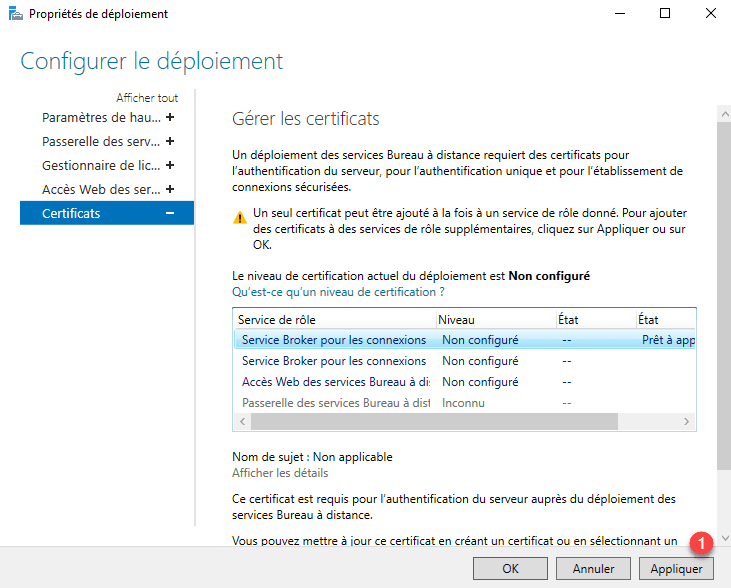
3. The certificate is created and ready to be applied. Click on the Apply button 1 .
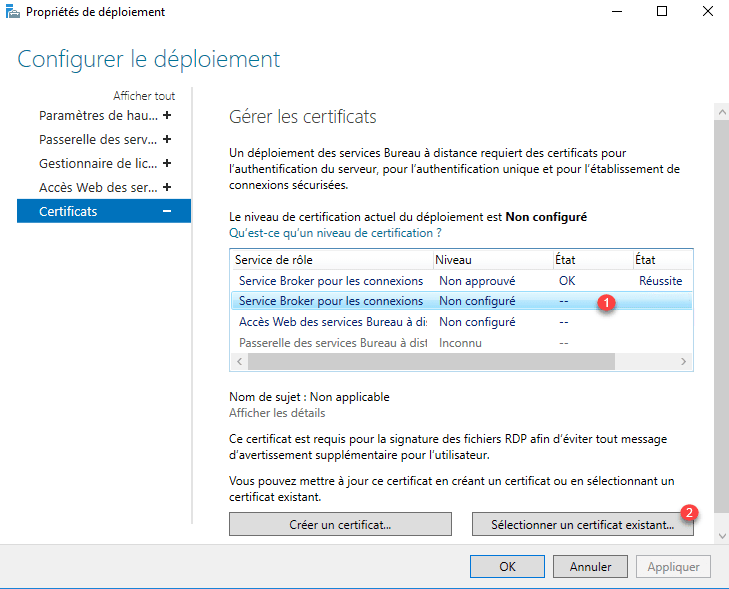
4. Select the other broker server 1 and click Select an existing certificate 2 .
5. Select the certificate 1 , enter the password 2 , check the box to add it to the magazine 3 and click OK 4 .
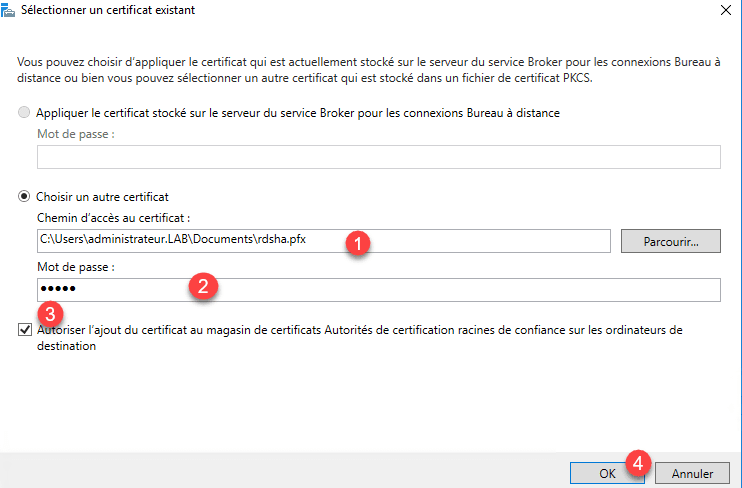
6. Apply the certificate by clicking Apply as for the first server.
7. The broker servers are now configured.
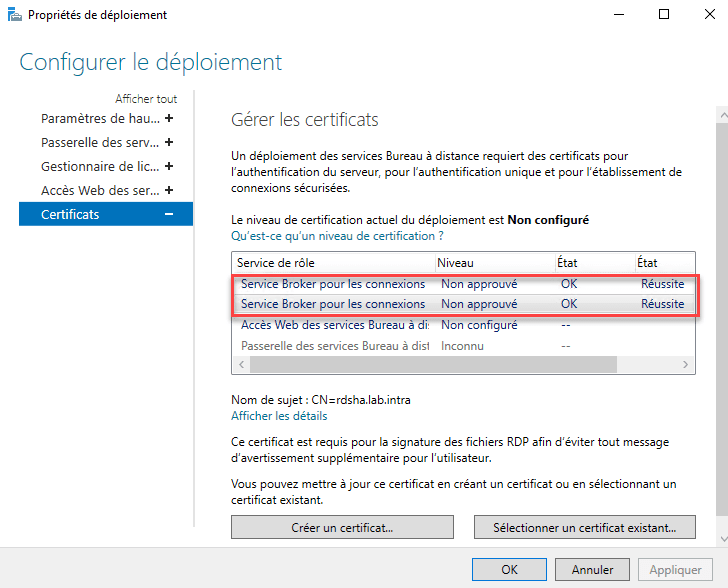
The broker service is now configured and in high availability.
Change the administration server
1. From the overview, click on TASKS 1 and then on Select Remote Desktop Services Administration Server 2 .
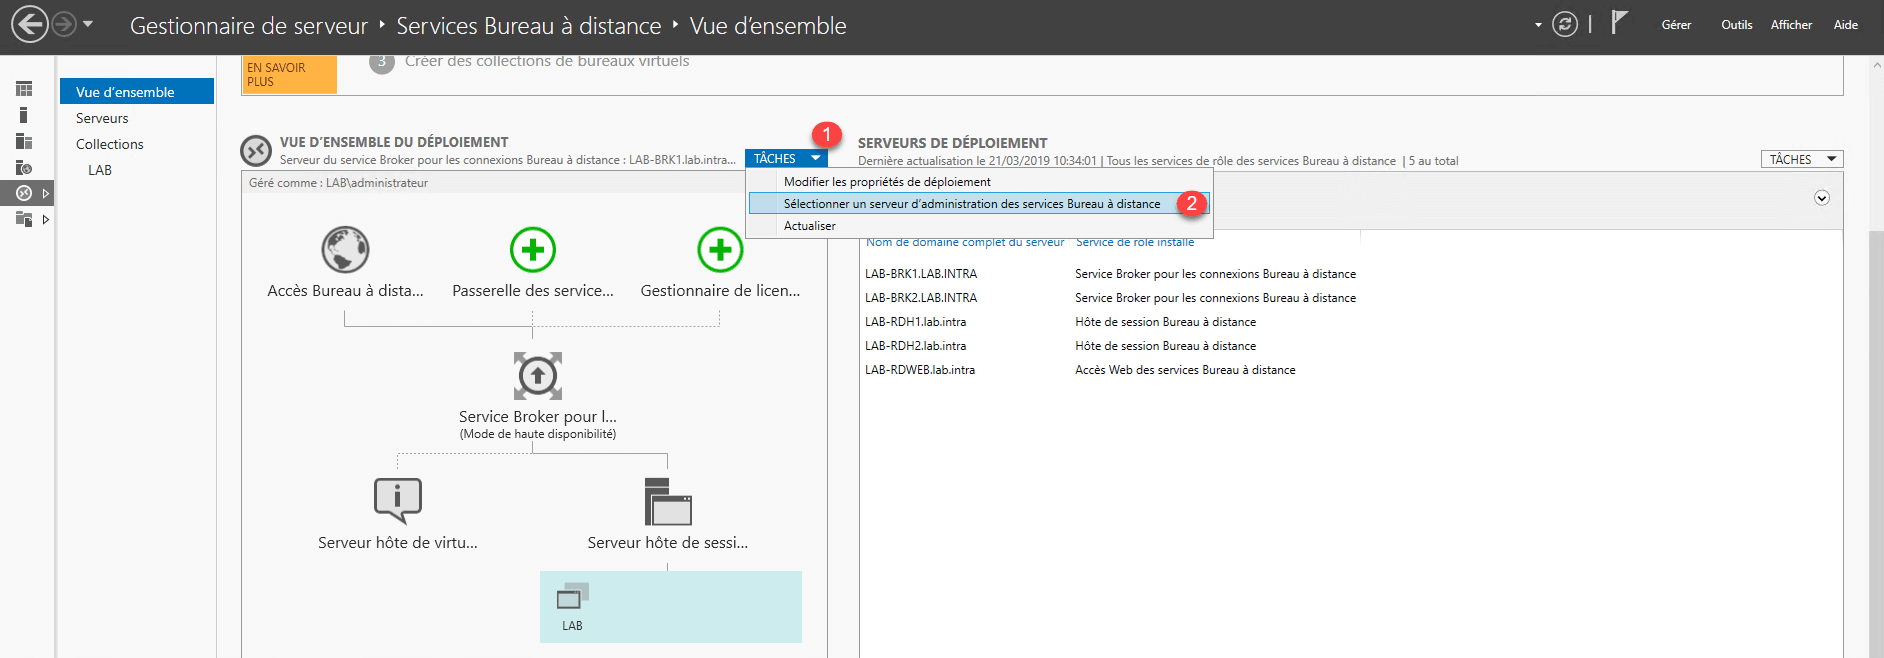
2. Select server 1 and click Set as active 1 .
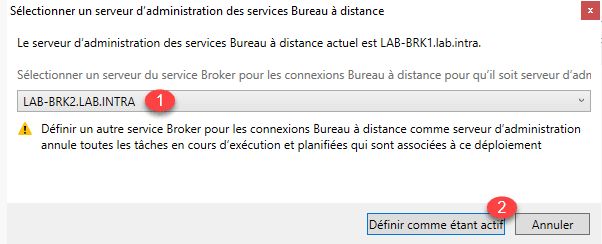
3. Wait during the server flip-flop.
4. The server is switched.
Conclusion
The broker service is now in “high availability”.
To have a real high availability of the broker service in this configuration it is necessary:
- Cluster the database
- Configure NLB on servers with the broker service or use a load-balancing solution (Kemp).
An alternative to making the broker service high availability if the server is virtual and you have multiple hypervisors is to replicate the broker server to another host.
- Virtual machine replication with Hyper-V
- Replication with Veeam
