In this tutorial, we will see how to install the role Hyper-V on Windows Server 2025.
Before we begin installing the Hyper-V role, let’s review the new features introduced by Windows Server 2025 in Hyper-V.
- The default generation for virtual machines is now Generation 2
- The VMs are now created with 2 vCPUs
- GPU partitioning; the VM must be in configuration version 12
- Dynamic processor compatibility: VM migration to a live environment, migration to another Hyper-V host that does not have the same physical CPU(s).
- Workgroup clustering eliminates the need for an Active Directory domain to create a Hyper-V cluster that supports dynamic migration
You can find the details here: https://learn.microsoft.com/fr-fr/windows-server/get-started/whats-new-windows-server-2025#hyper-v-ai-and-performance
To create this tutorial, as I did not have a physical server available, I used virtualization nesting from a Proxmox host and created a private type switch.
To learn more about switches, I invite you to read the following tutorials: https://rdr-it.com/en/hyper-v-cluster-installation-and-configuration/
Table of Contents
Installing the Hyper-V role
Before you begin, configure a static IP address for your server.

From Server Manager, click on Add roles and features 1.

When launching the assistant, click on the Next button 1.

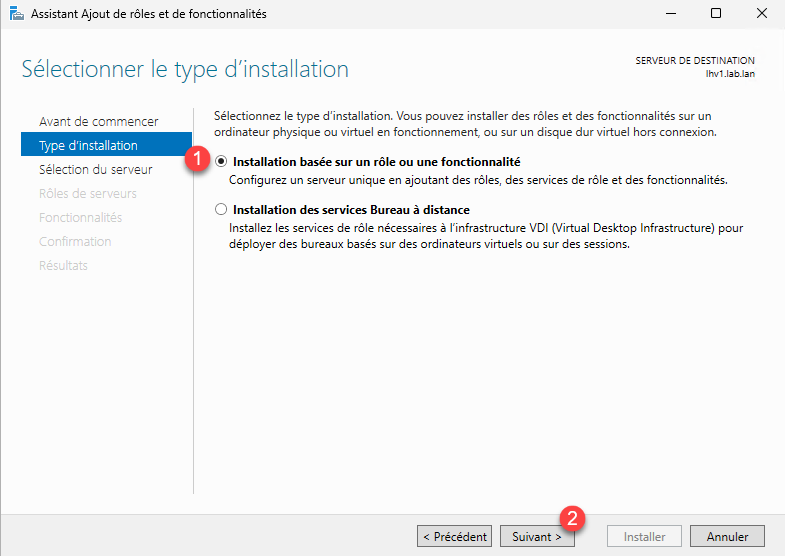
Choose: Role-based or feature-based installation 1 then click Next 2.
If you have only one server, click directly on Next, otherwise choose Select a server from the server pool 1, select the server from the list 2 then click on Next 3.

In the list of available roles, check the Hyper-V 1 box.

Clicking the Add Features button 1 will install the administration console and PowerShell modules at the same time.

The Hyper-V role is selected, click on Next 1.

Skip through the list of features by clicking Next 1.

The installation wizard displays a brief description of the Hyper-V role, click Next 1.

At this stage, the wizard offers you to configure a virtual switch; I advise you to do this operation after the installation without the physical server in the case of a simple installation with a single network card server. You can do it at that time, click on the Next button 1.

Skip the Migration section, click on the Next button 1.

At this stage, the wizard offers you the option to configure the default location of the virtual machines. If you have dedicated a partition with a folder for the virtual machines, you can specify it here, click on Next 1.

An installation summary will be displayed; click on the Install 1 button.

Please wait while the Hyper-V role is being installed on the server…

The Hyper-V role installation on Windows Server 2025 is complete, click Close 1.

Restart the server after the installation is complete.
Once restarted, you will be able to access the Hyper-V Manager console.

Configuring a virtual switch
Before creating your first virtual machine, you need to create a virtual switch.
From the Hyper-V Manager console, in the Actions panel on the right, click on Virtual Switch Manager 1.

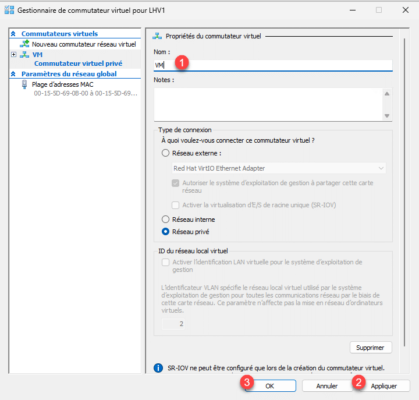
Select New virtual network switch 1, choose type 2 then click Create virtual switch 3.

For this tutorial, I chose a virtual private switch, but I will explain later the configuration of the external switch which will allow you to network your VMs.
Next, name the virtual switch 1 then click Apply 2 and OK 3.
In the case of an external switch, you must choose which network adapter on the Hyper-V host it is attached to. This can be a physical adapter directly or a team of network adapters. If you select the “Allow management operating system to share this network adapter” checkbox, this will create a virtual network adapter on the Hyper-V host that will be attached to the switch, allowing the Hyper-V host to access the network.

Attention
If you have a single network adapter or teaming card on your Hyper-V host and you assign it to a virtual switch, it is mandatory to check the box: Allow the management operating system to share this network adapter, otherwise the Hyper-V host will no longer have access to your network.
Finally, regarding the external virtual switch, normally the virtual network card that is created takes over the IP configuration of the physical card.
Create a virtual machine
To conclude this tutorial on the Hyper-V role with Windows Server 2025, we will see how to create a virtual machine.
Here, I will store the virtual machines in the folder: E:\VMs.

To install the operating system, you will also need the ISO of the operating system you wish to install.
From the Hyper-V Manager console, in the Actions panel, click on New 1 then on Virtual Machine 2.

When launching the assistant, click on the Next button 1.

Name the virtual computer 1> and indicate where 2 it will be stored, then click Next 3.

When the virtual machine is created, a folder with its name will be created which will contain all the files.
Choose the virtual machine generation 1 and then click Next 2.

The main difference between generation 1 and 2 is the lack of UEFI support for generation 2, which allows the use of SCSI storage and the use of a TPM chip.
Configure memory 1 then click Next 2.

Select the virtual switch 1 where the virtual card will be connected and click Next 2.

Now we will create a virtual hard disk, select Create a virtual hard disk 1, name the disk 2, verify its location 3, indicate the size of the disk 4 and click on Next 5.

Choose: Install an operating system from a bootable CD/DVD-ROM 1, select: Image file (.iso) 2 then select the ISO file 3 and click Next 4.

A summary of the virtual machine configuration, click on Finish 1.

The virtual machine is created and added to the Hyper-V Manager console.

To access the virtual machine configuration, select VM 1 and then in the Actions menu, click on Settings 2.

You can also right-click on the virtual machine and click on Settings.
As you can see, the VM is created with 2 virtual processors, whereas in previous versions there was 1 vCPU.

Since I’m going to install Linux, I need to disable secure boot.

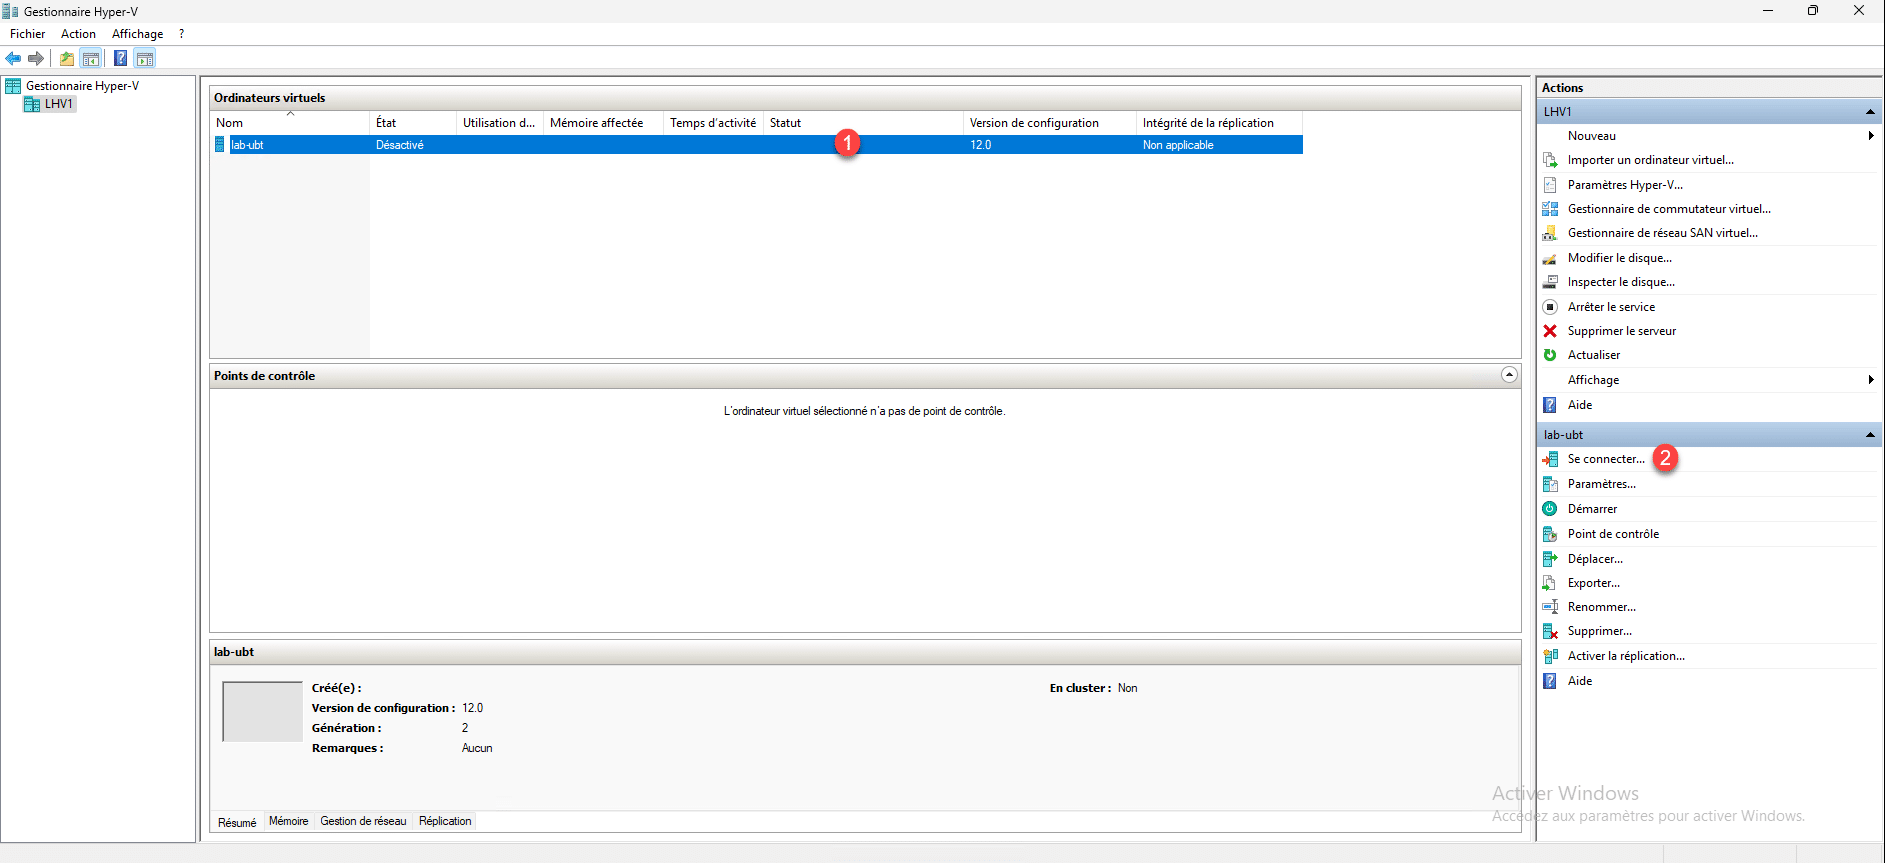
Back on the Hyper-V Manager console, select the virtual machine 1 and then click on Connect 2 which is located in the Actions panel.
Click on Start 1.

The virtual machine has started…

You now know how to install Hyper-V on Windows Server 2025, configure a virtual switch, and create a virtual machine.
If you are used to using Hyper-V, the management in Windows Server 2025 has not changed compared to the previous version.
