
In this tutorial, I will explain to you how to configure the Fastcgi cache with WordPress to put the pages generated with PHP in order to increase the speed of a WordPress site and reduce the server load.
With the activation of the fastcgi cache, the pages generated in PHP will be cache at Nginx level, with this cache, when the page would be called and it finds in cache, it would be served directly without generation of PHP code and therefore SQL requests.
To fully exploit this solution, the site must be mainly accessible in “guest” mode without authentication.
It’s gone, here are the configuration lines added:
In the http {…} part of the nginx.conf file or in the virtual host virtual file with the Server {…} Add the following lines that will allow the cache to Nginx.
# fastcgi cache
fastcgi_cache_path /var/cache/nginx levels=1:2 keys_zone=wpcache:200m max_size=10g inactive=2h use_temp_path=off;
fastcgi_cache_key "$scheme$request_method$host$request_uri";
fastcgi_ignore_headers Cache-Control Expires Set-Cookie;
- fastcgi_cache_path : Specifies the location of the cache and the cache settings
- keys_zone : L’attribute defines the name hides and the size of the shared memory area. 200 m is enough to contain more than a million keys.
- max_size : Max size of the cache on the disk
- inactive : lifespan of the cache in the event of non -use, here 2 hours
- fastcgi_cache_key : Allows you to generate the cache identifier (key)
- fastcgi_ignore_header : Allows you to deactivate the cache according to certain HTTP headers.
The following must be added in the Server {…} part of the virtualhost.
Exceptions are indicated when the cache should not be used:
set $skip_cache 0;

if ($request_method = POST) {
	set $skip_cache 1;
}
if ($query_string != "") {
	set $skip_cache 1;
}

if ($request_uri ~* "/wp-admin/|/xmlrpc.php|wp-.*.php|^/feed/*|/tag/.*/feed/*|index.php|/.*sitemap.*\.(xml|xsl)") {
	set $skip_cache 1;
}

if ($http_cookie ~* "comment_author|wordpress_[a-f0-9]+|wp-postpass|wordpress_no_cache|wordpress_logged_in") {
	set $skip_cache 1;
}
In the section which deals with the execution of the PHP code add the following lines:
location ~ \.php$ {
	...
	fastcgi_cache wpcache;
	fastcgi_cache_valid 200 301 302 2h;
	fastcgi_cache_use_stale error timeout updating invalid_header http_500 http_503;
	fastcgi_cache_min_uses 1;
	fastcgi_cache_lock on;
	fastcgi_cache_bypass $skip_cache;
	fastcgi_no_cache $skip_cache;
	add_header X-FastCGI-Cache $upstream_cache_status;
}
- fastcgi_cache : activate the cache and indicate the name of the cache to be used
- fastcgi_cache_valid : Determine the duration of the life hides according to the HTTP code
- fastcgi_cache_use_stale error : determines the conditions when Nginx must disseminate obsolete content.
- fastcgi_cache_min_uses : Determine when the cache should be used according to the number of requests.
- fastcgi_cache_lock : Behavior for simultaneous requests.
- fastcgi_cache_bypass : bypassing the cache by the variable $skip_cache
- fastcgi_no_cache : bypassing the cache by the variable $skip_cache
Test the Nginx configuration:
sudo nginx -tIf there is no error recharge the configuration:
sudo systemctl reload nginxTo test the function of the cache, go to the WordPress site as an unconnected visitor and open up the browser development tools (F12).
Go to a page of the site and watch the response heads.
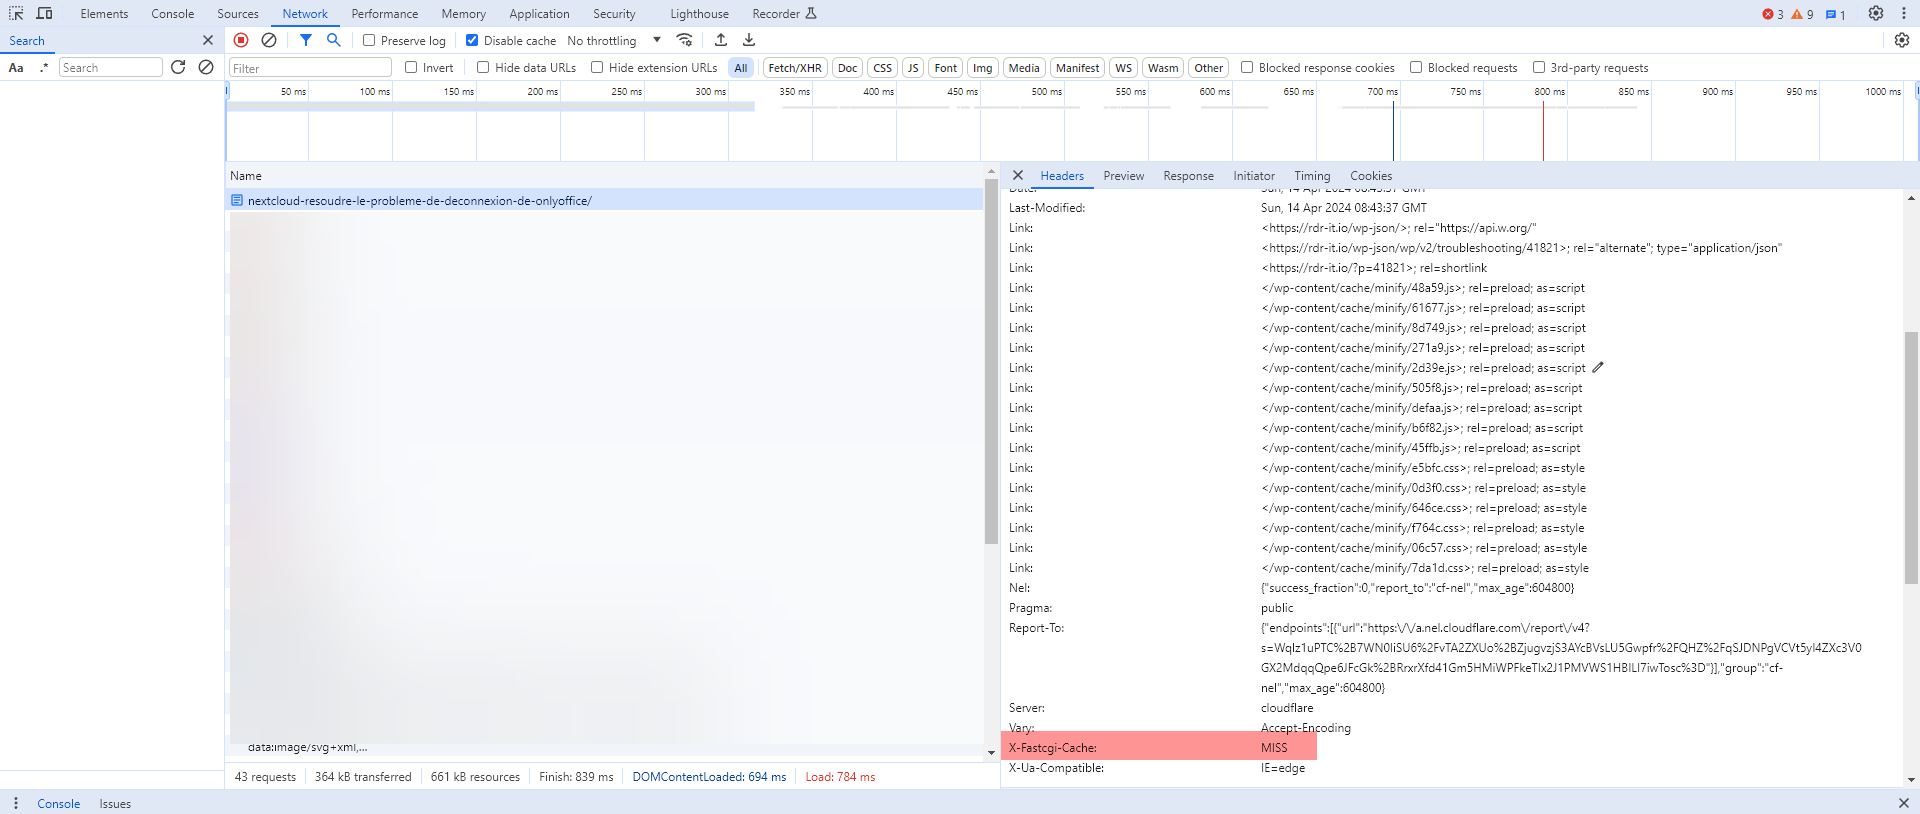
How is the first load of the page, the cache is not available (Miss) by looking at the X-Fastcgi-Cache header.
Reload the page:
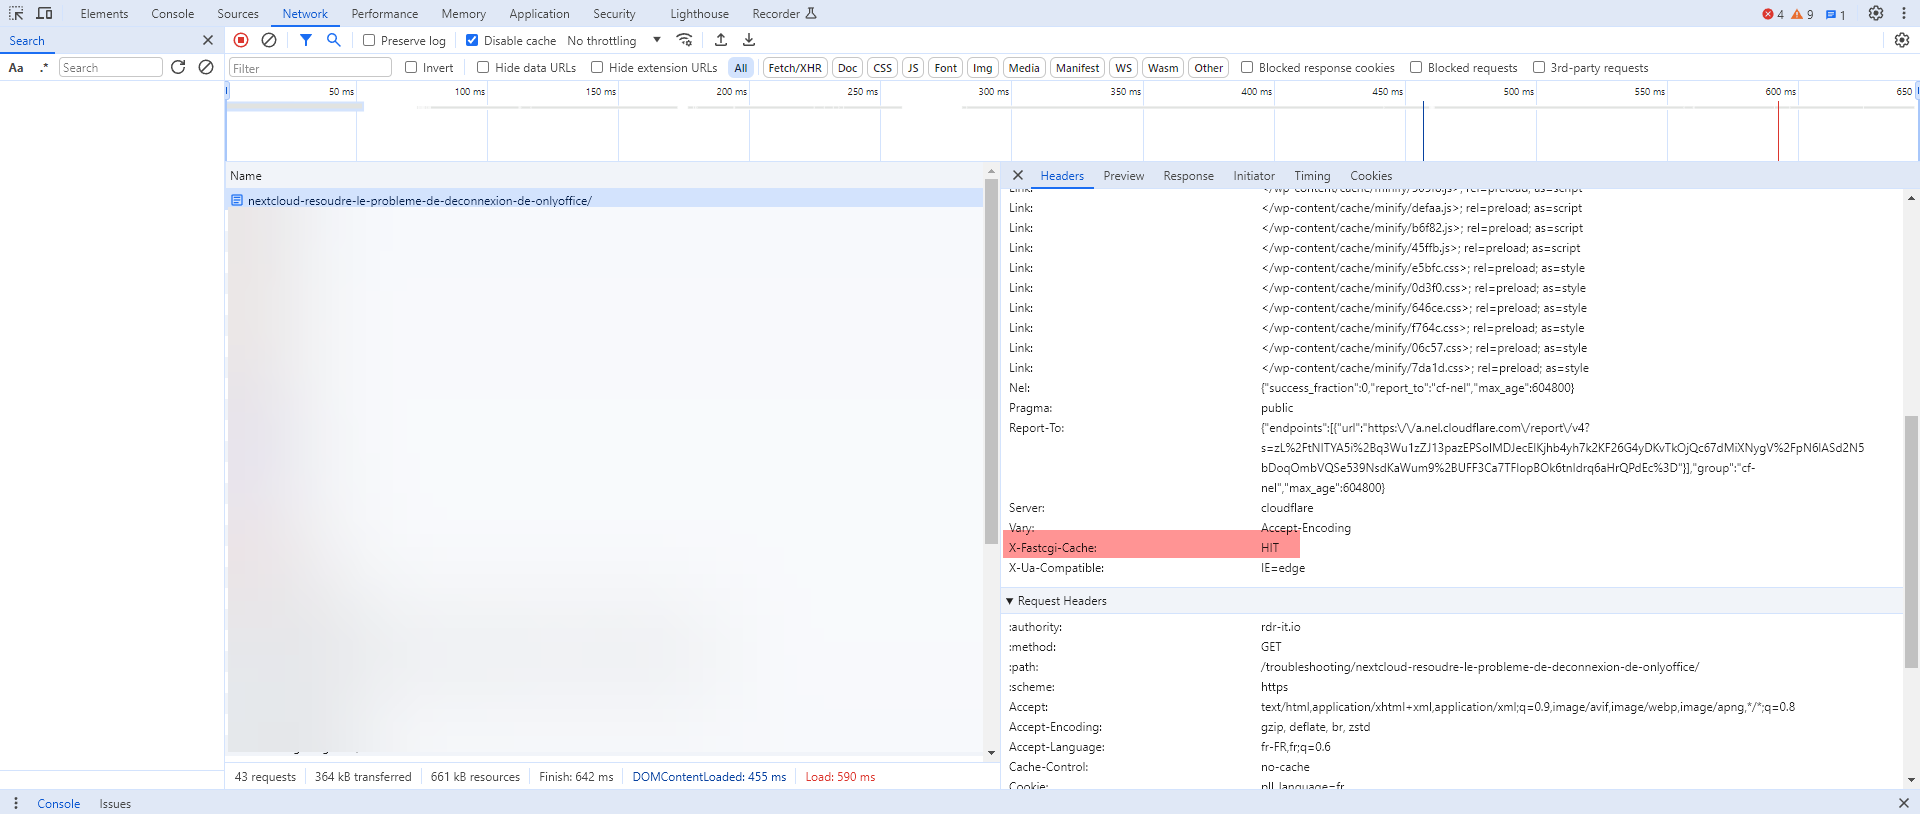
This time, the cache was used and can be seen with the X-Fastcgi-Cache header which is at the Hit value.
To finish this tutorial, I will explain to you how to purge the cache, from WordPress, there is a plugin which allows to manage the Fastcgi cache of Nginx which is called Nginx Helper, to function you must have the Libnginx-Mod-Http-Cache-Purge module. This solution works on a standard installation.
If you are in a container or not, the easiest way to purge the cache is to purge the cache folder and recharge the configuration of Nginx:
rm -rf /etc/nginx/cache/
/etc/init.d/nginx reload
You now know how to set up the FastCgi cache on Nginx for WordPress.
