In this tutorial, I will explain how to install Authentik with Docker in order to set up a single authentication portal (SSO) to access your different applications.
Authentik will allow you to set up a centralized simple authentication solution whether OpenID, SAML and even LDAP, Authentik also allows you to federate several IdP in order to have a unique portal.
Table Of COntent
Presentation of Authentik
Authentik is an open source centralized authentication (SSO) and identity management (IAM) solution designed for modern infrastructure. Developed in Python with an intuitive web interface, Authentik allows to centralize user access management to various applications and services, whether they are self-hosted or cloud-based.
Its main advantage lies in its flexibility: it supports modern standards such as OAuth2, OpenID Connect, SAML, LDAP and TOTP, which allows smooth integration with most common applications. Authentik can thus play the role of a secure identity provider (IdP) or reverse proxy.
Authentik allows to define granular access policies based on specific groups, roles or conditions. The administration interface offers a high level of control over users, groups, authentication flows, providers (OAuth/SAML), protected applications, etc.
Thanks to its configurable flowsAuthentik allows to customize each step of authentication: account creation, connection, password validation or MFA, etc. This modular approach facilitates the implementation of complex scenarios without changing the source code.
On the security side, Authentik natively integrates multiple factor authentication (MFA), detailed audit logs, fine permission management, and compatibility with reverse proxy (such as Traefik or Nginx) for safe production.
Authentik settles very easily via Docker or Docker Composerthis makes it accessible even to small structures wishing to retain control of their identification data.
In short, Authentik is a light, modern and open source alternatives to solutions like Keycloak, particularly adapted to DevOps environments, self-hosted laboratories and companies concerned with their digital sovereignty.
Prerequisites to deploy Authentik with Docker
We will assume that you want to make a “clean” deployment of Authentik for a start-up, so you will need:
- A linux server with Docker and Docker Composer installed
- A DNS record (auth.domain.tld / sso.domain.tld)
- An SSL certificate that can be used with the recording
- One reverse proxy
- A SMTP server for sending emails
Deploy Authentik with Docker and Docker composes
This deployment will be based on the official documentation available here: https://docs.goauthentik.io/docs/install-config/install/docker-compose
On your Linux server with Docker, start by creating a folder, where we will store the file docker-compose.yml, file .env and the various volumes (folder redirection).
For my part, I will work on the file: /containers/authentik/.
To start, download the file docker-compose.yml made available by Authentik.
sudo wget https://goauthentik.io/docker-compose.ymlWe’re going to continue for the moment following the documentation to create the file .env and add two variables in it.
echo "PG PASS=$(openssl rand -base64 36
echo "AUTHENTIK SECRET KEY=$(ocenssl rand -base64 60
At the moment, we have both files that are created, now we will add variables to the file .env for the Authentik configuration.
We start by opening the file:
sudo nano .envFirst we’ll set up the image TAG:
AUTHENTIK TAG=2025.6During my deployment, I had to make this modification, because the docker-comrose.yml file offered me an image that was not yet available, so it was impossible to deploy Authentik.
You will find the list of TAGS available here: https://github.com/goauthentik/authentik/pkgs/container/server
To continue the configuration, we will now add SMTP settings to send emails, add the following lines and adapt to your environment:
# SMTP Host Emails are sent to
AUTHENTIK EMAIL  HOST=smtp.domain.tld
AUTHENTIK EMAIL  PORT=25
# Optionally authenticate (don't add quota marks to your password)
#AUTHENTIK EMAIL  USERNAME=
#AUTHENTIK EMAIL  PASSWORD=
# Use StartTLS
#AUTHENTIK EMAIL  USE TLS=false
# Use SSL
#AUTHENTIK EMAIL  USE SSL=false
#AUTHENTIK EMAIL  TIMEOUT=10
# Email address authenticik will send from, should have a correct @domain
AUTHENTIK EMAIL  [email protected]
Adjust the application’s publishing ports:
COMPOSE PORT HTTP=80
COMPOSE PORT HTTPS=443
To finish this configuration, we will pass the settings for creating the default account: akadmin
AUTHENTIK BOOTSTRAP PASSWORD=change
AUTHENTIK BOOTSTRAP TOKEN=change
AUTHENTIK BOOTSTRAP [email protected]
Here too adapt to your environment by changing the email address and configuring a password and robust token.
File .env is configured, we’ll now go to the file docker-compose.yml.
sudo nano docker-compose.ymlFor each, services declared in the docker-compose.yml file, modify the volume declaration by adding ./ in order to redirect content to a local folder and delete the volume declaration at the end of the file
For the postgresql service: database:/var/lib/postgresql/data becomes: ./database:/var/lib/postgresql/data
We’re ready to start by downloading the images:
sudo docker composes sweater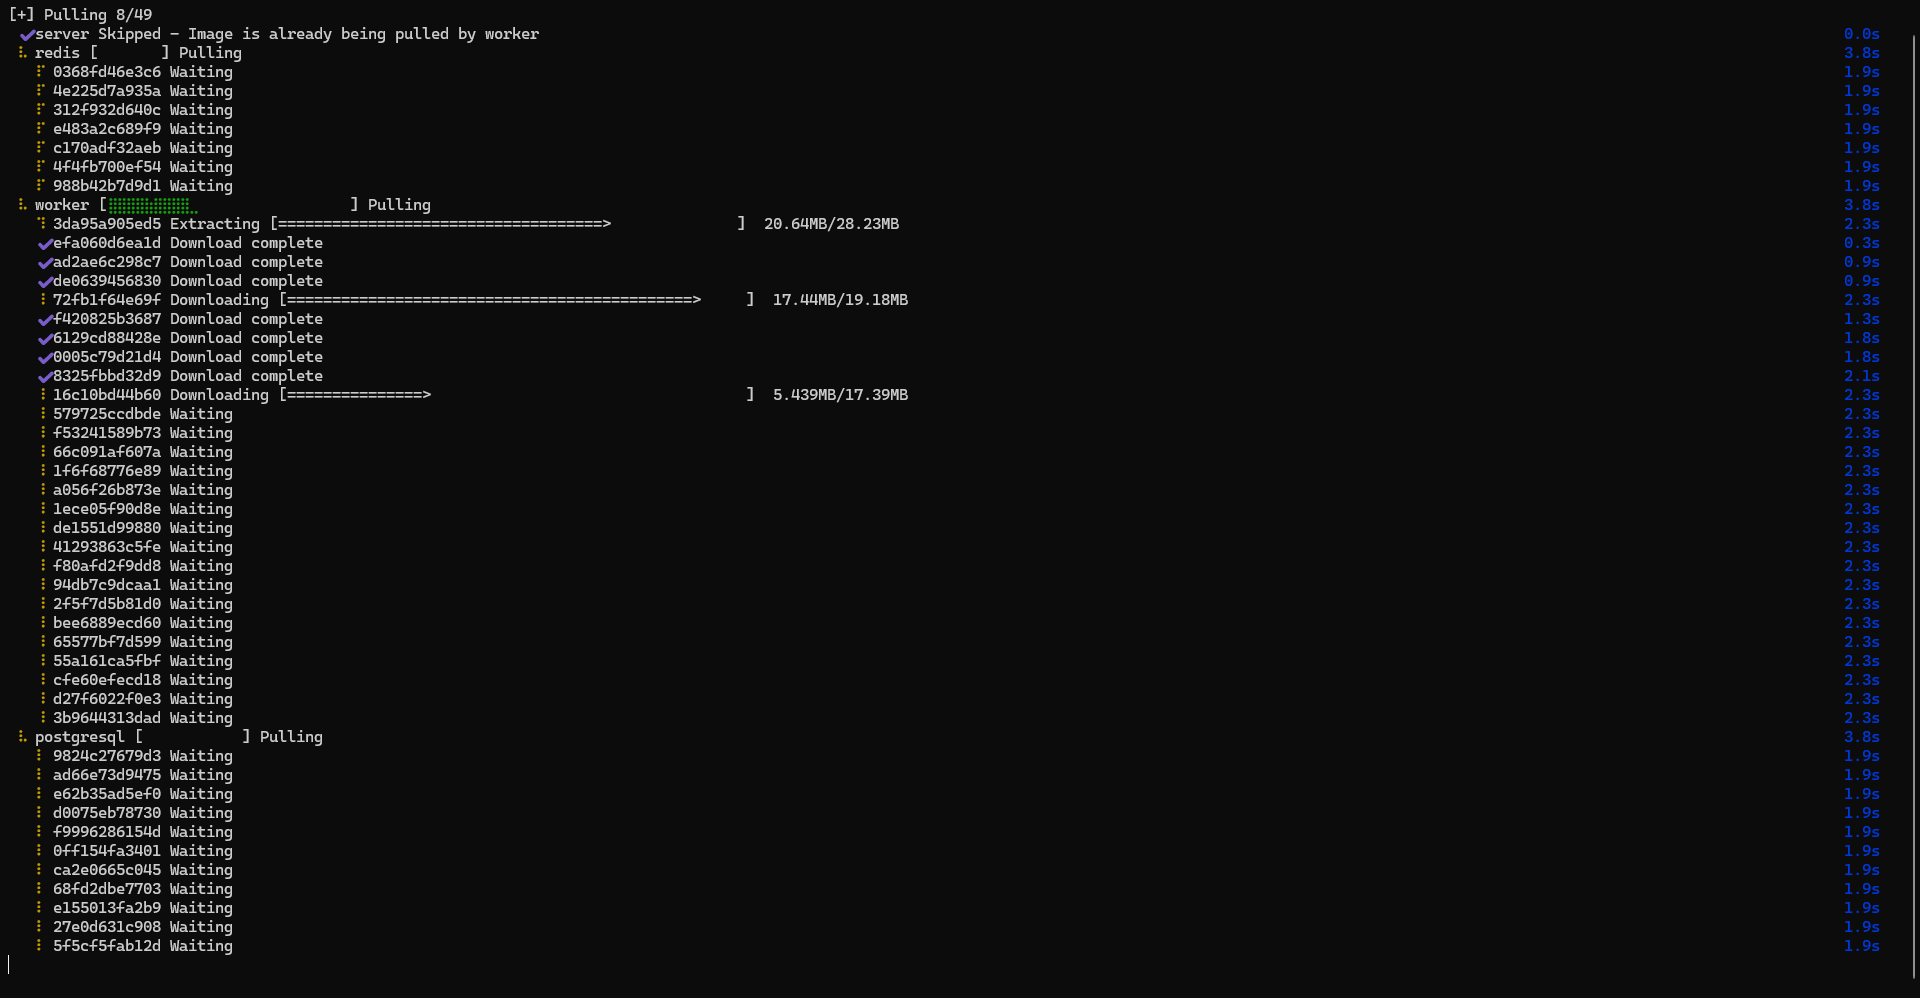
Then start the containers:
sudo docker compose up -d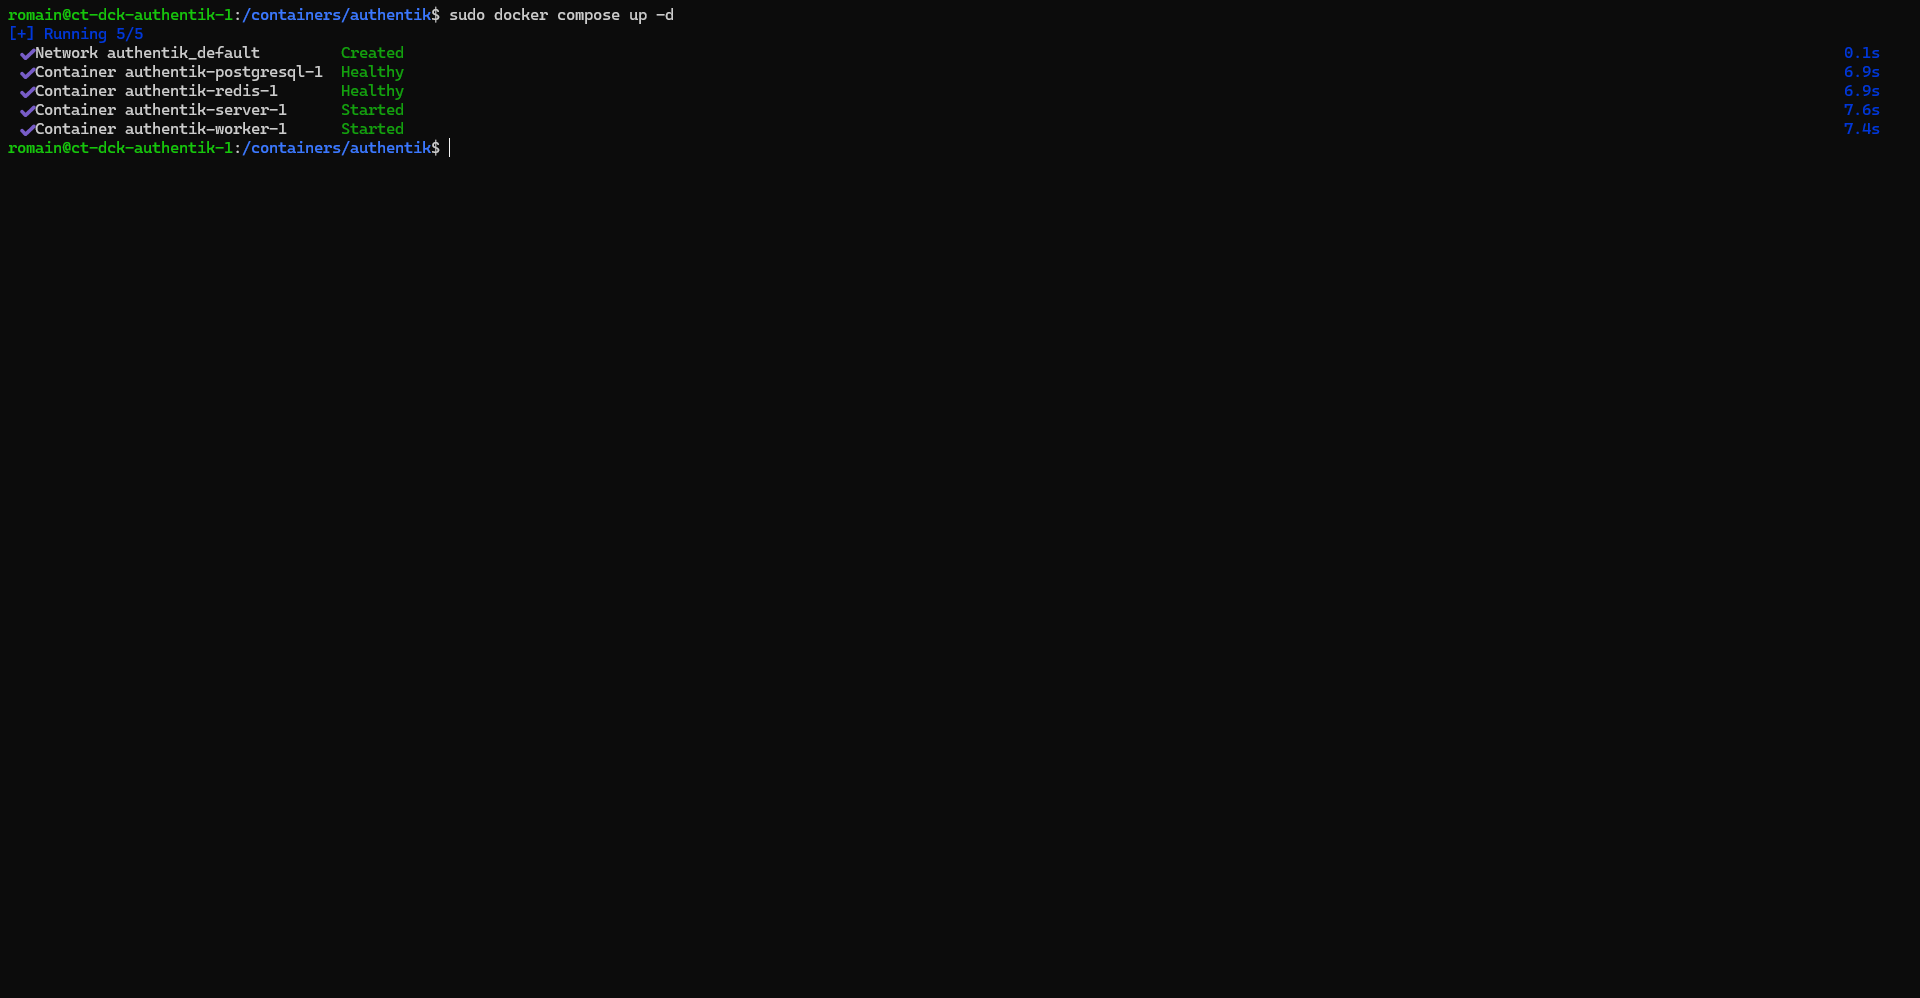
Display logs to ensure containers work well:
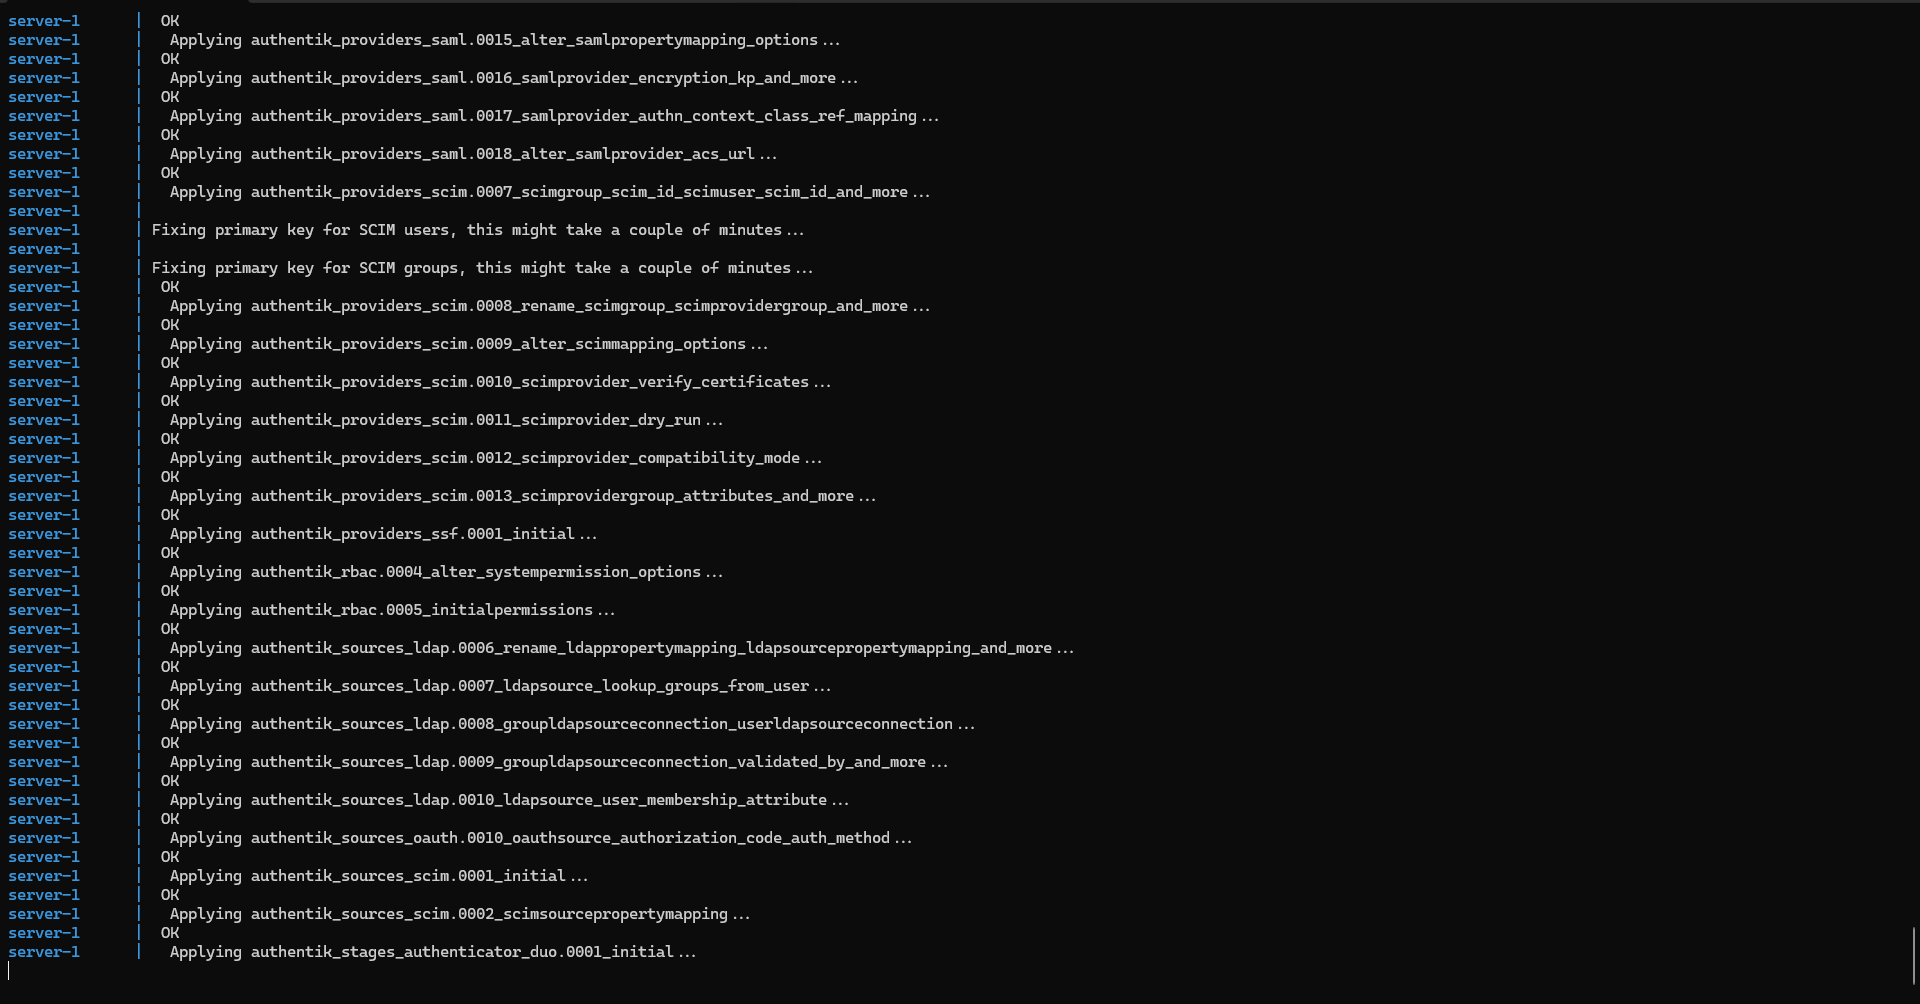
sudo docker compose logs -f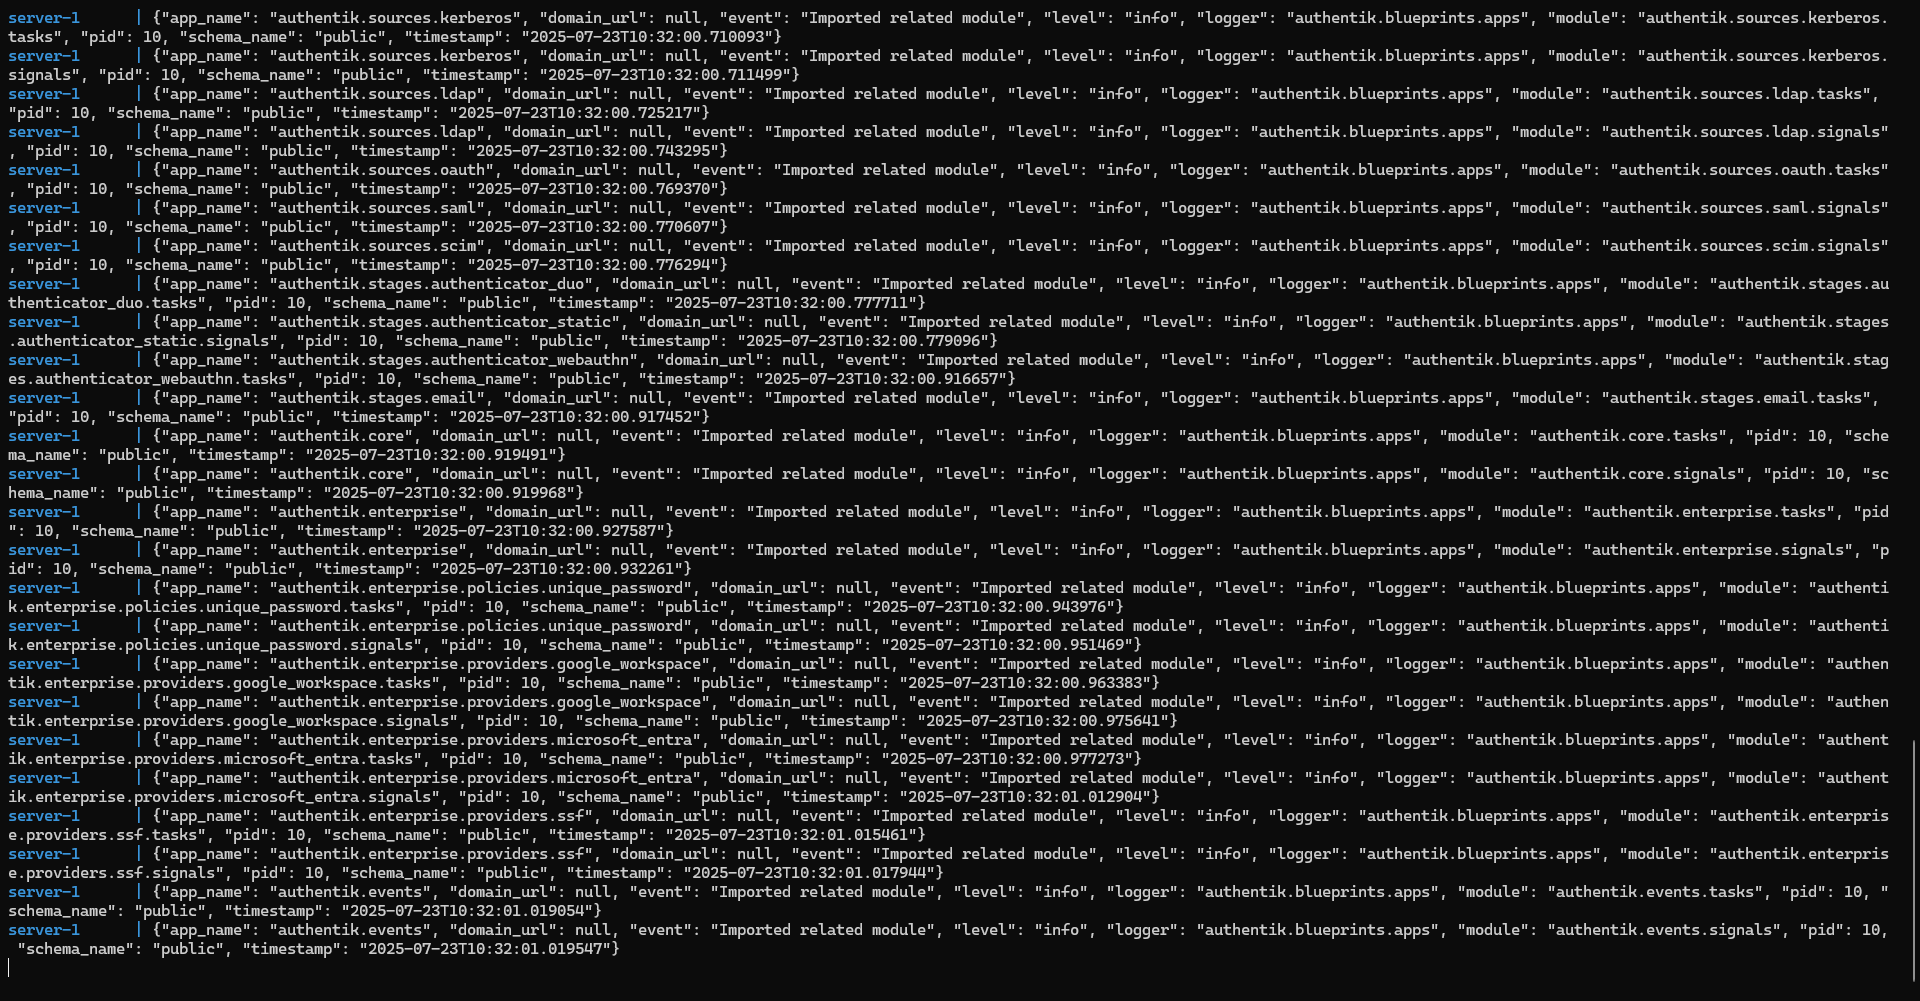
Before going to the configuration, we will test the proper functioning of Authentik, from an Internet browser as an address enter the IP address of your Docker server in HTTPS on the port defined in the file .env. Pass the certificate error, you should arrive on the authentication form, enter the email address 1 of the account akadmin and click on the Log in 2> button.

Enter the 1 password defined in the file .env and click Continue 2>.

We’re connected to Authentik.
Nginx configuration as reverse proxy
Before moving to the Authentik configuration, I will give you the virtualhost configuration for Nginx to use the DNS name you have chosen.
Here is an example configuration file for Nginx using an SSL certificate.
Adapt the configuration file to your environment, putting the IP address of the Authentik server in the part
upstream, modify the variableserver nameand the way of SSL certificates.
In the case of use of certbot to generate SSL certificate, take the example above, delete block server{ ... } configure on port 80, in block 443, delete SSL part, change port to 443 in 80 and delete http2 on;
First step with Authentik
To continue this first tutorial on Authentik, we will see how to create a user in the application and then configure a first application that will use the IdP.
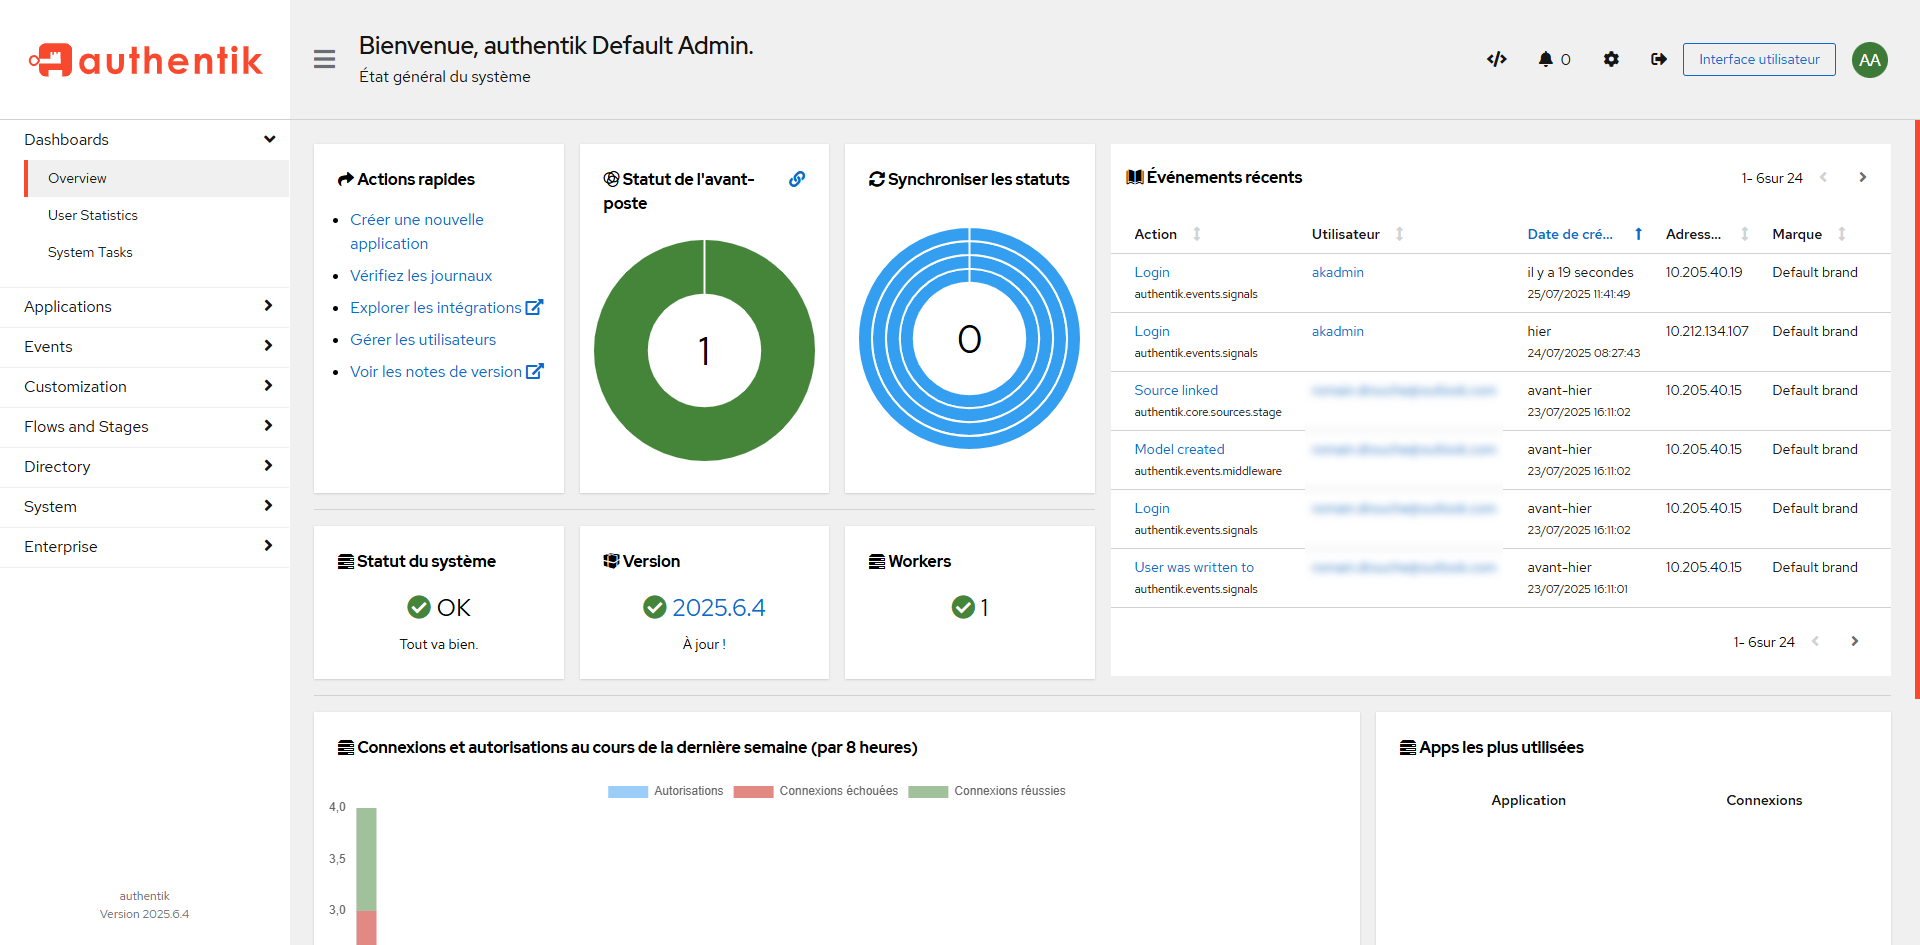
To access the Authentik configuration, once connected to the akadmin account, click Administration Interface 1>.
We get to the administration part of the IDP, where we have access to configuration, logs and statistics.
Create a user in Authentik
There are different solutions to manage users in Authentik, we will start with the basic solution, which will be to create a new user directly in the IdP.
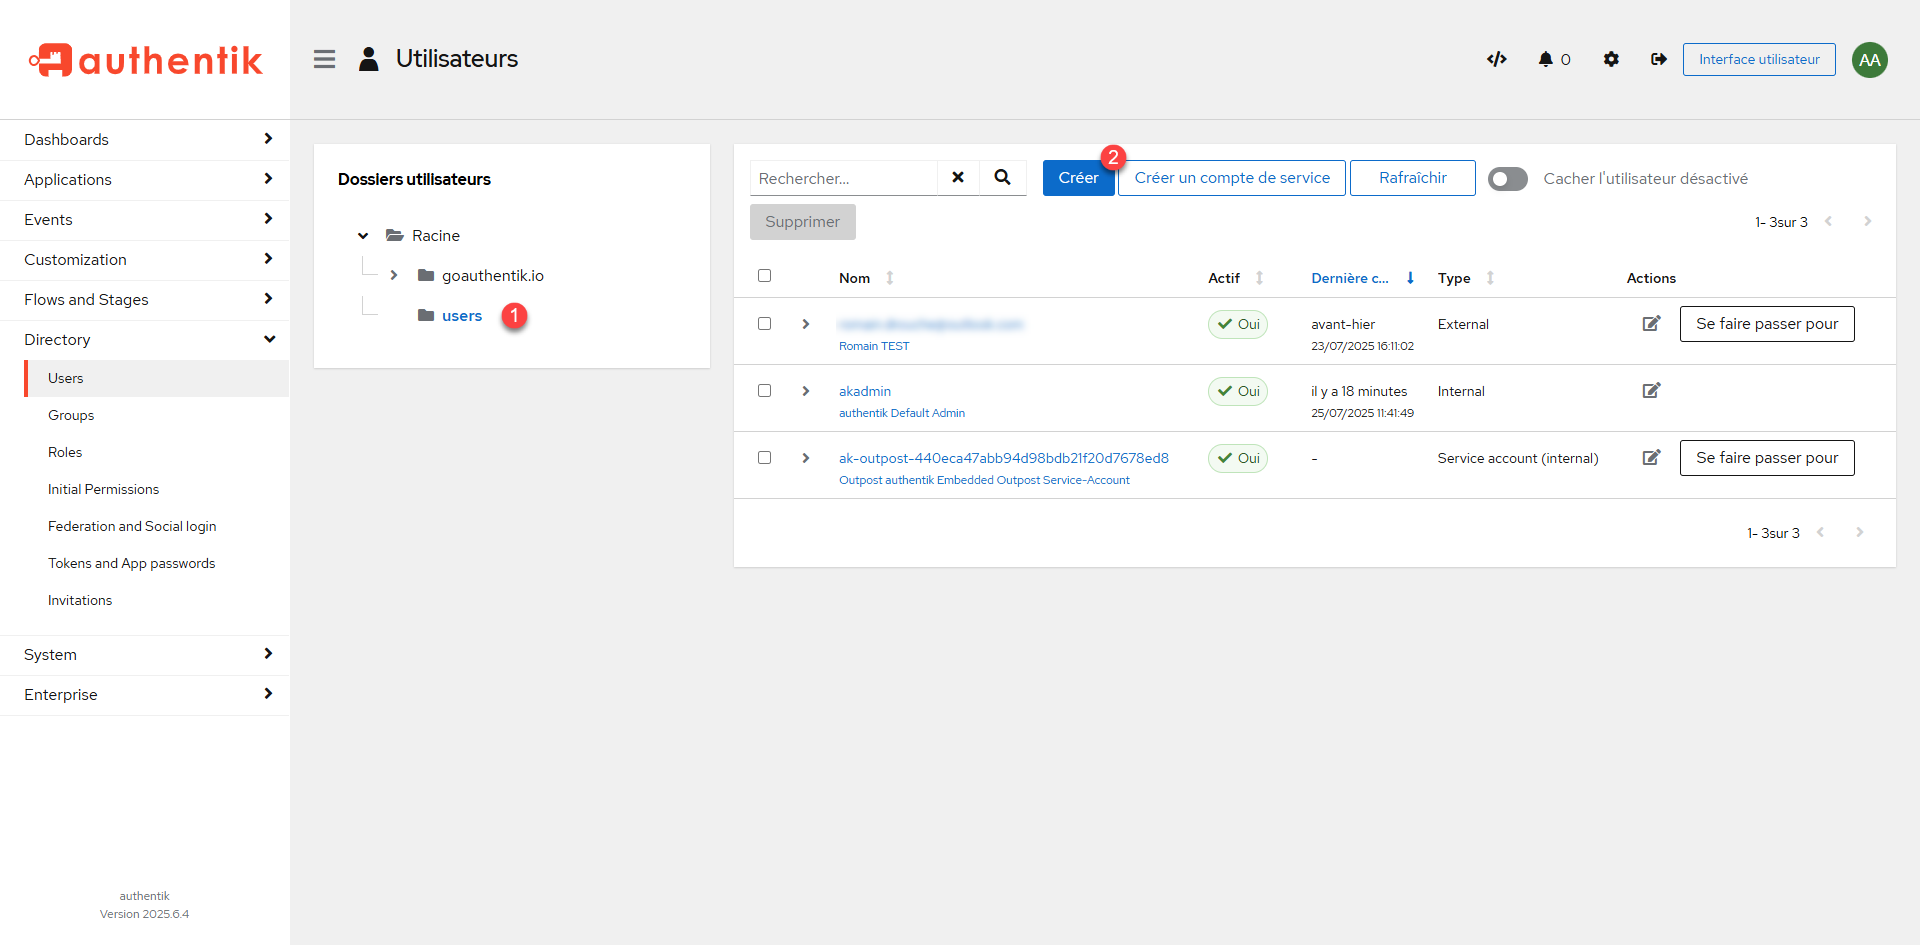
From administration, unroll Directory 1> and click Users 2>.

Place yourself in the 1> folder where you want to create the user and click the Create 2> button.
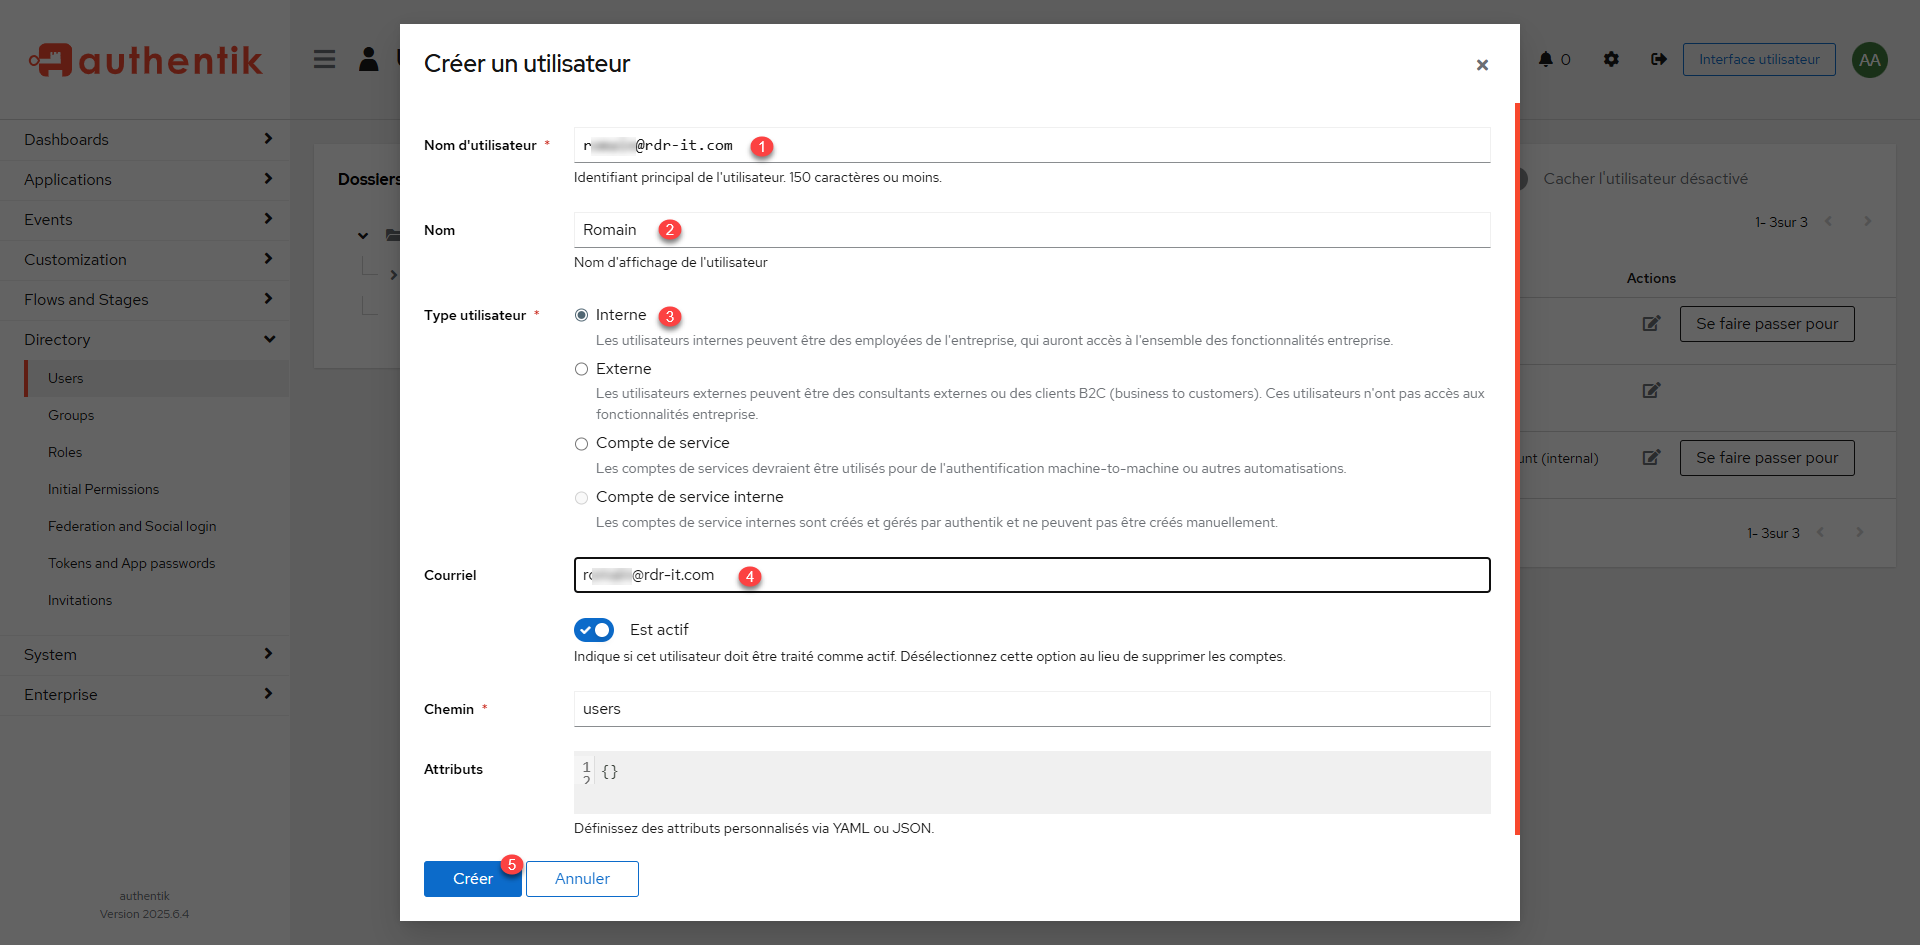
Enter the username 1> which will also be the identifier, the name 2, let Internal 3> for the user type, enter the email address 4> and then click Create 5>.
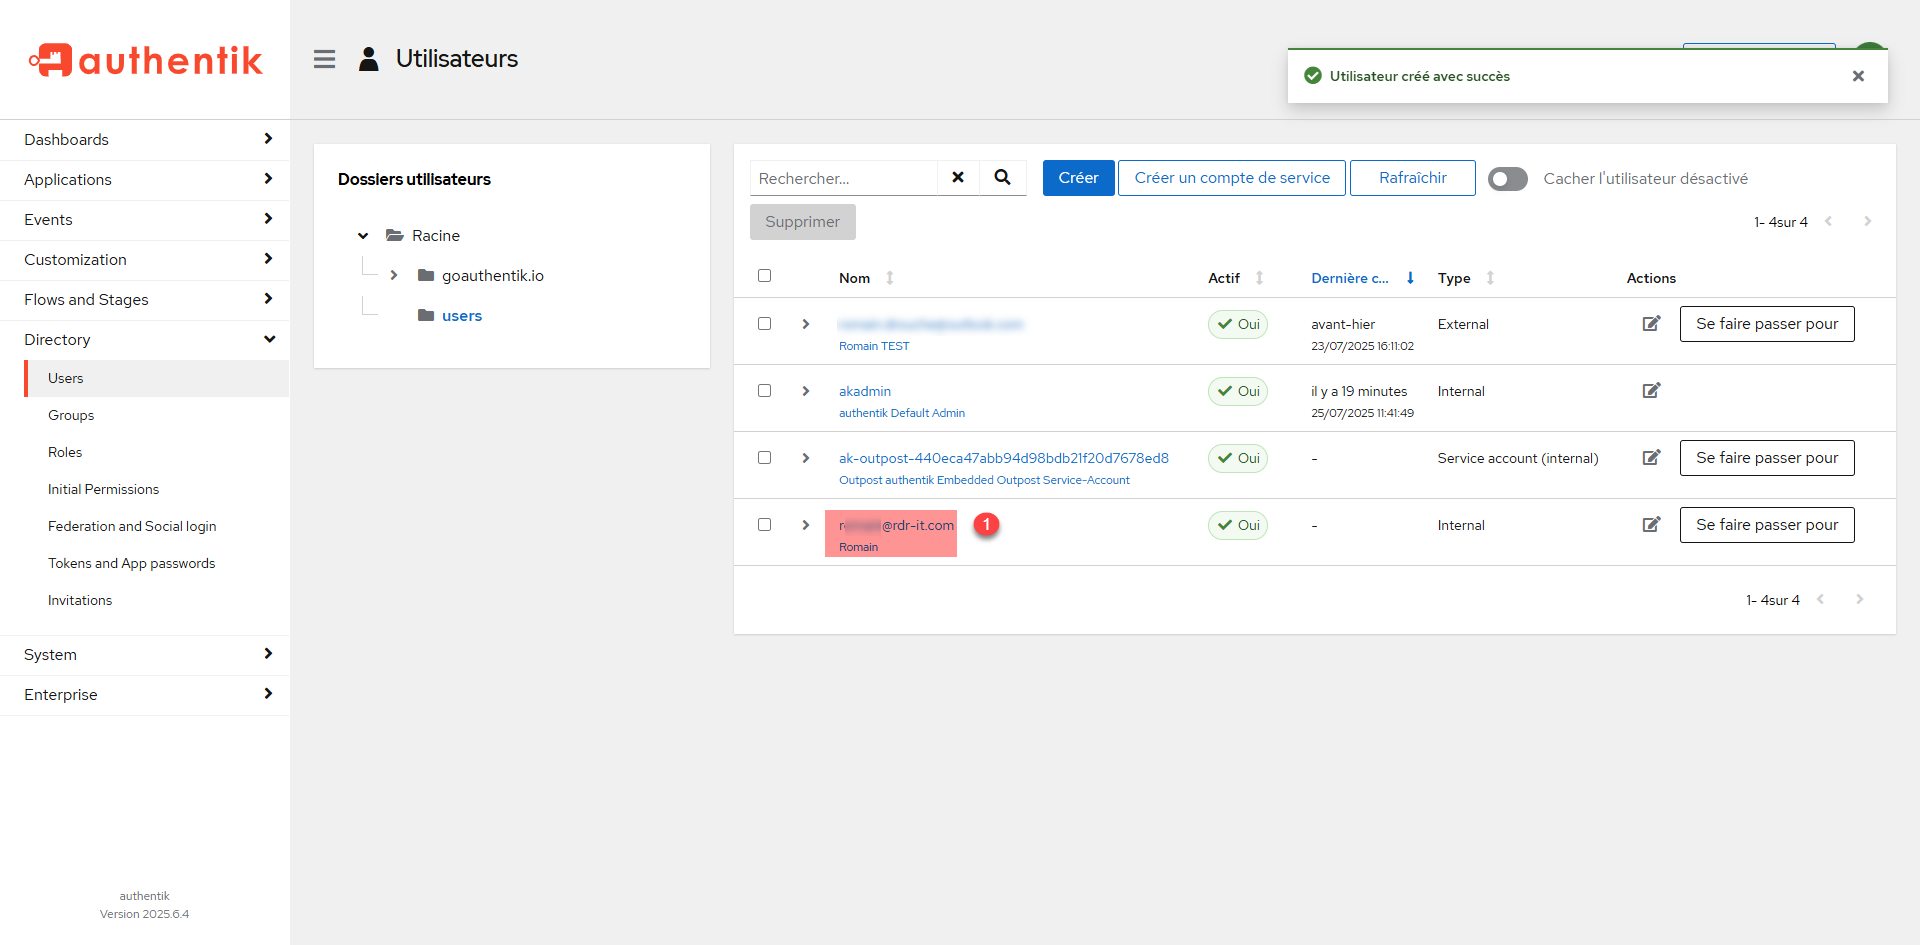
The user is created, we will now configure the account password, click on 1.
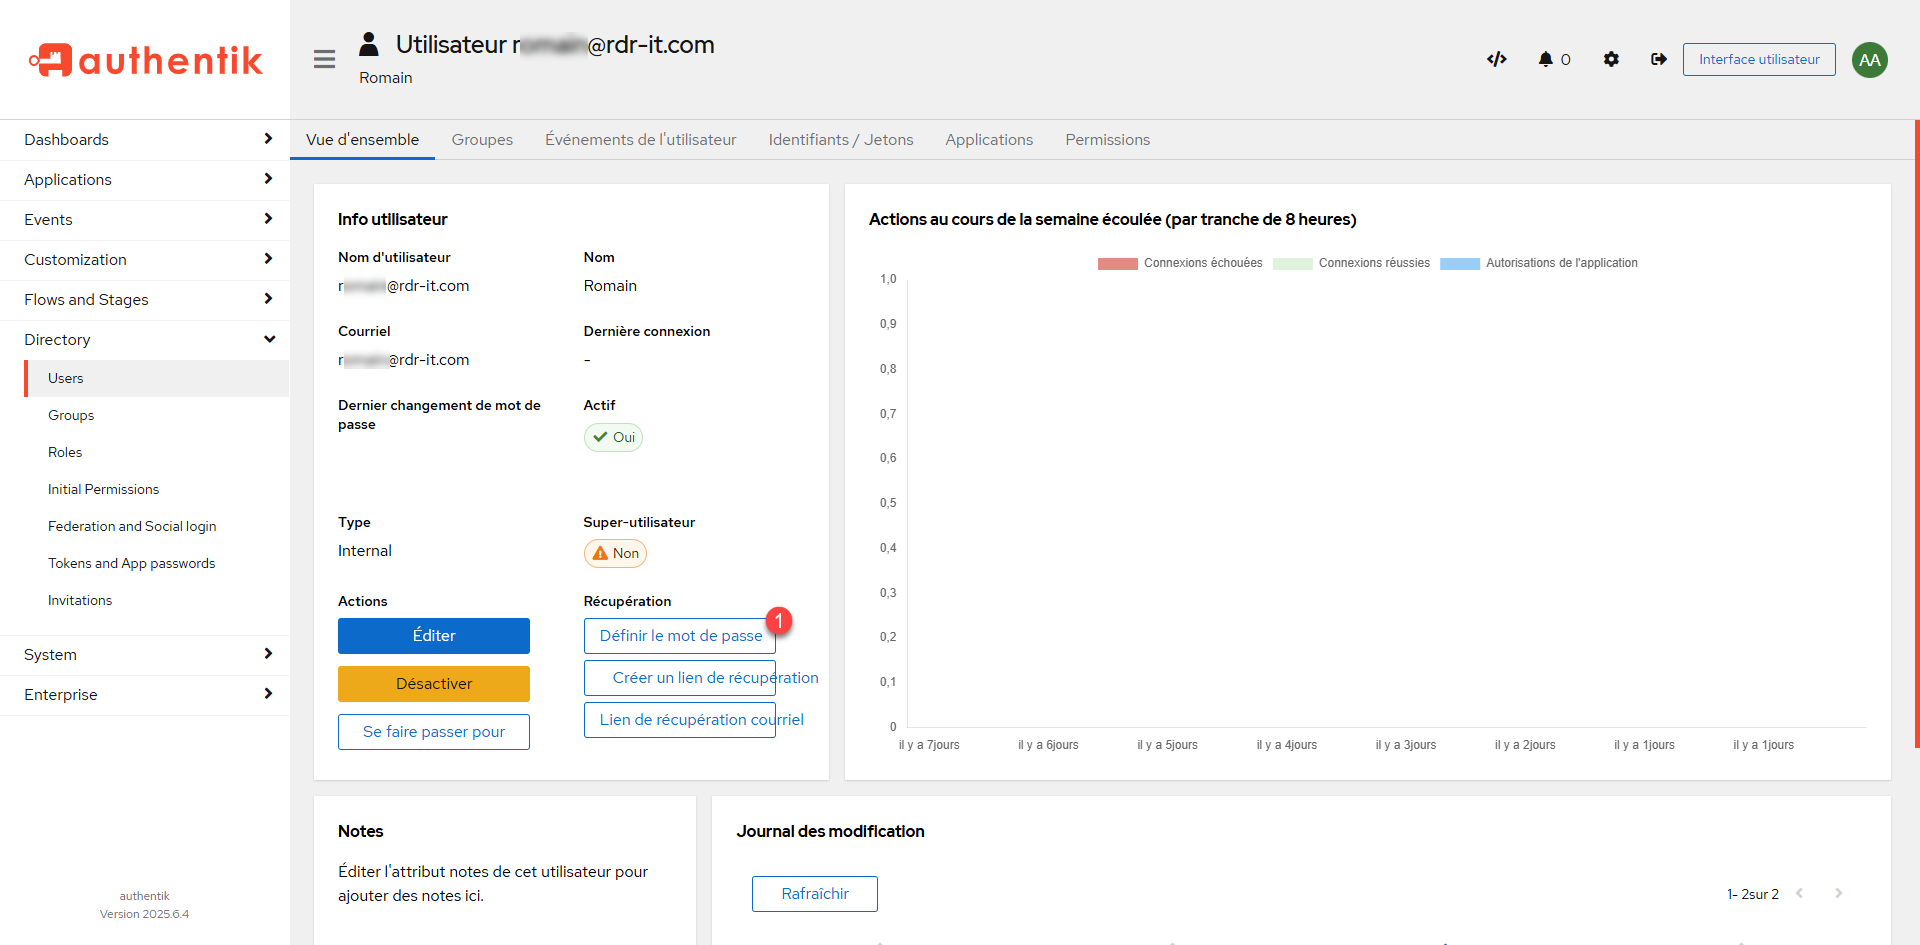
On the user page, click the Set Password button 1.
Enter the password 1> and then click the Update Password 2> button.

The user’s password is set.
Configure OpenID provider and app
To finish this first tutorial on Authentik, we will see how to add an OpenID provider to authenticate users in an application.
For you to show the operation, I will not use a real application, but a container that allows to test an idp that is called id-oidc-tester.
Here is the docker-compose.yml file:
name: openid-tester
services:
  idp-oidc-tester:
    container name: oidc-tester
    environment:
      EXTERNAL OWN URL: "http://A.B.C.D:8080"
    ports:
      - 8080:80
    image: register.gitlab.com/guenoledc-perso/idp-oidc-tester:latest
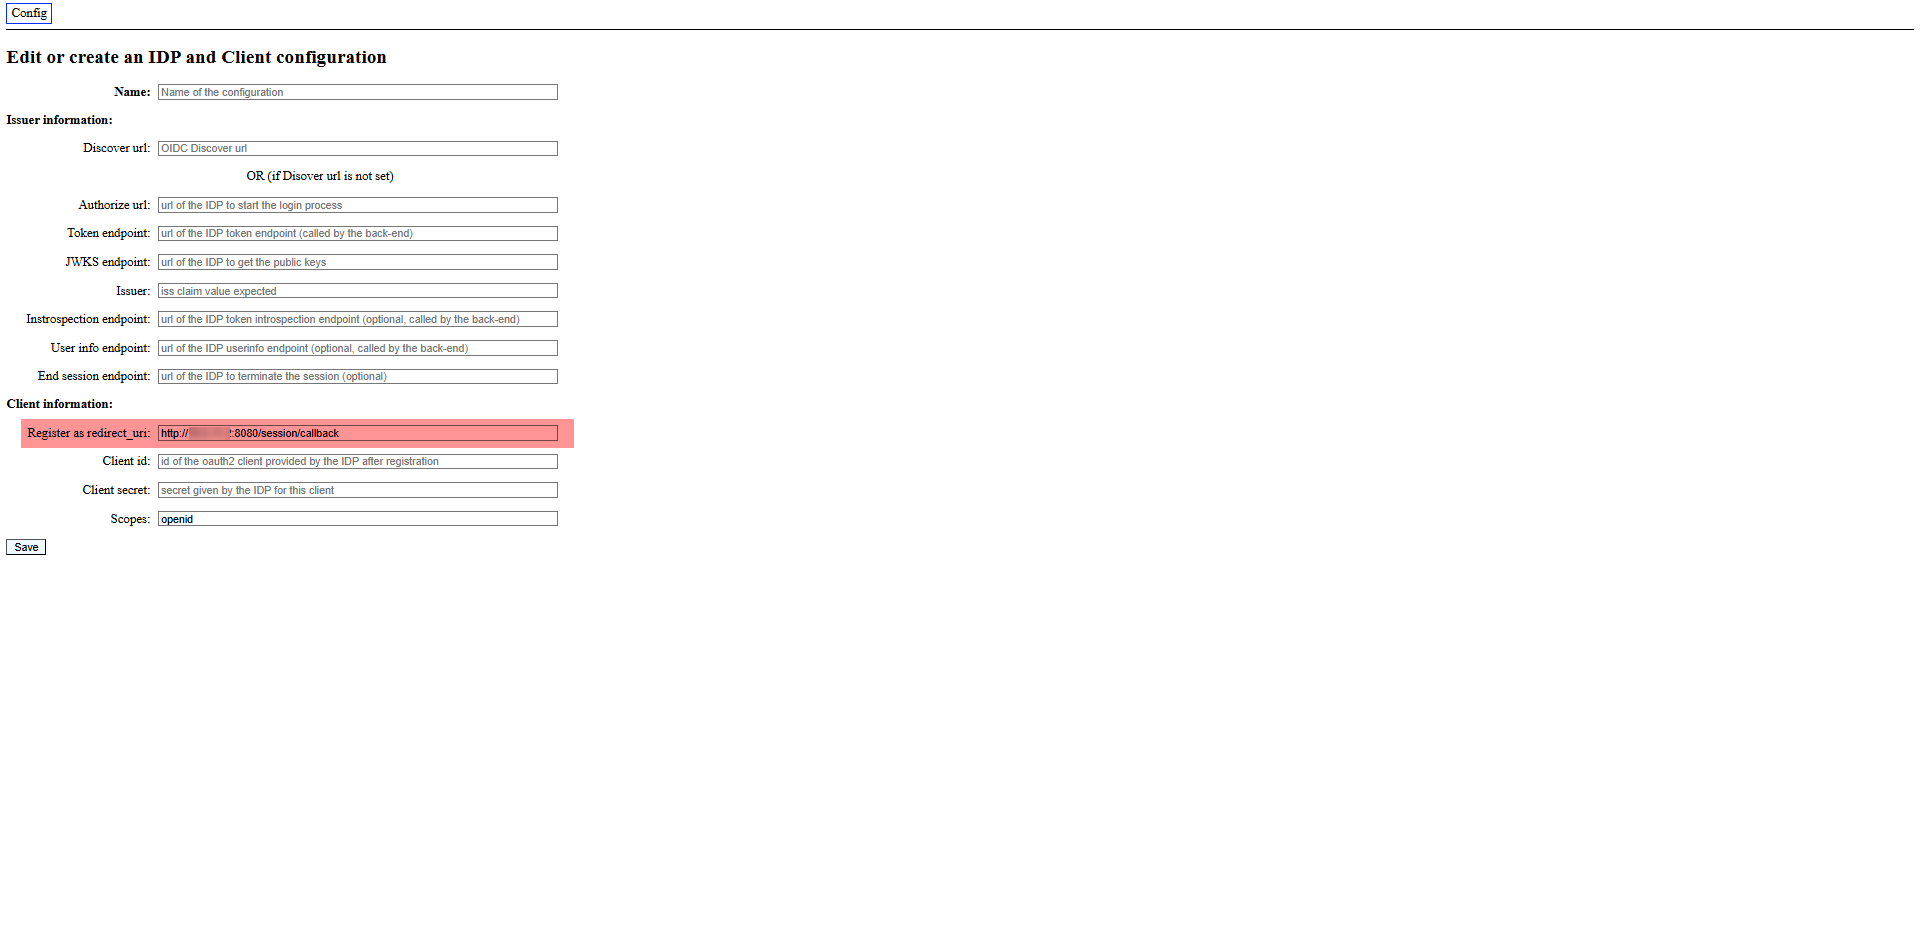
Recover the callback URL of your application at first, on Openid-Tester, it is available in the configuration part.
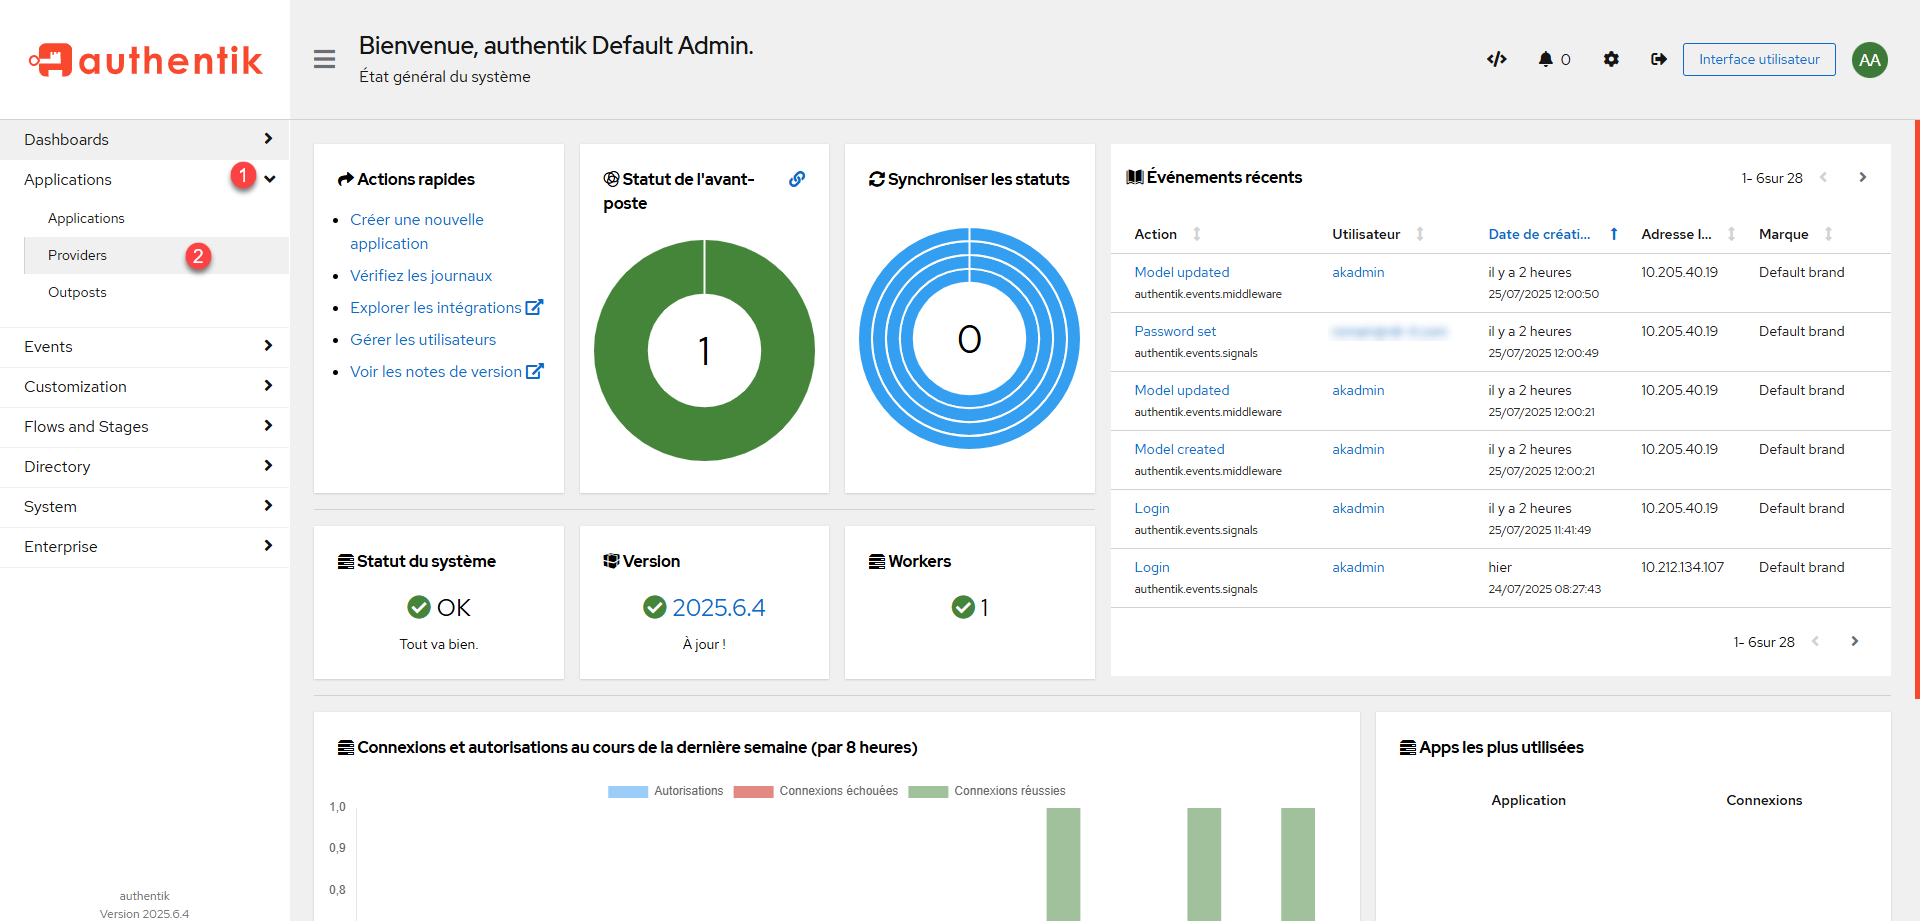
From the menu, scroll to Applications 1> and click Providers 2>.
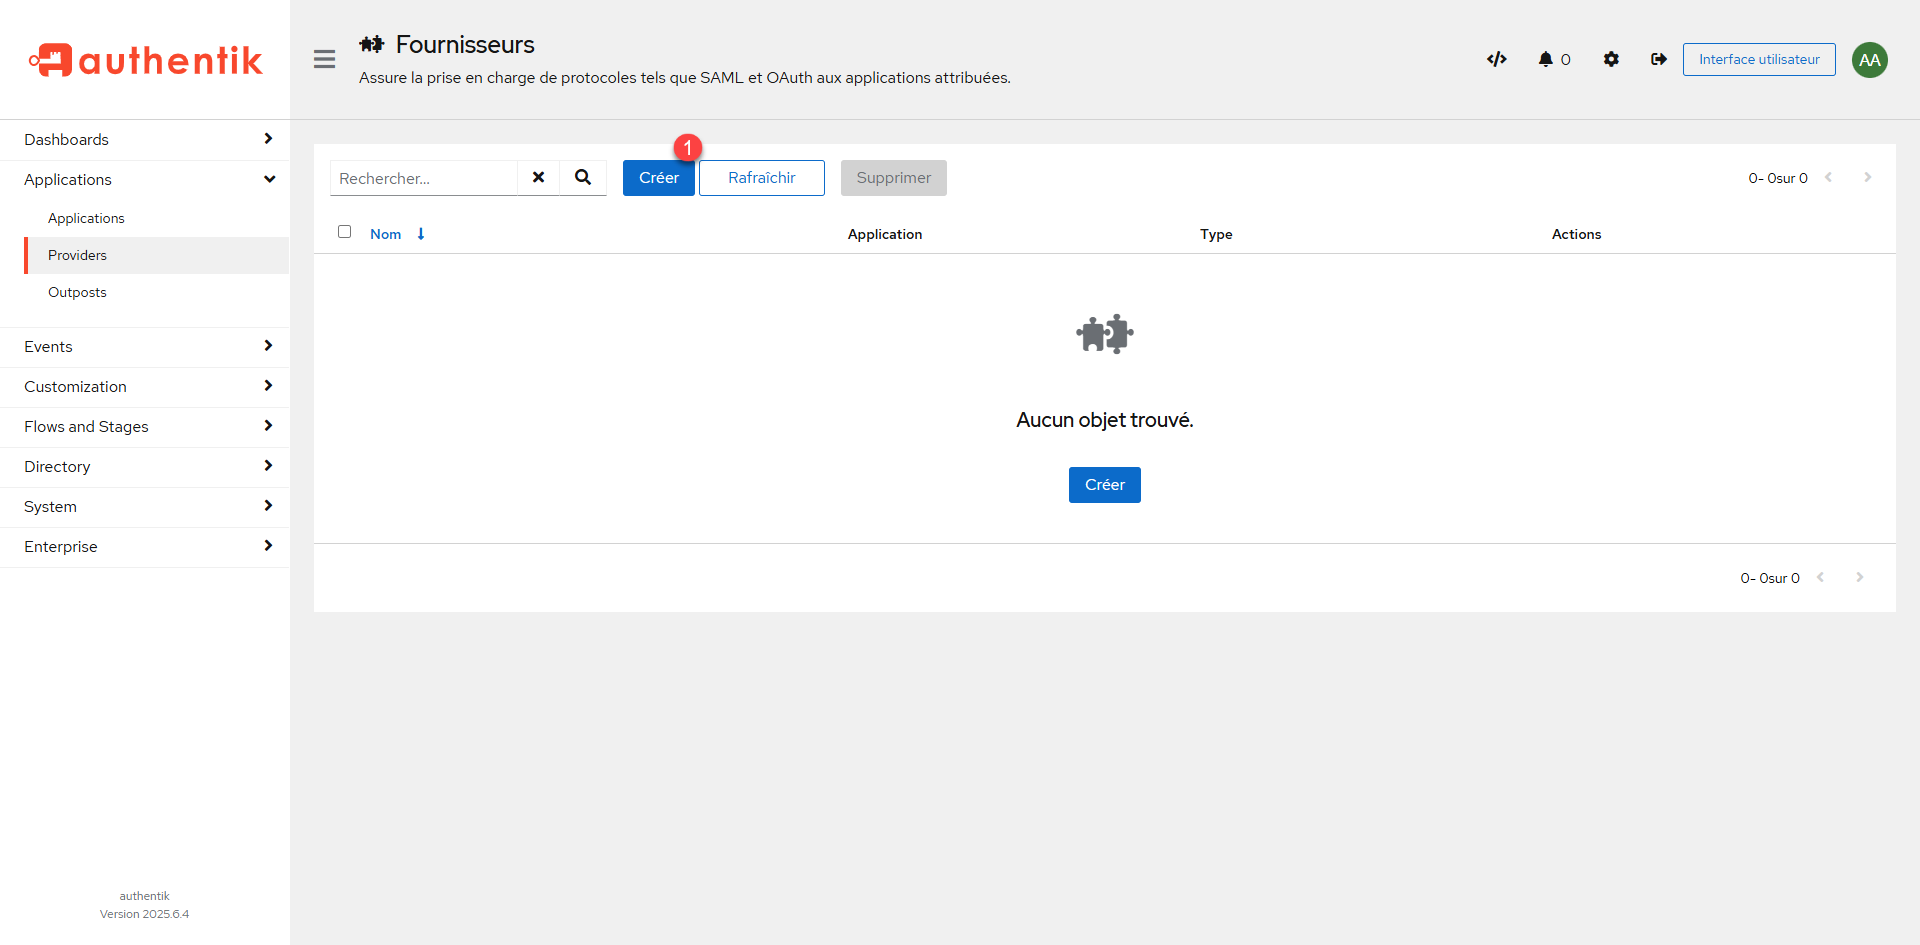
On the suppliers page, click Create 1.
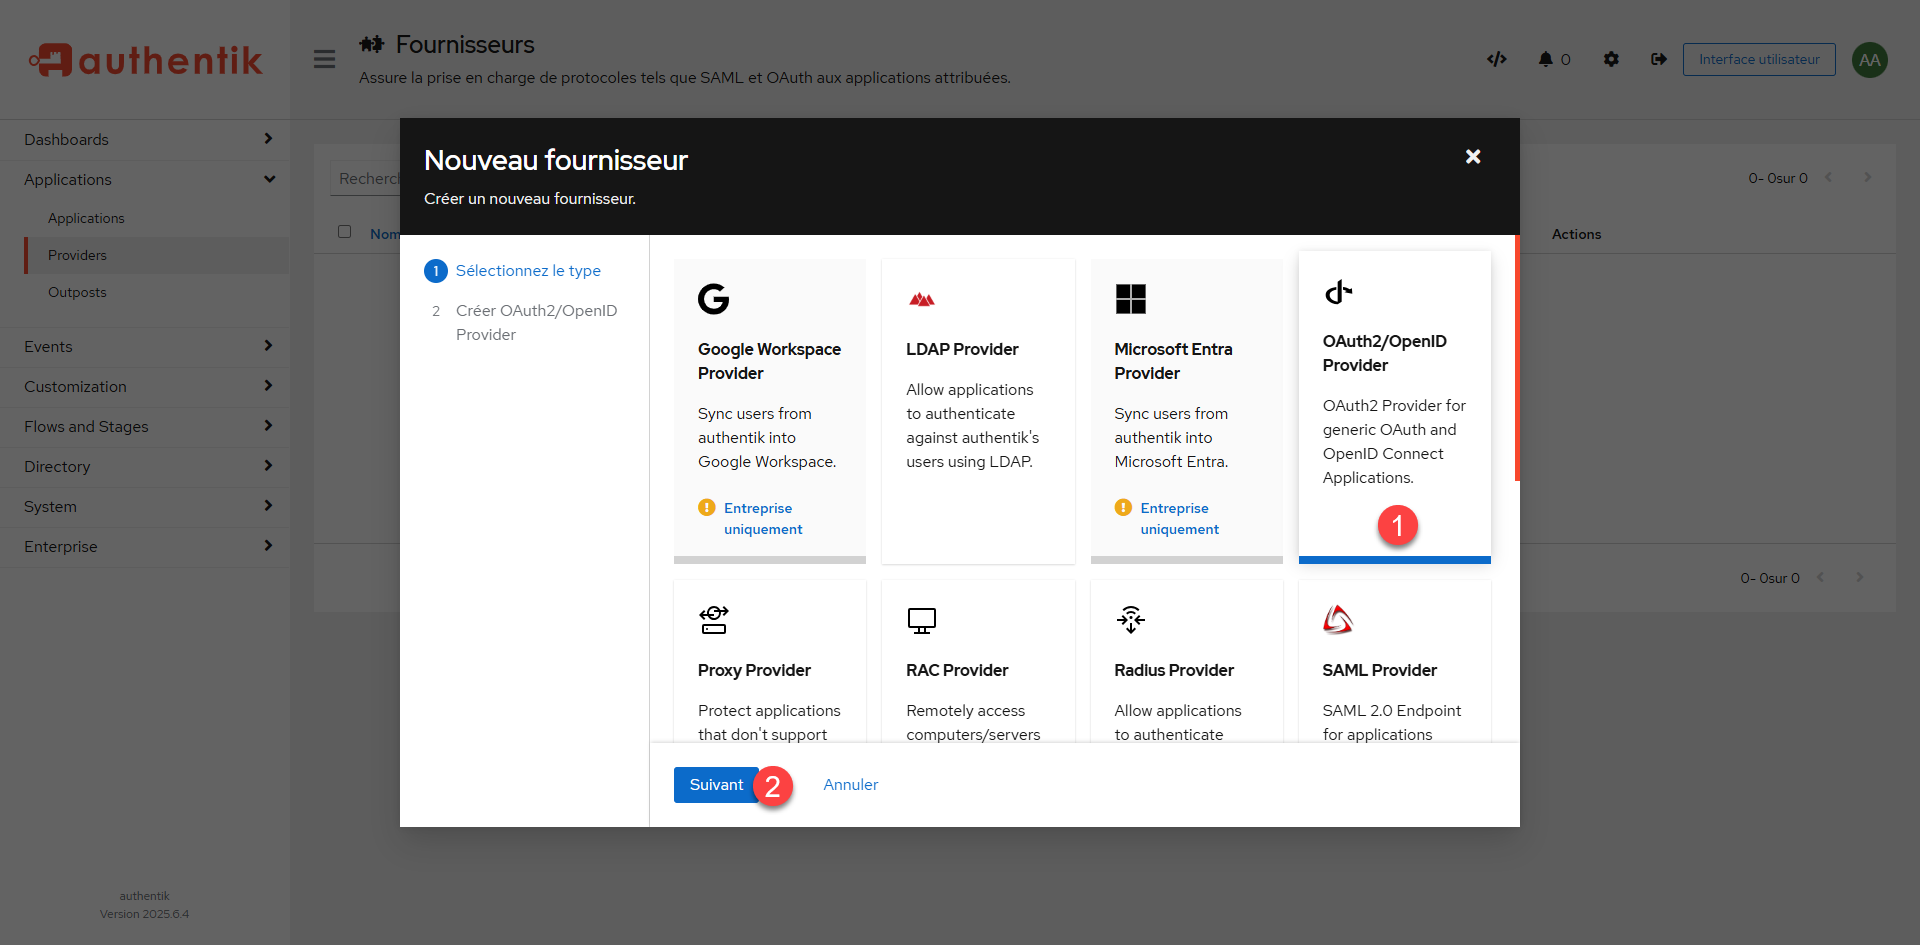
To start, you have to choose the type of provider you want to configure, in this tutorial we will create an OpenID provider, click OAuth2/OpenID Provider 1 to select it and click the Next button 2.
We will pass the provider configuration, start naming it 1, then select the authorization stream* 2, client type choose Confidential 3>, in a note block copy the Client ID 4> and Client Secret 5>, then specify the Callback URL 6 and click Finish 7> to create the provider.
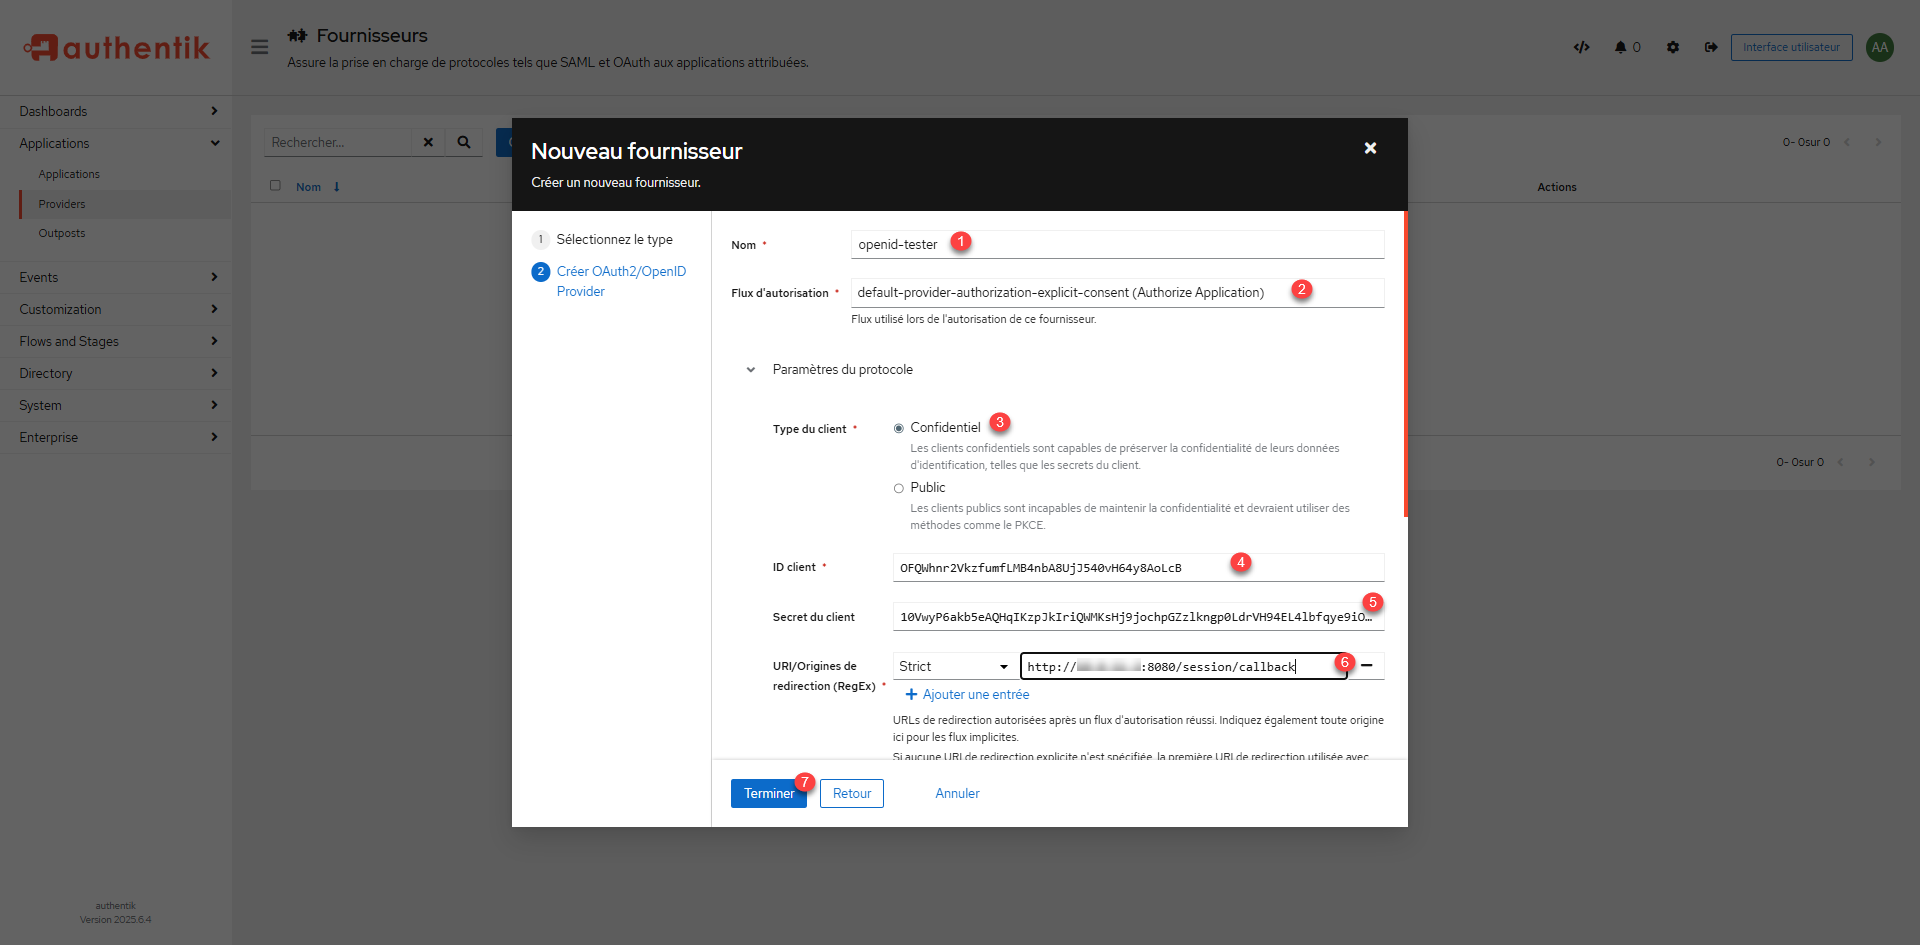
The authorization stream depending on the type selected will request (Explicit) or not (Implicit) the transfer of information (Email, surname, first name …) to the application on which it connects.
In an internal application framework, use Implicit, in the case of external application (SaaS), leave Explicit to inform the user that personal information is being transferred.
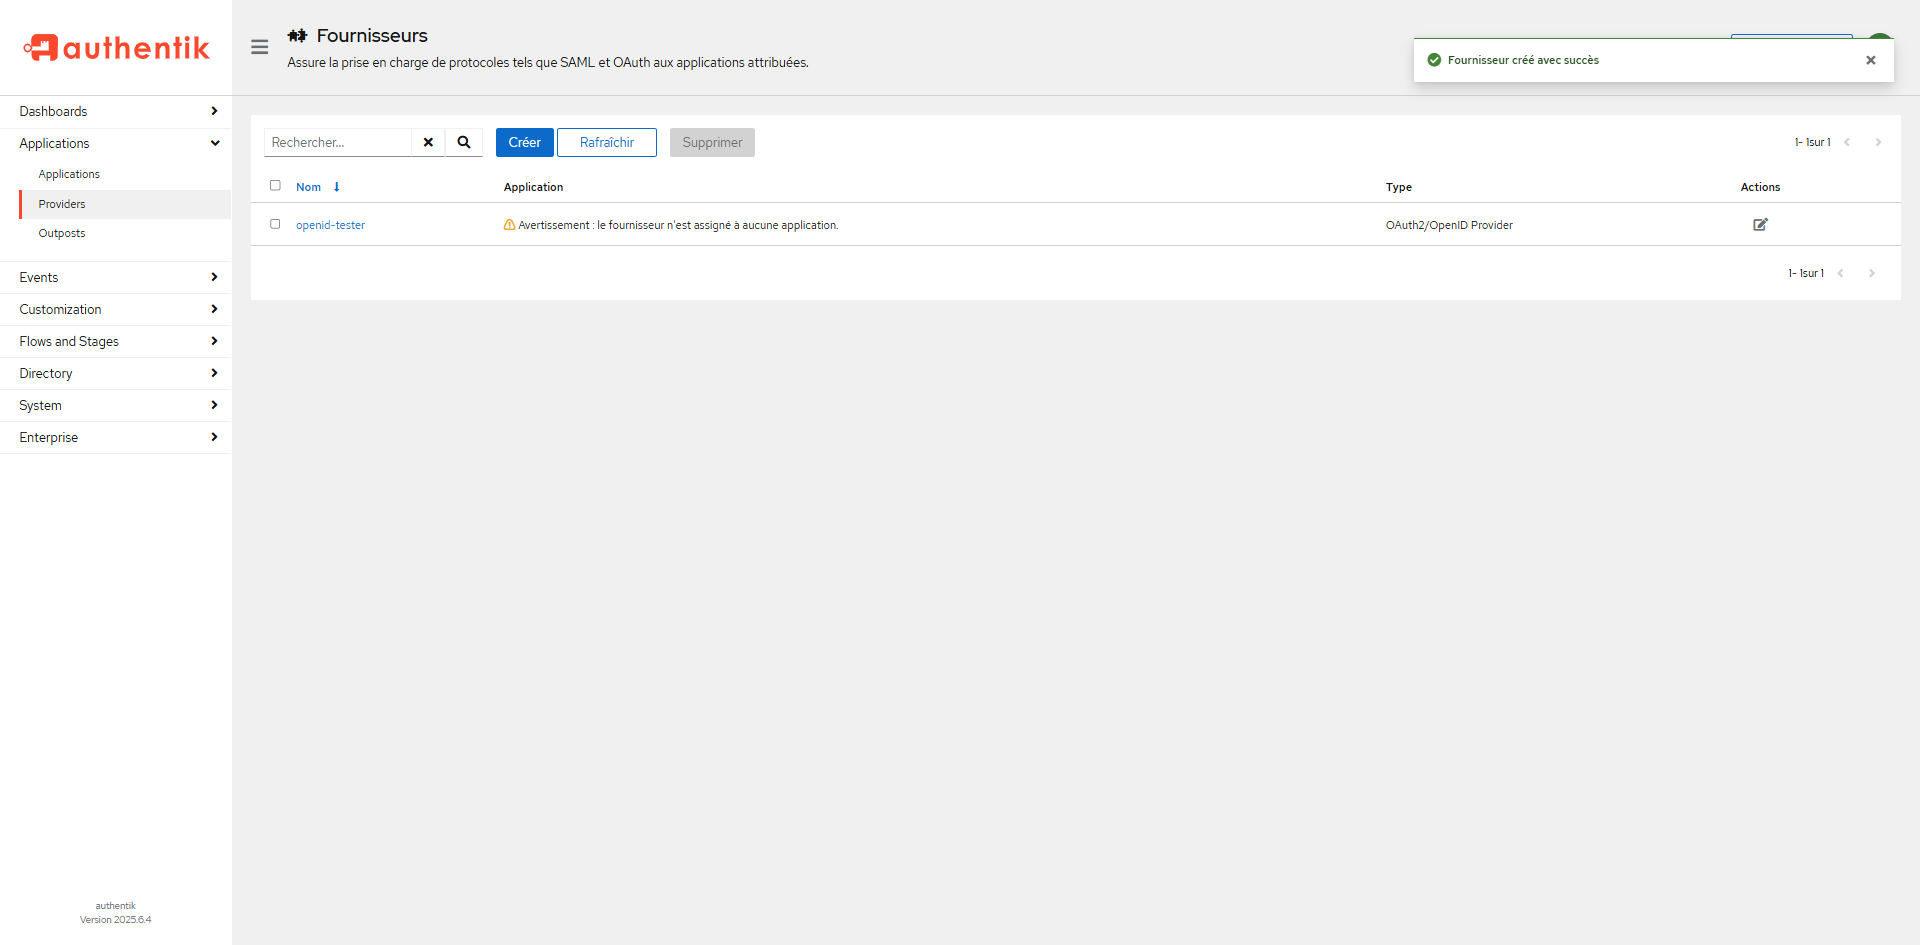
The supplier is created.
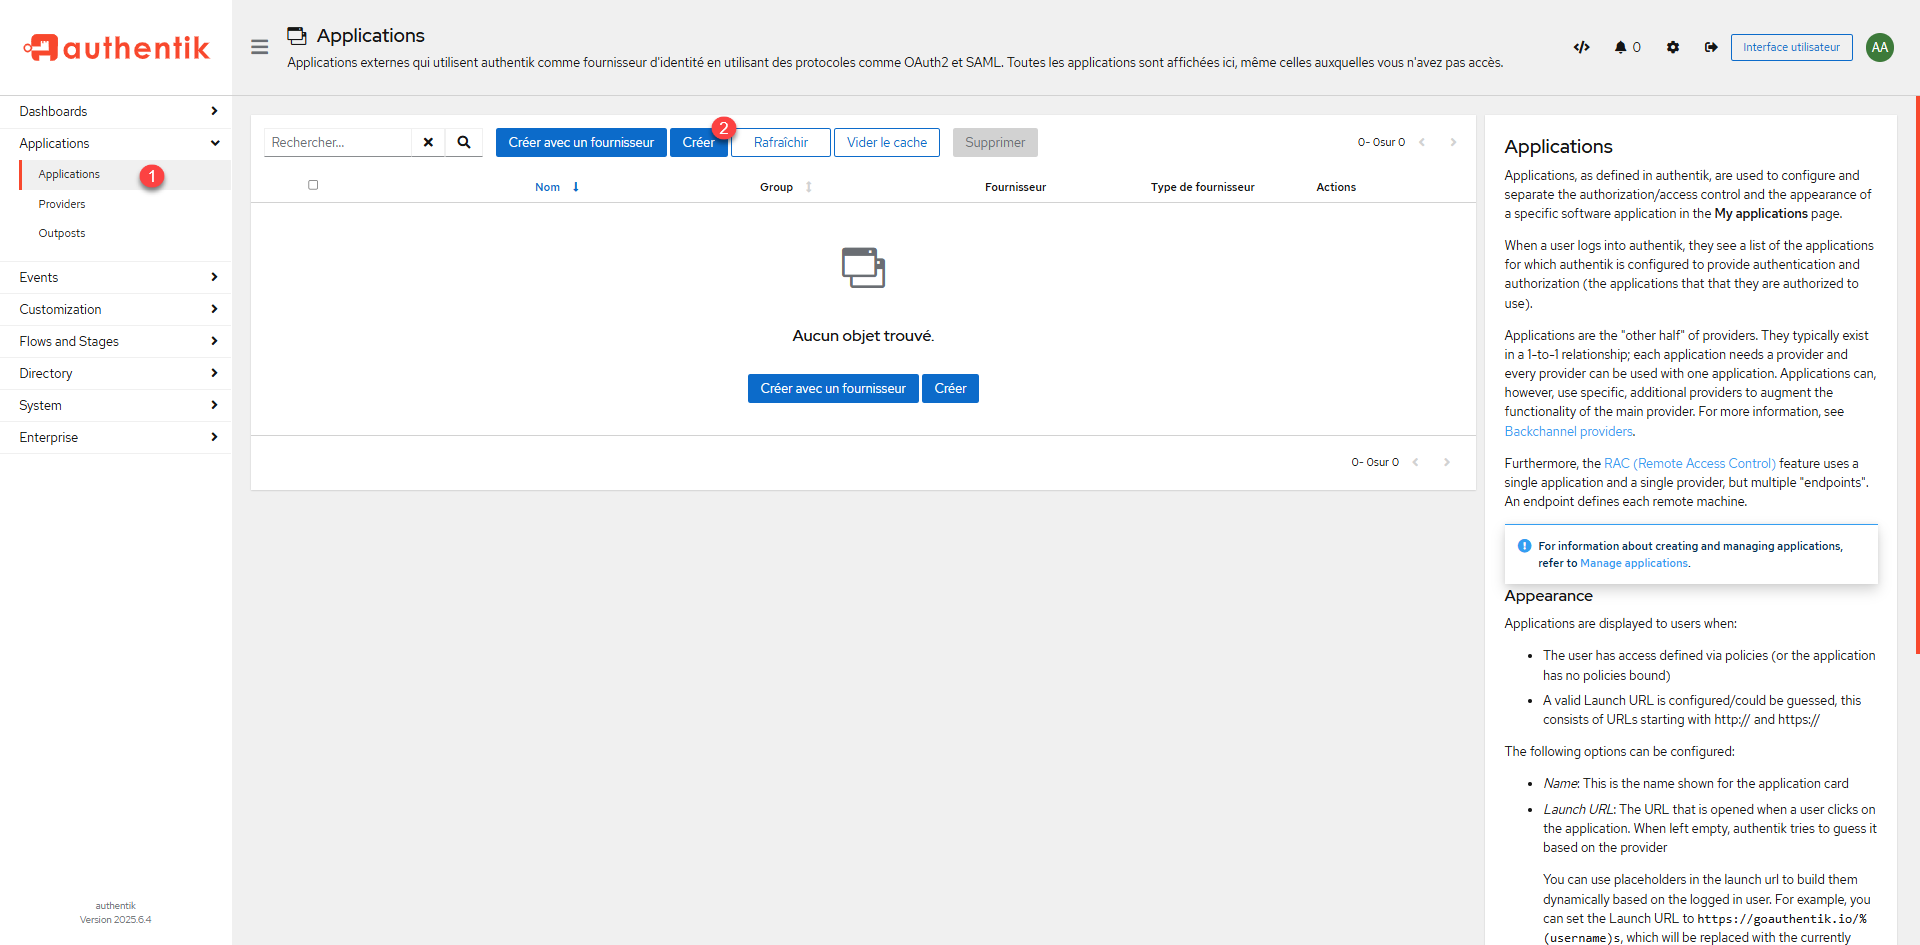
We will go to the creation of the app, from the navigation menu, click on Applications 1> and then on the page that lists it, click on Create 2>.
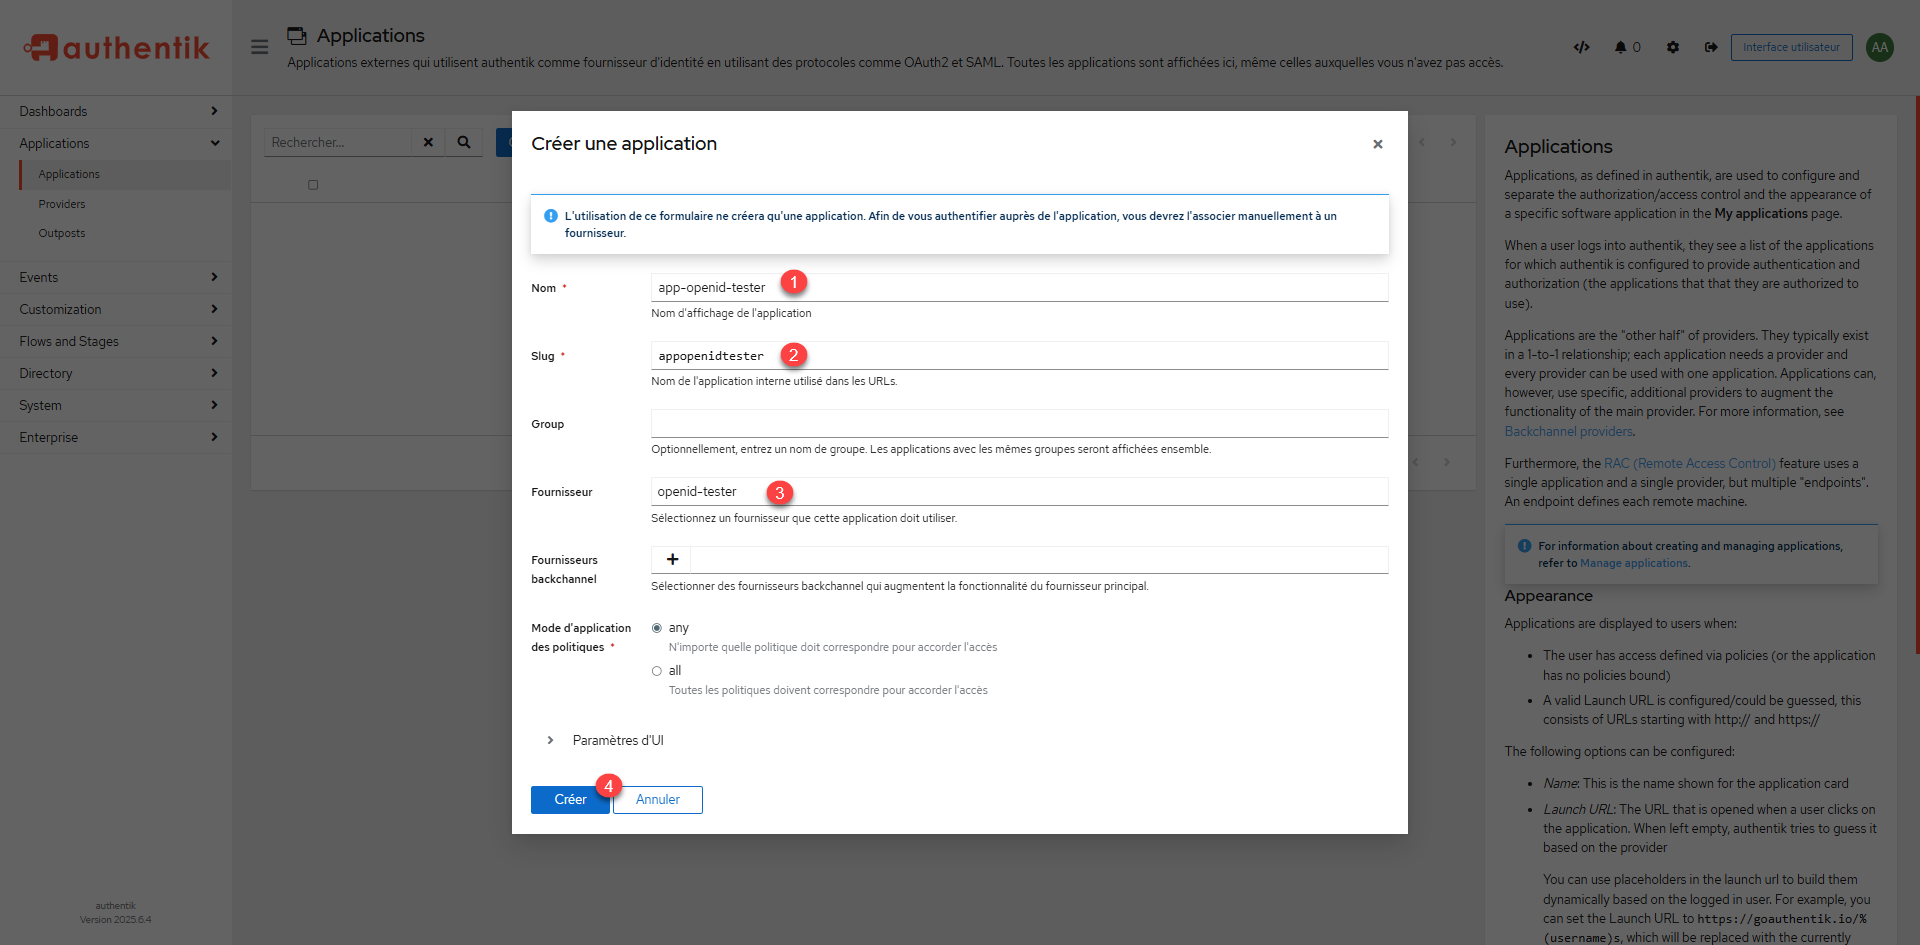
Enter the name of the 1> application and then the slug 2>, select the 3> provider created and click the Create 4> button.
The application is created, click 1 to access the information and retrieve the URLs needed to configure Openid Tester.
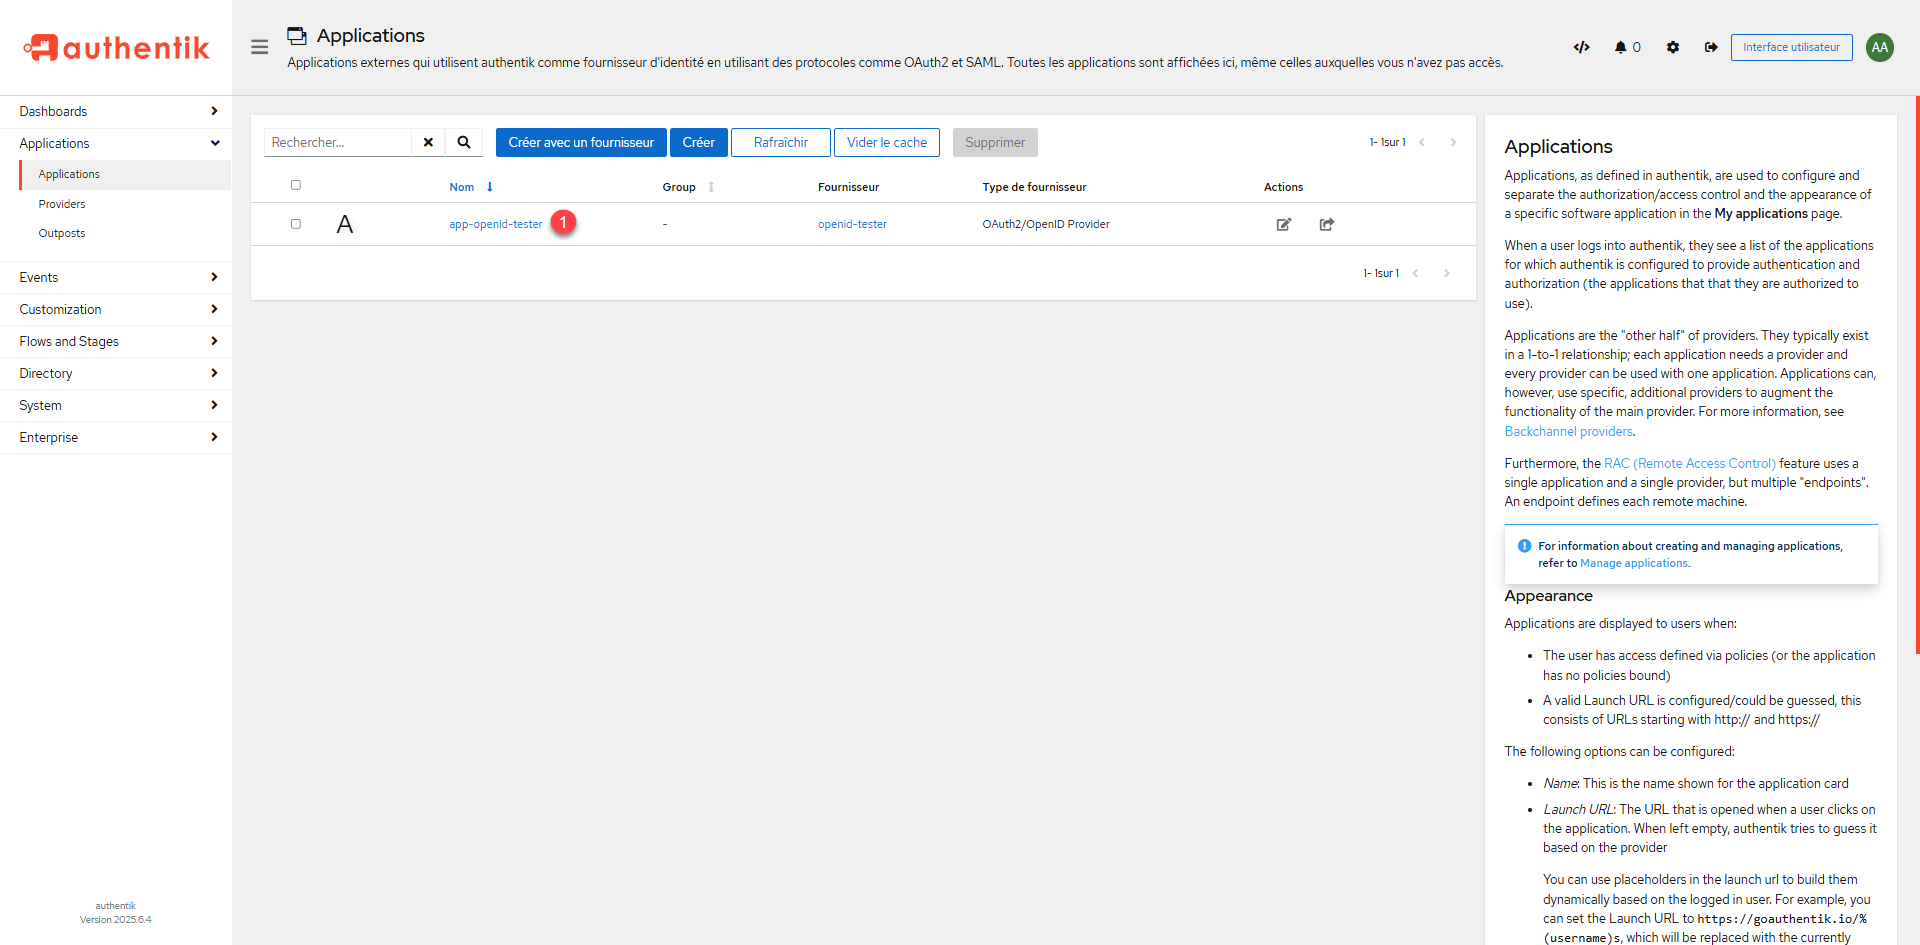
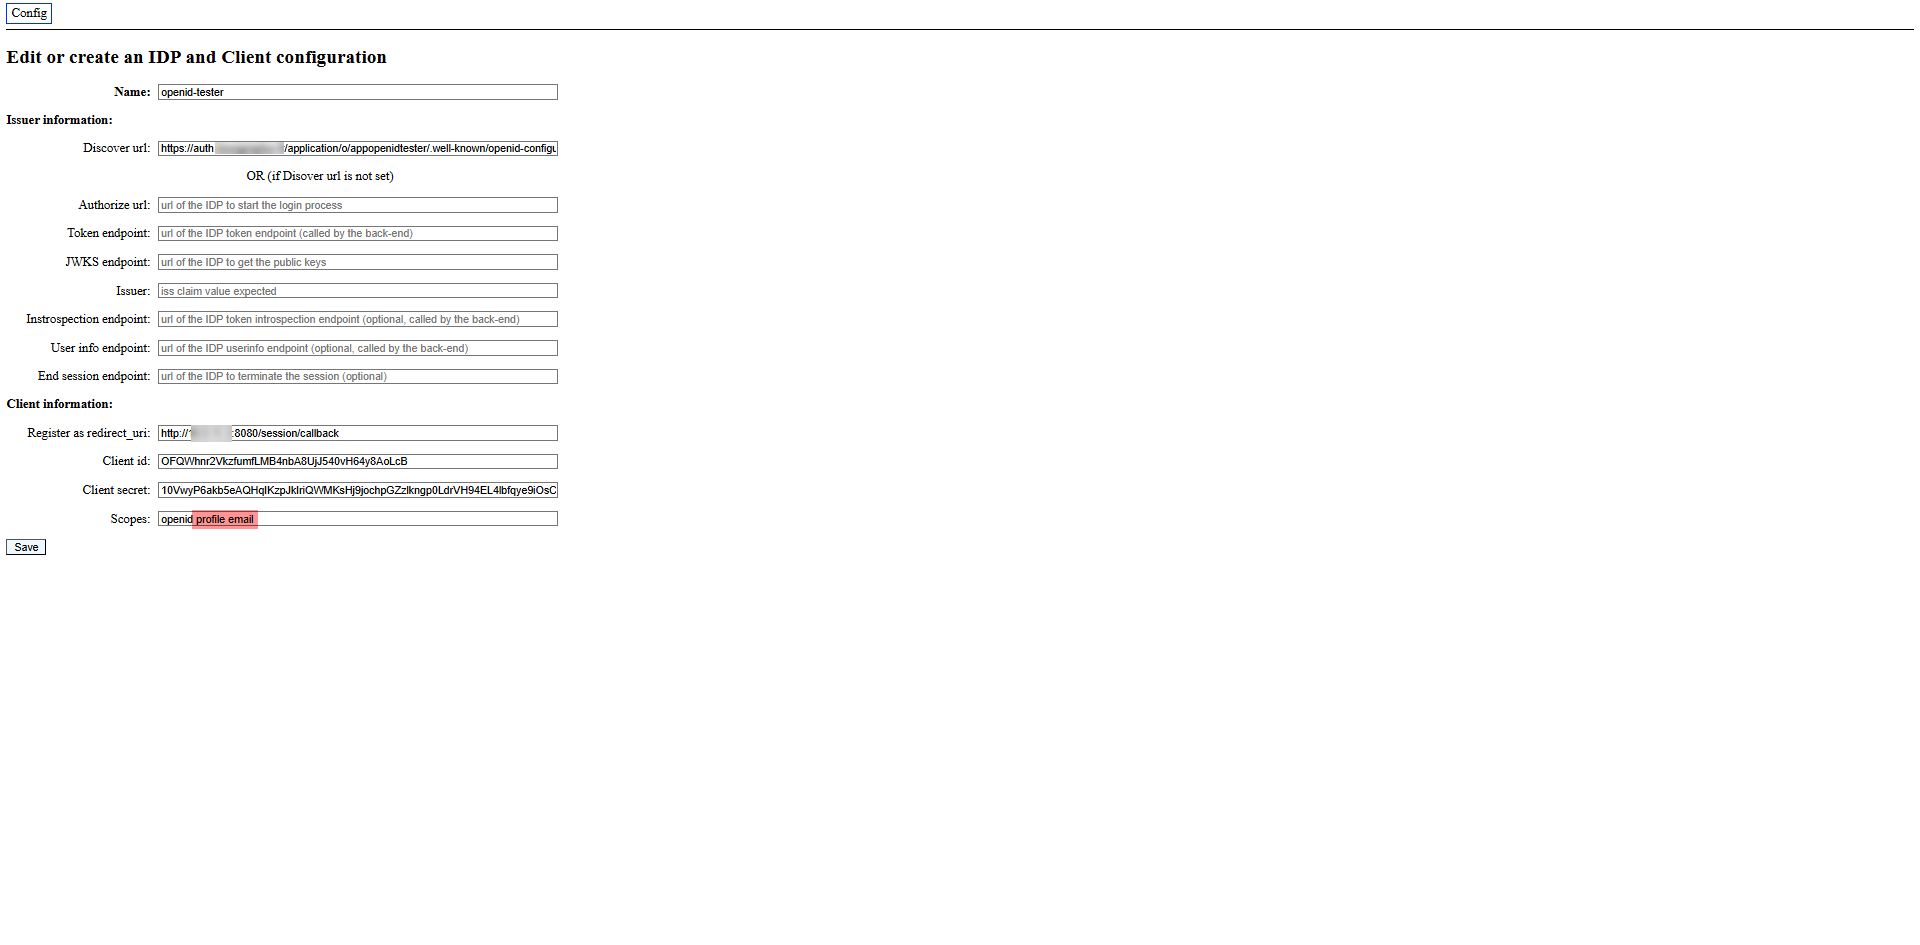
On the right side, you have the different URLs that may be required for the application configuration, for Openid-Tester, I will copy: OpenID configuration URL.
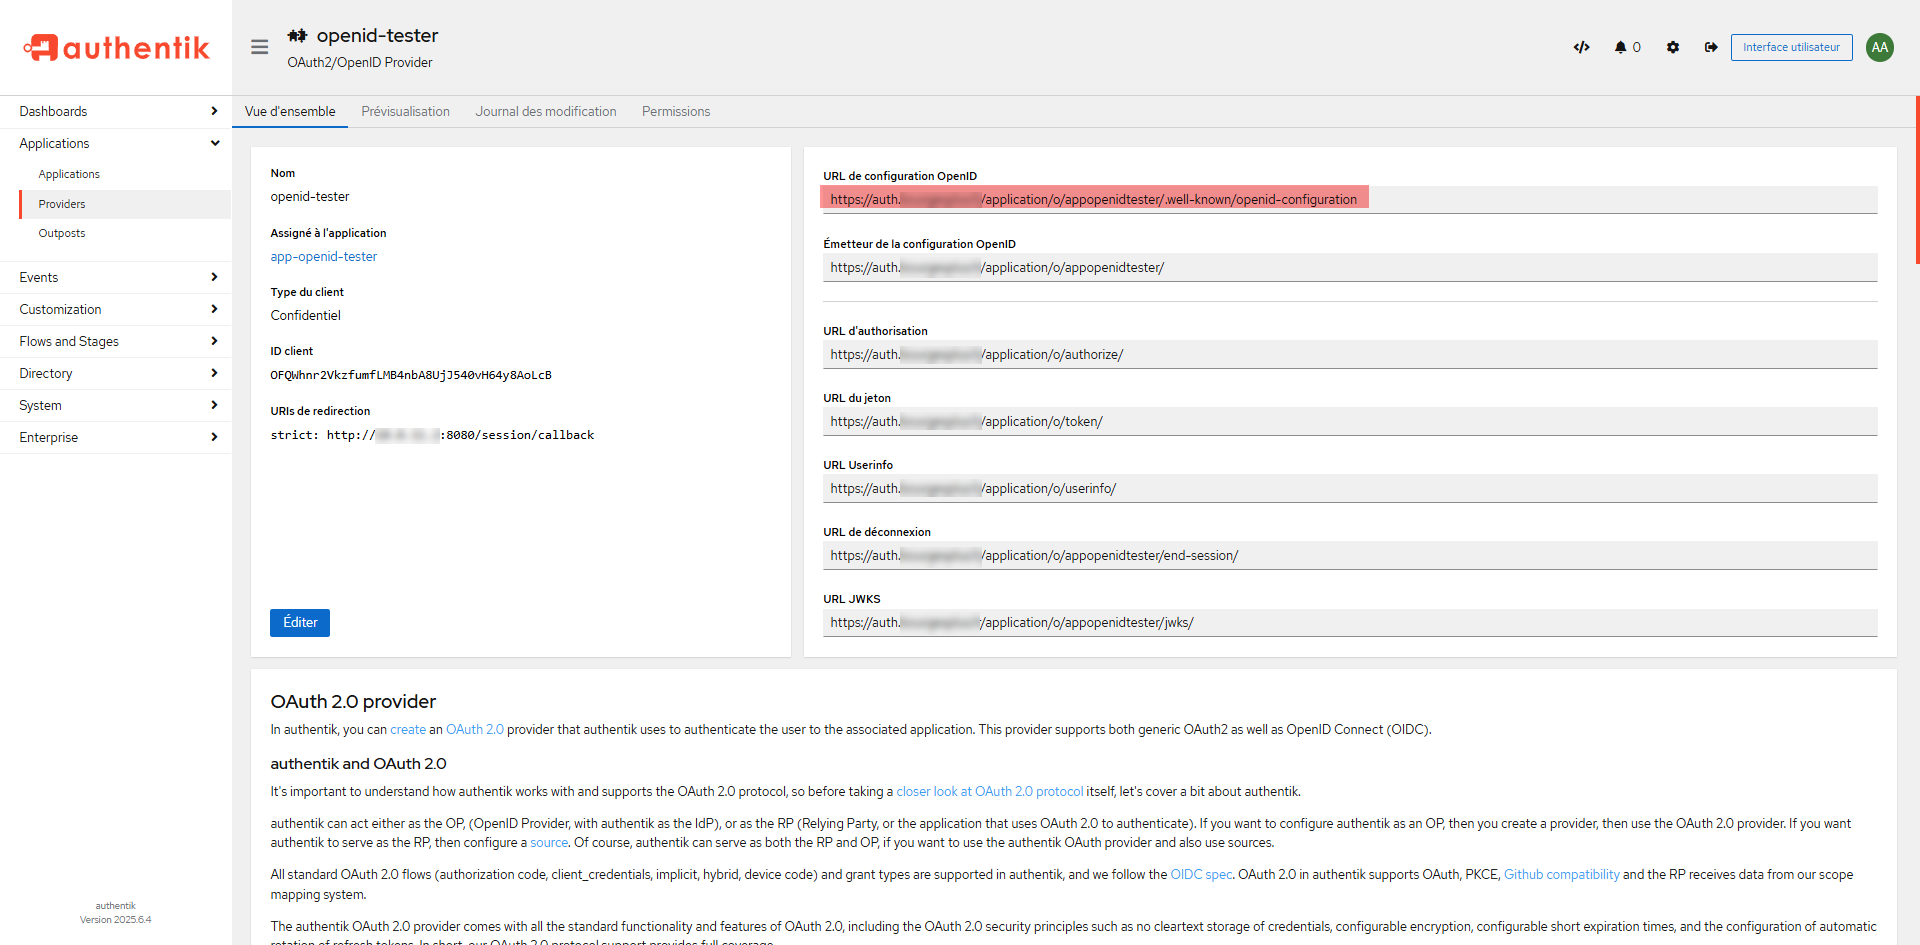
Here’s the configuration of openid-tester, I’m not going to go into detail because it’s no use.
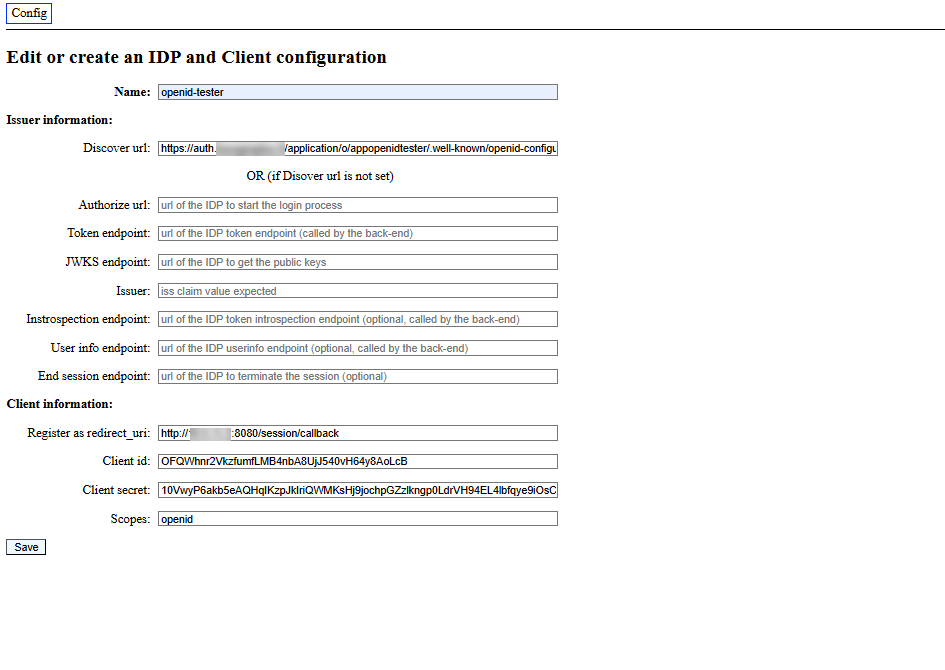
As you can see, for the scope, I only configure openid for the moment
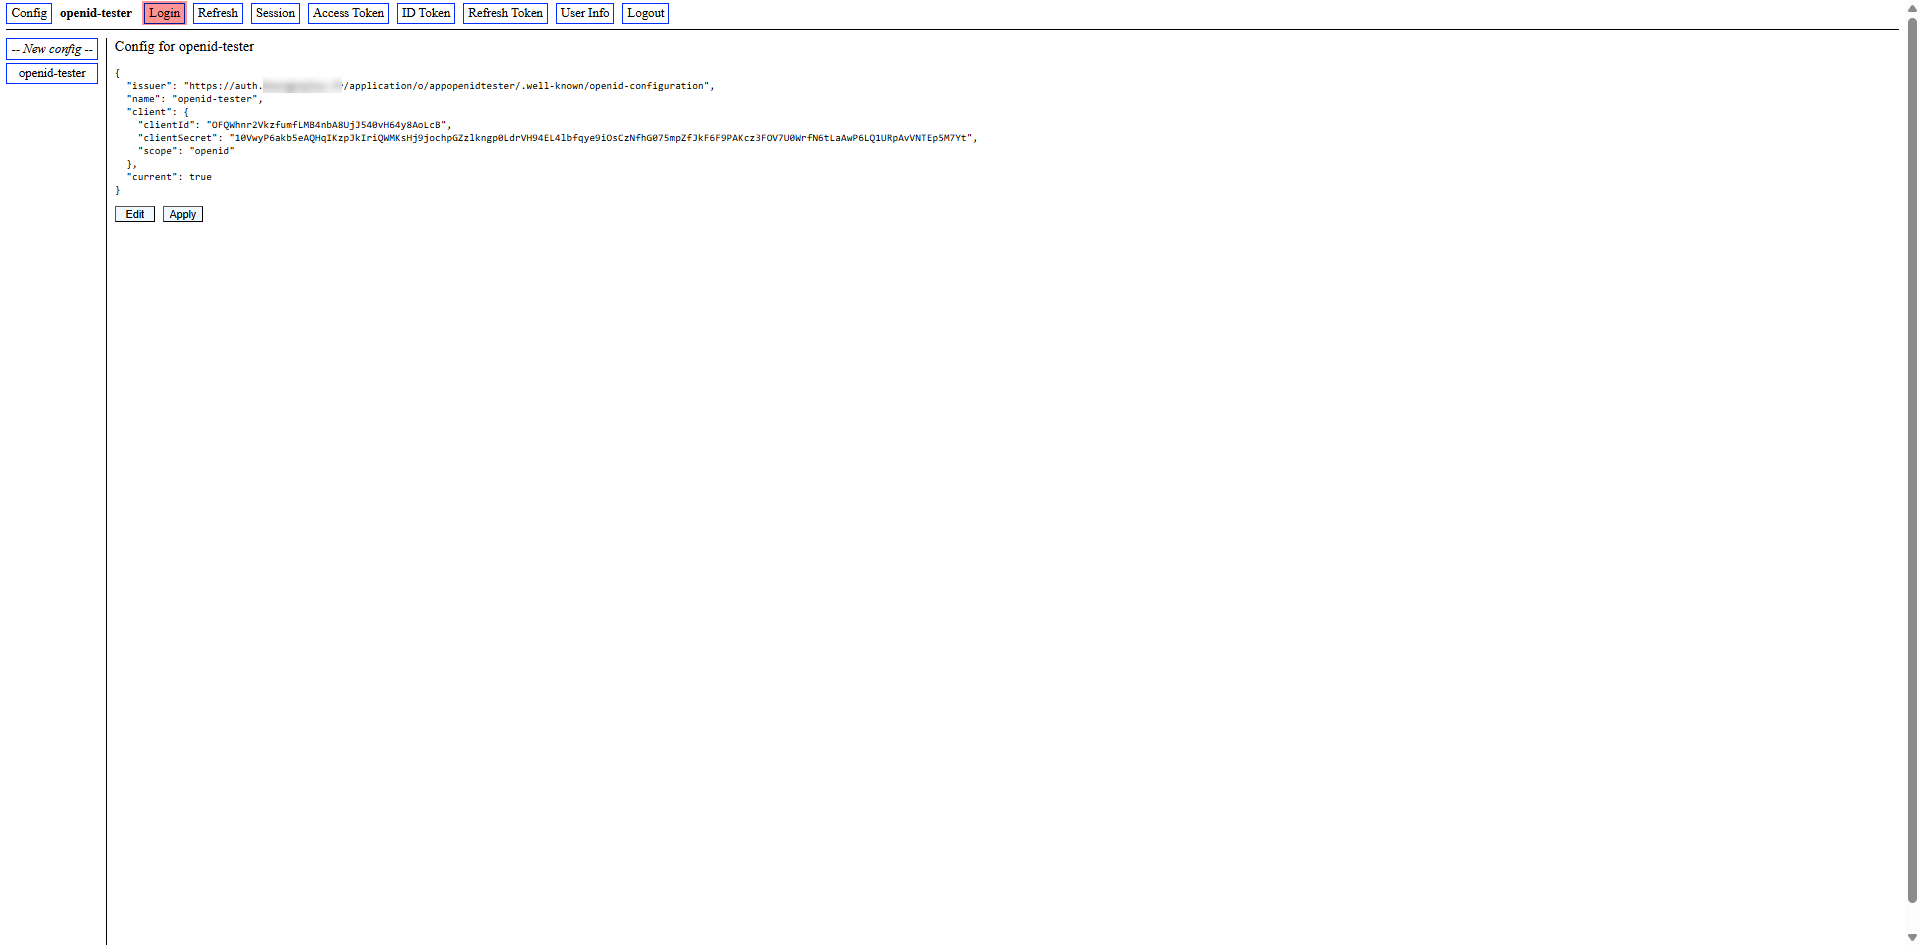
To test authentication, click the Login button.
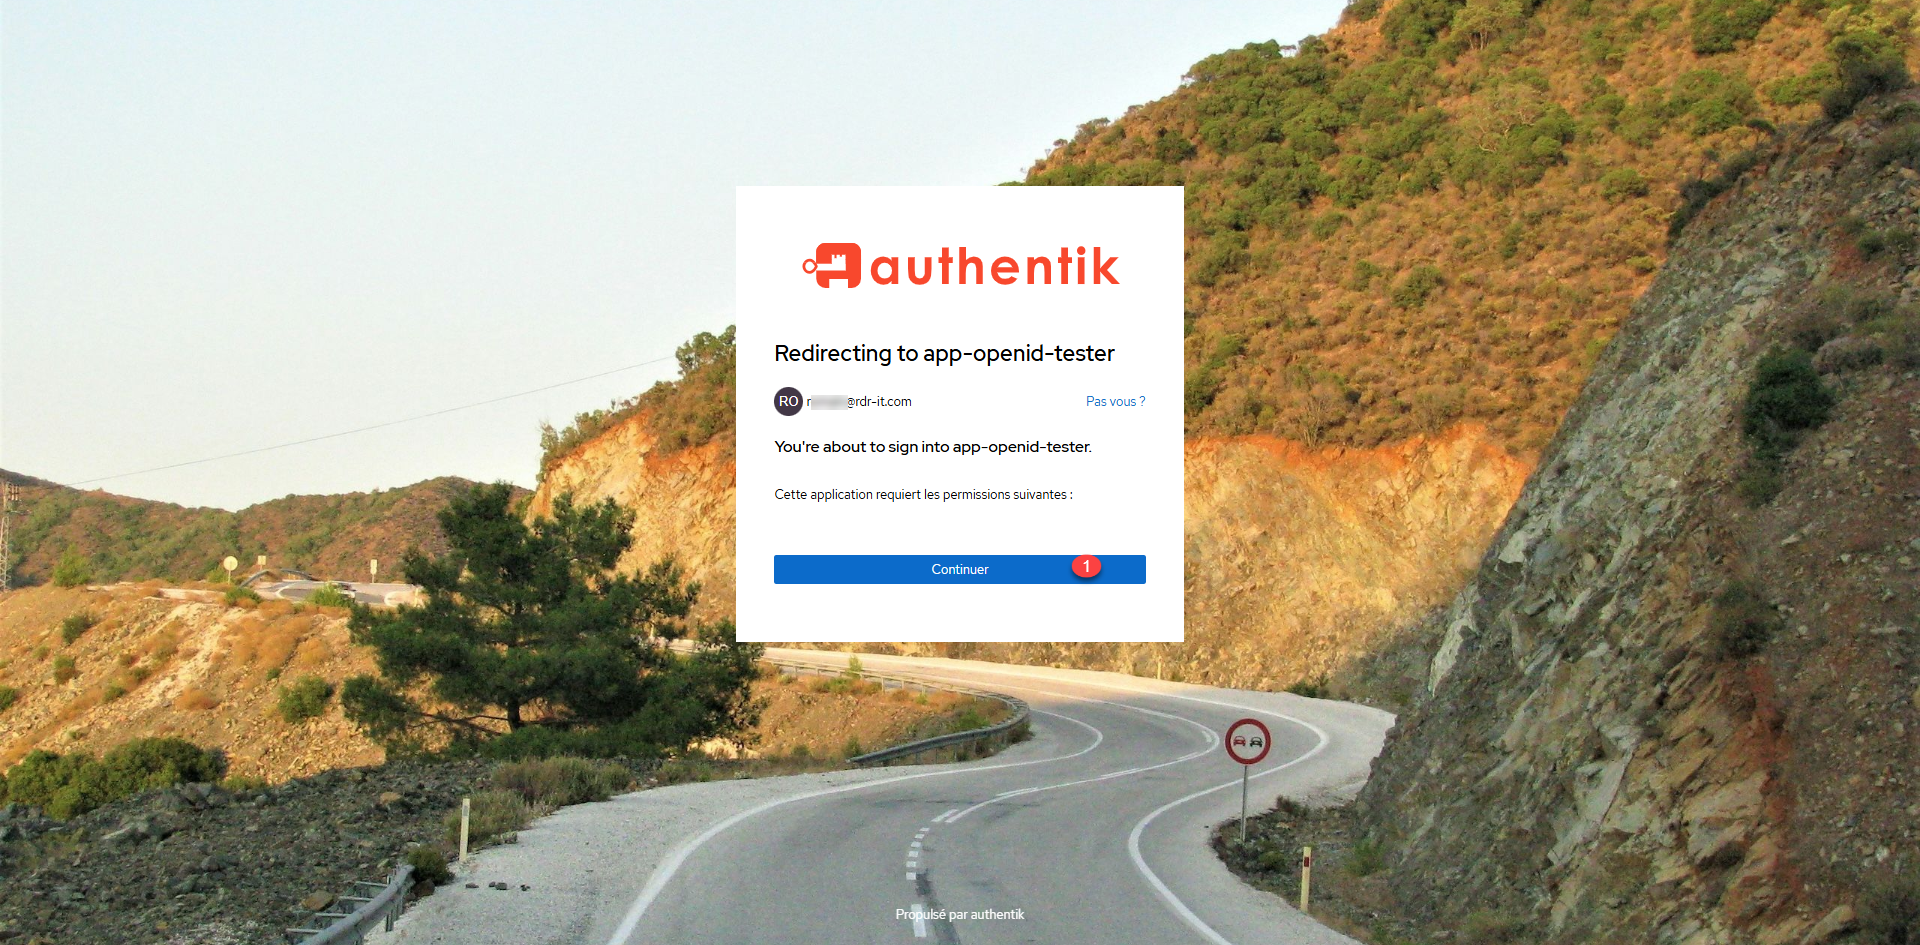
We arrive at the Authentik authentication page, I will enter the 1> email address of the user that was created and click the Log in 1> button.

Enter the password 1> and click Continue 2>.

Since the provider has been configured as an explicit one, you must validate the permissions by clicking the Continue 1> button.
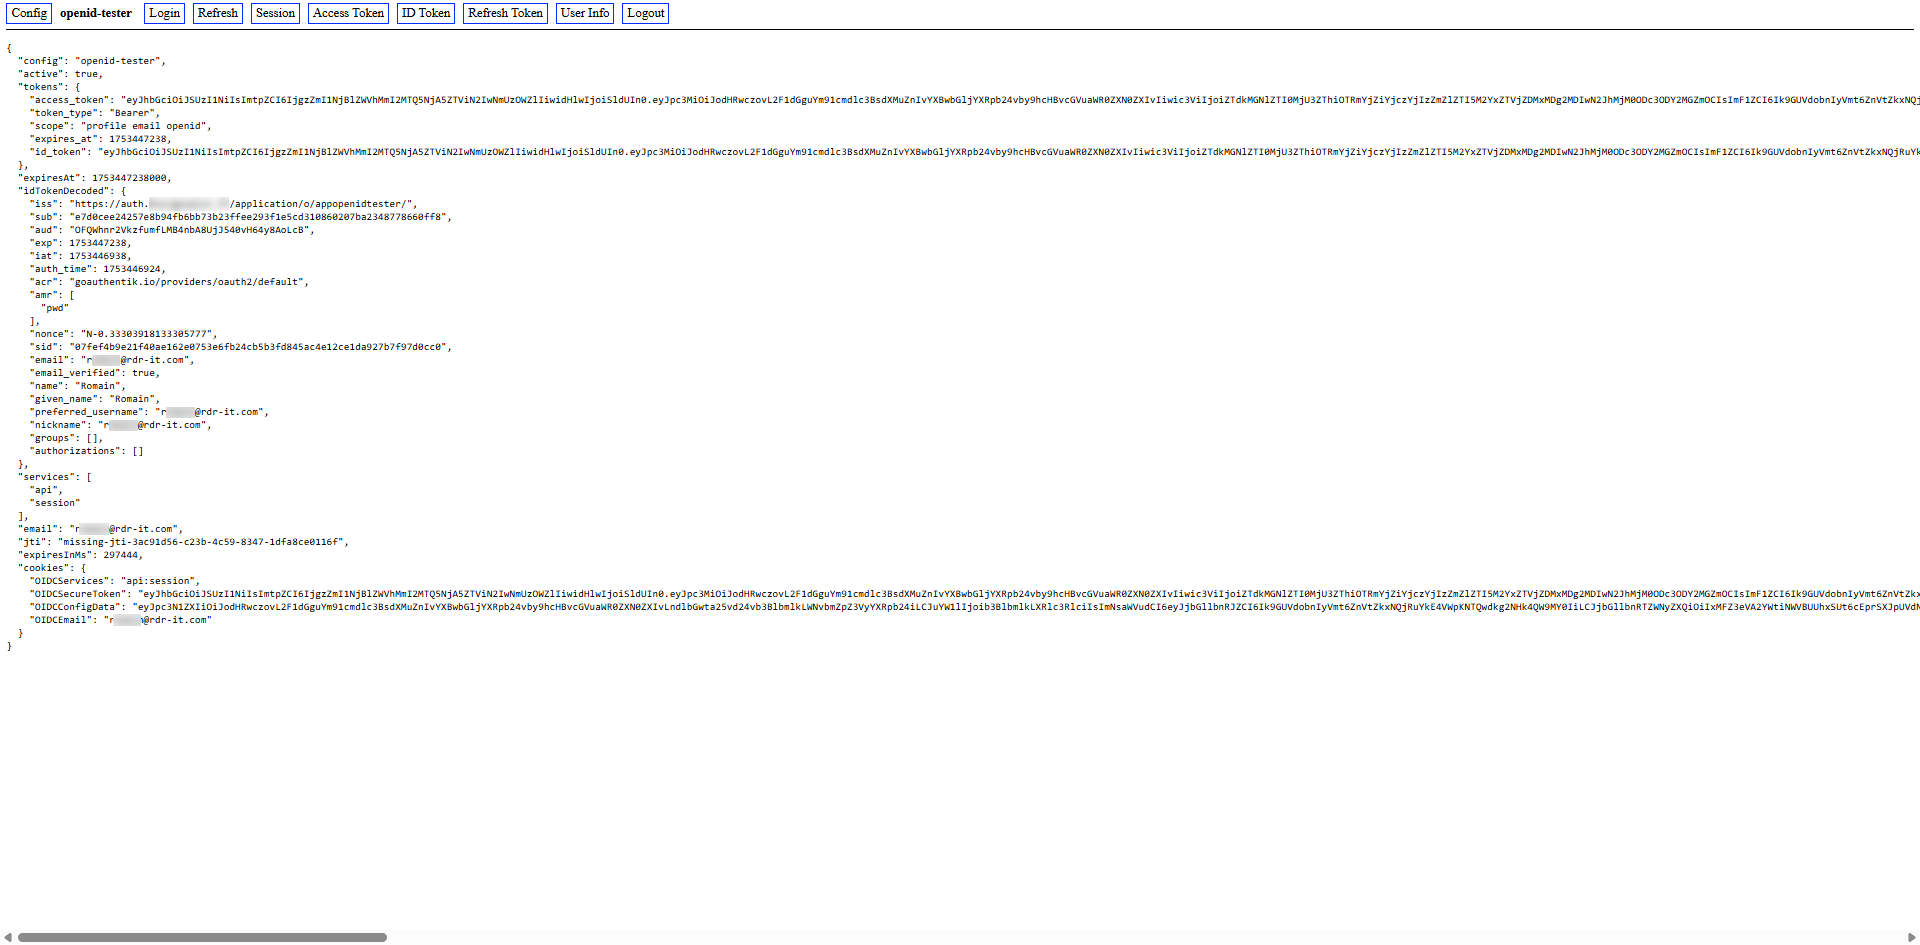
One is then redirected to the application, as can be seen below, with the different information return from the IoP.
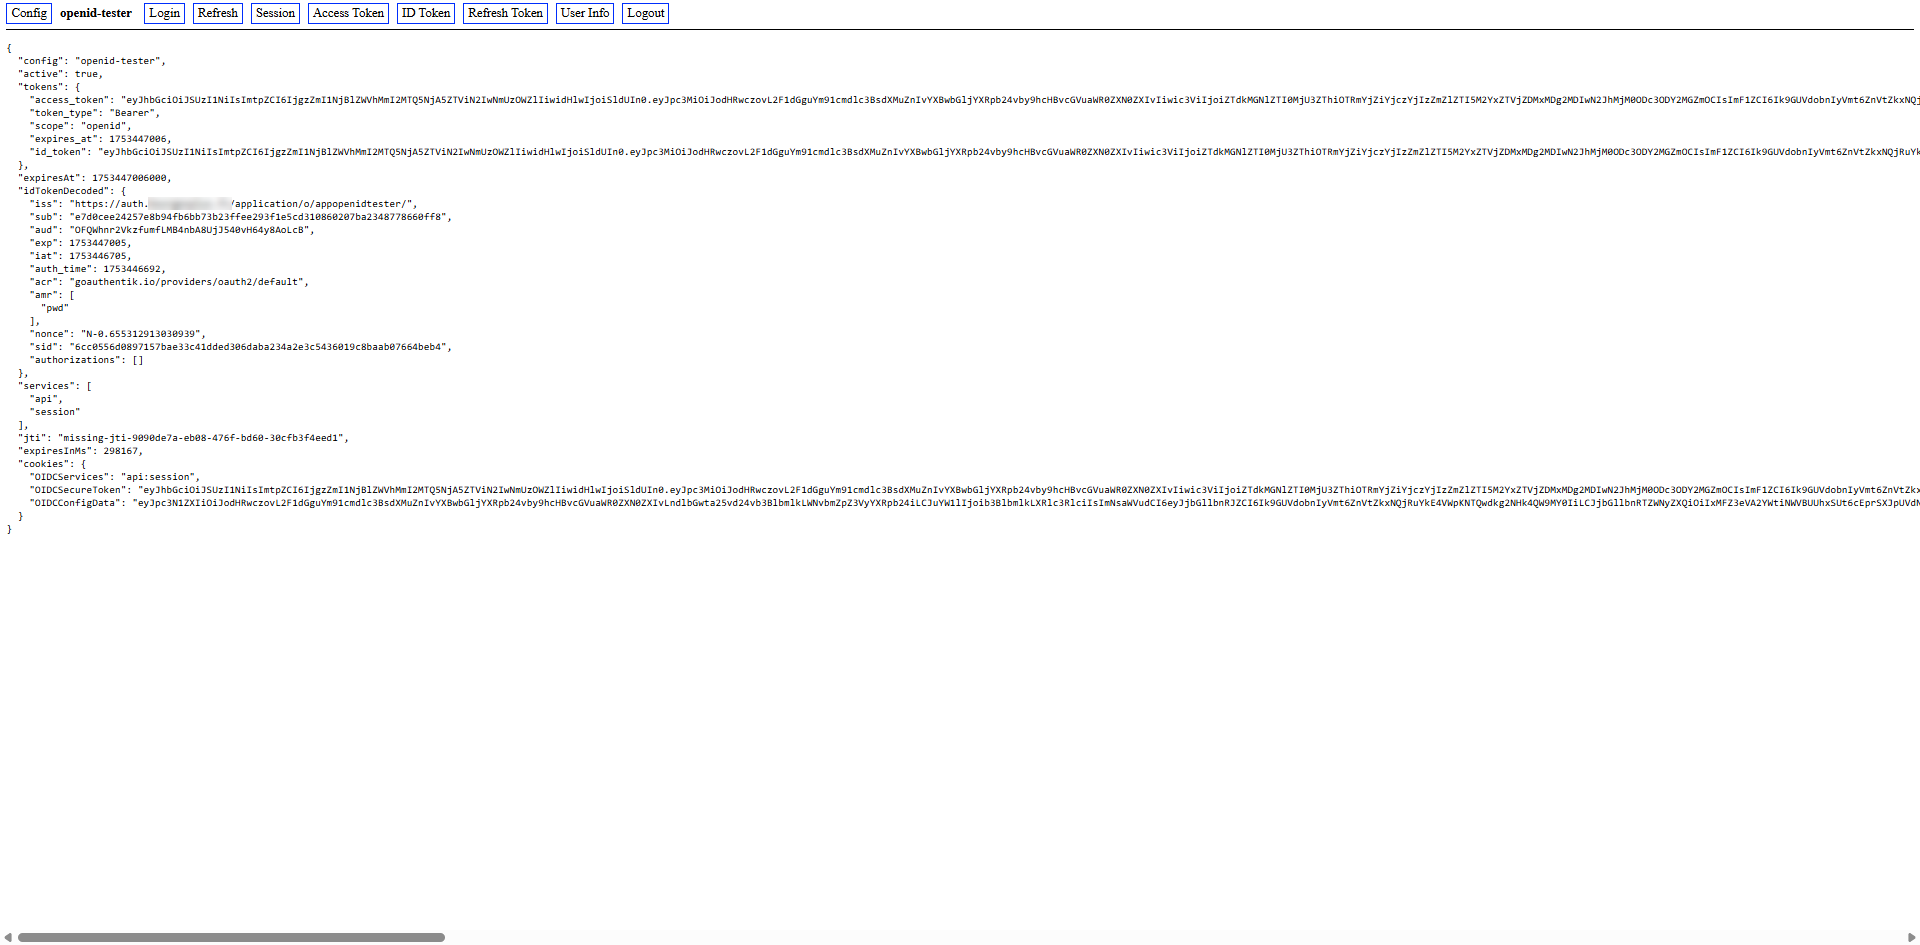

As you can see, for the moment no user information has been returned, which in a real application does not serve much.
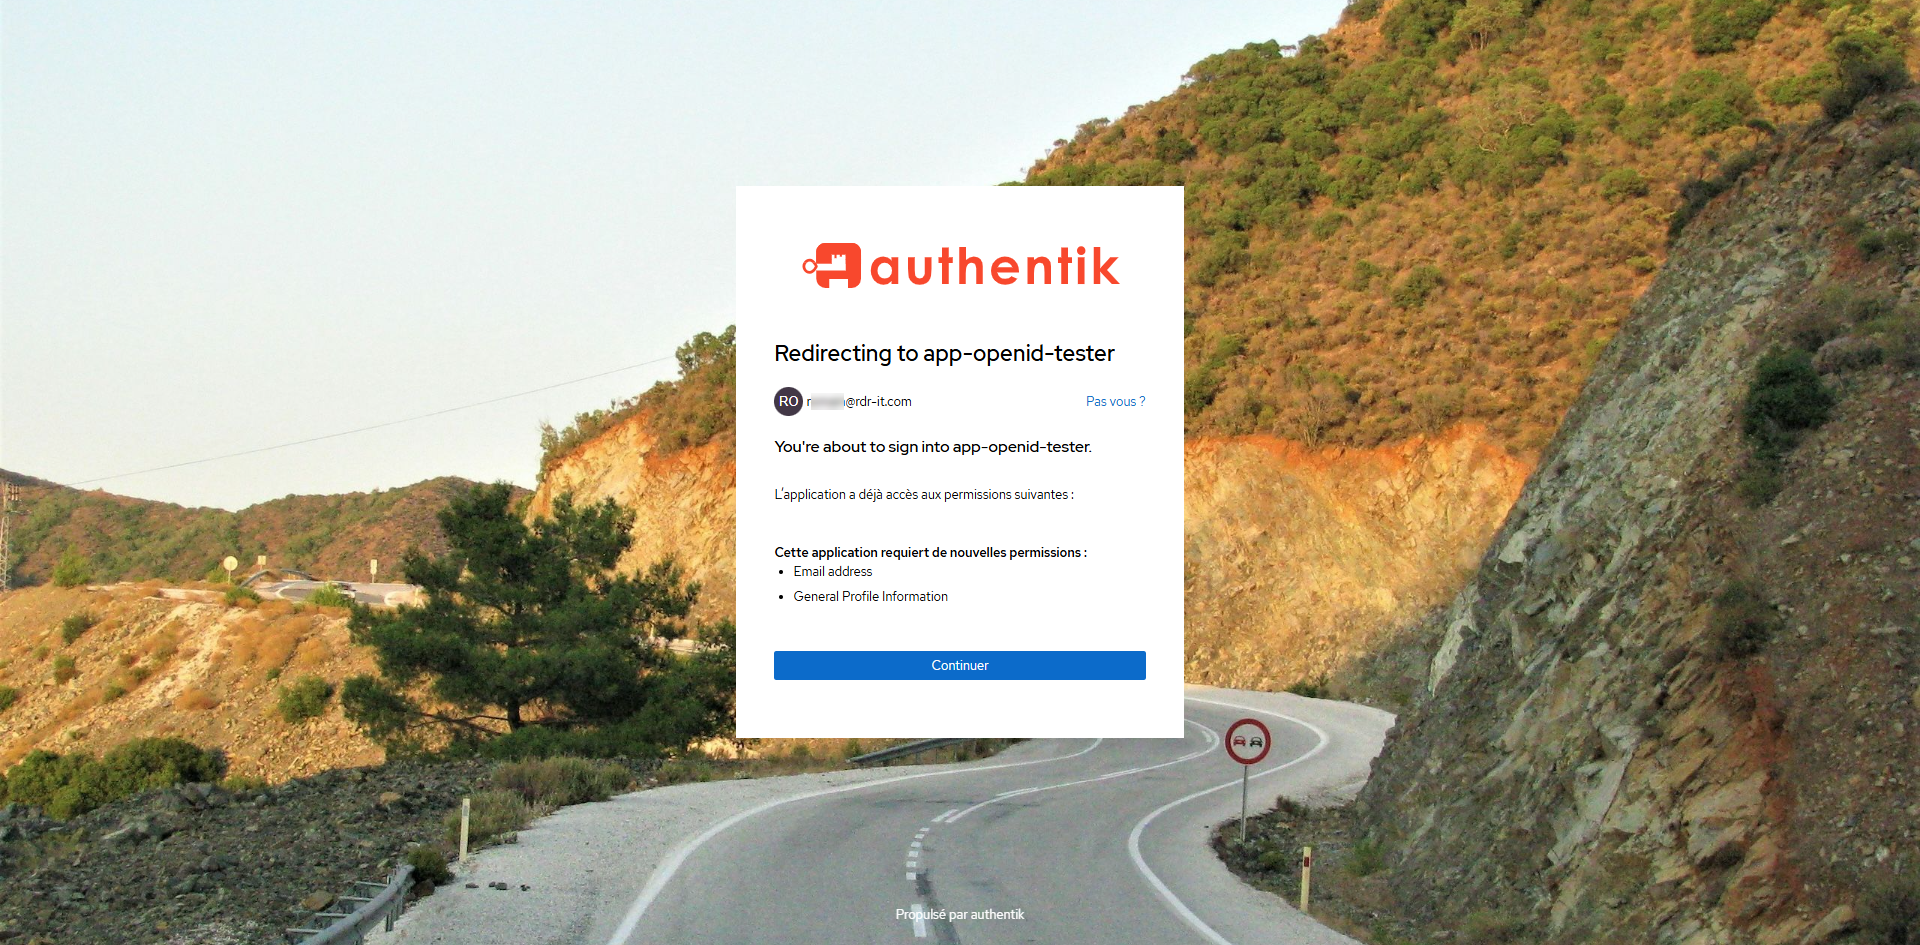
I will modify the application scope by adding profile and email that the application should need.
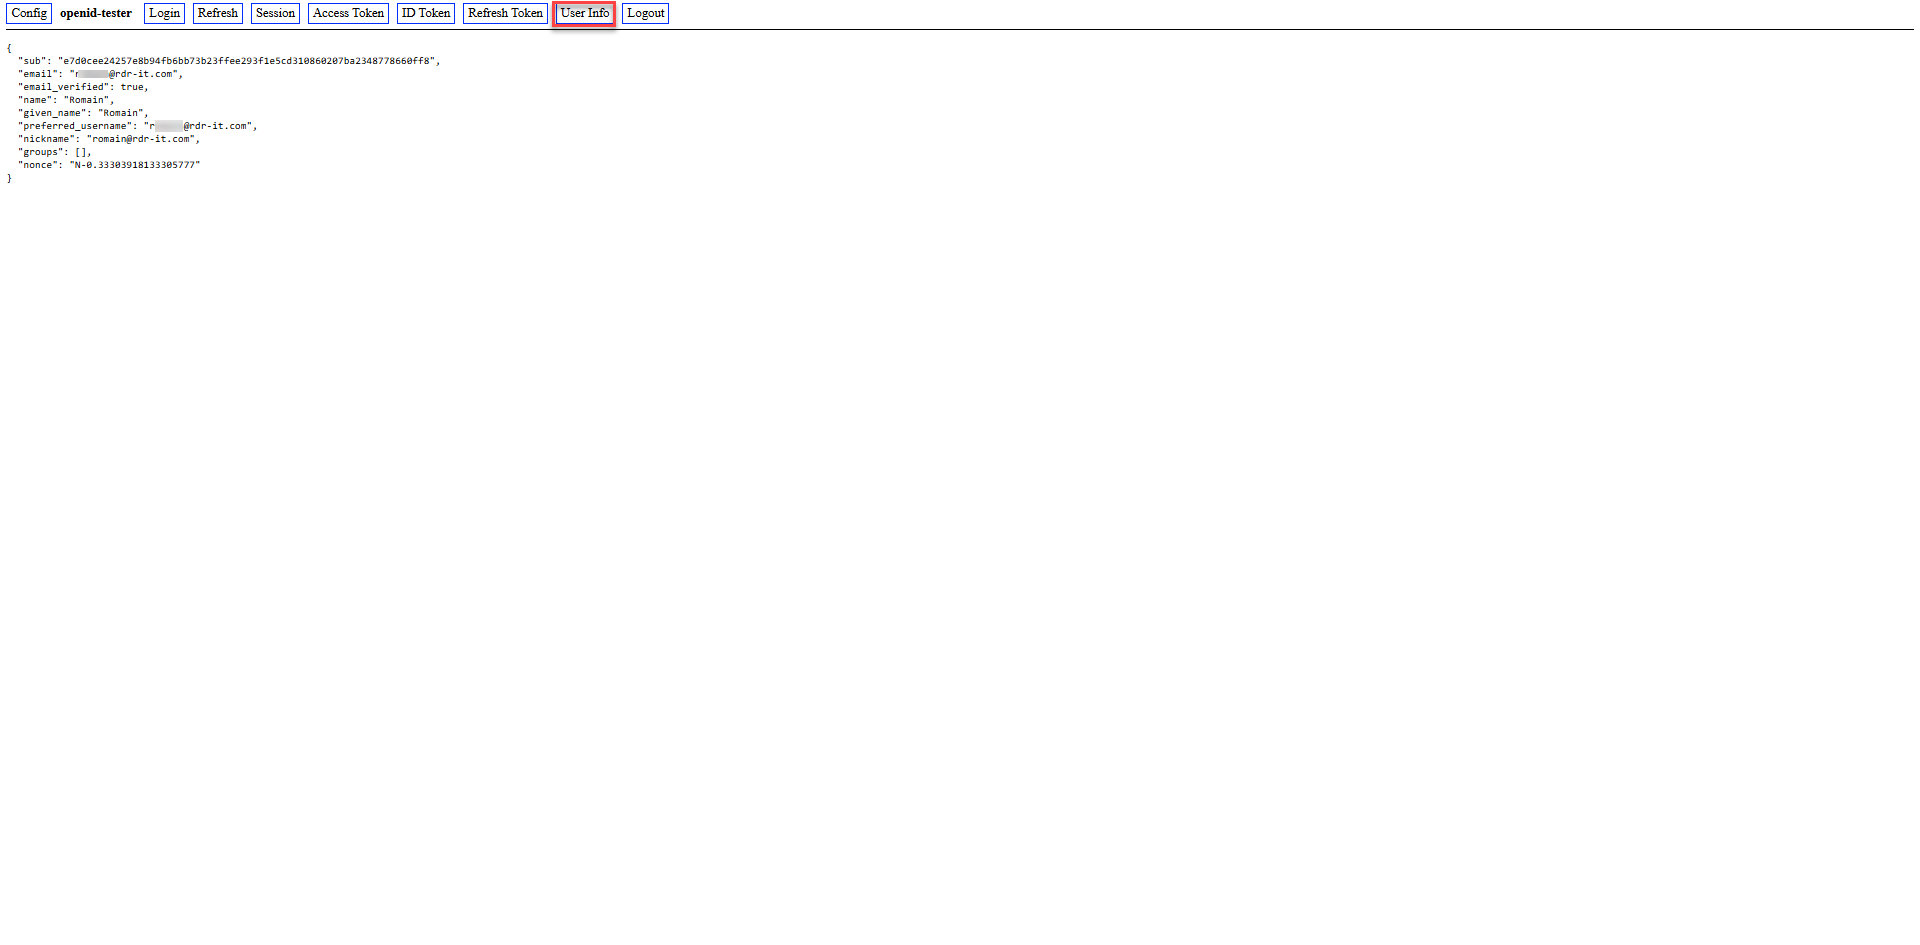
This time, by logging in, you can see that the application requires access to profile information and email address.
In the application, you can see this time that the user information has passed to Openid-Tester.
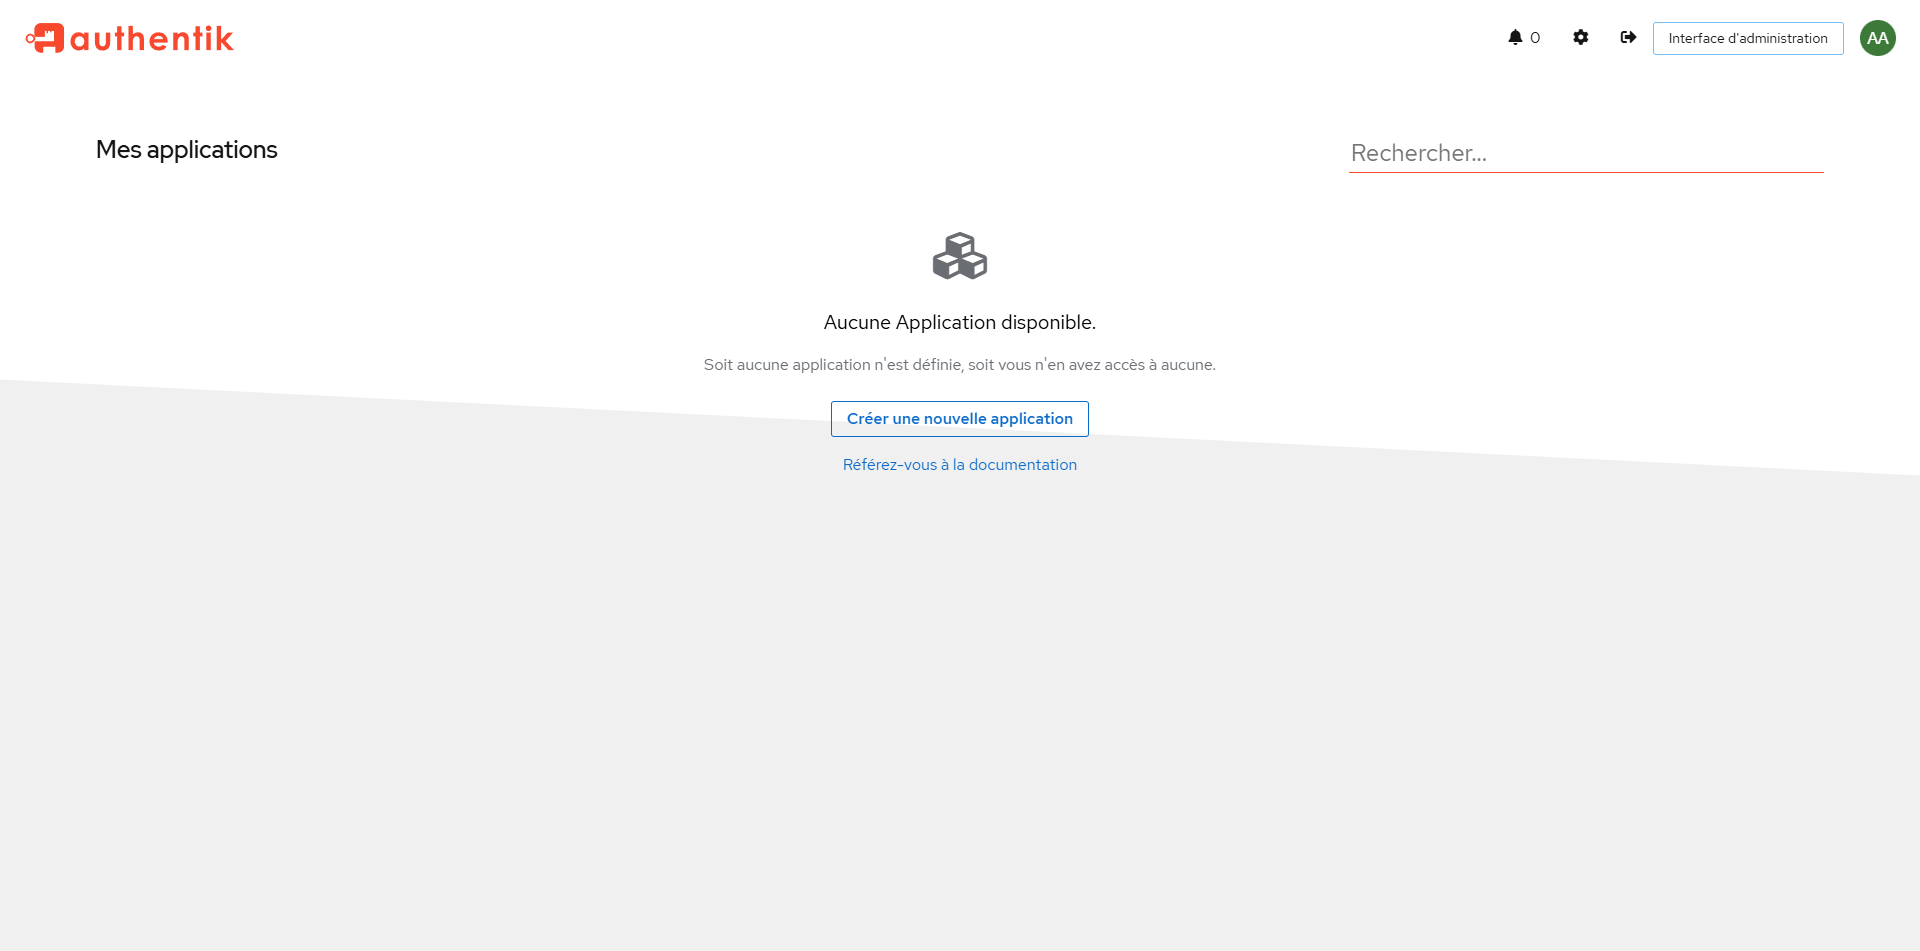
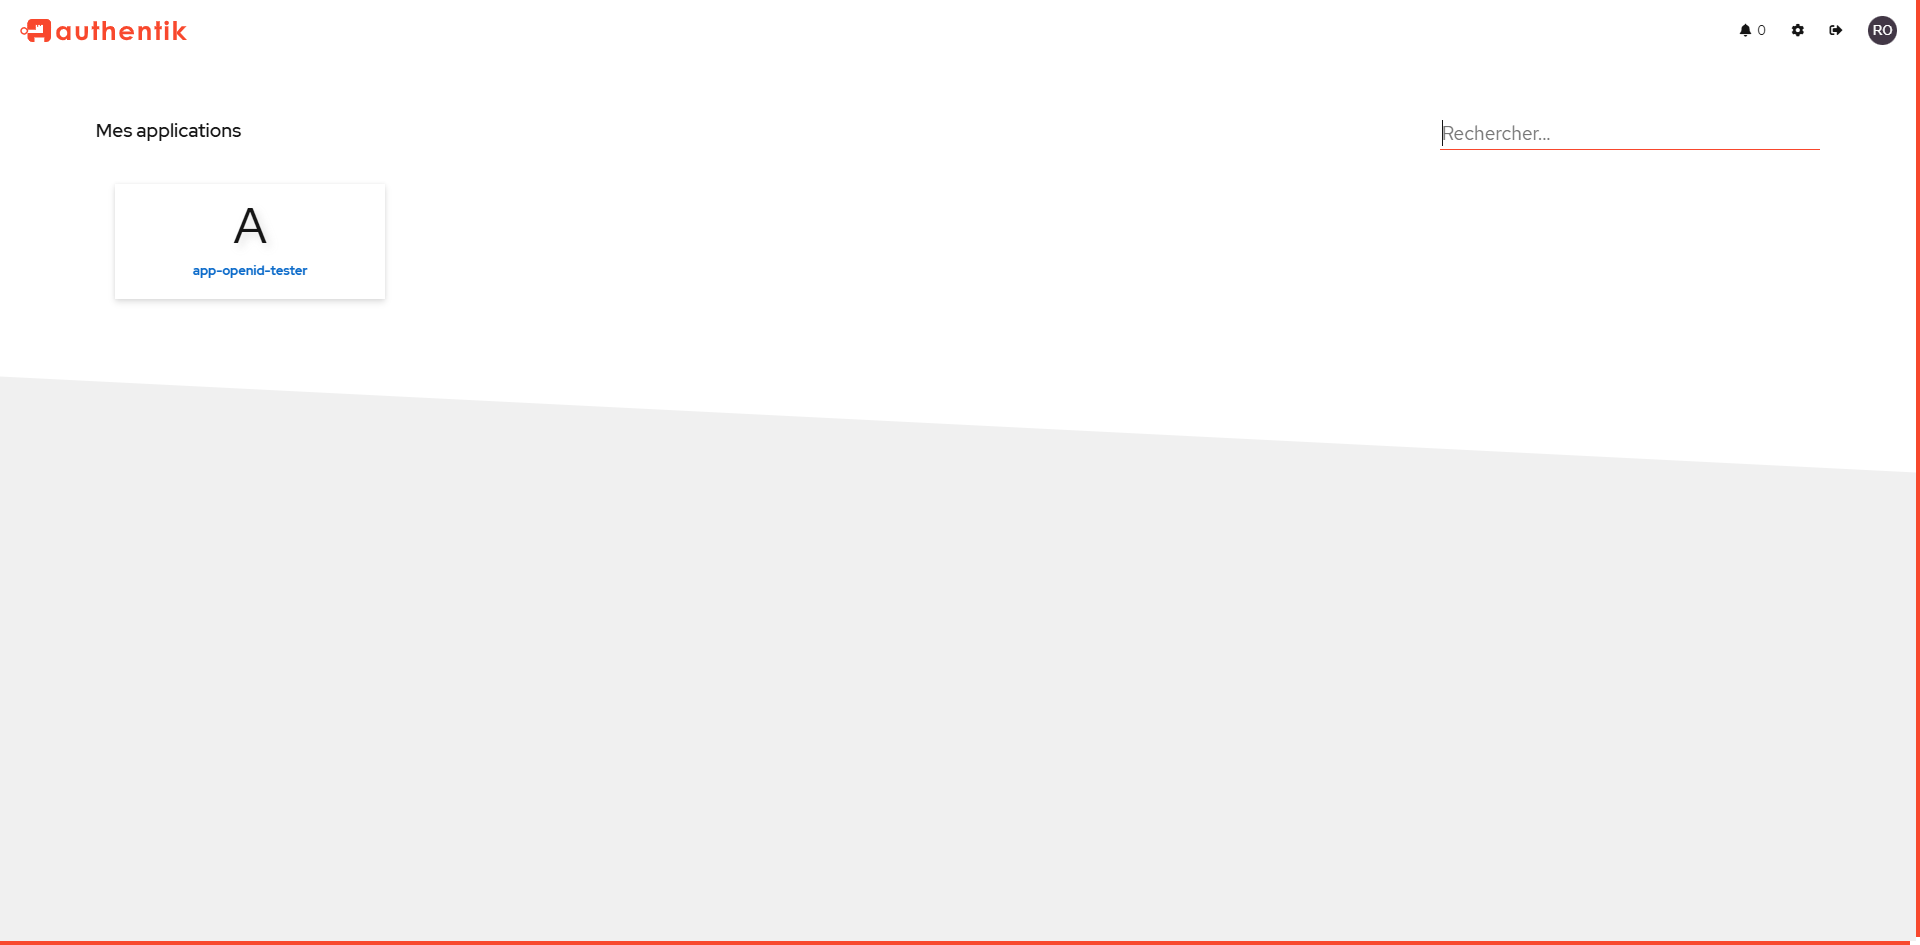
Finally, this tutorial, if the user connects directly to Authentik, on his homepage, he can see the applications configured.
Now you know how to deploy Authentik with Docker and configure an application that uses OpenID.
