In this tutorial, I’m going to tell you about the PowerShell cmdlet Test-NetConnection, which will enable you to run network diagnostics.
This command can replace the following utilities:
- Ping
- Telnet
- Traceroute (tracert)
With just one PowerShell cmdlet, you’ll be able to do it all!
In this tutorial, here’s what we’re going to look at:
- How to ping in PowerShell
- How to run a ’telnet’ command in PowerShell to test a (TCP) port
- How to create a route trace in PowerShell
Before we begin, the Test-NetConnection cmdlet takes a first parameter, -ComputerName, which does not have to be specified.
Pinging in PowerShell using Test-NetConnection
We’ll start with a simple task, which is to run a ping command.
Test-NetConnection google.fr
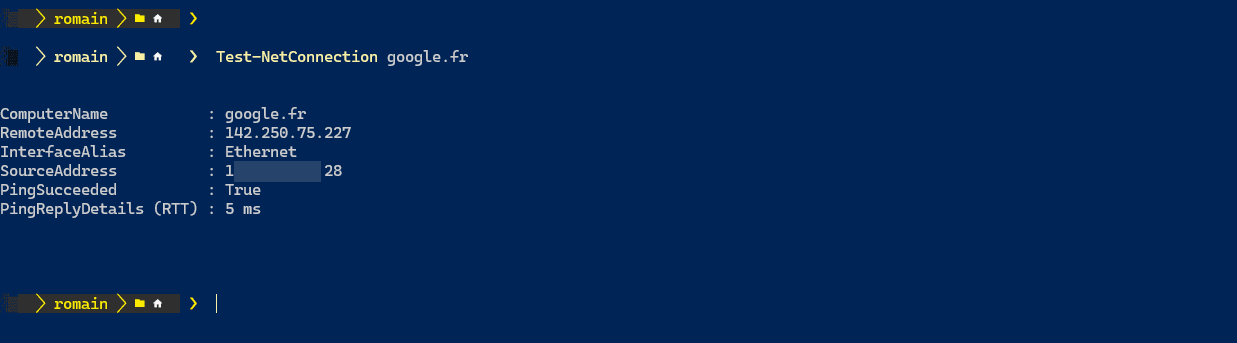
As can be seen from the screenshot, the command does not return any information:
- Remote IP address resolved when testing a domain name
- The interface and the source IP address
- The ping result
- Latency
Now, the advantage of PowerShell is that we can create scripts; to illustrate this, here’s a simple script that allows us to test a ping.
<#
	Script for TEST Connection
#>

param(
	$RemoteHost = "google.fr"
)

$ResultTest = Test-NetConnection -ComputerName $RemoteHost


if( $ResultTest.PingSucceeded ){
	Write-Output "Test OK for $RemoteHost"
}else{

	Write-Output "/!\ Test KO for $RemoteHost"
}
To retrieve the result of the command, you need to check whether PingSucceeded is true.
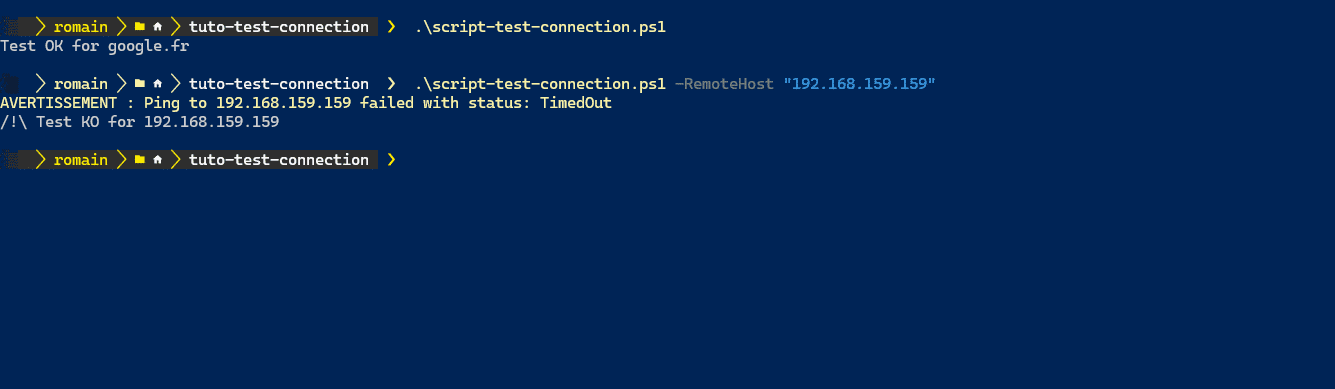
Here is the script and the output of the script for a host that responds and one that does not.
If you wish to send multiple pings or a continuous ping, you should use the Test-Connection cmdlet.
To perform 100 pings
Test-Connection google.fr -Count 100
For a continuous ping:
Test-Connection google.fr -Count ([int32]::MaxValue)
Testing a port in PowerShell using Test-NetConnection
Now, let’s look at how to test a port in PowerShell, just as you would with telnet .
The advantage of using Test-NetConnection, as opposed to Telnet, is that there is no need to install the Telnet client.
To test a port, you need to add the -Port parameter and the port number.
Which gives us:
Test-NetConnection rdr-it.com -Port 443
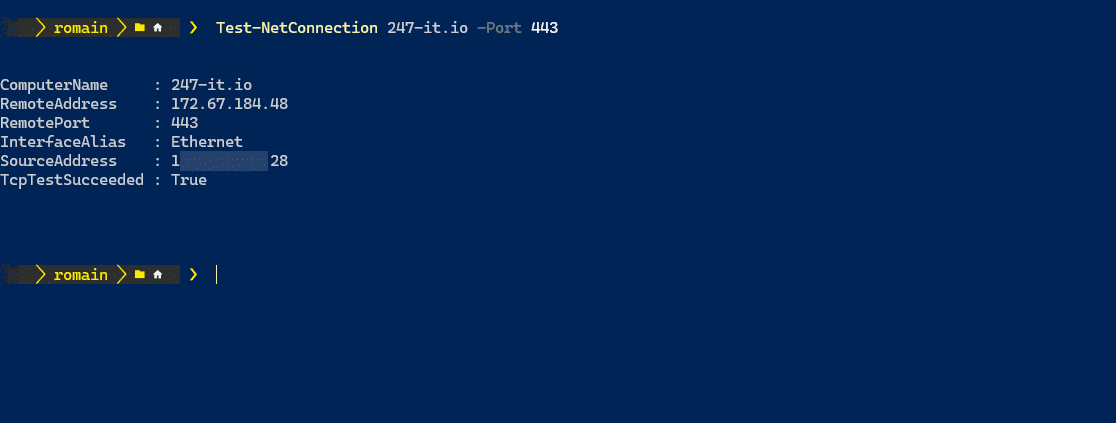
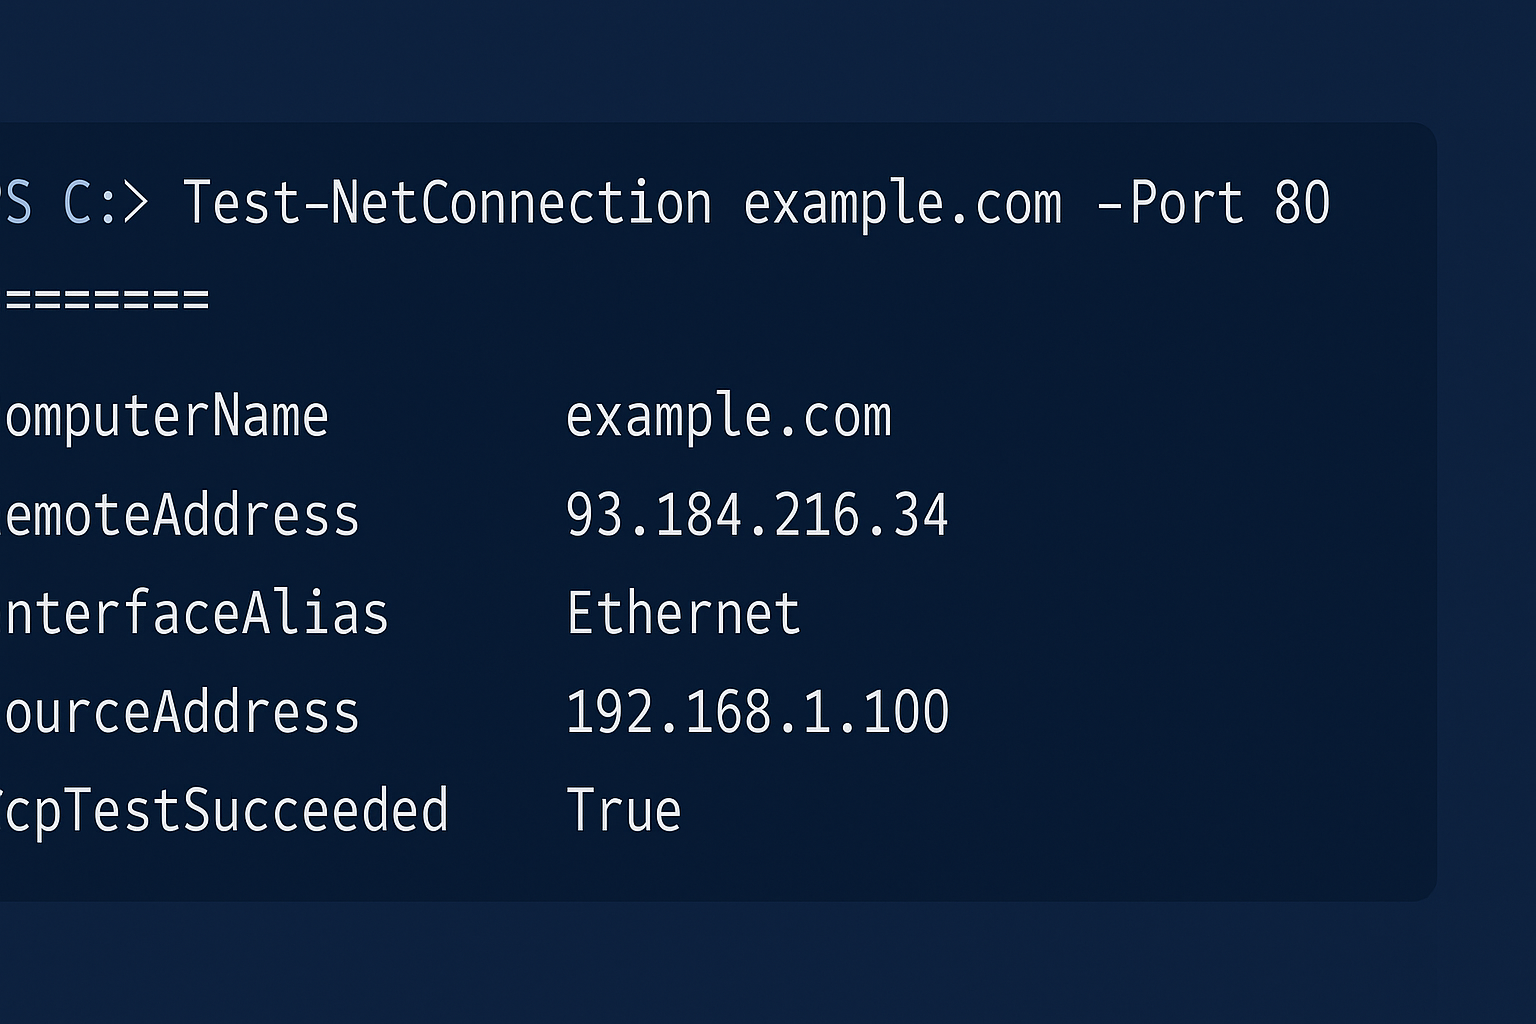
Here, I tested port 443 (HTTPS) on the website’s server; to see the test result, you need to check the value of TcpTestSucceeded.
If this fails, the cmdlet will test the host using a ping.
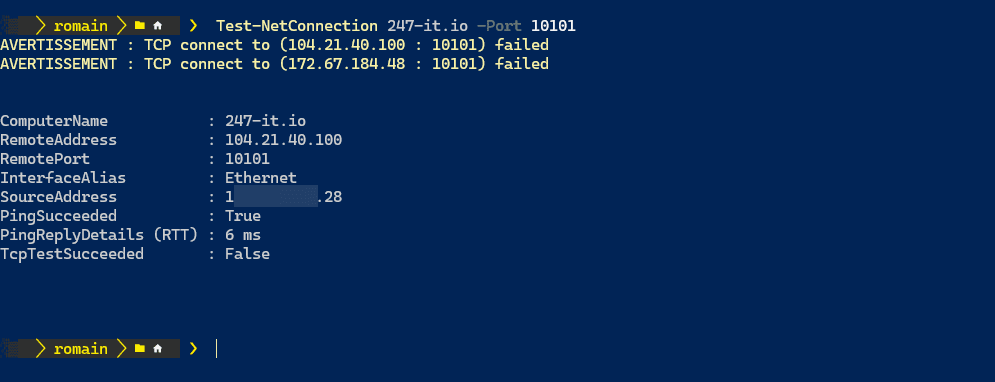
You can also use this response in a PowerShell script; unlike with ping, you need to analyse the result of TcpTestSucceeded.
Testing the connection with Test-NetConnection
To round off this tutorial, we’ll look at how to test routing using Test-NetConnection in PowerShell.
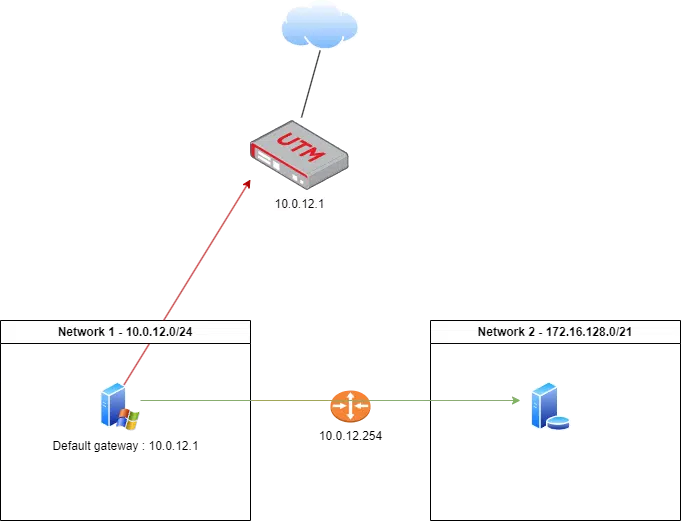
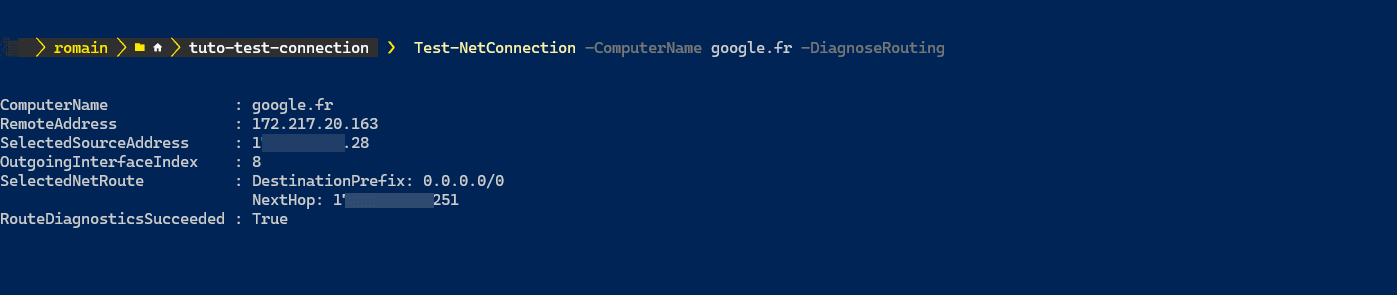
If you have several different routes to configure, the first option you can use is -DiagnoseRouting, which will analyse which route (gateway) will be used to access the remote server.
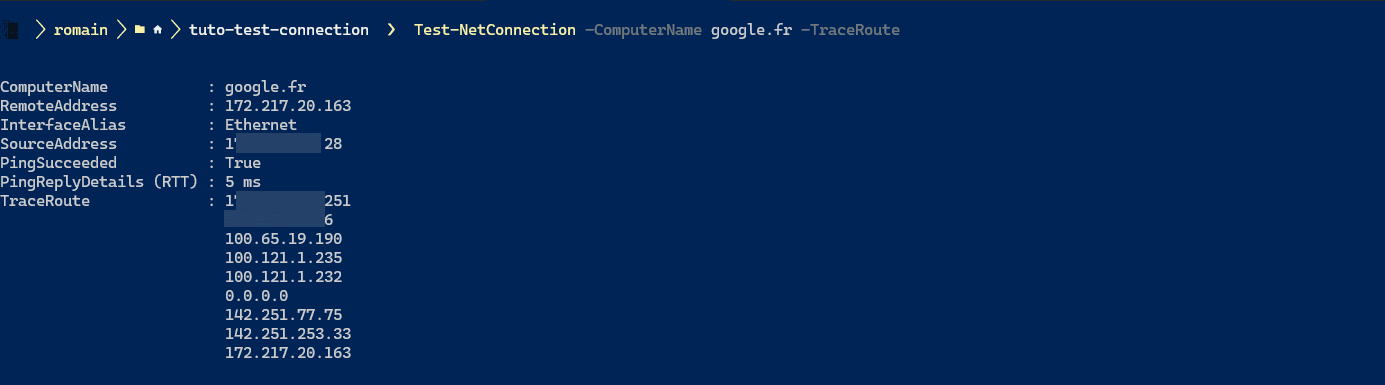
The second command we’re going to look at is traceroute, which acts as the equivalent of tracert and allows you to see all the routers that are being used.
You now know how to carry out various network tests with PowerShell using the Test-NetConnection cmdlet.