In this tutorial, we will see how to manage your virtual machines in a Hyper-V cluster using the Cluster Manager console.
It is also possible to use the following tools to manage virtual machines with Hyper-V:
- Hyper-V Manager Console
- Admin Center
- PowerShell
- SCVMM
- 5Nine
- ….
In this article we will address the following points:
- Creating a virtual machine
- Customizing the virtual machine
- Host change with Live Migration
- Move the virtual machine files
- Import a virtual machine as a role in the cluster.
If you are not in a hyper-v cluster, the Hyper-V Manager console administration is similar.
- Create a virtual machine
- Edit a virtual machine
- Add a component
- Change the boot order
- Change memory – RAM
- Change the number of processors
- Add a virtual hard disk
- Add a CD player – ISO file
- Configure a VLAN on the network adapter of the virtual machine
- Disable synchronization of the date / time of the host
- Starting the virtual machine automatically
- Action in case of automatic shutdown
- Manage virtual machines
Create a virtual machine
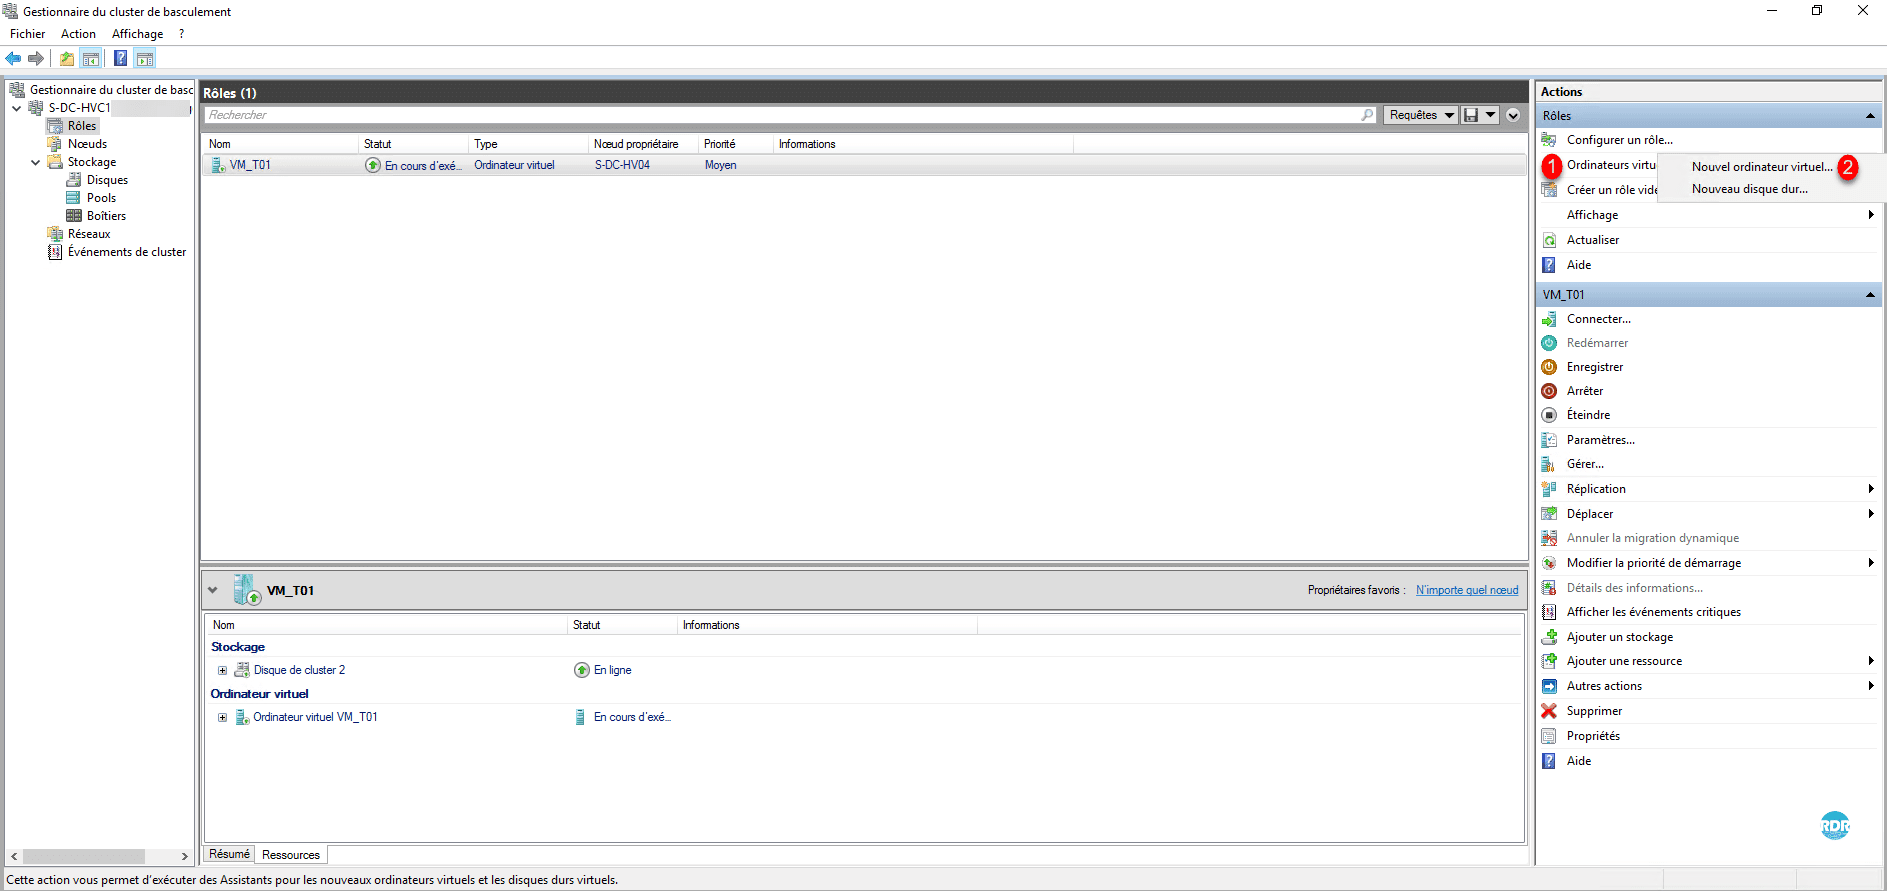
Start the Failover Cluster Manager console, click Virtual Machine 1 / New Virtual Machine 2 .
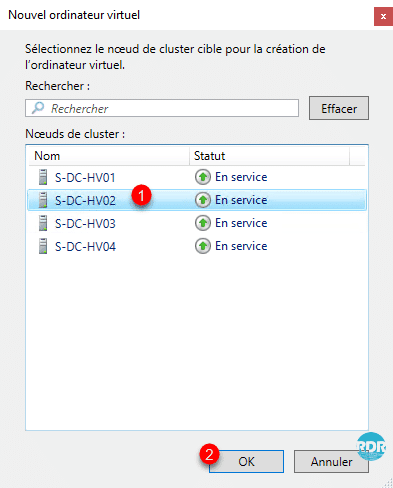
Choose a node (host) of the Hyper-V cluster 1 and click OK 2 .
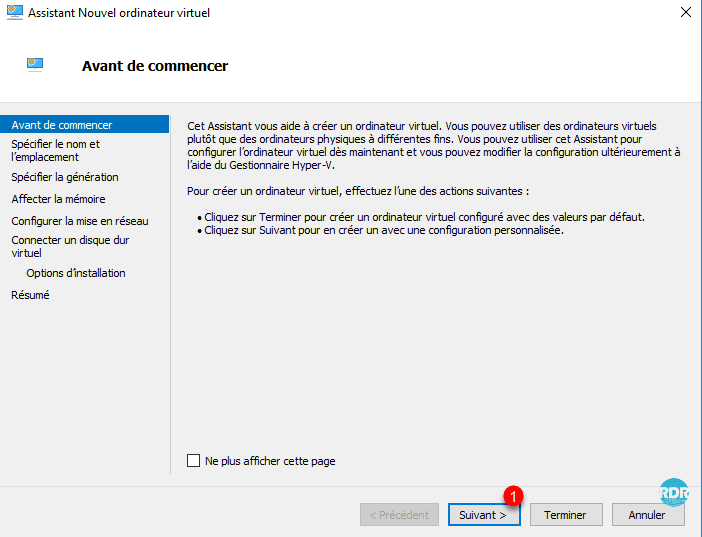
When launching the wizard, click Next 1 .
Name the virtual machine 1 , specify the location 2 that must be accessible to all the nodes of the cluster and click Next 3 .
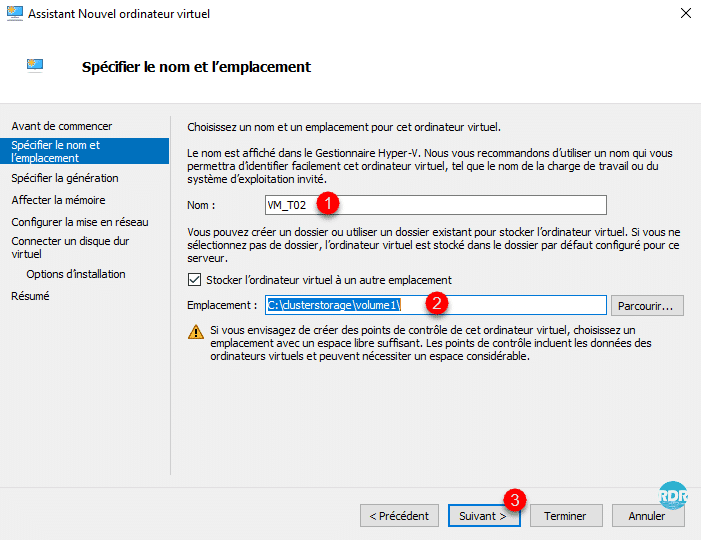
If you specify a different location than the default, a folder with the name of the virtual machine will be created with the configuration files and the virtual disk.
Select the 1 generation of the virtual machine and click Next 2 .
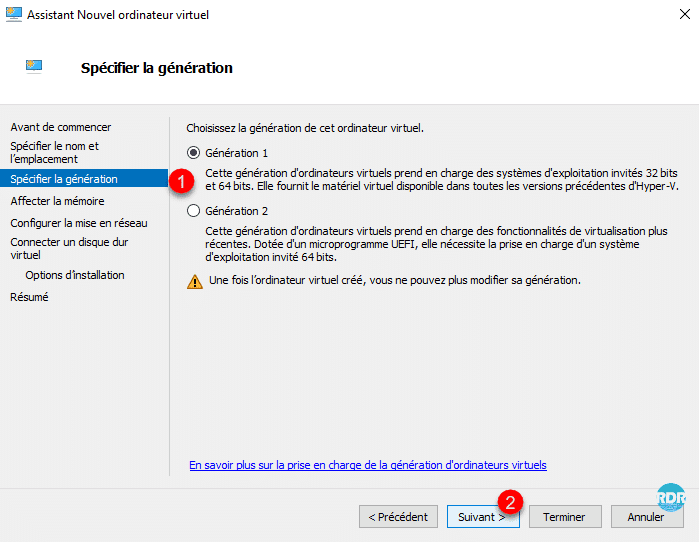
The choice of virtual machine generation can not be changed after creation. To summarize whether the OS is Windows Server 2012 and newer use generation 2. For other operating systems (Linux, Appliance …), you must check the prerequisites.
More about virtual machine builds: https://docs.microsoft.com/fr-fr/windows-server/virtualization/hyper-v/plan/should-i-create-a-generation-1-or-2-virtual-machine-in-hyper-v
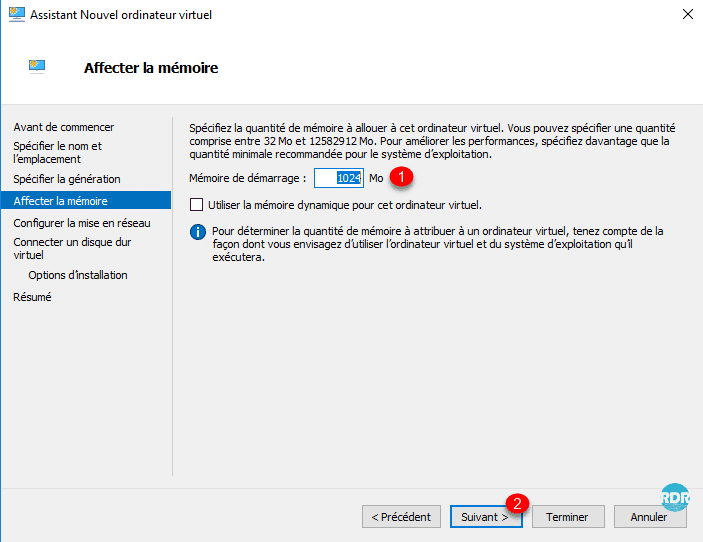
Configure virtual machine memory 1 and click Next 2 .
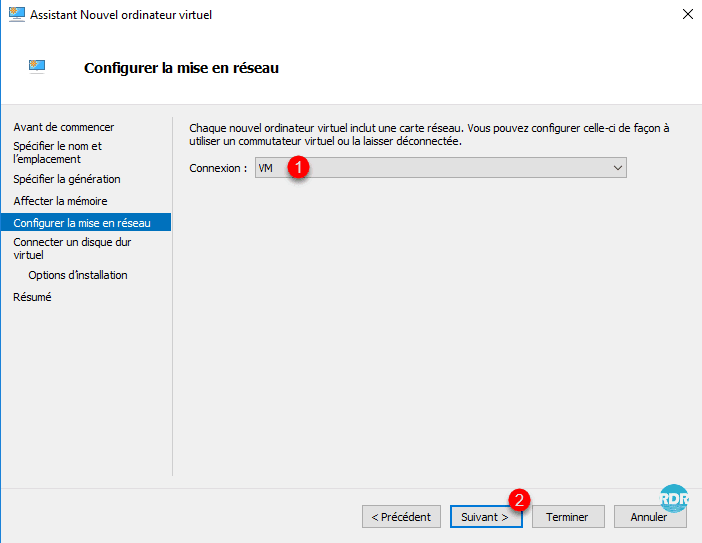
Configure Networking, select a 1 virtual switch, and click Next 2 .
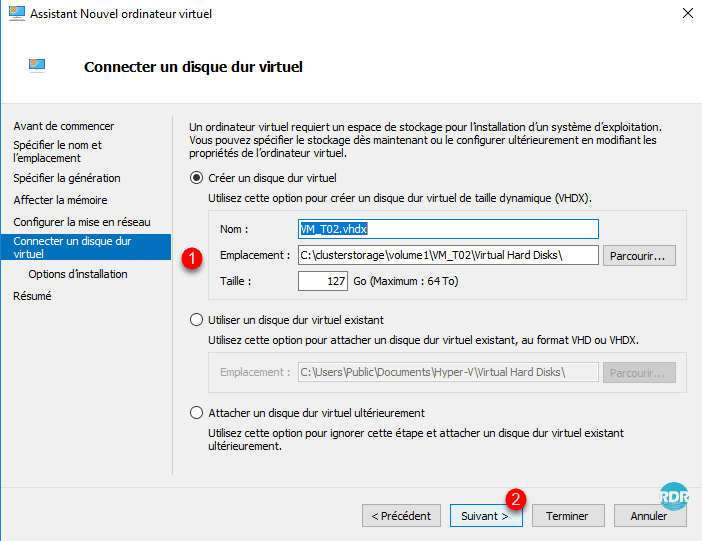
Configure the virtual disk 1 by default the wizard proposes the creation of a new disk then click Next 2 .
Select the mode of first boot 1 of the virtual machine and click Next 2 .

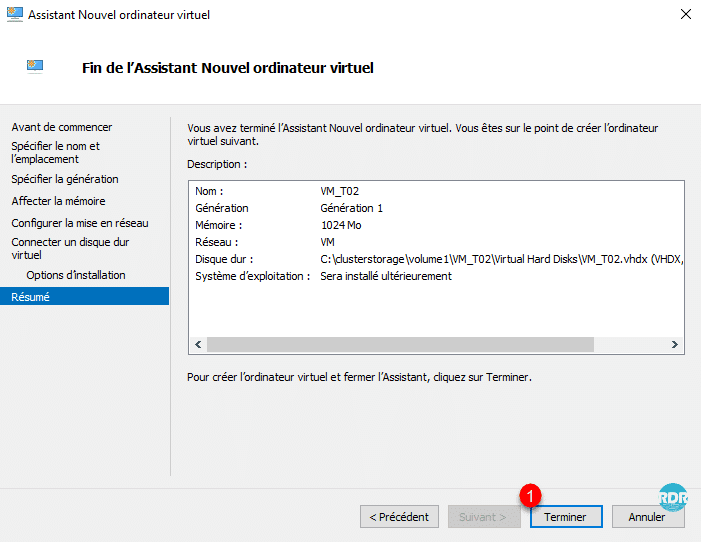
Confirm the creation of the virtual machine by clicking Finish 1 .
Close the confirmation window for creating the clustered virtual machine by clicking Finish 1 .
The virtual machine is available in the list of roles for cluster 1 . To start the computer click on Restart 2 and on Connect 3 to open the console.
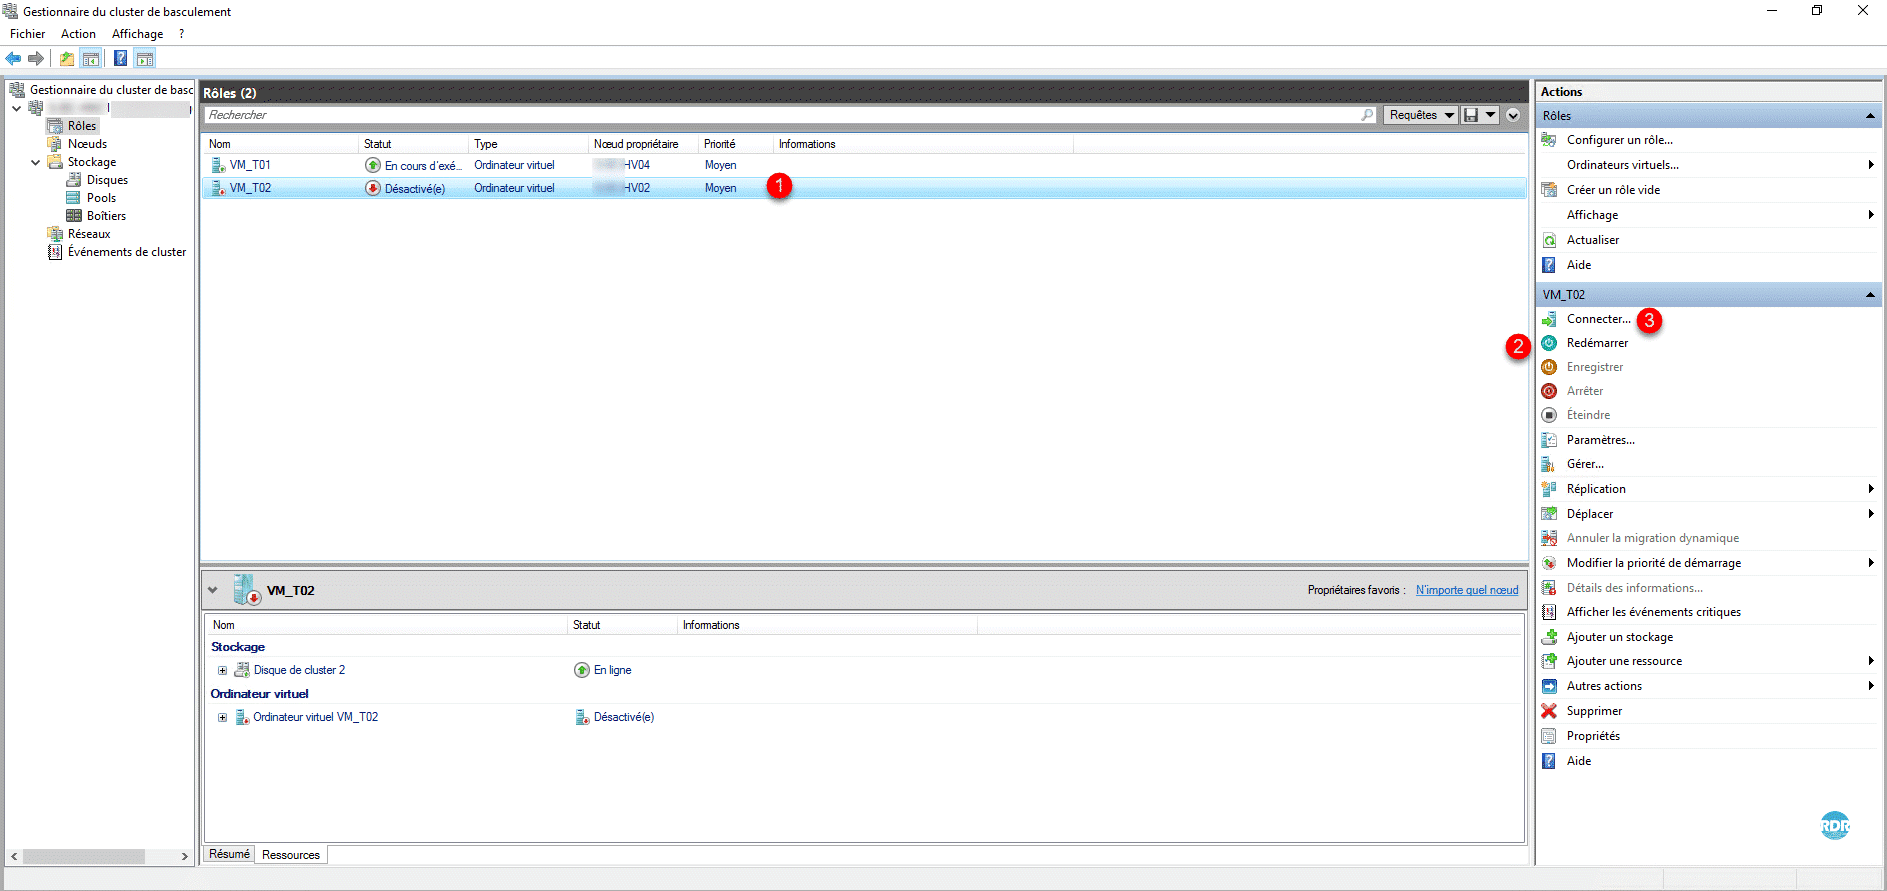
In the example below, the virtual machine restarts in a loop because it does not have an ISO to present.
If you have a deployment service (WDS / MDT), it can be used to install the operating system.
Now that the virtual machine is created, we will see how to modify it.
Edit a virtual machine
From the list of roles on the Failover Cluster Manager, right-click on the 1 virtual machine and click Settings 2 .
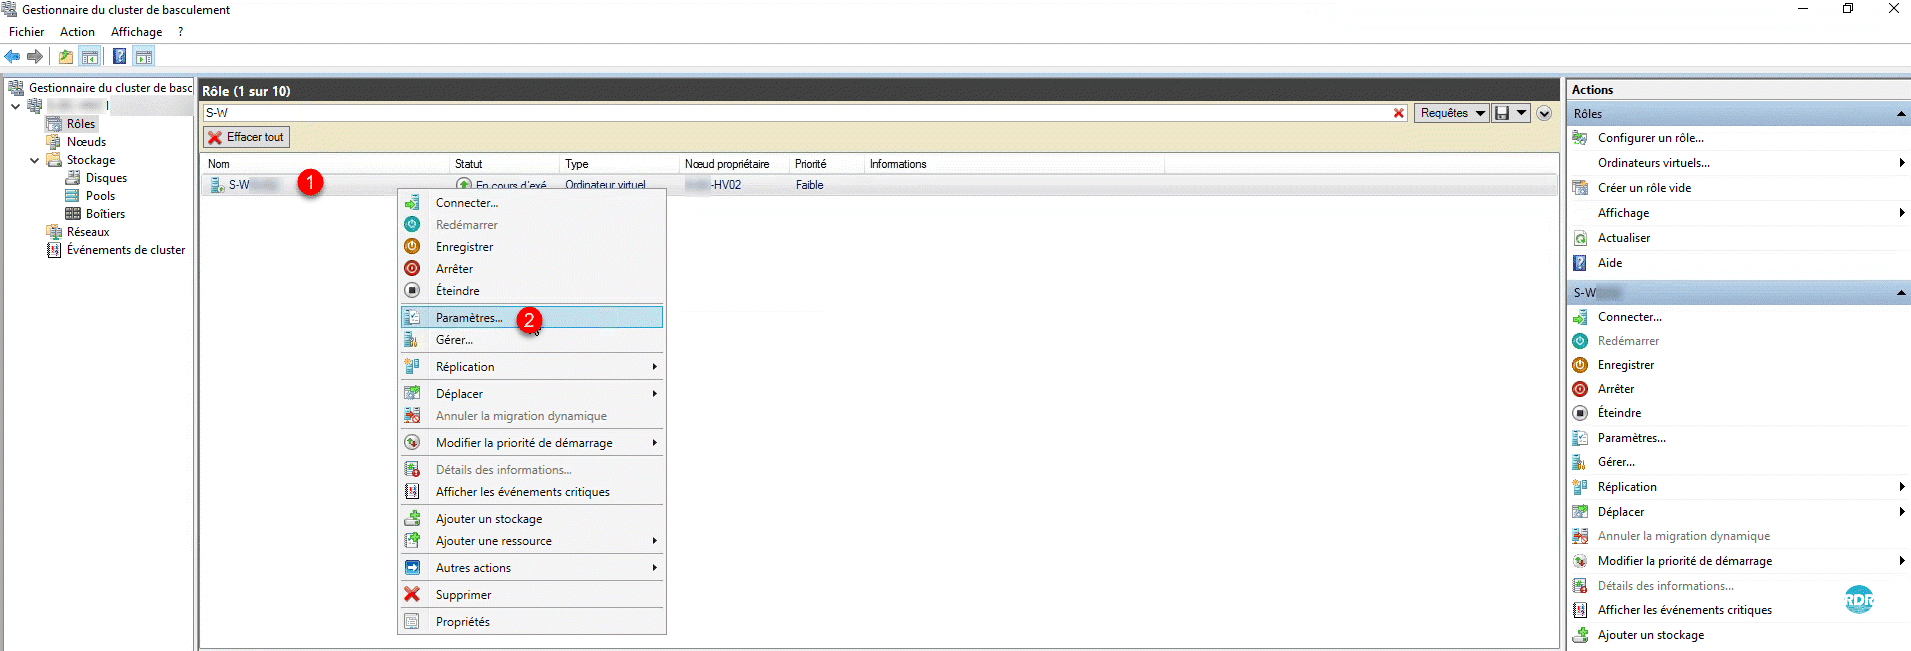
A window opens displaying all the parameters that can be modified, it is here that it is possible to add hardware components such as a hard disk, network card …
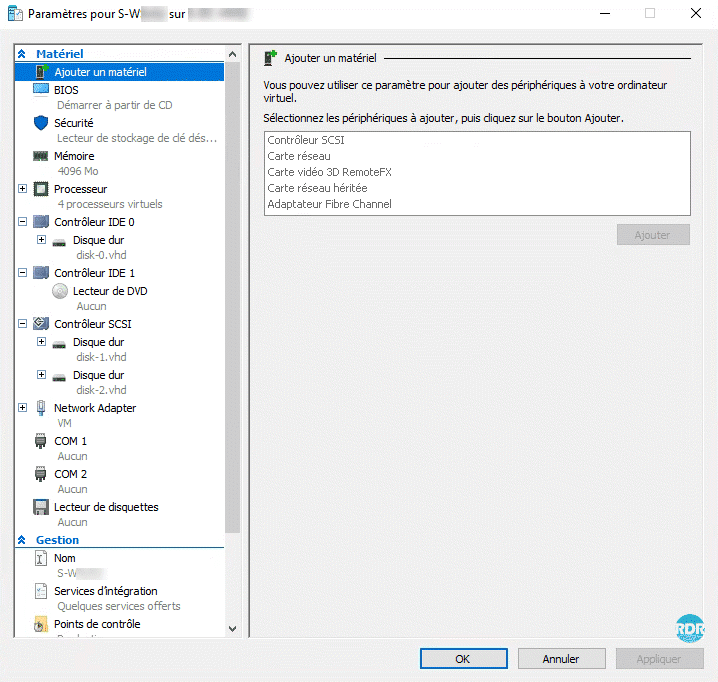
Add a component
Depending on the generation of the virtual machine and the hardware to add, the virtual machine needs to be turned off.
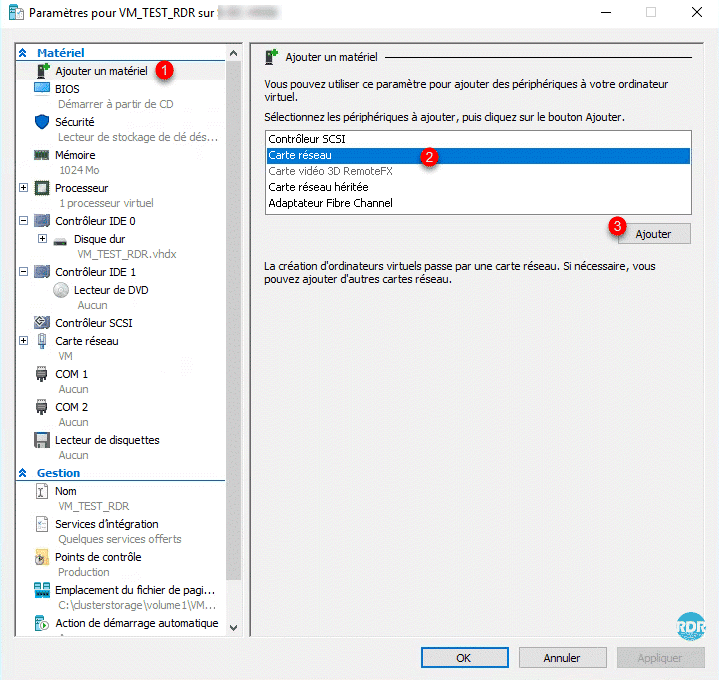
To illustrate the tutorial, we will add an additional network adapter to the virtual machine.
Select Add material 1 , choose the material to add 2 and click on the button Add 3 .
We are directly positioned on the added material 1 (which is written in bold), make the setting and click on Apply to add 2 .
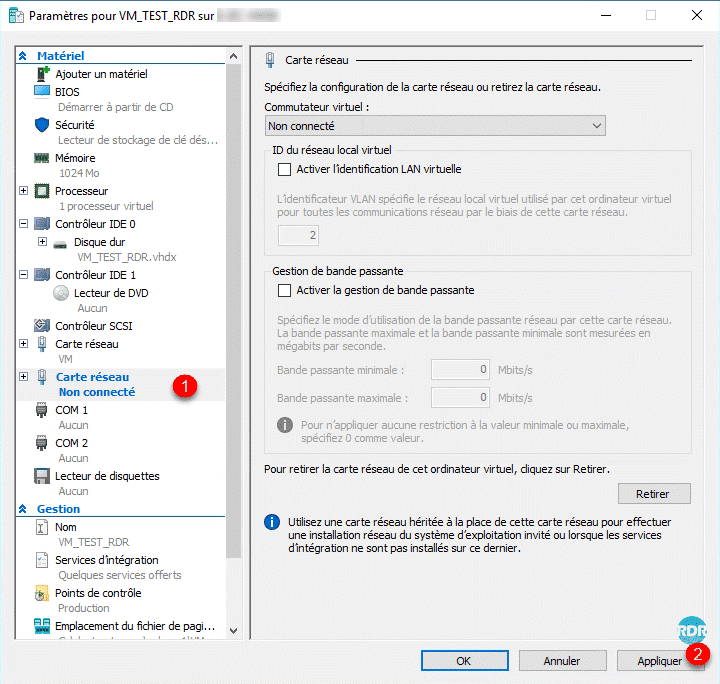
When the change is applied, the component passes with a “normal” write.
On Generation 2 virtual machines, it is not possible to add IDE devices and floppy disk drives.
Change the boot order
Generation 1
Go to BIOS 1 , select the device in boot order 2 and use the Up and Down buttons 3 and click on Apply 4 .
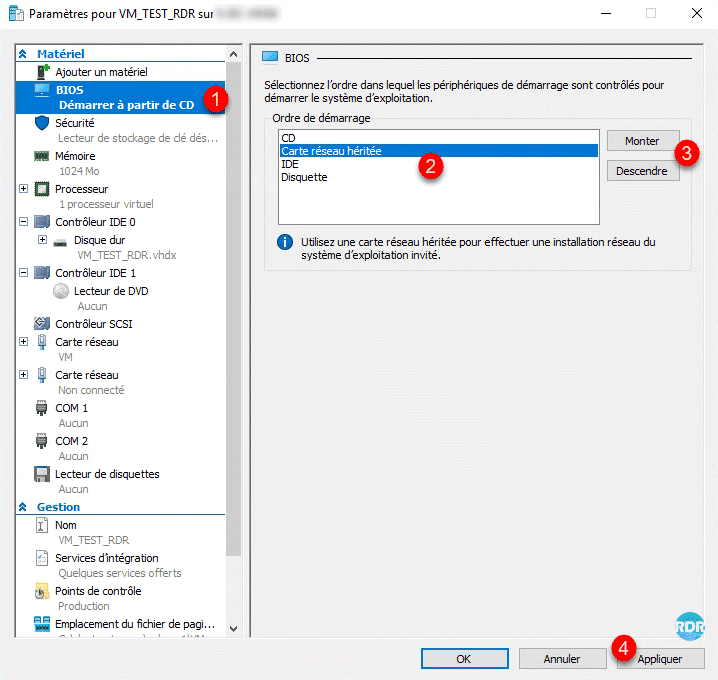
To start on the network with a computer of generation 1, it is necessary to add a material of the type Network card inherited.
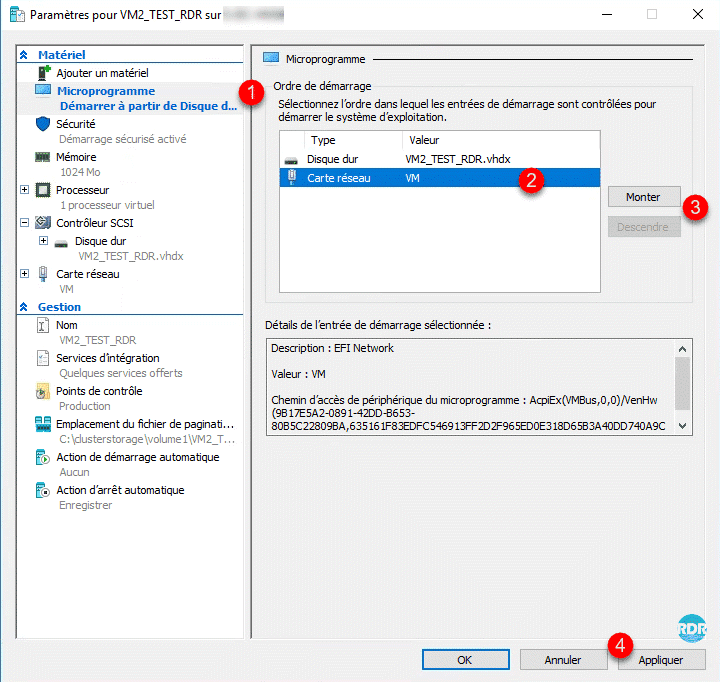
Generation 2
Go to Firmware 1 , select the device in start order 2 and use the Up and Down buttons 3 and click on Apply 4 .
Change memory – RAM
Go to Memory 1 and change the assigned RAM value 2 then click Apply 3 .
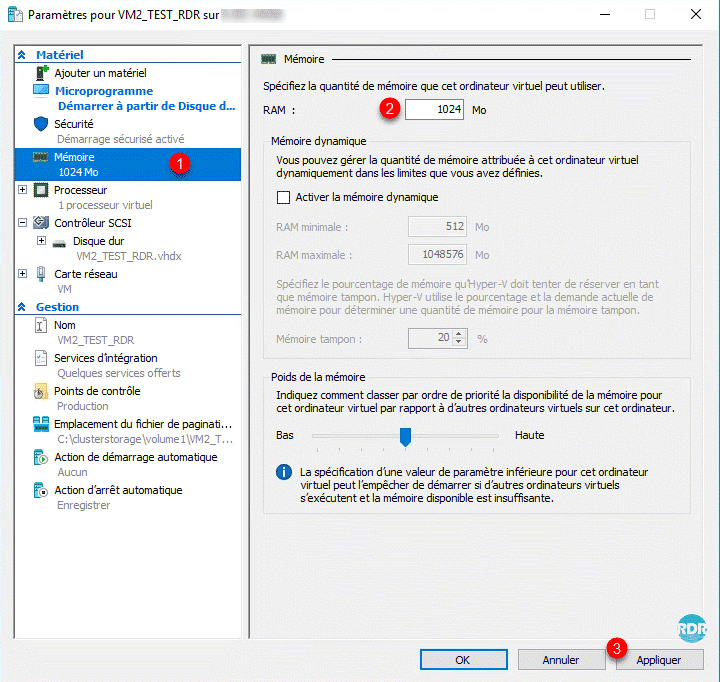
In the case of using dynamic memory, it is possible to configure the minimum and maximum memory attributable to the virtual machine.
Change the number of processors
Select Processor 1 , change the number of virtual CPUs 2 and click Apply 3 .
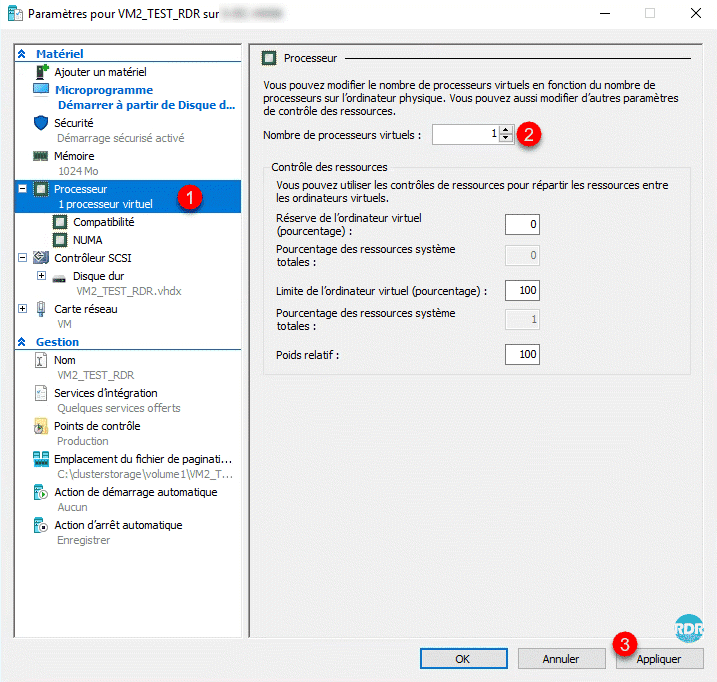
It is recommended not to exceed the number of logical CPUs, too many virtual processors cause queues and may slow down overall performance.
In a large number of cases, 2 virtual processors are sufficient for Windows.
Add a virtual hard disk
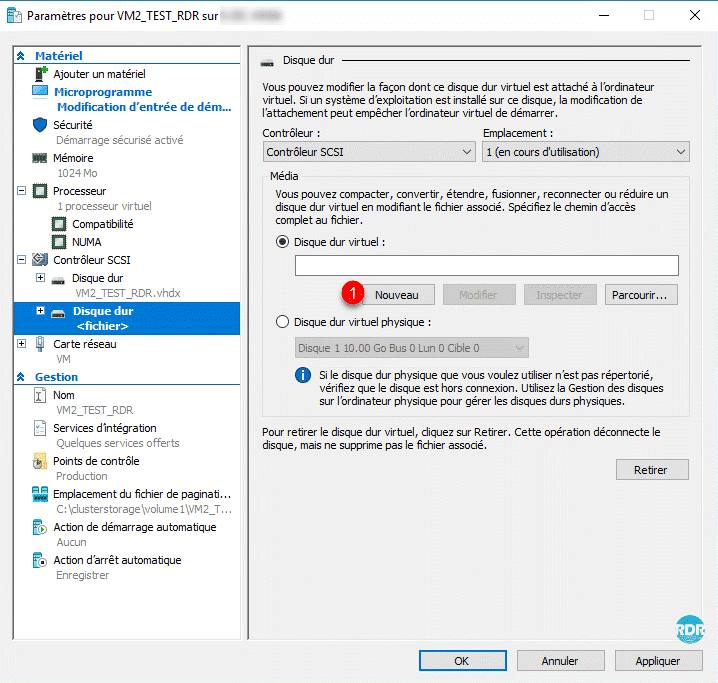
Go to the SCSI or IDE Controller 1 depending on the generation, select Hard Disk 2 and click on Add 3 .
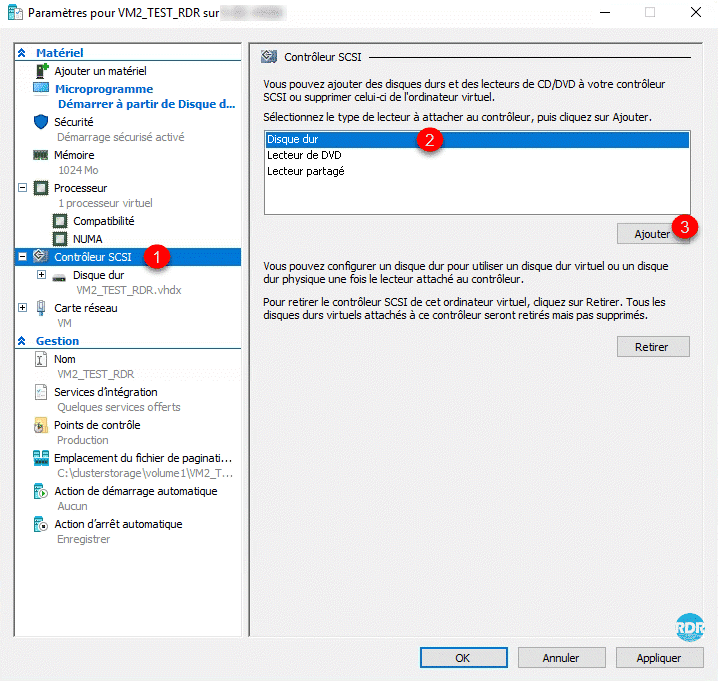
On Generation 1 virtual machines, which use an IDE controller, you can not put more than two virtual hard disks. Except special case, I advise you when you want to add an additional hard disk to put it on the SCSI controller. Only the disk where the operating system is installed must be on an IDE controller.
Click New 1 to launch the Create Hard Disk Wizard.
When launching the wizard, click Next 1 .
Select disk type 1 and click Next 2 .
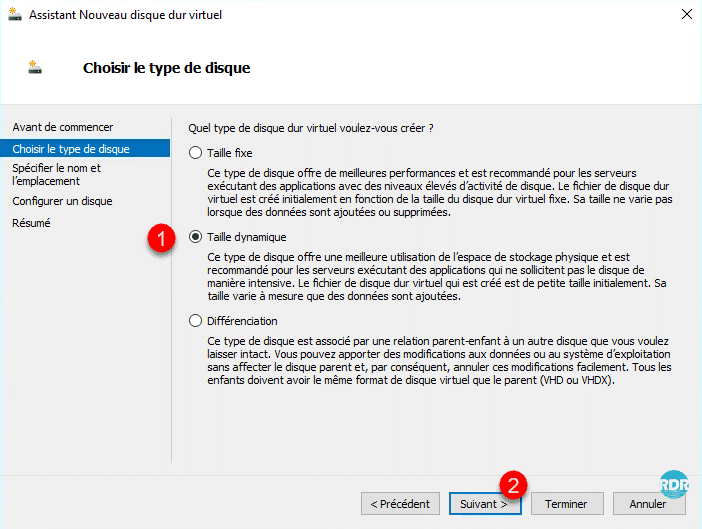
Dynamic disk usage requires physical storage monitoring to not allocate more virtual space than physical space.
Leave 10 to 20% available space on physical storage for snapshot storage (used by backup software) and RAM files.
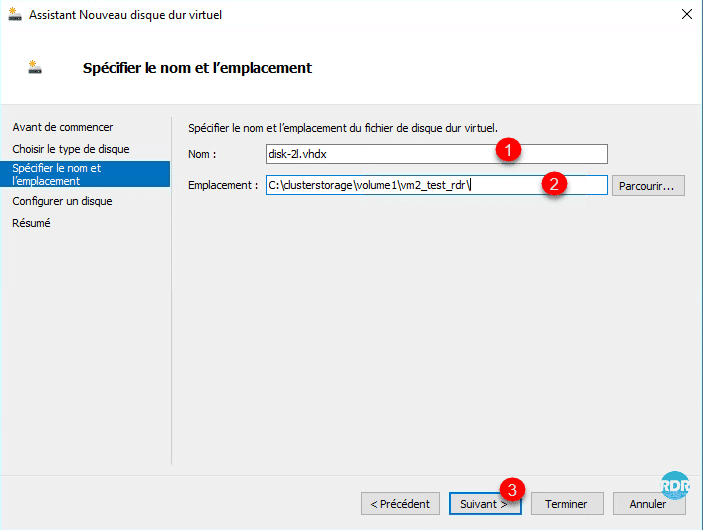
Name the disk 1 and indicate the location 2 that must be on a shared storage in the cluster and click Next 3 .
Indicate the size of the disc 1 and click Next 2 .
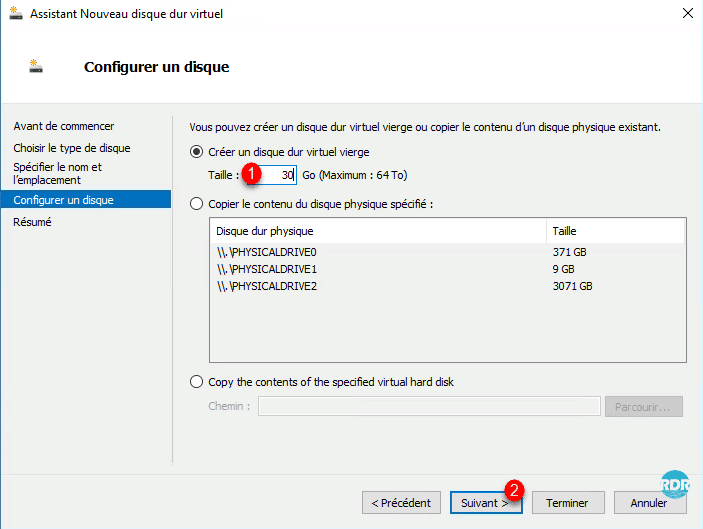
Click Finish 1 to create the disc.
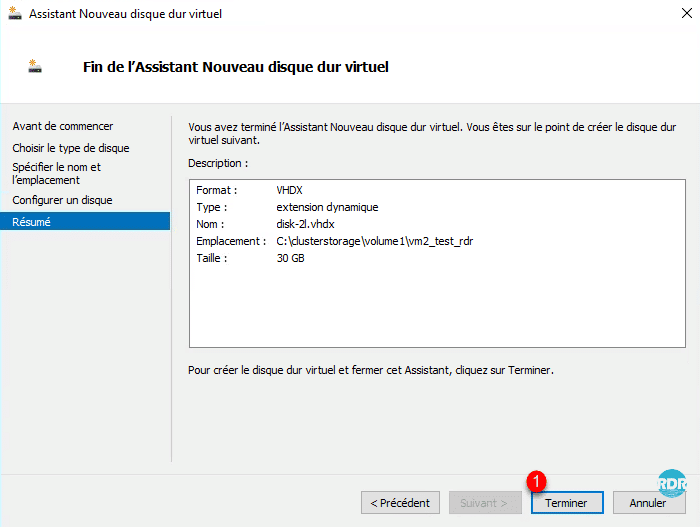
Avoiding the creation of large fixed disk during heavy demand periods of the SI, the process will create a blank disk of the defined size which will impact the performance of the physical storage.
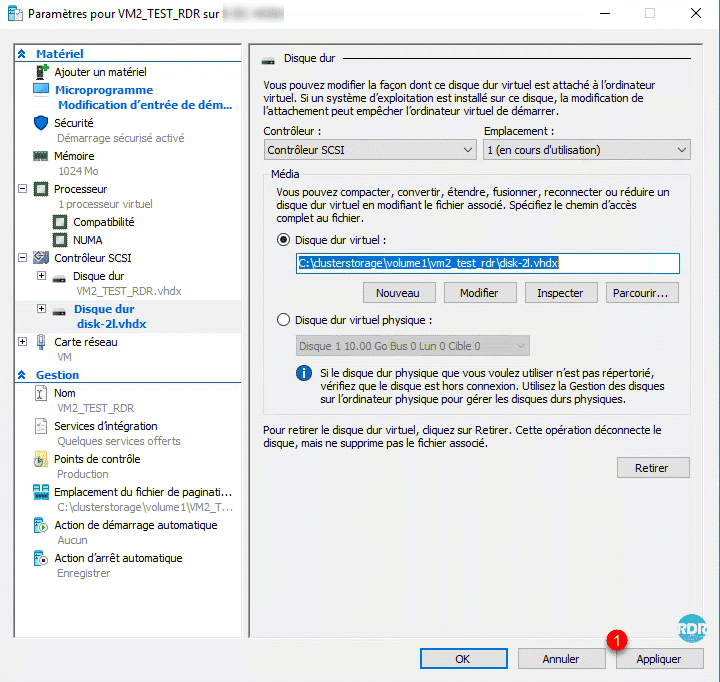
Click Apply 1 to validate the attachment of the disk to the virtual machine.
Add a CD player – ISO file
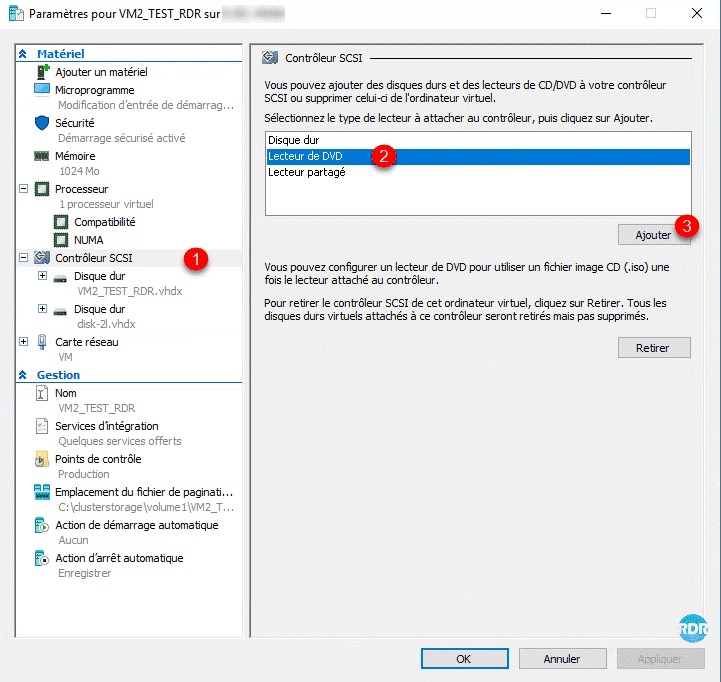
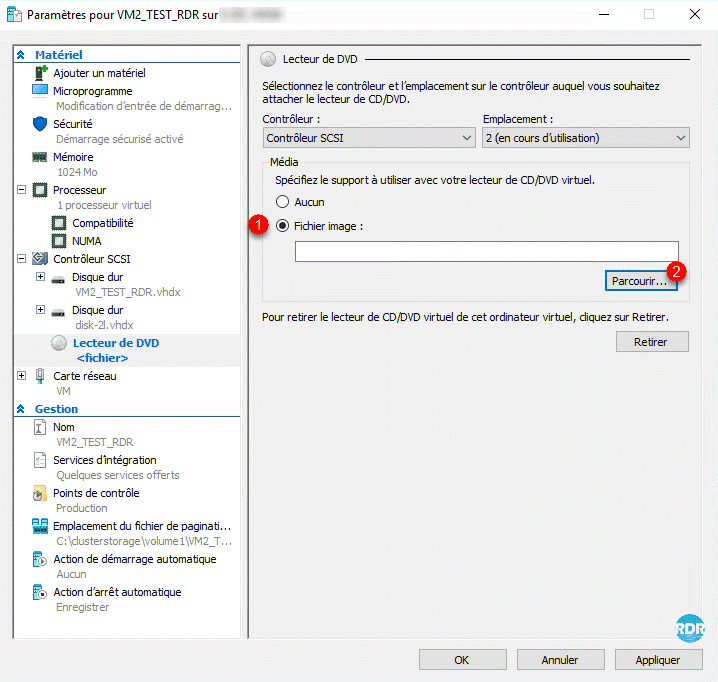
Go to SCSI Control or IDE 1 depending on generation, select DVD Player 2 and click on Add 3 .
Select Image File 1 and click Browse 2 .
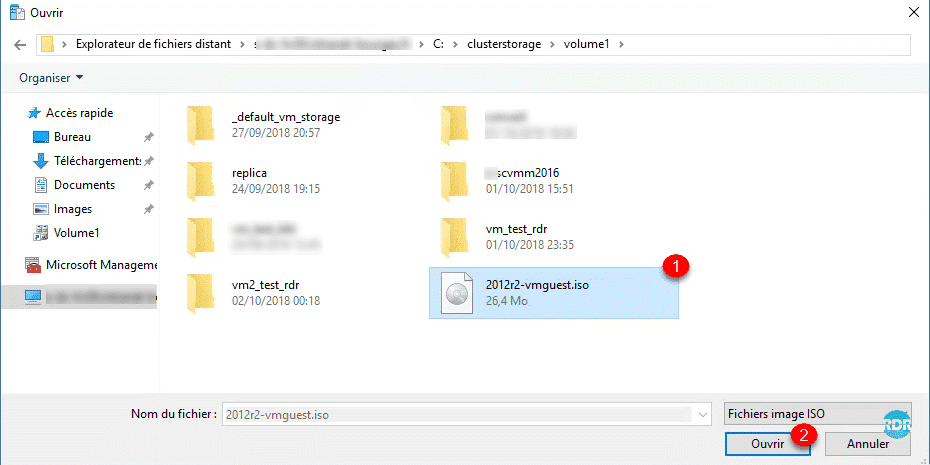
Choose the ISO file 1 to present and click on Open 2 .
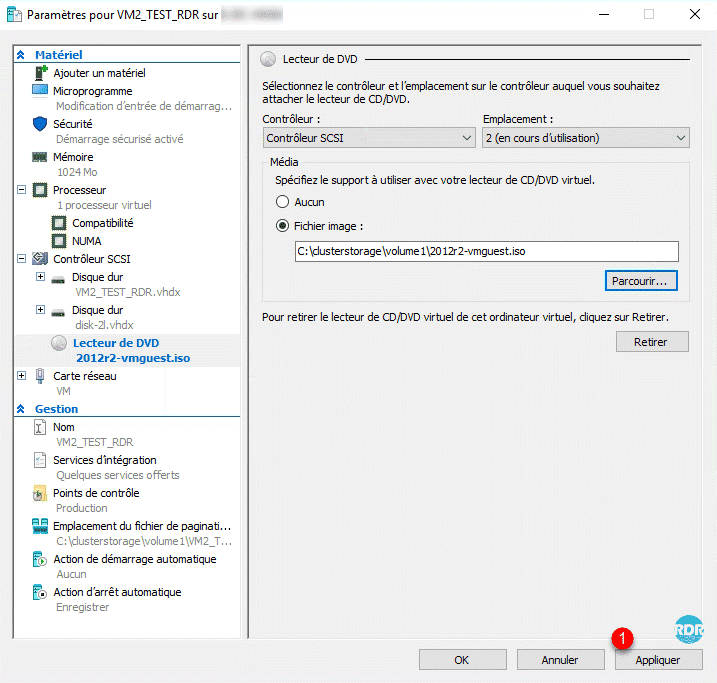
Click on Apply 1 to add the DVD player.
Configure a VLAN on the network adapter of the virtual machine
Go to the network card 1 where the VLAN is to be defined, check the box “Enable virtual LAN identification” 2 and indicate 3 . Finally click on Apply 4 .
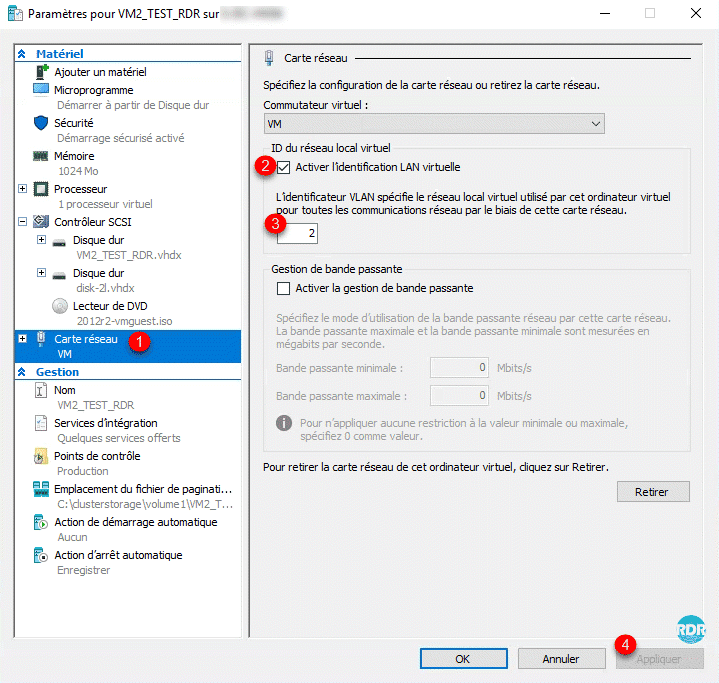
To work, the switch (s) where the hypervisor network cards are connected must have the tagged ports on the VLAN.
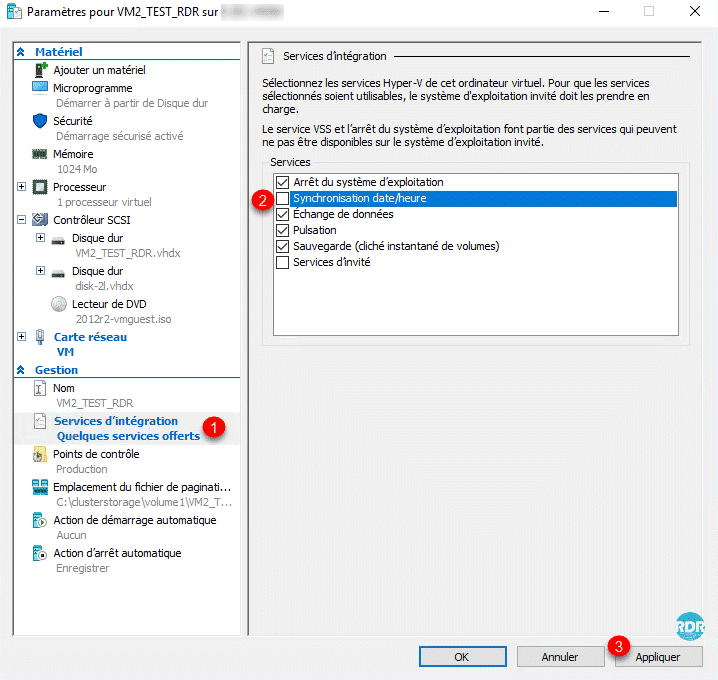
Disable synchronization of the date / time of the host
In an Active Directory environment, it is advisable to disable time synchronization between the host and the virtual machine because it is given by the PDC.
Go to Integration Service 1 , uncheck “Date / Time Synchronization” 2 and then click Apply 3 .
Starting the virtual machine automatically
Go to Autostart action 1 , choose Always start this virtual machine automatically 2 then click on Apply 3 .
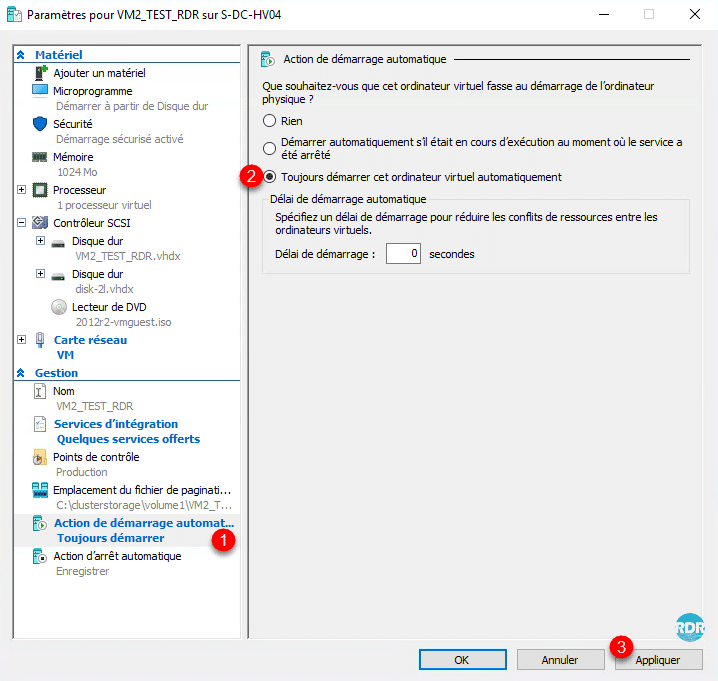
It is possible to configure a startup delay, it is generally used to order the startup of the virtual machines as first start the database servers and then the application servers.
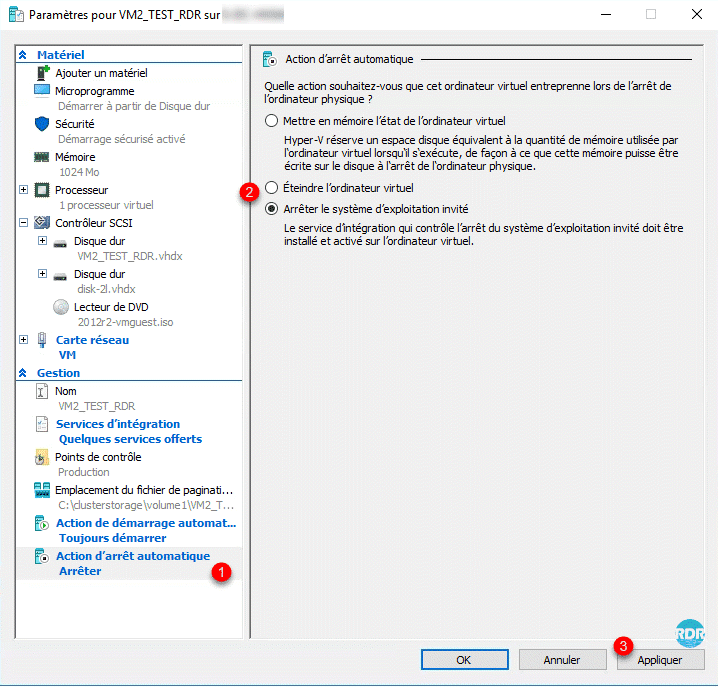
Action in case of automatic shutdown
On a Hyper-V host alone, this is the action performed when the physical computer is shut down, as part of a cluster it is the action that will be performed in case of stopping the last host or a stop without emptying roles.
Go to Automatic Shutdown Action 1 , select an action 2 and click Apply 3 .
Manage virtual machines
In this part, we will discuss what actions can be performed on virtual machines from the Failover Cluster Manager console.
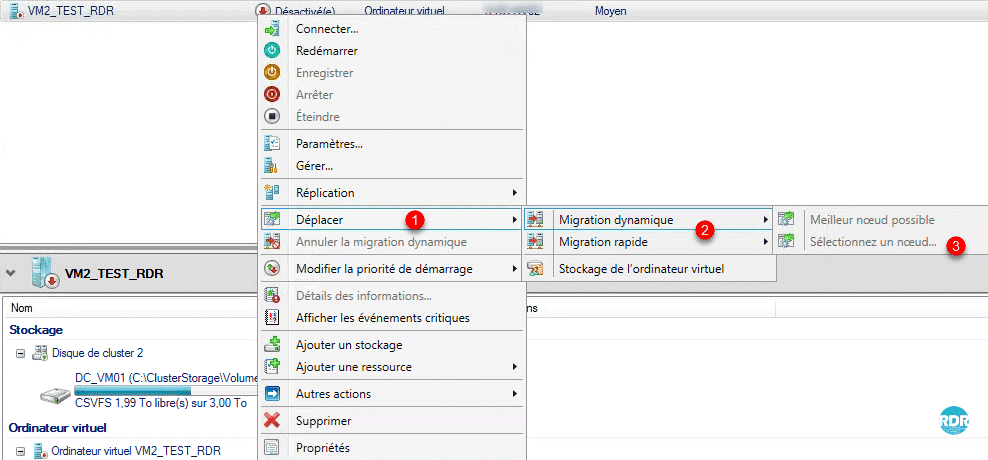
Move a computer to another cluster host
There are two ways to move a virtual machine from one node to another:
- Dynamic Migration: allows you to change hosts without interrupting the virtual machine.
- Quick Migration: faster solution that cuts service, vm is saved, sent on a host and restarted.
Right-click on the computer to move, go to Move 1 / Migration (choose the desired type) 2 / Select a 3 node.
Choose a 1 node and click OK 2 .
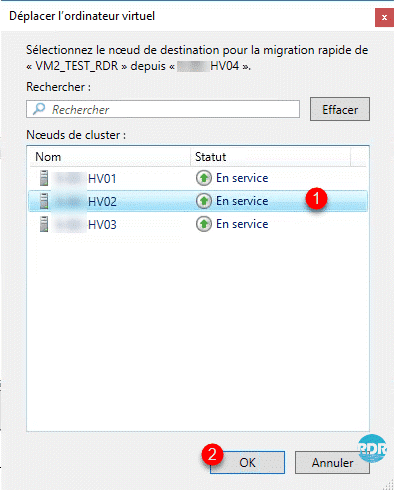
The Best Possible Node option is based on the number of roles.
Move files from a virtual machine
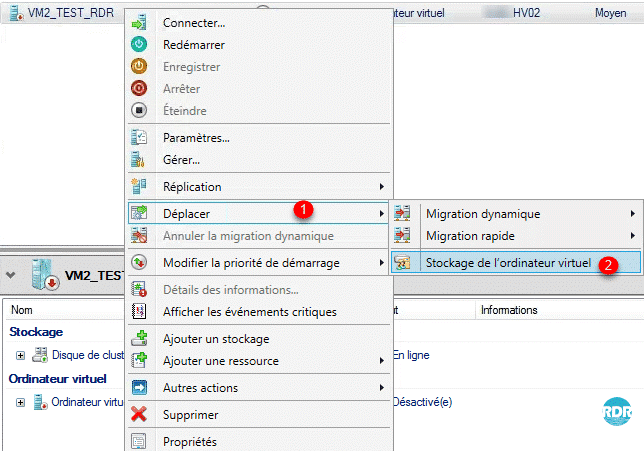
Right-click on the virtual machine and click on Move 1 / Storage of the virtual machine 2 .
Select the destination folder 1 and click on it, select the file or files to move 2 and drag and drop into the folder 3 . Finally click on Start 4 to start the move.
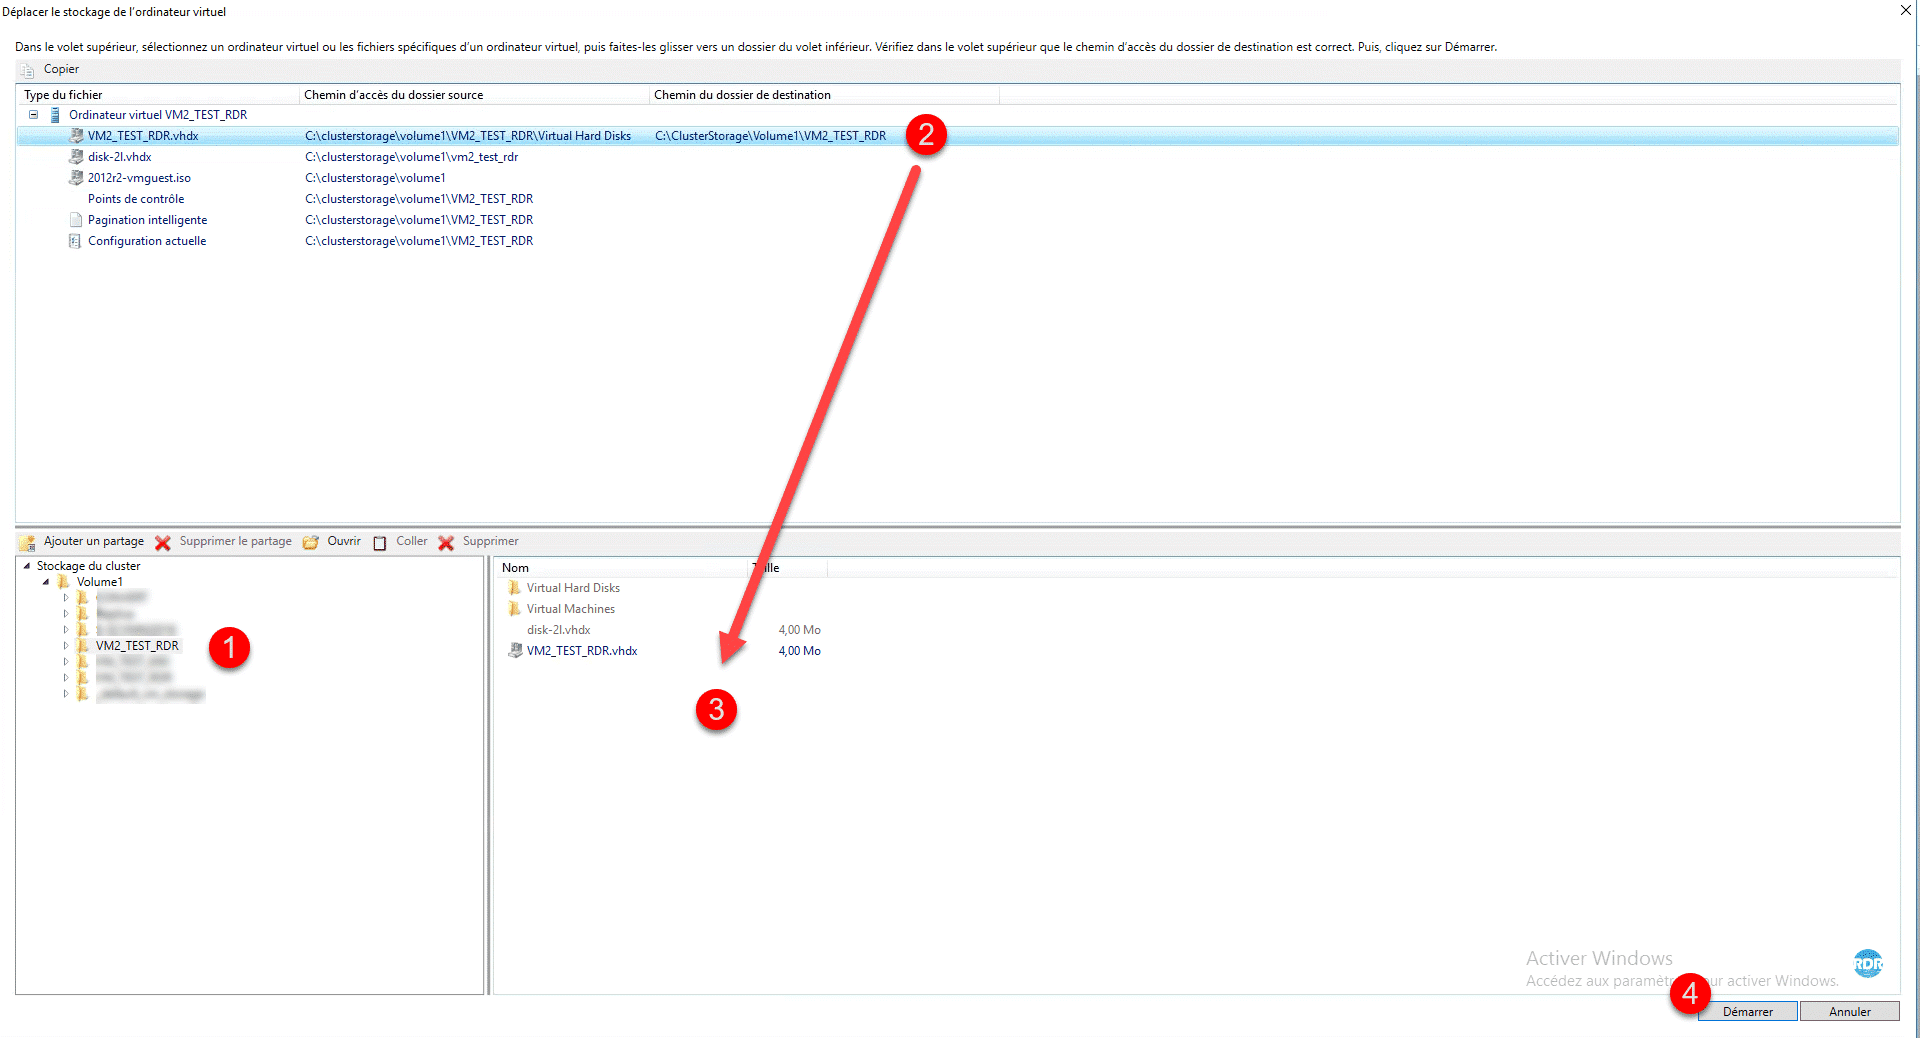
It is possible to track the progress of the move in the Summary section of the VM or by the Hyper-V Manager.
Import a virtual machine into cluster roles
If a virtual machine was created directly from the Hyper-V Manager Console and its files are on the cluster’s shared disk, it can be imported into the roles.
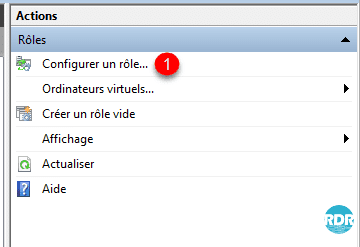
On the Actions menu of Failover Cluster Manager, click Configure Role 1 .
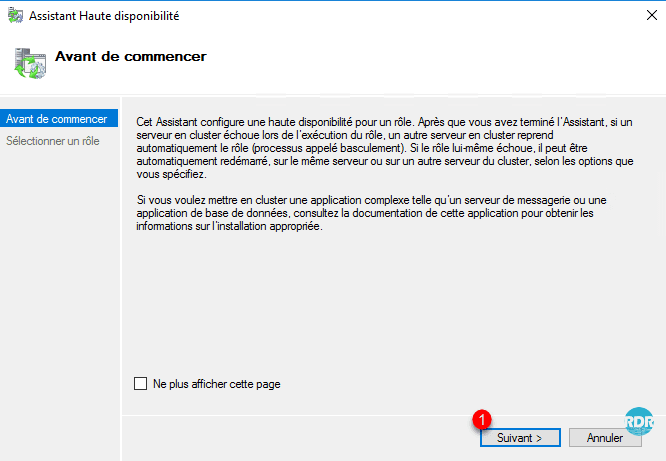
When launching the wizard, click Next 1 .
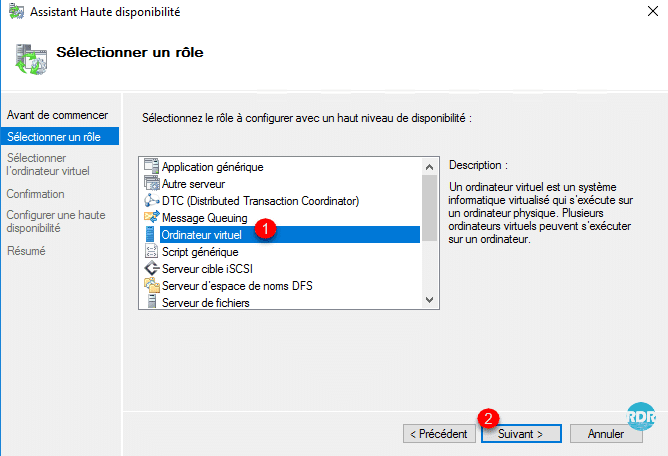
Choose the Virtual Machine 1 role and click Next 2 .
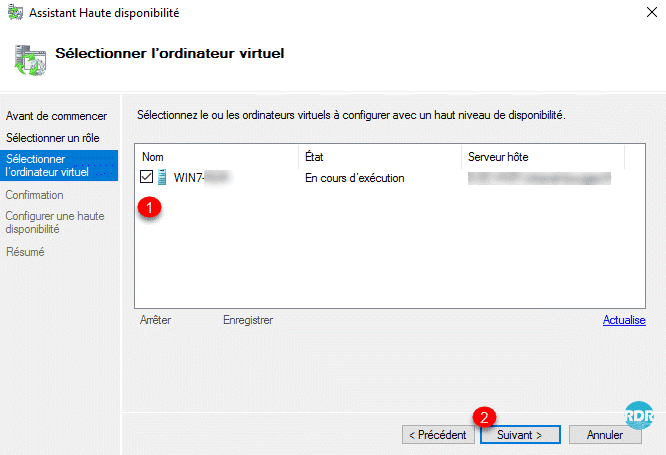
Select the virtual machine(s) to cluster <1 and click Next 2 .
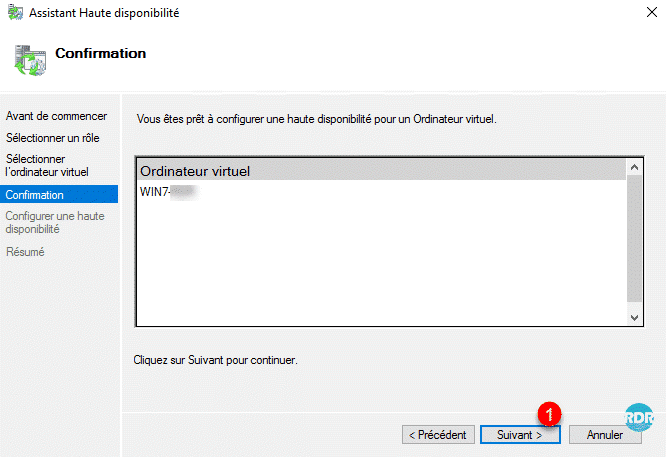
Confirm high availability by clicking Next 1 .
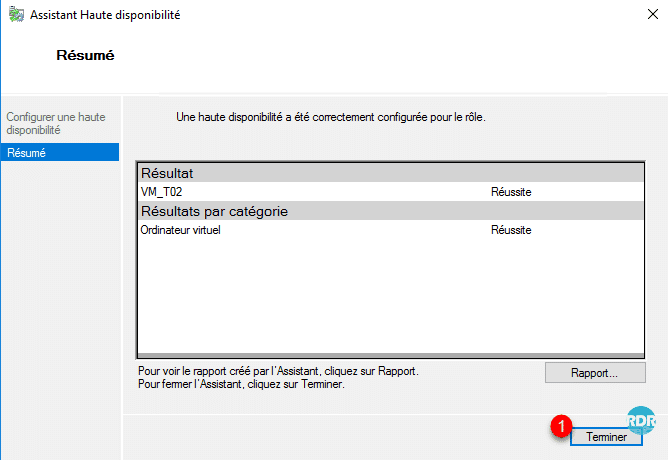
The computer is added to the cluster, close the wizard by clicking the Finish 1 button.
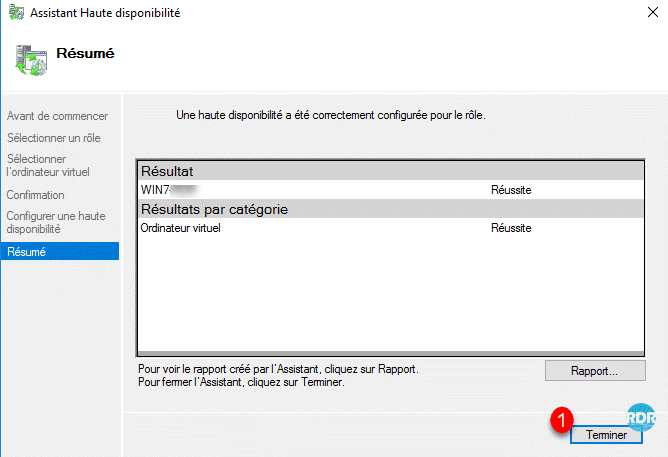
The virtual machine(s) 1 are added to the failover cluster role list.
