Enable Remote Desktop on Windows Server
This tutorial “how” explains how to activate the remote desktop on Windows Server with a graphical interface.
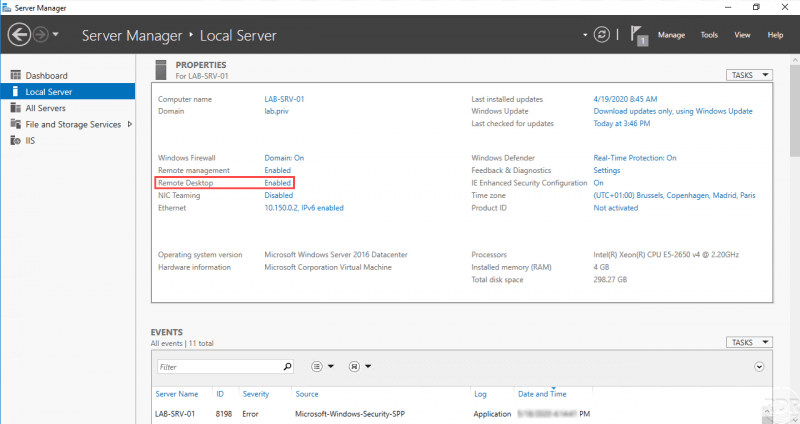
Open the server manager and click on Local server
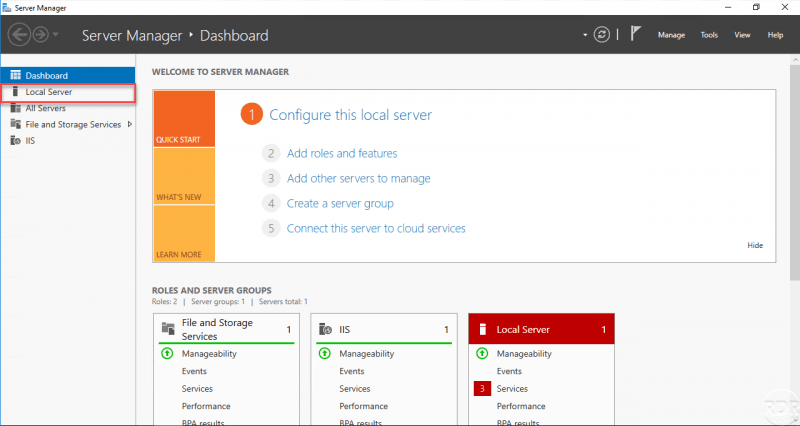
Open the server manager and go to Local server.
Click Disabled at Remote Desktop Level
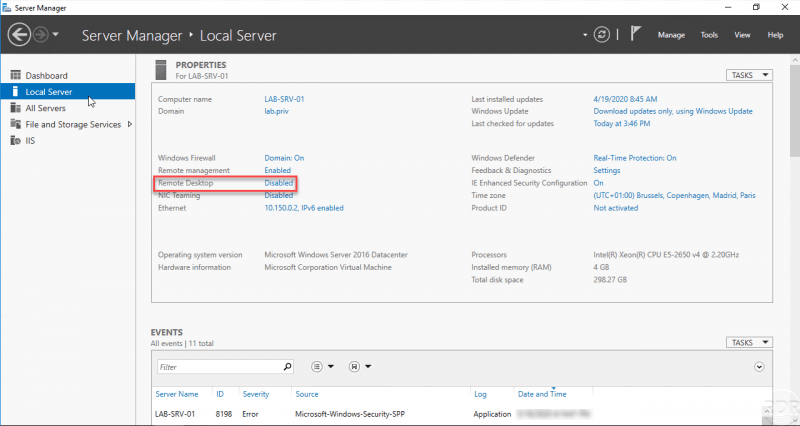
Remote desktop status is disabled, click on disabled to open system properties.
Choose Allow remote connections to this computer.

In the Remote Desktop section, on the Remote Usage tab of the system properties, select Allow remote connections to this computer.
Validate the creation of firewall rules
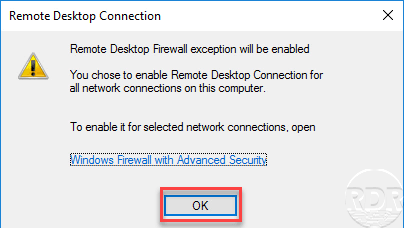
Following the selection of Allow remote connections to this computer, a window opens indicating that exceptions in the firewall have been enabled, click OK.
Apply the configuration to activate the remote desktop.
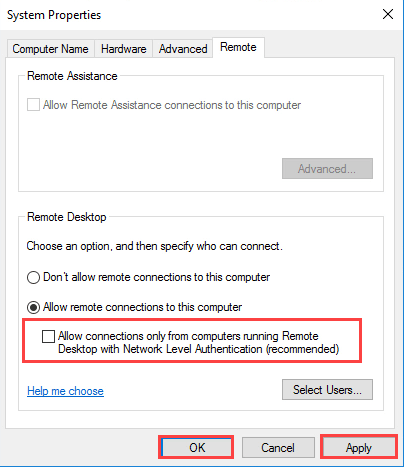
Activate or not the NLA then click on Apply and OK to apply the configuration.
Remote desktop is enabled.
Refresh the server manager, we can see that the status of the remote desktop is now “Activated”.