In this tutorial, I’ll explain how to install the Passbolt password manager onLinux usingDocker andDocker Compose, which will allow us to deploy it quickly and easily.
Introduction to Passbolt
Passbolt is an open-source password manager specifically designed for teams and businesses. Unlike consumer-facing solutions, it allows for secure password sharing, with granular access control and end-to-end encryption based on OpenPGP.
Passbolt’s intuitive web interface makes it easy to organize credentials, while its APIs enable integration into automated workflows. It is particularly popular among system administrators, DevOps teams, and organizations that want to maintain full control over their data.
Passbolt can be easily self-hosted, and its source code is audited, ensuring transparency and security. By combining itDockerwith its installation, you benefit from a fast, isolated, and reproducible deployment—ideal for both production and test environments.
Prerequisites for installing Passbolt with Docker
DockerTo install Passbolt with [], you’ll need a serverLinux(Ubuntu) withDocker [] installed.
To serve Passbolt, you’ll also need a reverse proxy (Nginx ), a DNS name (URI), and a valid SSL certificate.
For my part, I’ll place the filedocker-compose.ymland the folders (volumes) in the folder: /containers/passbolt/.
Installing Passbolt with Docker
To begin, we’ll deploy Passbolt usingDocker so that it’s accessible via the server’s IP address.
First, download the filedocker-compose.ymlavailable from the Passbolt website.
sudo wget https://download.passbolt.com/ce/docker/docker-compose-ce.yaml
To simplify the Docker commands, we’ll rename the file:
sudo cp docker-compose-ce.yaml docker-compose.yml
Now, we’ll edit the `docker-compose.yml` file and customize it:
sudo nano docker-compose.yml
Here is my `docker-compose.yml` file for Passbolt:
services:
  db:
    image: mariadb:10.11
    restart: unless-stopped
    environment:
      MYSQL_RANDOM_ROOT_PASSWORD: "true"
      MYSQL_DATABASE: "passbolt"
      MYSQL_USER: "passbolt"
      MYSQL_PASSWORD: "P4ssb0lt"
    volumes:
      - ./database_volume:/var/lib/mysql

  passbolt:
    image: passbolt/passbolt:latest-ce
    #Alternatively you can use rootless:
    #image: passbolt/passbolt:latest-ce-non-root
    restart: unless-stopped
    depends_on:
      - db
    environment:
      APP_FULL_BASE_URL: https://A.B.C.D
      DATASOURCES_DEFAULT_HOST: "db"
      DATASOURCES_DEFAULT_USERNAME: "passbolt"
      DATASOURCES_DEFAULT_PASSWORD: "P4ssb0lt"
      DATASOURCES_DEFAULT_DATABASE: "passbolt"
      EMAIL_TRANSPORT_DEFAULT_HOST: "smtp.domain.tld"
    volumes:
      - ./gpg_volume:/etc/passbolt/gpg
      - ./jwt_volume:/etc/passbolt/jwt
    command:
      [
        "/usr/bin/wait-for.sh",
        "-t",
        "0",
        "db:3306",
        "--",
        "/docker-entrypoint.sh",
      ]
    ports:
      - 80:80
      - 443:443
    #Alternatively for non-root images:
    # - 80:8080
    # - 443:4433

#volumes:
#  database_volume:
#  gpg_volume:
#  jwt_volume:
Here are the changes I made:
- I modified the volumes so they point to a folder at the same level as the `docker-compose.yml` file by adding `./` before the volume declarations. Lines 11, 28, and 29
- Modify the variable
APP_FULL_BASE_URLon line 21 by entering the machine’s address - Add the variable
EMAIL_TRANSPORT_DEFAULT_HOSTfor the SMTP server declaration on line 26 - Comment out the volumes section at the bottom of the file, lines 46 through 49
To continue, create the following directories:
sudo mkdir gpg_volume
sudo mkdir jwt_volume
Change the owner:
sudo chown www-data:www-data gpg_volume
sudo chown www-data:www-data jwt_volume
Download the container images:
sudo docker compose pull
Start the containers:
sudo docker compose up -d
Check the container logs:
docker compose logs -f
If everything is working correctly, you should see something like the screenshot below:
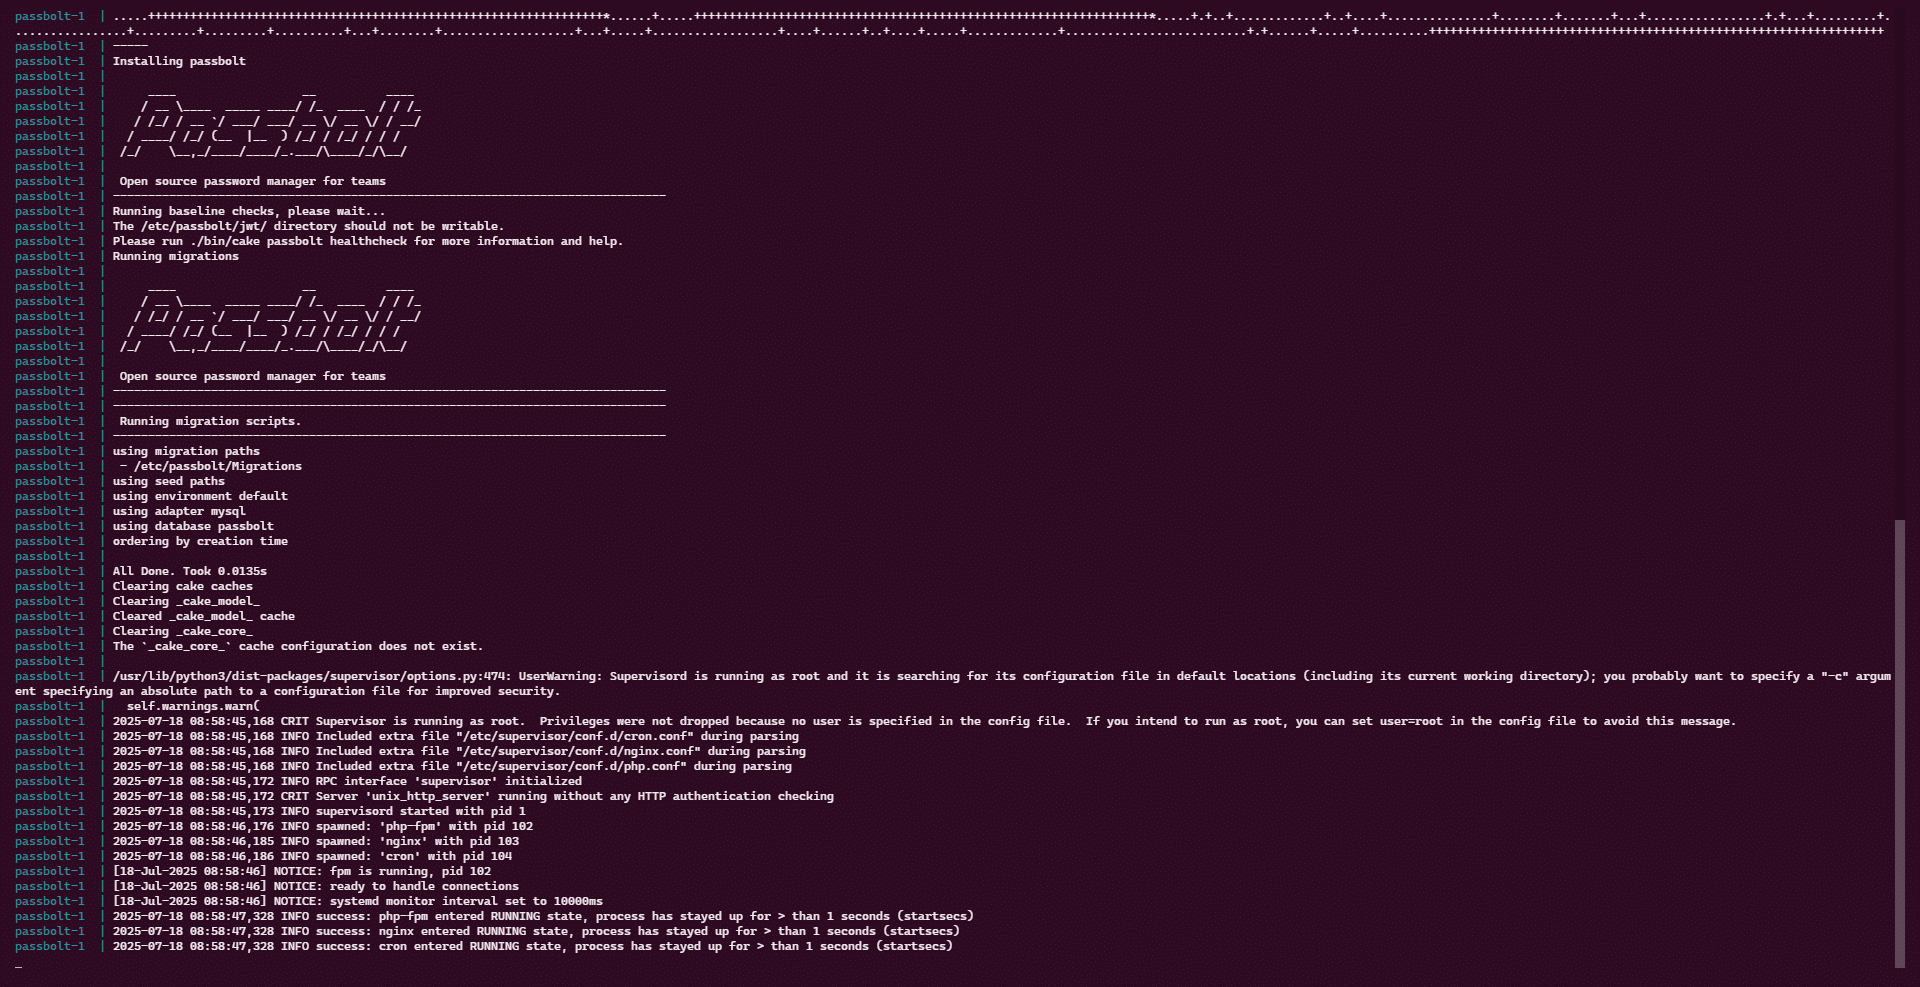
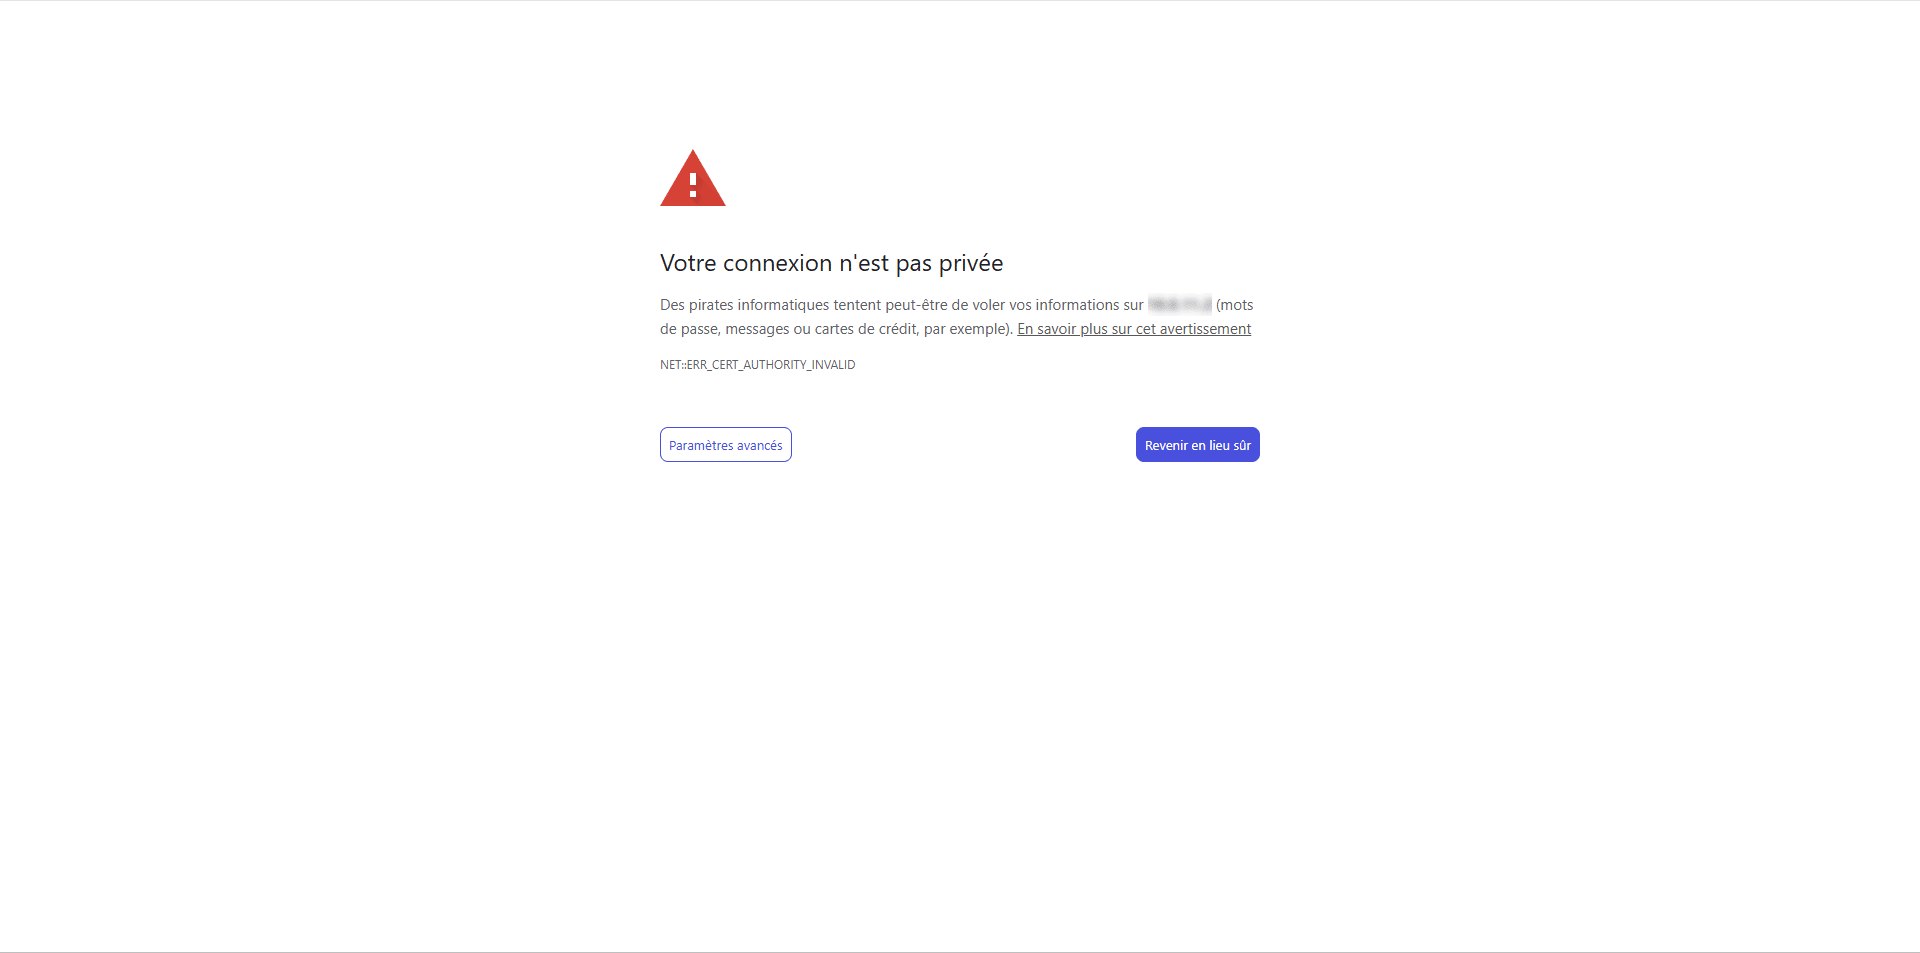
Test access to the web interface by going to the URL https://A.B.C.D, ignore the certificate error, and you should be taken to the login form.
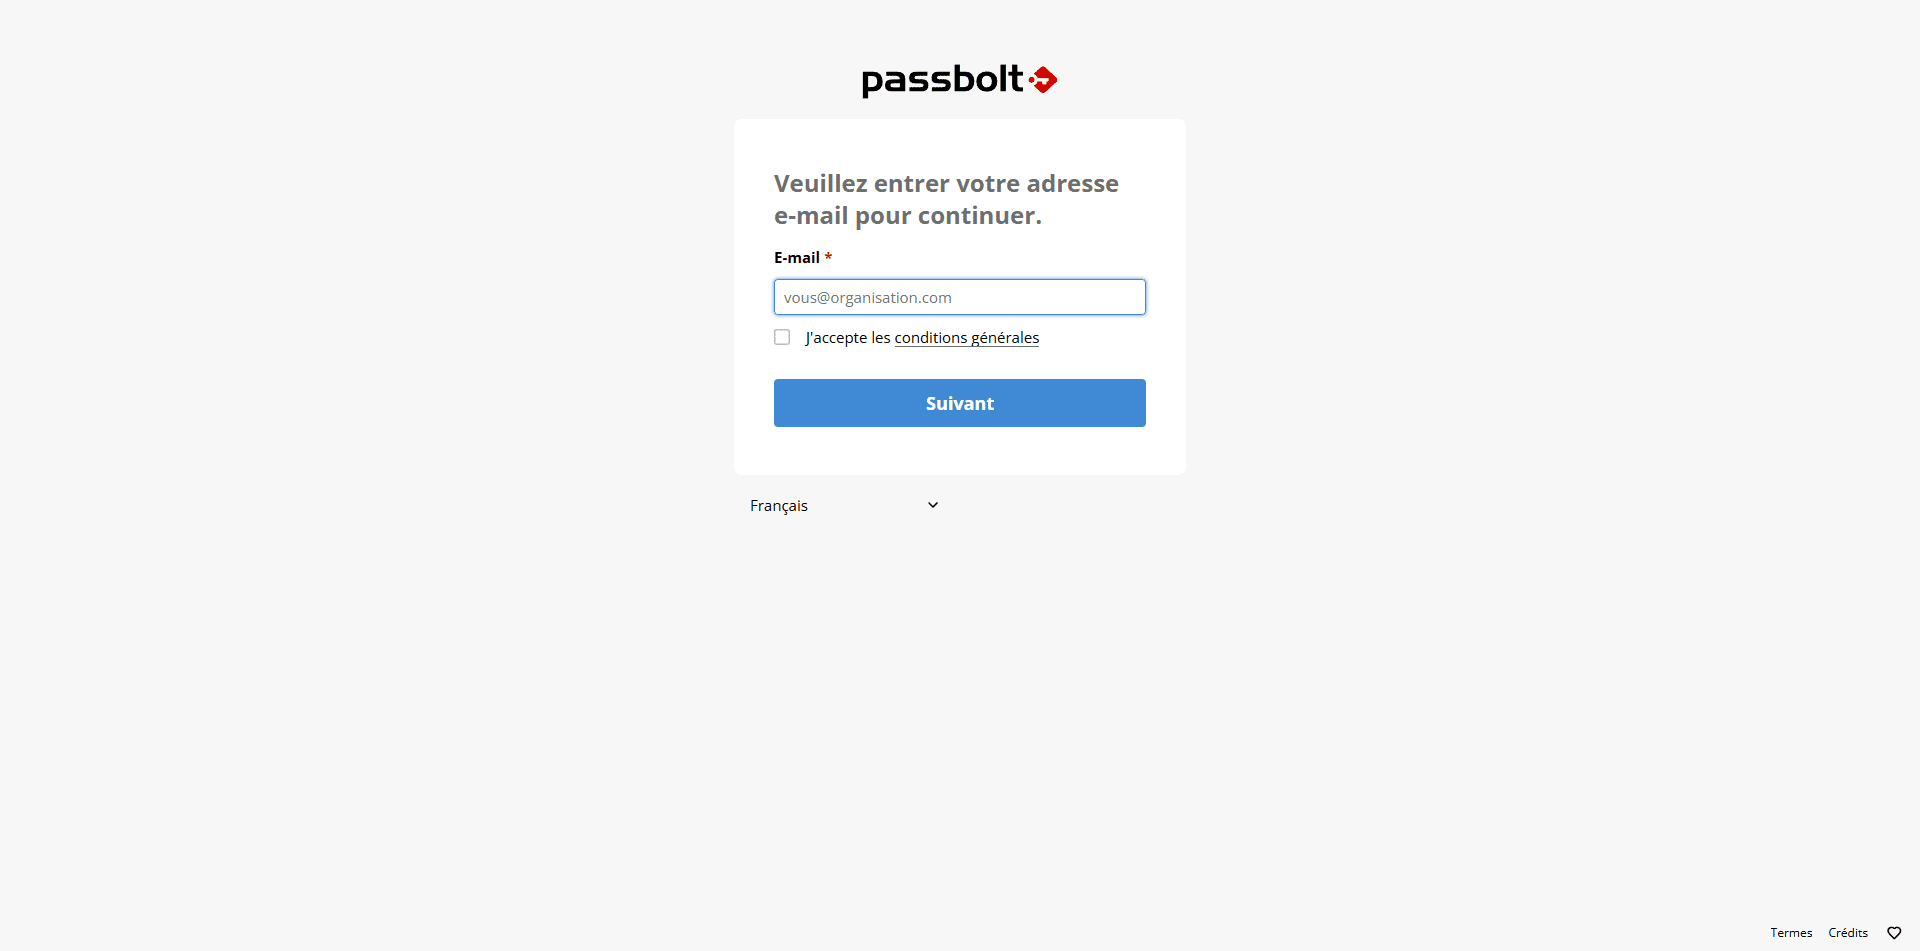
Passbolt is installed; now you just need to create the first administrator account and configure the password manager.
Create the first administrator in Passbolt
The first account must be created via the command line; enter the command below:
sudo docker compose exec passbolt su -m -c "/usr/share/php/passbolt/bin/cake passbolt register_user -u [email protected] -f Prenom -l NOM -r admin" -s /bin/sh www-data
The command will return a link; copy it and open it in your browser:
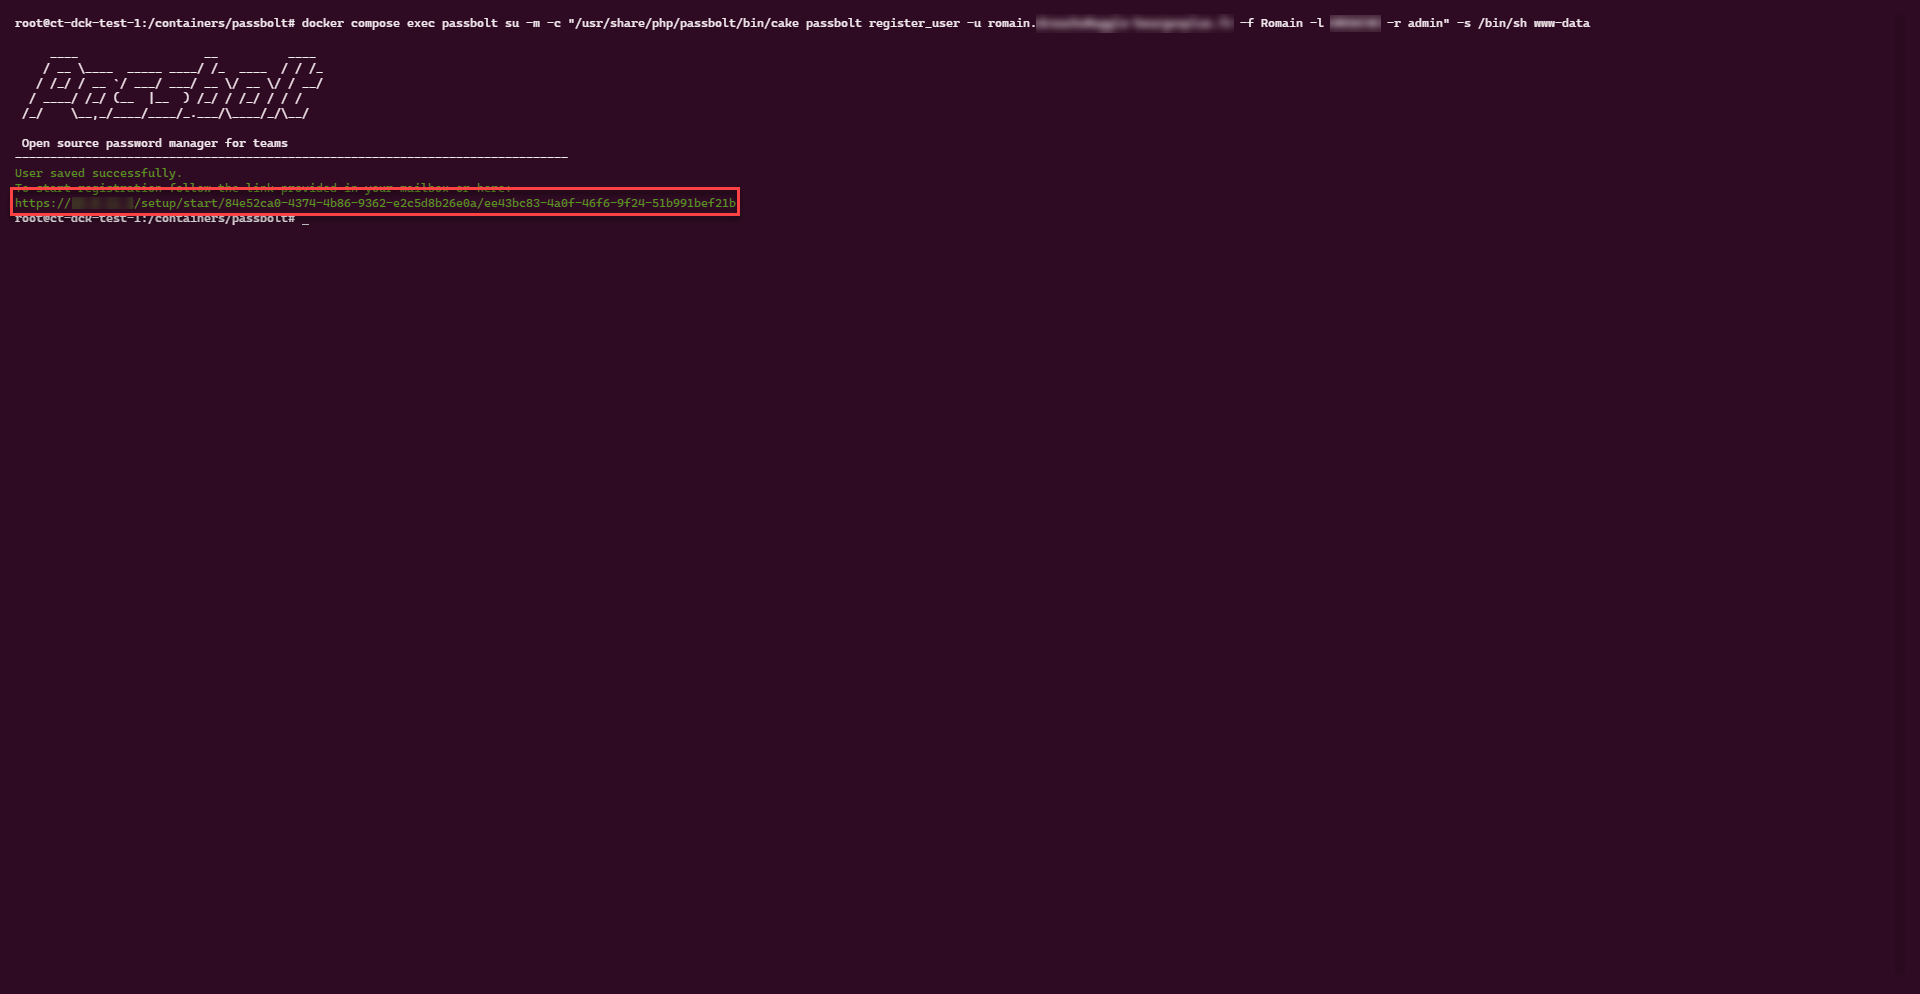
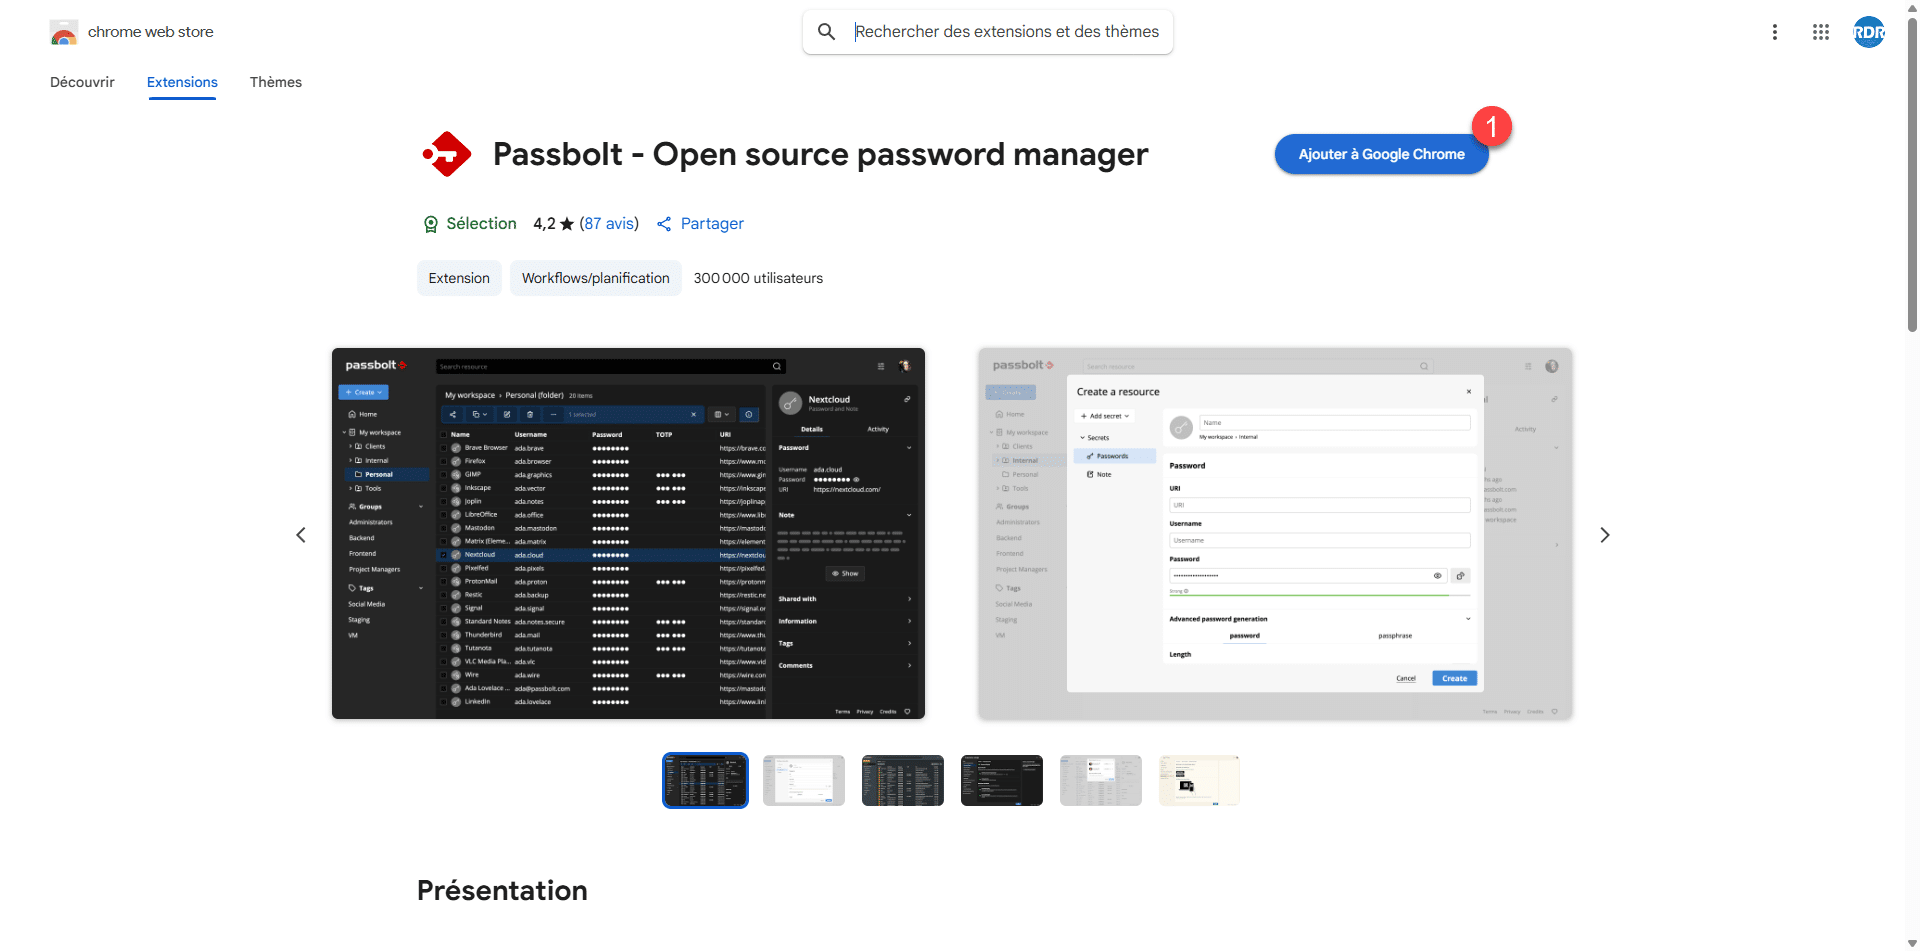
Clicking the link takes you to a page asking you to install the Passbolt extension in your browser; this is required. Click “Download Extension” 1 .
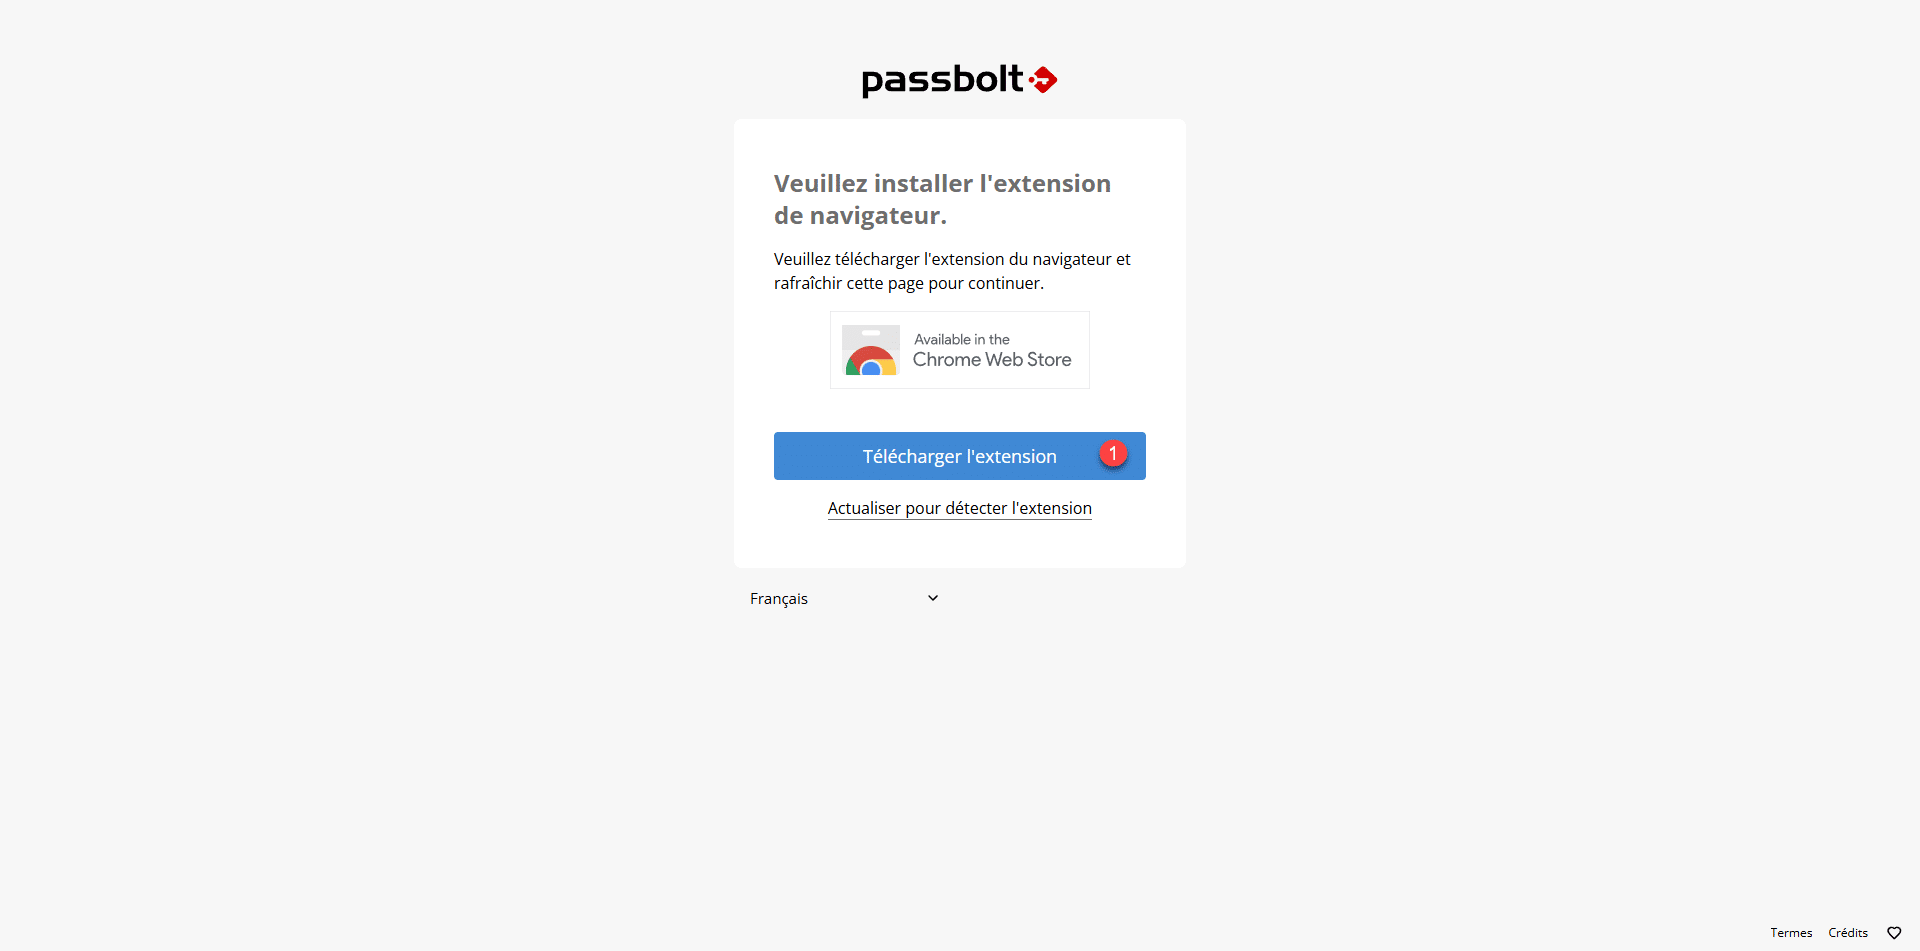
On the extension page, click “Add to XXXX” 1 .
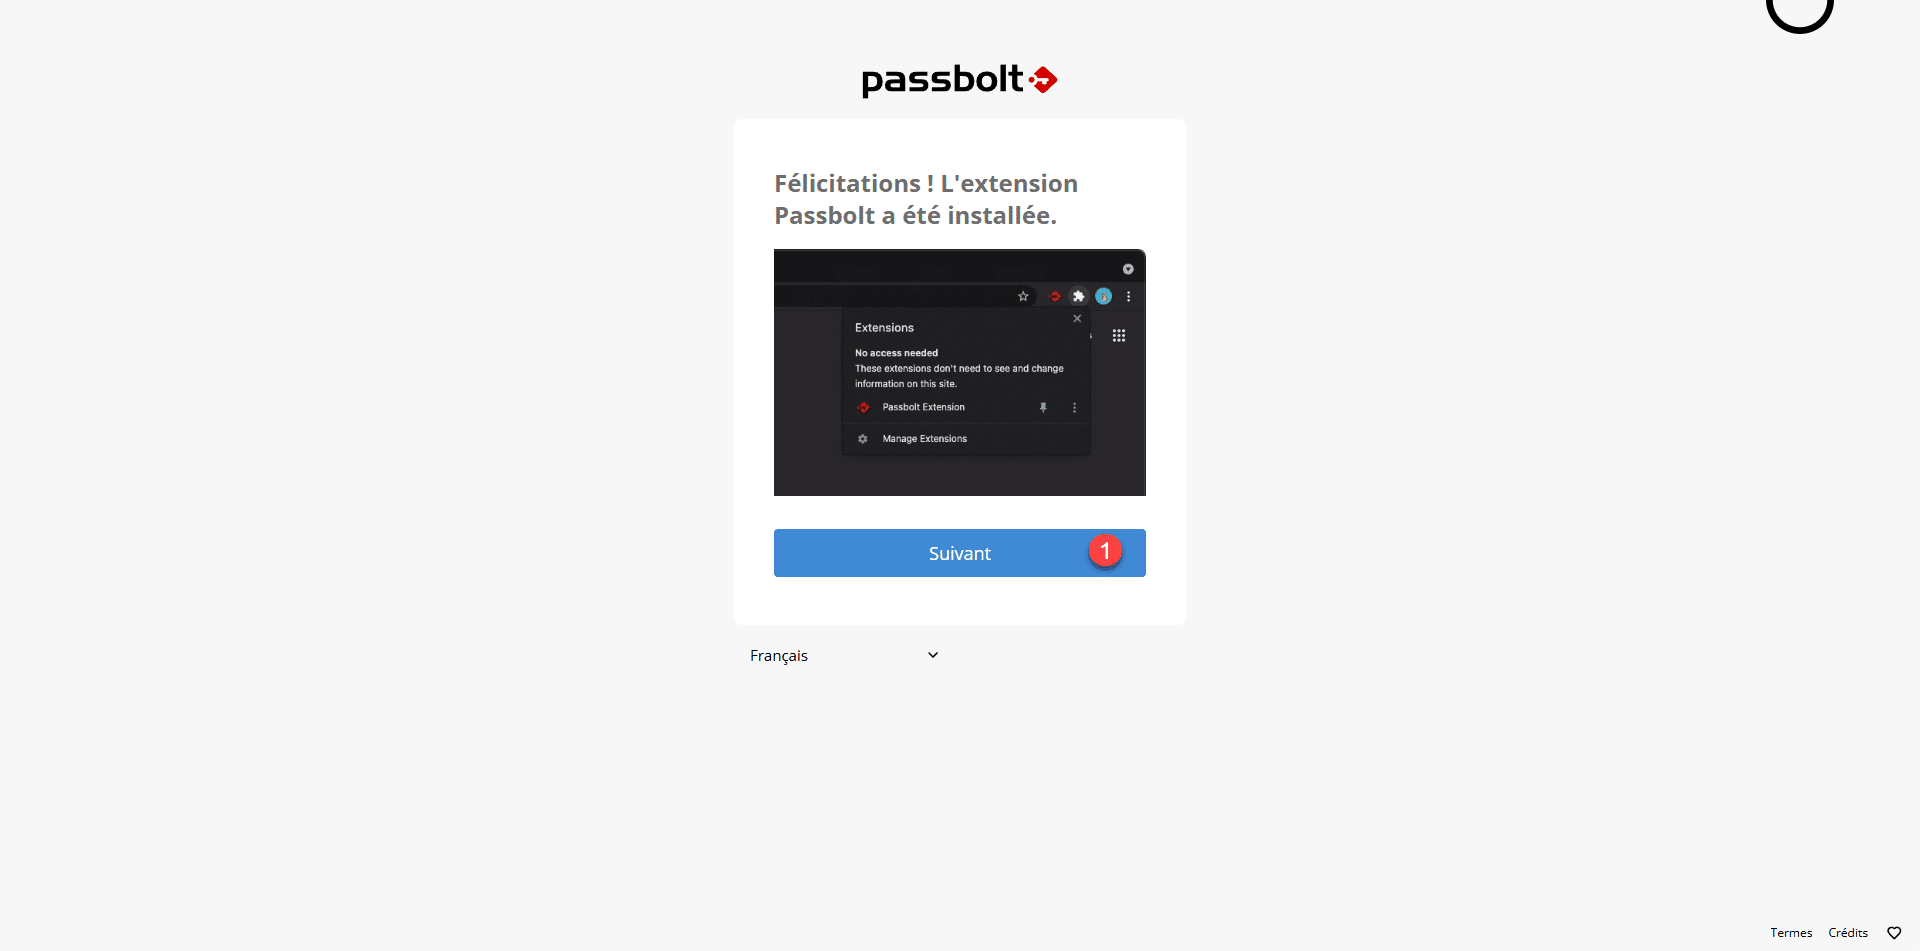
Once the Passbolt extension is installed, return to the page and click the “Next” button 1 .
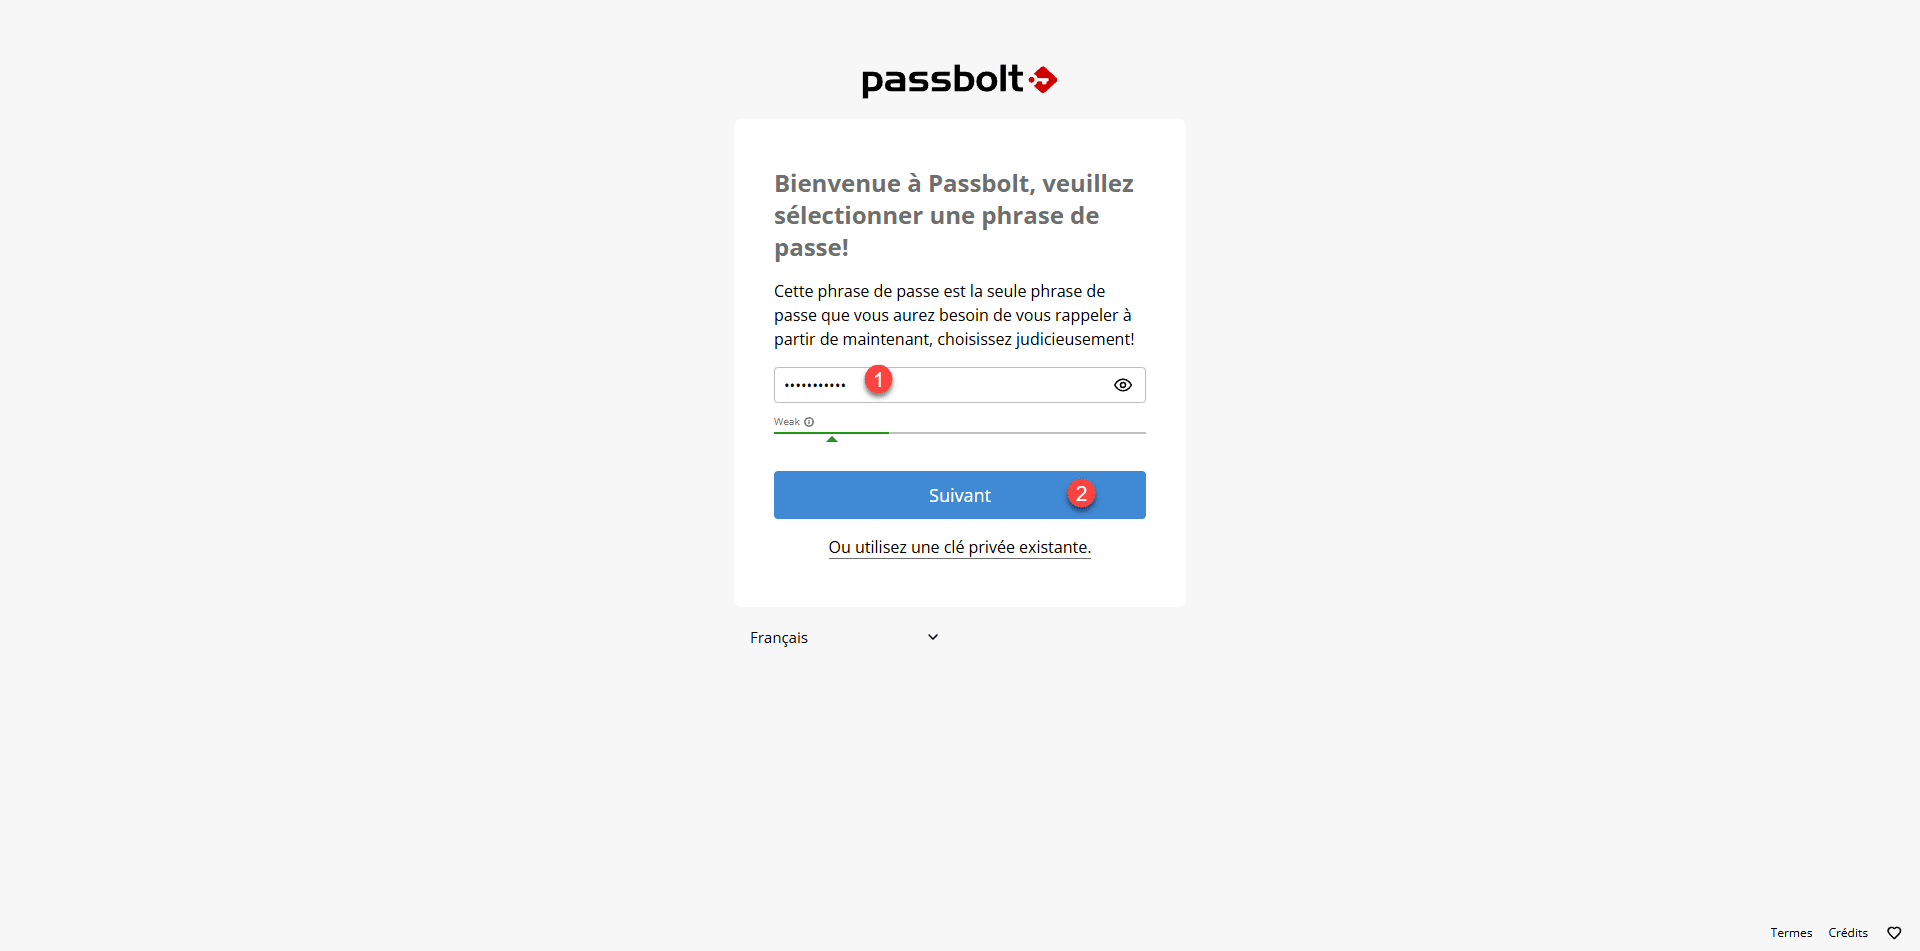
Enter a passphrase 1 that will grant you access to the password manager, then click “Next” 2 .
Save the file that will allow you to recover your account. Once you’ve done this, check the box: “I have saved my recovery file…” 1 and click “Next” 2 .
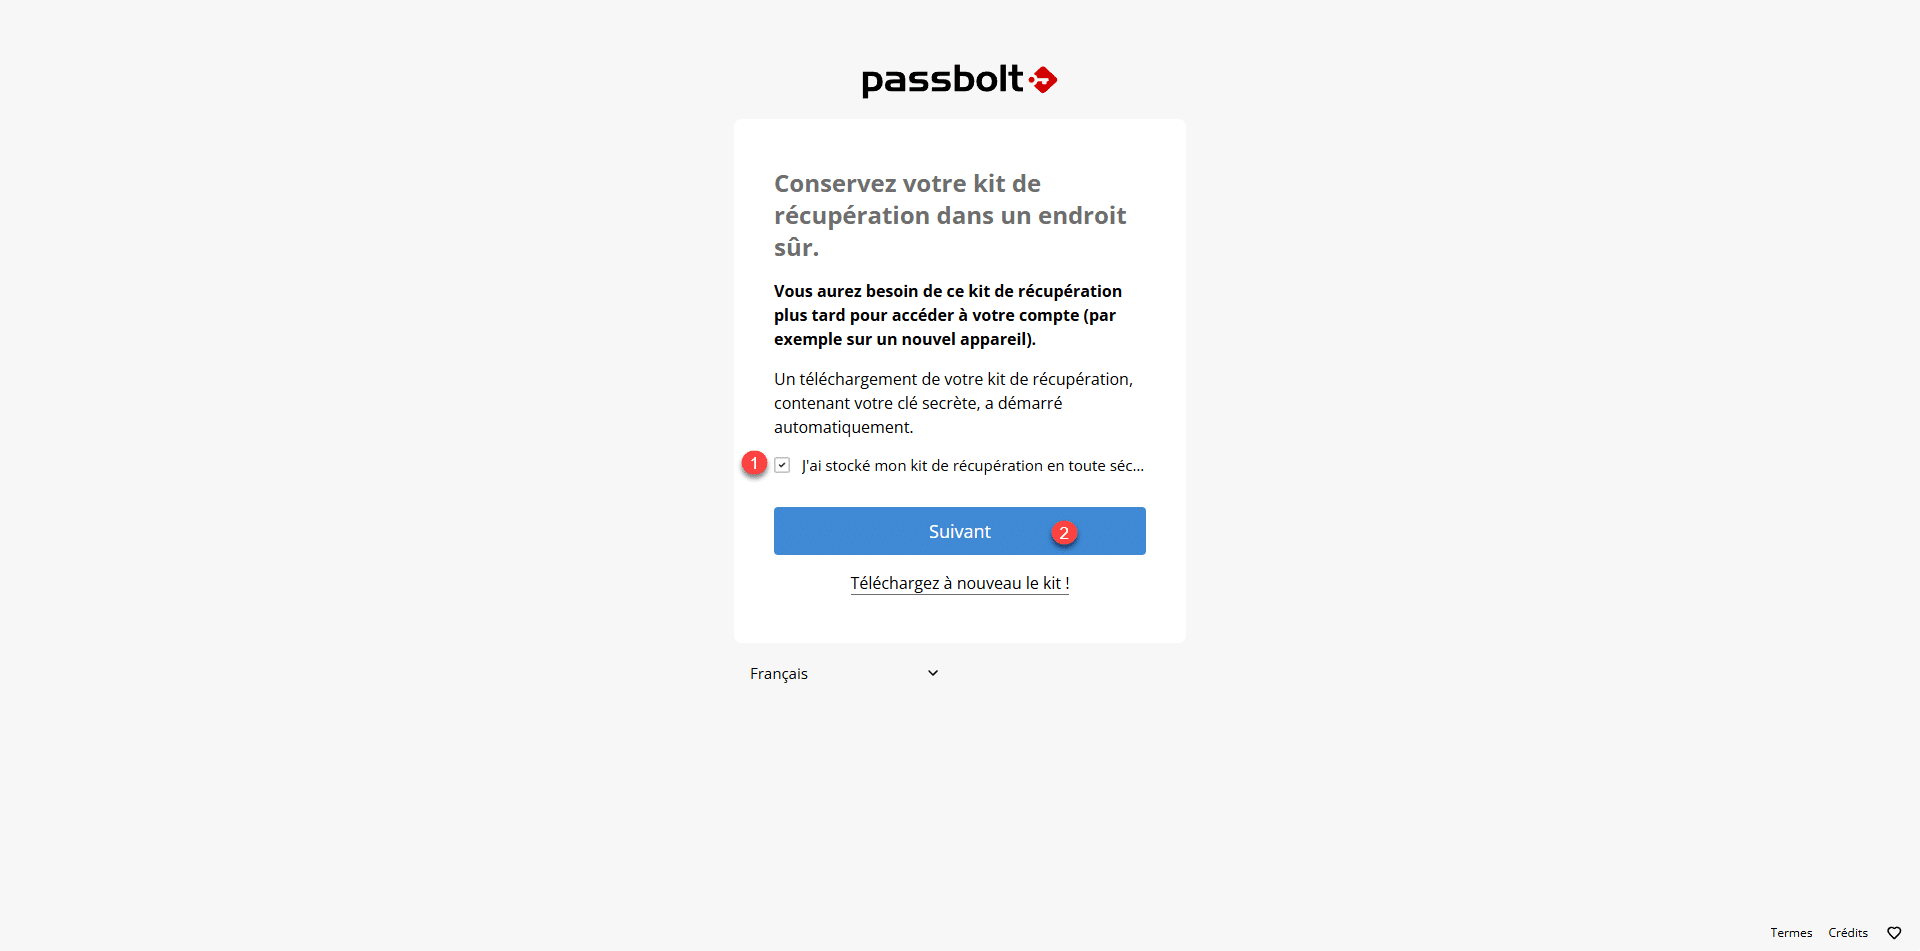
This file must be saved in a secure and permanent location; its contents allow you to recover your vault in the event of a change in browser and/or computer. Without it, access will be lost and cannot be recovered.
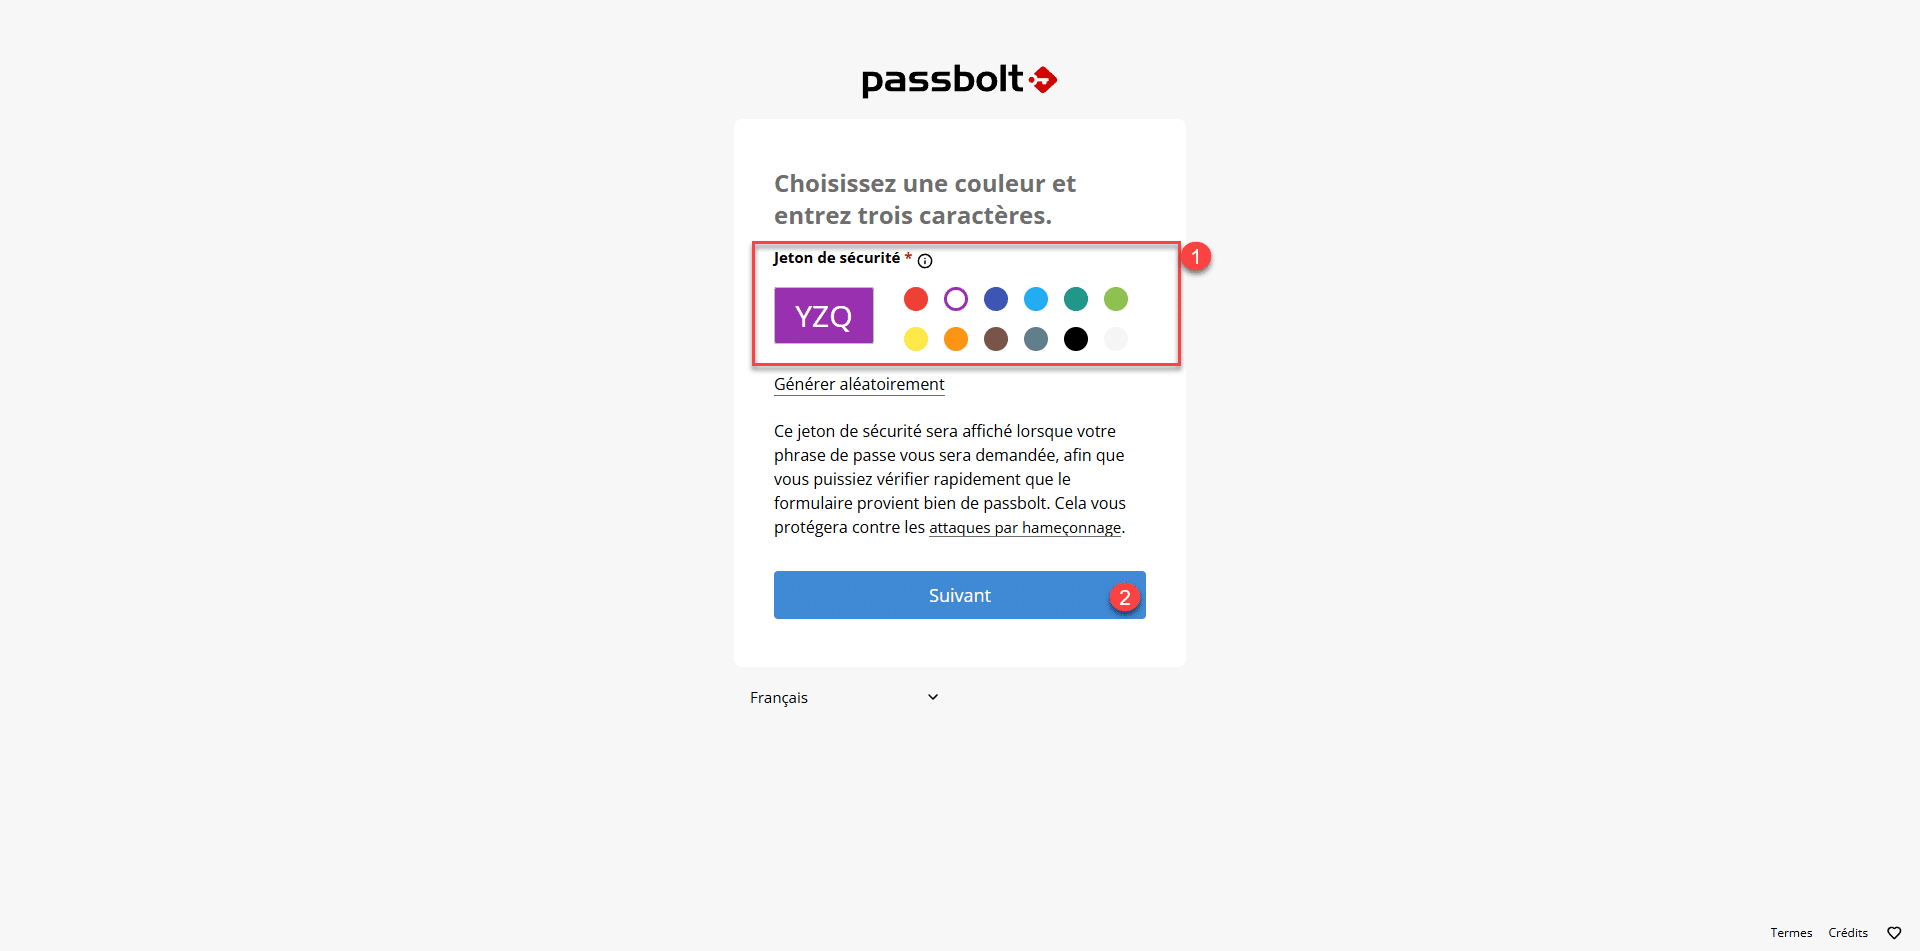
Configure the security token 1 ; this ensures that the request to enter your master password actually comes from Passbolt. Click Next 2 .
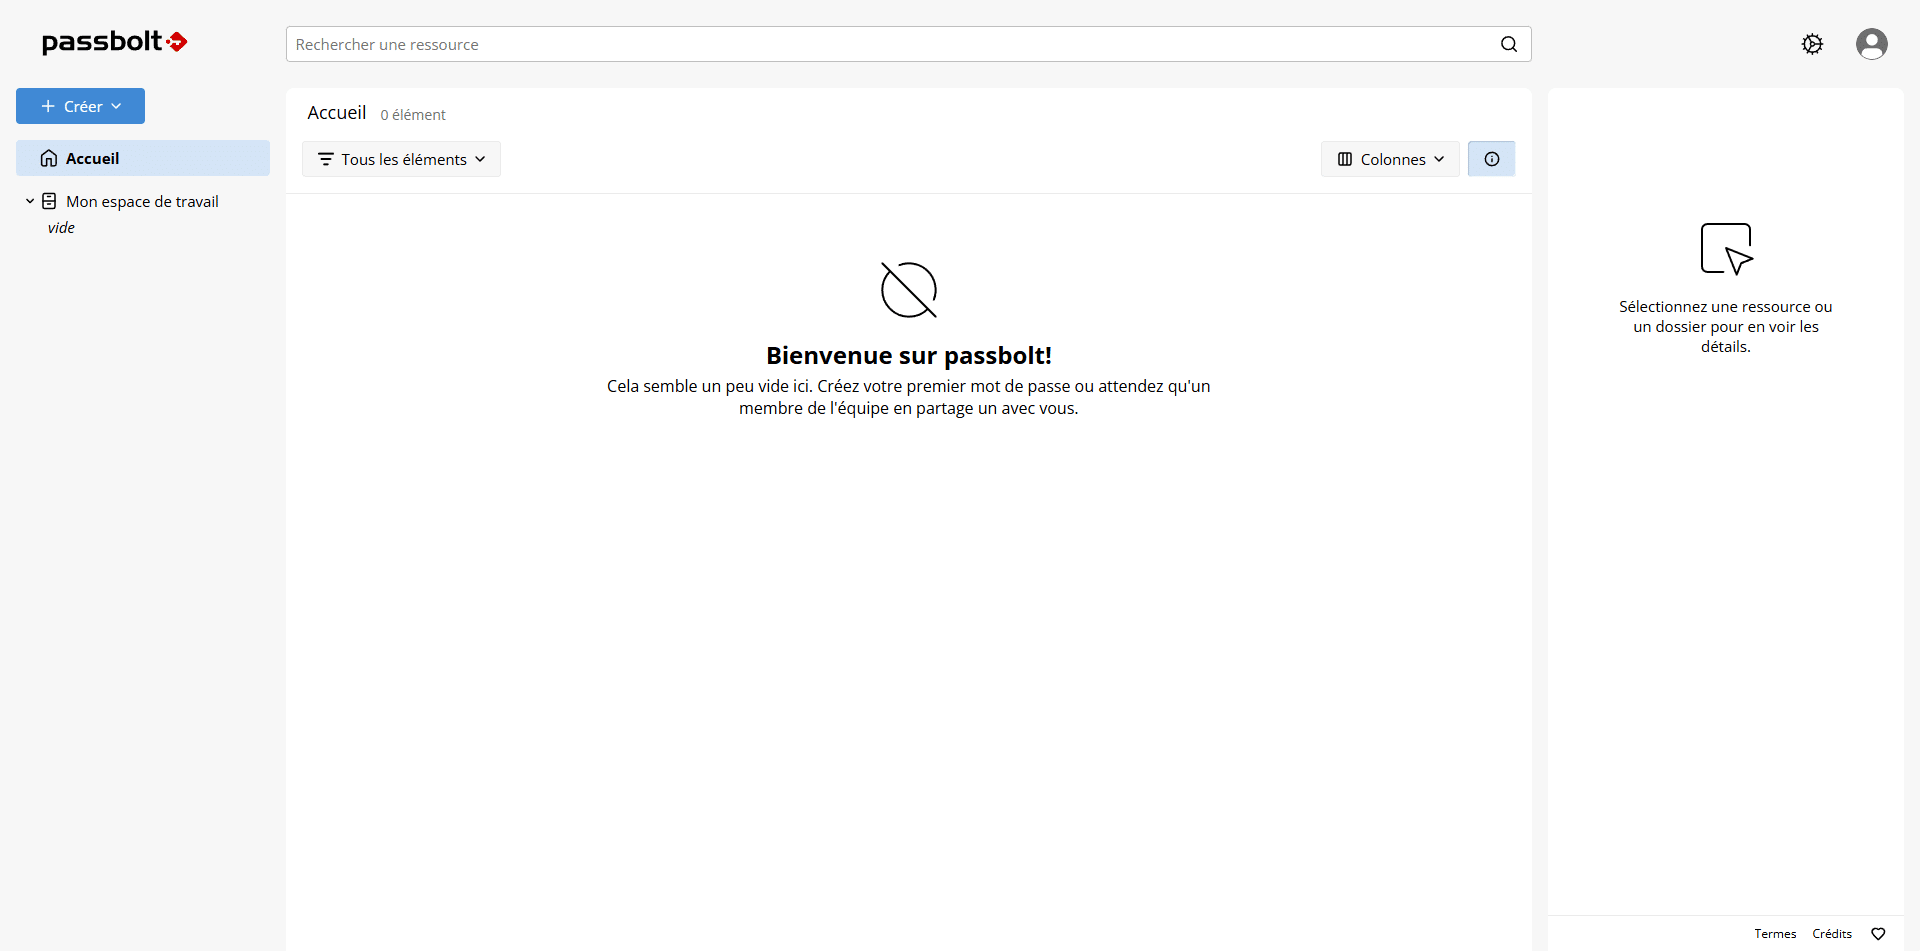
The account has been created, and you are now logged in to your Passbolt password vault.
Creating a Password in Passbolt
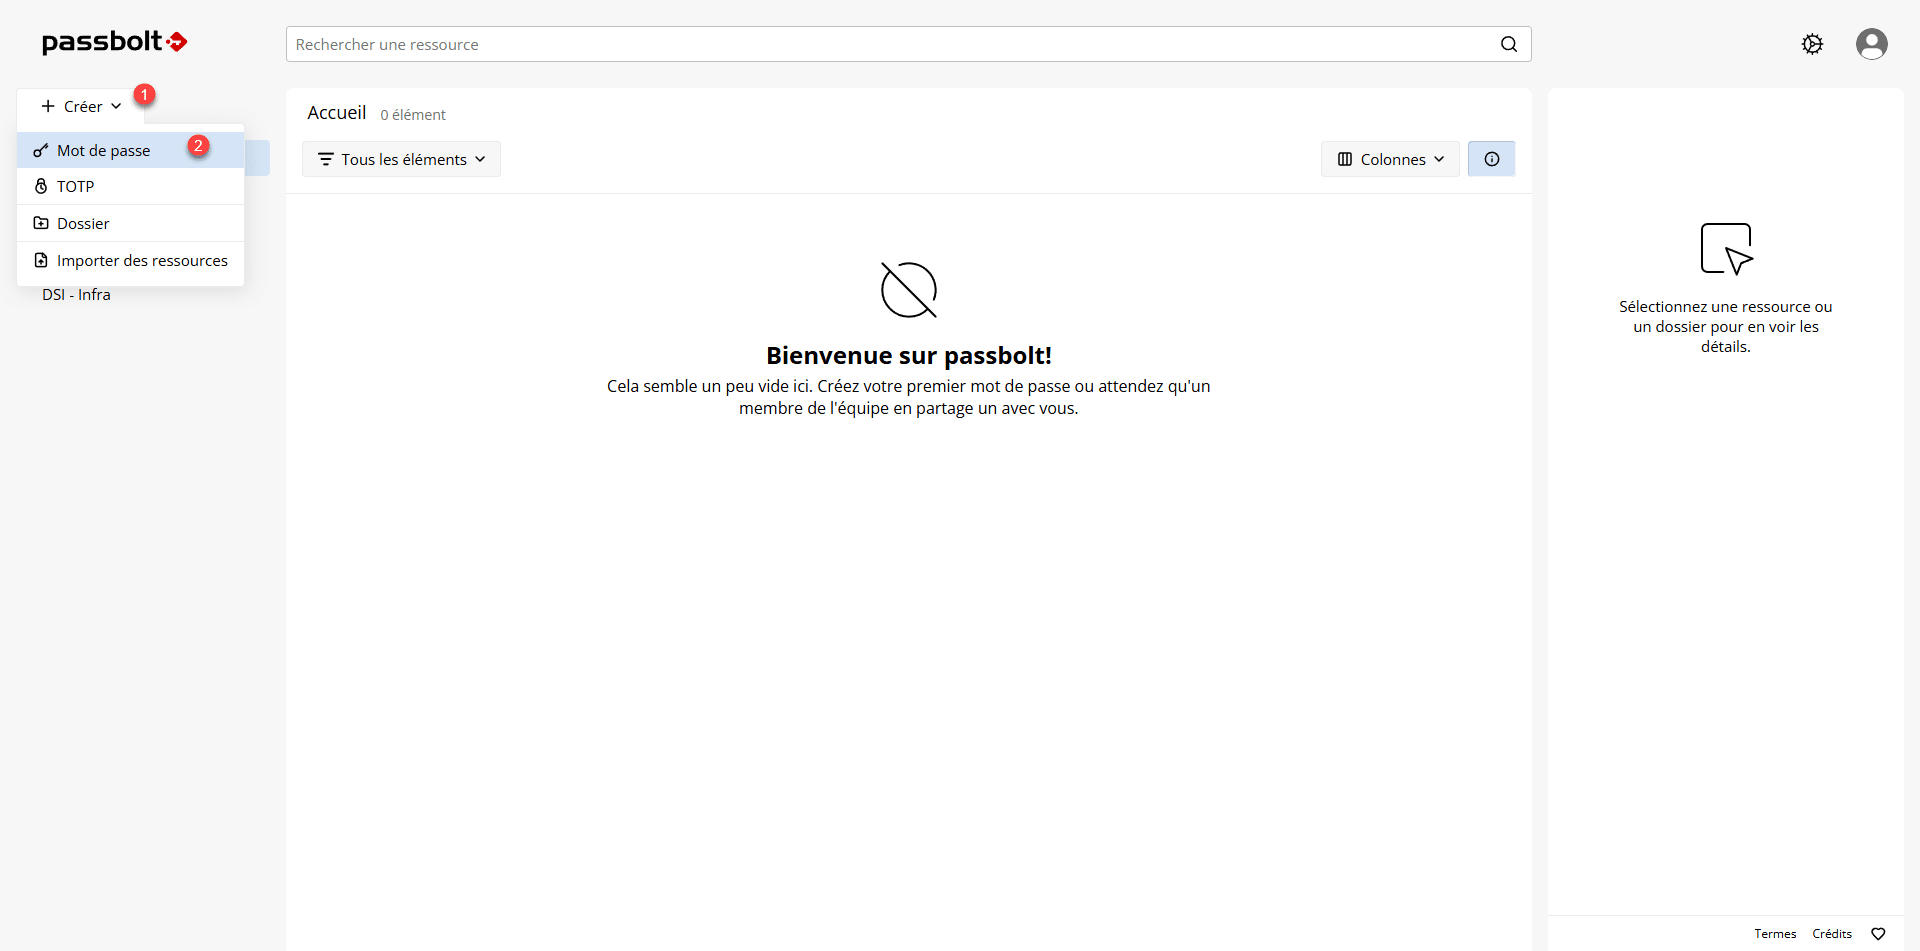
To get started with Passbolt, let’s see how to create a password in Passbolt. From the web interface, click Create 1 , then click Password 2 .
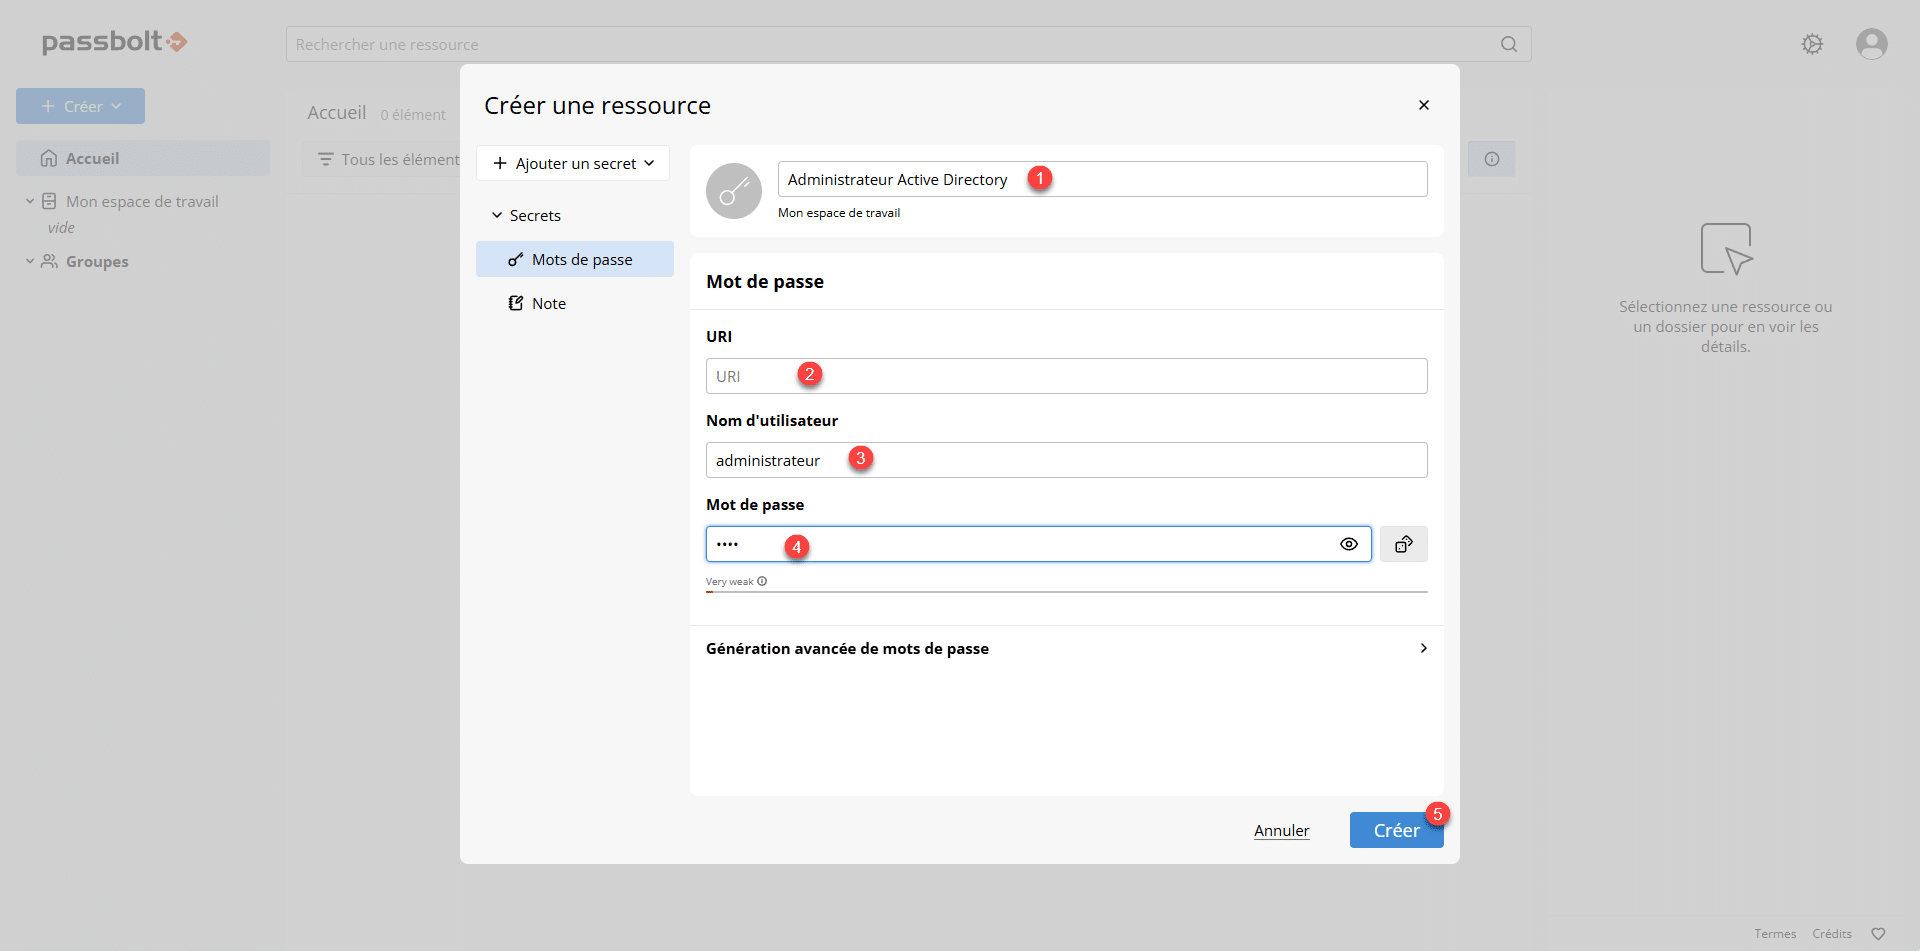
Enter a name/title 1 for the password, enter the URI 2 if it’s linked to a website—this allows the plugin to suggest and autofill the form—then enter the username 3 and password 4 , and click the Create button 5 .
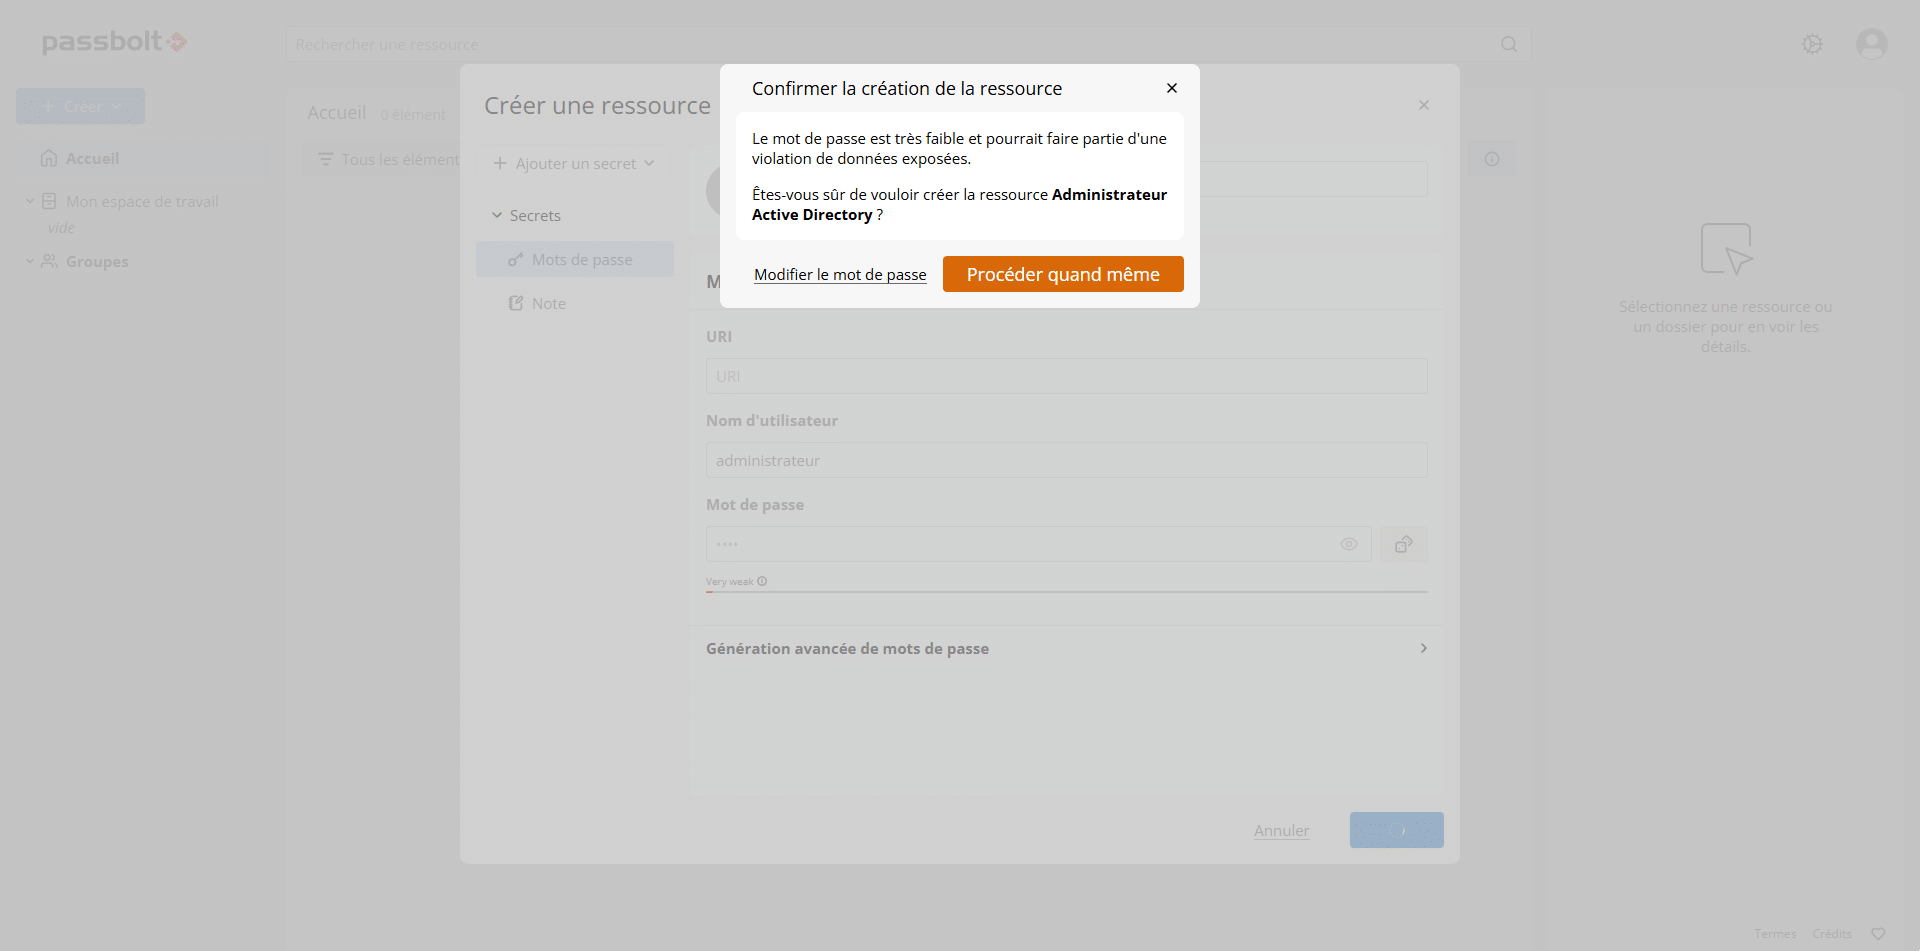
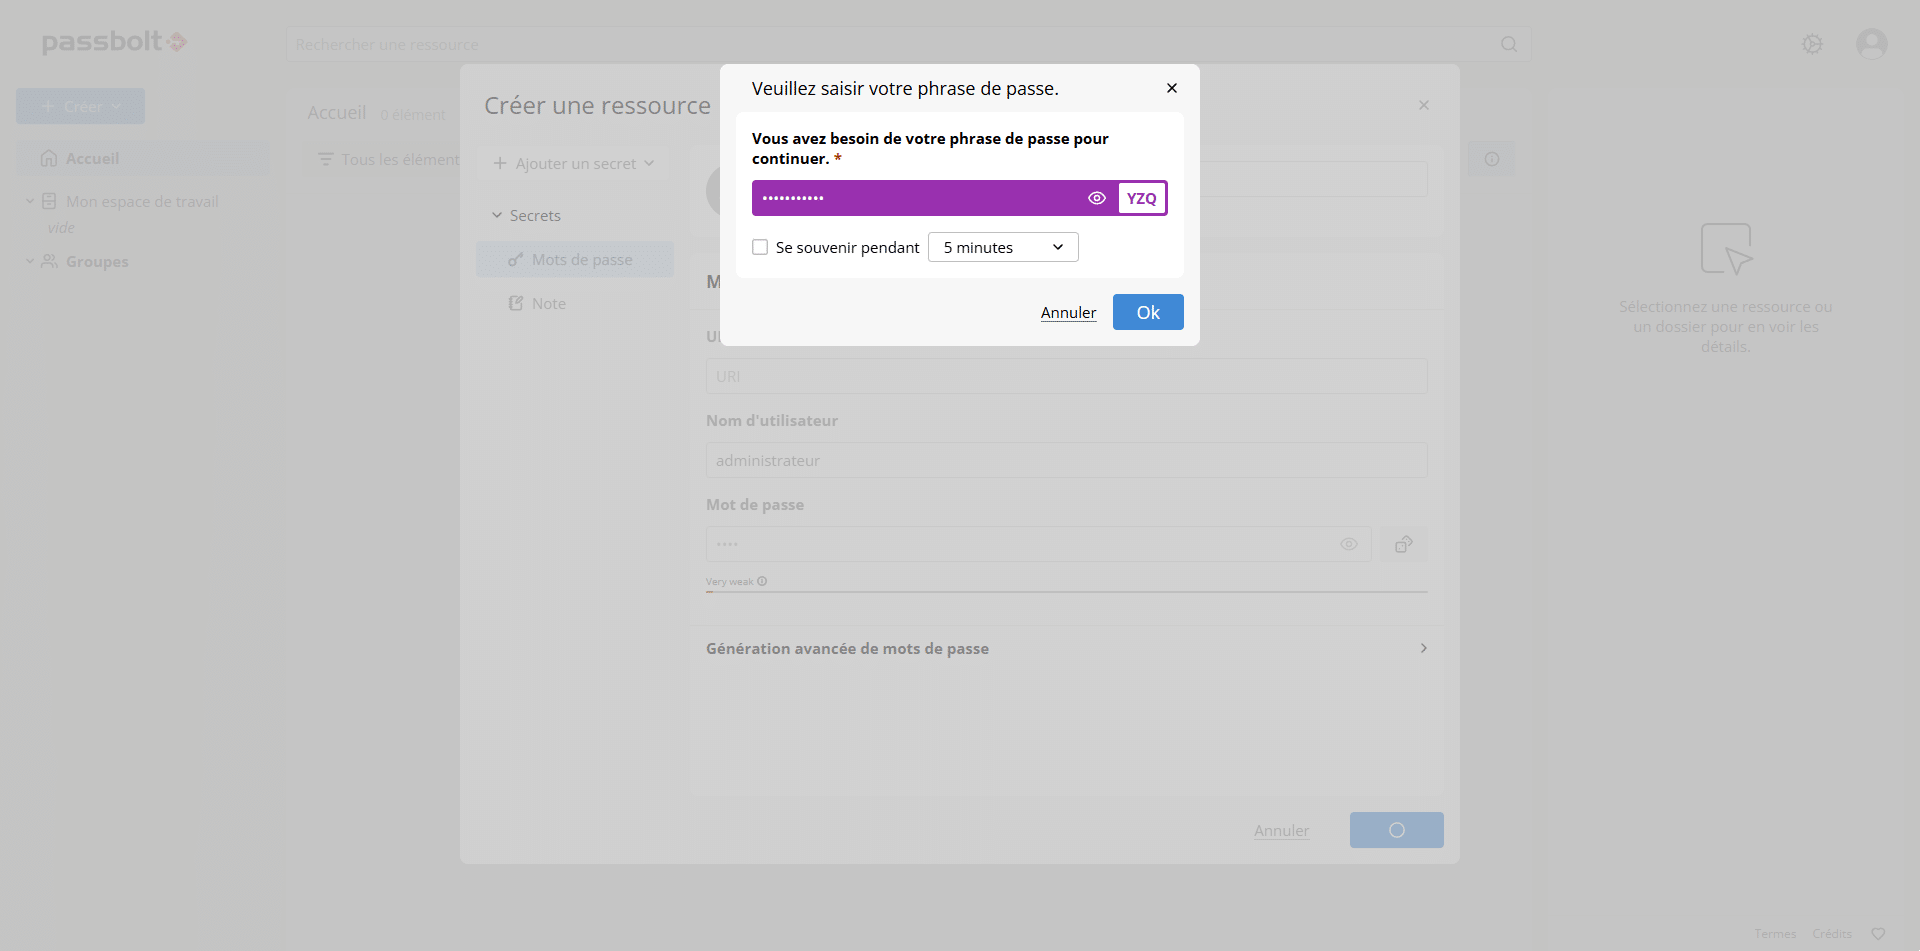
When saving the password, you may receive a weak password warning, and you may also be asked to enter the master password.
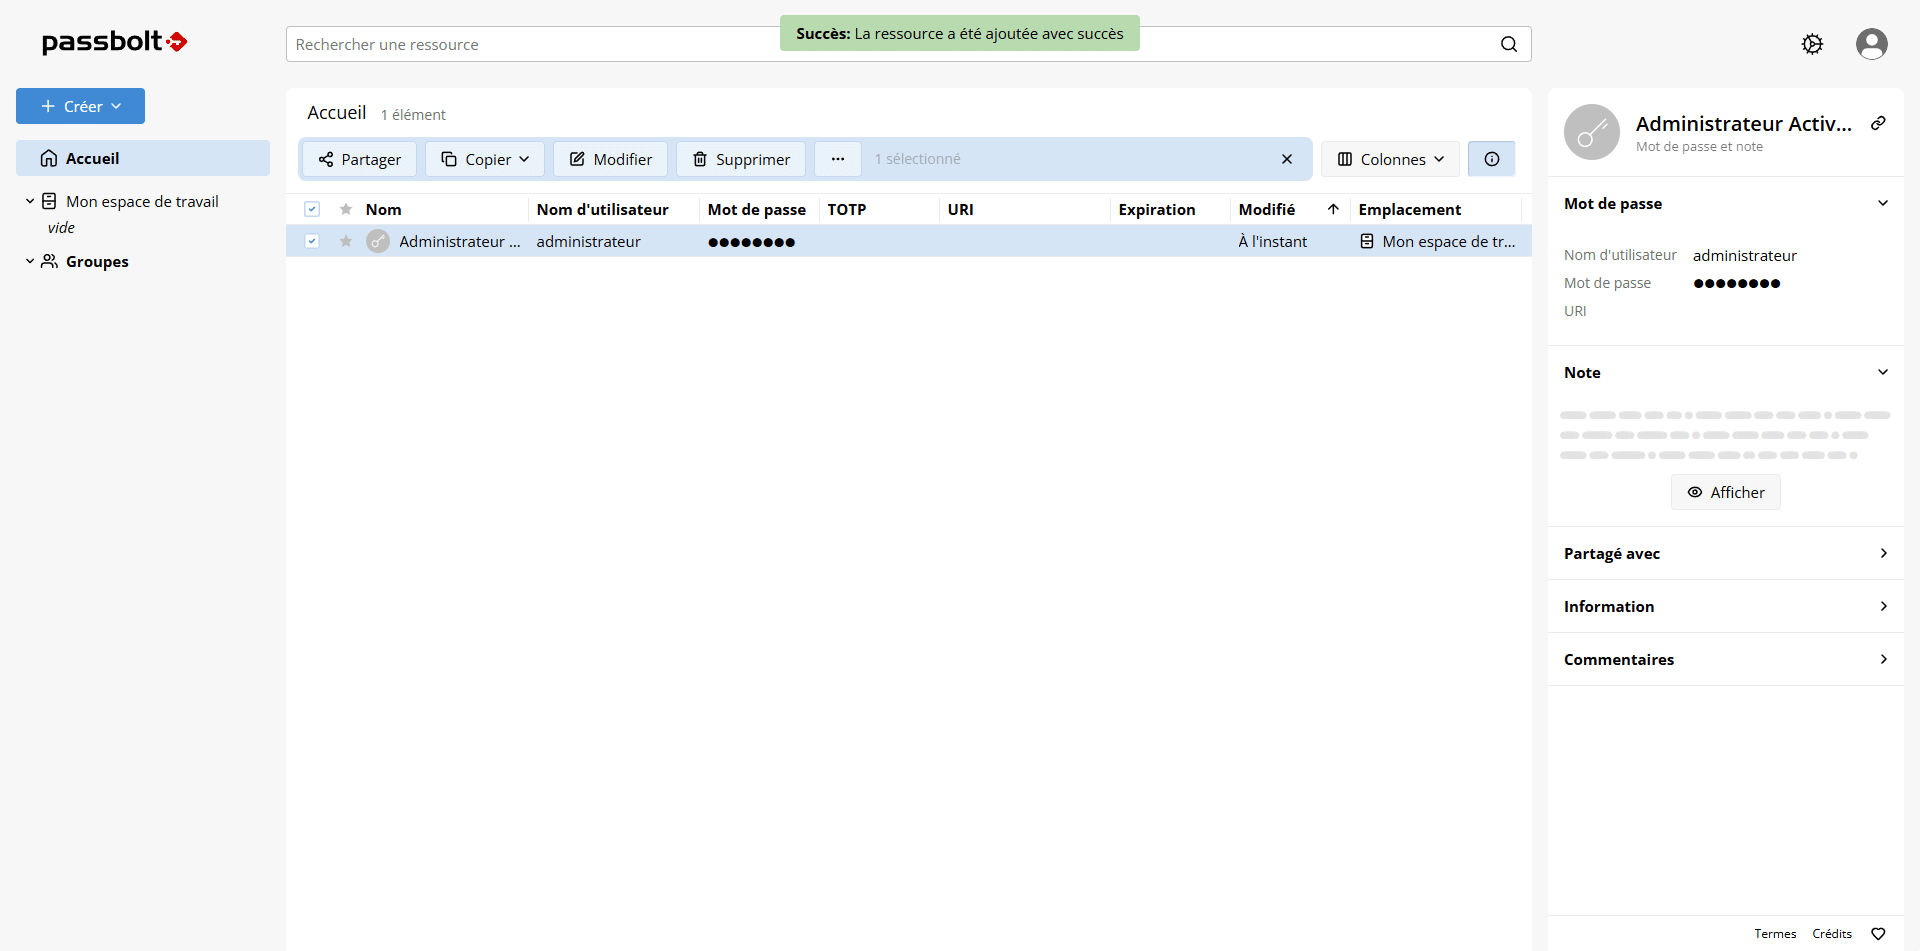
The password is added to Passbolt.
Enable Auto-Registration in Passbolt
Auto-registration in Passbolt allows users in your company to automatically create their accounts in the software based on the authorized email domain(s).
This feature eliminates the need to invite users; they can set up their accounts independently.
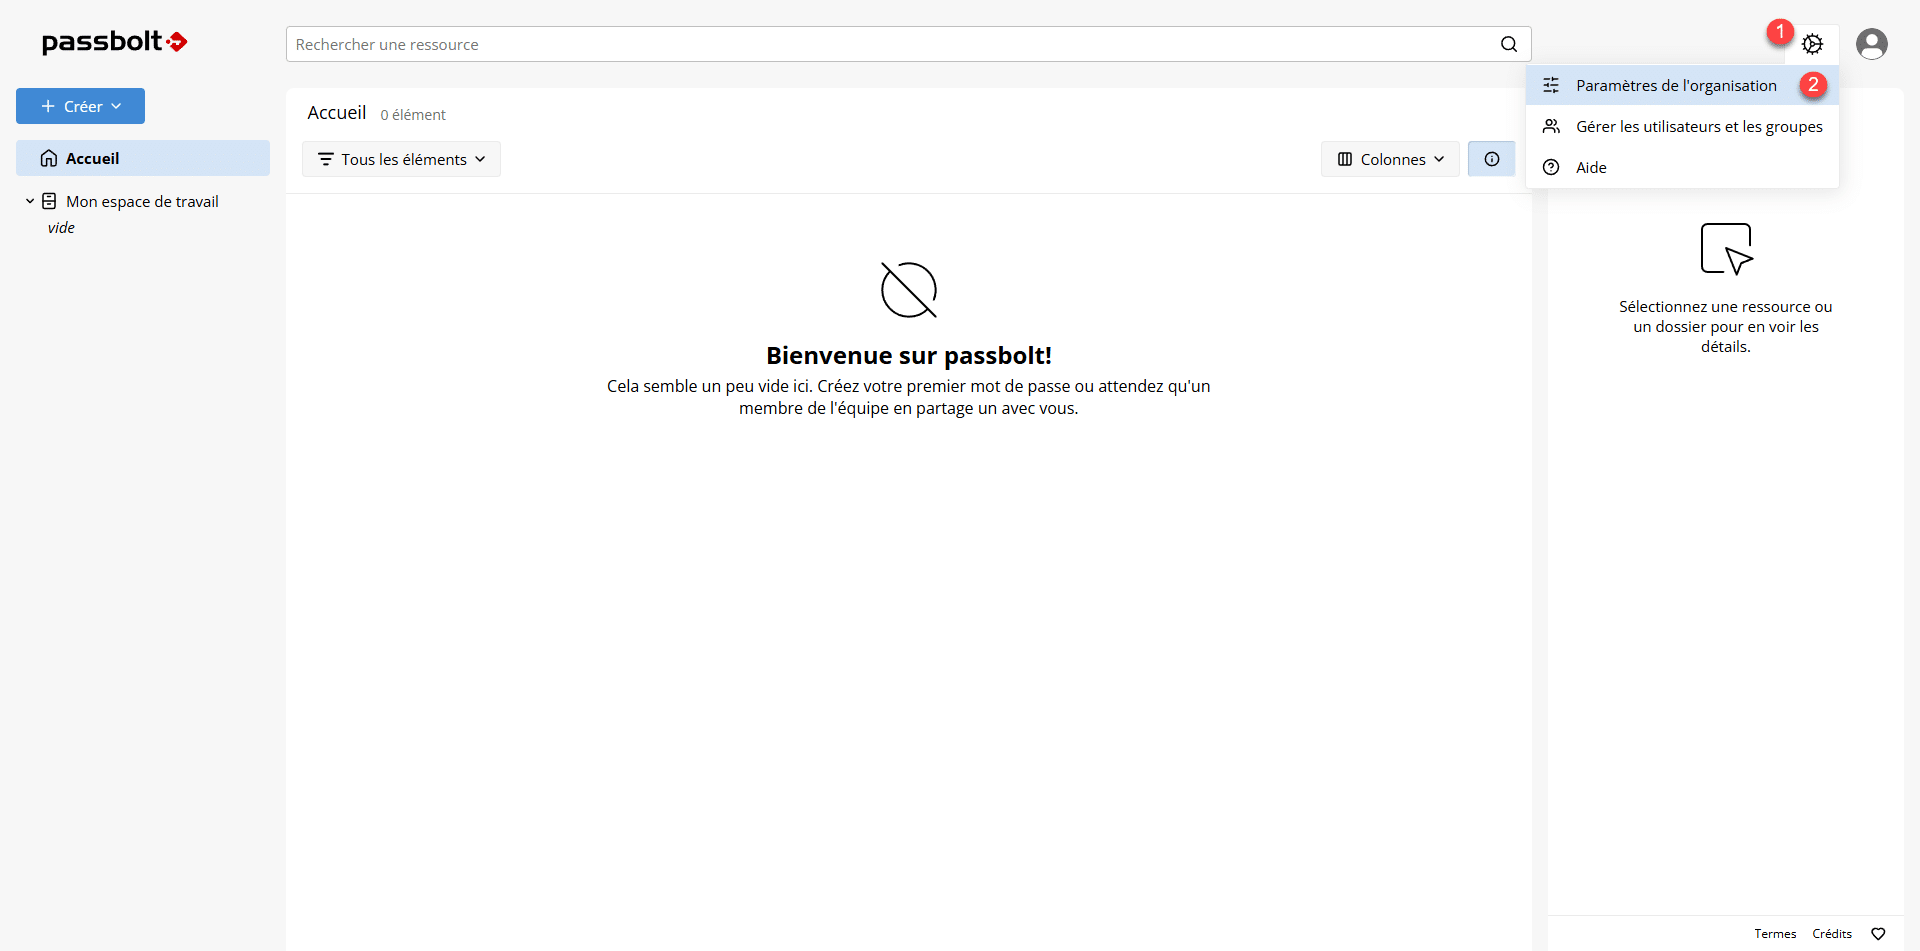
Click the gear icon 1 , then click Organization Settings 2 .
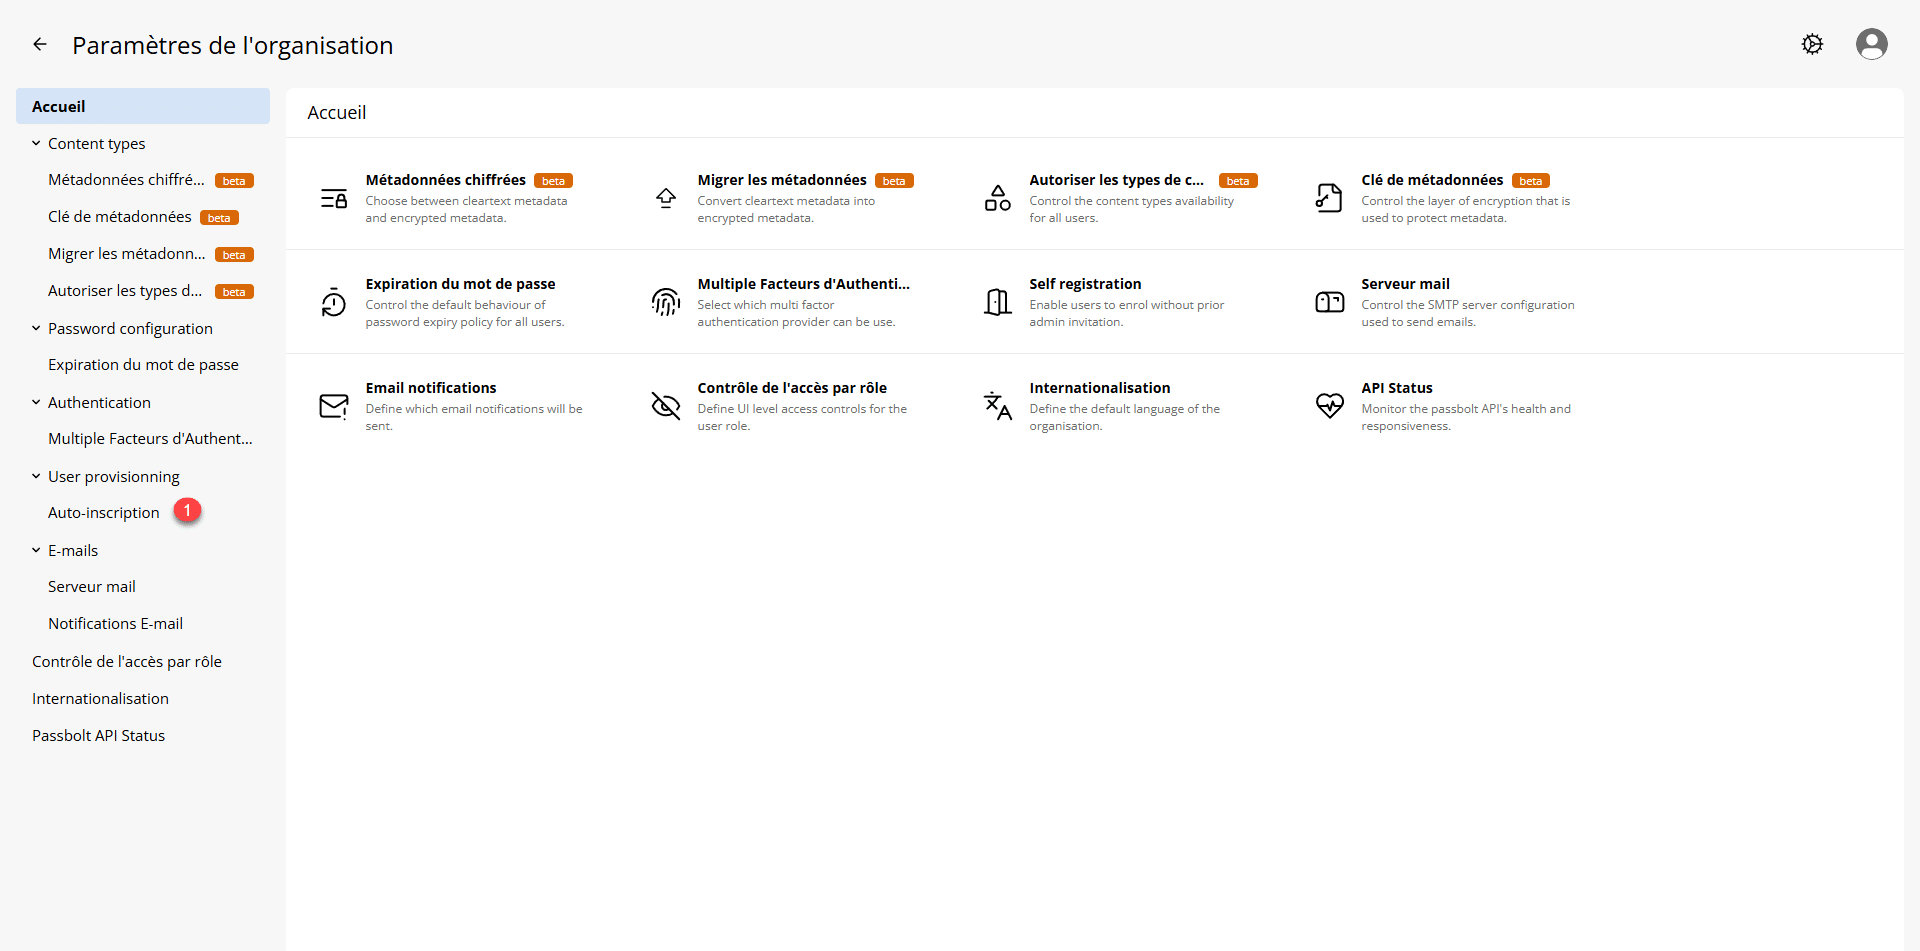
Click on Self-Registration 1 to access the settings.
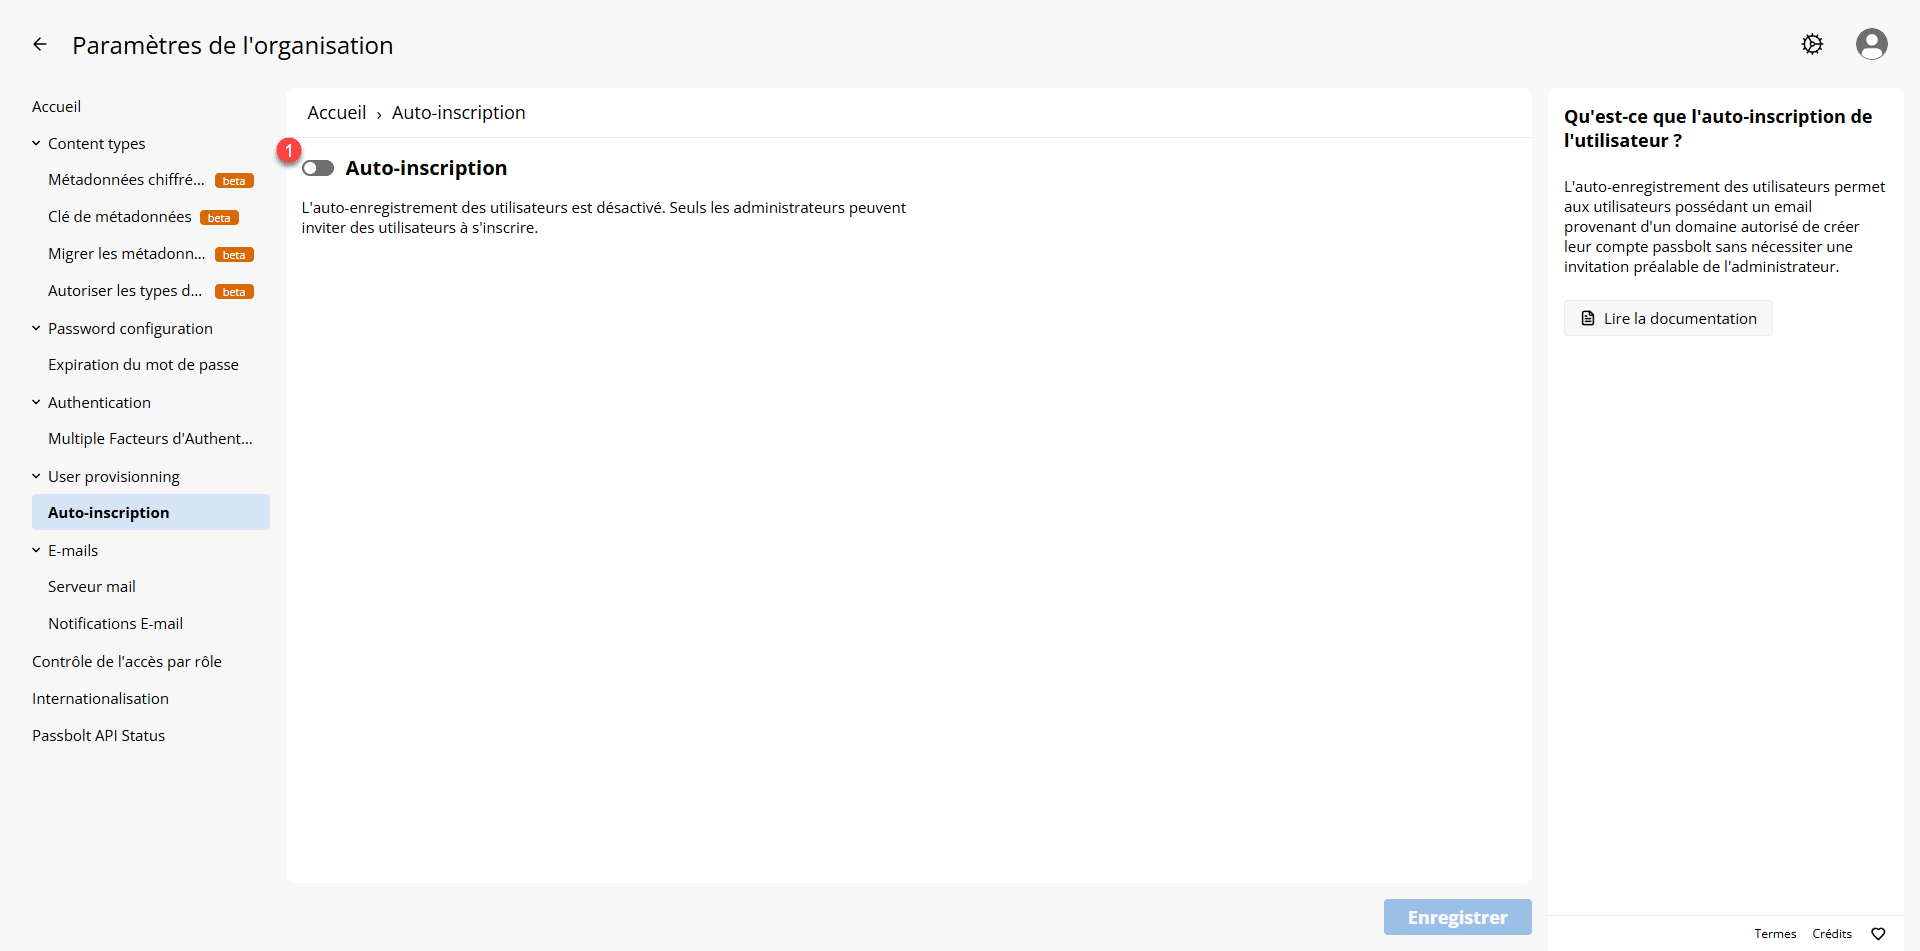
By default, auto-registration is not enabled; click the toggle 1 .
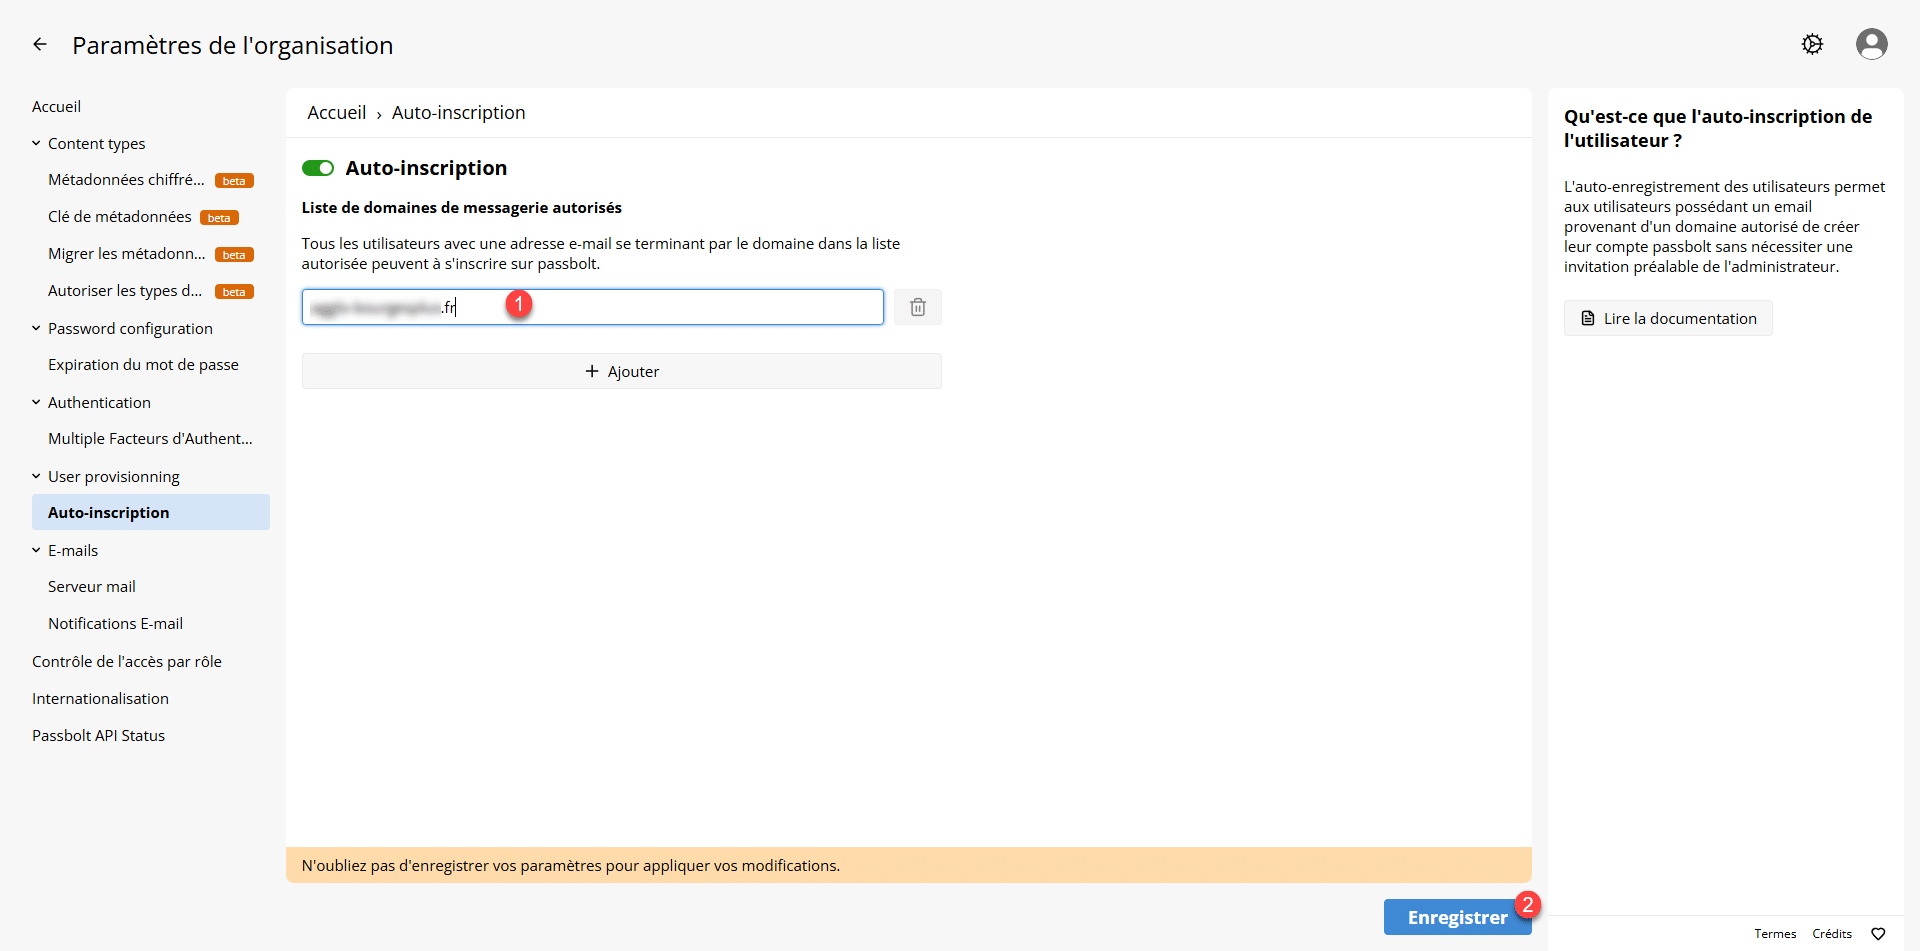
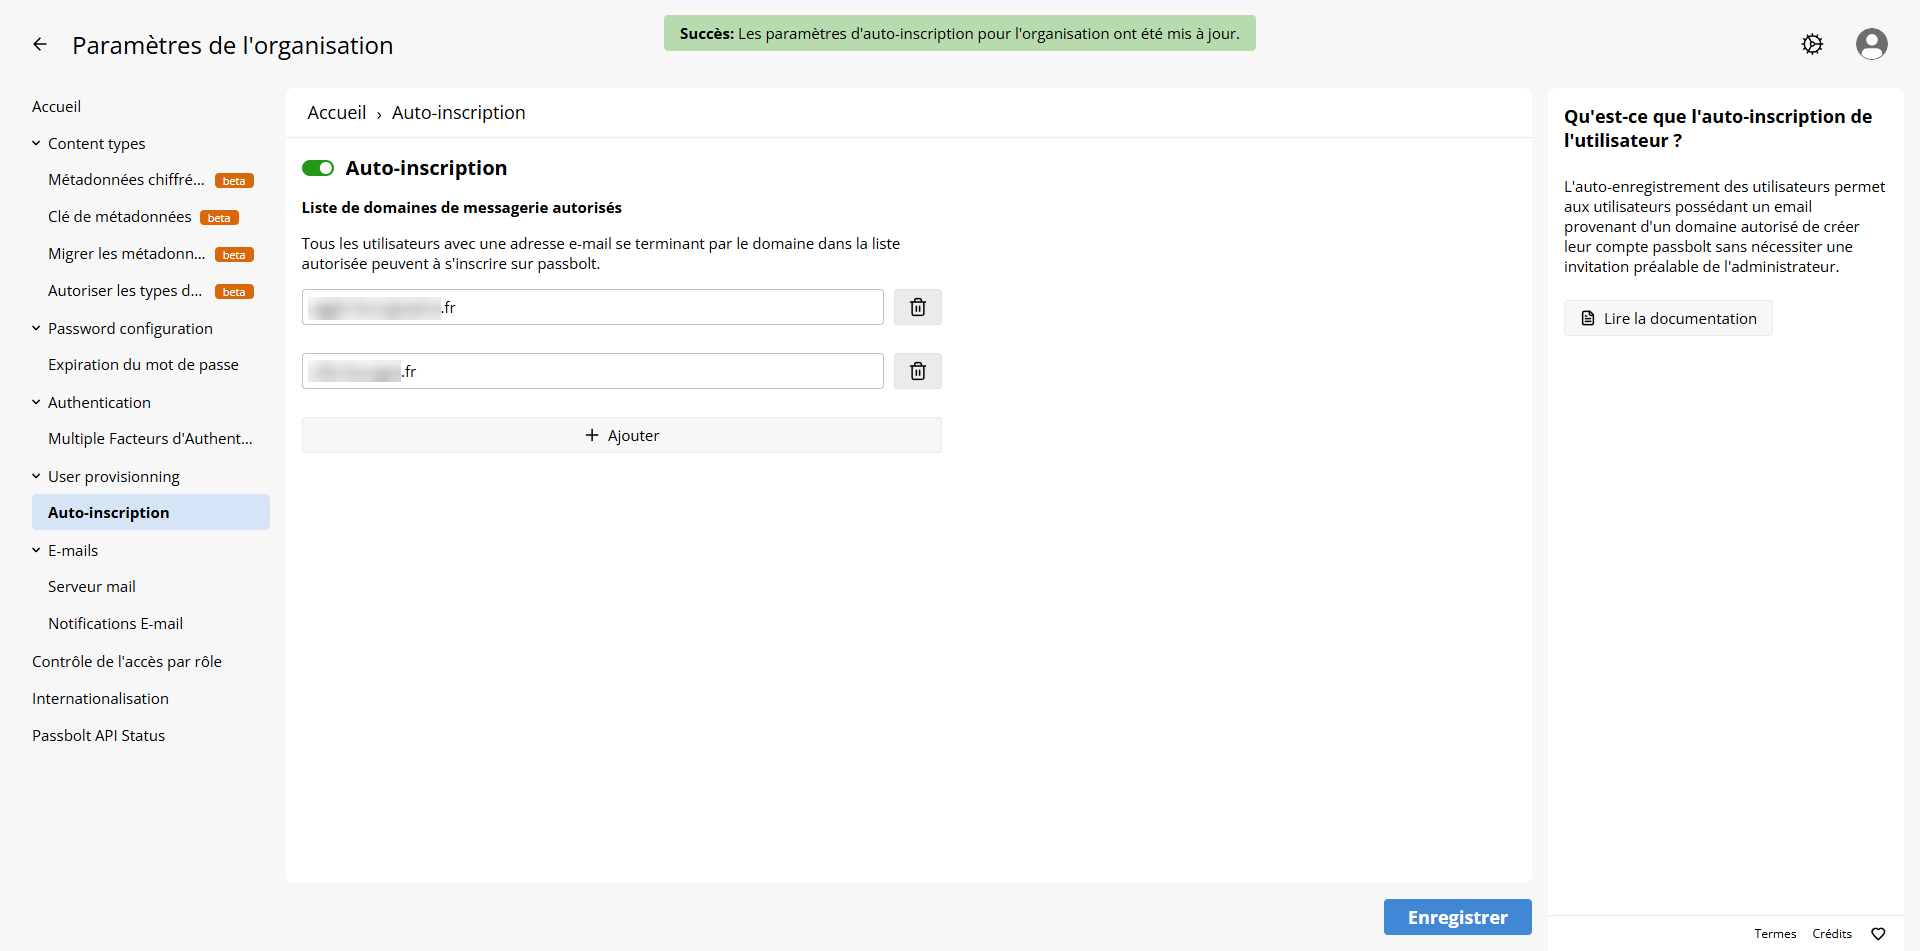
When enabled, your user’s domain is added 1 ; you can add multiple domains by clicking the Add button, then finish by clicking the Save button 2 .
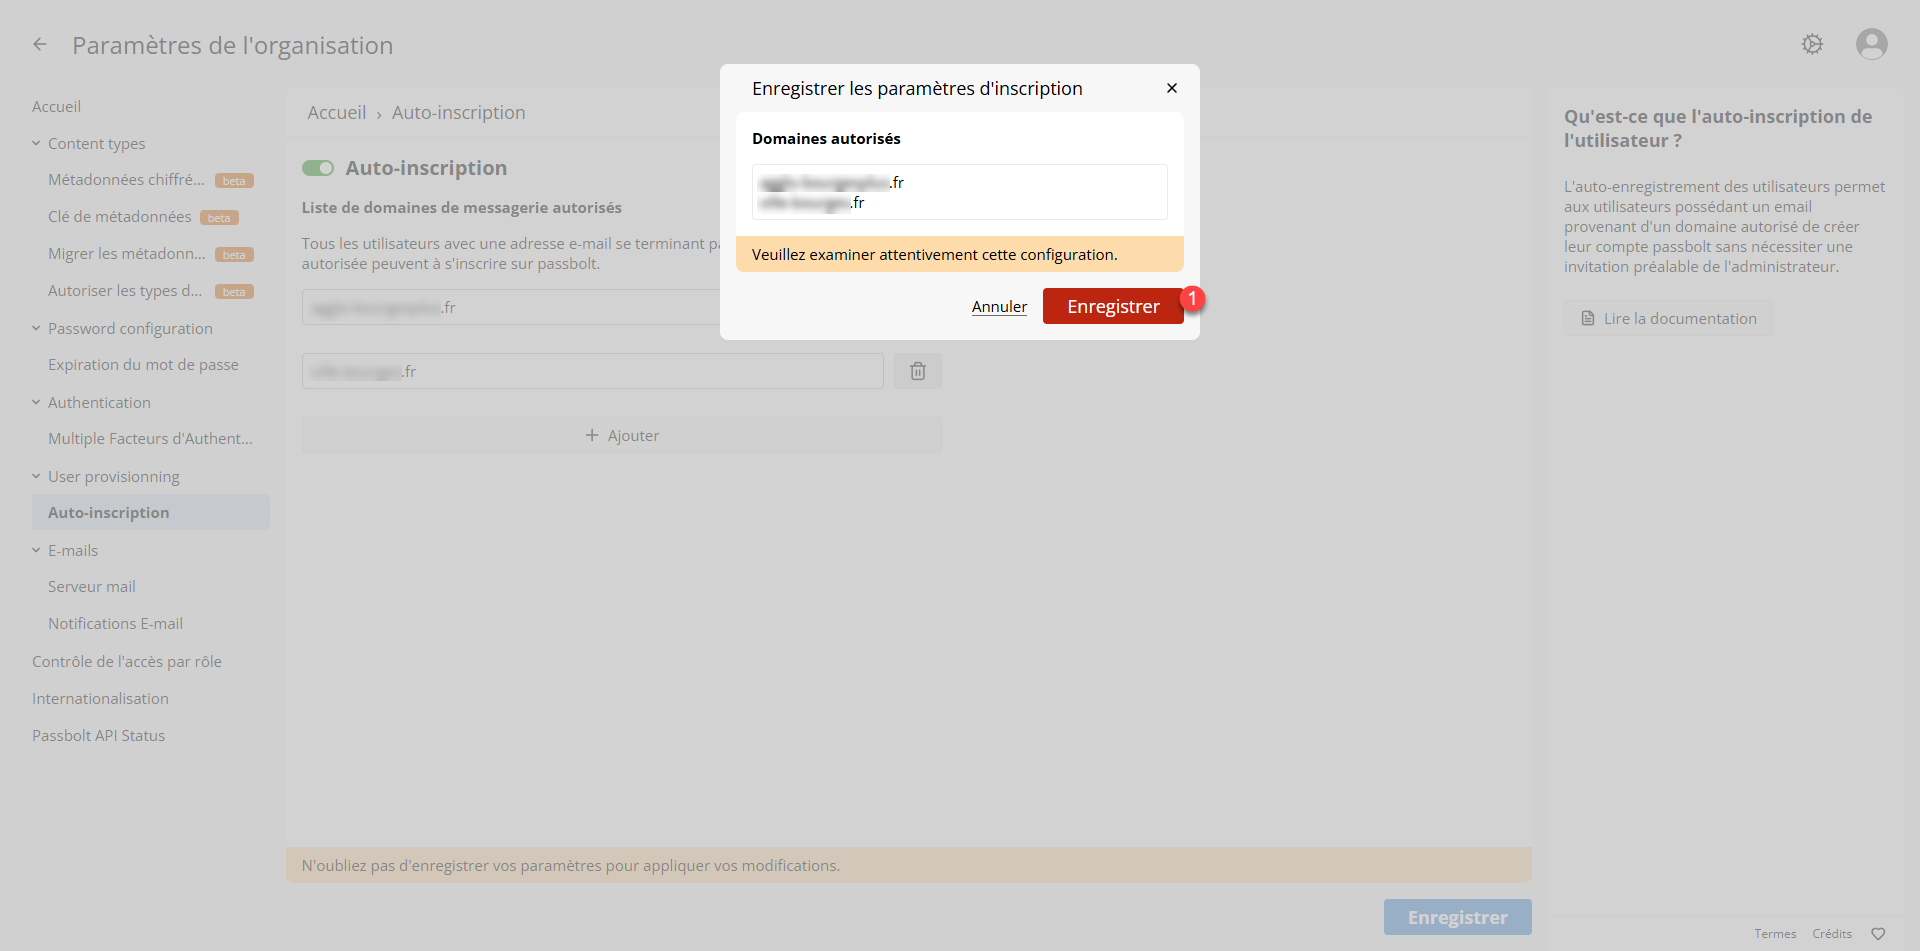
Confirm the domains by clicking Save 1 again.
The auto-registration settings are now configured.
User Auto-Registration
The process for user self-registration is similar to creating the first user.
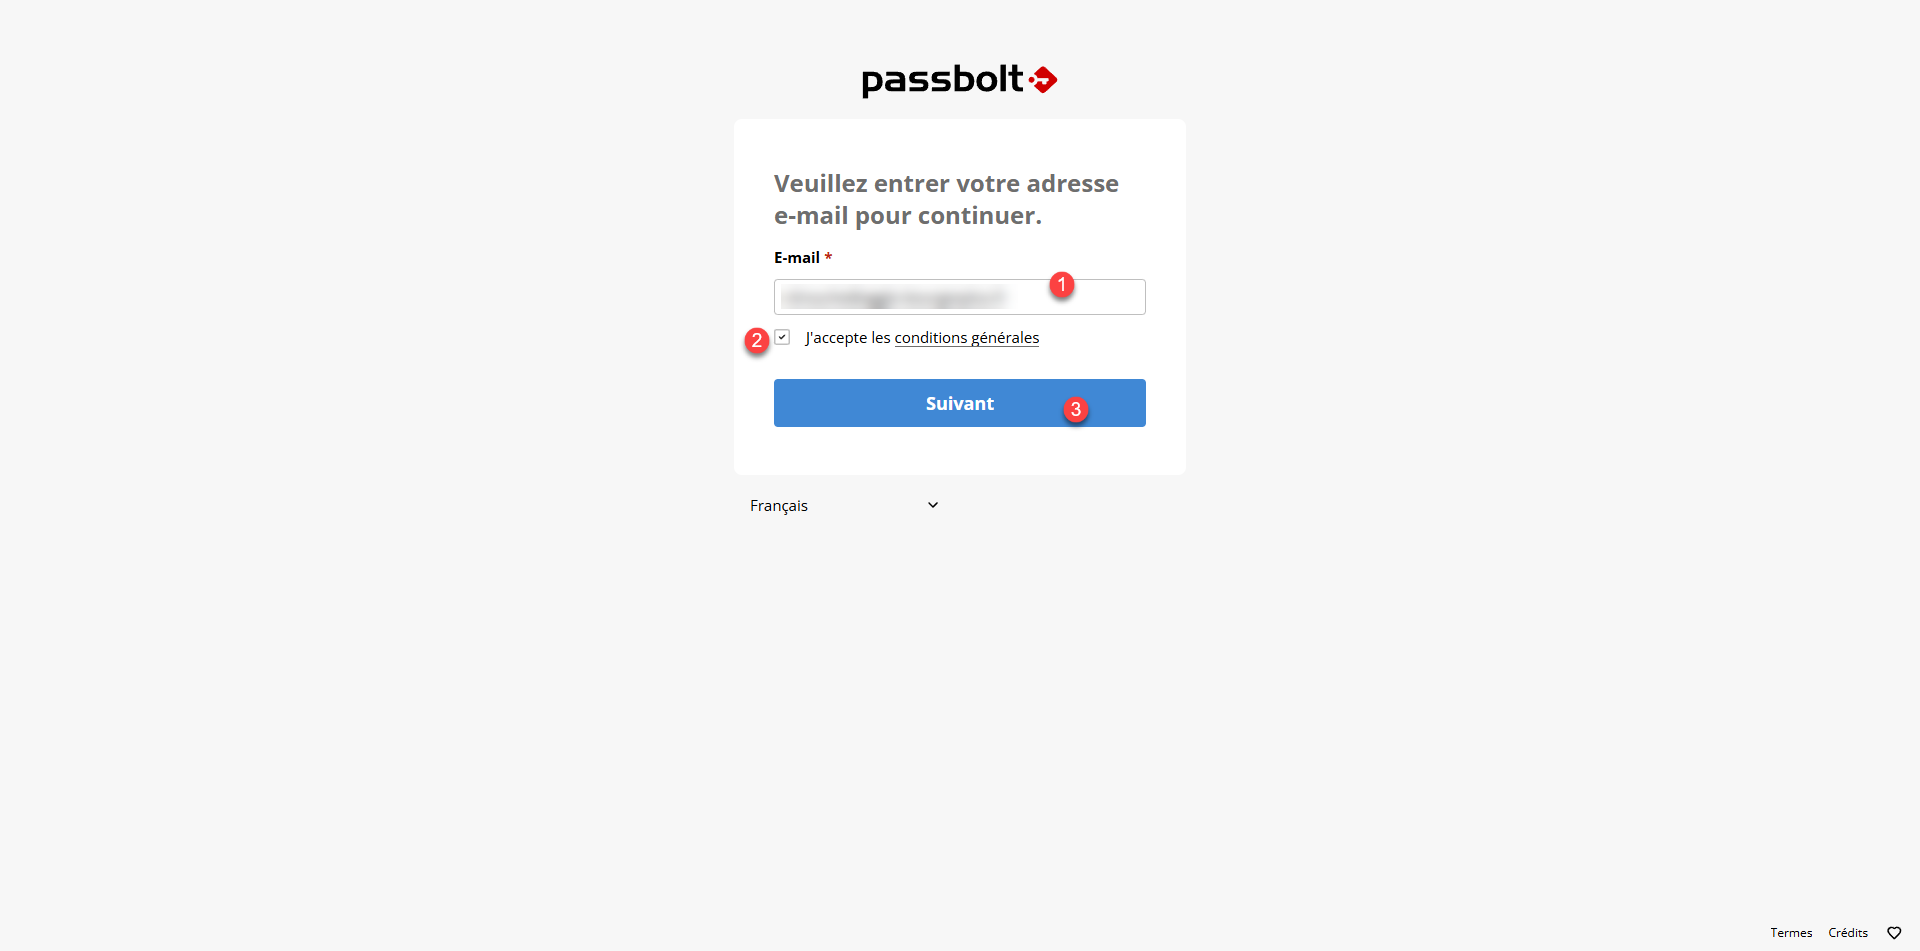
Go to the Passbolt homepage: https://A.B.C.D or https://passbolt.domain.tdl . On the login page, the user enters their email address 1 , checks the box: “I accept the terms and conditions” 2 , and then clicks the “Next” button 3 .
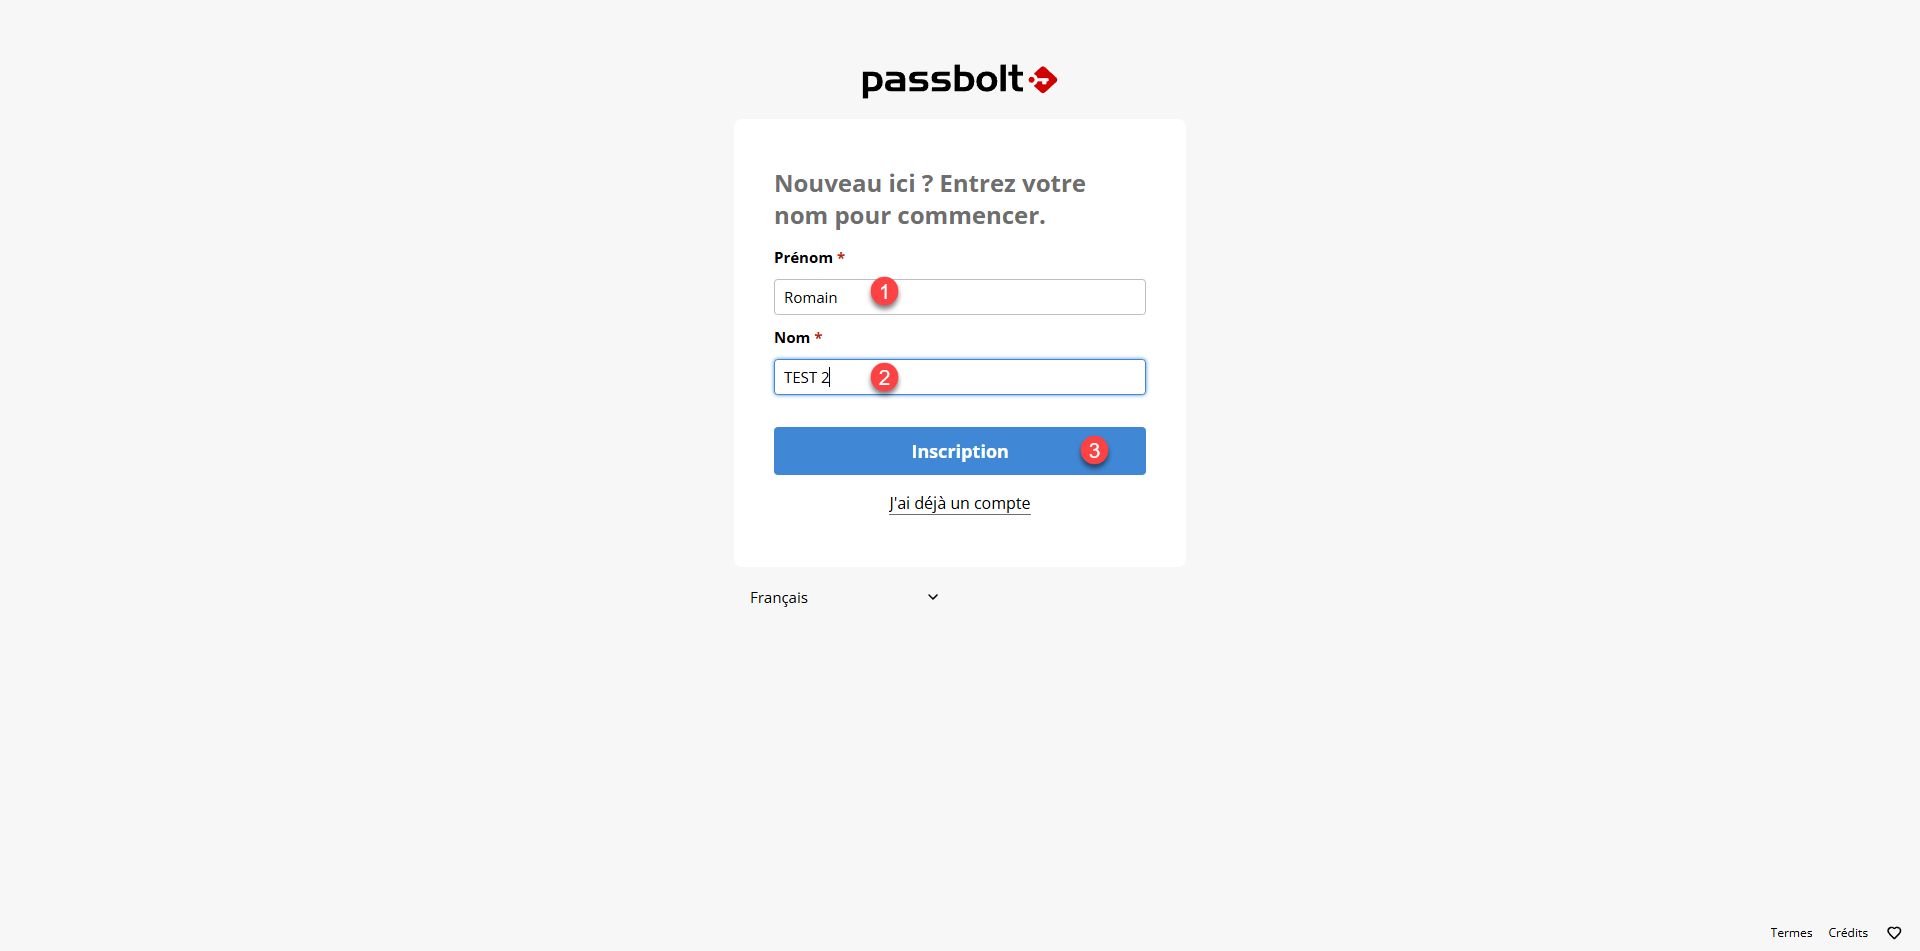
Next, the user enters their first name 1 , then their last name 2 , and clicks “Sign Up” 3 .
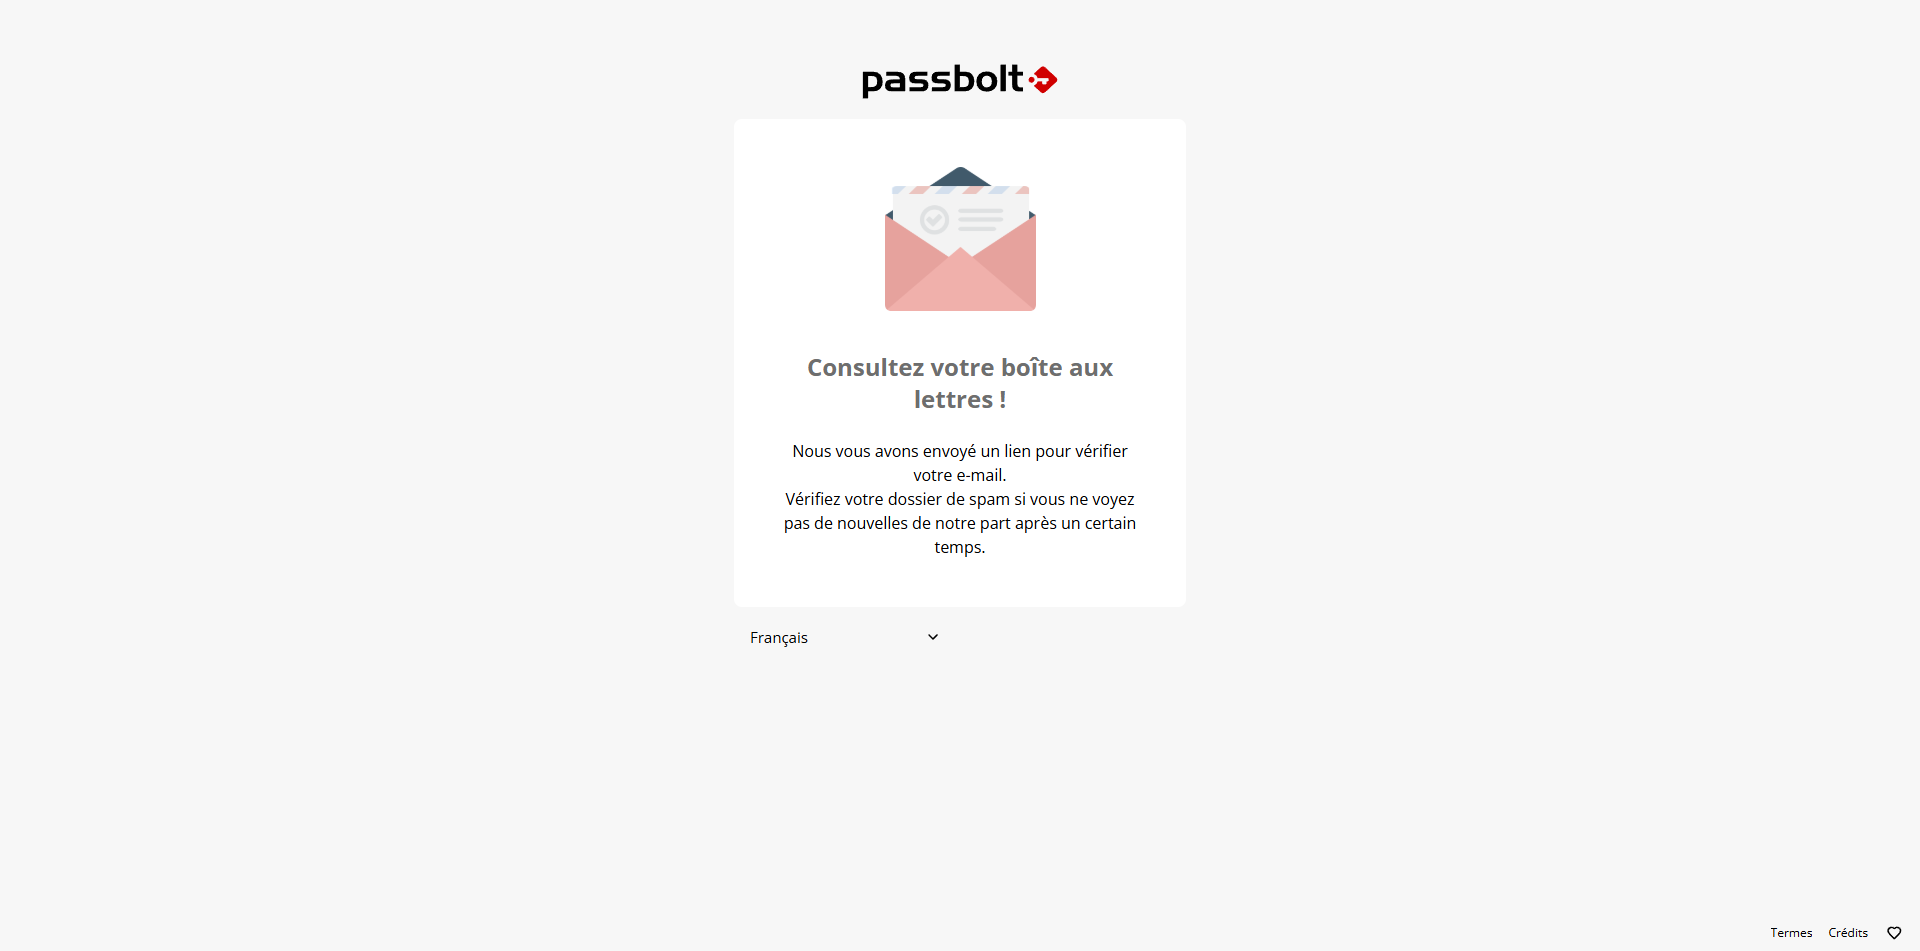
After that, an email is sent…
The user receives an email and clicks the “Get started” link 1 .
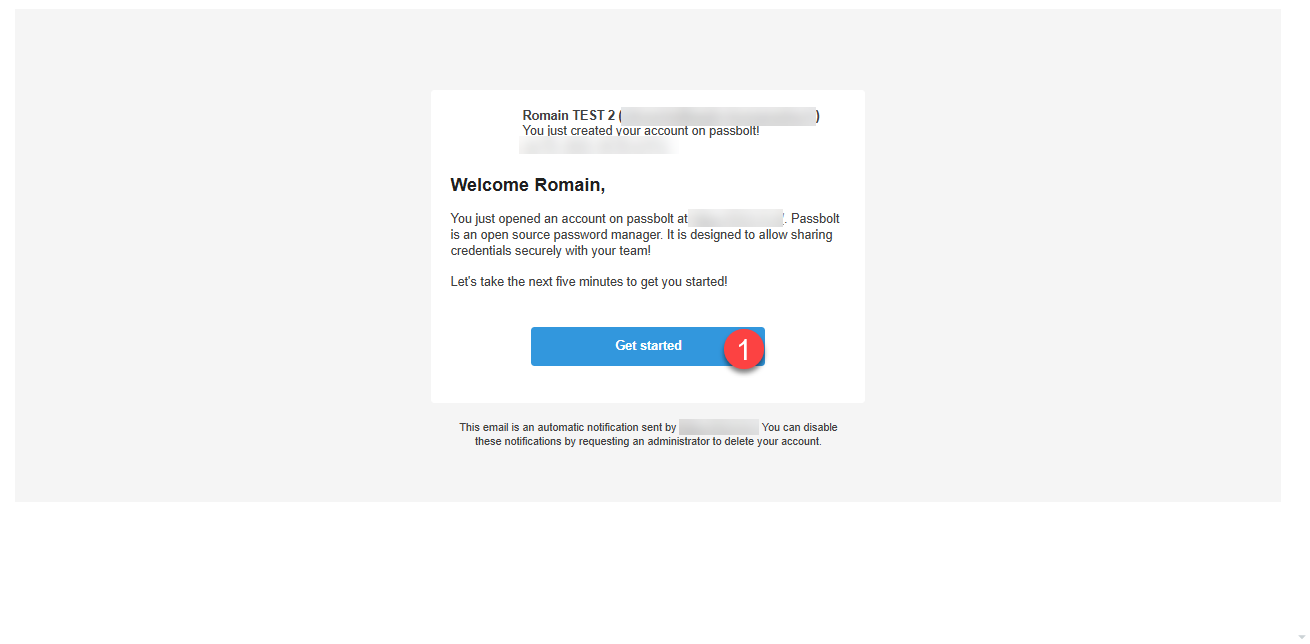
Next, follow the same procedure: install the extension in the browser, set up the passphrase (master password), save the recovery kit, and then configure the security token.
Using Groups in Passbolt
An interesting feature of Passbolt that’s available in the free version is the use of groups, which allows passwords to be shared among group members. This can be useful for accessing service provider portals where you have a single account, or for sharing passwords for servers that only have generic accounts.
Groups are created by Passbolt administrators; you can then manage roles within the group to delegate certain permissions.
To access group management, click the gear icon 1 , then click Manage Users and Groups 2 .
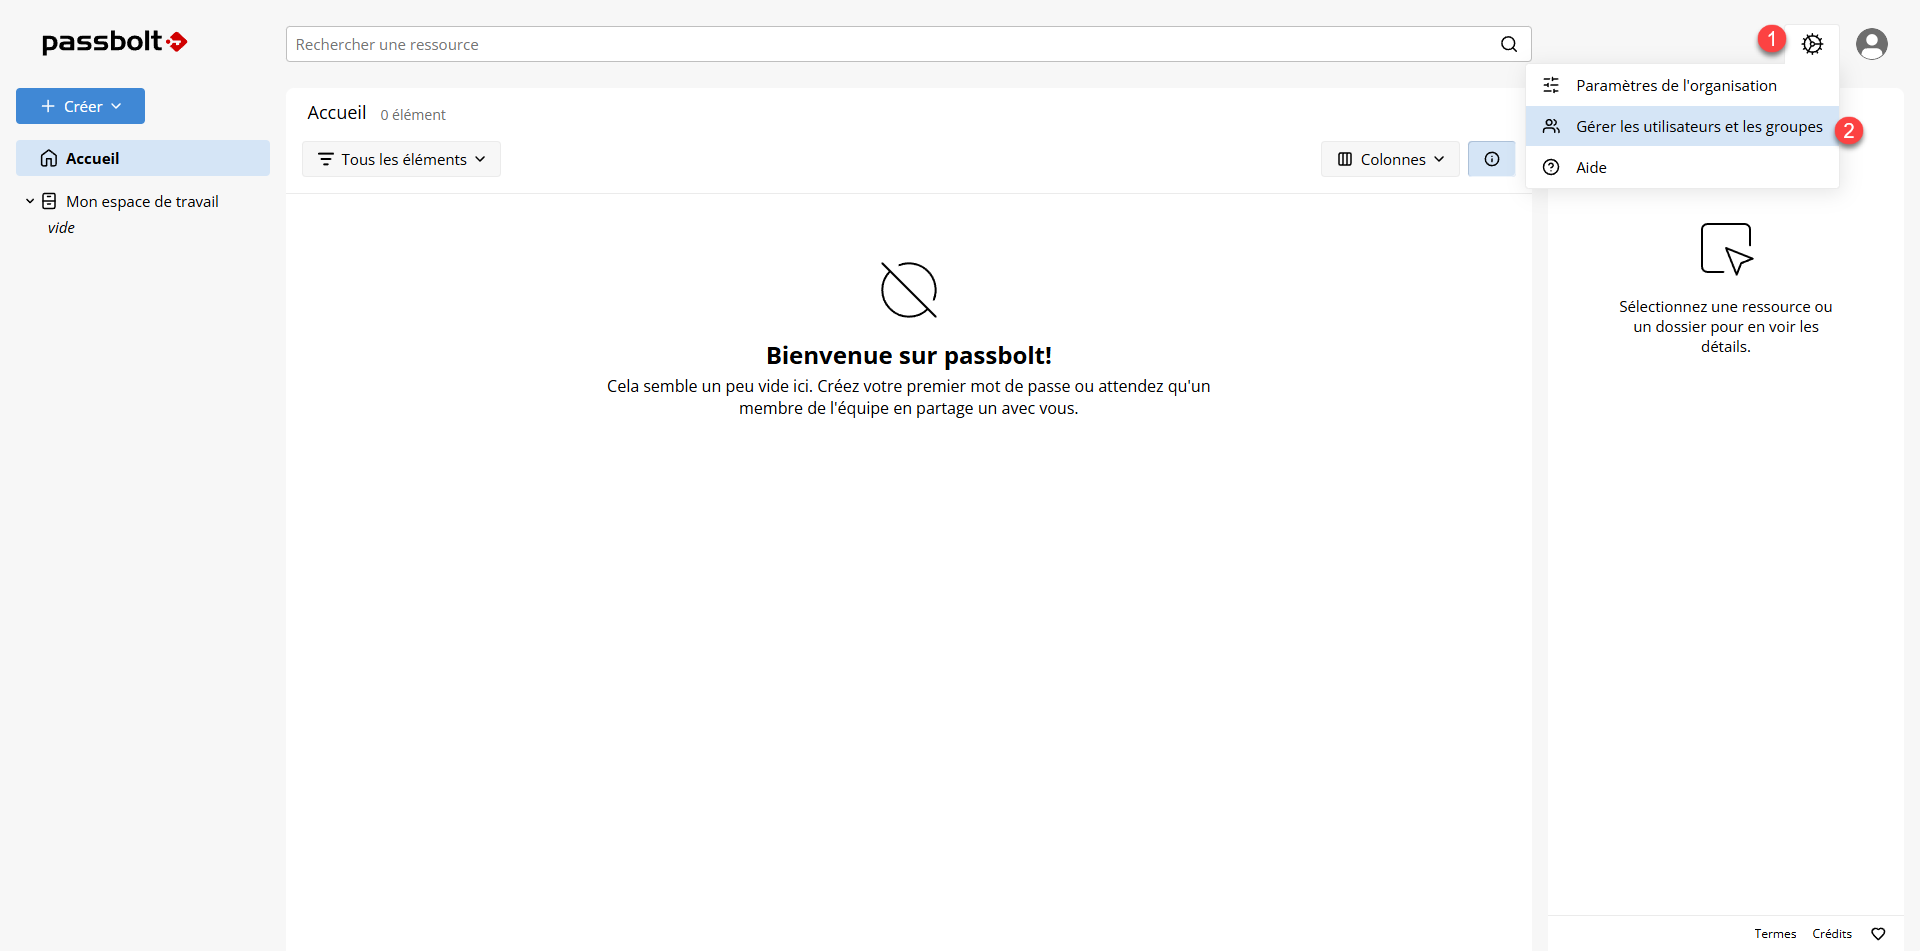
This takes you to the list of users; the groups are displayed on the left-hand side, which is currently empty. Click the Create button 1 , then click Group 2 .
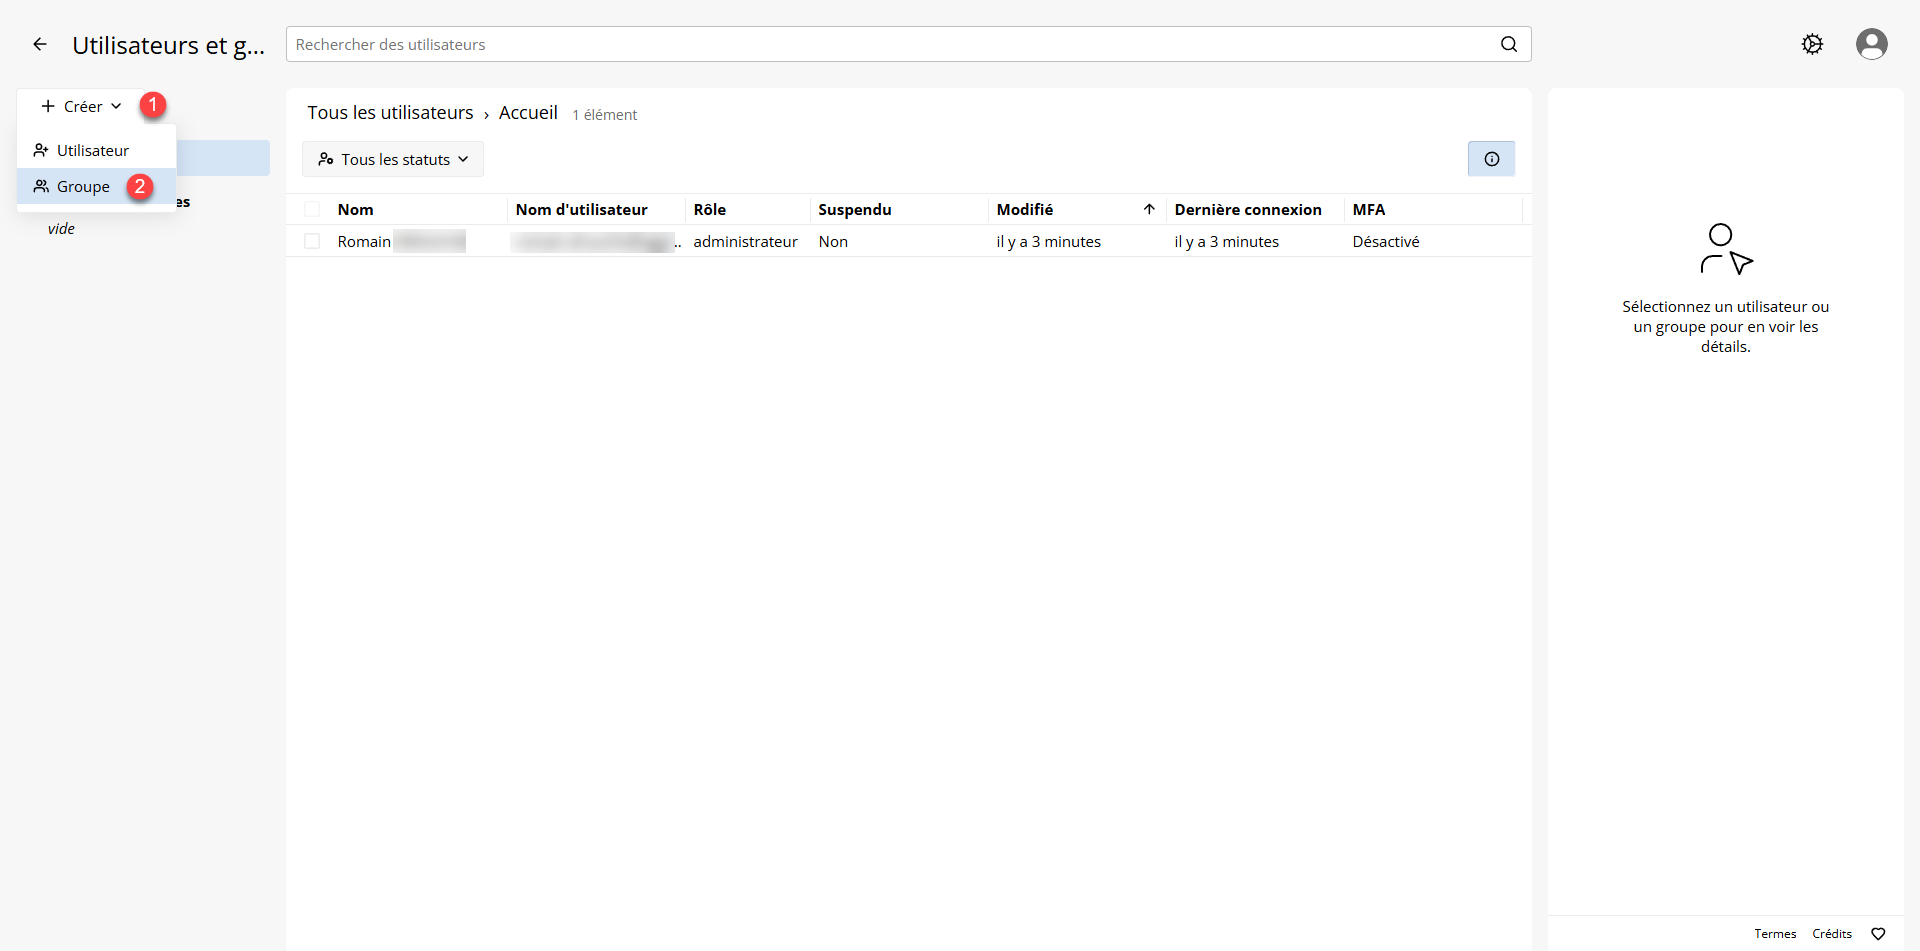
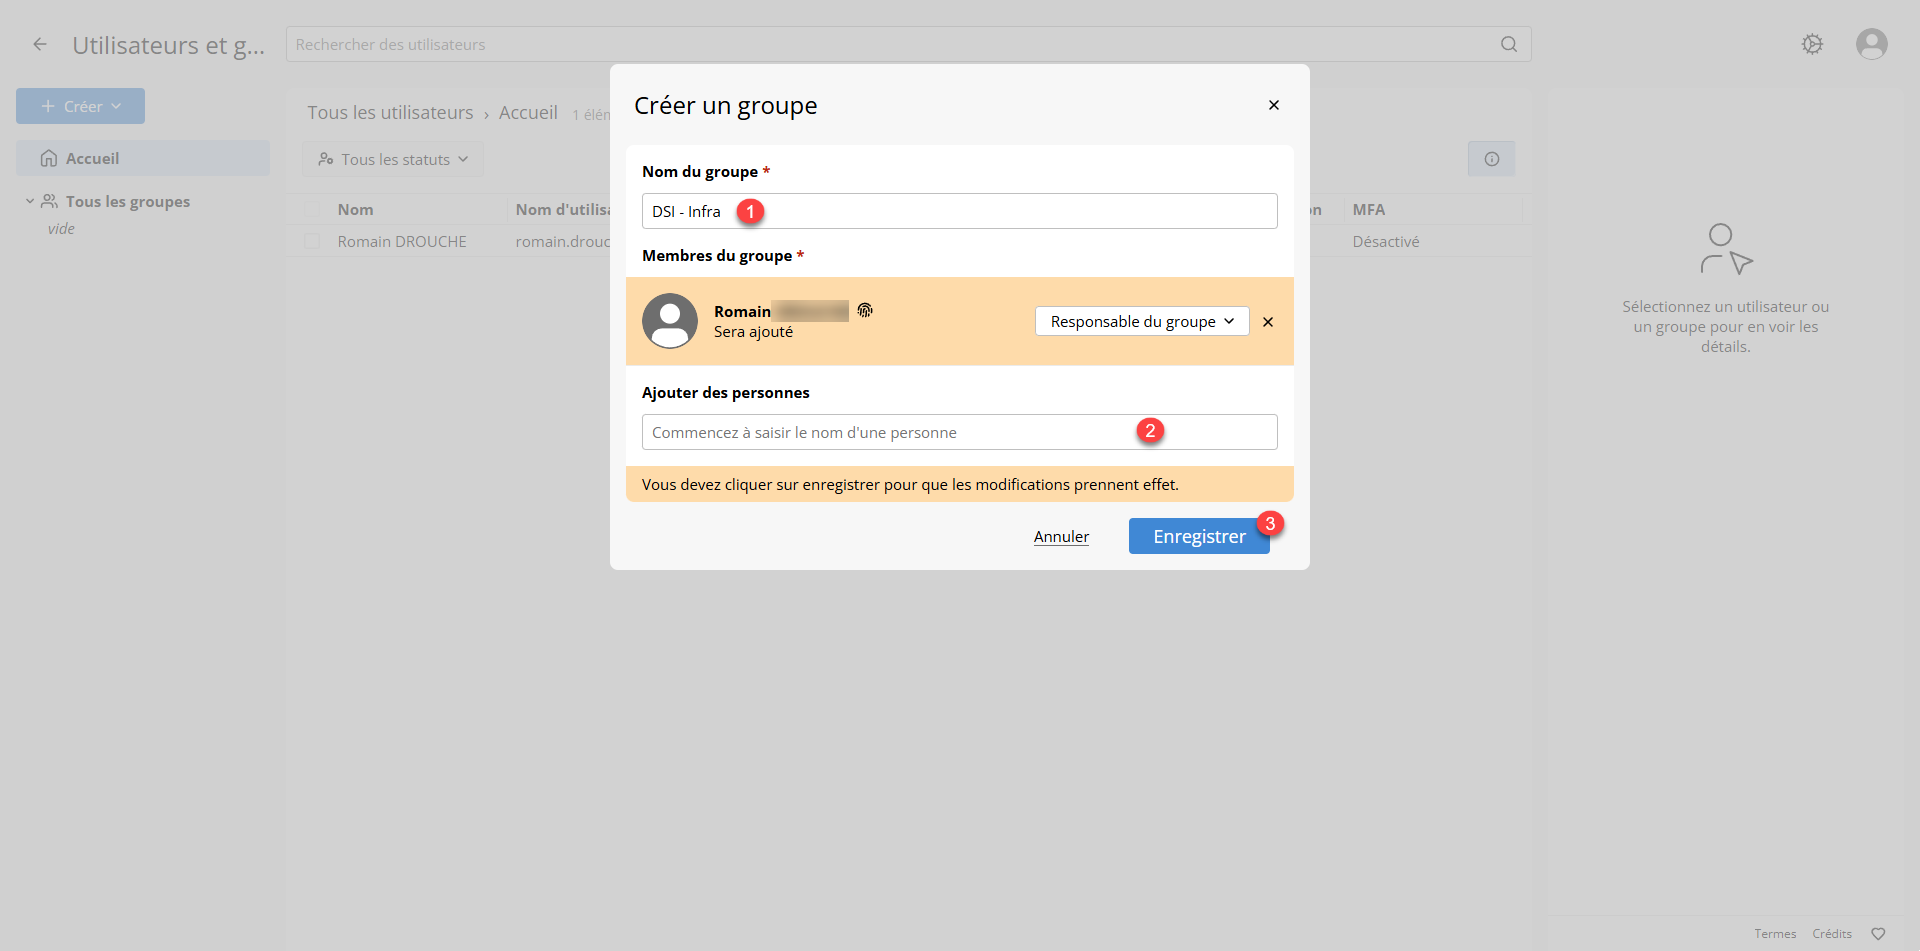
Enter the group name 1 . As you can see, my user is added to the group as a Manager. Once the group is created, you can add users 2 by entering their names and selecting their roles. Finally, click Save 3 .
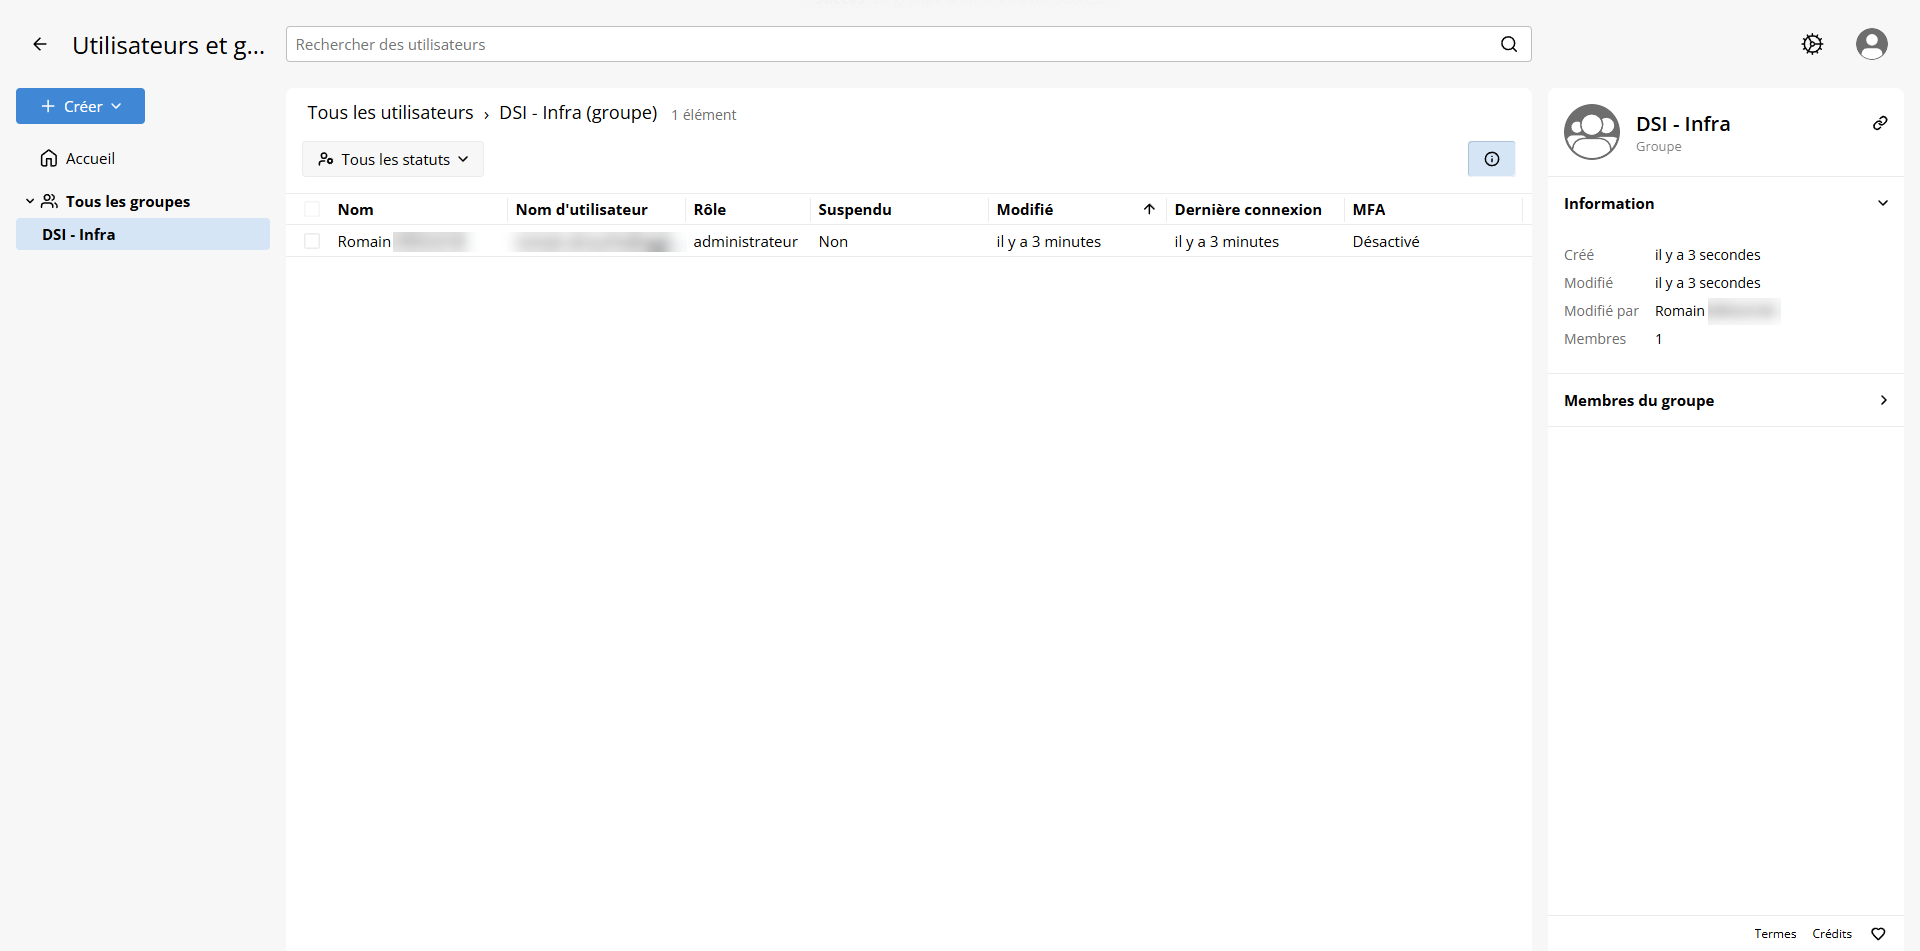
The group is created.
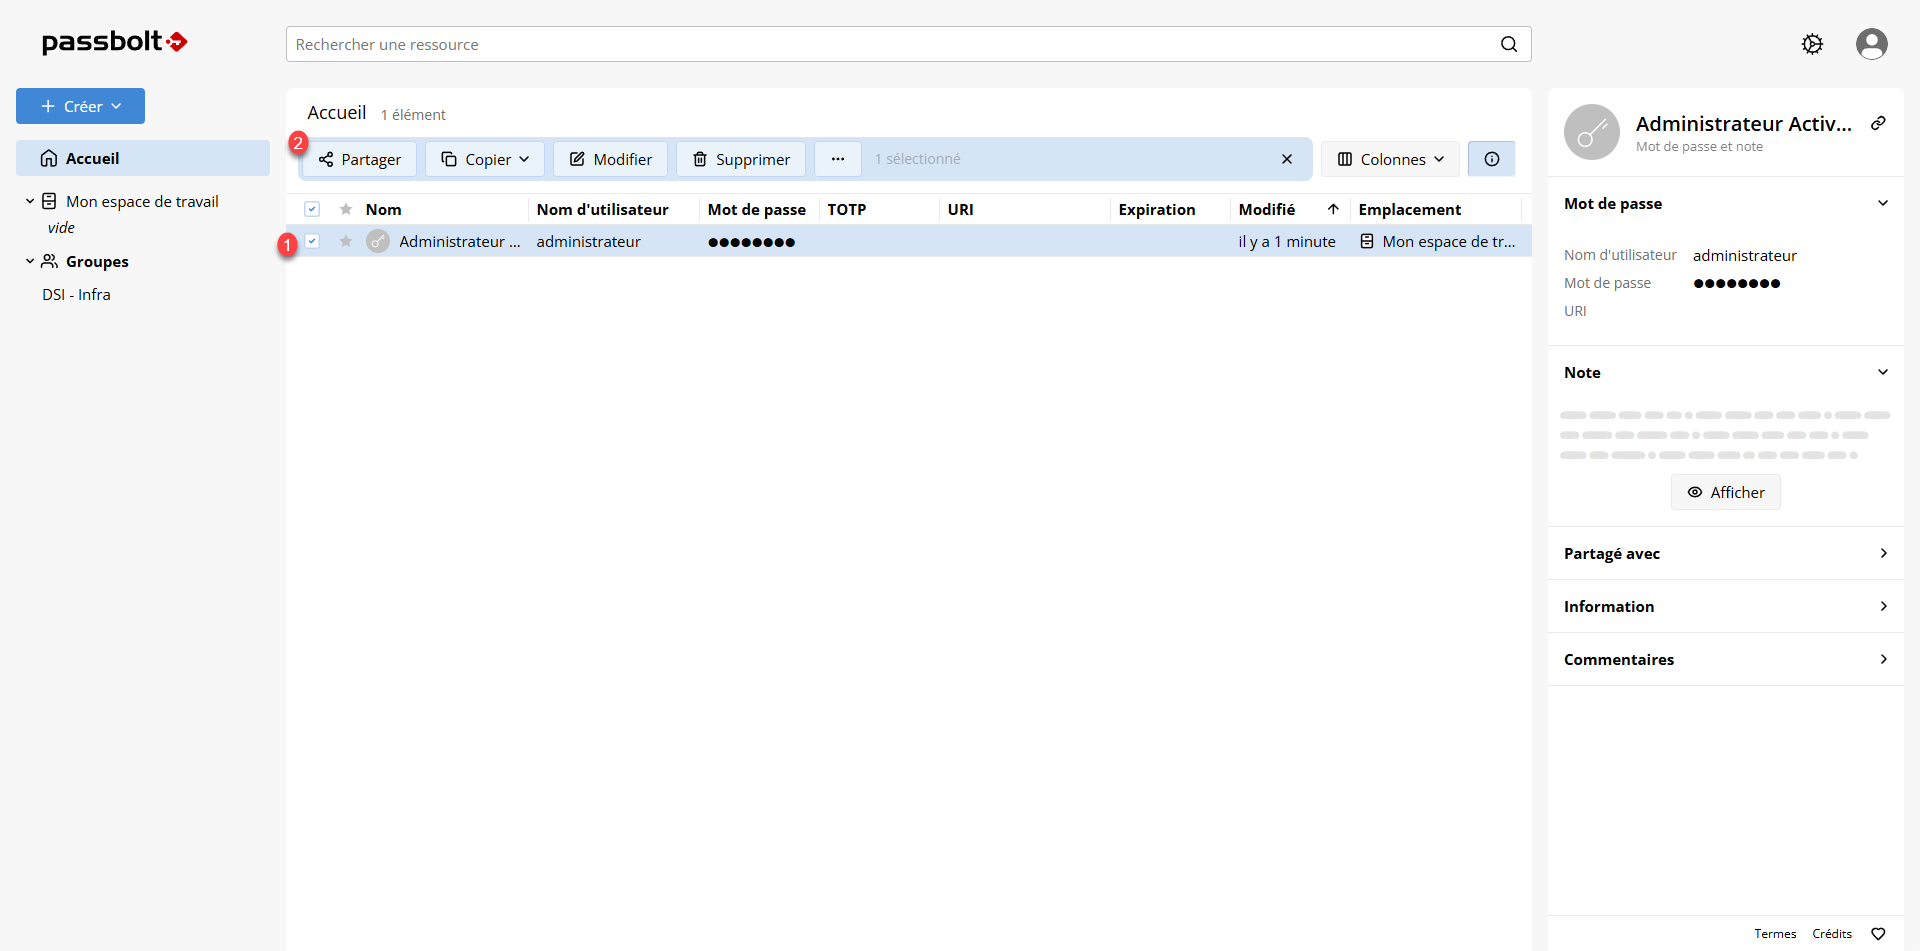
To share a password within a group, select the password 1 and click Share 2 .
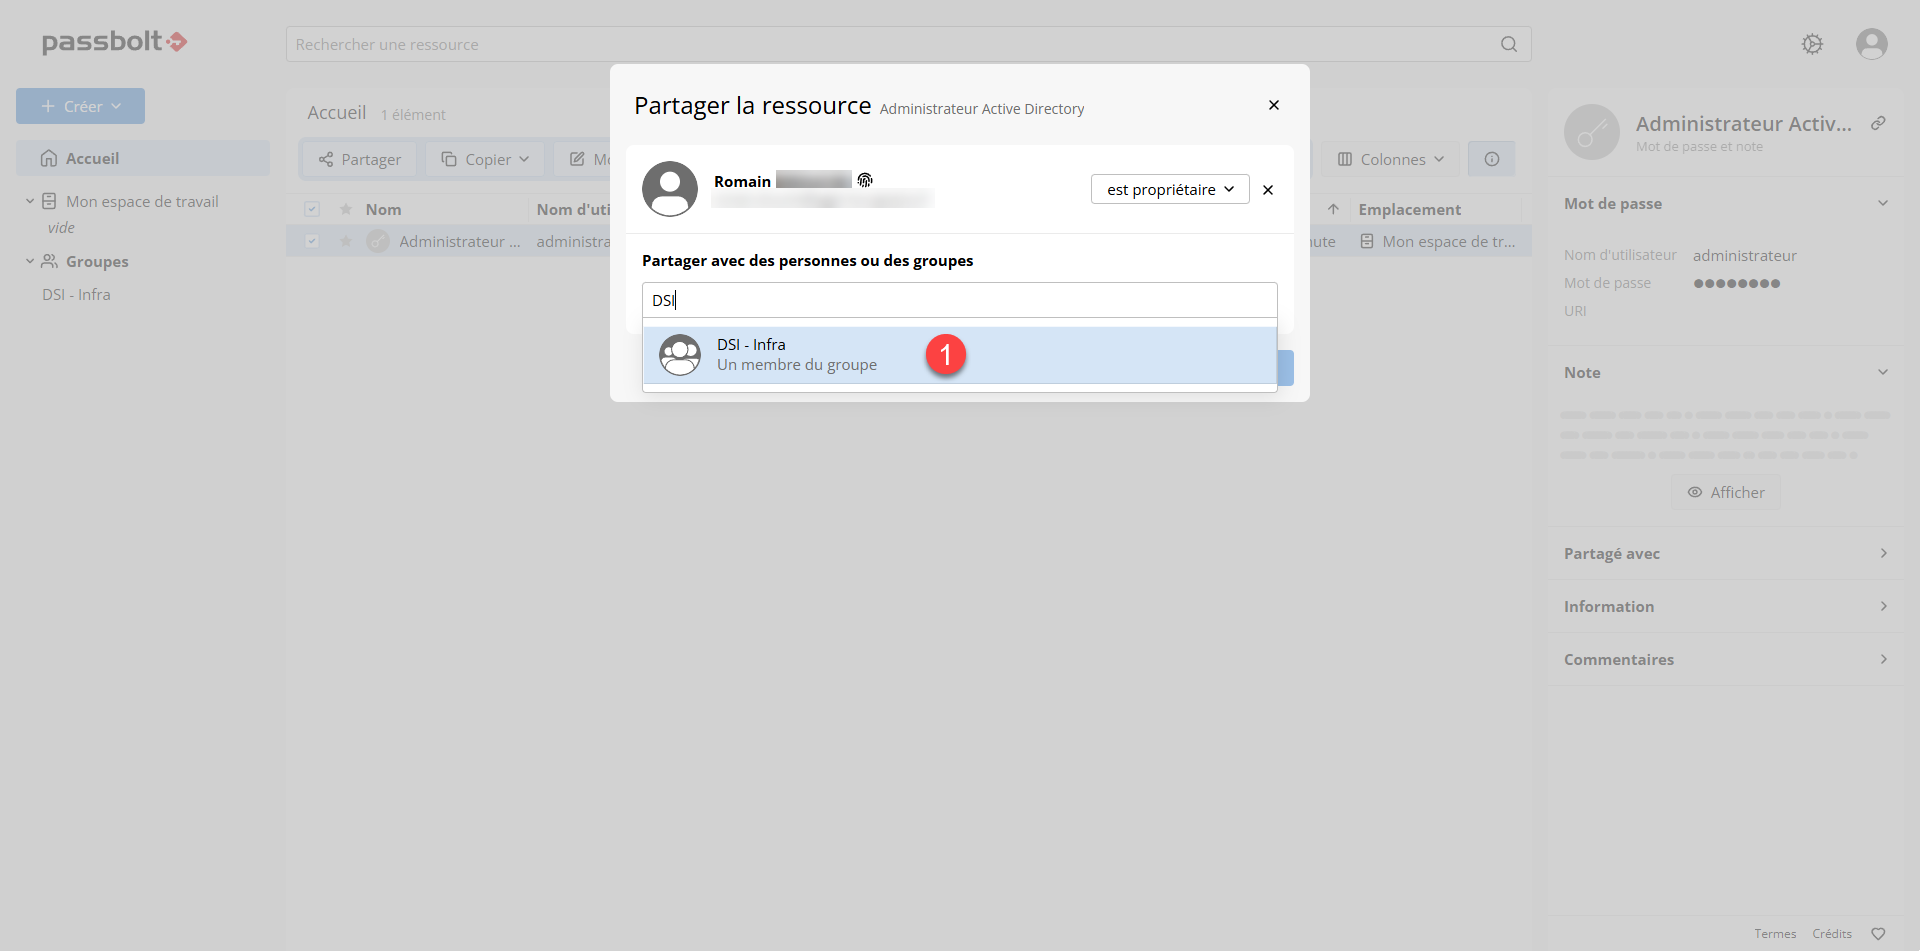
Search for the group and click on it 1 .
Select the sharing permission 1 and click Save 2 .
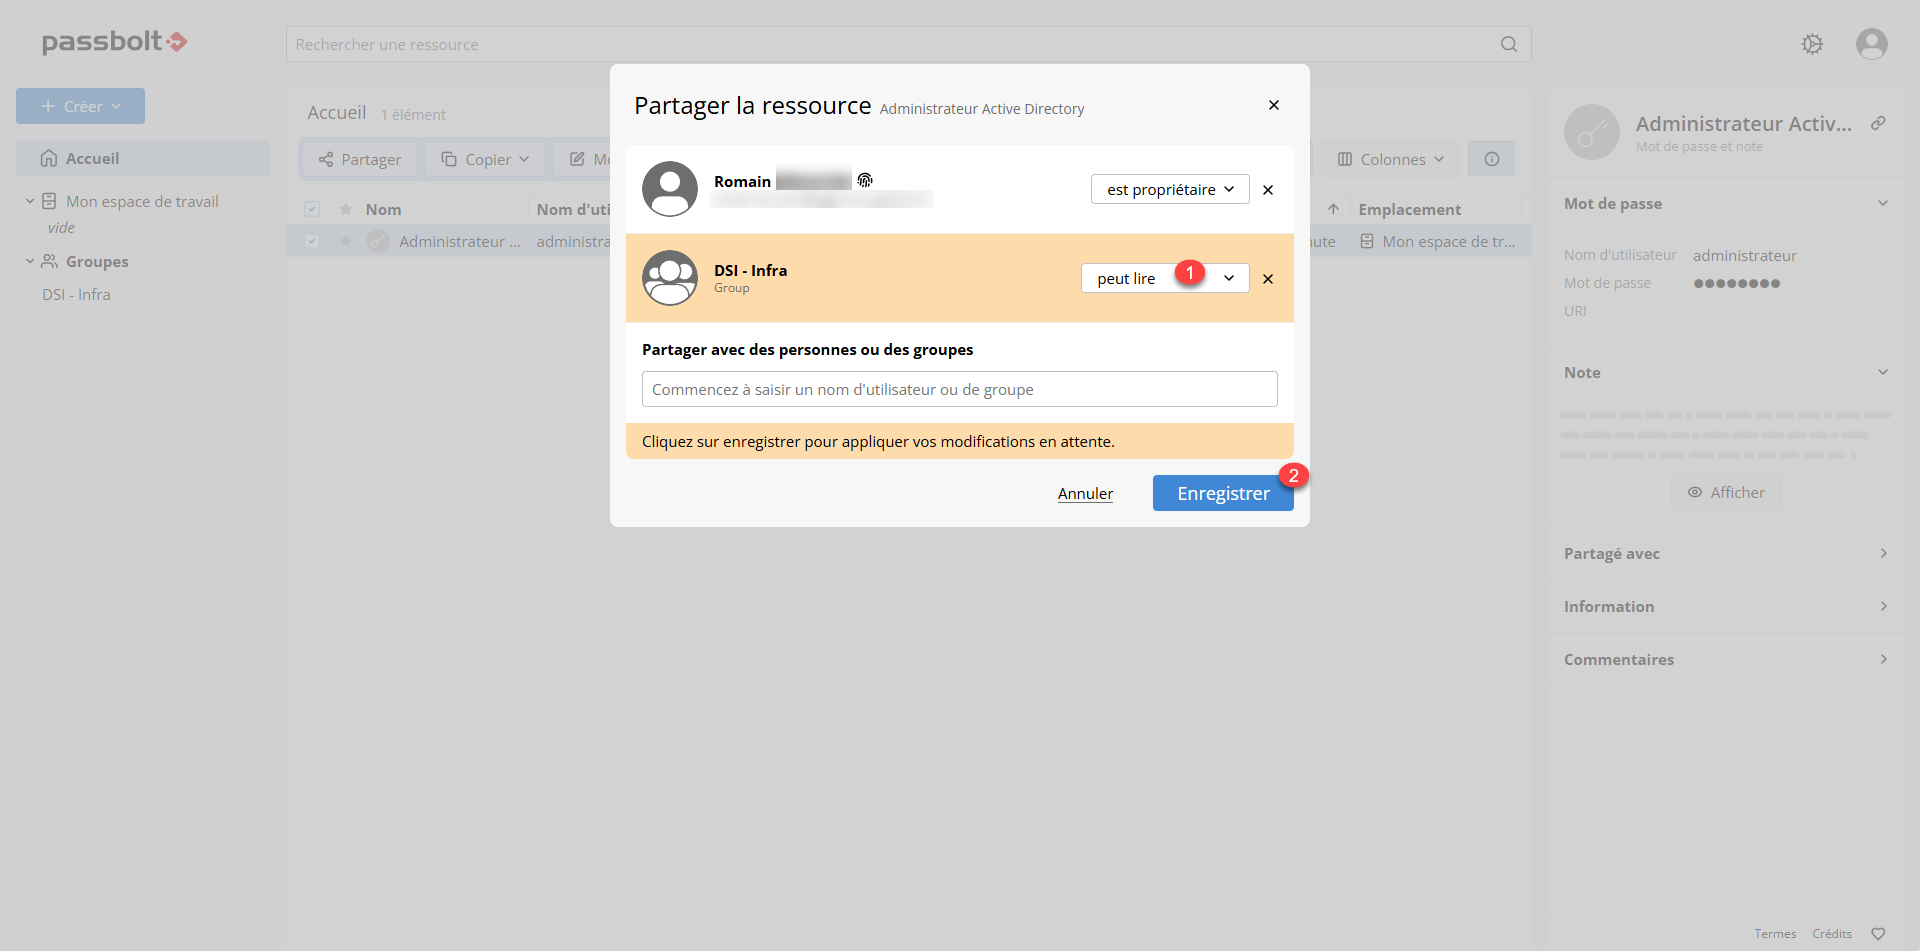
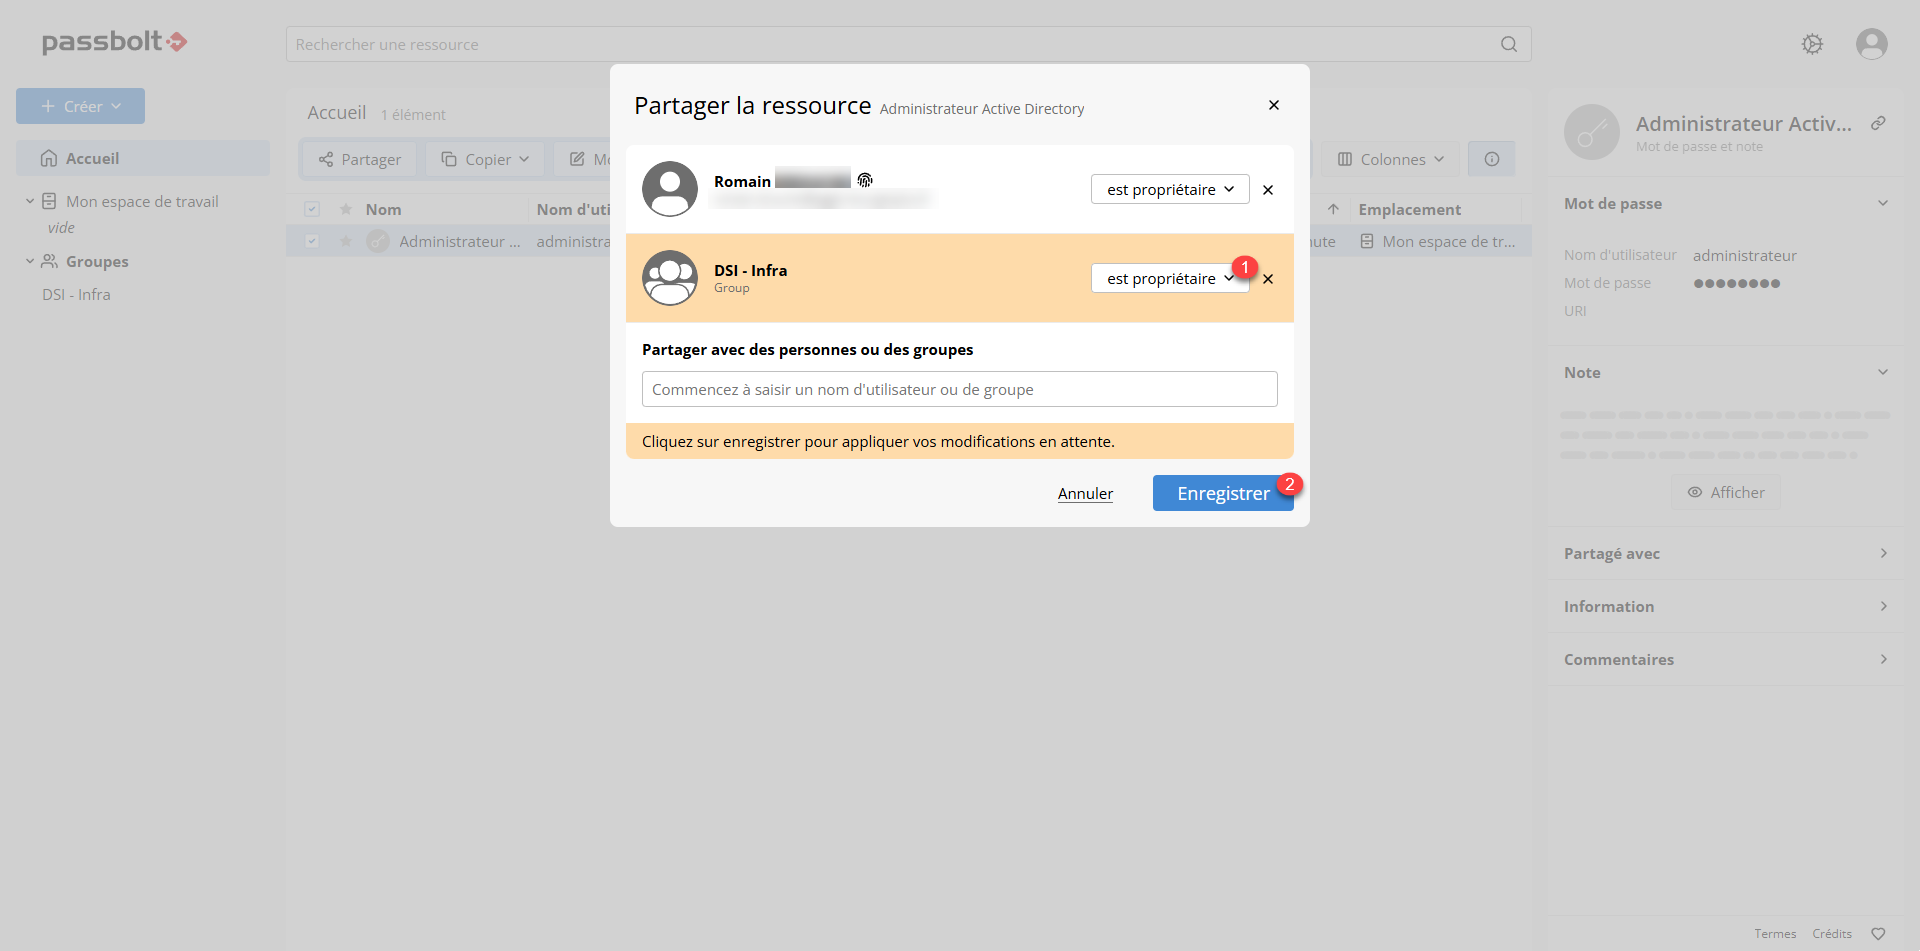
Once saved, the password will be shared with the group.
Passbolt FAQ
To wrap up this tutorial, here are some questions and answers about Passbolt.
Is it possible to share a password with a user?
What happens when you delete a user who has shared passwords?
Is Passbolt free?
Is the use of the browser extension mandatory?
Can passwords be organized into folders?
You now know how to deploy Passbolt,Dockerwhich is a “simple” password manager that’s easy to administer.
If you’re looking for a more “advanced” solution, you can deploy Vaultwarden .