In this tutorial, I will explain how to install Guacamole on Ubuntu, configure access to equipment and use it.
Before starting the technique, I will first introduce you to Apache Guacamole and especially why to put it in place.
Table of Contents
What is Guacamole?
No, I’m not going to talk about the avocado sauce recipe in this tutorial, to be more precise, we’re going to talk about Apache Guacamole which is a remote desktop gateway clientless solution.
To give you a simple presentation of Apache Guacamole, it is a free Open Source solution that allows you to set up remote access through a Web portal on different devices.
At the time of writing this tutorial, the following protocols are supported:
- RDP
- SSH
- Telnet
- VNC
It is possible through the Web portal to manage several users and connections, group them into groups, configure access constraints (time, number of connections, etc.) and record sessions in video.
Guacamole is often presented as a solution used at “home” in order to be able to access your computer with a browser …
I will focus on professional use in order to set up a “bastion” / PAM (Privileged Access Management) solution
Using Guacamole in a Professional Environment
What interests me here is why and how to use Guacamole in a professional environment to manage access to providers and secure them.
Today many companies are faced with the problem of managing service providers and especially how to give them access to the most secure information system possible.
The solution is the bastion, which is a remote access software solution that will make it possible to manage this by managing accounts and limiting their access and adding various layers of security.
The problem with stronghold solutions is their cost, which can quickly become a real brake on their adoption.
Without a bastion solution, companies continue to do as they can and often by “undergoing” the operating methods of service providers:
- Multiple remote control solution (Teamviewer, AnyDesk, Remote Desktop, VPN …)
- Often passwords are given to providers
- Non-monitoring of accesses
- Little or no control over access times
- …
Guacamole allows us to partially respond to these issues:
- Unique solution for connecting to the information system via an Internet browser
- As it is possible to configure the connections to the devices (SSH, RDP) by indicating the identifiers, it is no longer necessary to communicate them, it is only necessary to give the web portal access identifiers which must be different. This solution also makes it possible to limit the rebound of service providers on other equipment..
- All access is recorded in Guacamole, so it is easy to follow the activity of providers and it is possible to video record the sessions.
- It is possible to configure access times on the accounts, which avoids certain overflow.
How Guacamole Works
Je ne vais pas rentrer dans le détail ici du fonctionnement de Guacamole, voici un diagramme qui vous permet de vous faire une idée :
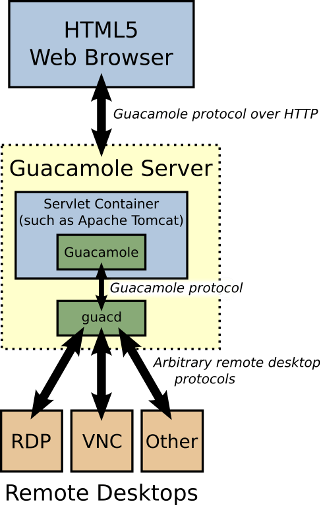
Apache Guacamole consists of 2 main components:
- Guacamole Server : This provides all of the server-side and native components required by Guacamole to connect to remote desktops..
- Guacamole Client : This is an HTML 5 web application and client that allows you to connect to your remote servers / desktops. This is supported by the Tomcat server.
Now we will see how to install Guacamole.
Guacamole: installation
For this tutorial, I used a fresh install of Ubuntu Server 20.04.
In this tutorial, we will link Guacamole to MySQL to manage user accounts and logins.
To begin with, we will install the various prerequisites on the server.
Since it is necessary to compile Guacamole, it is necessary to install make.
sudo apt install make -y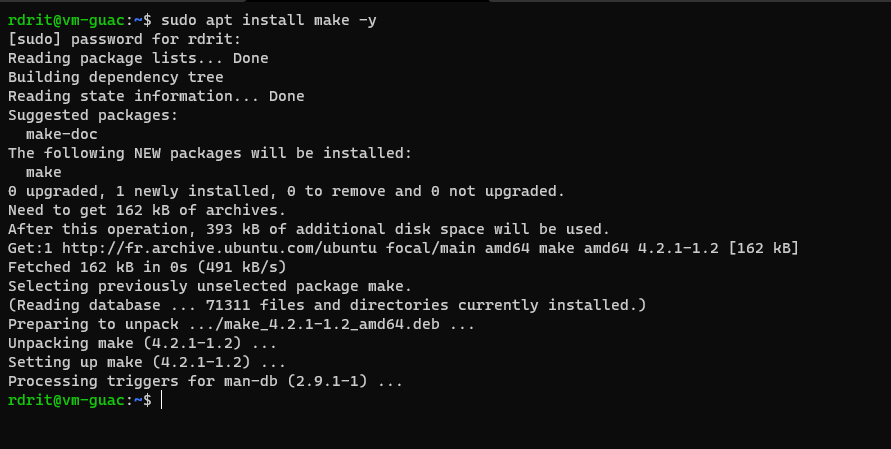
By default make is not installed on version Ubuntu Server 20.04
Now, we will install the prerequisites using the command below:
sudo apt install gcc g++ libcairo2-dev libjpeg-turbo8-dev libpng-dev libtool-bin libossp-uuid-dev libavcodec-dev libavformat-dev libavutil-dev libswscale-dev freerdp2-dev libpango1.0-dev libssh2-1-dev libvncserver-dev libtelnet-dev libssl-dev libvorbis-dev libwebp-dev libpango1.0-dev libwebsockets-dev libpulse-dev -y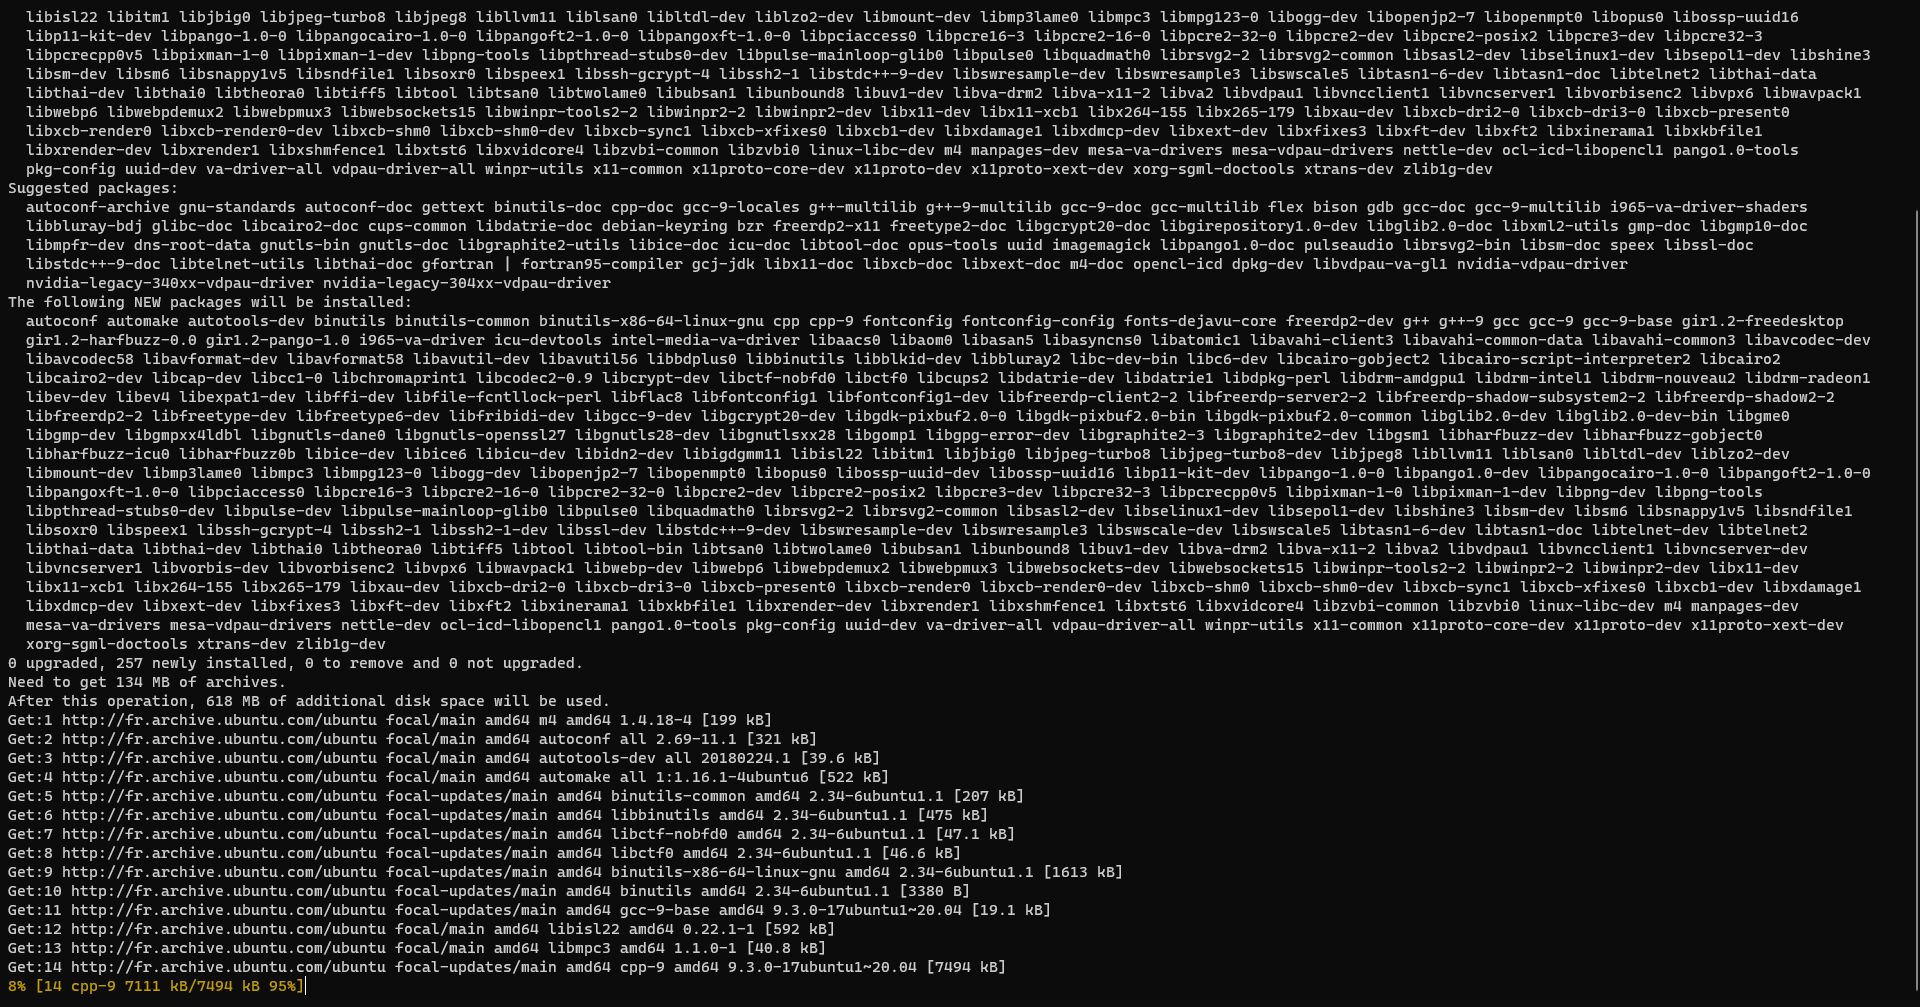
If you want more information on the prerequisites everything is explained here: Chapter 2. Installing Guacamole natively (apache.org)
Installing Guacamole-Server
We will now install the first guacamole server component.
At the time of writing this tutorial, the available version of Guacamole is 1.3.0
Download the archive to the server:
wget https://downloads.apache.org/guacamole/1.3.0/source/guacamole-server-1.3.0.tar.gz
Unzip the archive:
tar xzf guacamole-server-1.3.0.tar.gzGo to the folder that has just been unzipped:
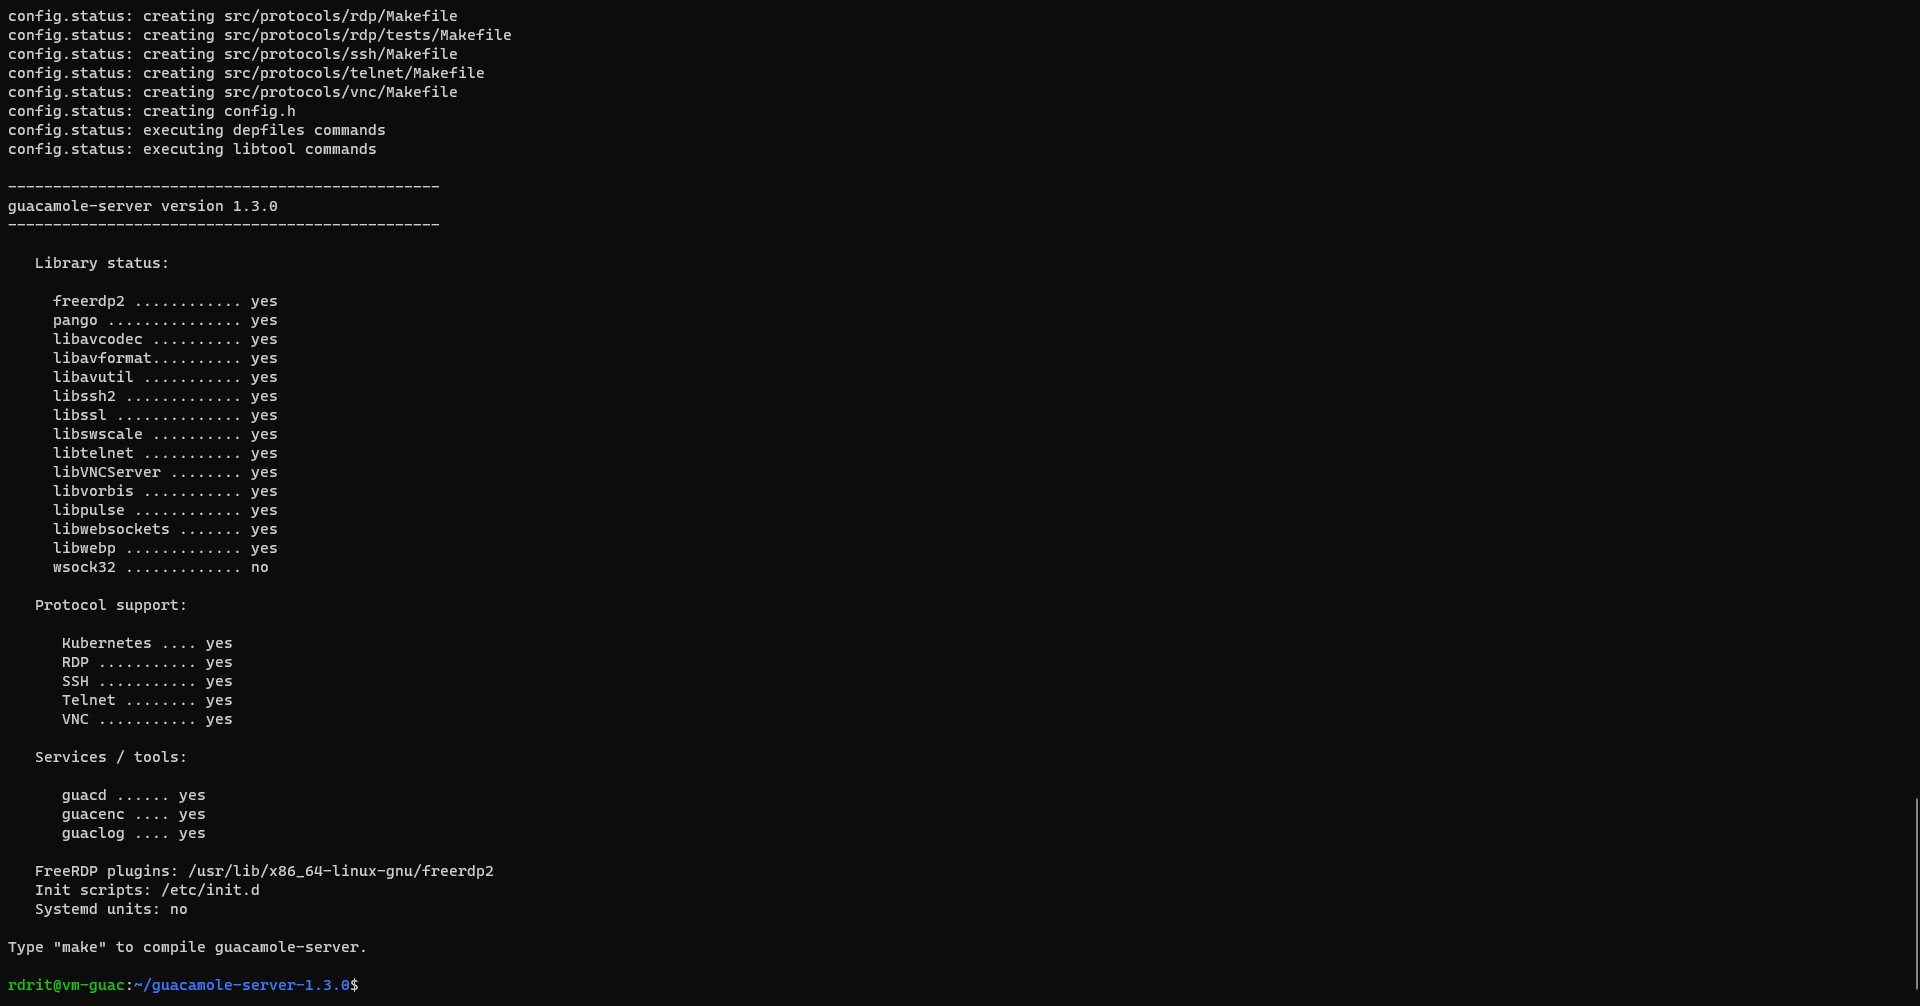
cd guacamole-server-1.3.0/We will now verify that all the necessary dependencies are installed on the server using configure:
sudo ./configure --with-init-dir=/etc/init.dMore get help run the command : .
/configure --help
If all is well, you should with the set of protocols to yes.
Now we will compile and then install Guacamole-Server.
Compilation :
sudo make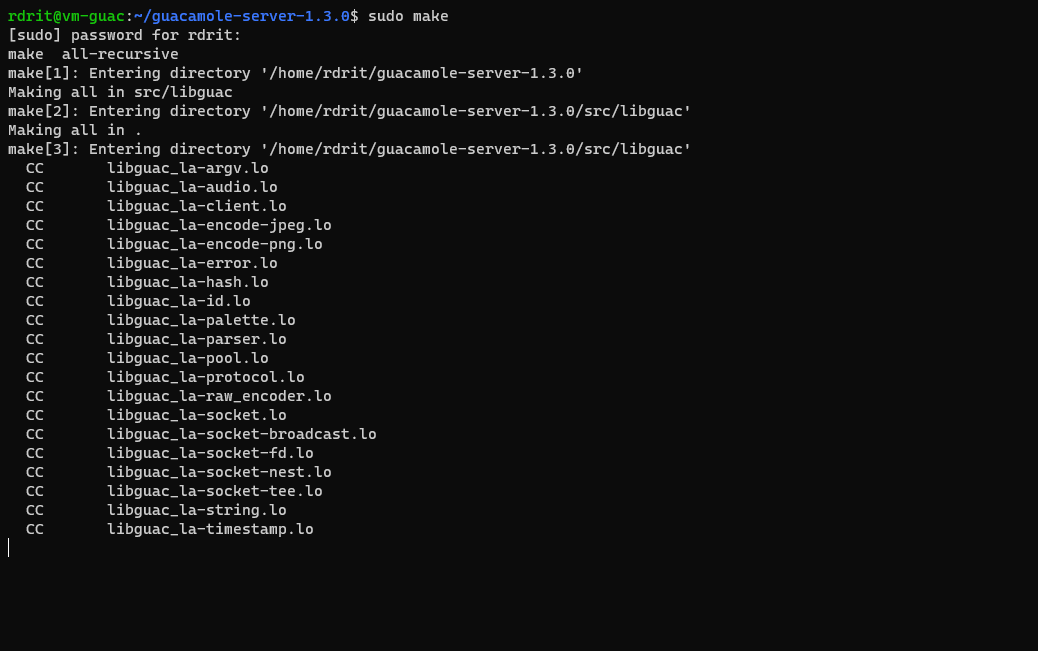
Installation :
sudo make installNow run the ldconfig command to create the various links with the libraries.
sudo ldconfigActivate the service:
sudo systemctl enable guacd
Start the guacd service:
sudo systemctl start guacd
Check the status of the service (optional):
systemctl status guacd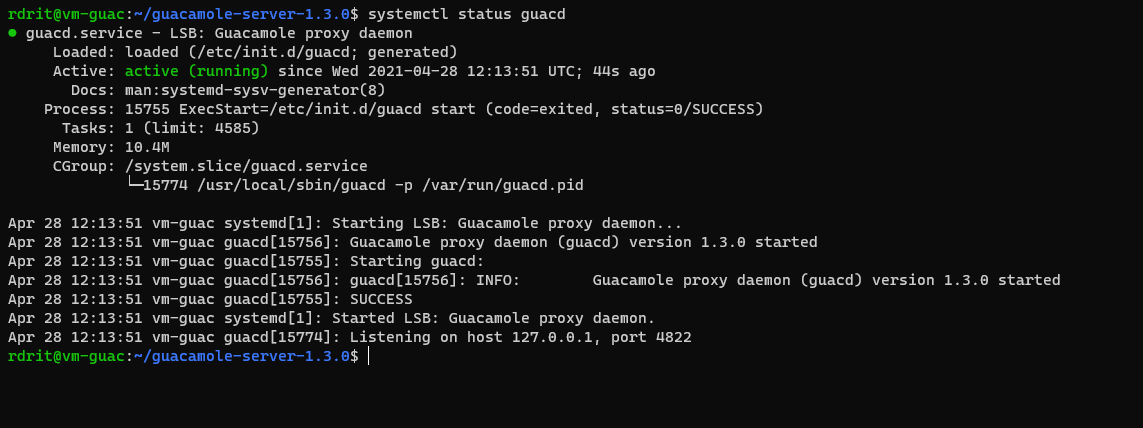
The server part of Guacamole is operational.
Installation of Guacamole-Client
The client that provides the HTML5 interface and needs Tomcat.
On the server install Tomcat using the command below:
sudo apt install tomcat9 tomcat9-admin tomcat9-common tomcat9-user -y
Check that the Tomcat server is running:
systemctl status tomcat9 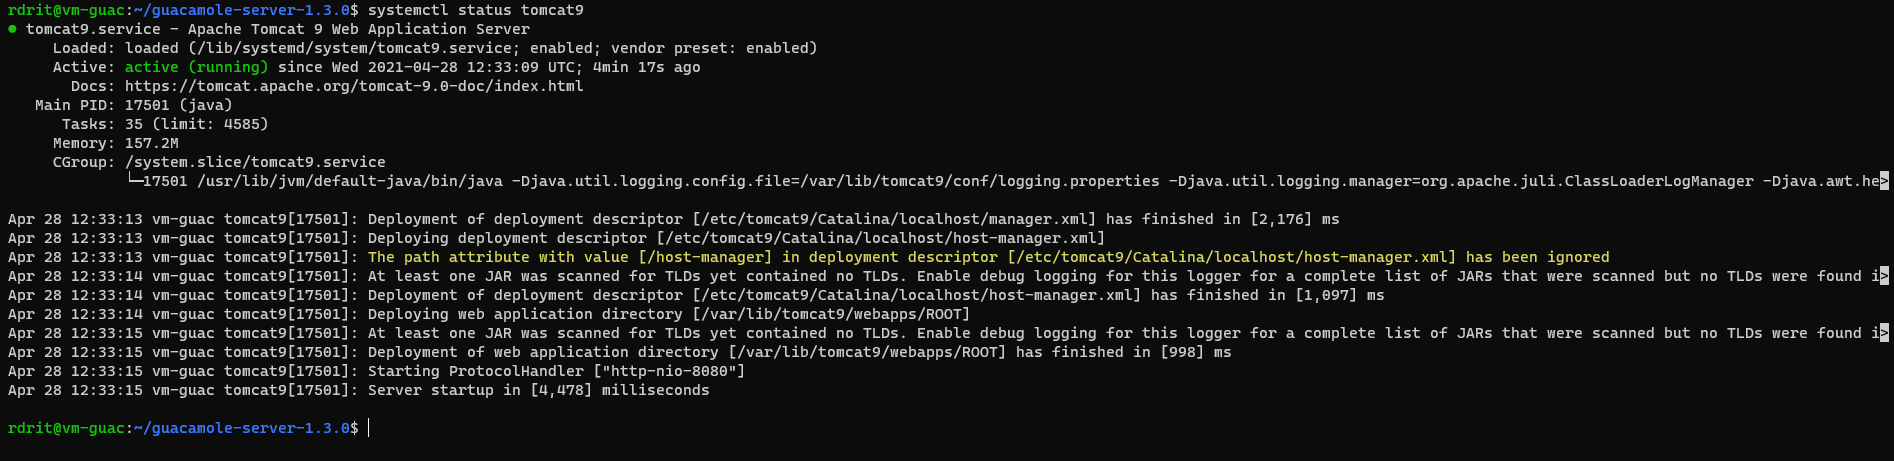
Create a folder where we will store the configuration and the client:
sudo mkdir /etc/guacamoleNow we will download the client and store it in the folder we just created:
sudo wget https://downloads.apache.org/guacamole/1.3.0/binary/guacamole-1.3.0.war -O /etc/guacamole/guacamole.war
You must create a symbolic link to Tomcat9 WebApps to “activate client use”
sudo ln -s /etc/guacamole/guacamole.war /var/lib/tomcat9/webapps/In order for the application to be fully deployed, the services must be restarted:
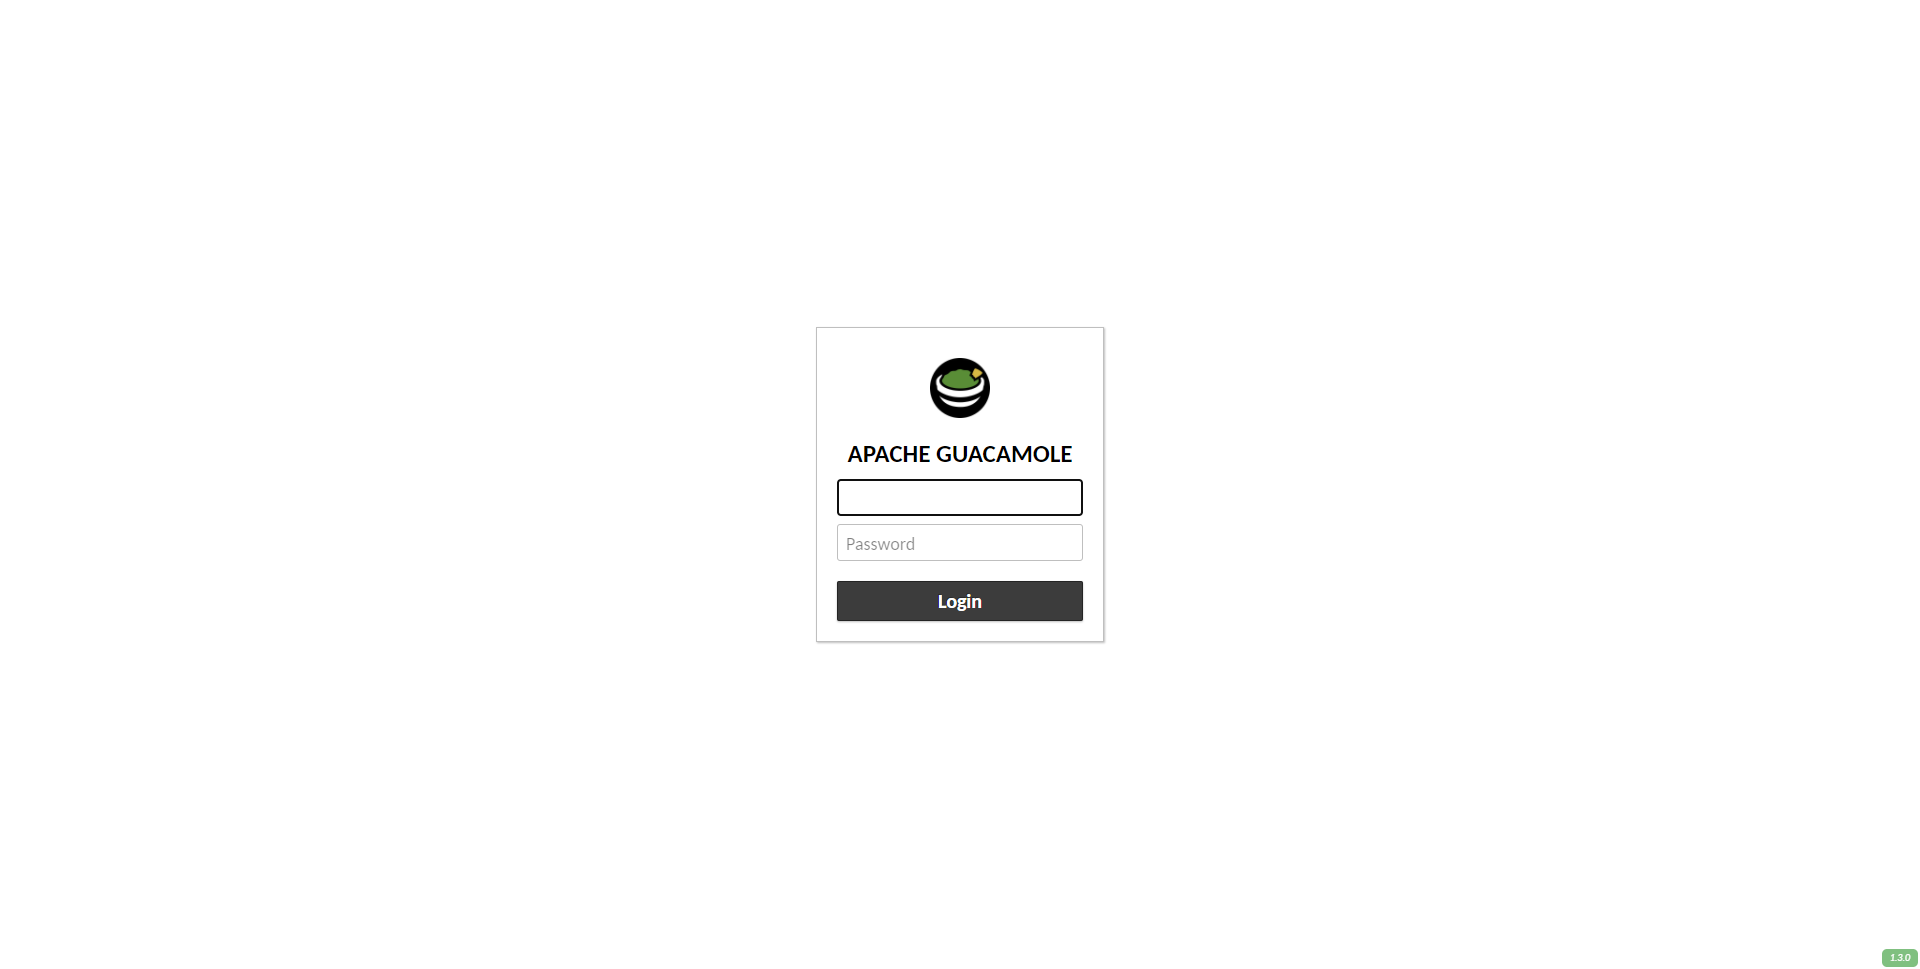
sudo systemctl restart tomcat9
sudo systemctl restart guacd
From there the authentication window should appear on you go to the url: http://IP_SERVER: 8080/guacamole
Guacamole-Server|Client : configuration
Now that the main services are installed, you have to configure all of this to make them work together.
Create the extensions and lib folders in the /etc/guacamole folder:
sudo mkdir /etc/guacamole/{extensions,lib}Add an environment variable:
Solution 1 :
sudo echo "GUACAMOLE_HOME=/etc/guacamole" /etc/default/tomcat9Solution 2 :
echo "GUACAMOLE_HOME=/etc/guacamole" | sudo tee -a /etc/default/tomcatSolution 3 :
Open the file / etc / default / tomcat9 with nano and add the variable:
sudo nano /etc/default/tomcat9At the end of the file add:
GUACAMOLE_HOME=/etc/guacamole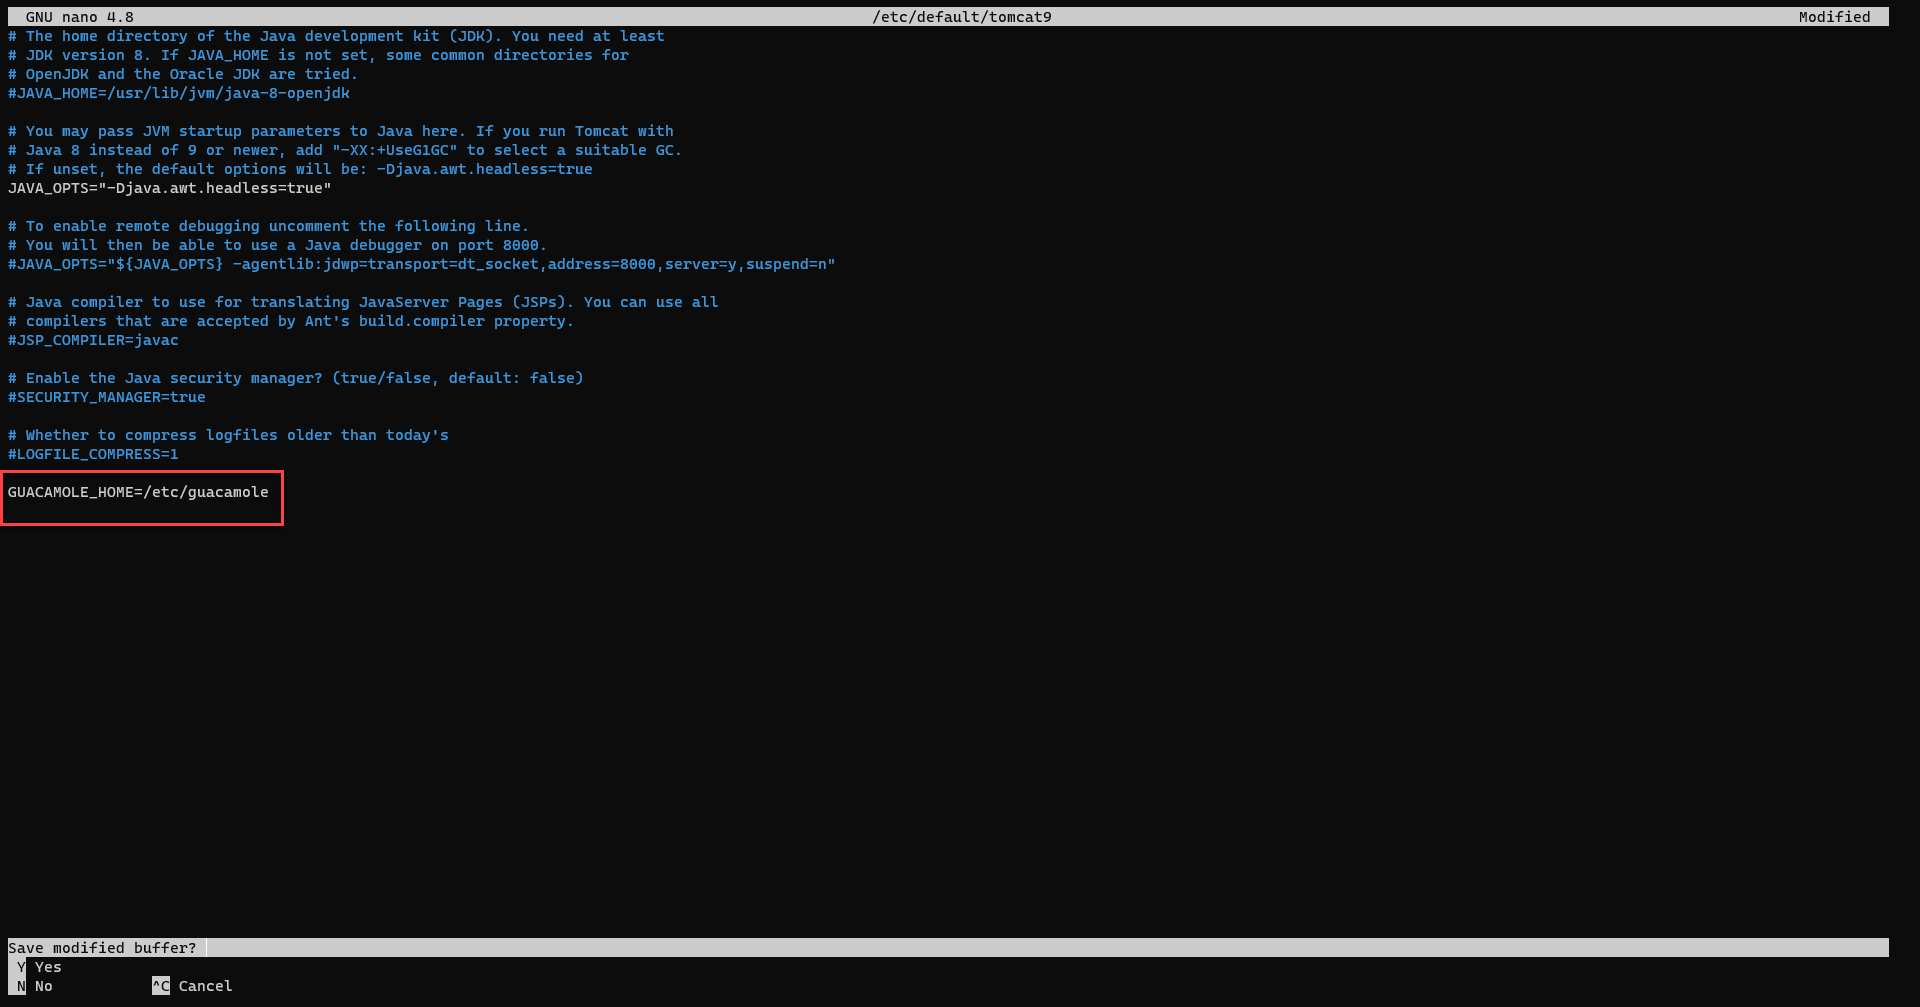
In a basic configuration, from here, most of the tutorials explain how to configure the client with the server and how to manage a mapping file. As a reminder in the introduction I explained that we are going to use MySQL / MariaDB
Install MariaDB or MySQL on the server:
sudo apt install mariadb-server mariadb-client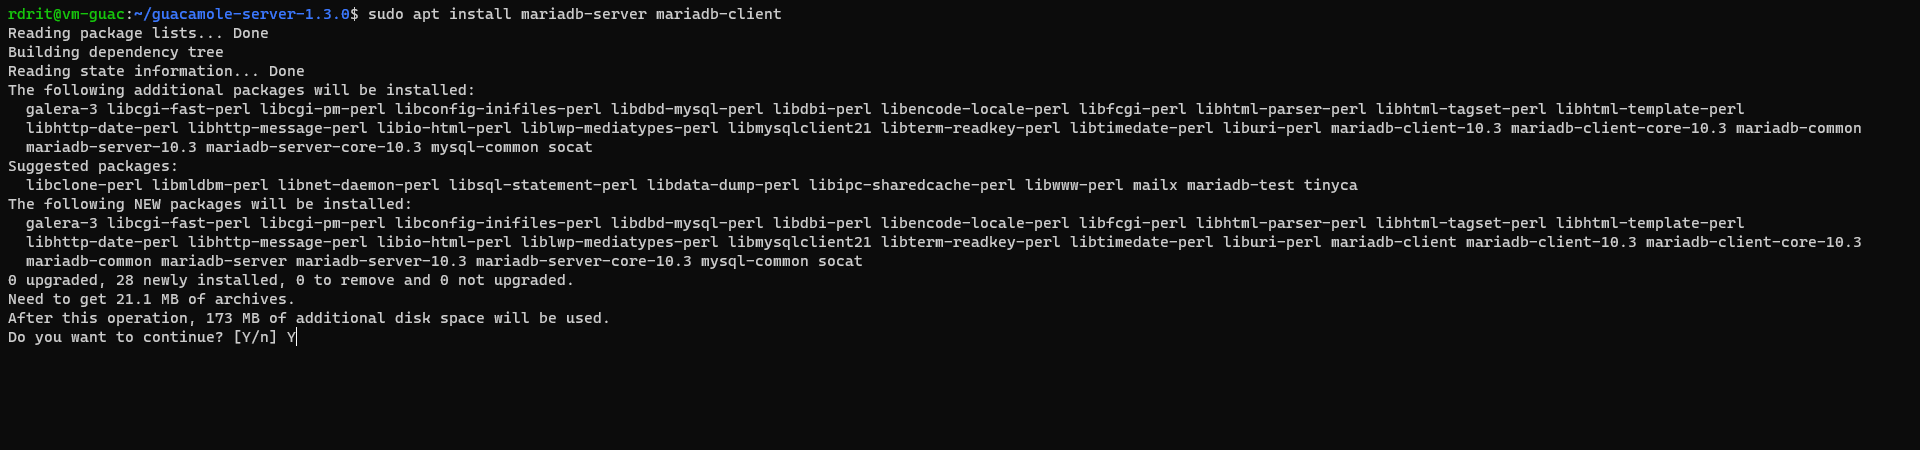
We must now create a user and the database, we start by connecting to the database server:
sudo mysqlExecute the requests below in modifying at least the password:
CREATE DATABASE guacamole_db;
CREATE USER 'guacamole_user'@'localhost' IDENTIFIED BY 'P@$sW0rd';
GRANT SELECT,INSERT,UPDATE,DELETE ON guacamole_db.* TO 'guacamole_user'@'localhost';
FLUSH PRIVILEGES;
quit;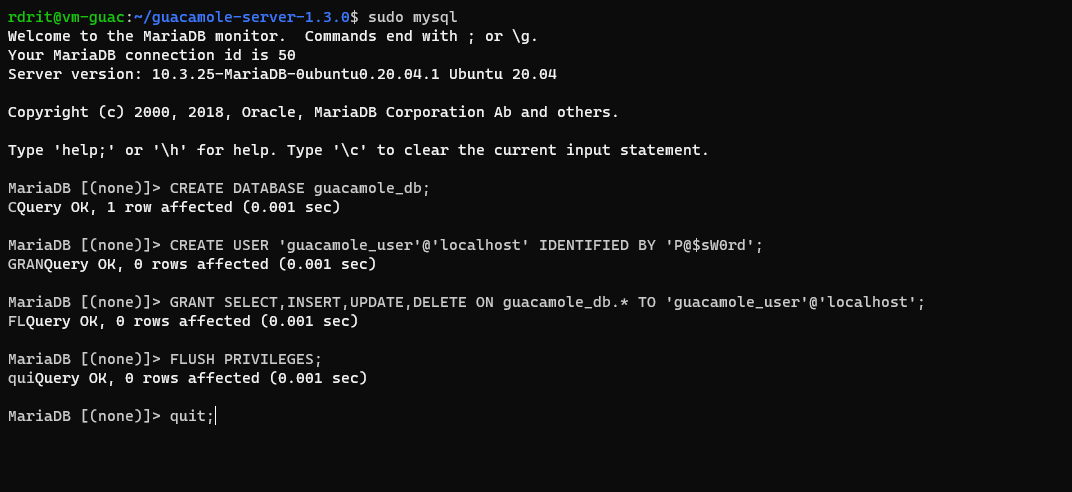
Download the mysql extension for Guacamole:
wget http://apache.mirror.digionline.de/guacamole/1.3.0/binary/guacamole-auth-jdbc-1.3.0.tar.gzUnzip the archive:
tar vfx guacamole-auth-jdbc-1.3.0.tar.gzAdd the necessary tables in the created database:
cat guacamole-auth-jdbc-1.3.0/mysql/schema/*.sql | sudo mysql guacamole_dbInstallation of the extension:
sudo cp guacamole-auth-jdbc-1.3.0/mysql/guacamole-auth-jdbc-mysql-1.3.0.jar /etc/guacamole/extensions/Download the JDBC driver:
wget https://dev.mysql.com/get/Downloads/Connector-J/mysql-connector-java-8.0.13.tar.gzDownload the JDBC driver:
tar xvzf mysql-connector-java-8.0.13.tar.gzInstall (copy) the driver for Guacamole:
sudo cp mysql-connector-java-8.0.13/mysql-connector-java-8.0.13.jar /etc/guacamole/lib/We can now move on to configuring the client to use the database.
Create the configuration file:
sudo nano /etc/guacamole/guacamole.propertiesAdd the configuration below by adapting to your environment (mysql-):
# Hostname and Guacamole server port
guacd-hostname: localhost
guacd-port: 4822

# MySQL properties
mysql-hostname: localhost
mysql-port: 3306
mysql-database: guacamole_db
mysql-username: guacamole_user
mysql-password: P@$sW0rd
The configuration is complete, link the configuration folder to Tomcat:
sudo ln -s /etc/guacamole /usr/share/tomcat9/.guacamoleRestart the services:
sudo systemctl restart tomcat9
sudo systemctl restart guacd
Optional: Create a guacamole folder in the /var folder for storing video recordings
sudo mkdir /var/guacamoleThe installation and the basic configuration are finished, we will now see how to use Guacamole.
Using Guacamole
As a reminder to access Guacamole from a web browser go to : http://IP_SERVER:8080/guacamole
The default credential is : guacadmin:guacadmin

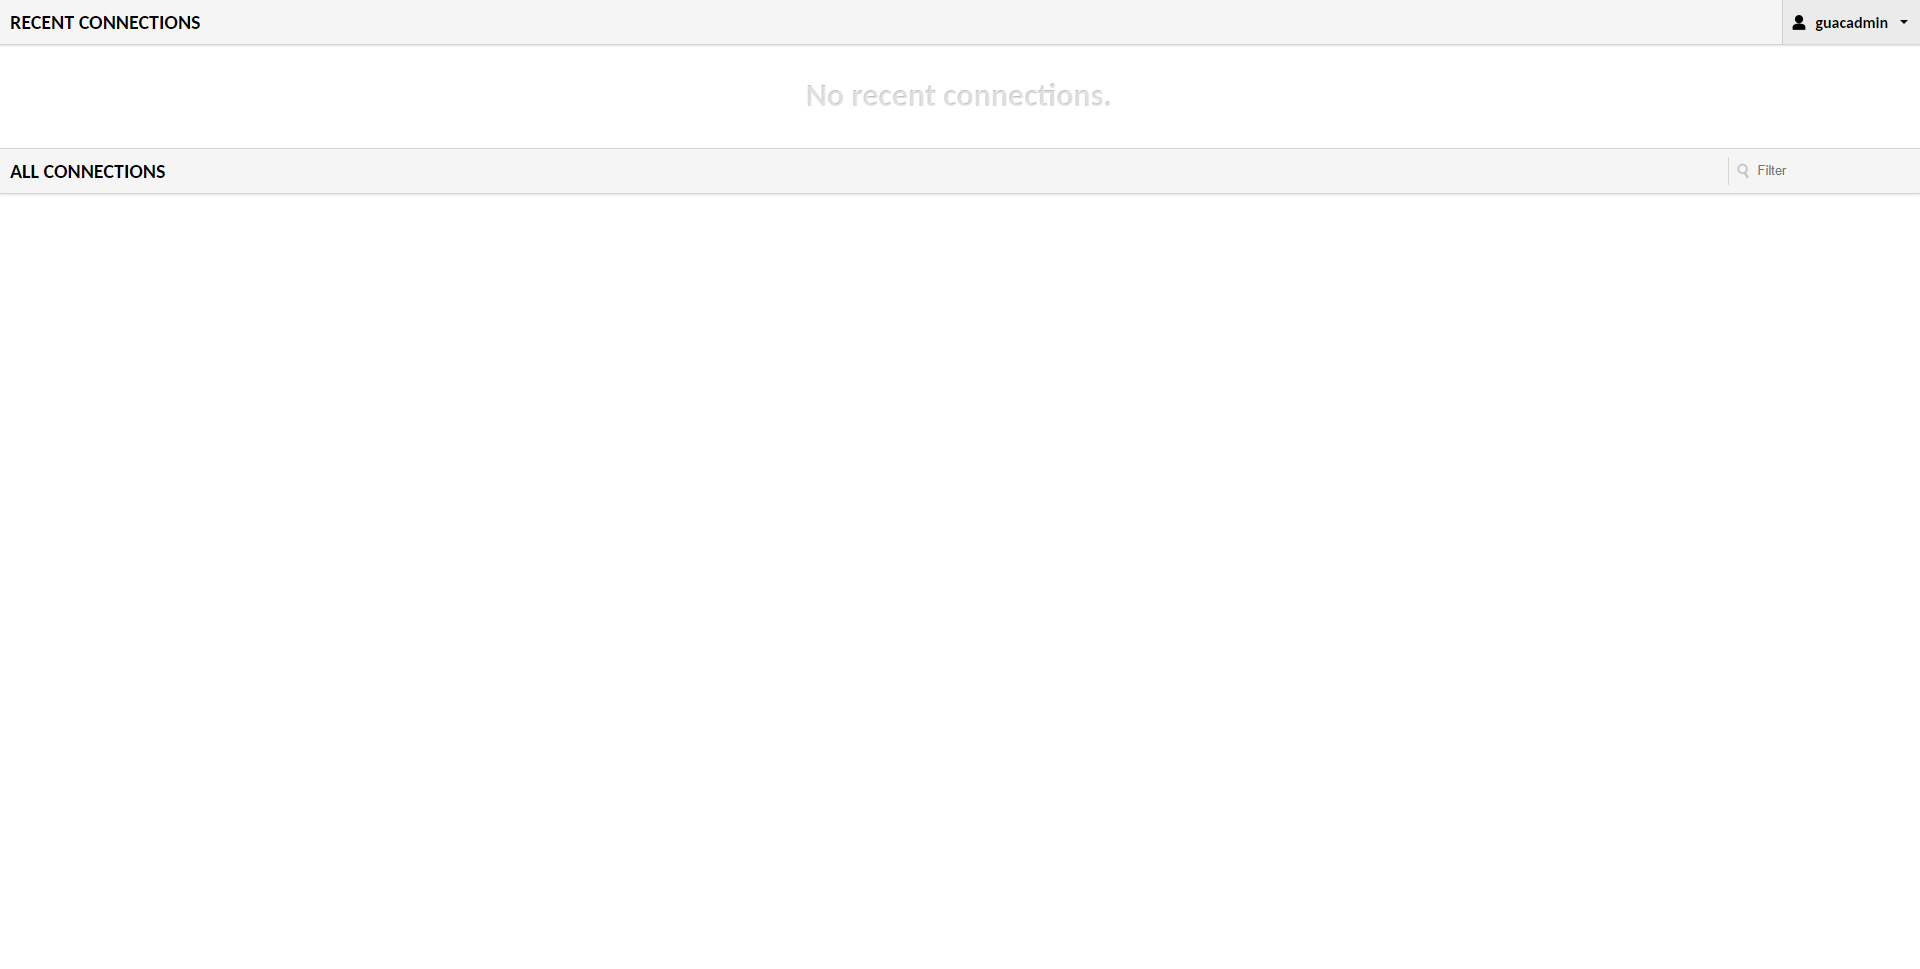
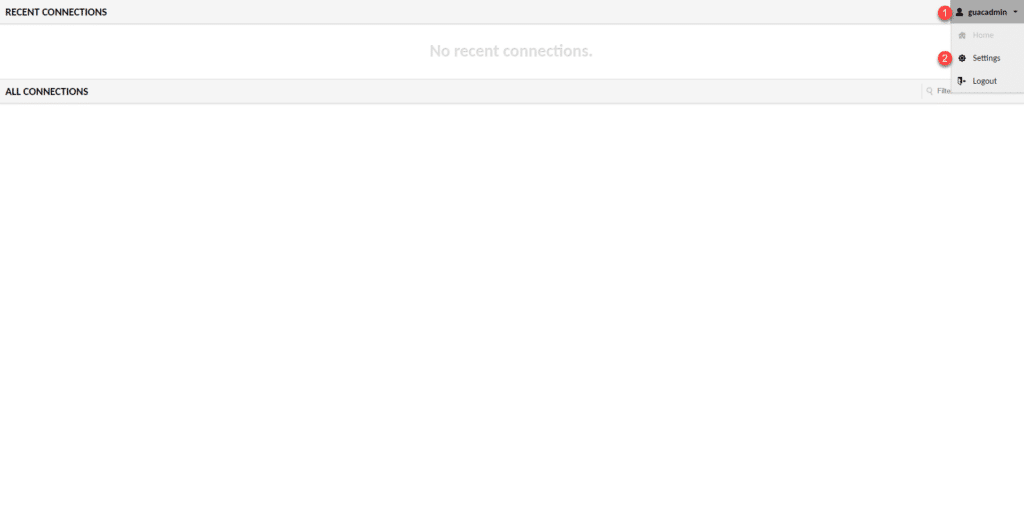
Once connected, you arrive on a page which normally displays the last connections used and the connections that the user can use.
To access the Guacamole configuration, click on the user’s name 1 to pull down the menu and click on Settings 2.
To get started, I will explain how to use Guacamole in a logical way and not you directly show its use.
The goal as a reminder is to provide access to external providers, so I will base my groups on this issue.
Create a connection group
The first thing we will see is the creation of a connection group.
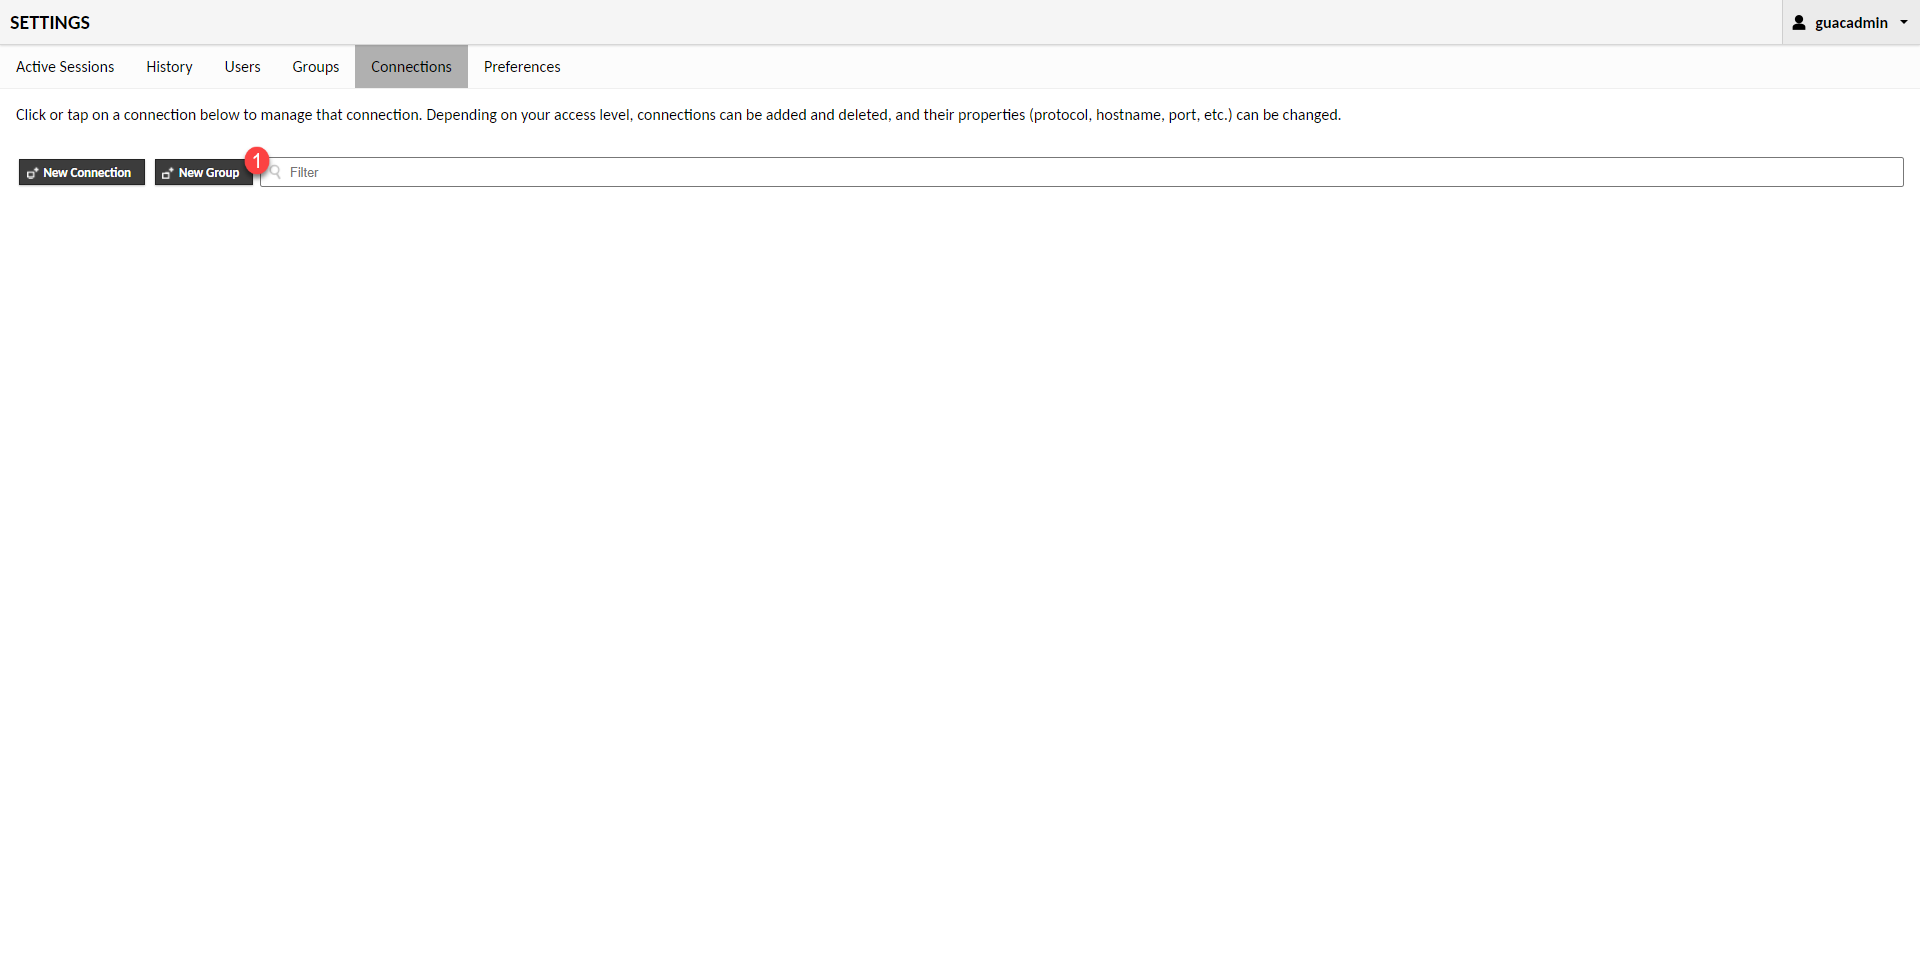
In the navigation menu go to Connection 1.

For the moment this view is empty, we will subsequently find all the configured connections as well as the different groups.
The goal will now be to create a tree structure in order to organize the connections of the providers.
What I am showing you here is as an example, you are then free to adapt to your needs.
I will first create a Providers group, in which I will then create sub-groups that will represent a provider.
Click on the New Group 1 button.
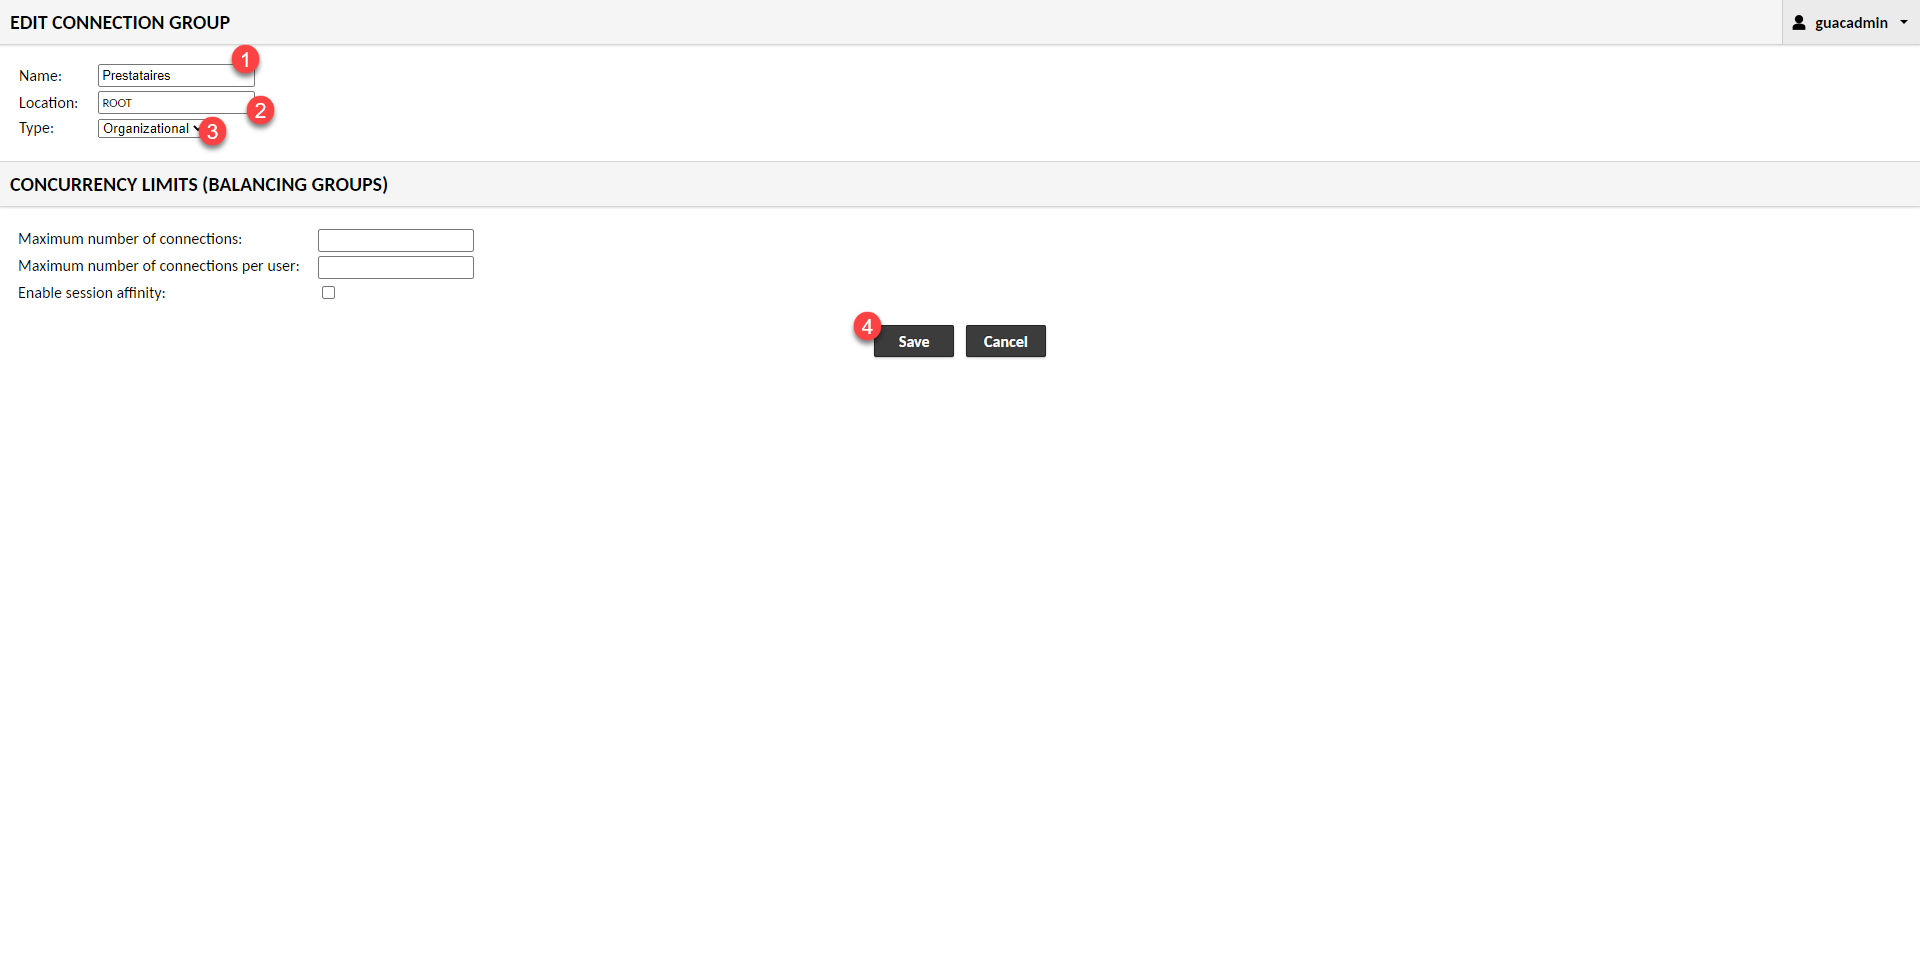
Name the group 1, Location leave ROOT 2 and Type leave Organizational 3. Click on the Save 4 button to create the group.
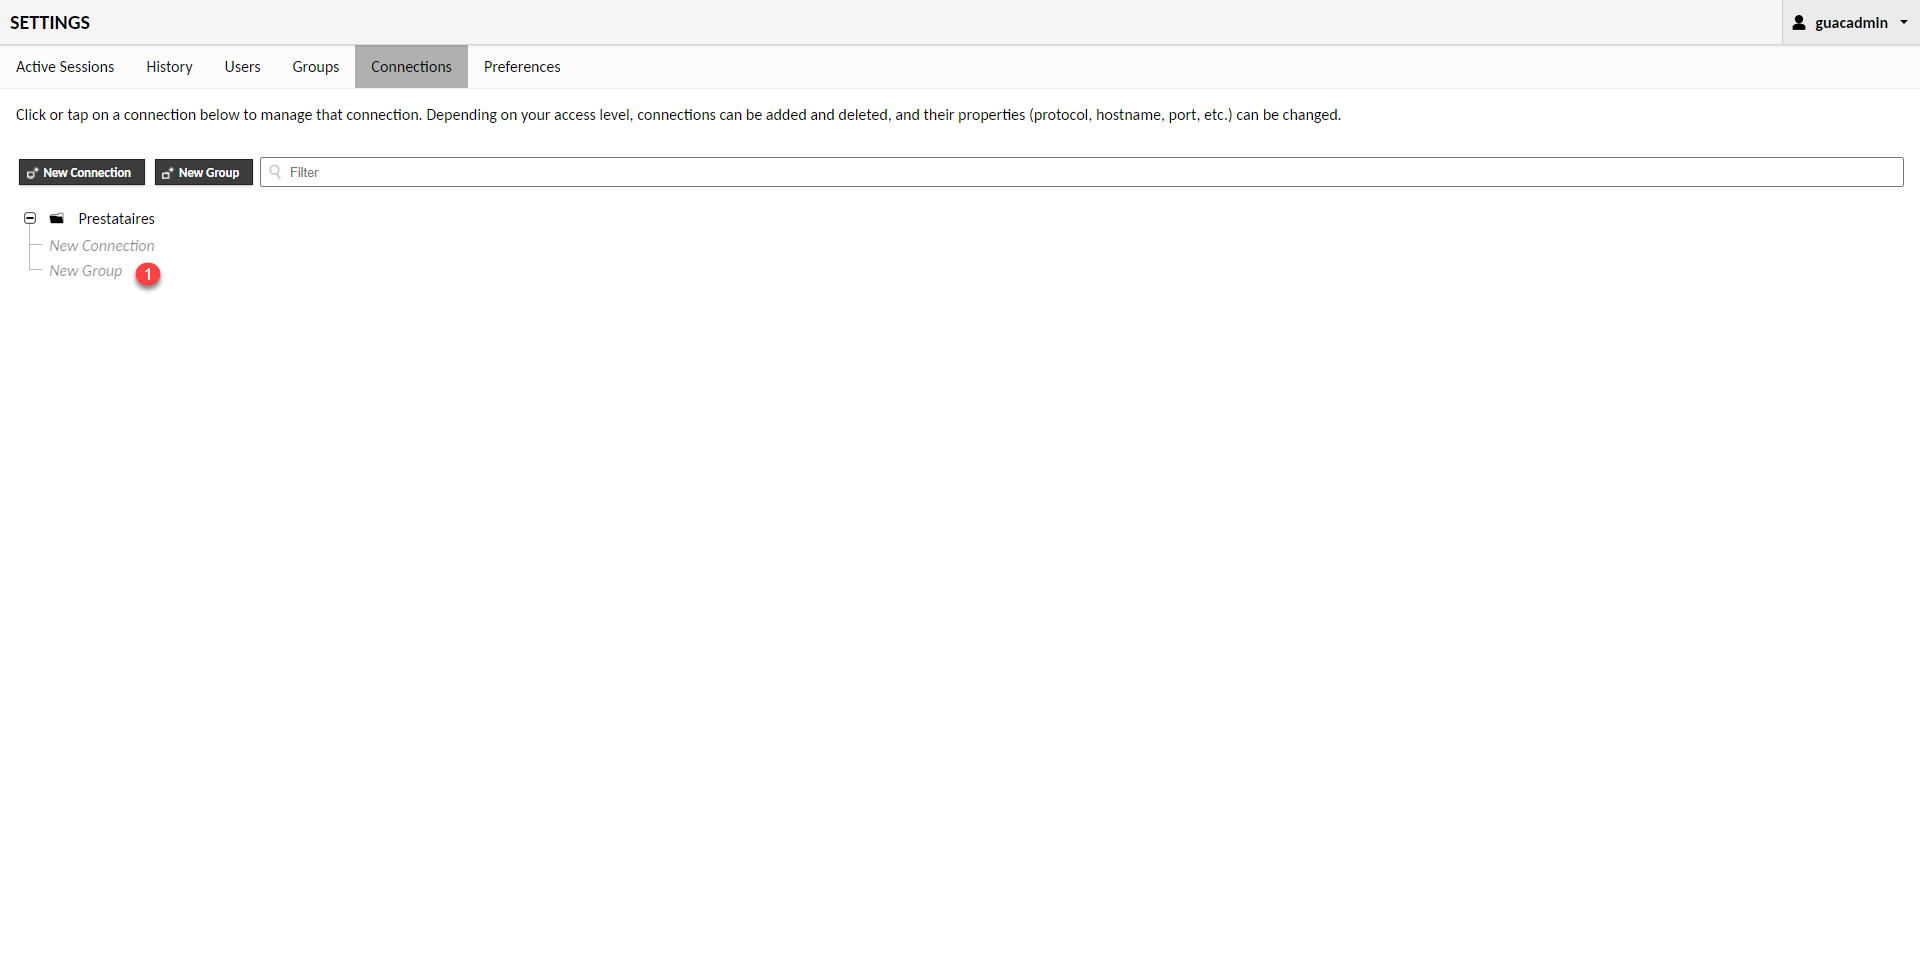
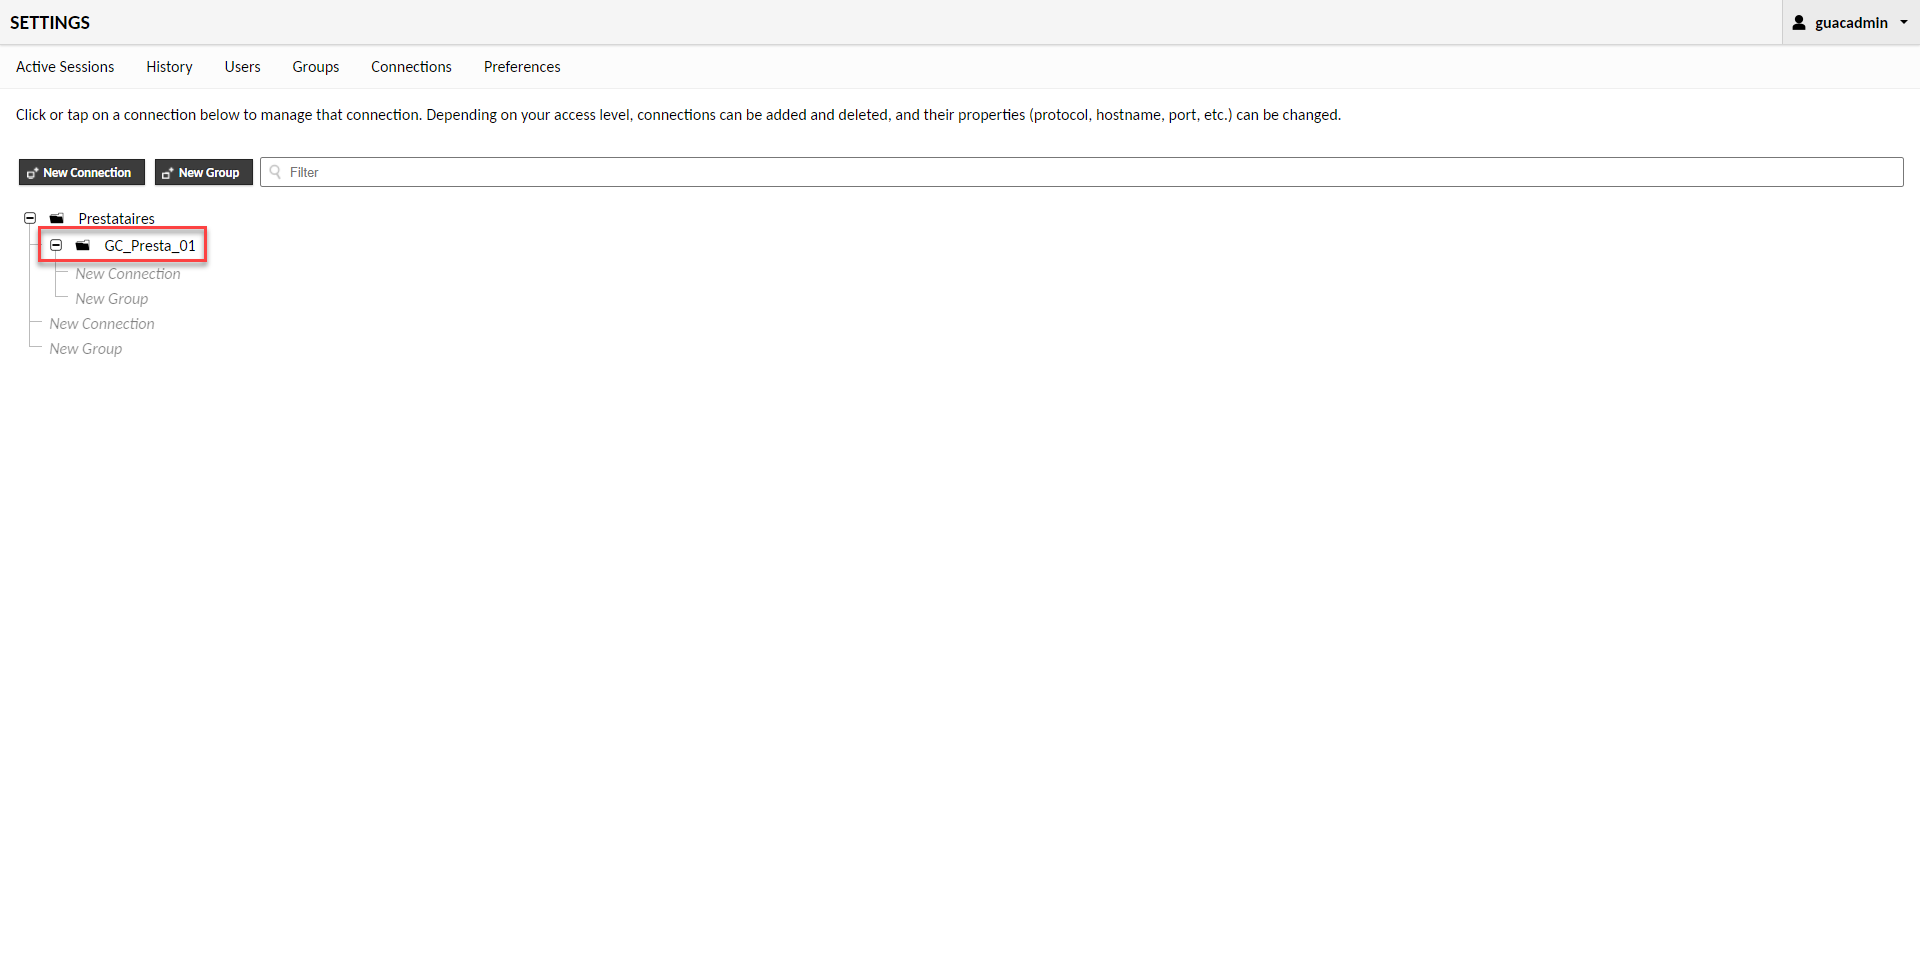
The group is created and visible in the list of connections, if we unfold it, we see that we can add connections and sub-groups. Click on New Group 1.
As for the root group, name the group 1 (here the name of the provider prefixed with GC), the Location field is already selected and leave the Organizational type. Click on Save 2.
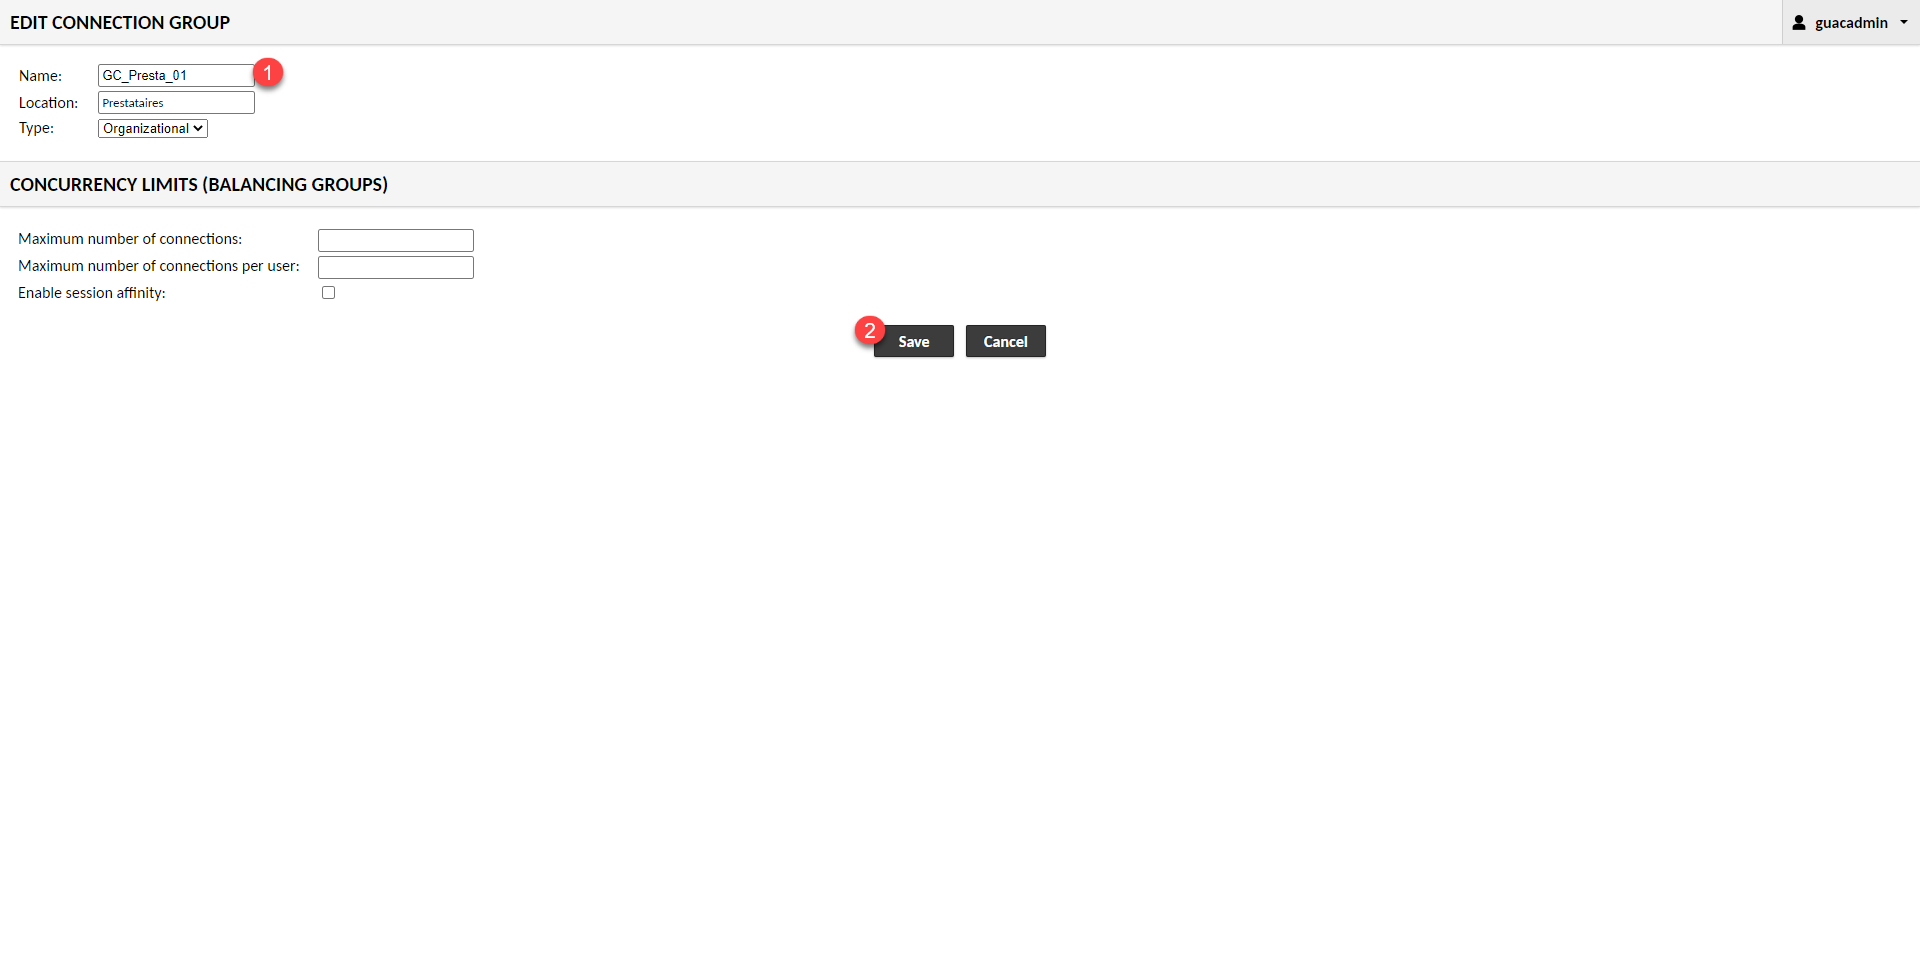
The group is added.
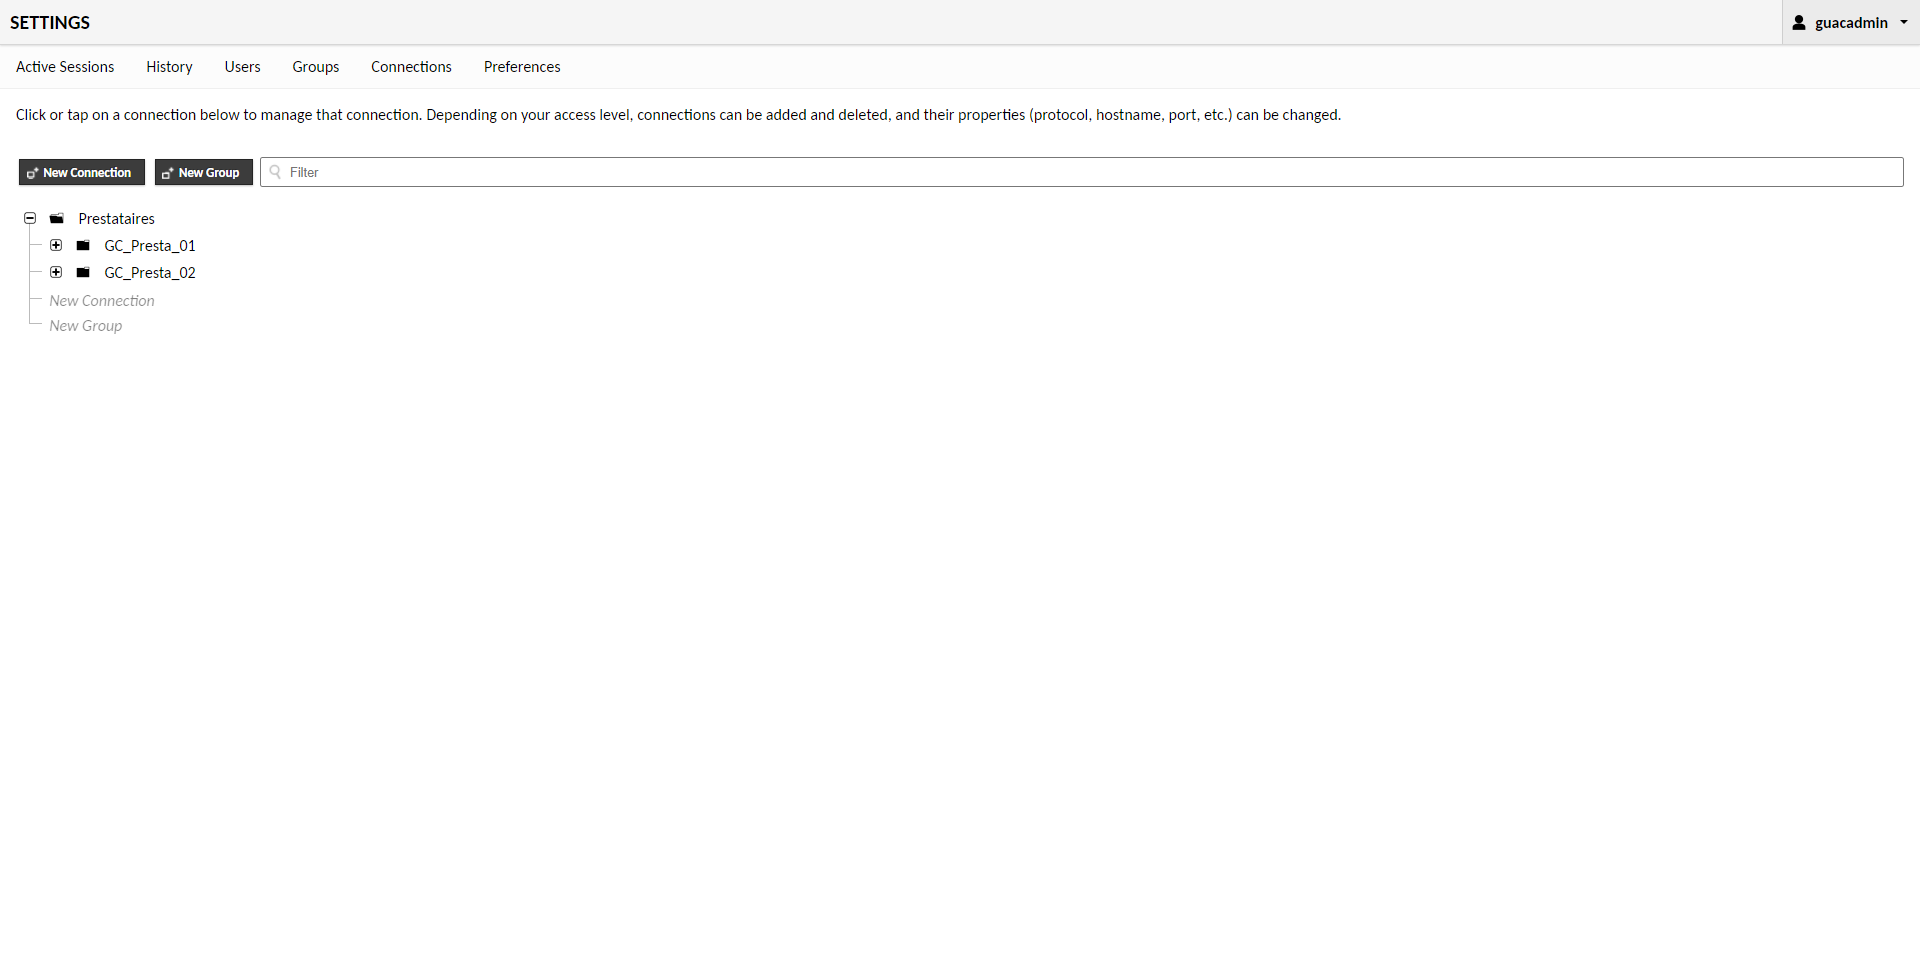
To illustrate the tutorial, I added a second group of connections to simulate multiple providers.
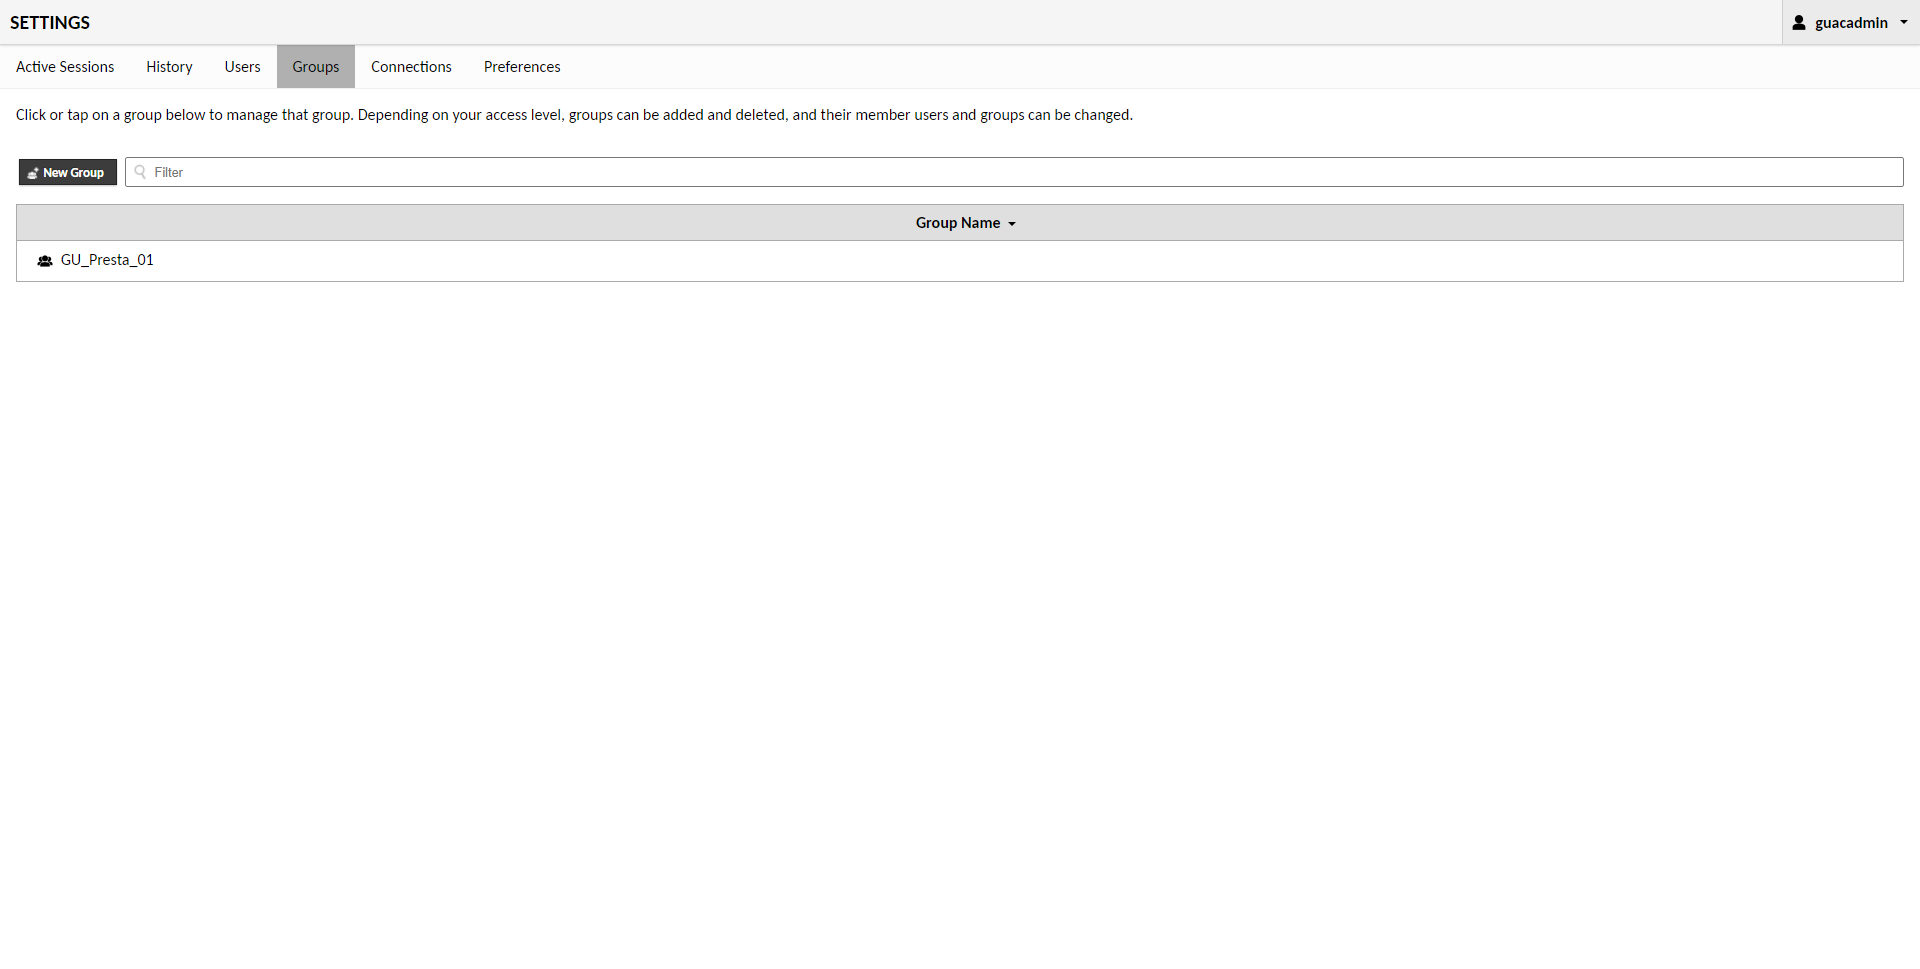
Create a user group
User groups will make it possible to group user accounts into a group in order to be able to access their data more easily, instead of managing user by user.
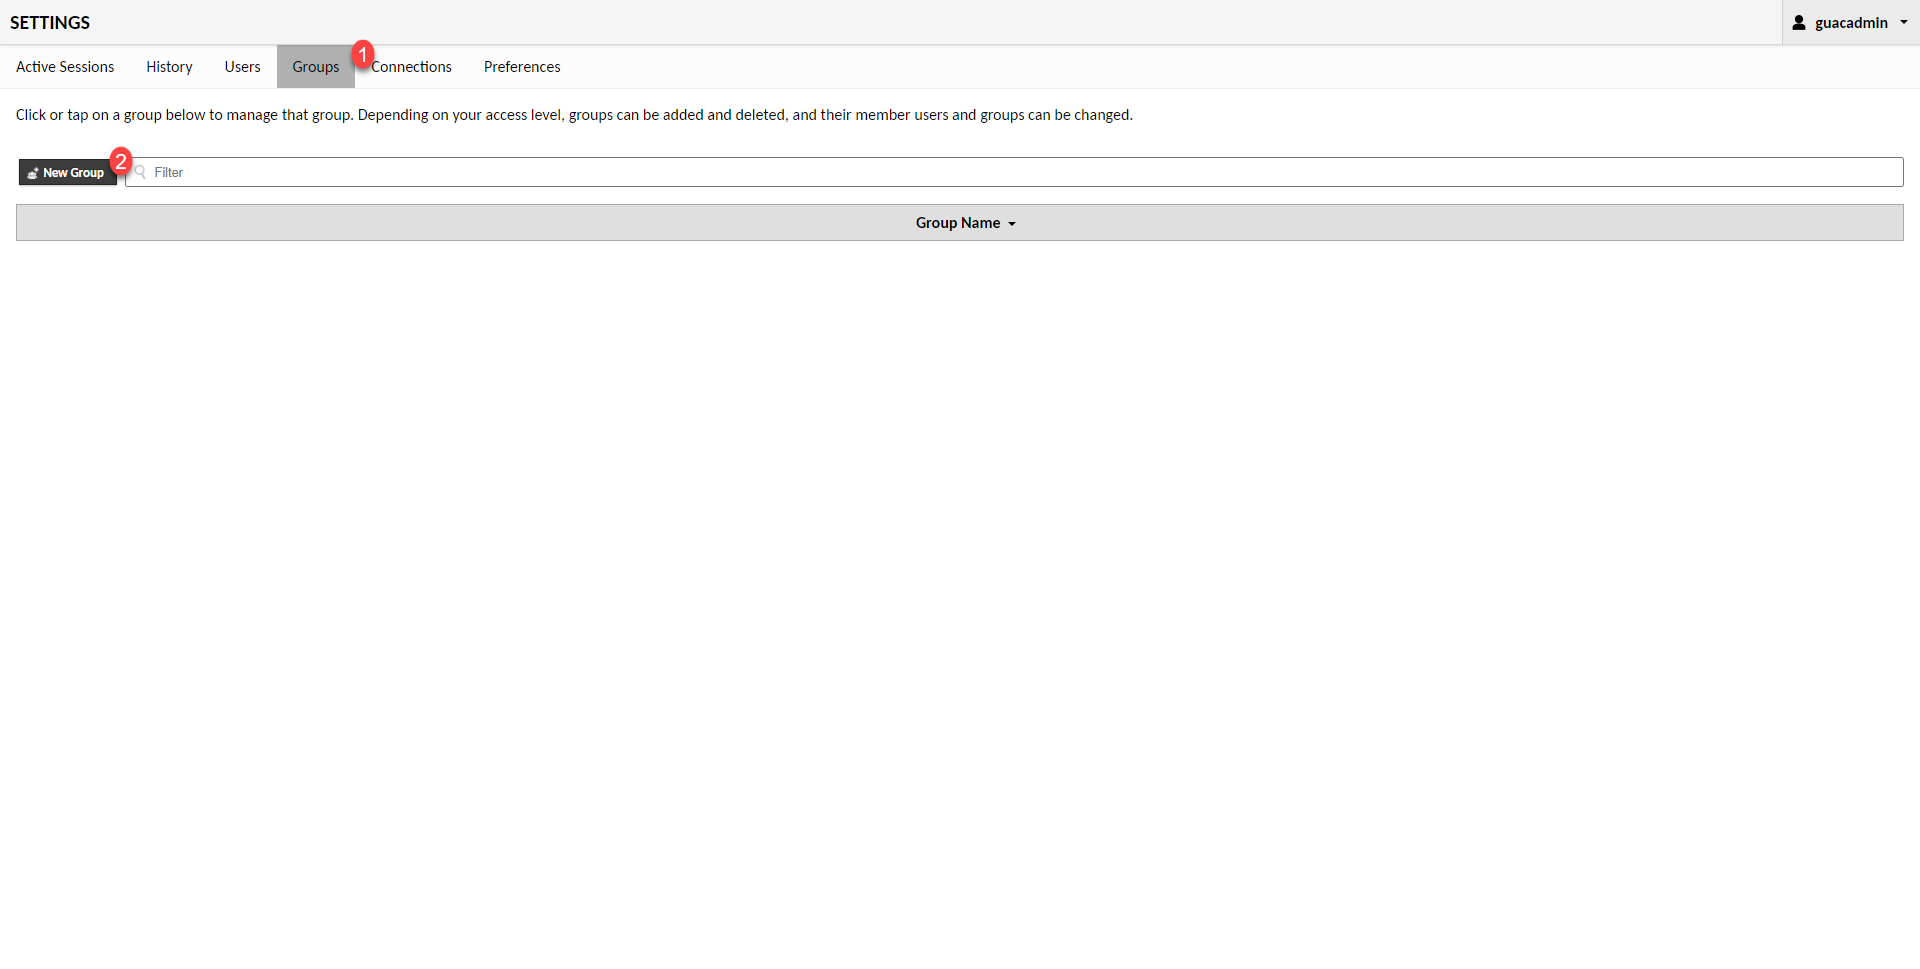
Go to the Group 1 menu and click on New Group 2.
Name the group 1, check the connection groups linked to the service provider 2 and click on Save 3.

It is imperative to check the parent groups, if this is not done, access to connections will not be possible.
In the configuration of a group, it is possible to add administrative rights on Guacamole.
The group is added.
I also add a second group.
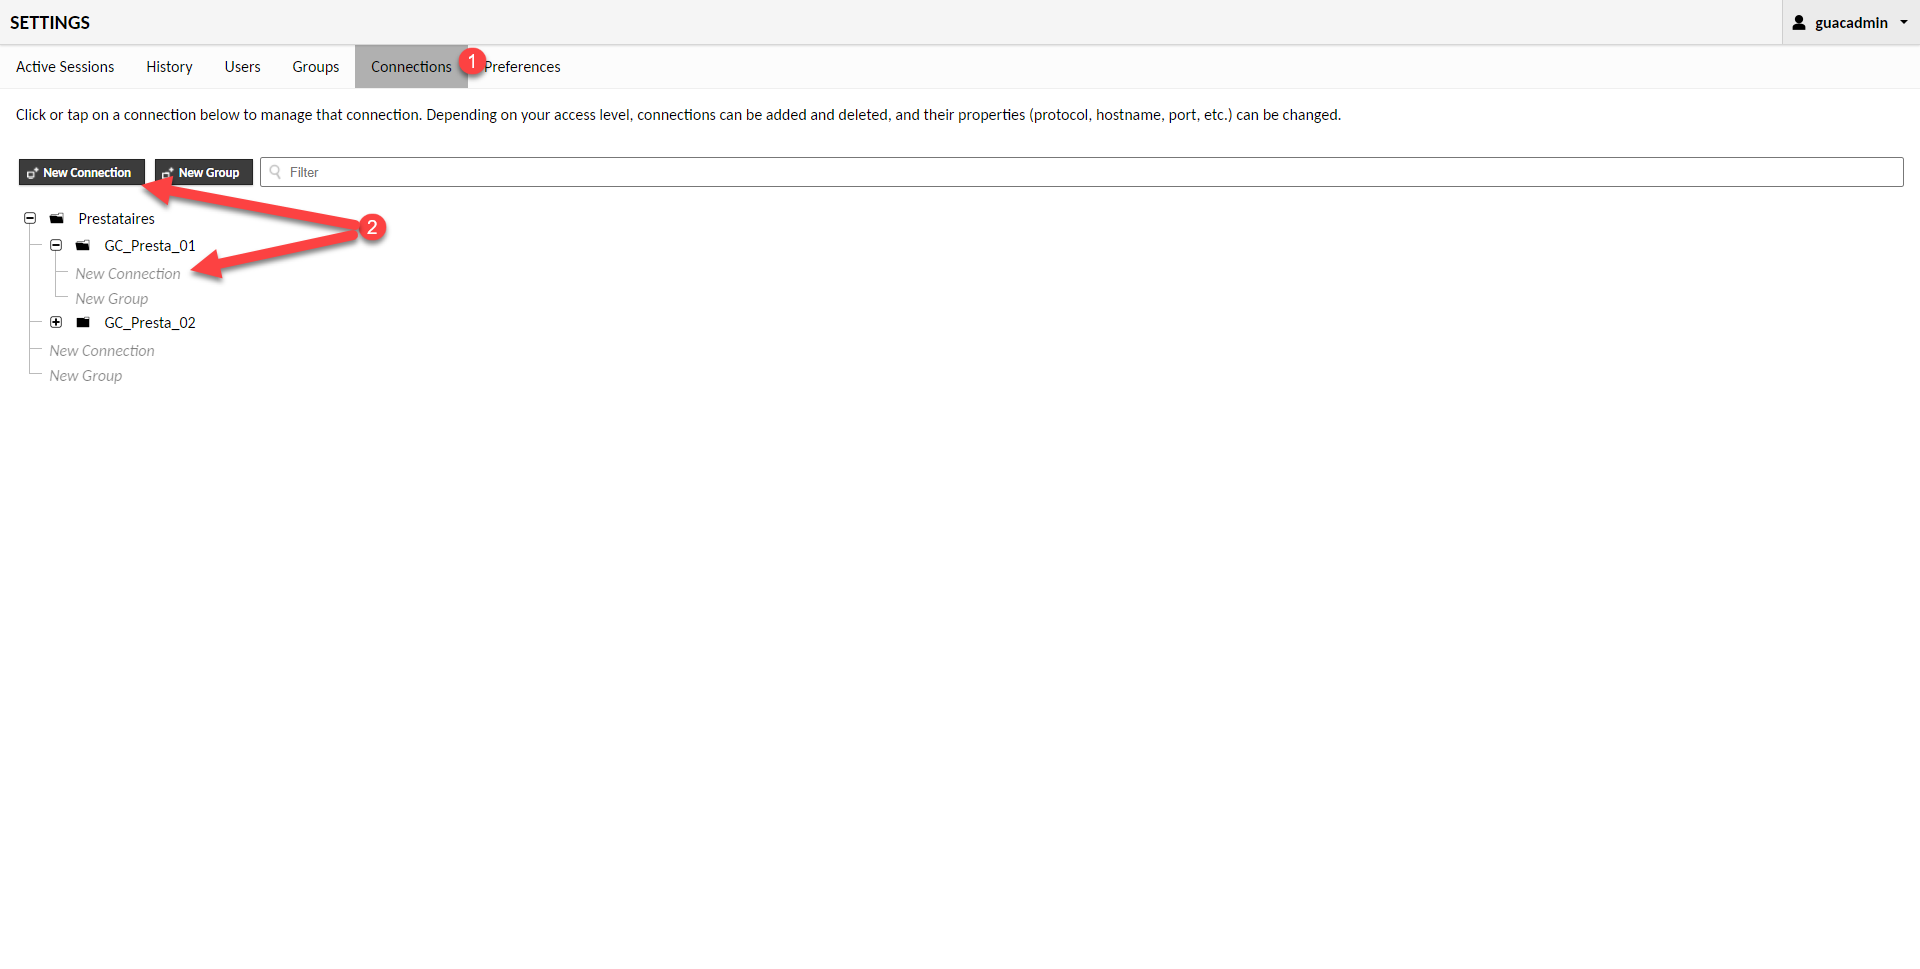
Add a new connection
Before explaining to you how to add a connection, it is necessary to imagine a connection as being an access to a device with a particular configuration. Therefore, it is normal to have several connections with different parameters to the same server depending on the access and information you want to give to your service provider.
Go to the Connections 1 menu, to add a connection, several possibilities, click on the New Connection 2 button or on New Connection 2 which can be found at group level.
Configure an RDP connection
The first connection that we will configure is an RDP access on a Windows server.
The connection parameters being numerous, I will take by block.
Start by naming the connection 1 and select the RDP protocol 2.

Regarding the Location field, having clicked on New Connect at group level, it is already selected
In the CONCURRENCY LIMITS part, it is possible to limit the number of simultaneous connections, in the context of an RDP connection where the identifiers are passed, this will have no impact because the same user will not be able to open several times the same session.
We pass the LOAD BALANCING and GUACAMOLE PROXY PARAMETERS (GUACD) parts which are to be configured on complex installations with several servers.
We will now be interested in the PARAMETERS part, here too, I will not go over all the available options, I will let you browse them and you will be able to see that we can configure all the parameters of the RDP client (RDS gateway, Redirection peripherals, Performance …).
I will limit myself to the minimum and I will let you do your own tests if necessary.
In the Network section, indicate the name or the IP address of the host 1 as well as the port 2 (3389) for RDP.

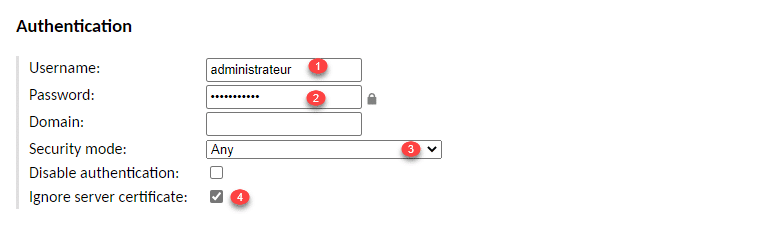
In the Authentication section, we will directly indicate the account to be used to connect, which avoids giving this information to the service provider. Enter the user name 1 and the password 2, select Any 3 for the Security mode field and check the Ignore server certificate 4 box.
Last setup item I’m going to show you is the recording of the session in the Screen Recording section. In the Recording path 1 field, indicate the location where they will be stored (/ var / guacamole /) and then indicate the name of the recording in the Recording name 2 field.

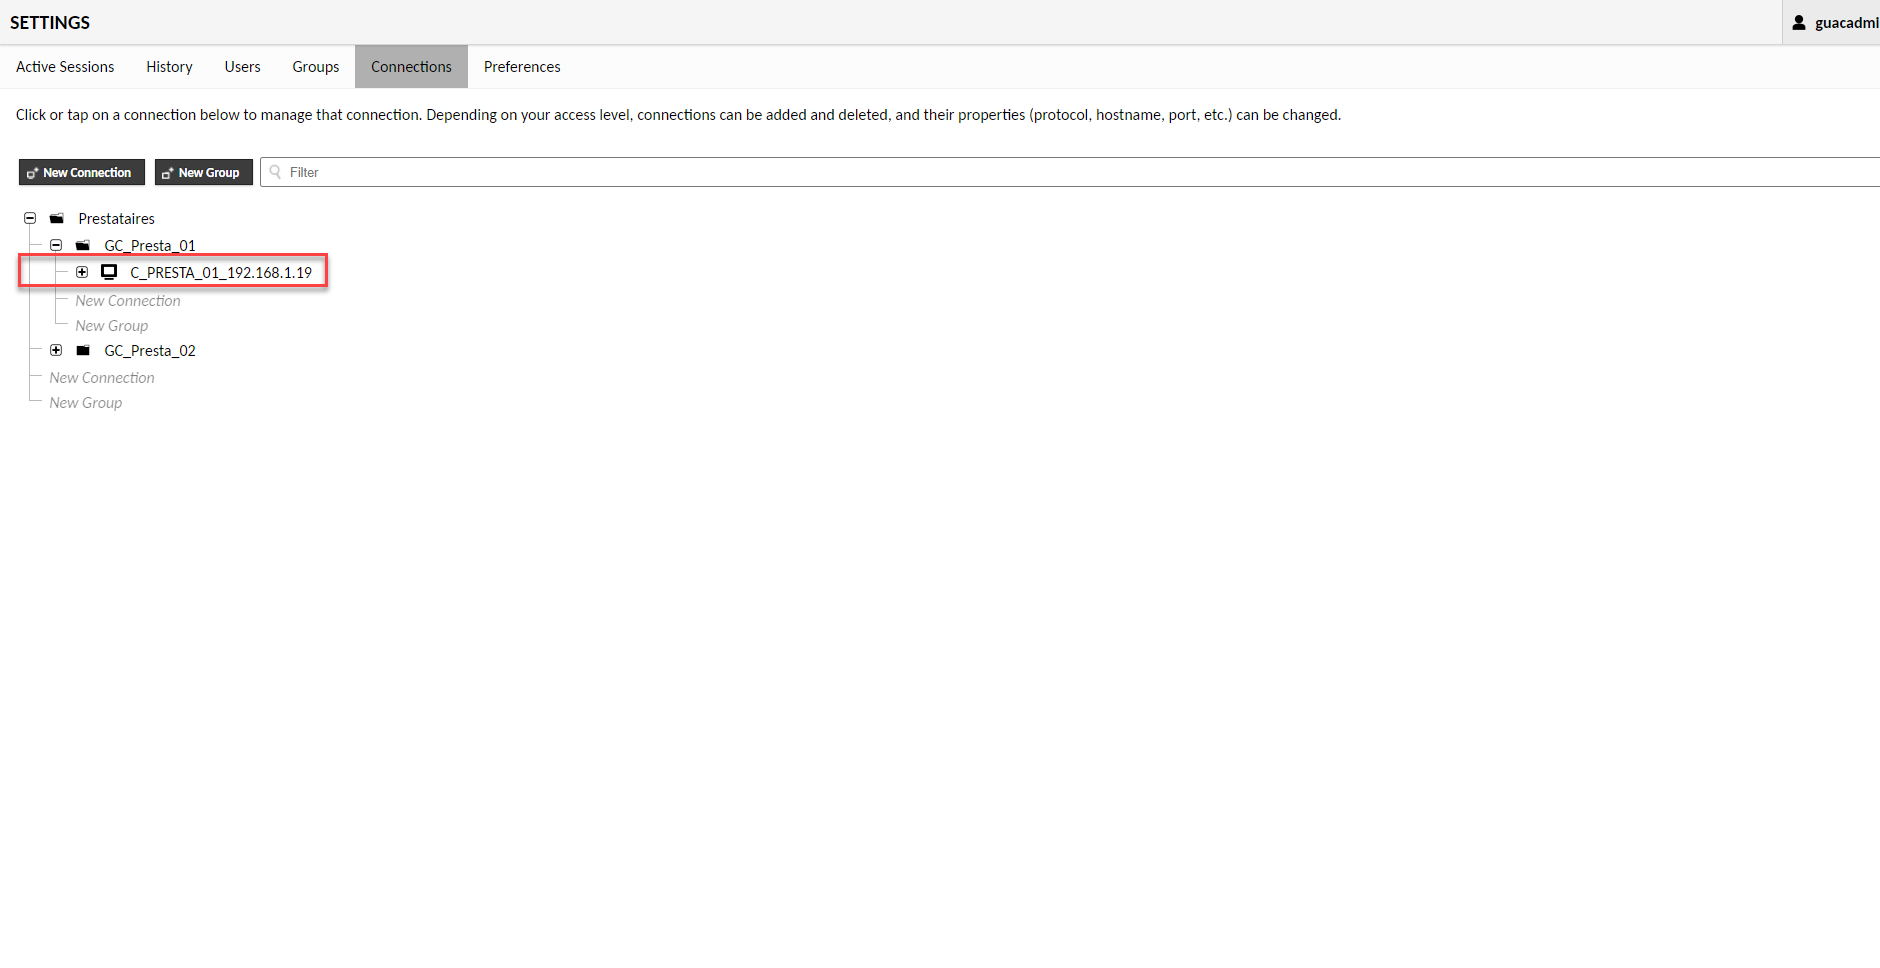
Save the connection by clicking on the Save 1 button.

The connection is added and stored in the connection group.
Configure an SSH connection
In the same way as for the SSH connection, I will limit myself to the minimum, for the rest of the parameters I will let you look.
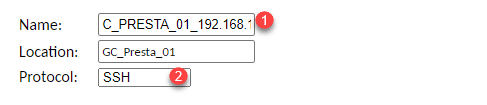
Name the connection 1 and select the SSH protocol 2.
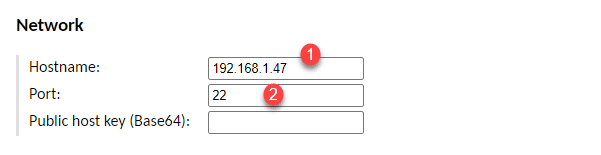
In the Network part, enter the host 1 (IP or FQDN) and indicate the port (22) 2.
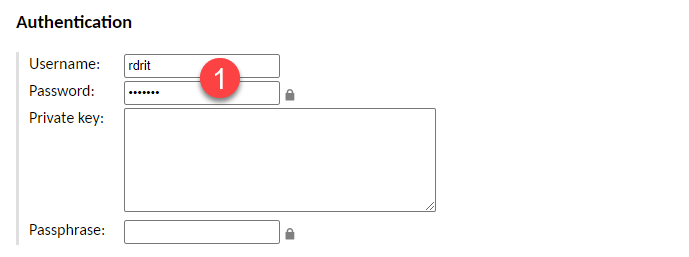
In the Authentication section, indicate the user and password pair 1 according to your policy.
How for the RDP connection, in the Screen Recording section, it is possible to configure the video recording of the connection session.

To finish, click on Save 1.

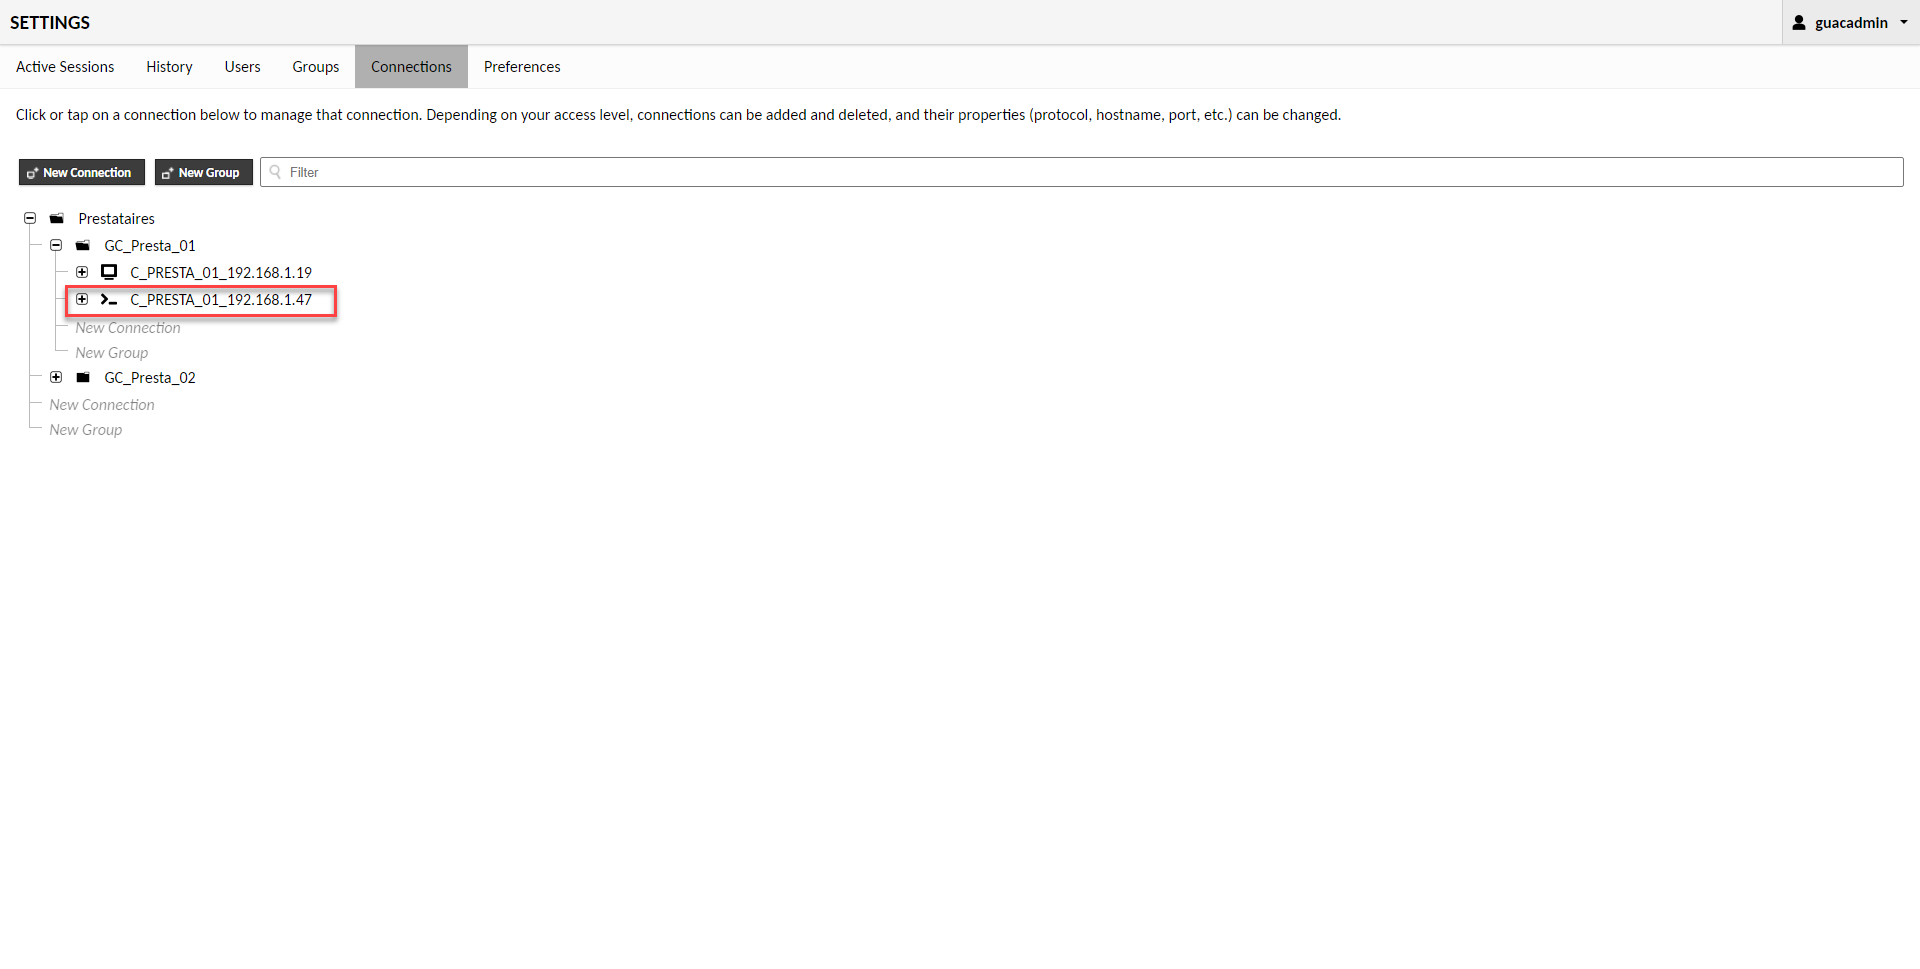
The SSH connection is added and in the group.
For the tutorial, I also added connections to the second provider, but this time without indicating the identifiers.
Modify a connection
To modify an existing connection, all you have to do is click on it, you then arrive on the same form as for adding a connection. Once the changes have been made, click on Save.
Assign connections to groups
This operation is mandatory so that users can have access to connections.
This manipulation made me lose my mind, because inheritance is not automatic
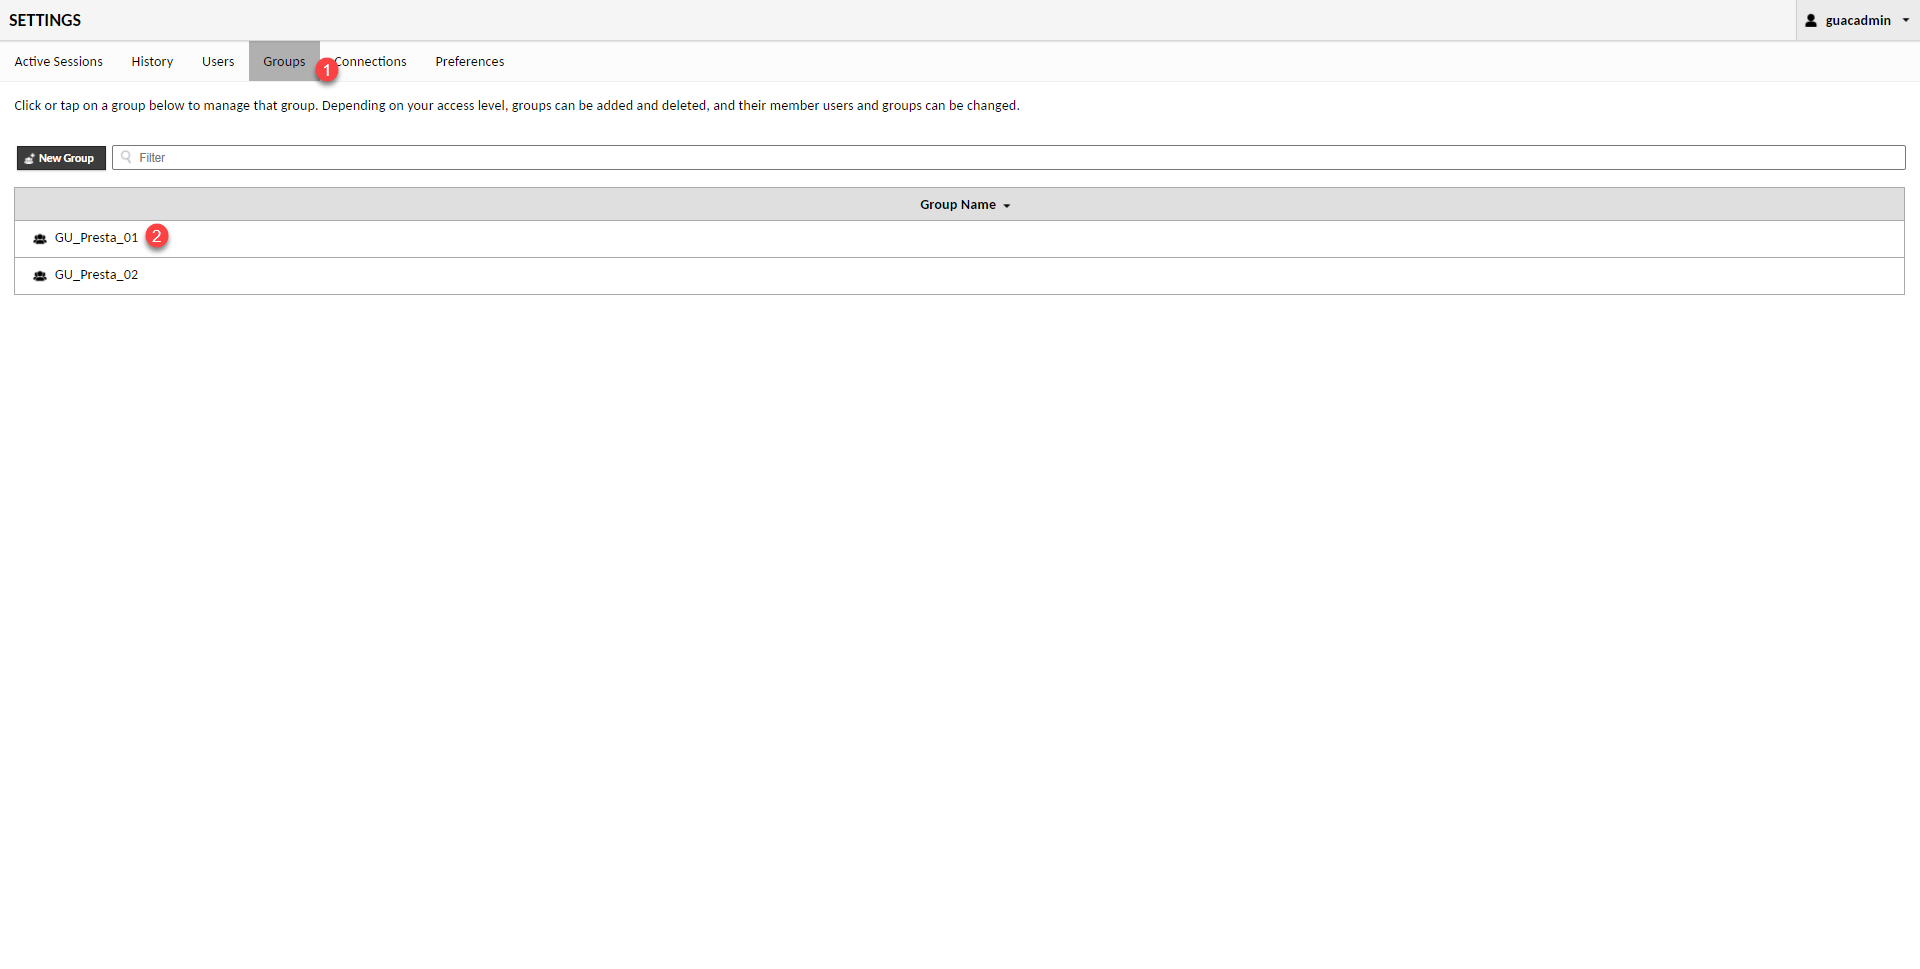
Return to the management of user groups 1 then click on the group to edit 2.
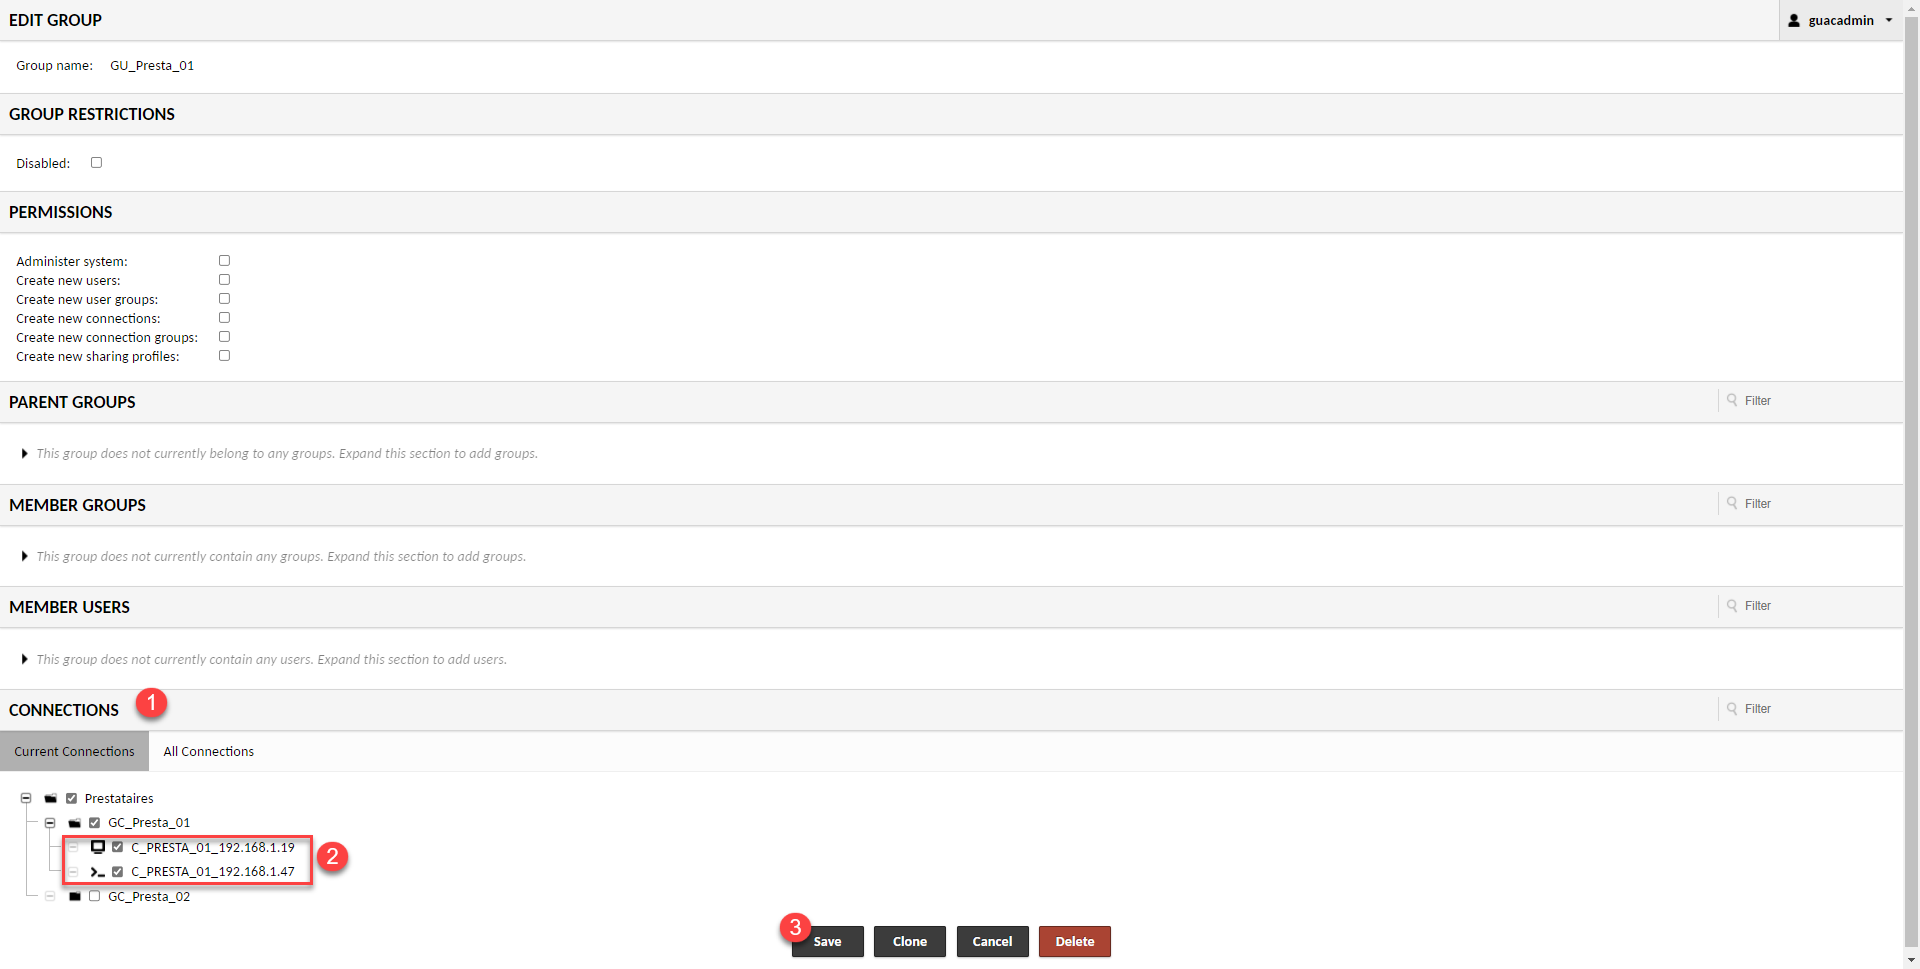
In the Connections 1 section, check the connections created previously 2 and click on Save 3.
Add a user (provider)
Now we will see how to add a user and assign it directly to a group.
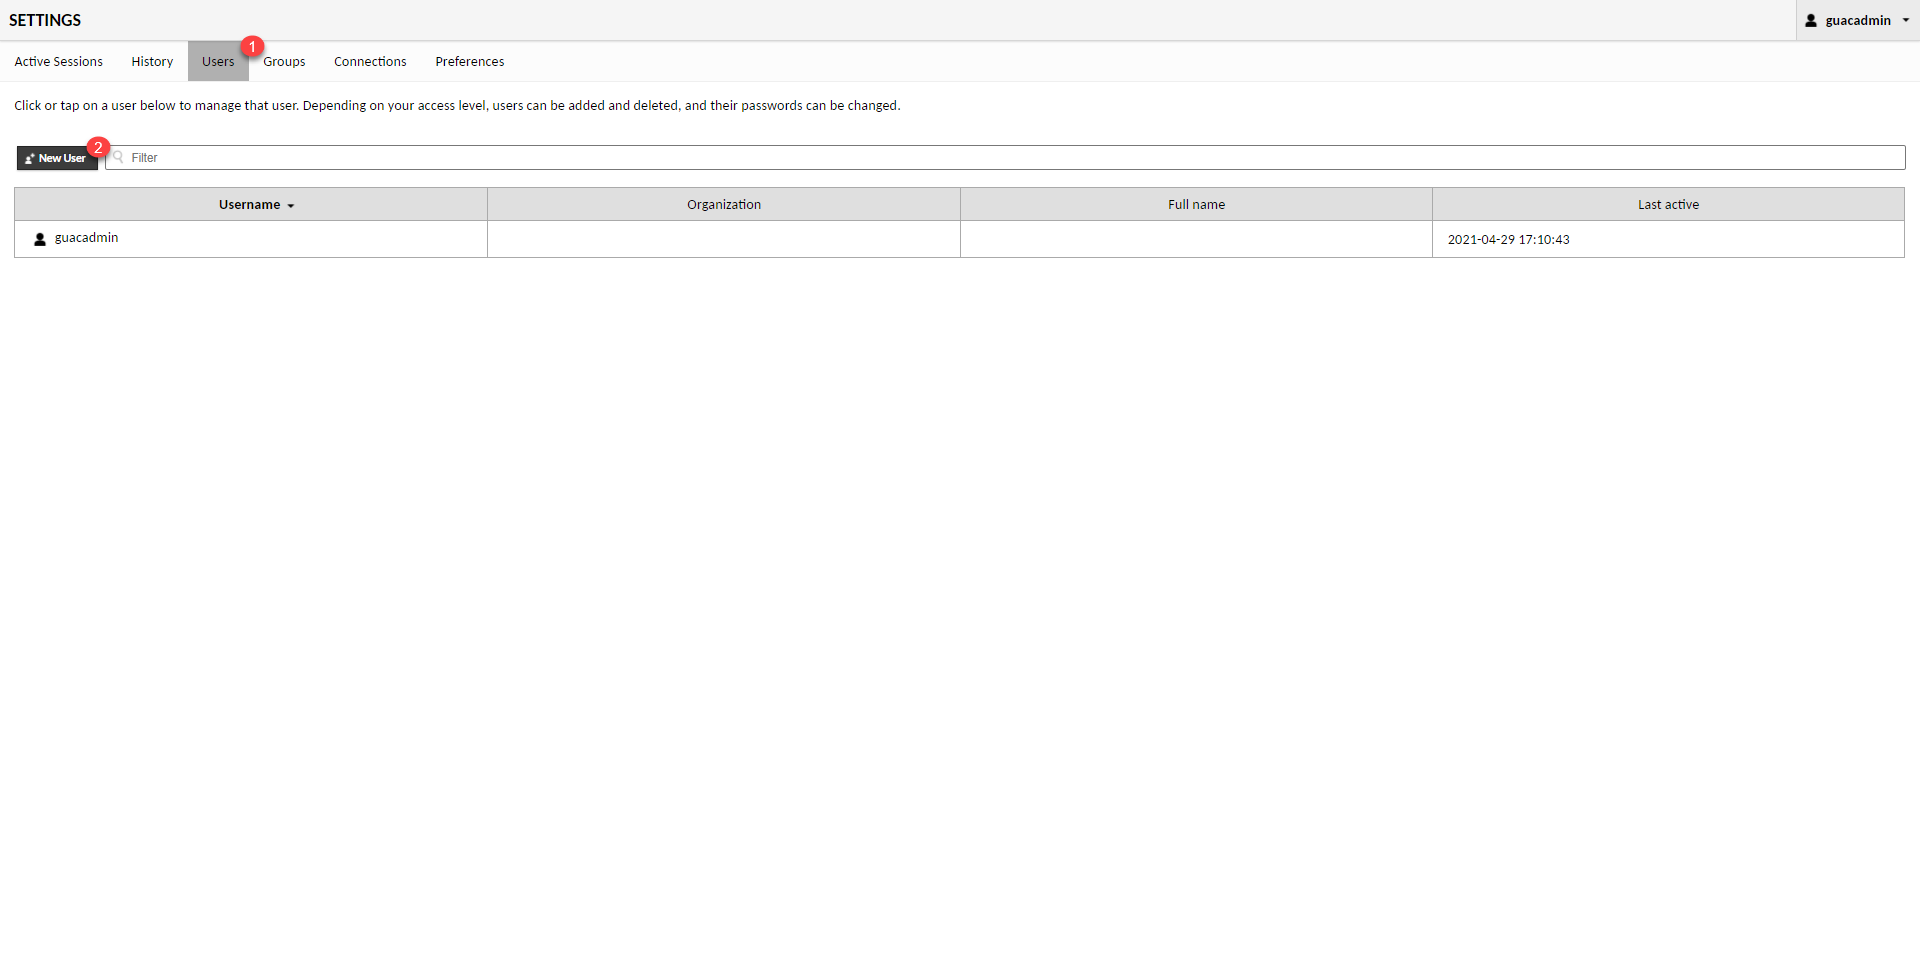
Go to user management 1 and click on the New User 2 button.
How for the other elements, I will focus on the required fields.
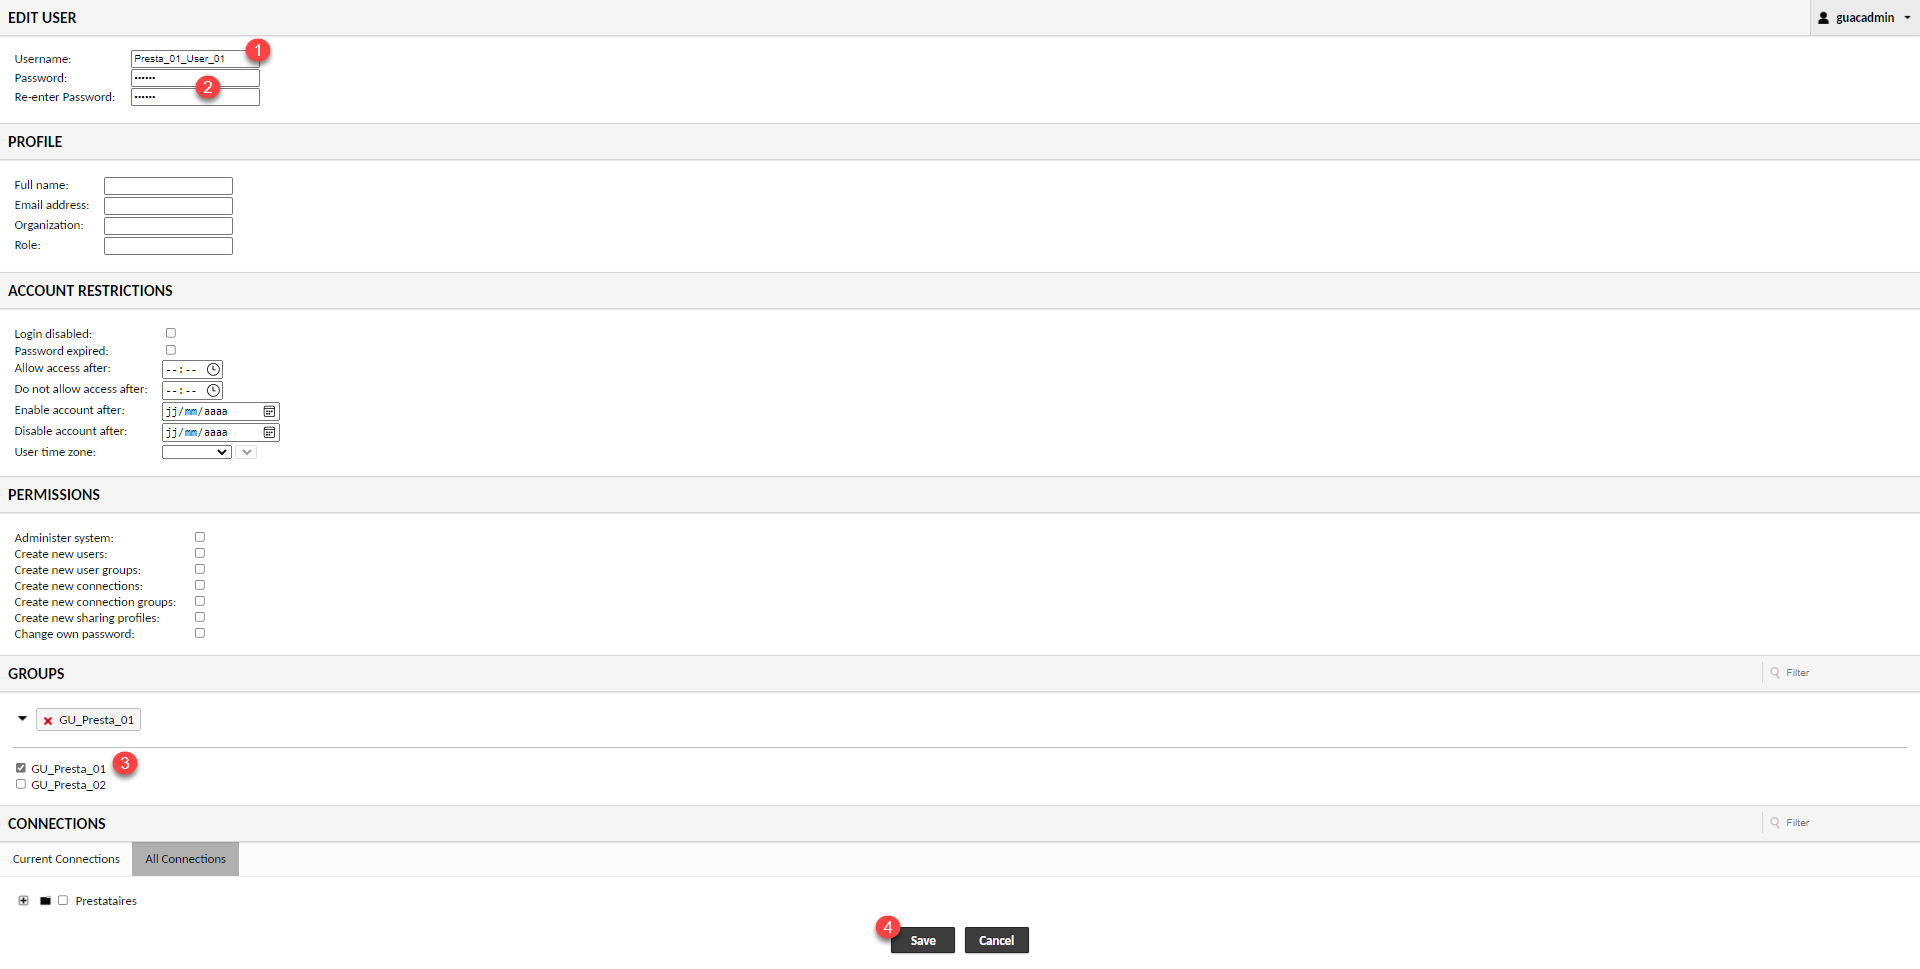
Enter the account identifier 1 and the password 2 (x2), in the GROUPS section, check the group (s) to which the user 3 belongs and click on Save 4.
The user is added.
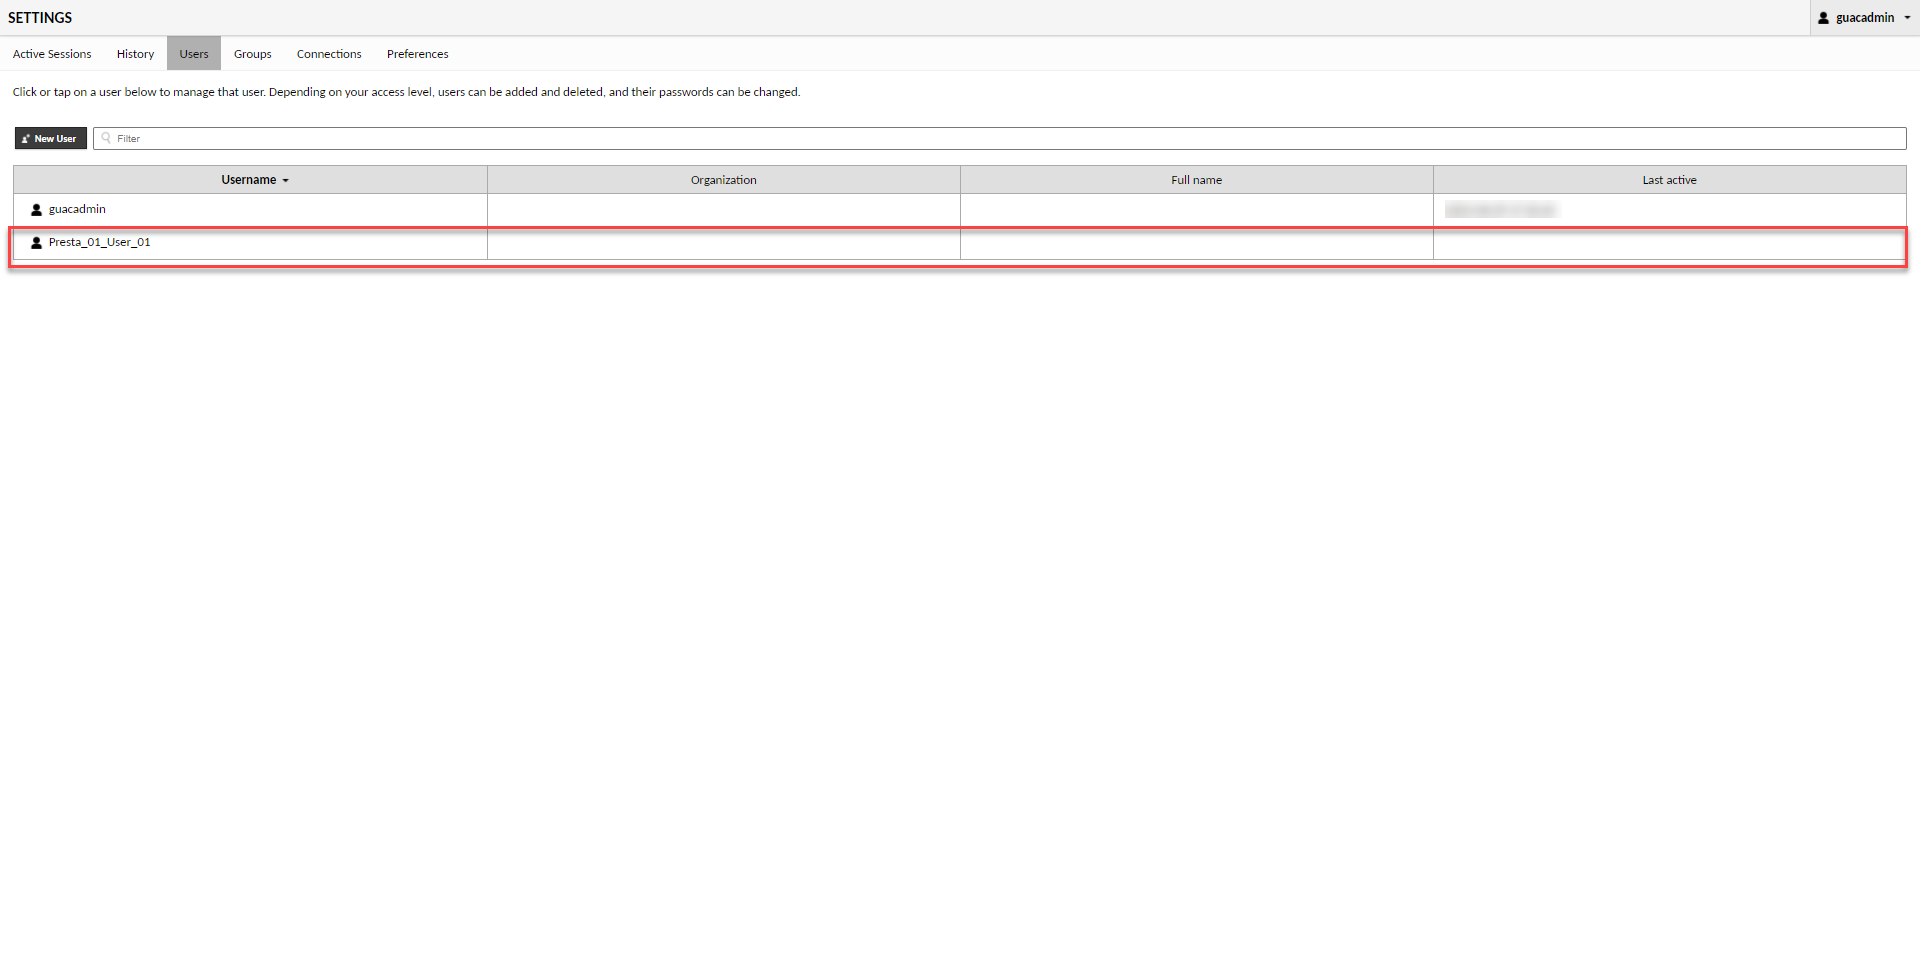
Repeat the operations for the other accounts and service providers.
Connection / Use with a service provider account
Now that we have configured everything, all that remains is to test our “bastion” solution.
Connect with a service provider account:

If the account has only one connection to configure, it is established directly.
We arrive on a page where we can see recent connections (currently empty) and below the list of available connections.
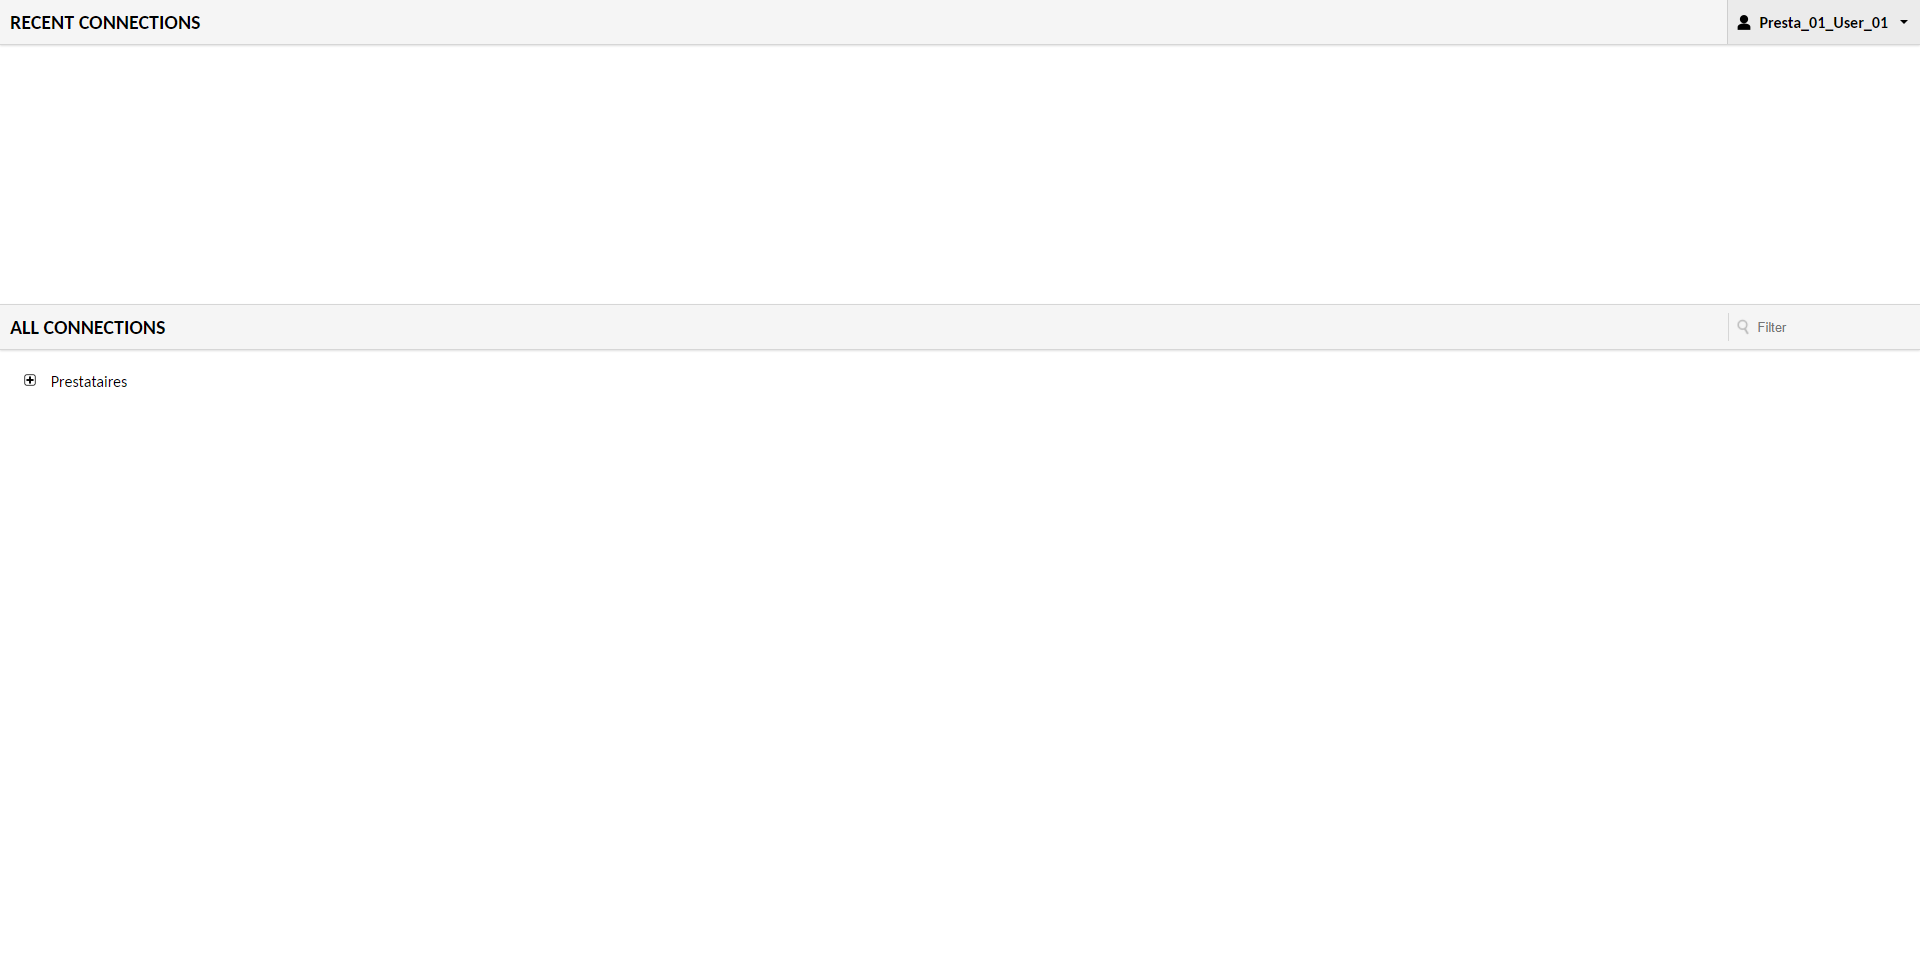
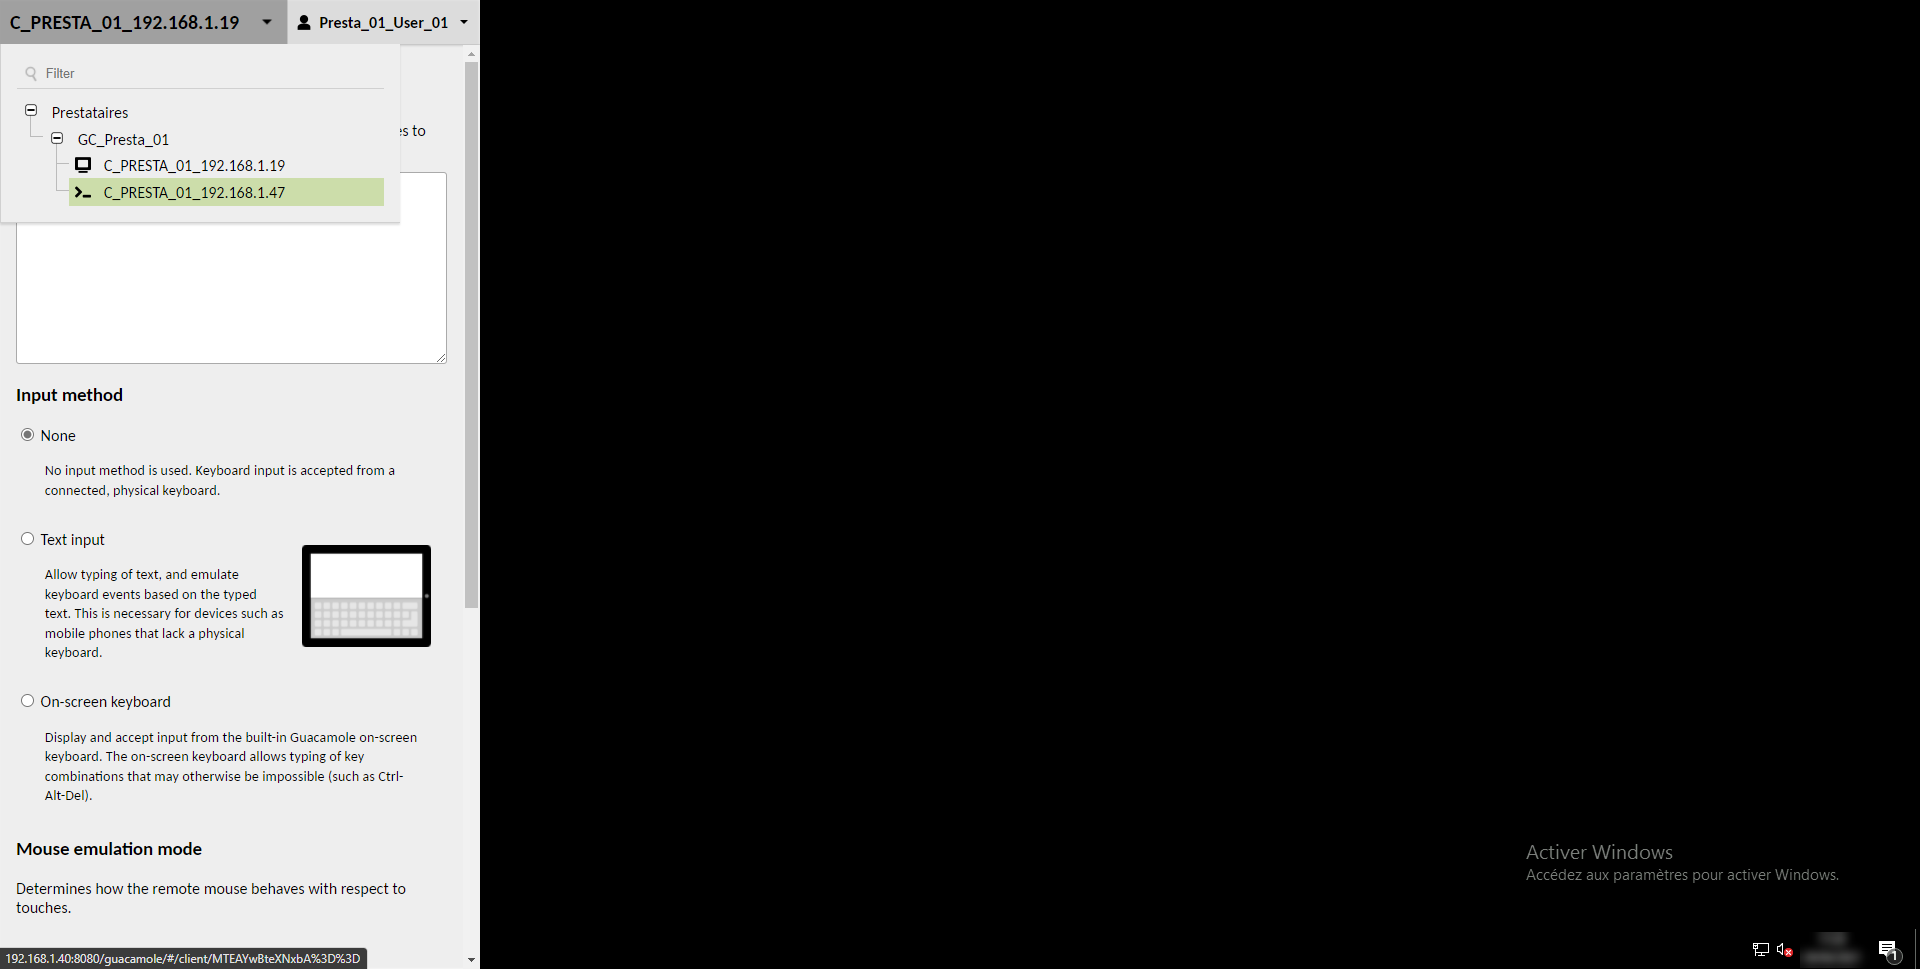
Unfold the connections and click on one to connect, (I’ll start with the RDP connection).

Wait while connecting to the server …

The connection is established in RDP on the server without having to provide an identifier.

Tip: during a session, it is possible to navigate between several connections or return to the home page using a “hidden” menu, use the Ctrl + Alt + Shift key combination to display it.

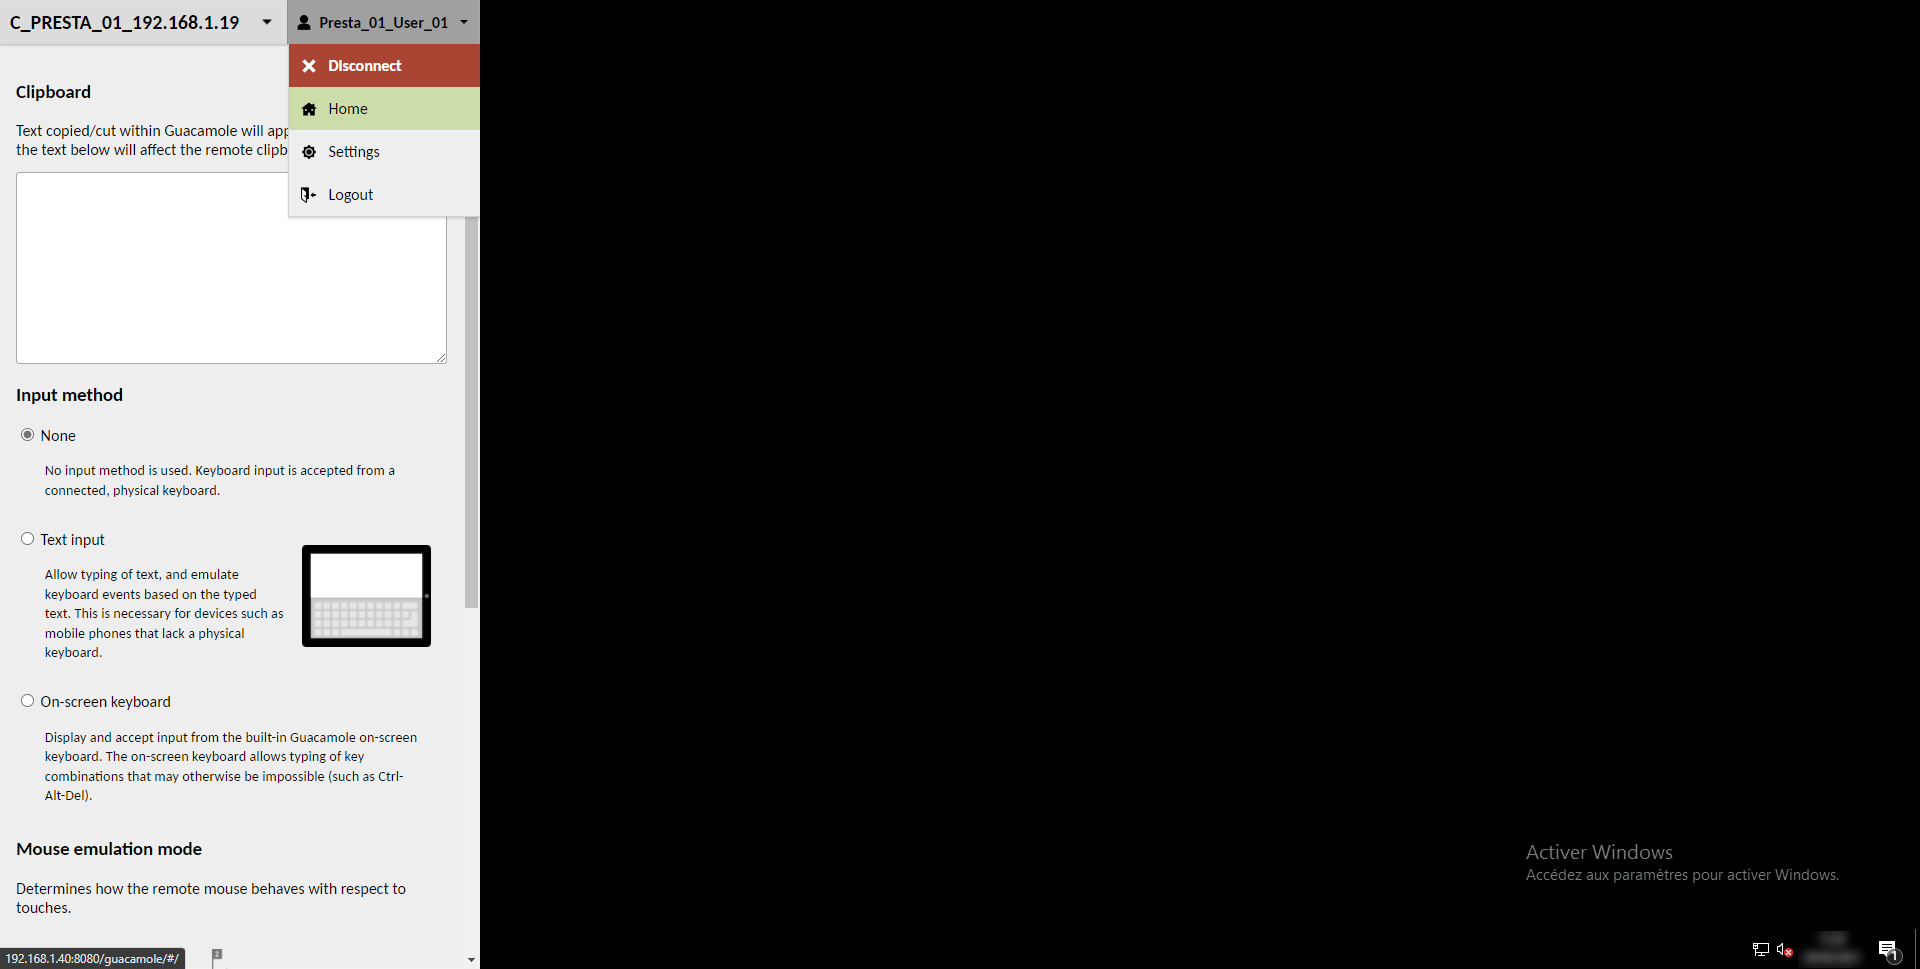
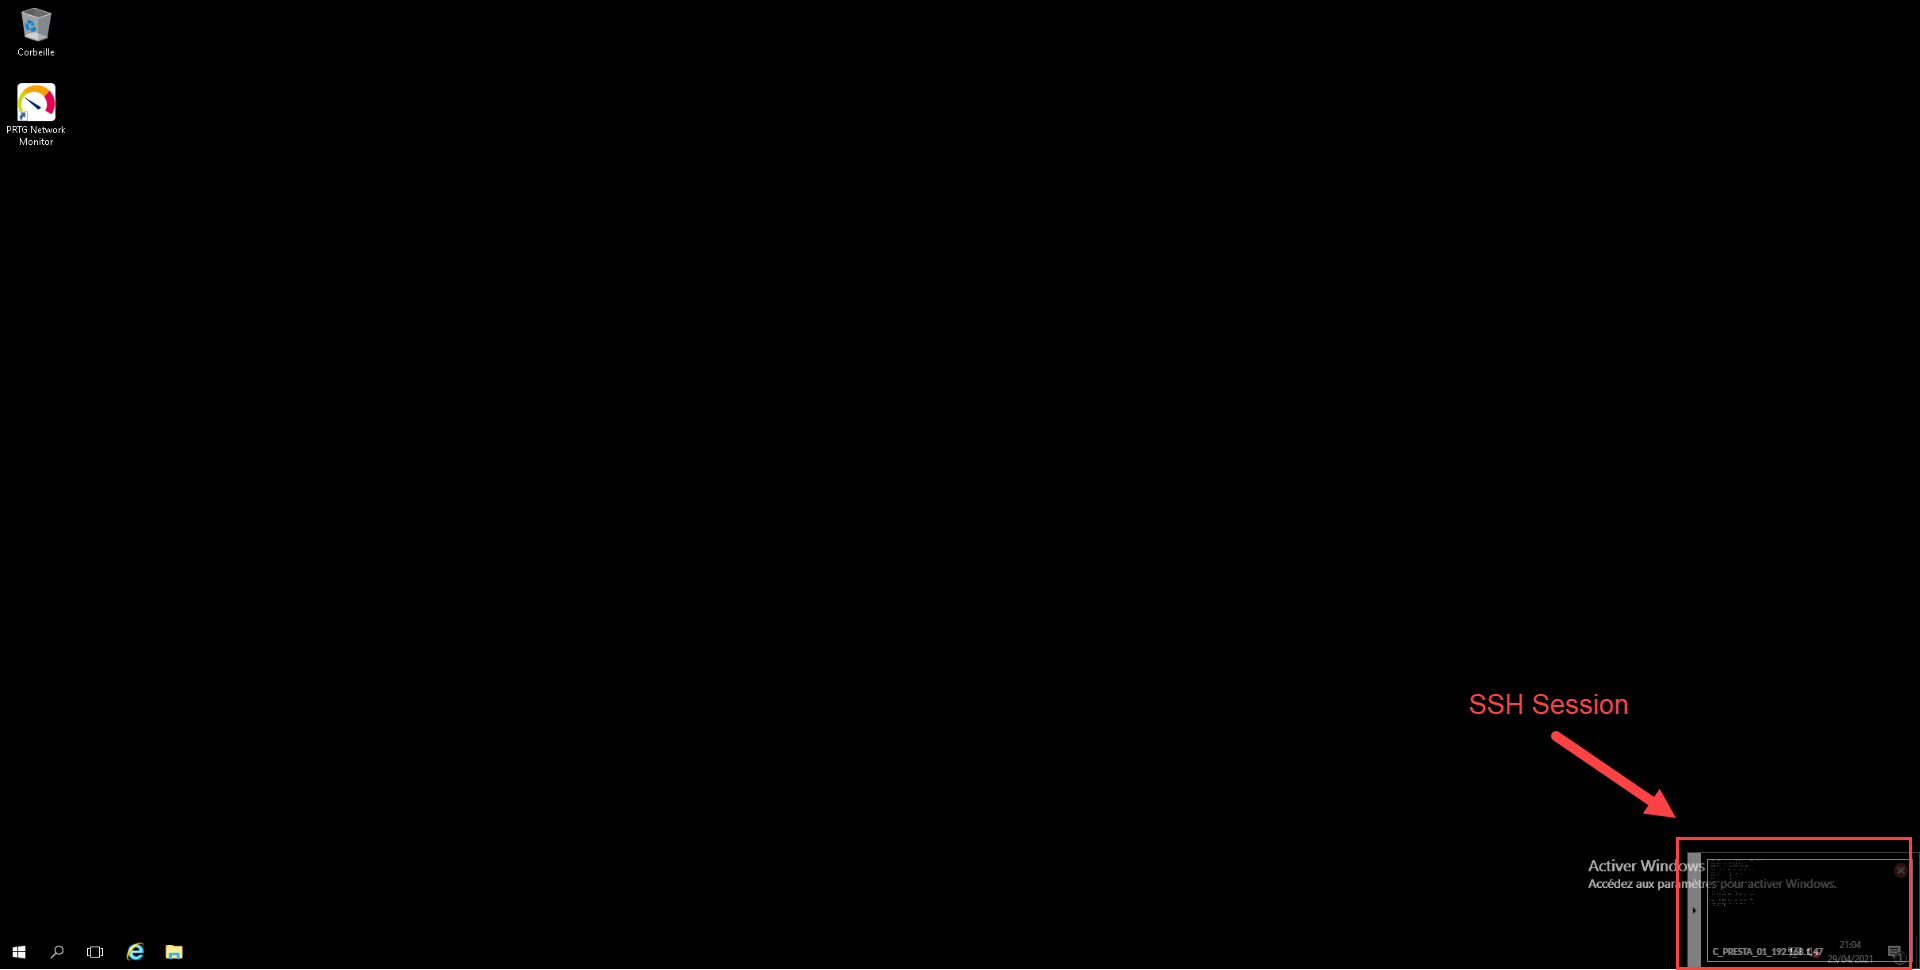
For SSH connection, it’s similar:

Back on the home page of the user’s account, this time we see the last connections used.
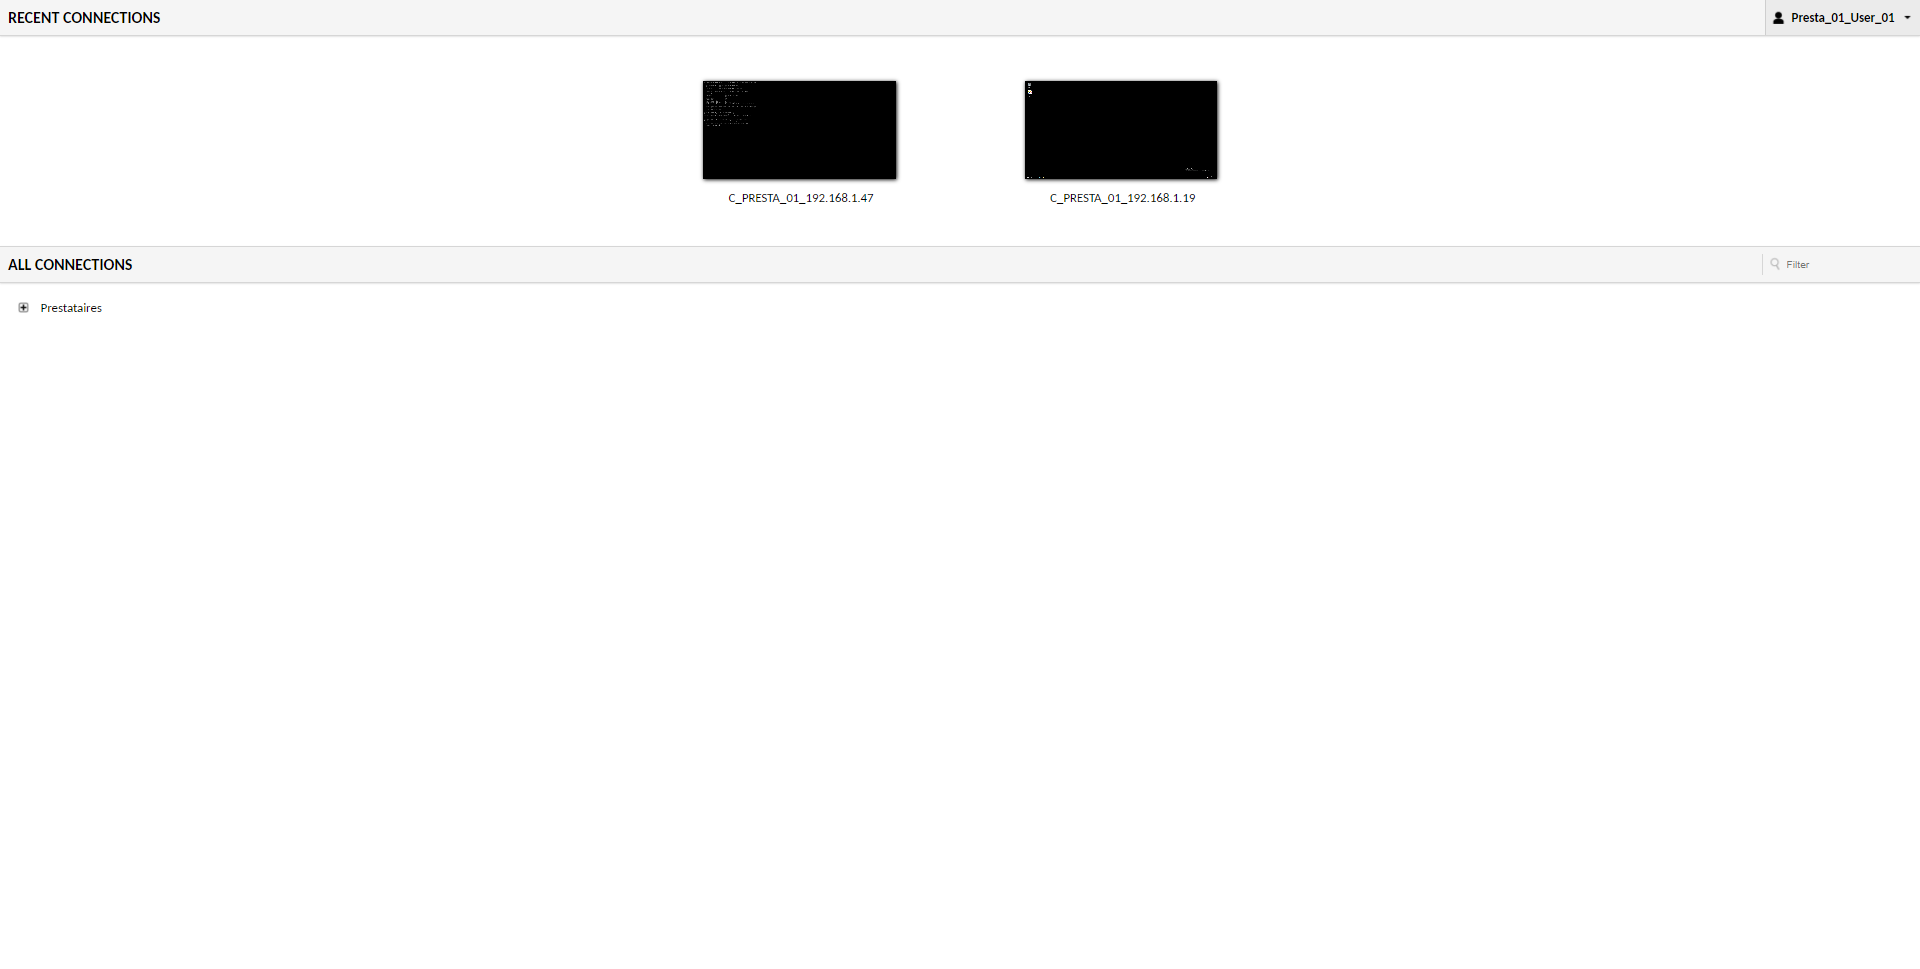
If several sessions are open simultaneously, it is possible to change quickly by clicking at the bottom left of the screen.
Follow the sessions
The interest of setting up a Bastion solution is also to follow the sessions, Guacamole offers us two solutions.
Current sessions
It is possible to follow the sessions in progress from the administration by going to the Active Sessions menu.
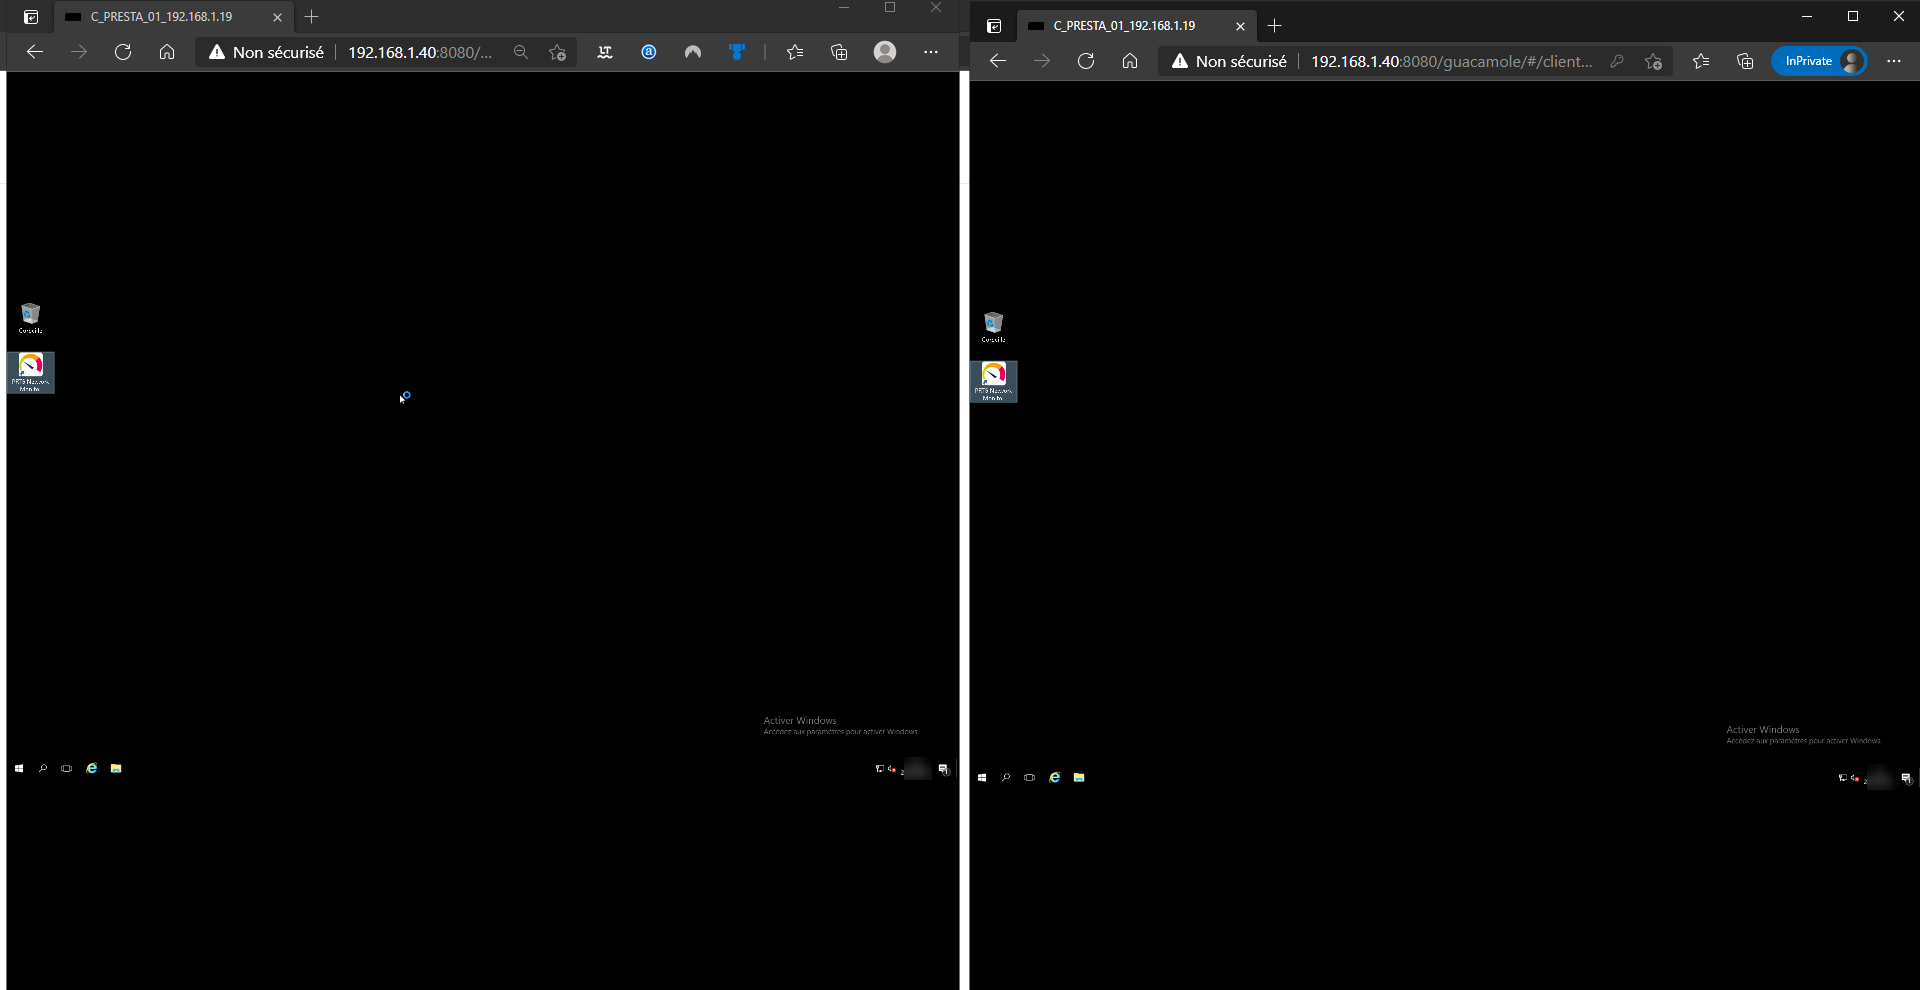
From this view, you can see the connections in progress with the possibility of closing a session and the icing on the cake to follow live and interact by clicking on the name of the connection.
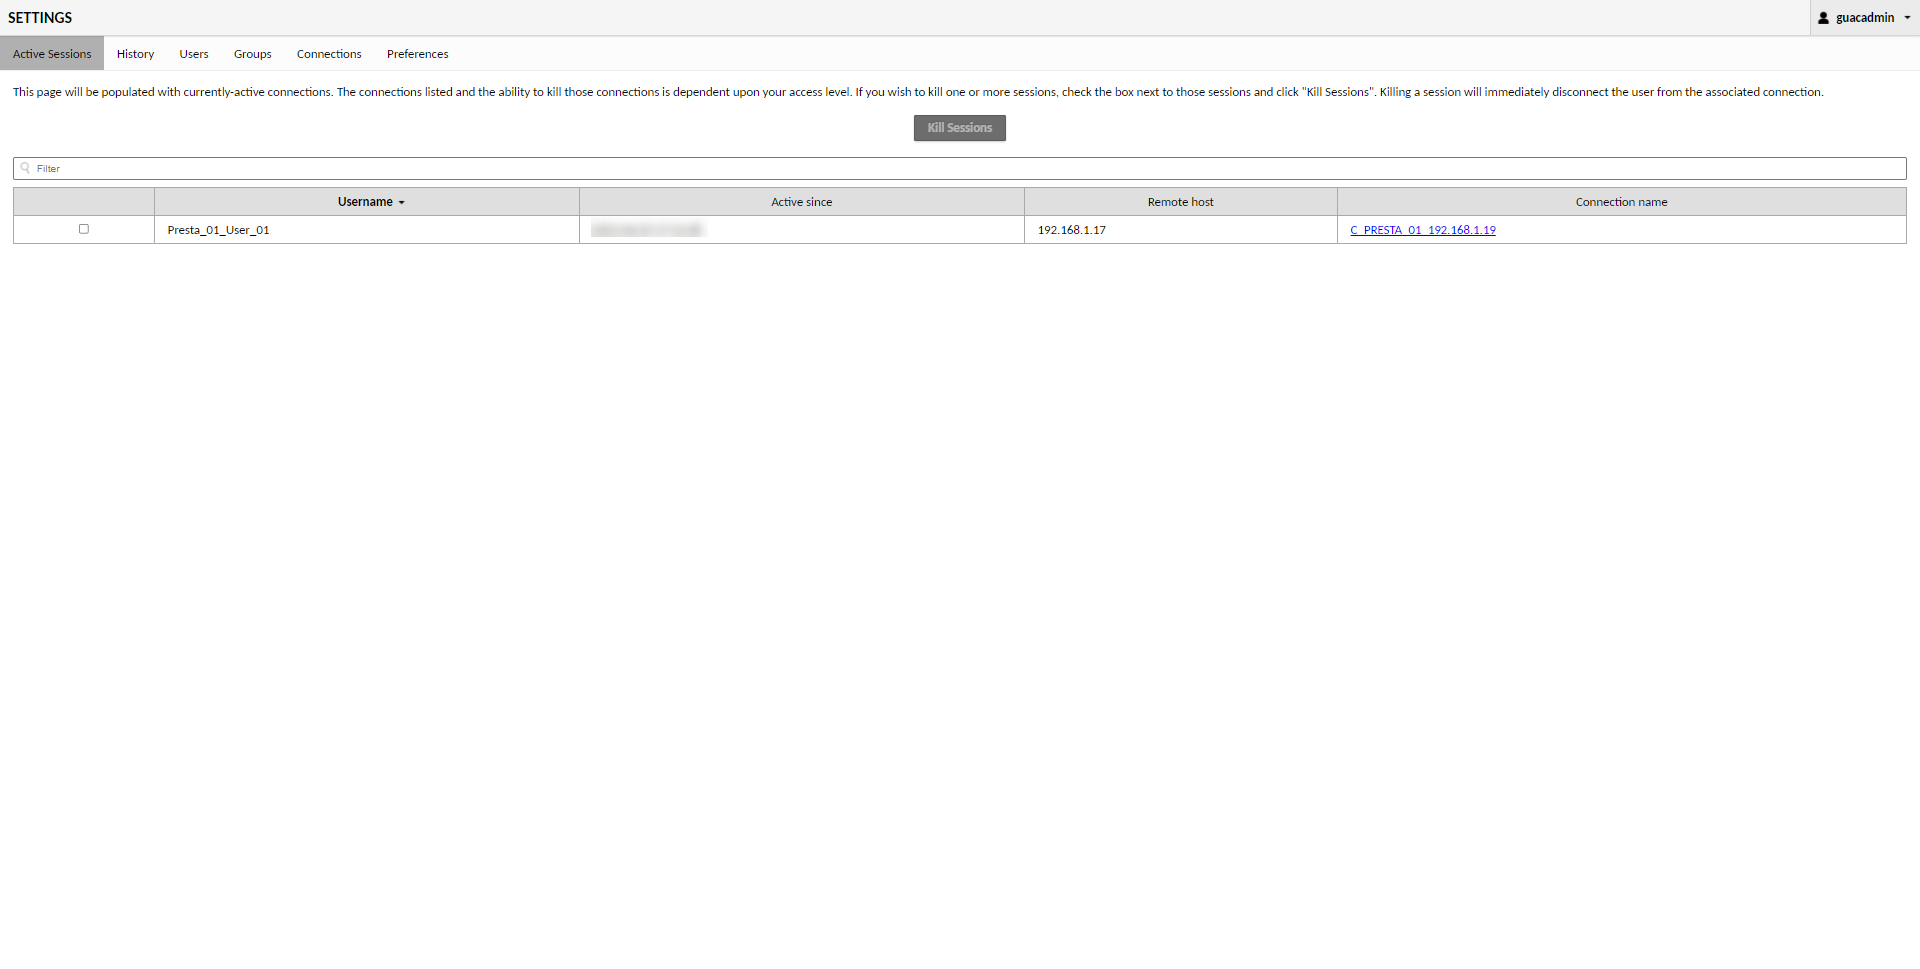
Here is a capture with the monitoring of the live visualization of a connection:
Session history
Session history is available in several places:
- In the menu Hostiry
- In editing a connection


Screen recordings
If you’ve enabled session recording, I’ll explain how to use them.
As a reminder, storage has been configured in the folder /var/guacamole.
This is how the files look:
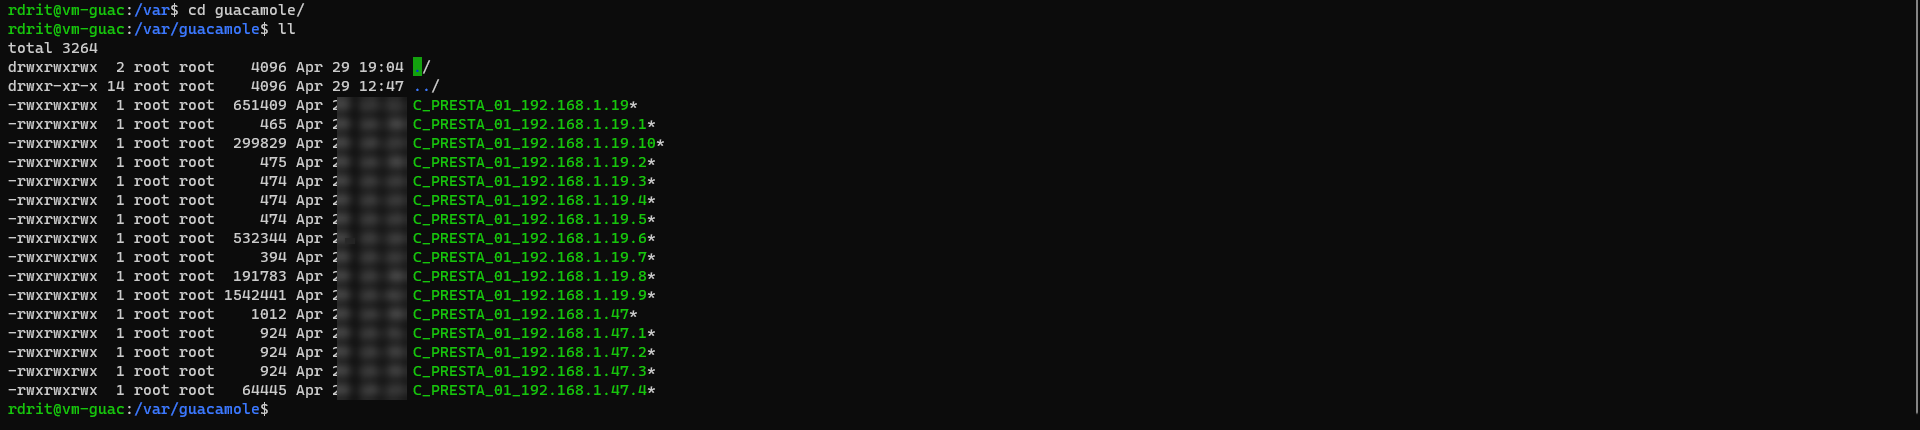
By default, the files cannot be used, they must be converted into a video file using the command below:
guacenc -s 1280x720 -r 20000000 -f file-name
Once converted, we have a file in m4v format.
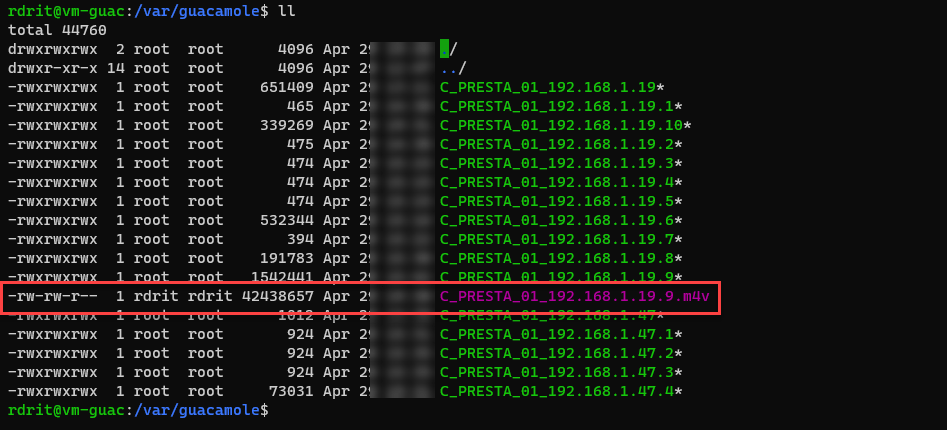
For 10 minutes, I have a 40MB file
All that remains is to download the file and view it with a VLC-type player.
Conclusion
You now know how to set up a free Bastion / PAM solution with Guacamole, it is a good solution to start securing access when no solution is in place and allows you to really assess the need before acquiring a paid solution.
In this tutorial, I focused on provider access, but it is also possible to use it for all administrators to manage the IS and avoid the use of VPN, Remote Desktop Gateway …
It is possible to easily increase the level of security for free by setting up a double authentication system.
Avant un déploiement sur l’extérieur, je vous conseille très fortement de configurer un reverse proxy Apache2 ou Nginx sur le serveur afin de publier Guacamole sur le protocole HTTPS.
