Table of Contents
Introduction
In this tutorial, we will see step by step how to install GLPI on an Nginx / PHP / MariaDB server.
Before you begin, you are going to need a web server with Nginx / PHP / MariaDB installed. If you need everything is explained in this tutorial: Ubuntu: install a web server – NGINX / PHP / MariaDB
From experience, installing GLPI on an Nginx web server offers better performance than with Apache or IIS, but some features will not be available such as SSO.
Preparing the environment
Before attacking the installation of GLPI itself, we will prepare the server. It is necessary to adapt certain elements to your environment.
Creating a DNS record
In your DNS zone, create a record which will correspond to the url of the GLPI site and which points to the IP address of the server.

Vhost configuration
You must configure a vhost (virtual host) that will respond to the DNS record that was created previously
I am allergic to the use of the default host, I prefer to use vhosts which allow better organization of sites and also to pool the resources of a server by hosting several sites.
Create the folders for the vhost using the following commands:
sudo mkdir /home/www-data/glpi
sudo mkdir /home/www-data/glpi/log
sudo mkdir /home/www-data/glpi/public_html
sudo chown www-data /home/www-data/glpi -R
The first 3 lines will create the folders for the GLPI files and the last line changes the owner.
We will use the default.conf file to create the configuration of the glpi vhost. Copy the file using the following command:
sudo cp /etc/nginx/conf.d/default.conf /etc/nginx/sites-available/glpi.conf
Open the file with nano:
sudo nano /etc/nginx/sites-available/glpi.conf
Here is my config file:
server {
    listen       80;
    server_name  glpi.lab.priv;

    #charset koi8-r;
    access_log  /home/www-data/glpi/log/access.log  main;

    location / {
        root   /home/www-data/glpi/public_html;
        index index.php index.html index.htm;
    }

    #error_page  404              /404.html;

    # redirect server error pages to the static page /50x.html
    #
    error_page   500 502 503 504  /50x.html;
    location = /50x.html {
        root   /usr/share/nginx/html;
    }

    location ~ \.php$ {
        root           /home/www-data/glpi/public_html;
        #try_files      $uri =404;
        fastcgi_index  index.php;
        fastcgi_pass   unix:/run/php/php7.3-fpm.sock;
        fastcgi_param  SCRIPT_FILENAME $document_root$fastcgi_script_name;
        include        fastcgi_params;
   }
}
- line 3 : url
- line 6 : logs folder
- line 9: location of the GLPI files
- line 10: declaration of index.php
- line 23: location of the GLPI files
Activate the vhost:
sudo ln -s /etc/nginx/sites-available/glpi.conf /etc/nginx/sites-enabled/
Test the nginx configuration:
sudo nginx -t
Reload the configuration:
sudo systemctl reload nginx
Download and copy GLPI files to the server
Go to the site: https://glpi-project.org/ and download the latest version.

Unzip the archive and upload the content to the server in the / home / www-data / glpi / public_html folder.
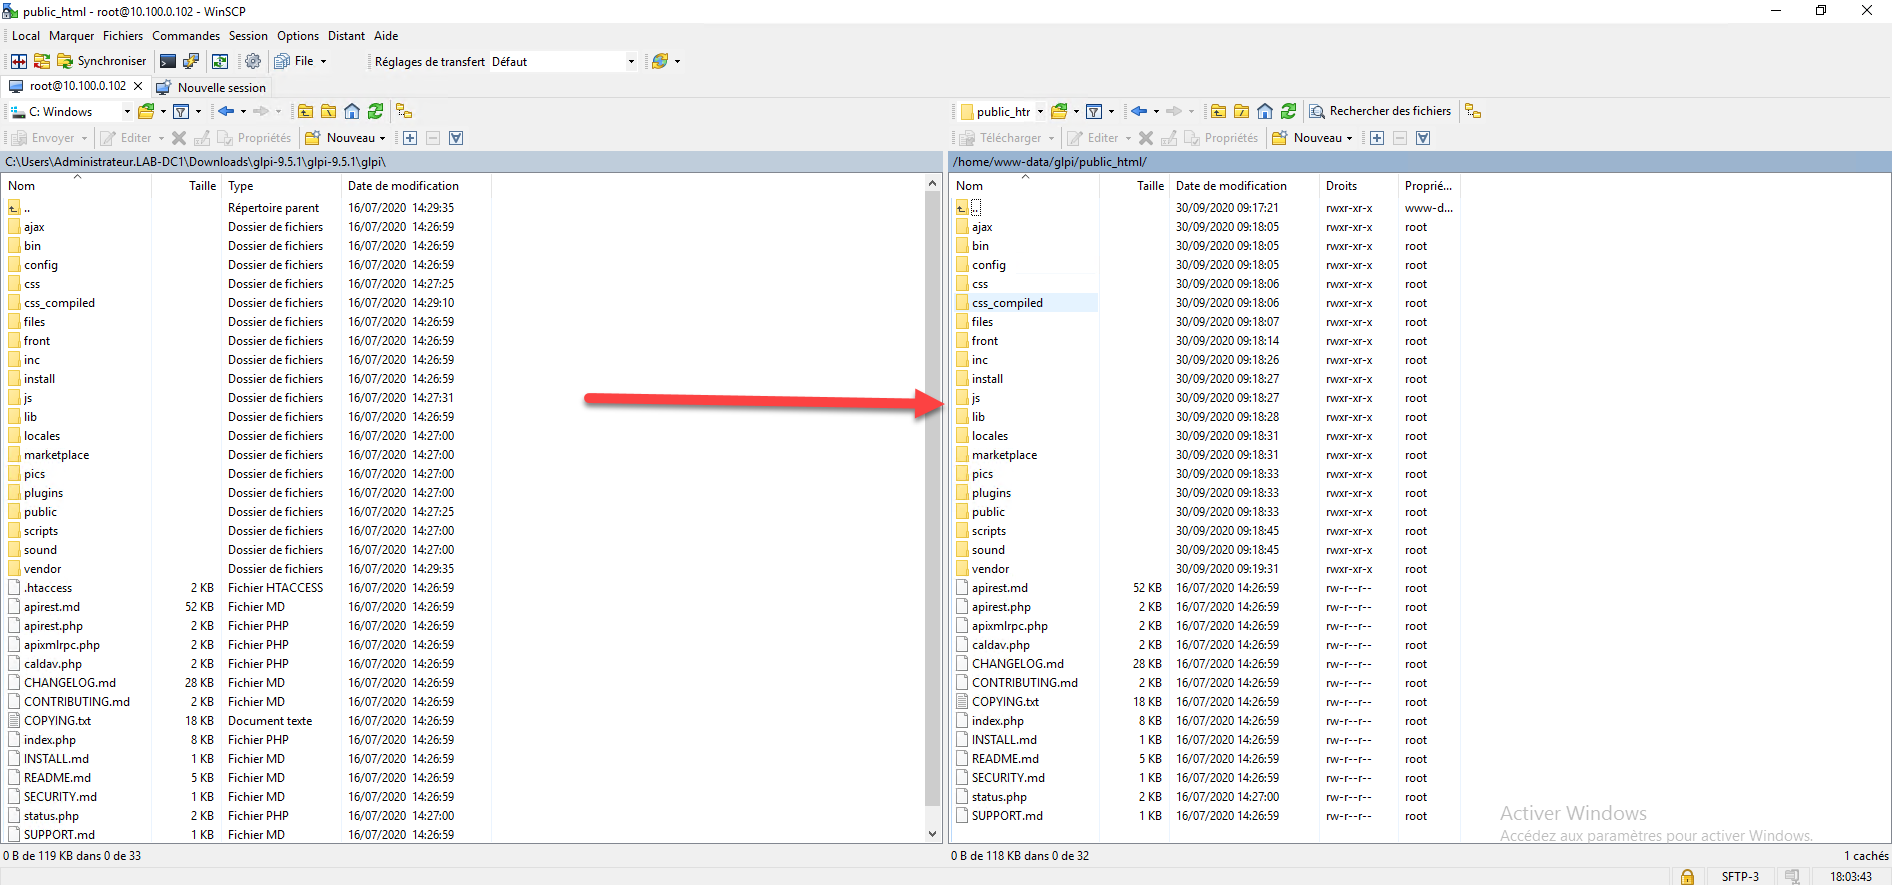
Personally I use WInSCP to do it
Depending on the account used for the transfer, repeat the following command to change the owner of GLPI files and folders:
sudo chown www-data /home/www-data/glpi -R
Glpi vhost test
Before going any further, we will now test the correct functioning of the virtual host.
From an Internet browser, go to the url configured for the GLPI site, the install page should appear.
Installation of PHP modules for GLPI
GLPI requires PHP modules to function. Install the additional modules using the following command (to be adapted according to the version of PHP):
sudo apt install php7.3-mbstring php7.3-curl php7.3-gd php7.3-xml php7.3-intl php7.3-bz2 php7.3-ldap php7.3-xmlrpc php7.3-zip -y
Restart the PHP service (to be adapted according to the version of PHP):
sudo systemctl reload php7.3-fpm
Creation of the database
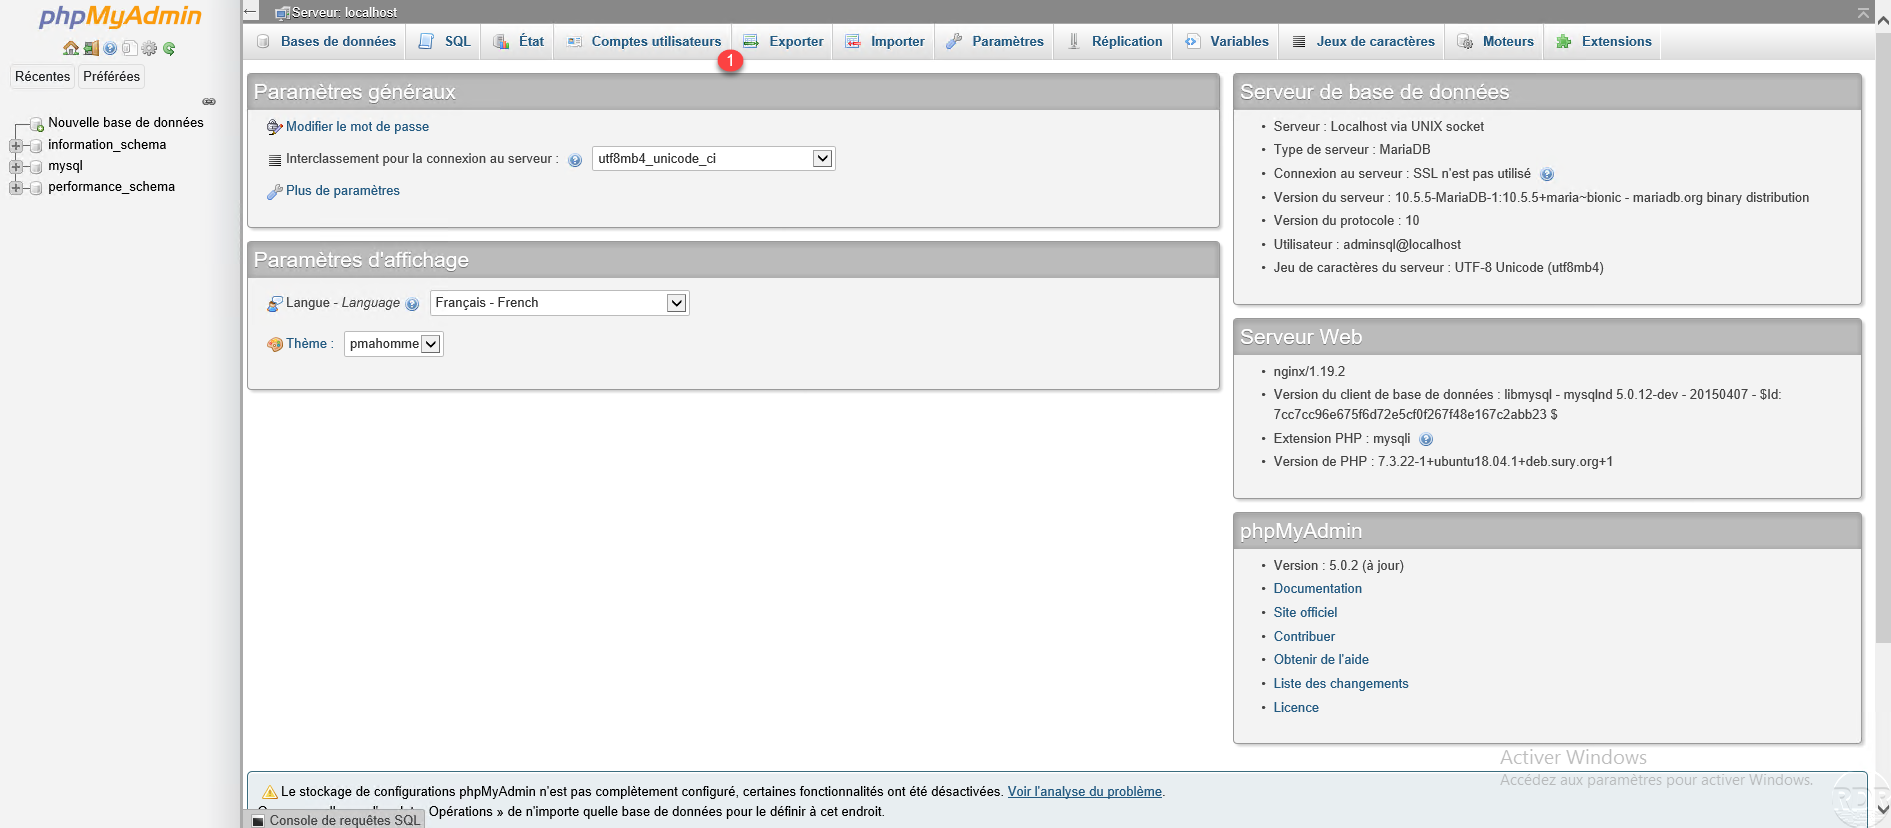
“Last element” of preparation of the environment for GLPI and the creation of the database and of a user, for that we will use PHPMYADMIN, if you followed the Nginx tutorial you should have it.
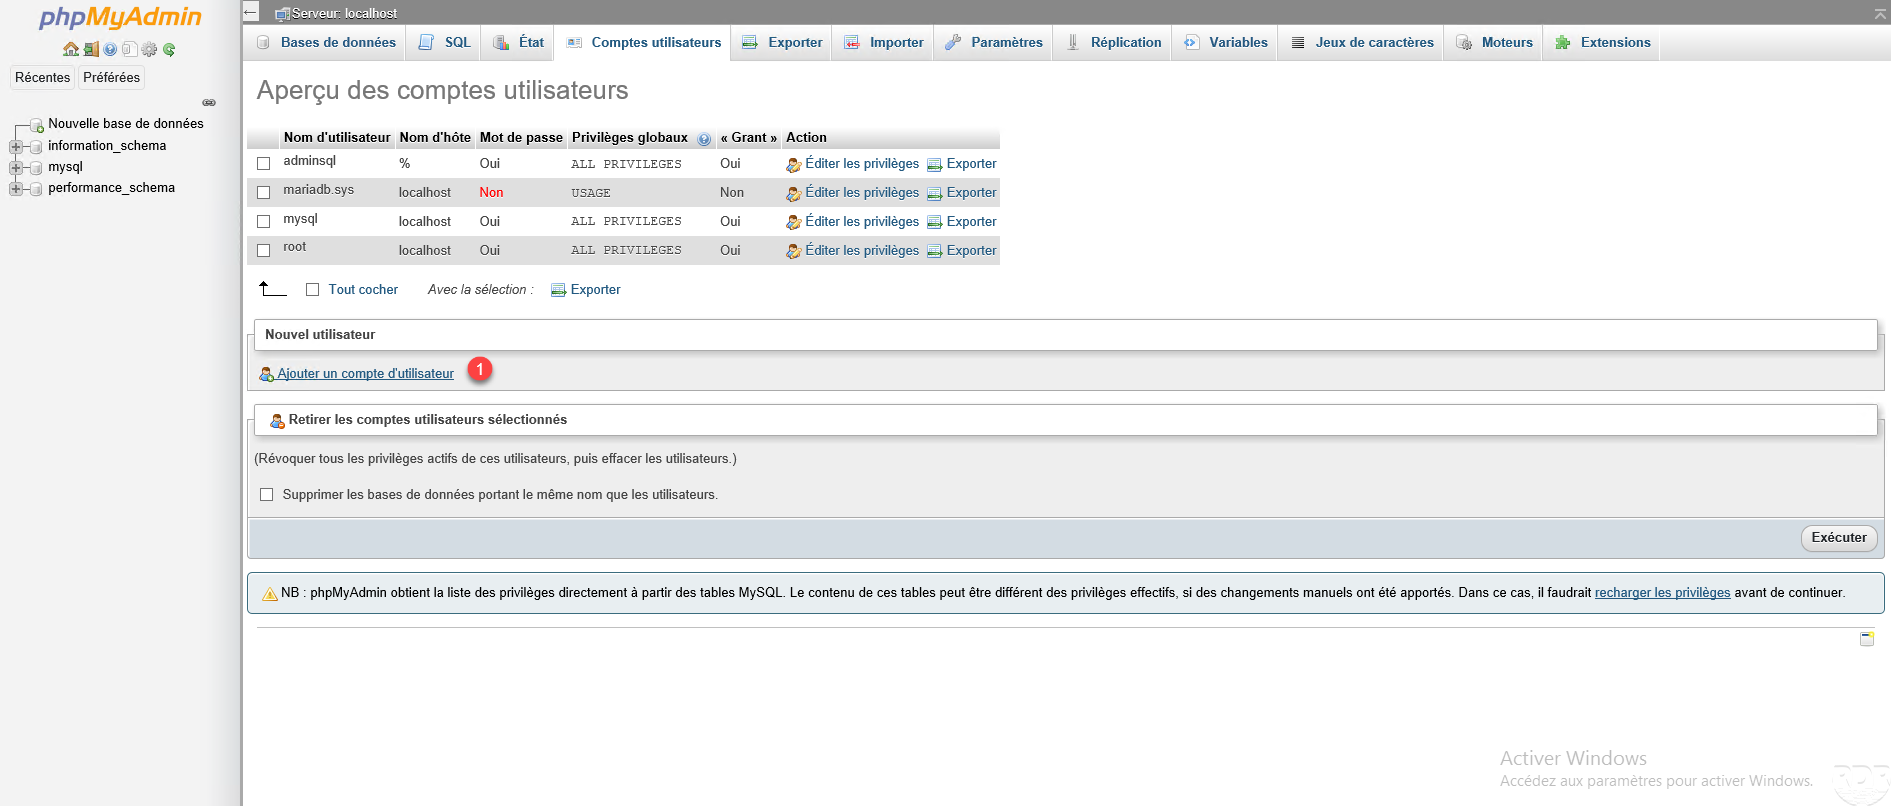
Go to PHPMYADMIN, once identify, click on User accounts 1.
Click on Add a user account 1.
Enter the name of the user 1 (glpi), enter a password (x2) 2, check the Create a database bearing his name box and give this user all the privileges on this database 3 and click on Run 4.
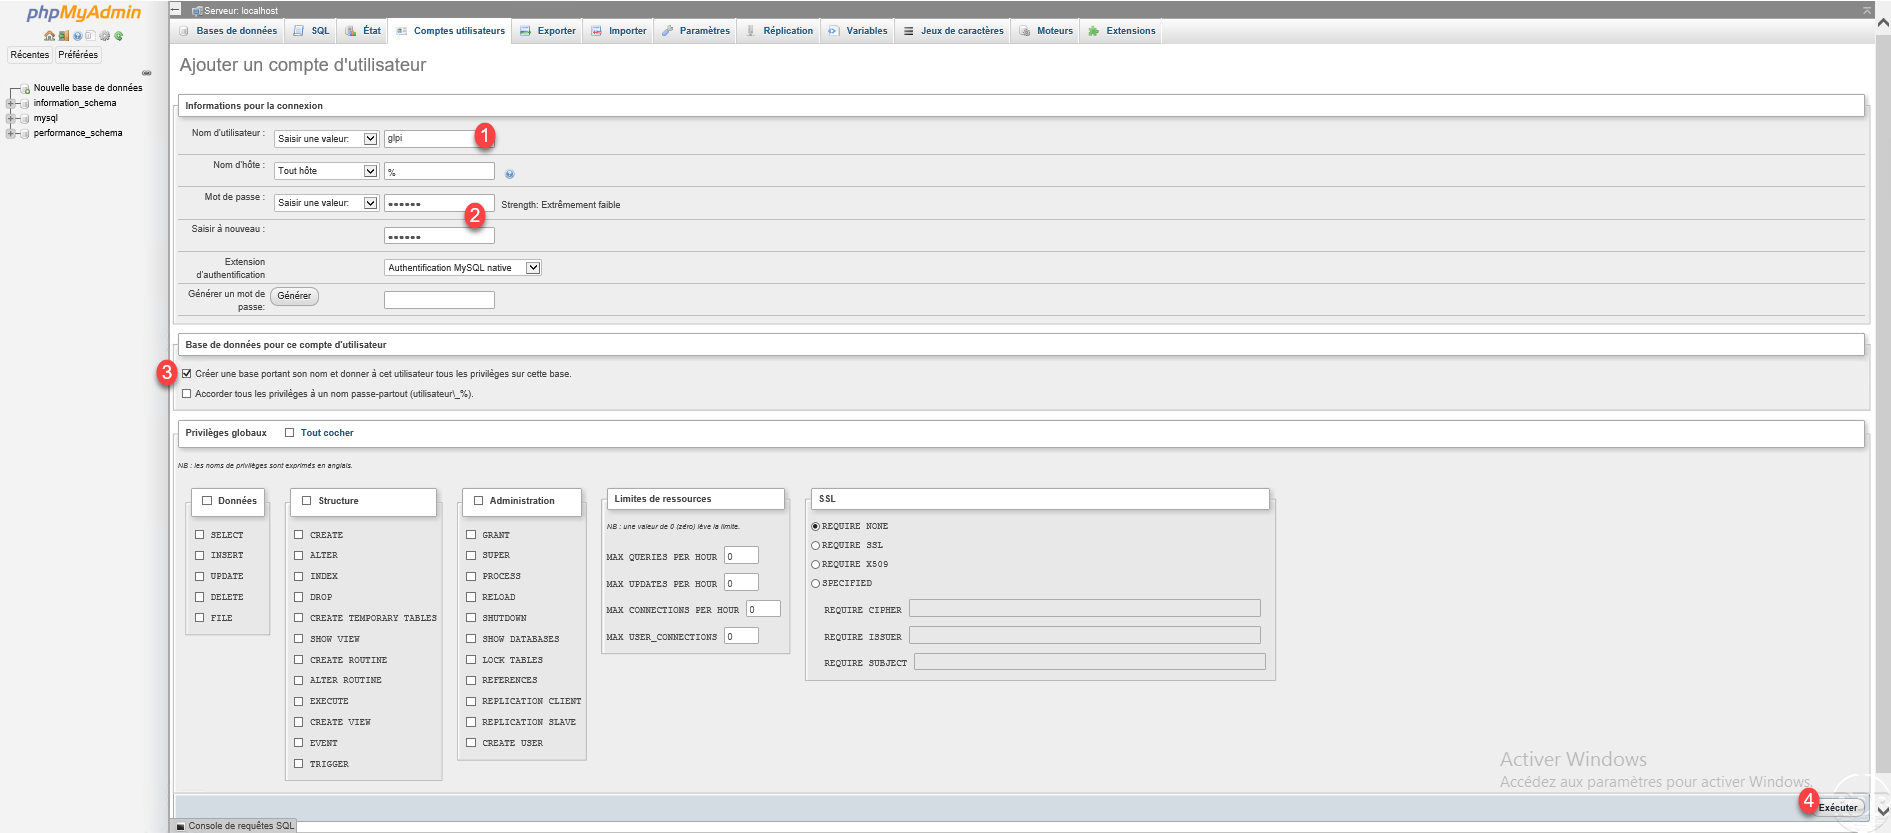
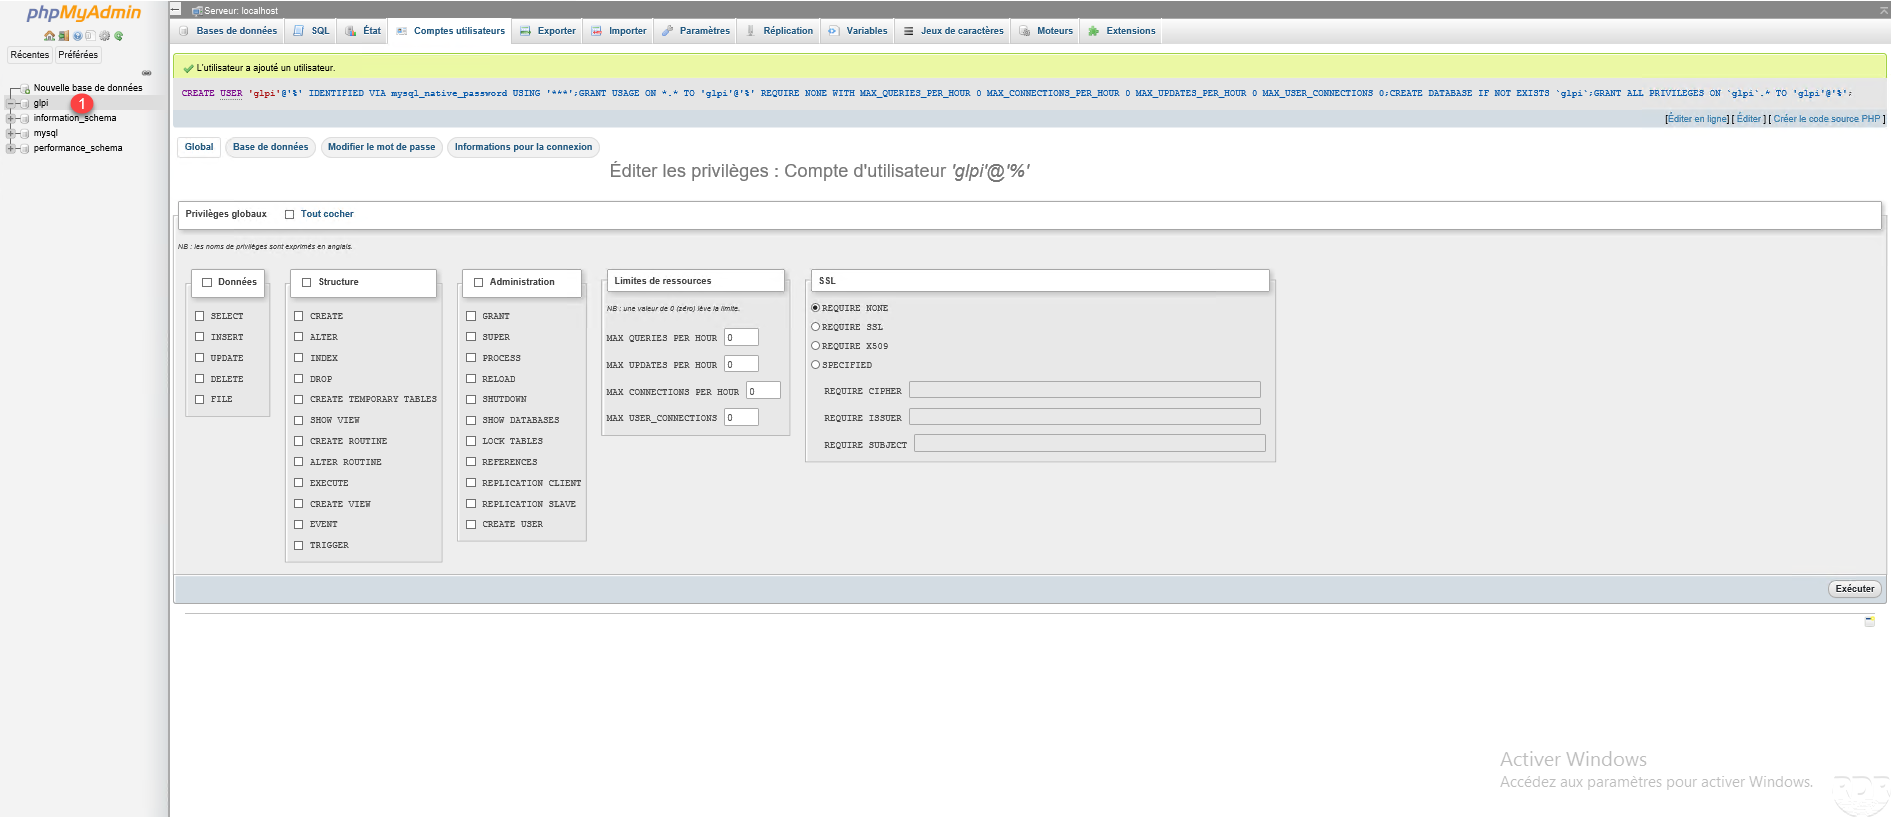
The glpi user and the glpi 1 database have been created.
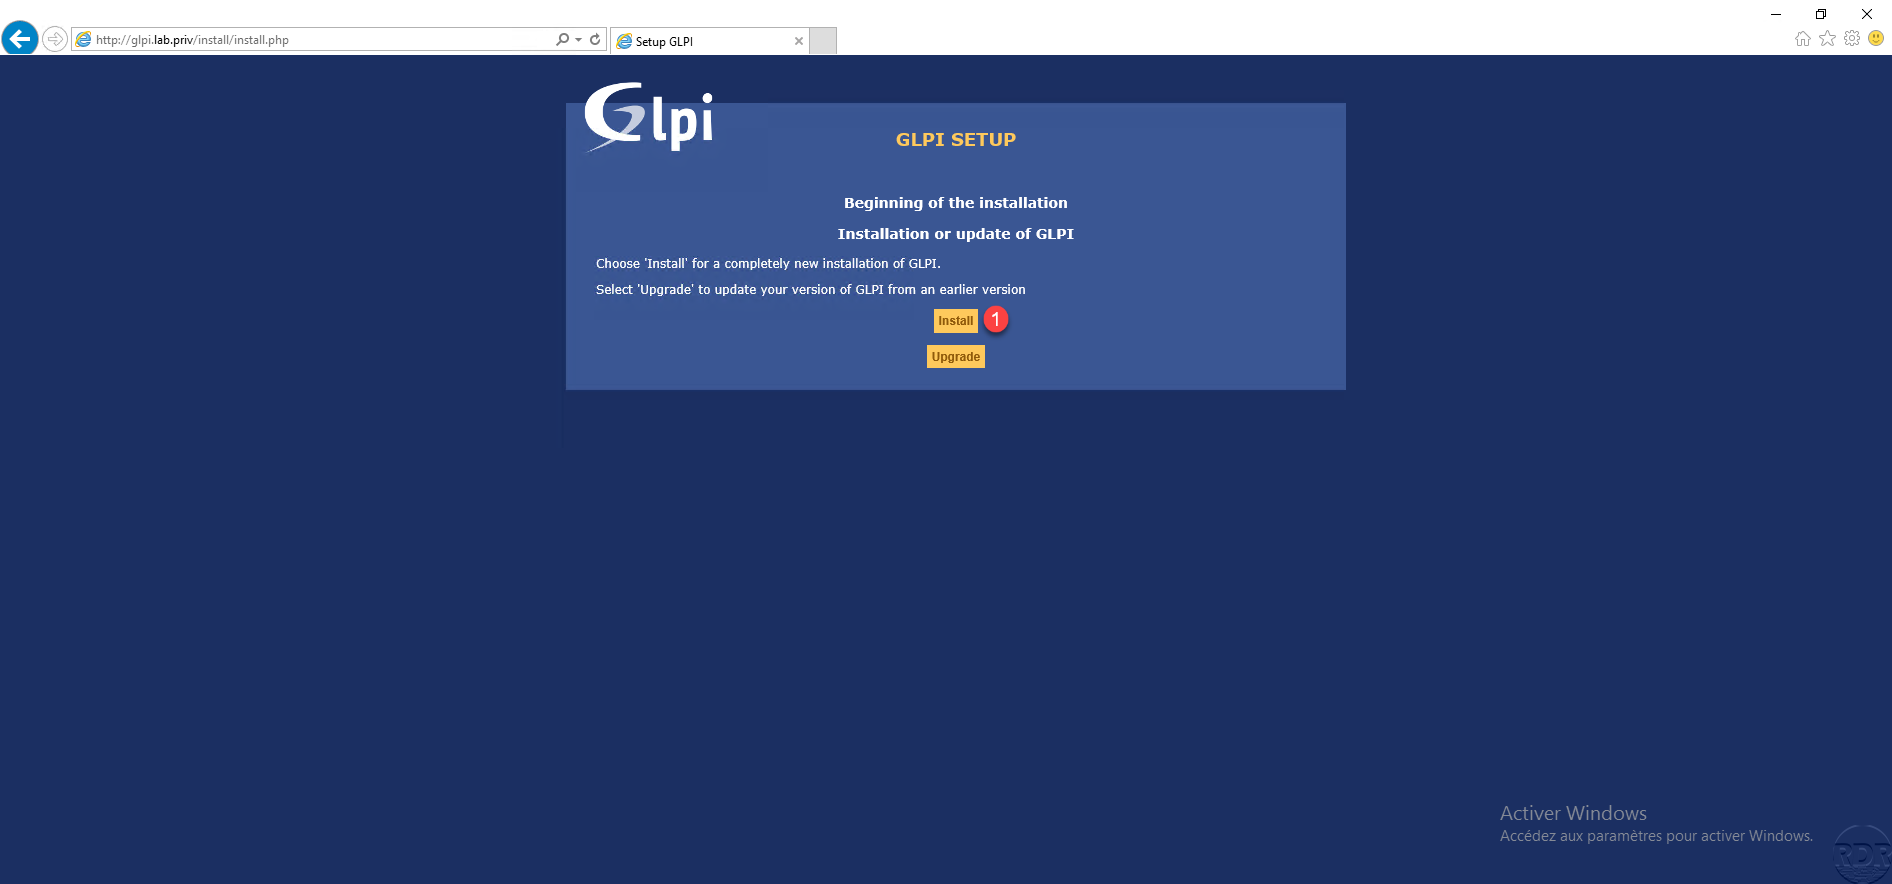
Installation of GLPI
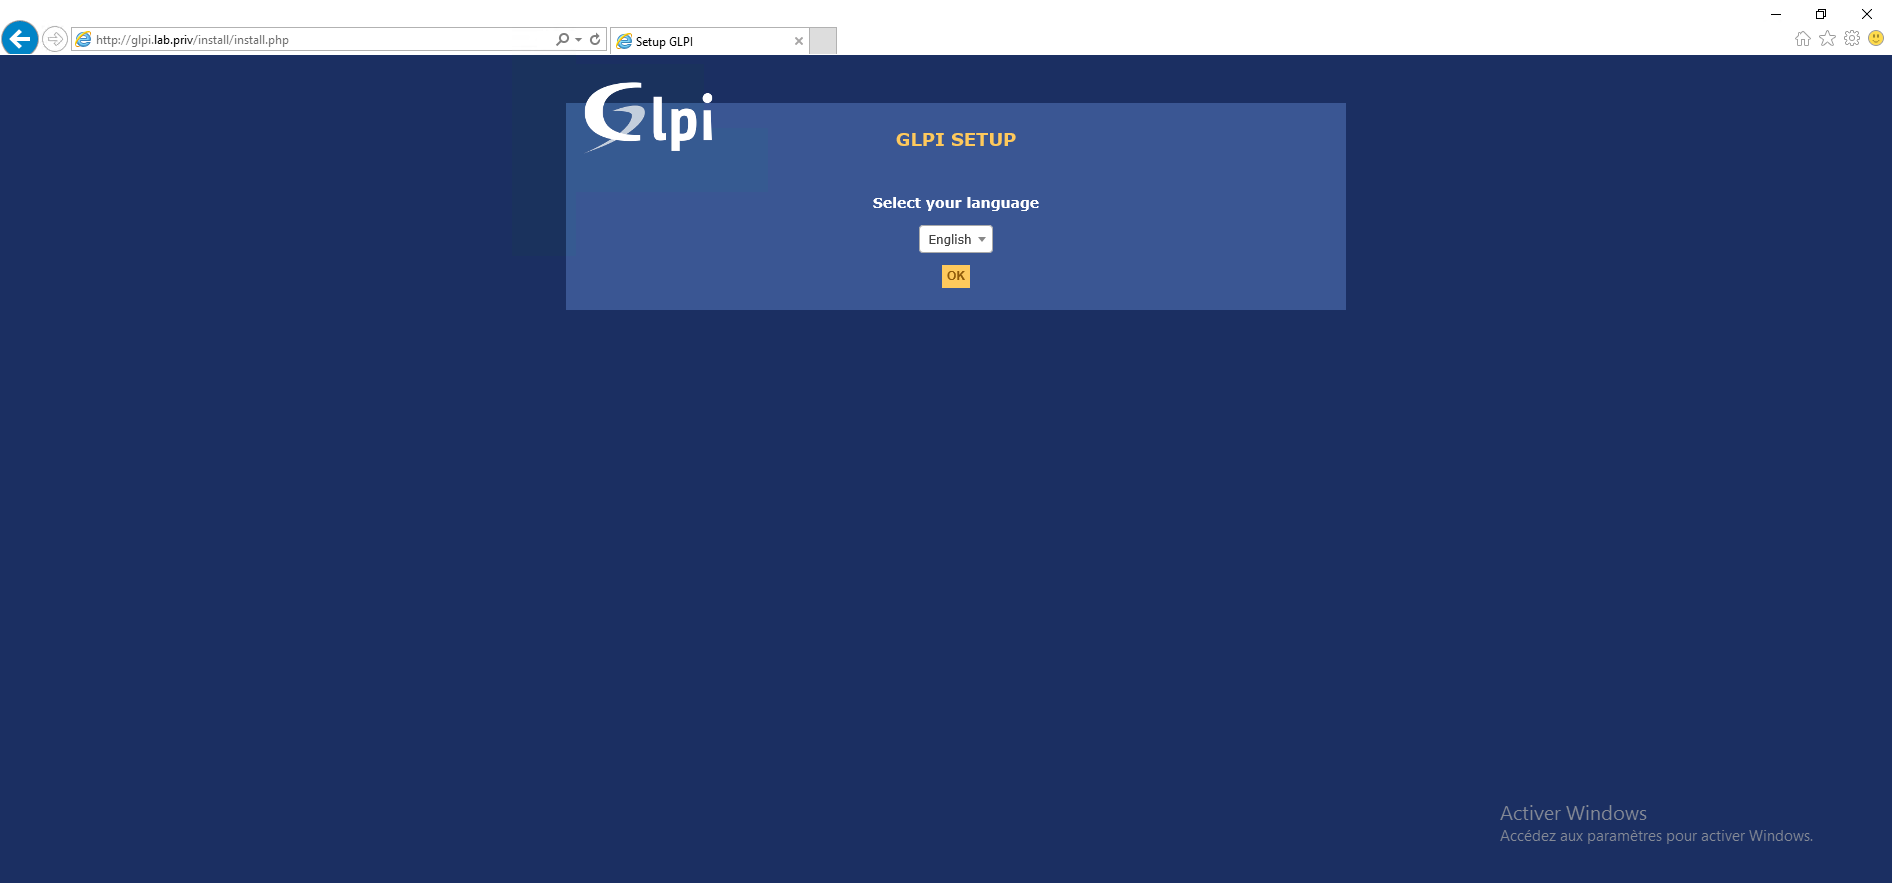
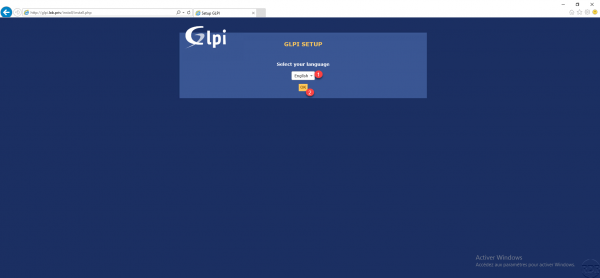
From an Internet browser, go to the configured url, select the language 1 and click on OK 2.
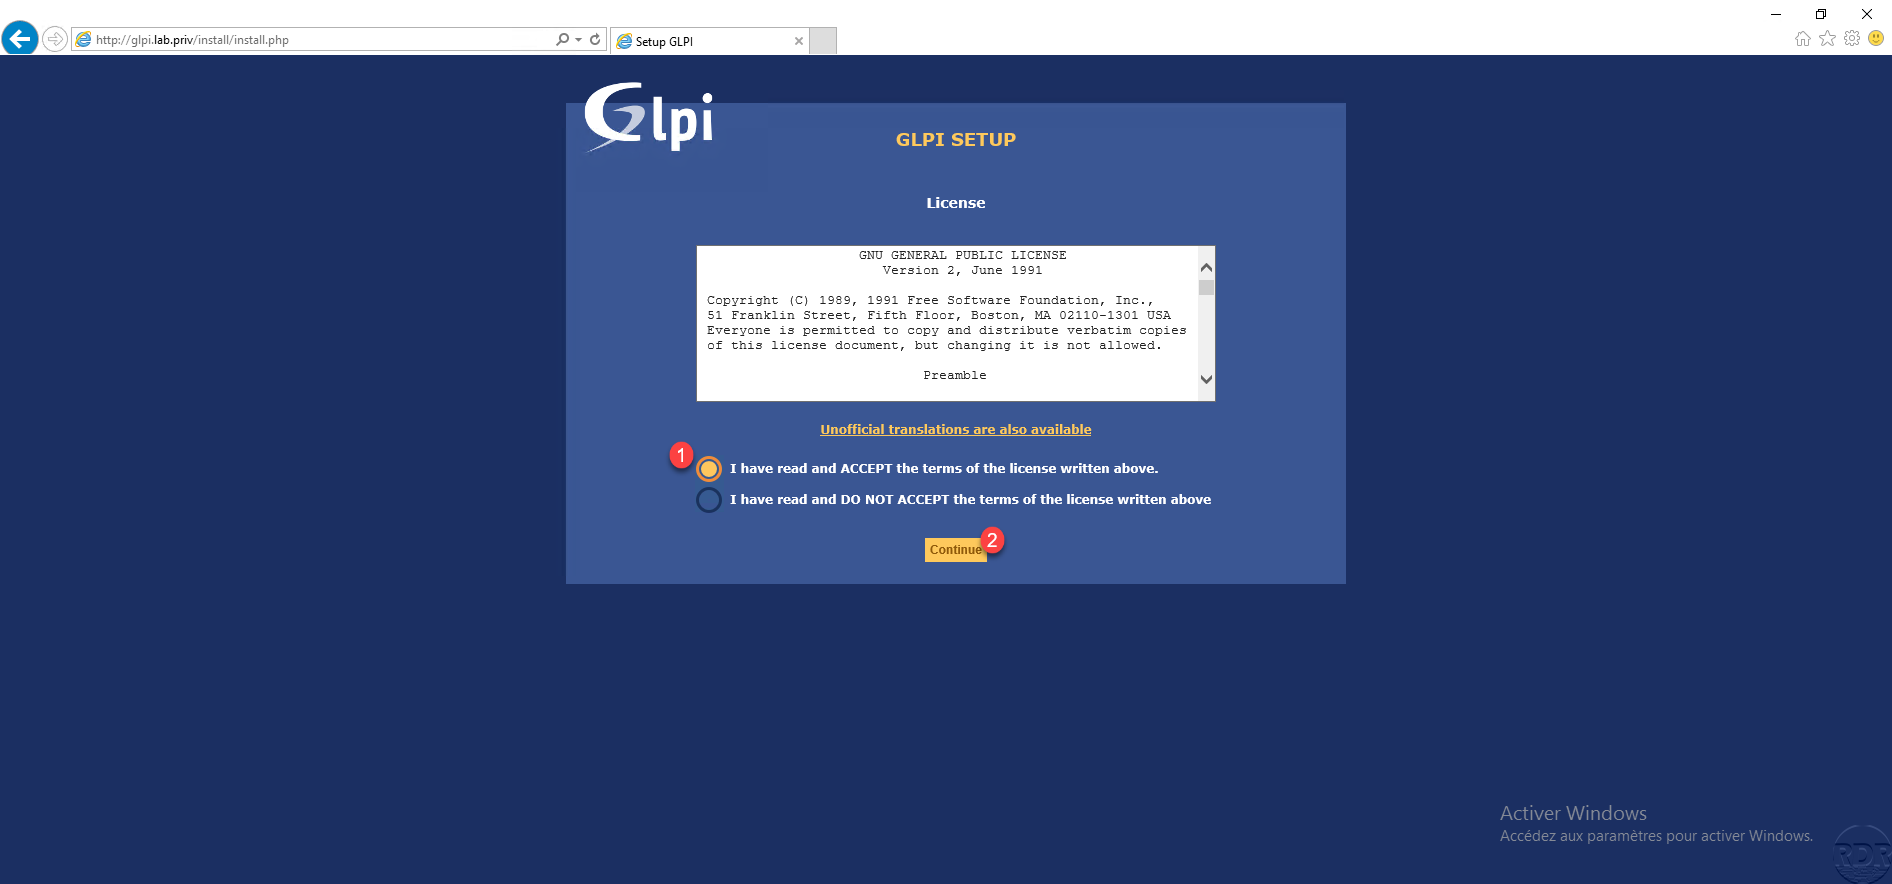
Accept license 1 and click on Continue 2.
Click on Install 1.
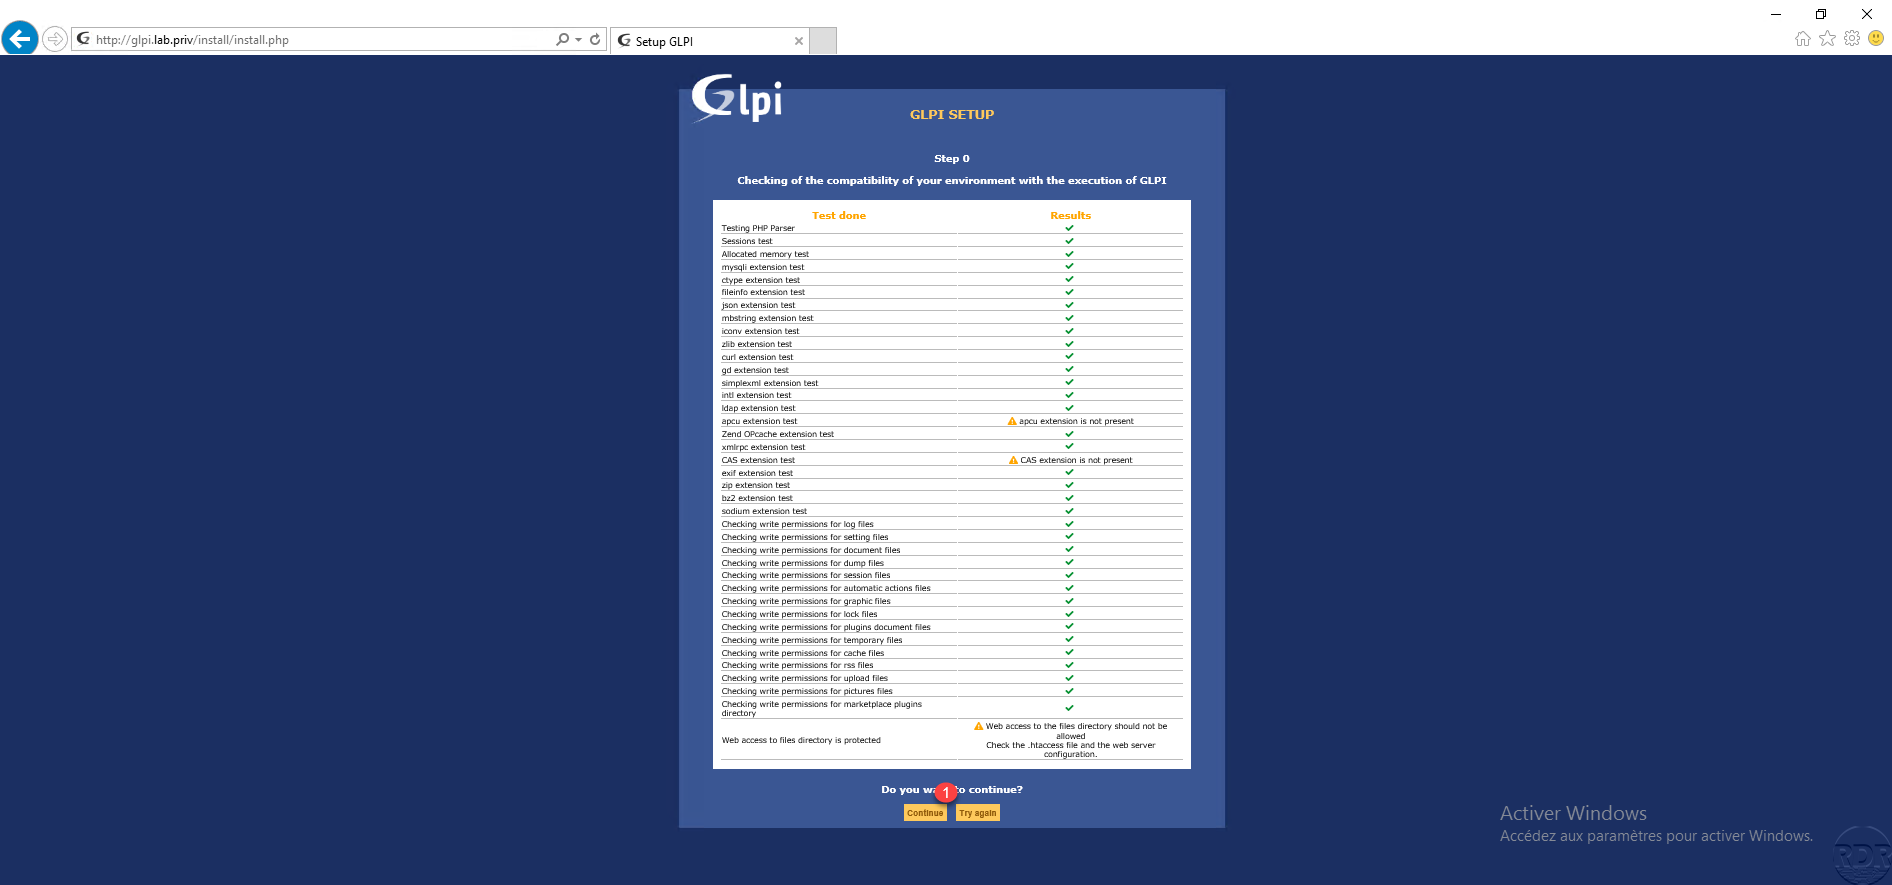
Normally all tests should be good, click Continue 1.
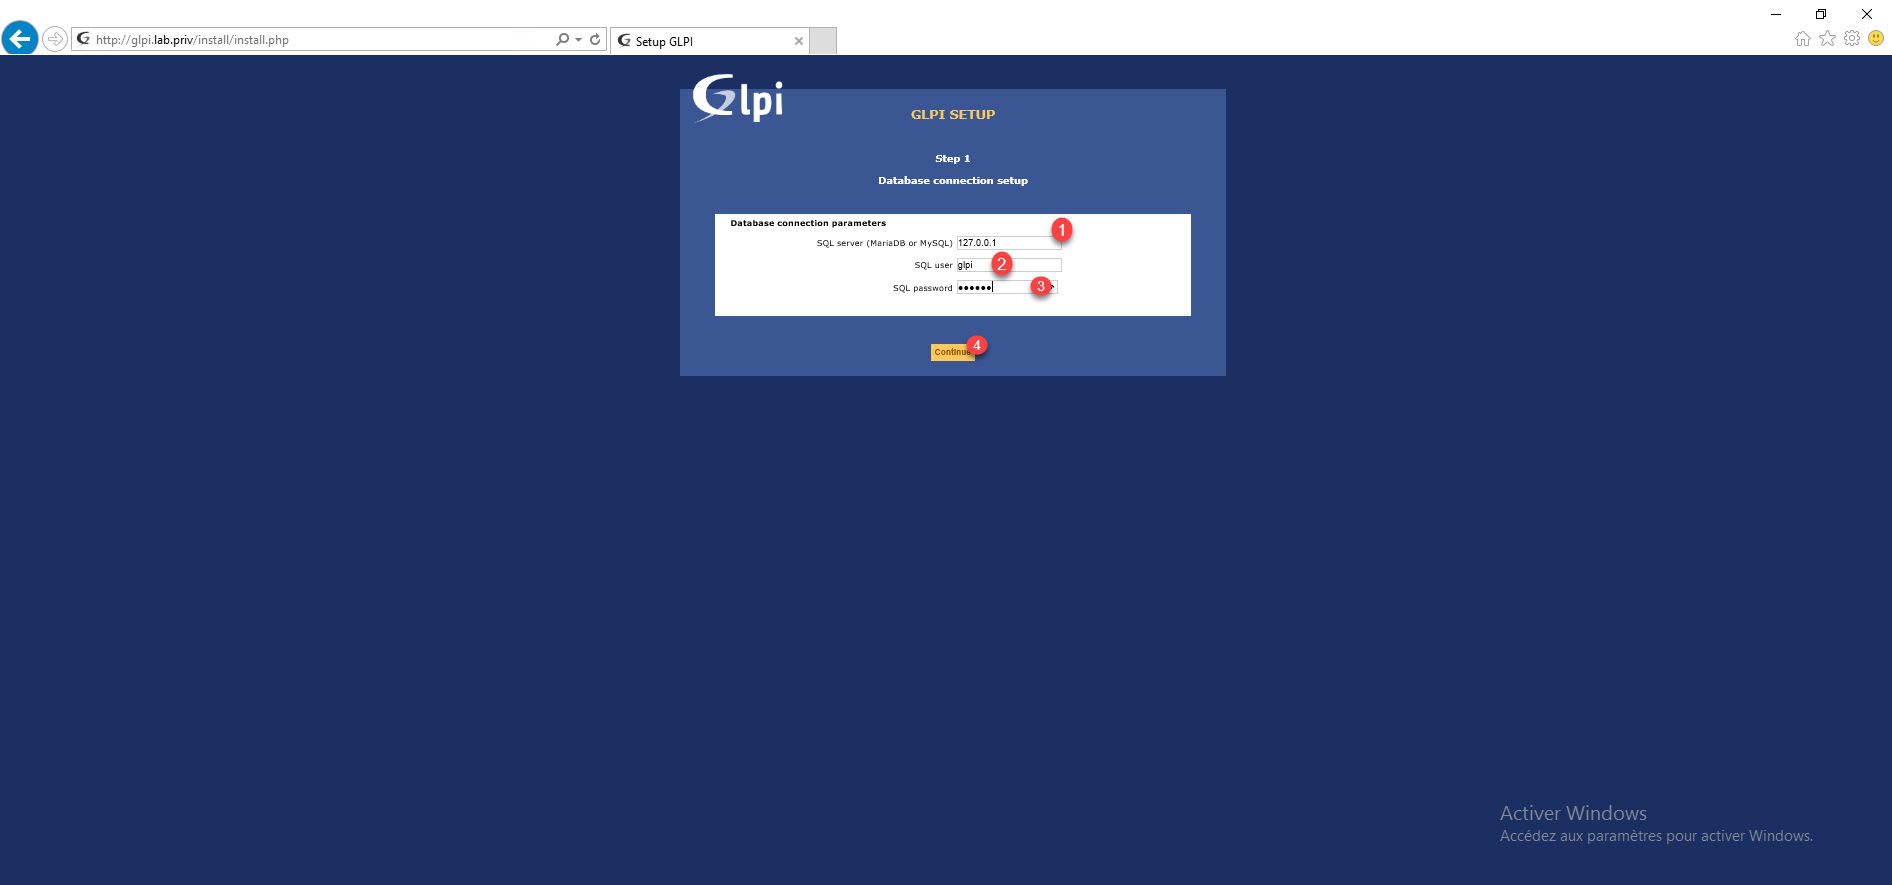
Enter the address of the MariaDB server (127.0.0.1 or localhost) 1, the user (glpi) 2 and the associated password 3 then click on Continue 4> >.
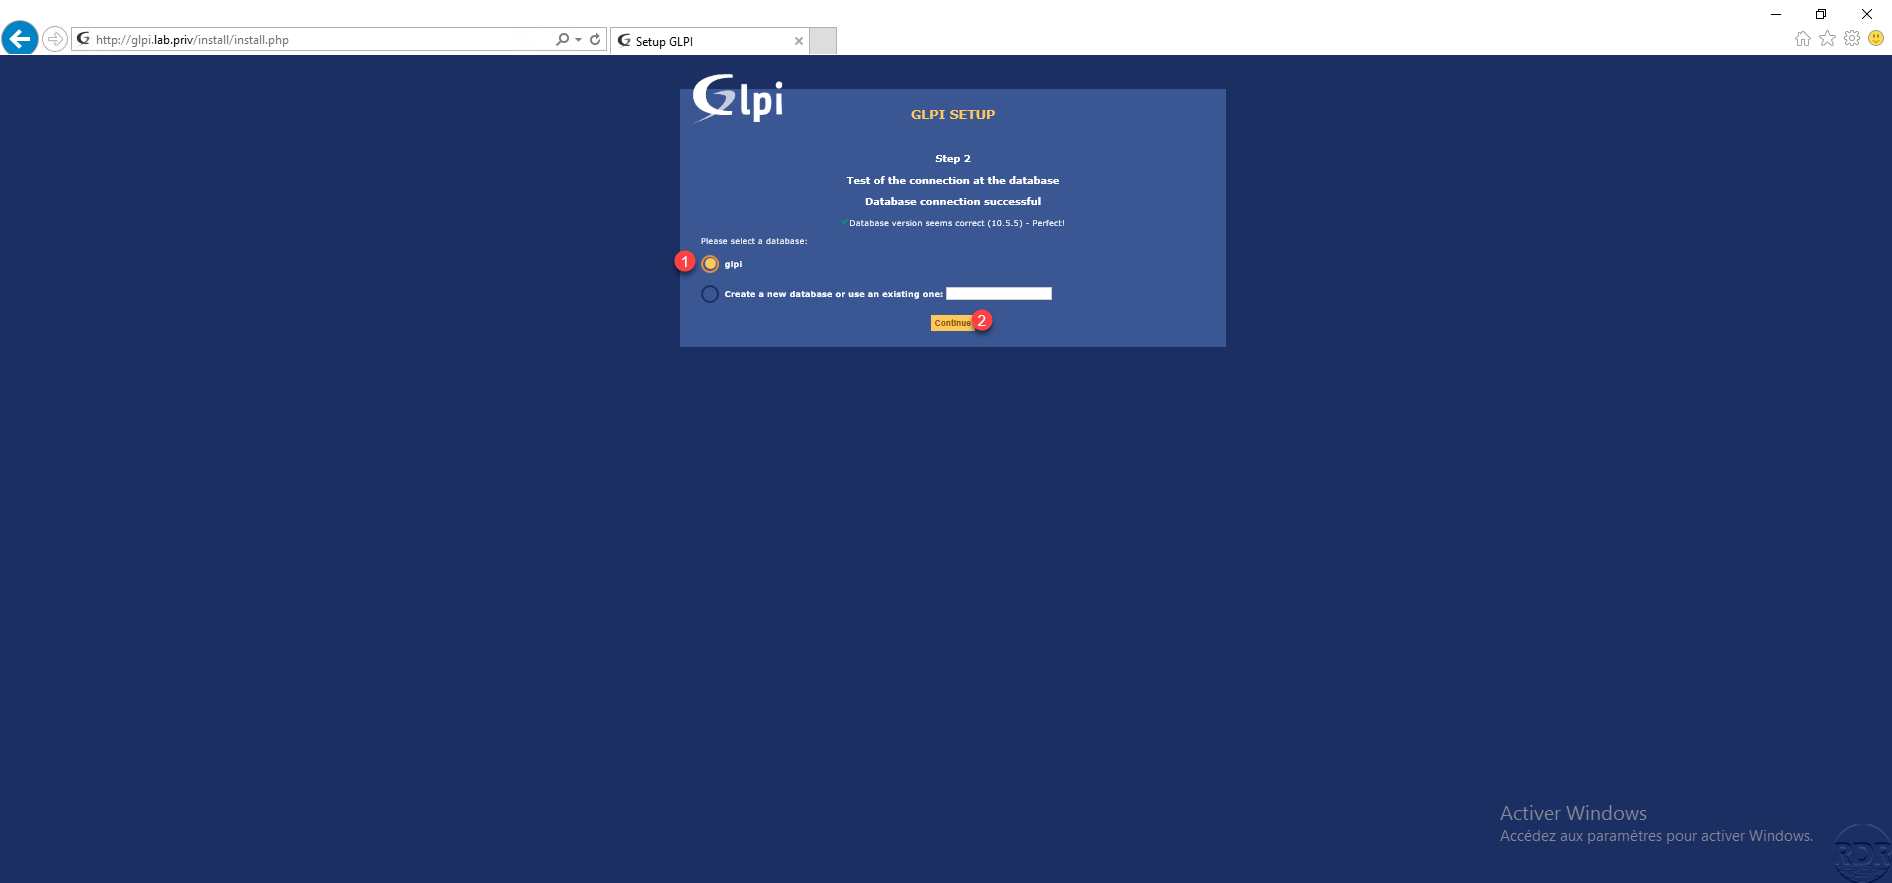
Select the database 1 and click on Continue 2.
Once the database is initialized, click on Continue 1.

This step may take several seconds.
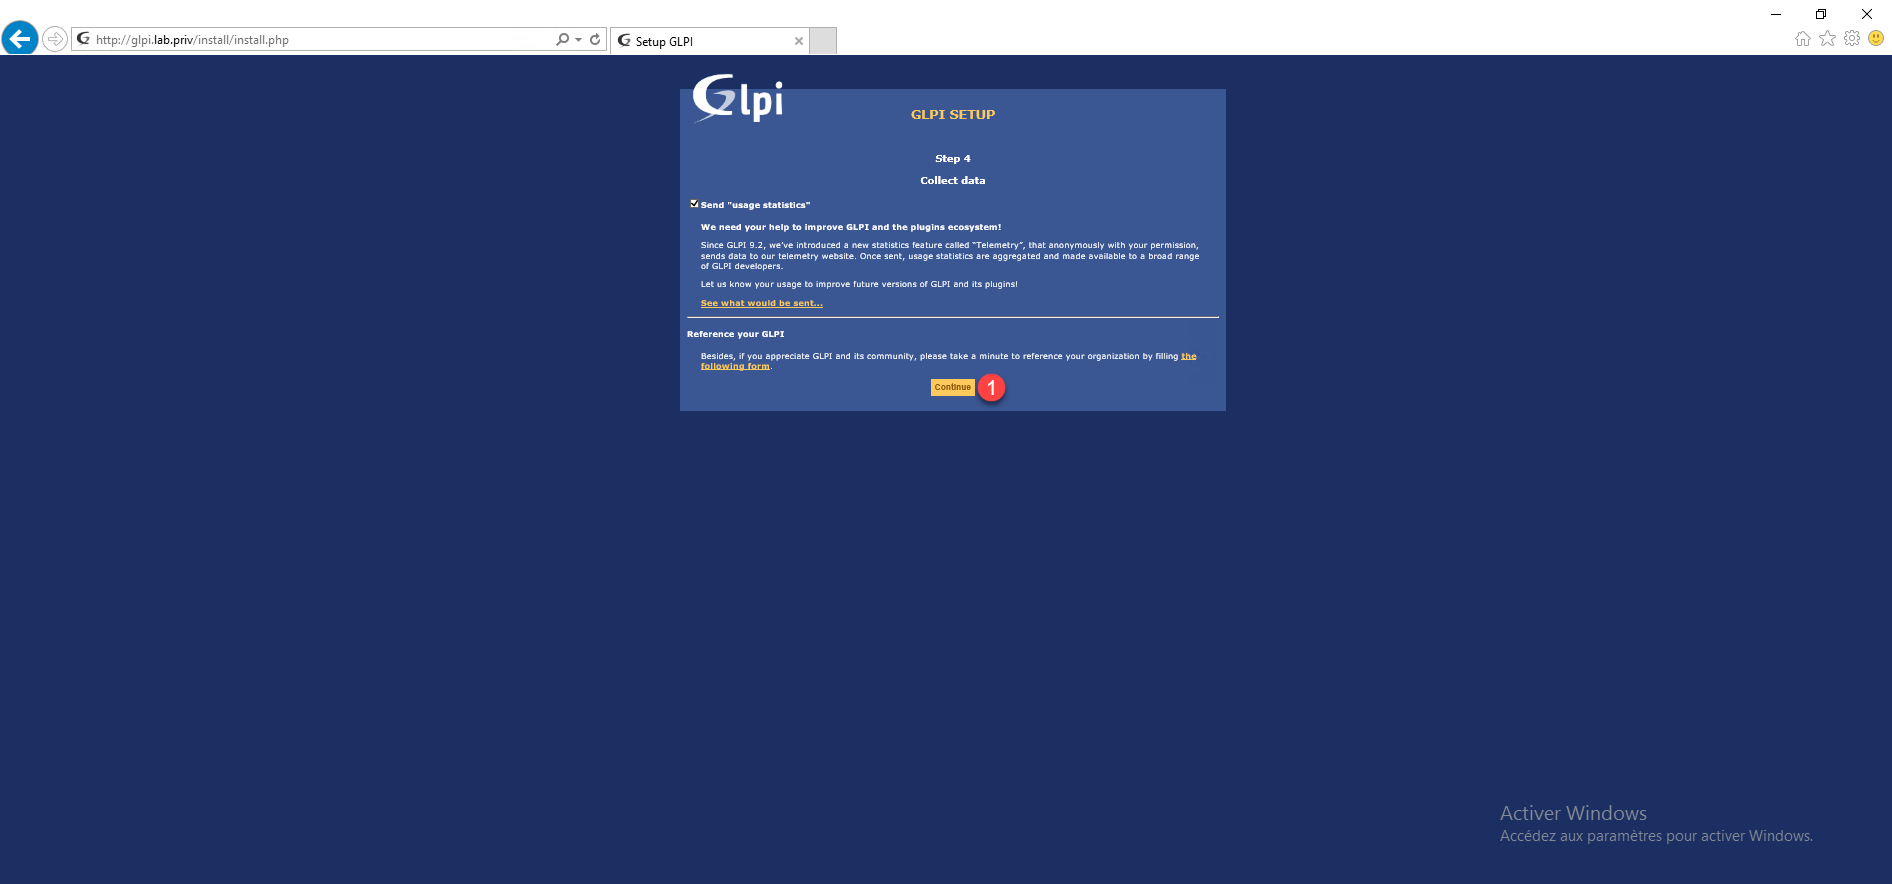
Choose to send telemetry information and click on Continue 1.
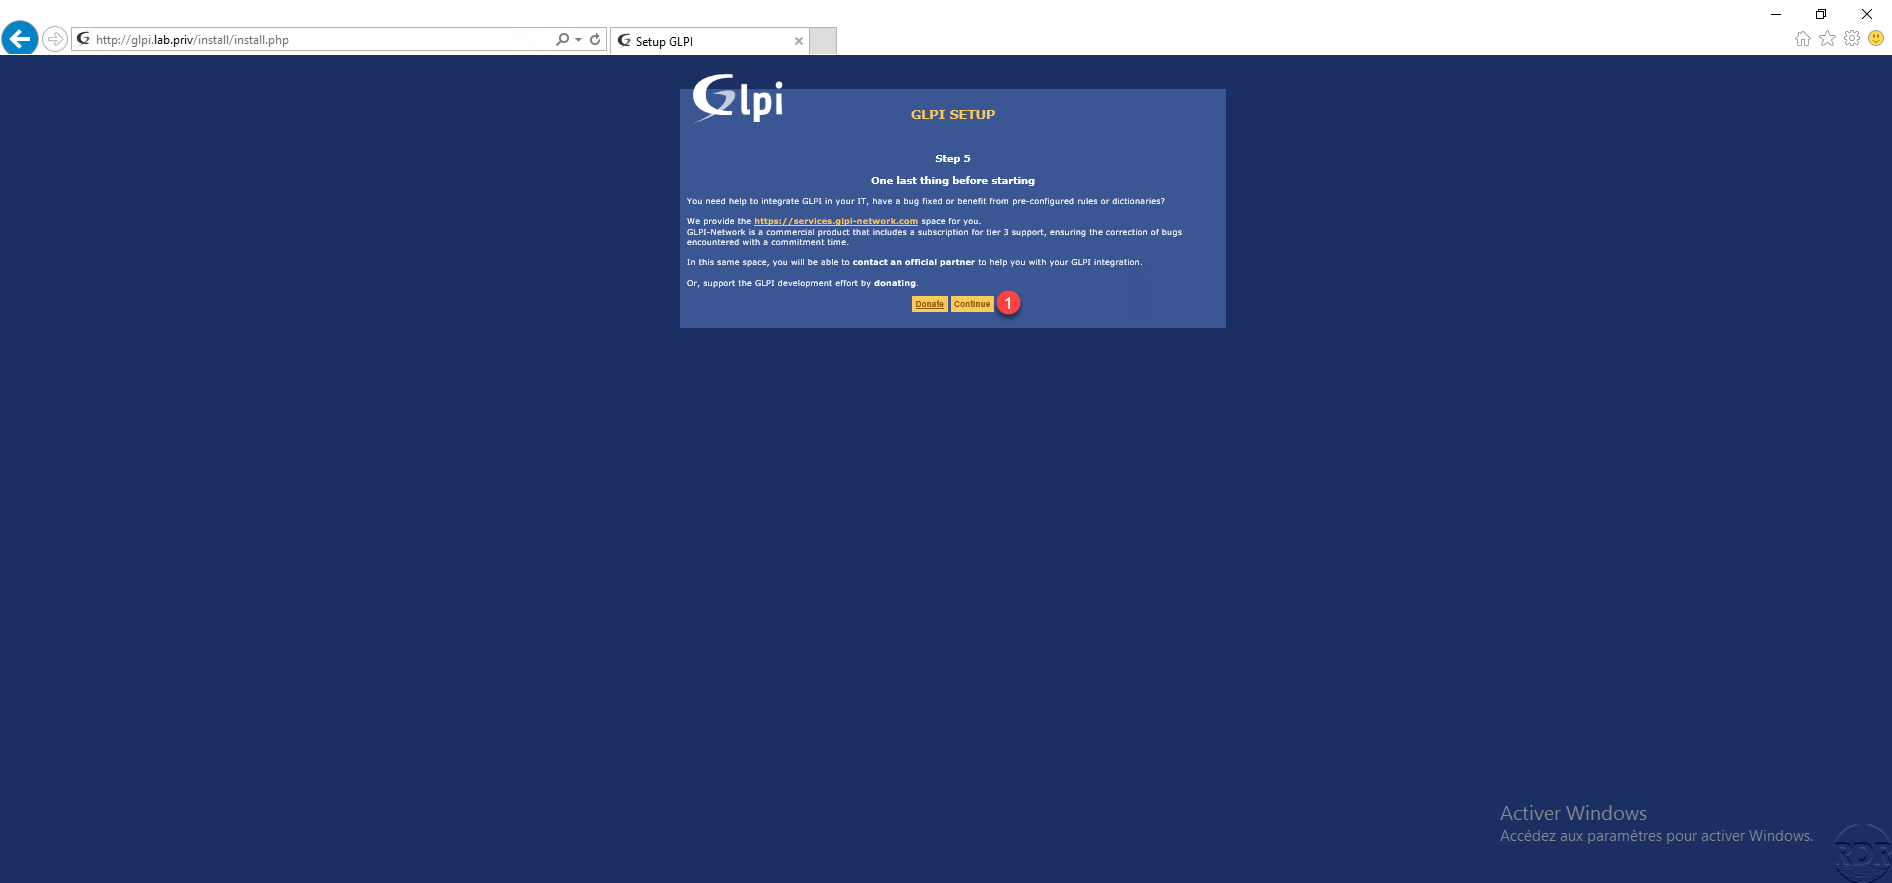
Skip the donation part by clicking on Continue 1.
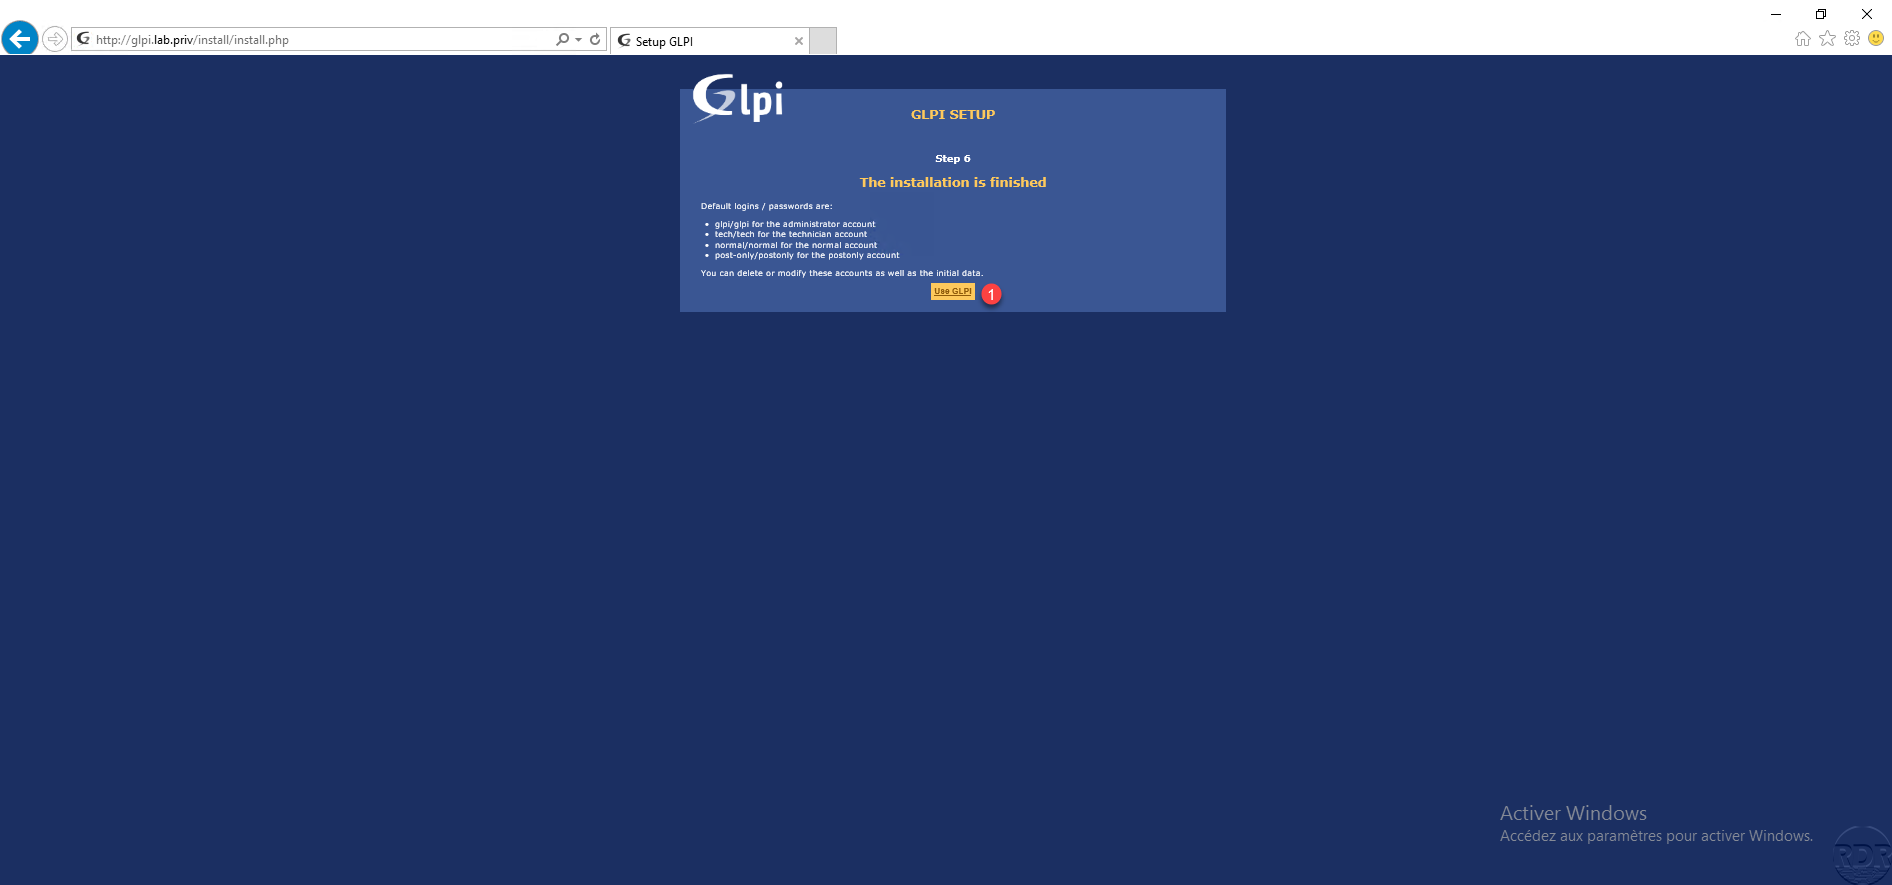
The installation is complete, the identifiers of the default accounts are displayed. Click on Use GLPI 1.
Enter the credentials (glpi / glpi) 1 and click on Send 2 to connect.

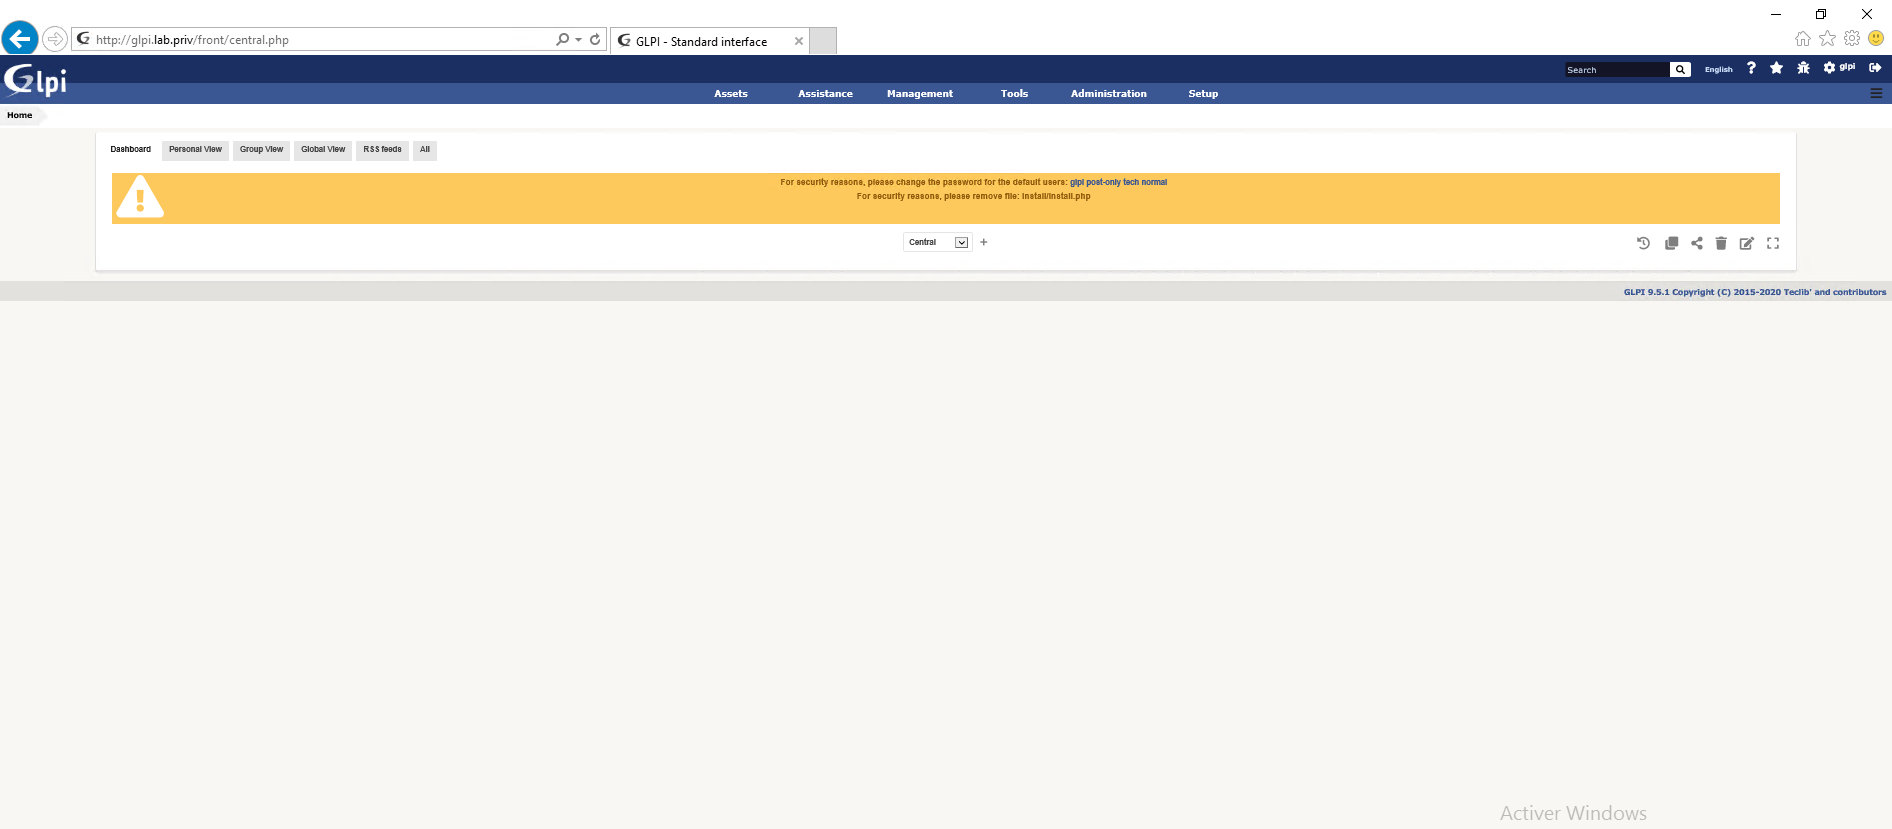
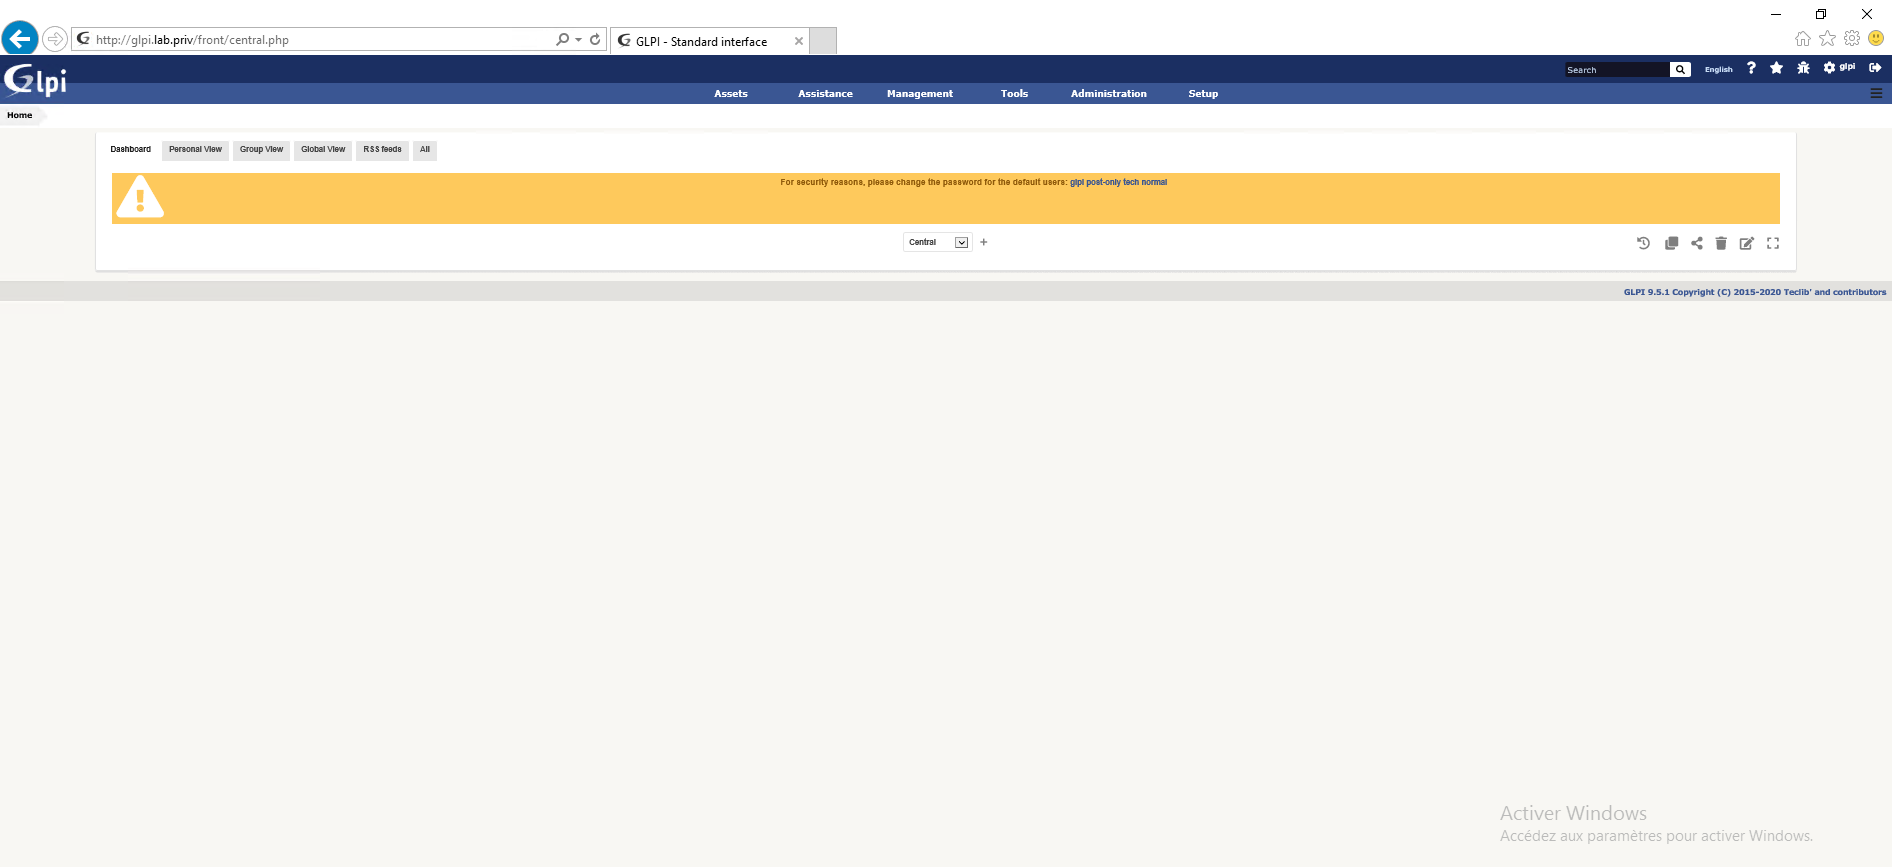
GLPI is ready for use.
After installation
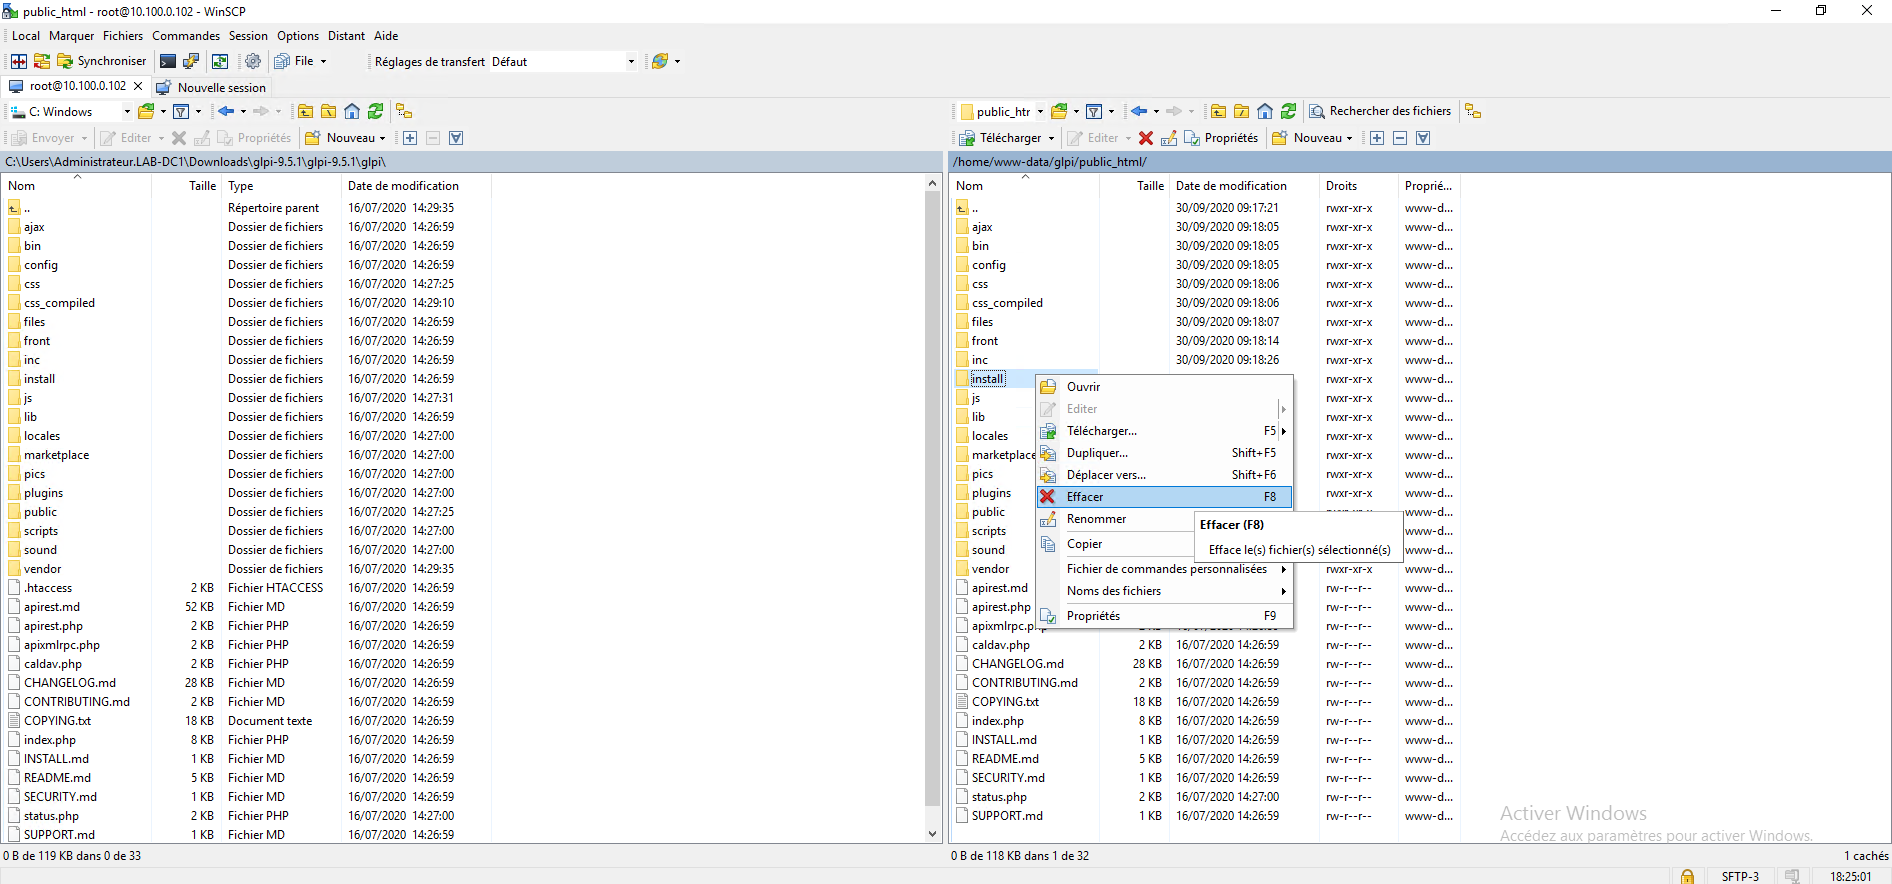
Delete the install folder
Delete the install folder from the GLPI directory.
Refresh the home page, the message should be gone.
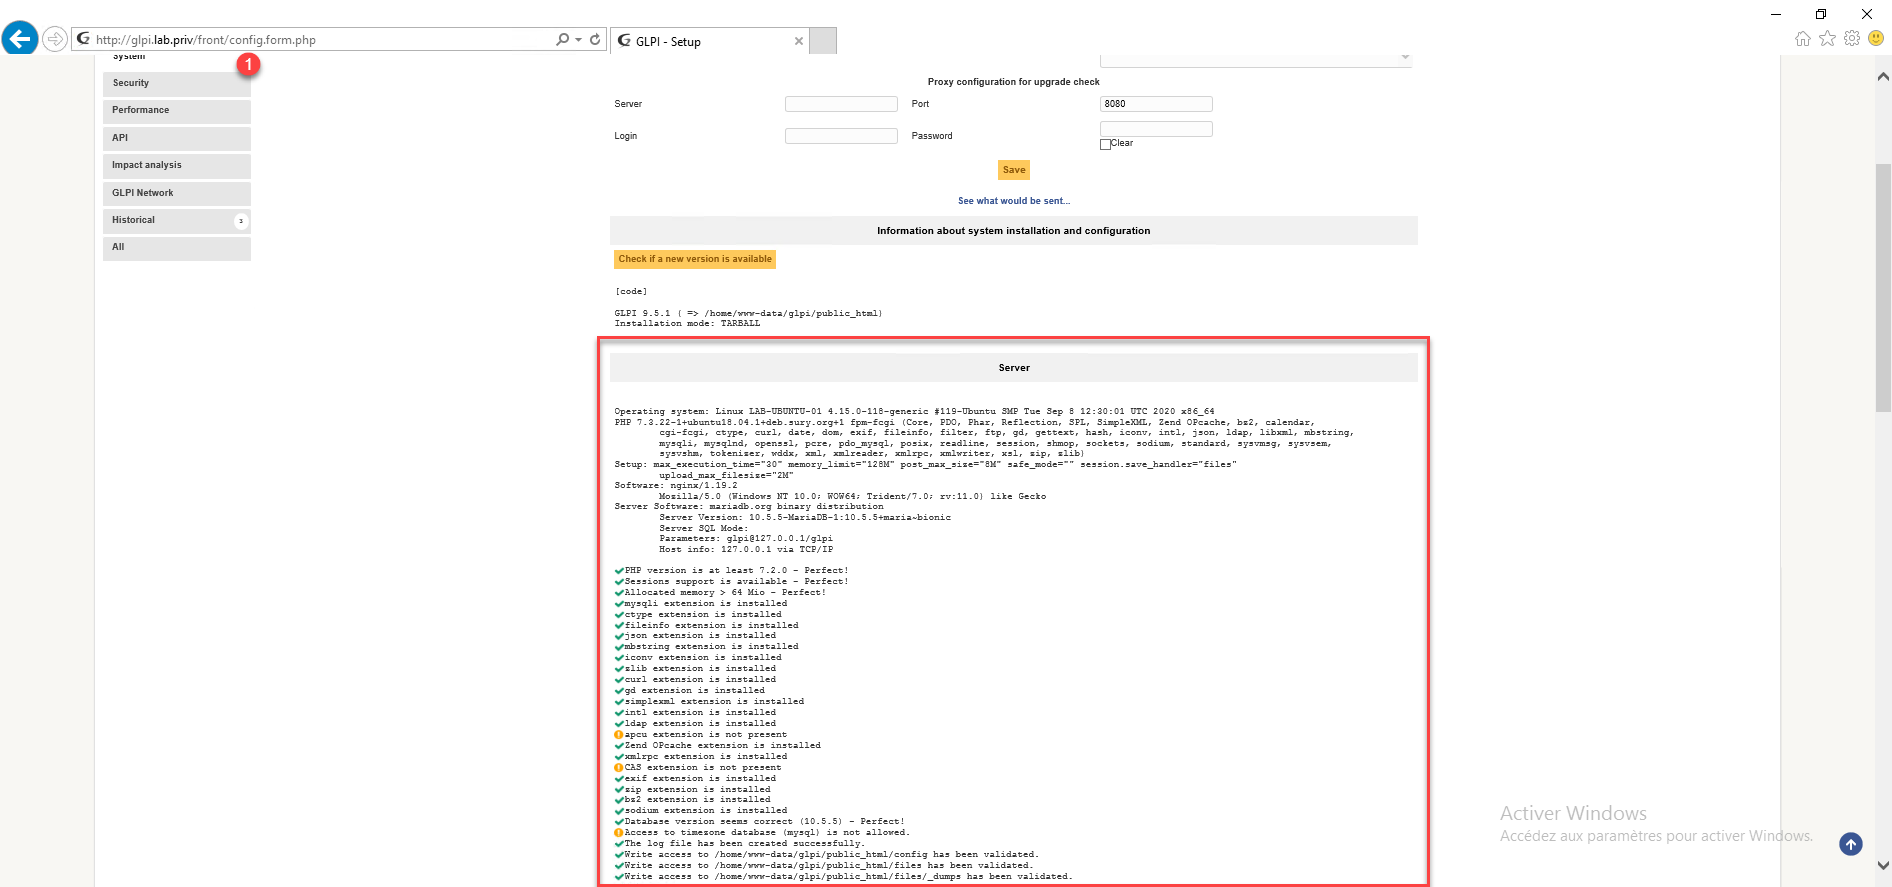
View server settings
You may be asked for this information in the event of support, with a super-admin (glpi) account, click on Configuration 1 then on General 2.

Go to the System 1 tab to display the server settings.
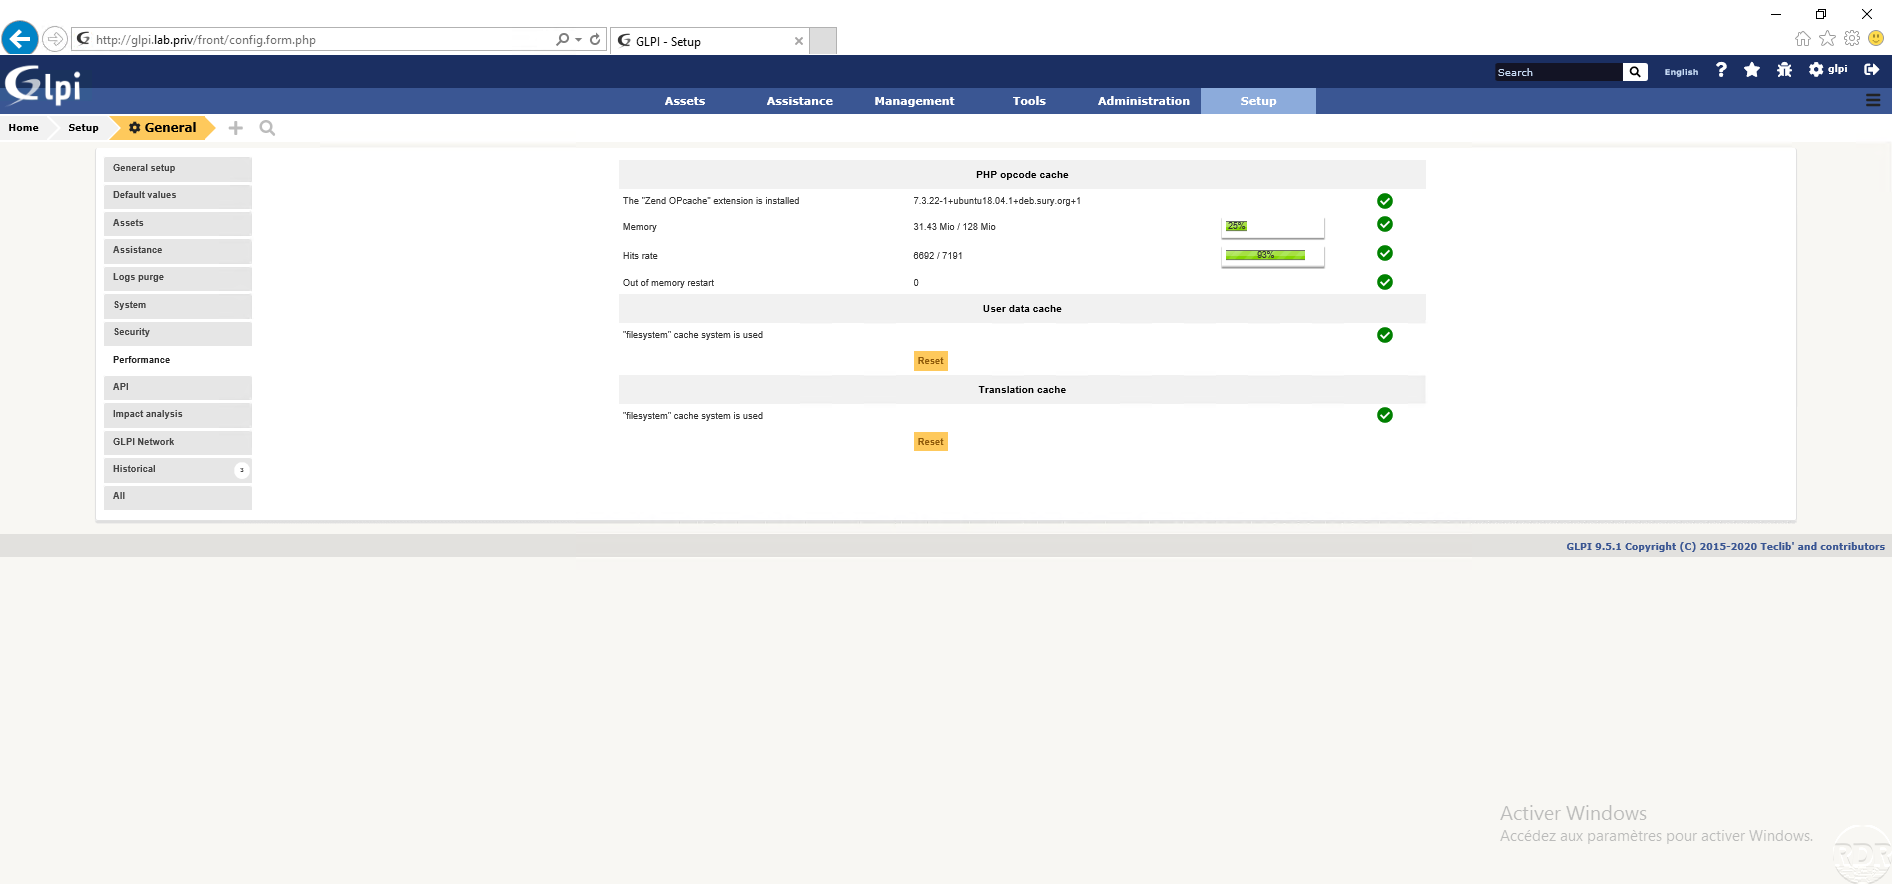
The performance tab 1 gives information on the different performance mechanisms available.
Server optimization for GLPI
In this part, I will give you two tips to increase GLPI server performance.
Install PHP-APCU
The installation of PHP-APCU can also be done if you are on Apache
PHP-APCU is a PHP object cache module that allows you to store certain query results in RAM (random access memory) in order to have the results faster. GLPI is intended to use this system.
To install php-apcu enter the following command:
sudo apt install php-apcu
Once the installation is complete, restart the php-fpm service:
sudo systemctl restart php7.3-fpm
On the performance tab that we saw previously in the User data cache 1 part, we can see that the apcu extension is now used.

Optimization of PHP settings
Last elements of optimization of the server at the PHP level will be to modify some PHP parameters for the GLPI virtual host by increasing the memory for PHP and by authorizing the sending of larger files.
As we can see on the screenshot below the memory limit is 128M, the file upload is limited to 2M.
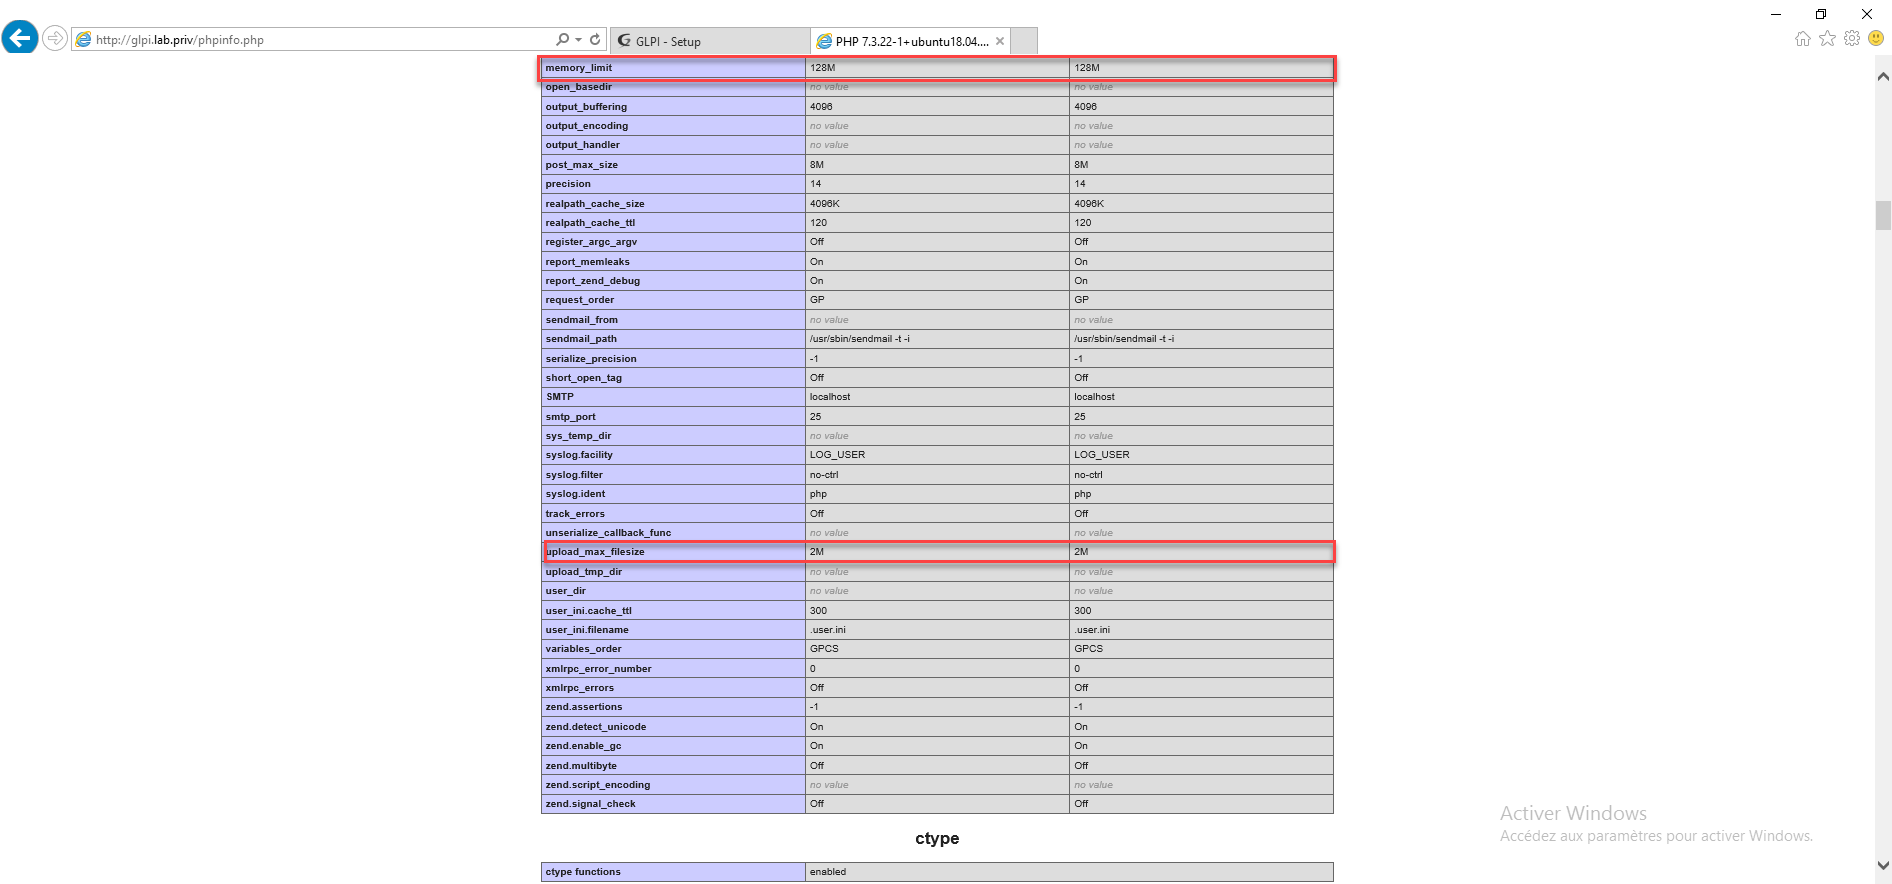
I created a phpinfo.php file at the root of GLPI with the phpinfo() function; to display information
Open the glpi.conf configuration file and add the items below in the location section ~.php $
fastcgi_param  PHP_VALUE "memory_limit=\"256M\"
post_max_size=\"128M\"
upload_max_filesize=\"32M\"";

Reload the nginx configuration and restart the PHP service to take it into account:
sudo systemctl reload nginx
sudo systemctl restart php7.3-fpm
We can see the taking into account of the parameters:

This part also explains how to configure custom PHP parameters (directives) to a virtual host under Nginx.
Check the number of NGINX processes
The last optimization that I will present to you in this tutorial is the number of nginx processes, for that open the nginx.conf file:
sudo nano /etc/nginx/nginx.conf

Check that the worker_processes directive is also the number of processors, by default the value is also the number of processors – 1.
If you are using a virtual machine and increasing the number of processors, consider changing the value of worker_processes.
If you make a change restart the nginx service
sudo systemctl restart nginx
Go further with GLPI
Now you are ready to configure and use GLPI.
You have several tutorials on GLPI available on the site.
