In this tutorial, I'll explain how to automatically empty the Deleted Items folder in Exchange 2016 and Exchange 2019 mailboxes.
It’s possible to configure the Outlook client to perform this task, but here we’ll look at how to do it directly on the Exchange server. This way, it will also work if users are only using the web client or an email client on a mobile device (phone, tablet, etc.).
To set up this automatic deletion on the Exchange server, we’ll configure two items:
- A retention tag that allows you to configure message retention and subsequent deletion
- A retention policy that will be applied to mailboxes, which may contain one or more retention tags.
To begin, log in to the Exchange administration web interface, the ECP.
Go to Compliance Management 1, then to Retention Tags 2.
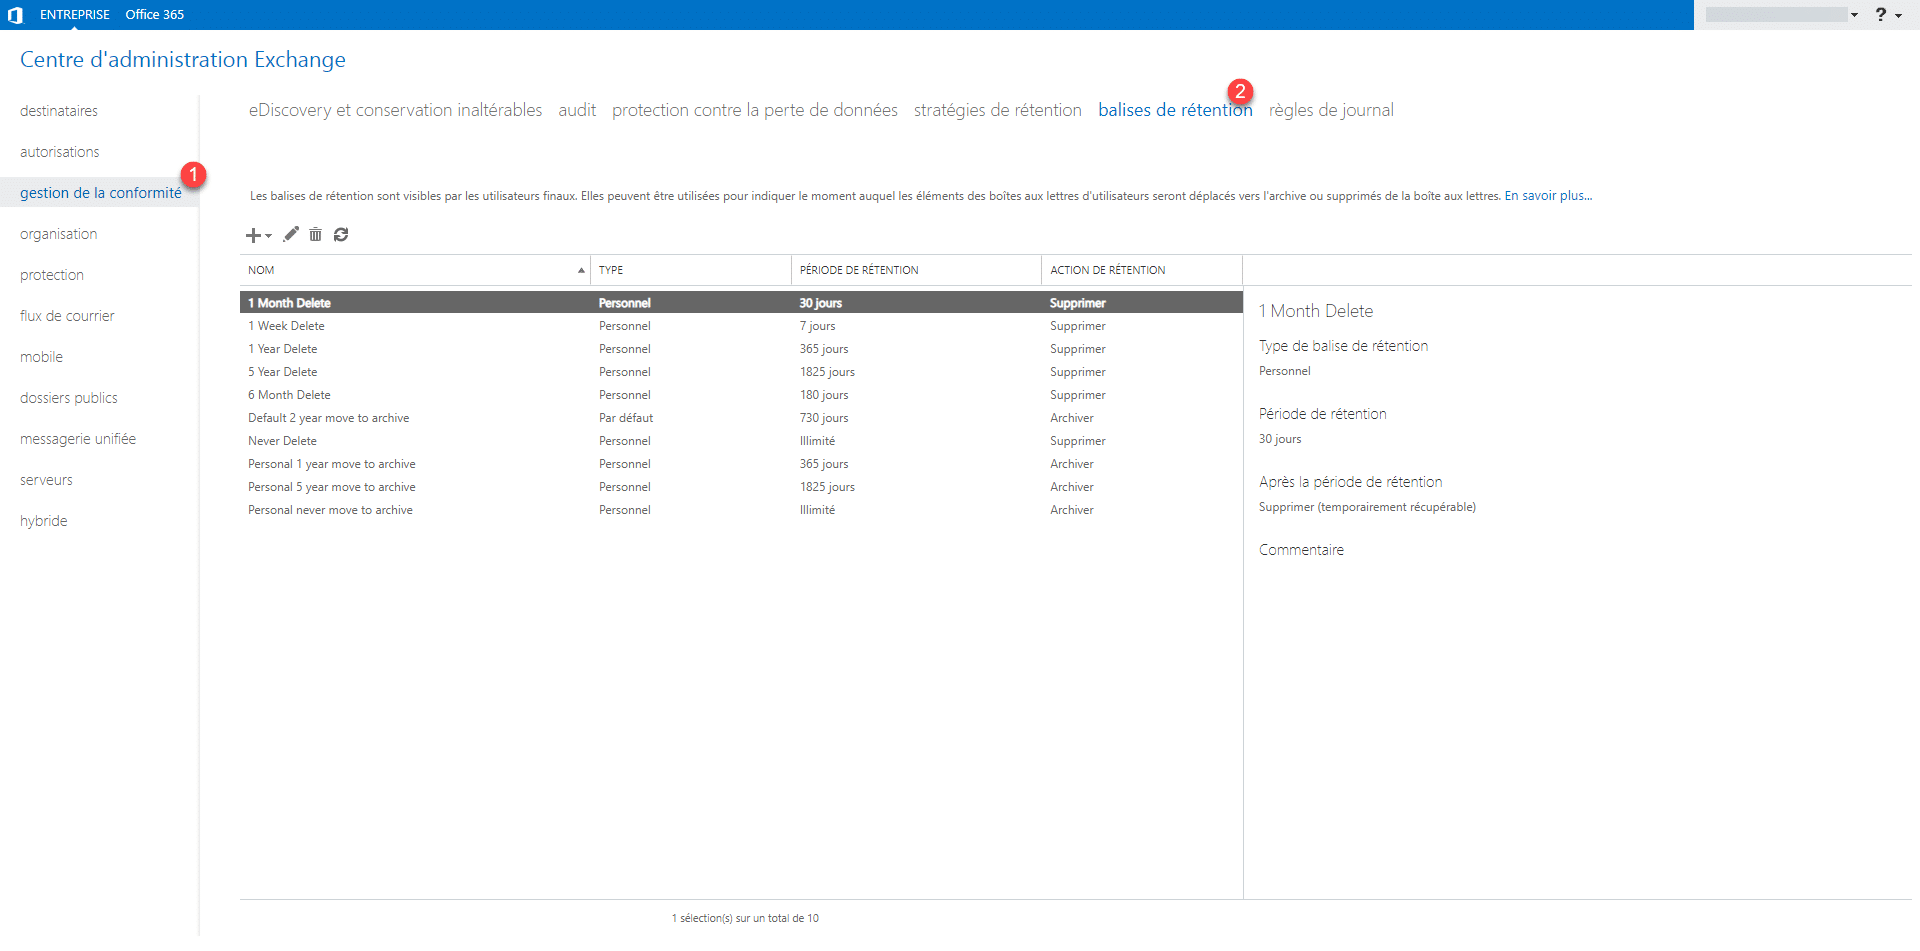
By default, you’ll see that retention tags are already configured.
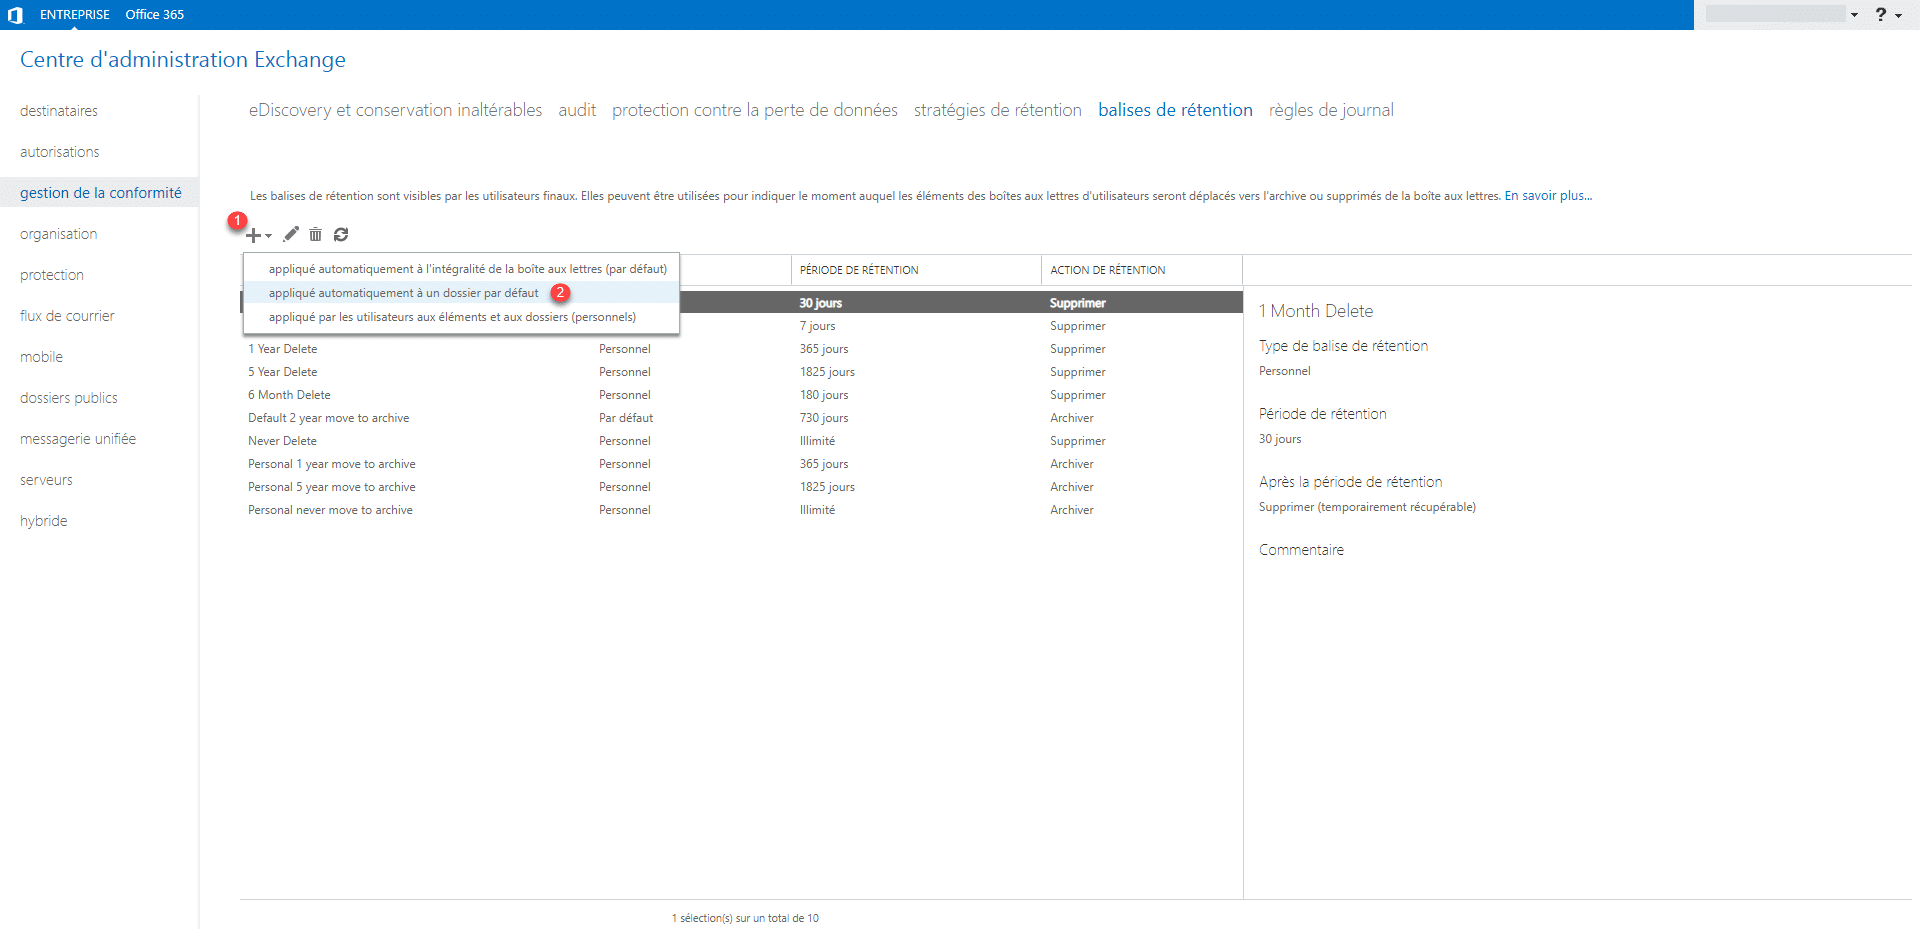
Click the + 1, then select “Apply automatically to a default folder” 2.
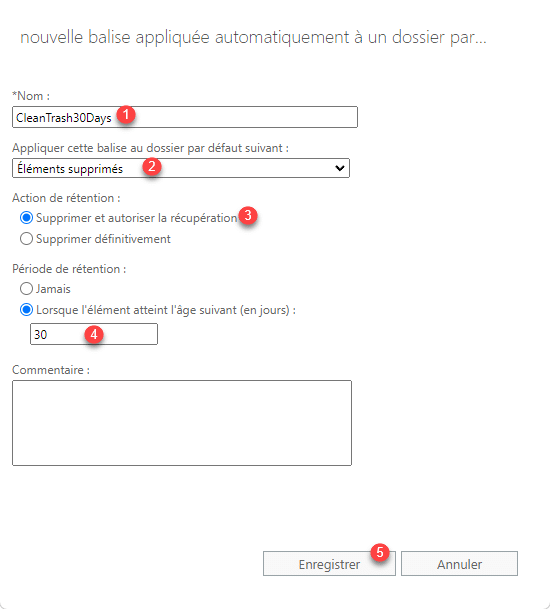
Start by naming 1 the retention tag, select the folder to which the tag will apply—in our case, Deleted Items 2, choose an action—I chose “Delete and Allow Recovery” 3—then specify the duration in days 4 for when the action will be applied, and click “Save” 5.
The retention policy is created; next, go to “Retention Policies” 1.
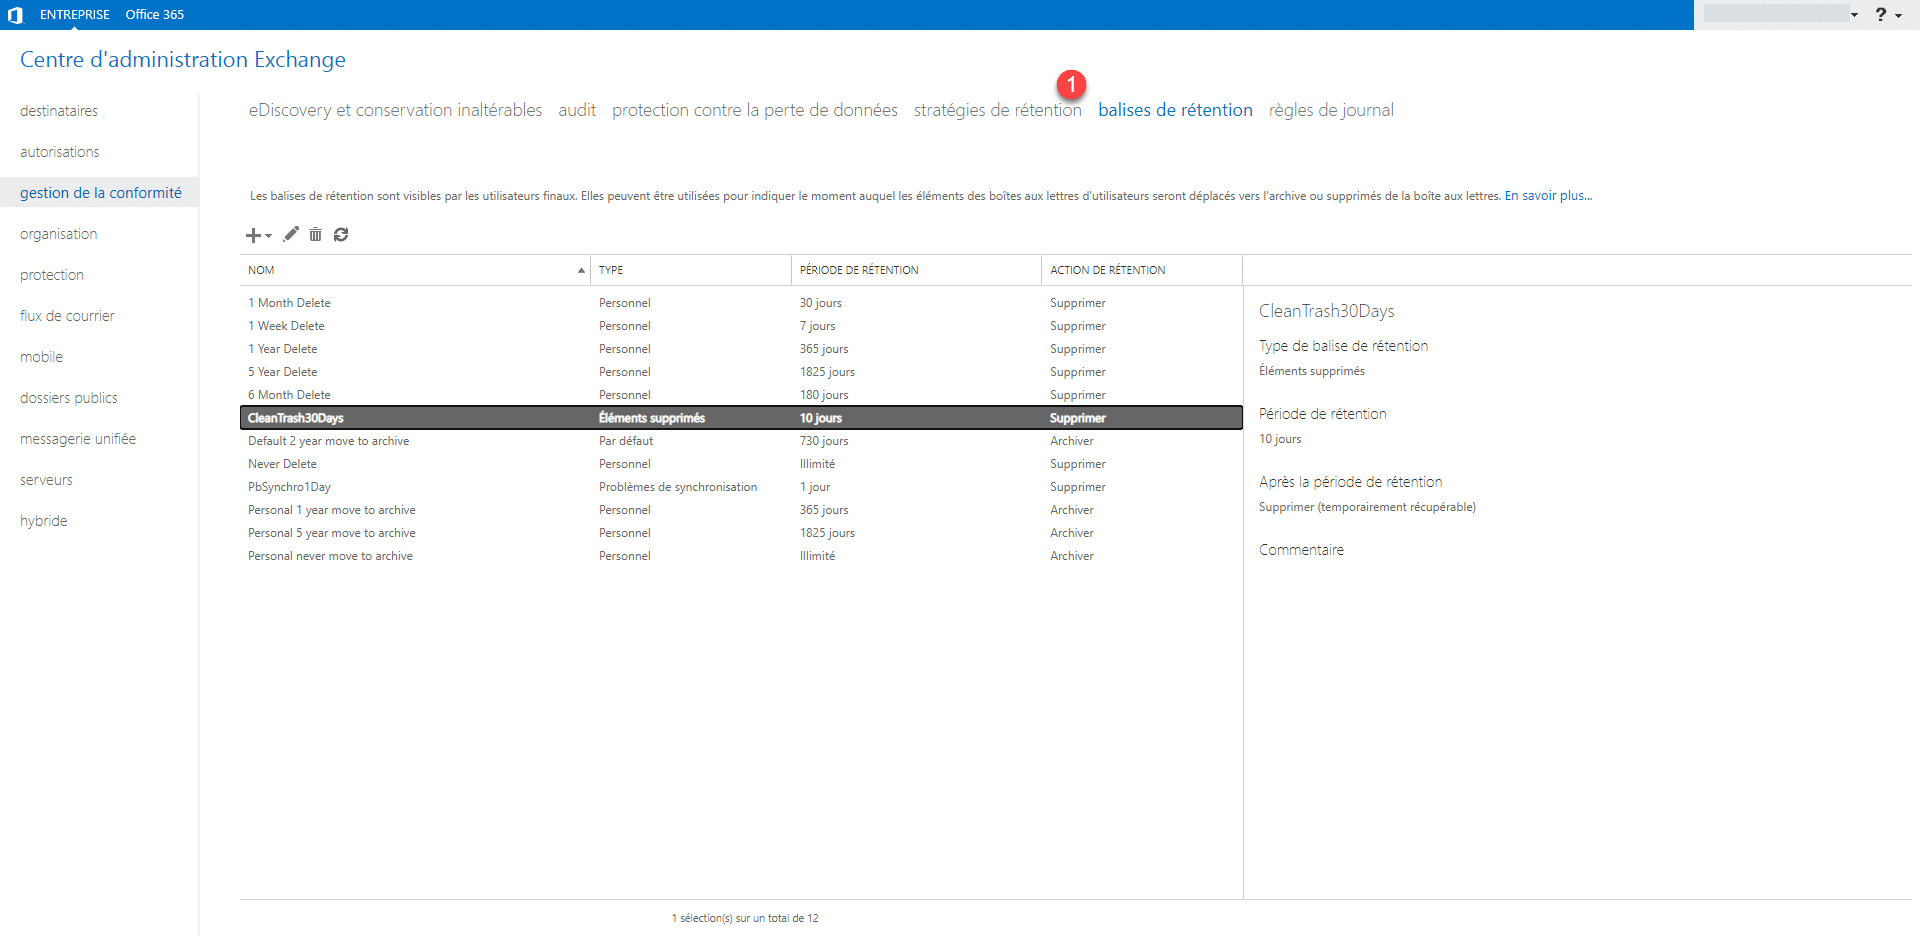
For the testing phase, I temporarily reduced the duration to 10 days.
From the list of retention strategies, click the + 1 to create a new one.
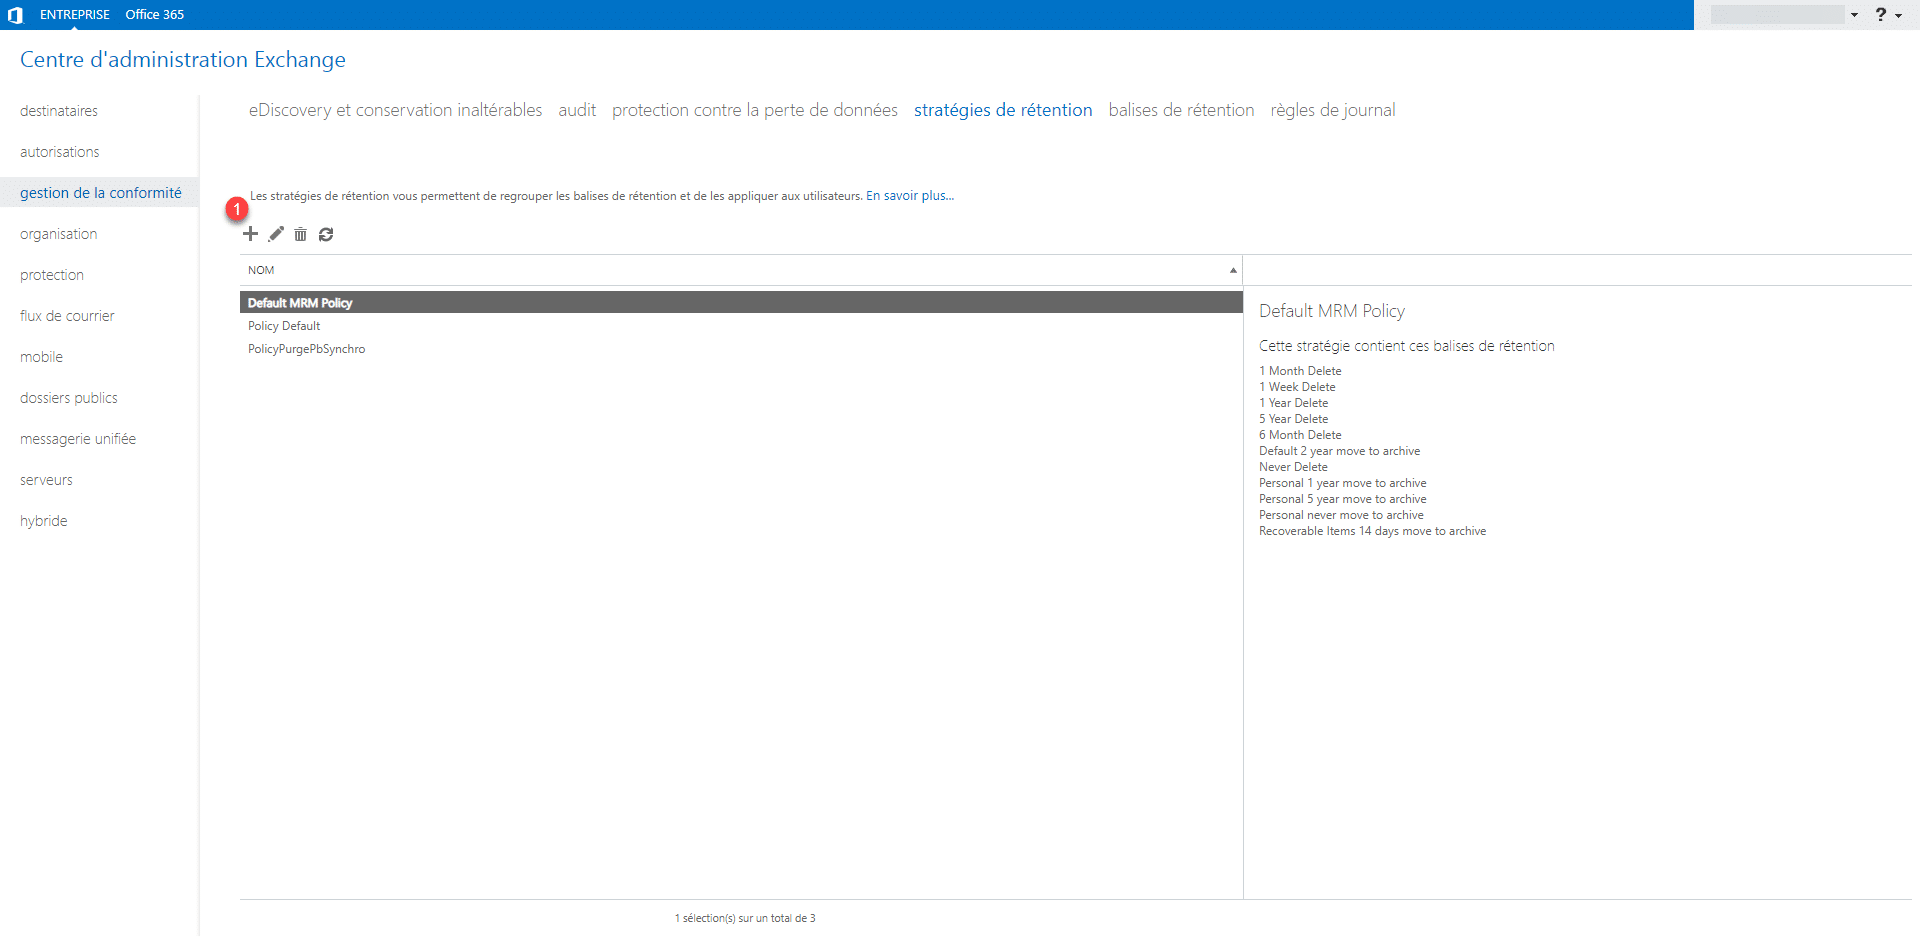
Start by naming 1 the retention strategy, then click the + 2 to assign retention tags to the strategy.
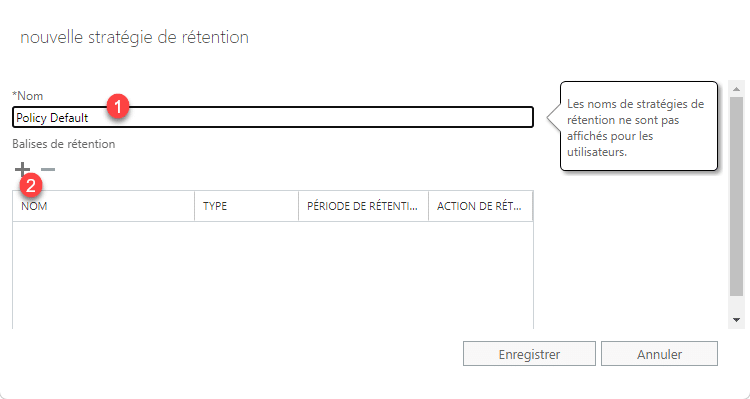
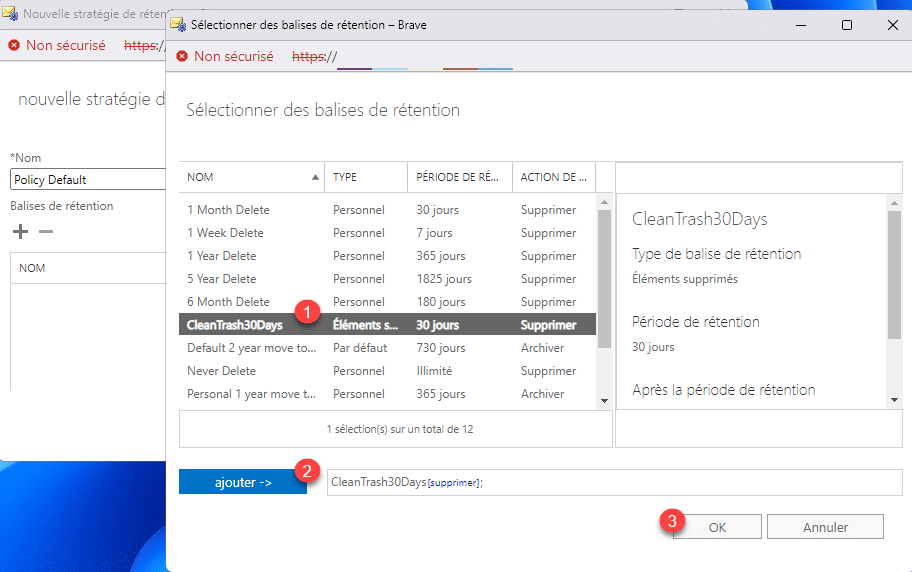
Select the database 1, then click Add 2 and OK 3.
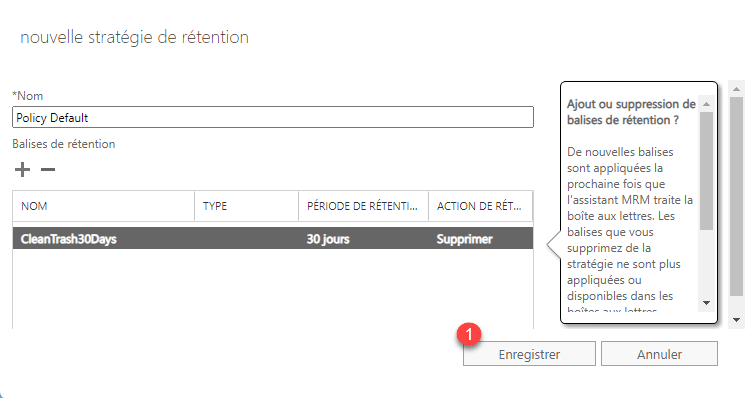
The tag is added to the policy; then click “Save” 1.
The retention policy is created; next, go to the list of mailboxes by clicking Recipients 1.
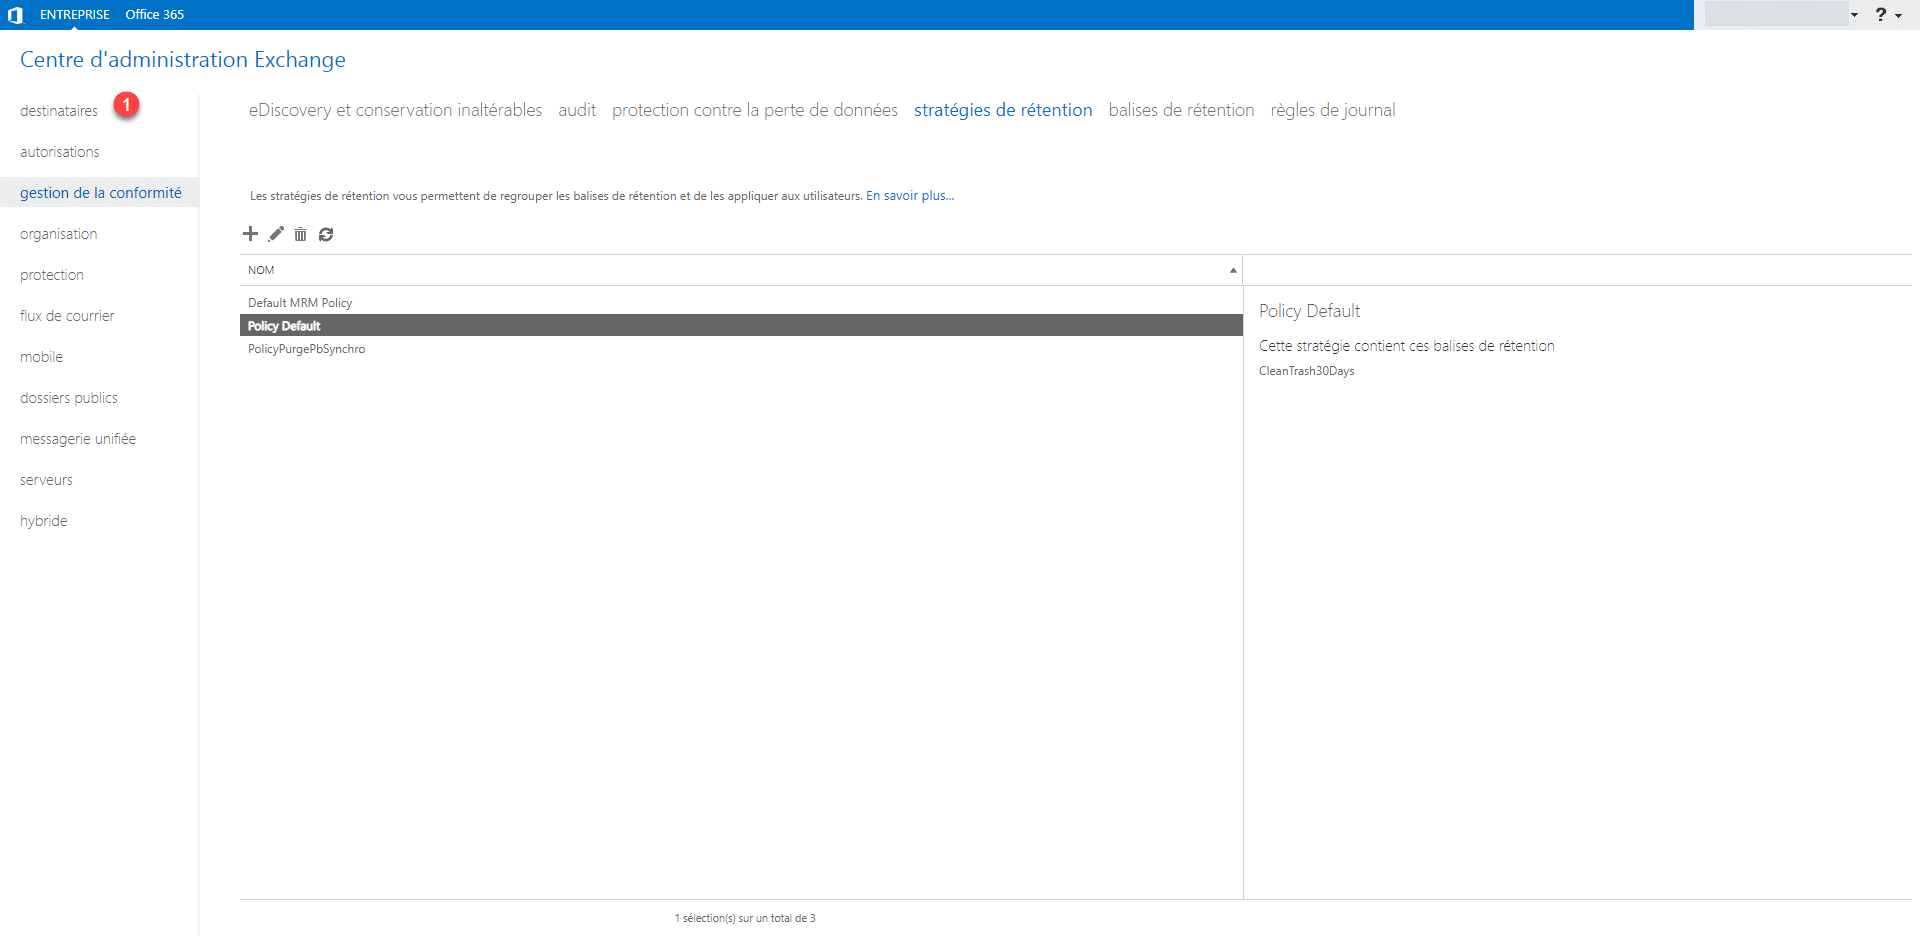
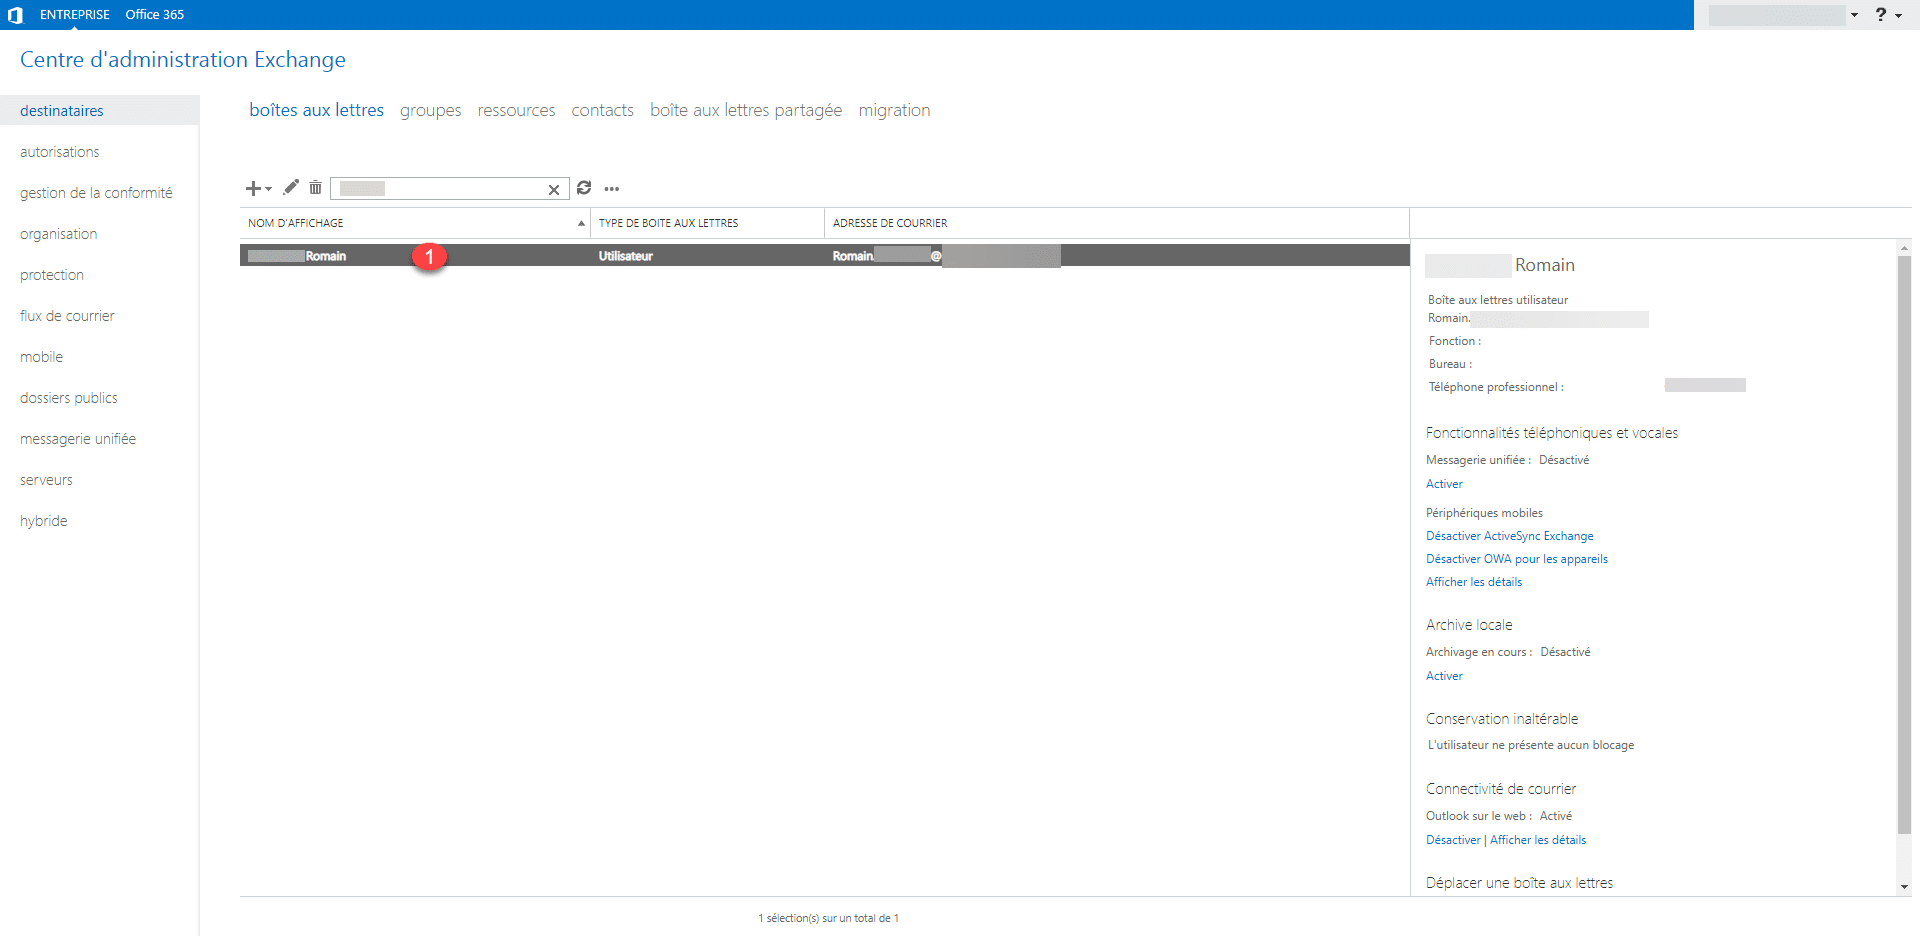
Now, you need to apply this policy to the mailboxes; here, I’ll apply it to just one mailbox. Select the mailbox 1 and double-click to open it.
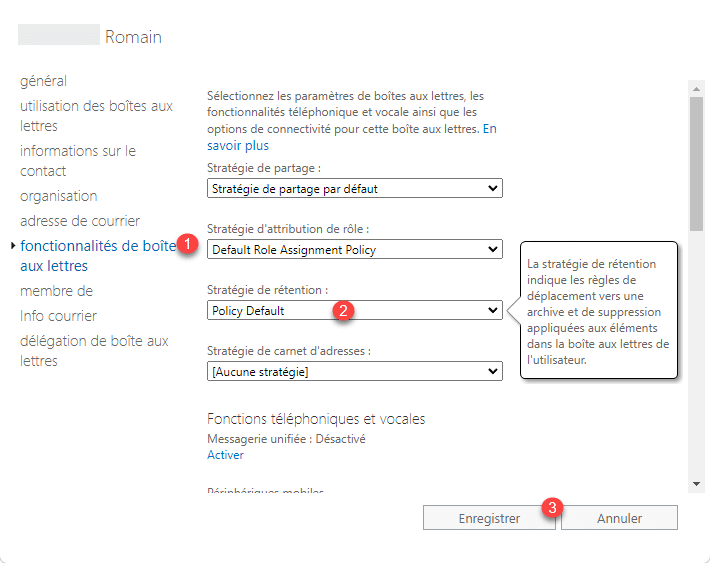
Go to Mailbox Features 1, then select the retention policy 2 and click Save 3.
The policy is assigned to the mailbox; for it to take effect, you’ll need to wait or run the following command in EMS to force the application Start-ManagedFolderAssistant -Identity "XXXX"
To verify that the strategy has been applied correctly, in OWA you’ll see a message displayed on the email showing the expiration date and the applied tag.
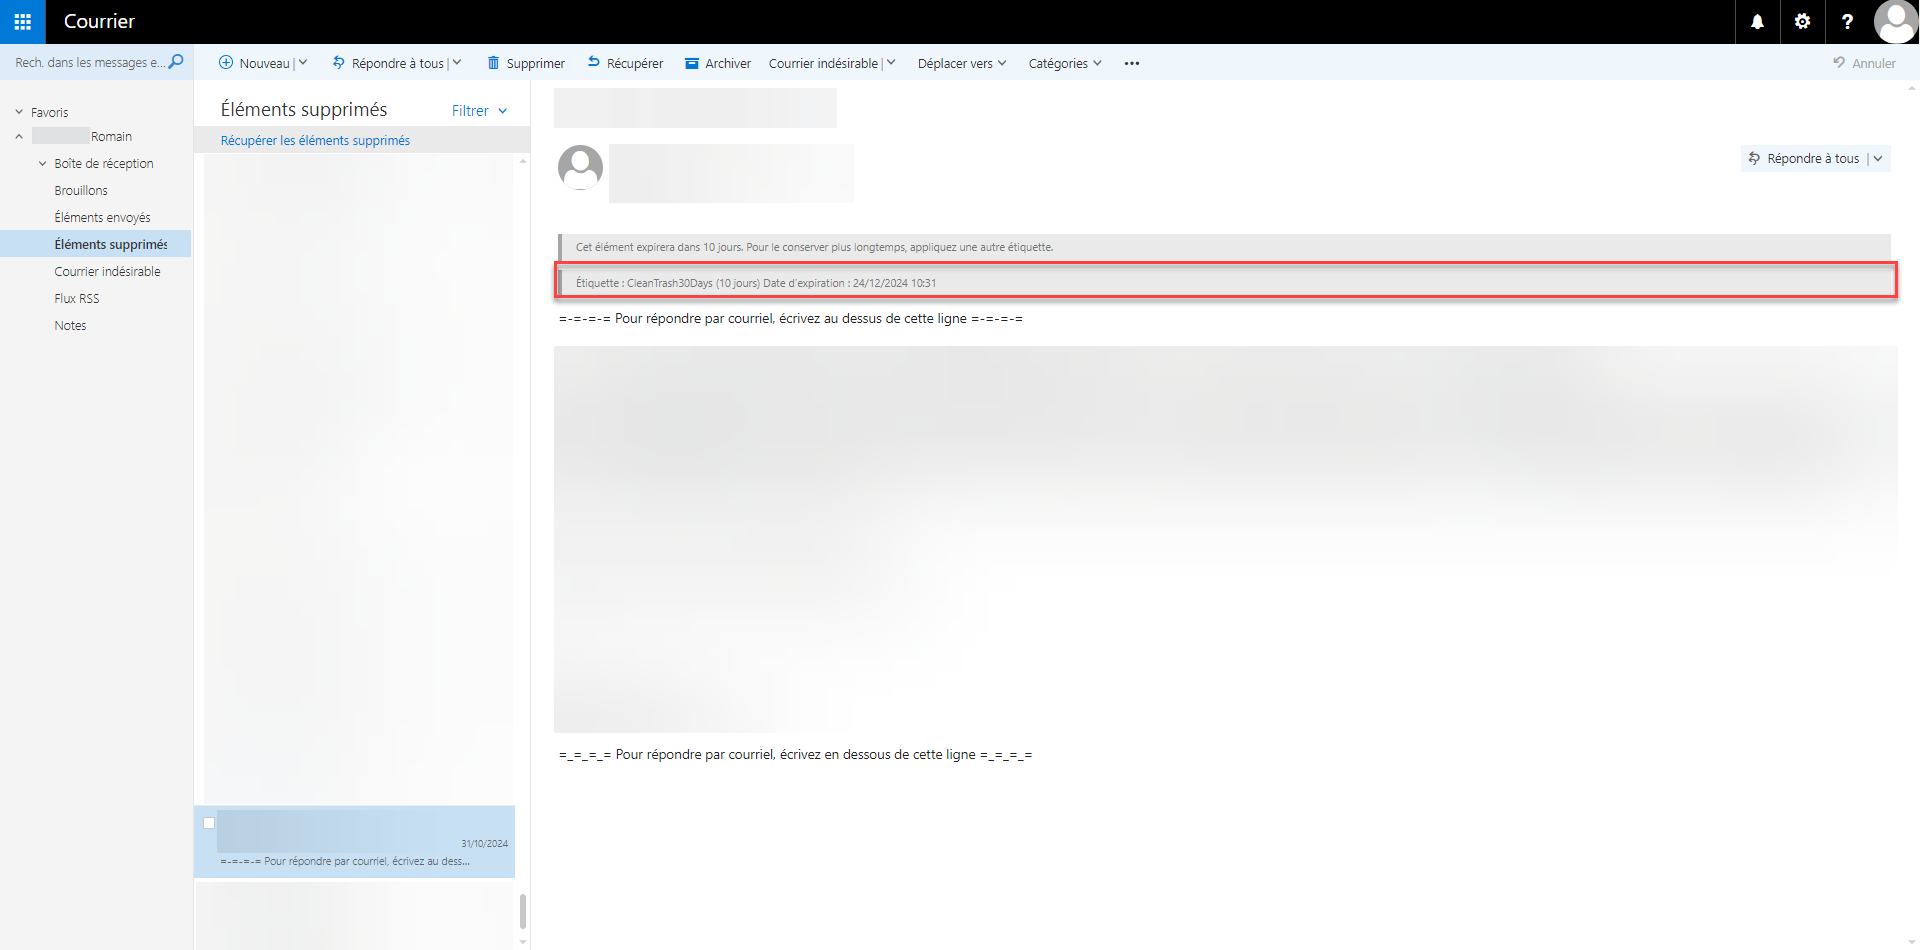
On 12/24, the message will be automatically deleted.
To apply the policy to all mailboxes, use PowerShell:
Get-Mailbox -ResultSize unlimited | Set-Mailbox -RetentionPolicy "RetentionPolicy-Name"With this solution, deleted items will be automatically purged.