In this article, I’ll explain how and why I usedDocker for the first time. Since then, I’ve become a big fan of this technology, and whenever possible, I use it to deploy services and applications.
We’ll look at how to installDocker and a real-world use case for Docker.
KubernetesAt the time of writing this tutorial (in 2021), as a SysAdmin, I had a hard time finding a practical use for containers, particularlyDocker[Kubernetes](https://kubernetes.org/ ), so I’ll let you imagine the rest.
That’s not necessarily true—in a production environment, I have a few examples, but nothing to write home about…
Most of the tutorials you find online explain how to installDockerDocker and then create one or more containers to run a LAMP stack—something that works just fine without containers and just as quickly…
I’m not saying the tutorials aren’t good—just that they’re not very interesting…
Wanting to set up a forum-style solution for RDR-IT, I found Discourse, which lets me link a forum and comments to my various WordPress sites.
After testing it locally on a dedicated VM, I approved the solution—I love it—and then came the time to figure out how to put it into production… I currently have two VPS servers (one dedicated to web hosting with Cyberpanel and another where I only run my GitLab server).
I don’t want to install the Discourse prerequisites on the web server, since Discourse requires quite a few things (web server, PostgreSQL, Redis, Ruby…), and on the server where GitLab is running, I’m a bit worried because GitLab and Discourse use the same components… I’m starting to think I need a third server… and I’m starting to backtrack, because that’s extra money, and my various attempts to set up a forum have all ended in failure.
A light bulb goes off—both GitLab and Discourse offer containersDocker… and I think to myself that maybe it’s time to test this out. I’m finally starting to see a use for containers, so I decide to test this solution in a local lab environment, which would allow me to run both GitLab and Discourse on the same server.
There’s still one problem to solve: both applications use a web server and rely on ports 80 and 443. To resolve this, I’ll use Nginx as a reverse proxy installed locally on the server (I could have also used the Nginx container for this…).
In this tutorial, I’ll be using a virtual machine running Ubuntu Server 20.04
Installing prerequisites
Before we begin installing Docker, we’ll first install a few packages:
- Cockpit: a web-based graphical interface that will allow us to manage our Ubuntu server and containers
- Nginx: which will be used as a reverse proxy to serve GitLab and Discourse
- Certbot: which will allow us to generate Let’s Encrypt certificates
Installing Cockpit
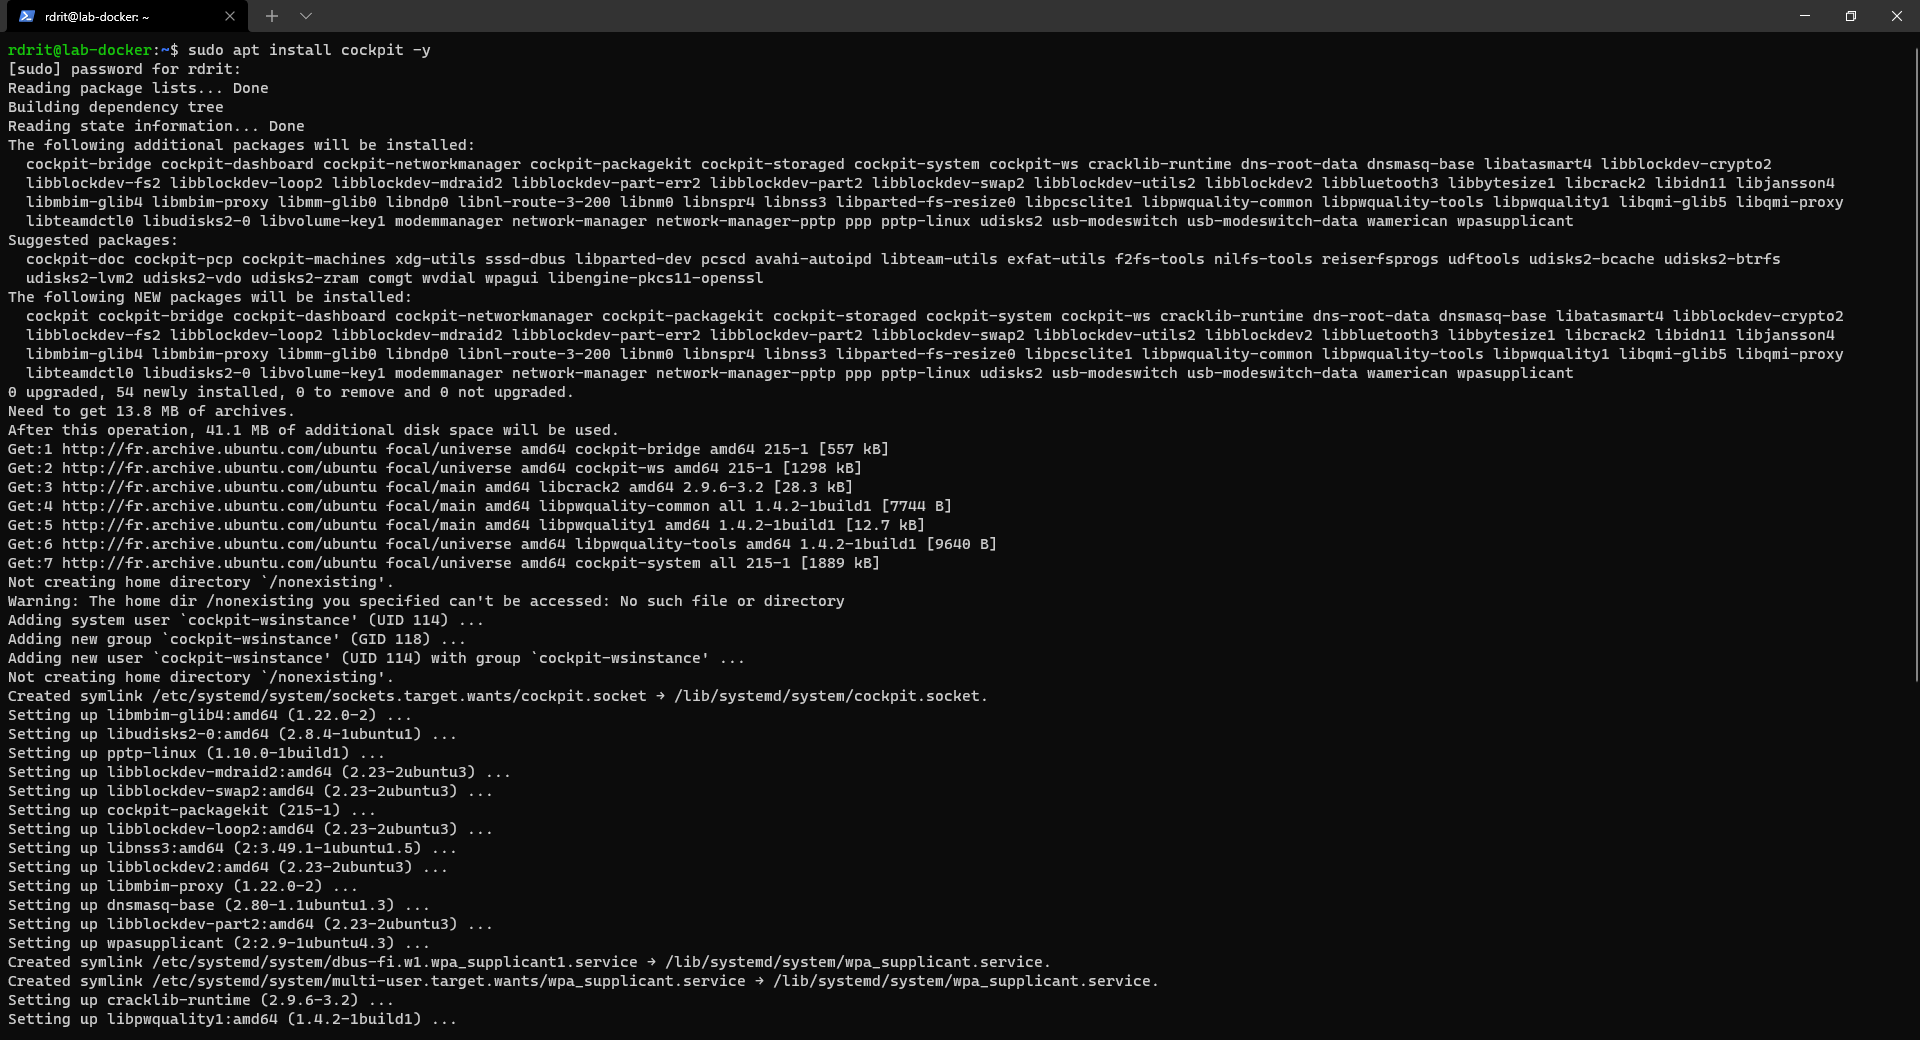
Enter the following command:
sudo apt install cockpit -y
Once Cockpit is installed, it is available at the following address: https://ip_du_serveur:9090

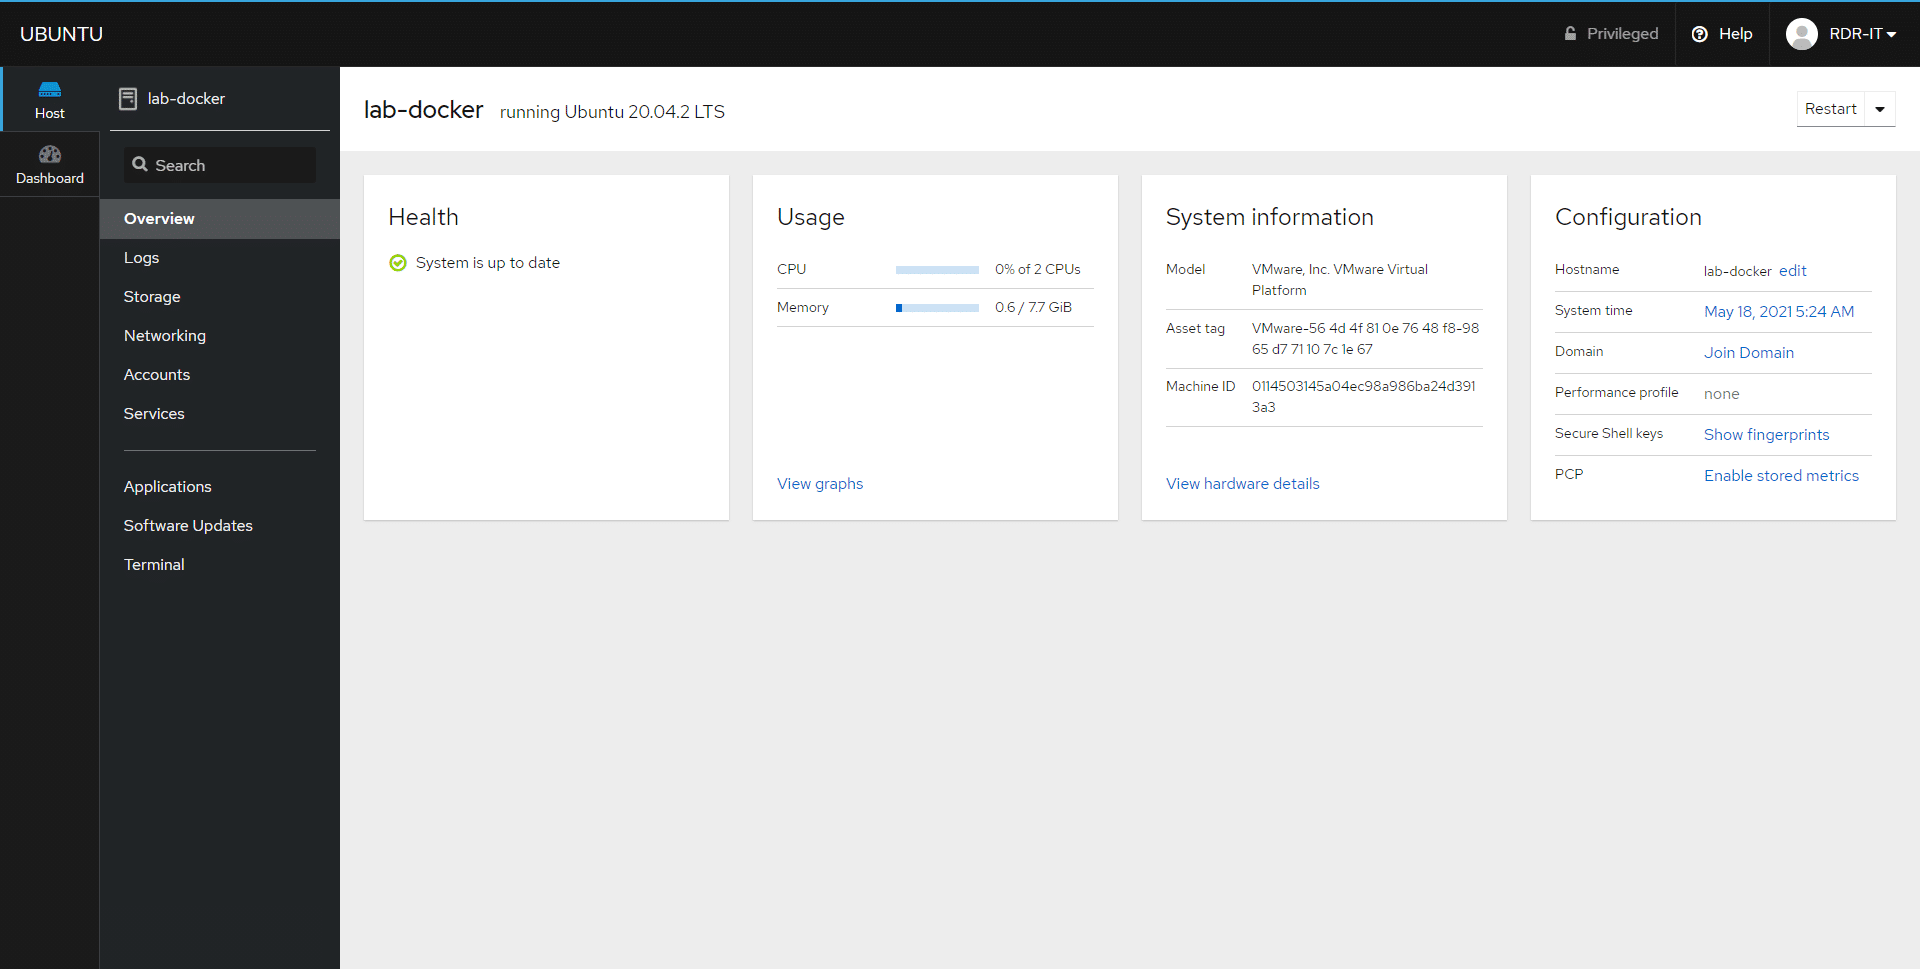
DockerTo manage containers, you need to install an additional module.
At the time of writing, the module is not officially available for version 20.04, but version 19.10 works.
Download the .deb file using the wget command
wget https://launchpad.net/ubuntu/+source/cockpit/215-1~ubuntu19.10.1/+build/18889196/+files/cockpit-docker_215-1~ubuntu19.10.1_all.deb
Install the .deb:
sudo apt install ./cockpit-docker_215-1~ubuntu19.10.1_all.deb
Wait while the installation completes:
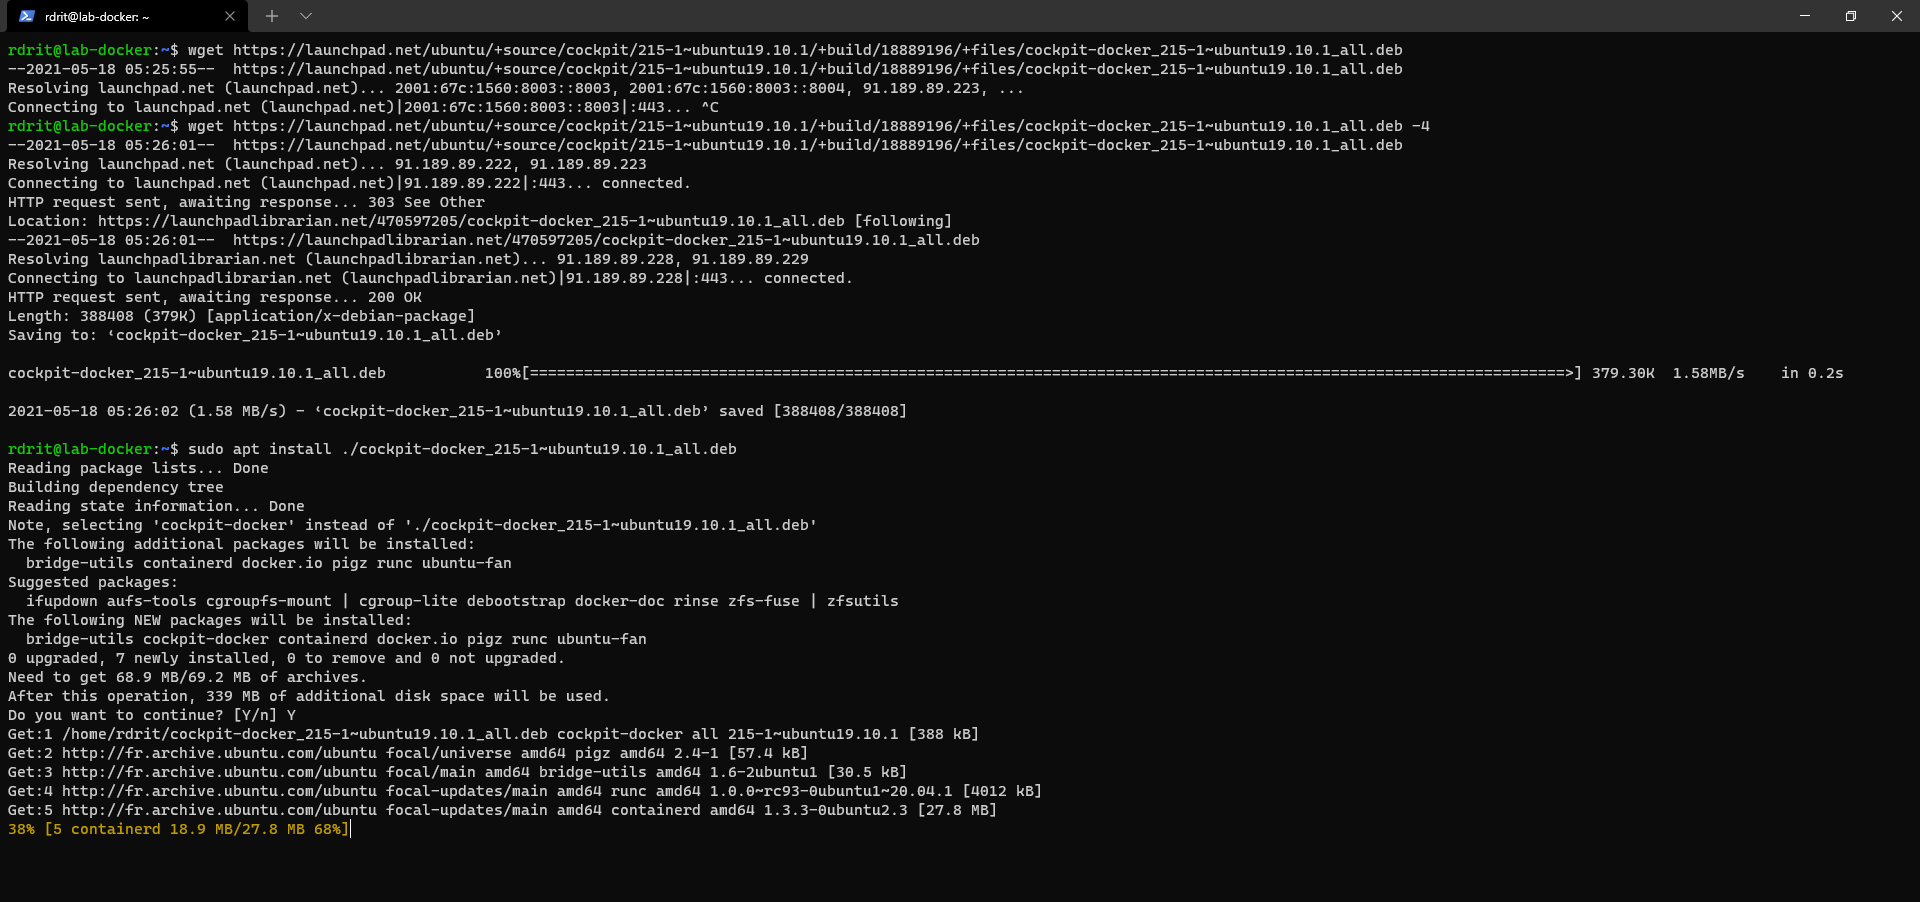
Once installed, return to the Cockpit interface and refresh; the Container menuDocker is now available.
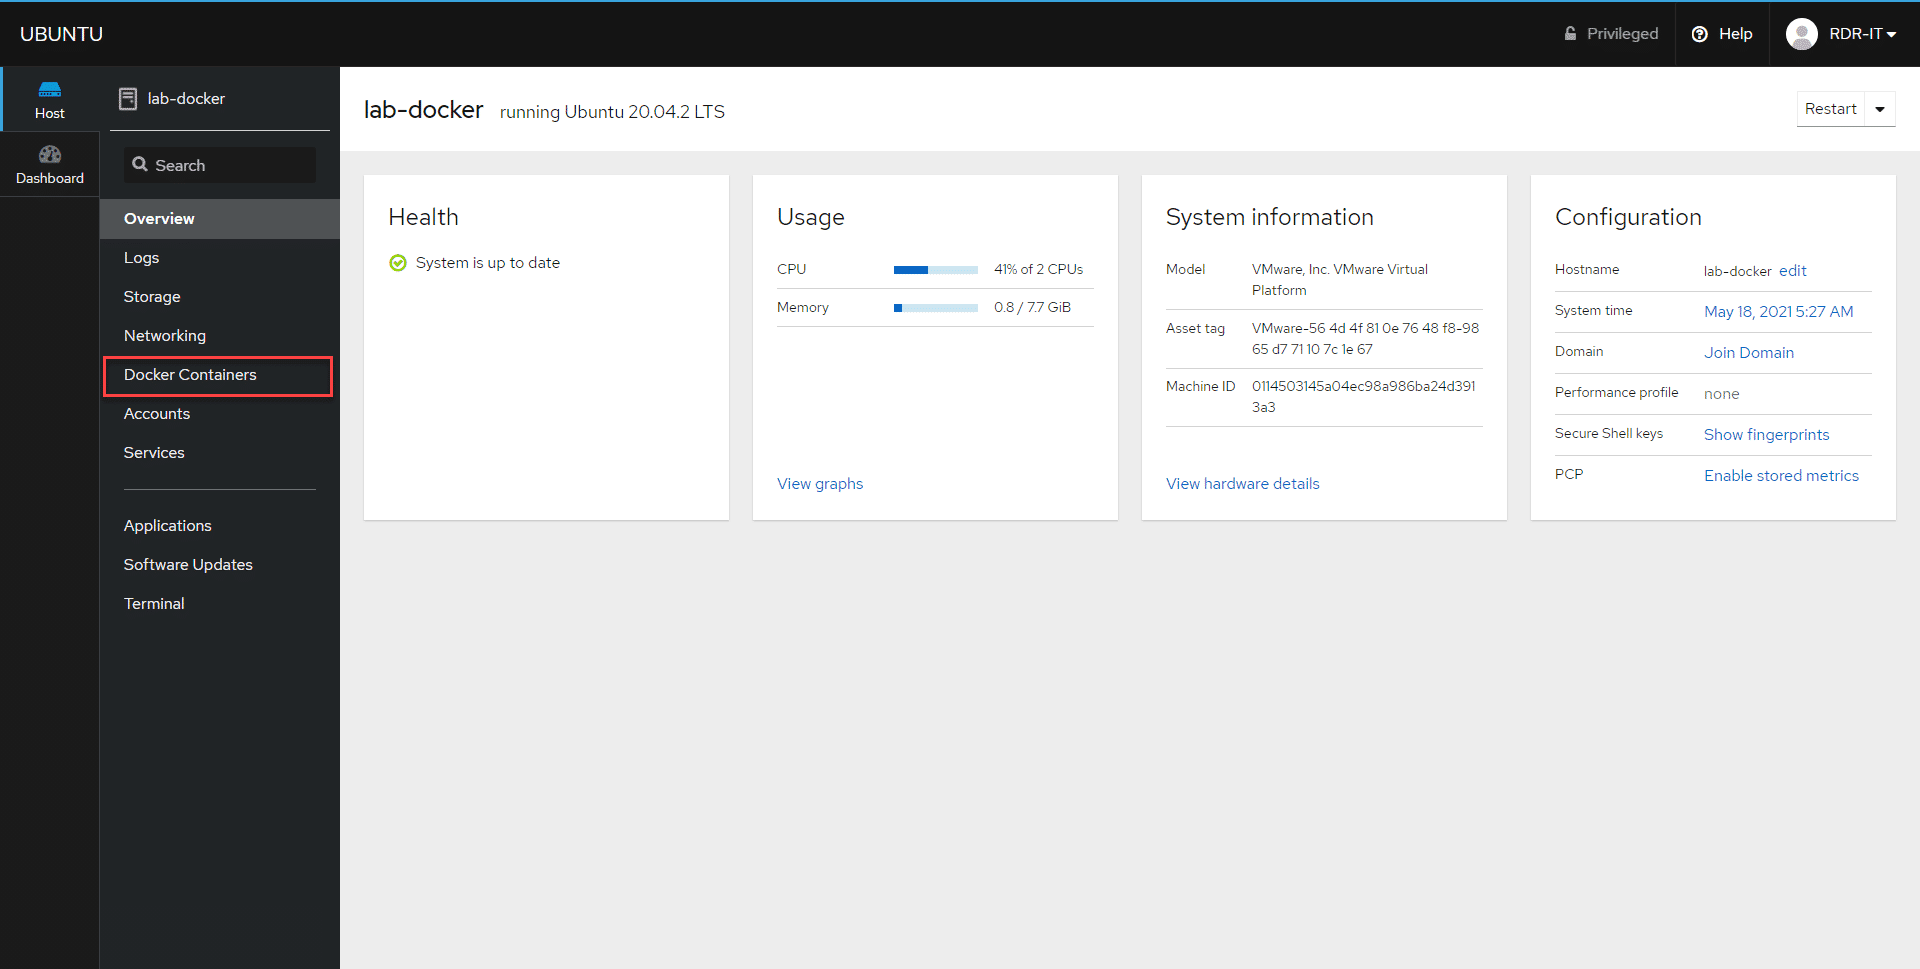
DockerDockerInstalling the cockpit-docker module installs the package; this will be uninstalled later to use the official repository.
It is also possible to install the cockpit-docker module after installing Docker, which avoids the need for uninstallation.
Installing Nginx
Since several web servers will be exposed via containers, we will install Nginx to act as a reverse proxy; it is also possible to use Apache2.
We could have also used the Nginx container.
Use one of the commands below to install Nginx on the server:
apt install nginx -y
Installing Certbot
This installation is optional; it will allow you to generate Let’s Encrypt certificates to make the various applications accessible via HTTPS.
To install Certbot for Nginx, enter the command:
apt install python3-certbot-nginx -y
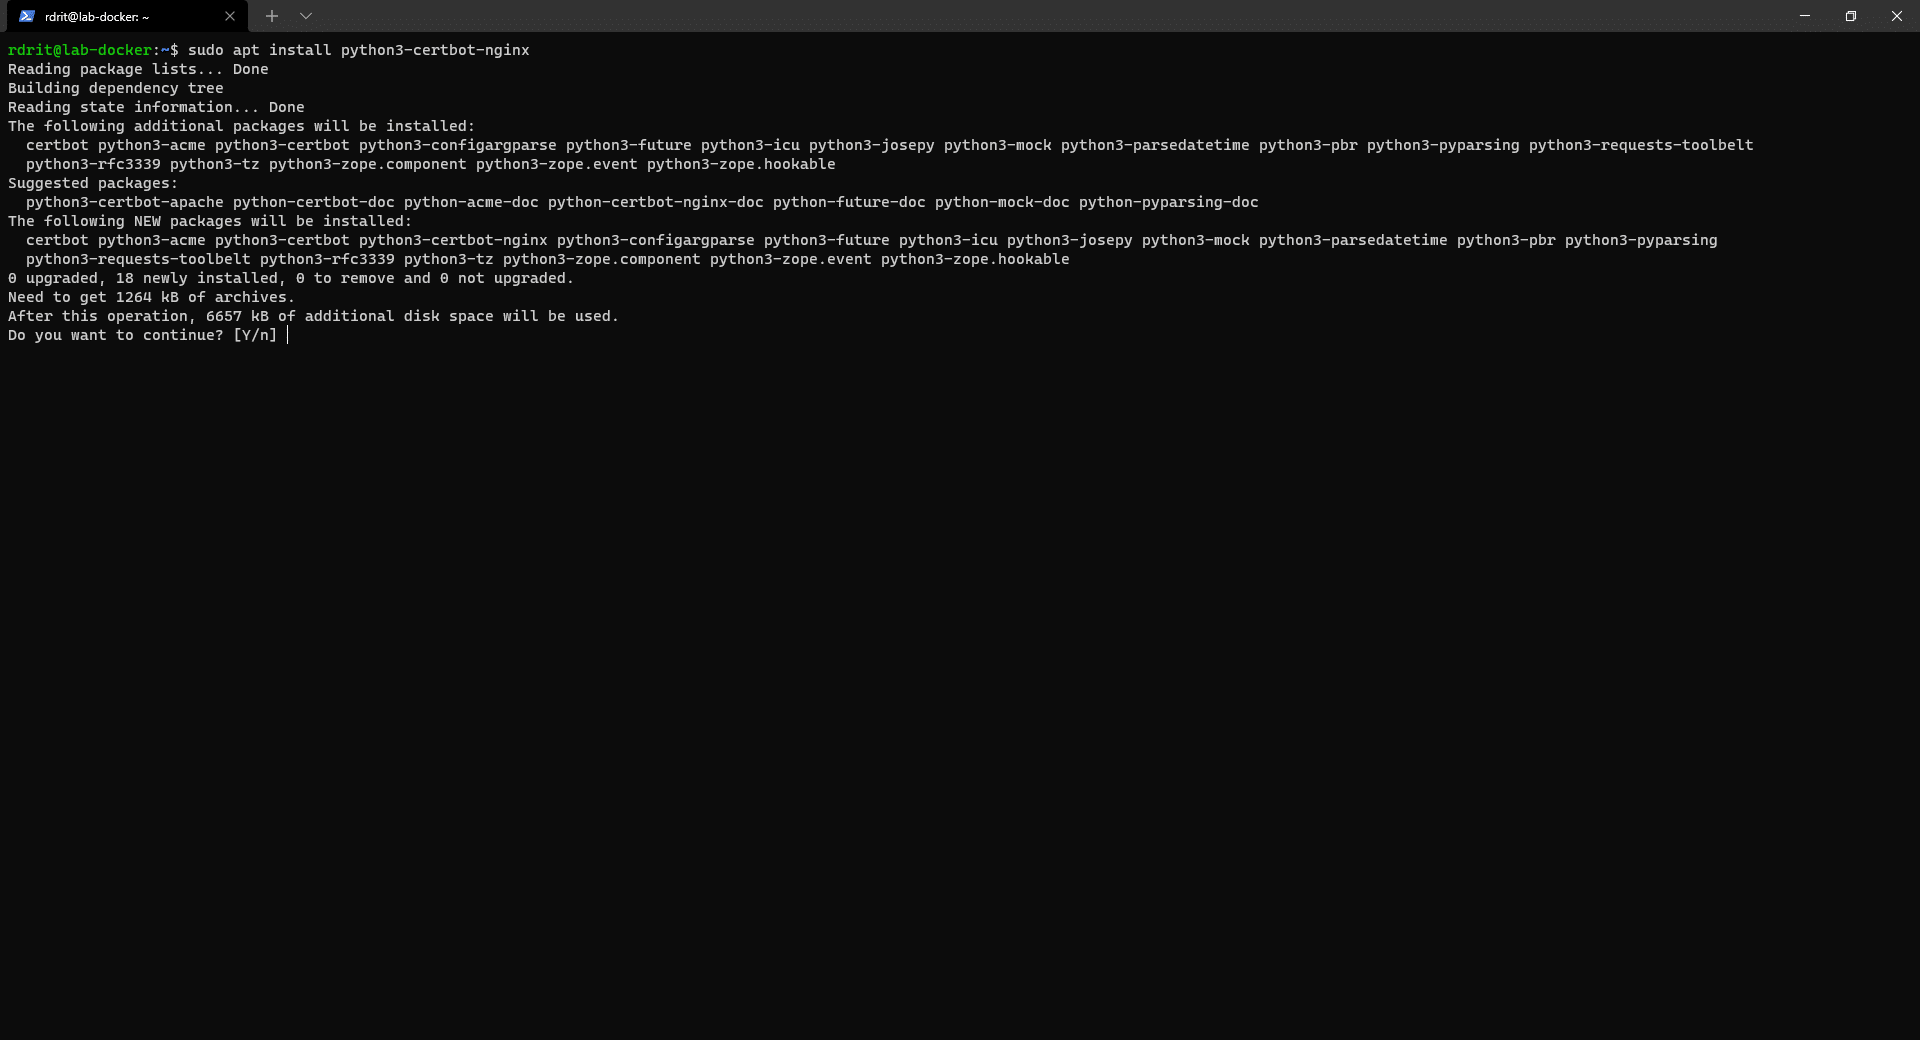
Now that we have installed the necessary prerequisites, we will proceed to installDocker on the Ubuntu server.
InstallingDocker on Ubuntu
Before we can use containers, we need to install (opens in a new tab)" rel=“noreferrer noopener” class=“rank-math-link”>Docker on our Ubuntu server, which will manage them.
To put it simply:Docker is the container manager, just as Hyper-V or VMware is for virtualization.
DockerIn addition to Docker, we’ll install Docker Compose, which allows you to configure Docker containers using YAML files.
DockerFor this tutorial, I will be following the official documentation .
InstallDocker engine
This first command-line step is optional; we’ll first uninstallDocker if it’s present, especially if you’ve installed the cockpit-docker module.
sudo apt remove docker docker-engine docker.io containerd runc
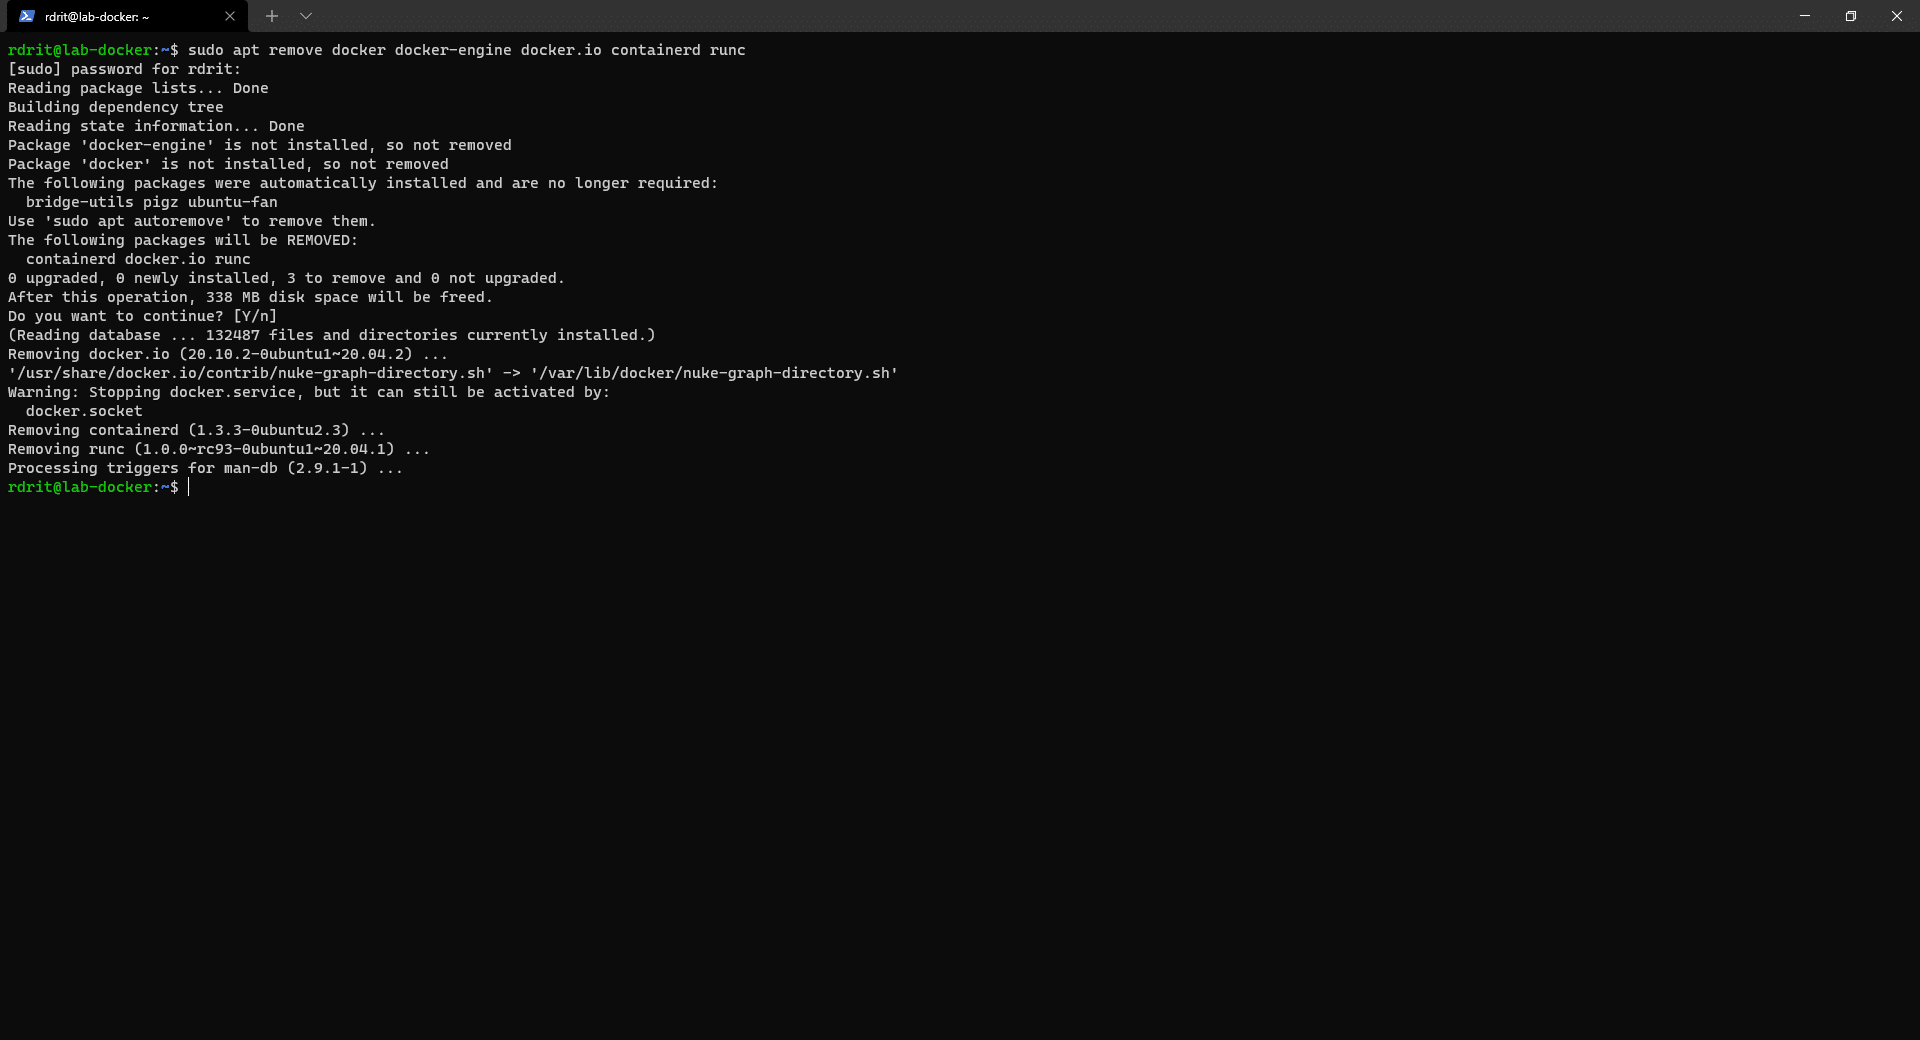
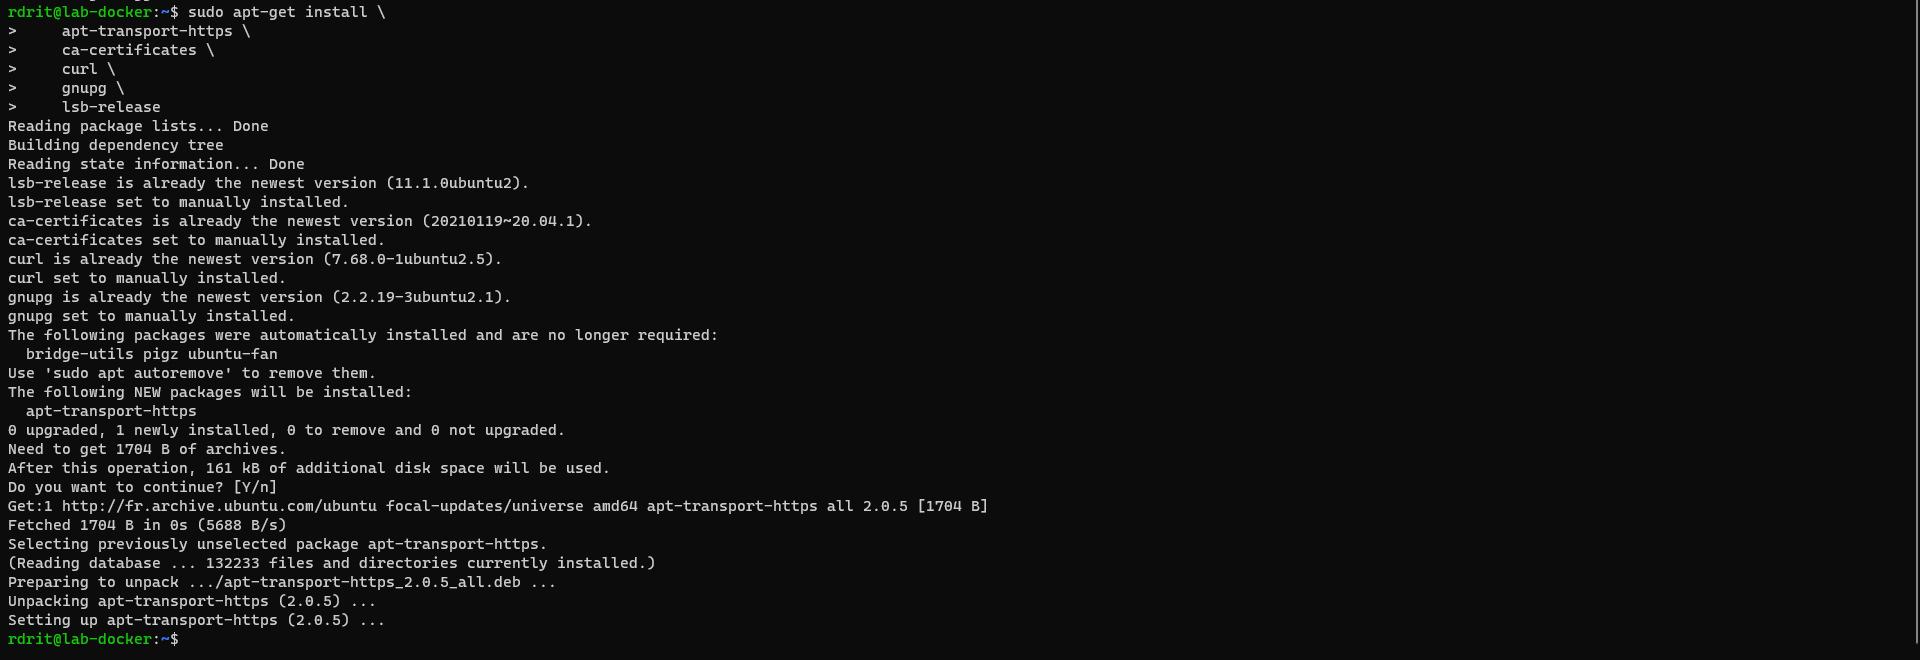
Install the prerequisites forDocker Docker:
sudo apt-get install \
    apt-transport-https \
    ca-certificates \
    curl \
    gnupg \
    lsb-release
Install the repository key:
curl -fsSL https://download.docker.com/linux/ubuntu/gpg | sudo gpg --dearmor -o /usr/share/keyrings/docker-archive-keyring.gpg
Add the repository
echo \
  "deb [arch=amd64 signed-by=/usr/share/keyrings/docker-archive-keyring.gpg] https://download.docker.com/linux/ubuntu \
  $(lsb_release -cs) stable" | sudo tee /etc/apt/sources.list.d/docker.list > /dev/null
Update the package list:
sudo apt update
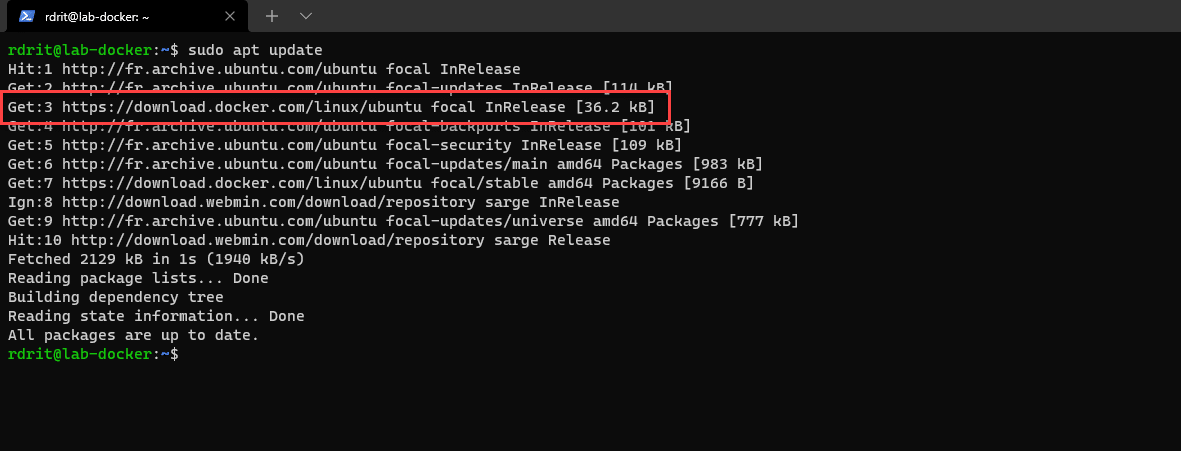
You can see that the repositoryDockerhas been successfully added
InstallDocker:
sudo apt install docker-ce docker-ce-cli containerd.io
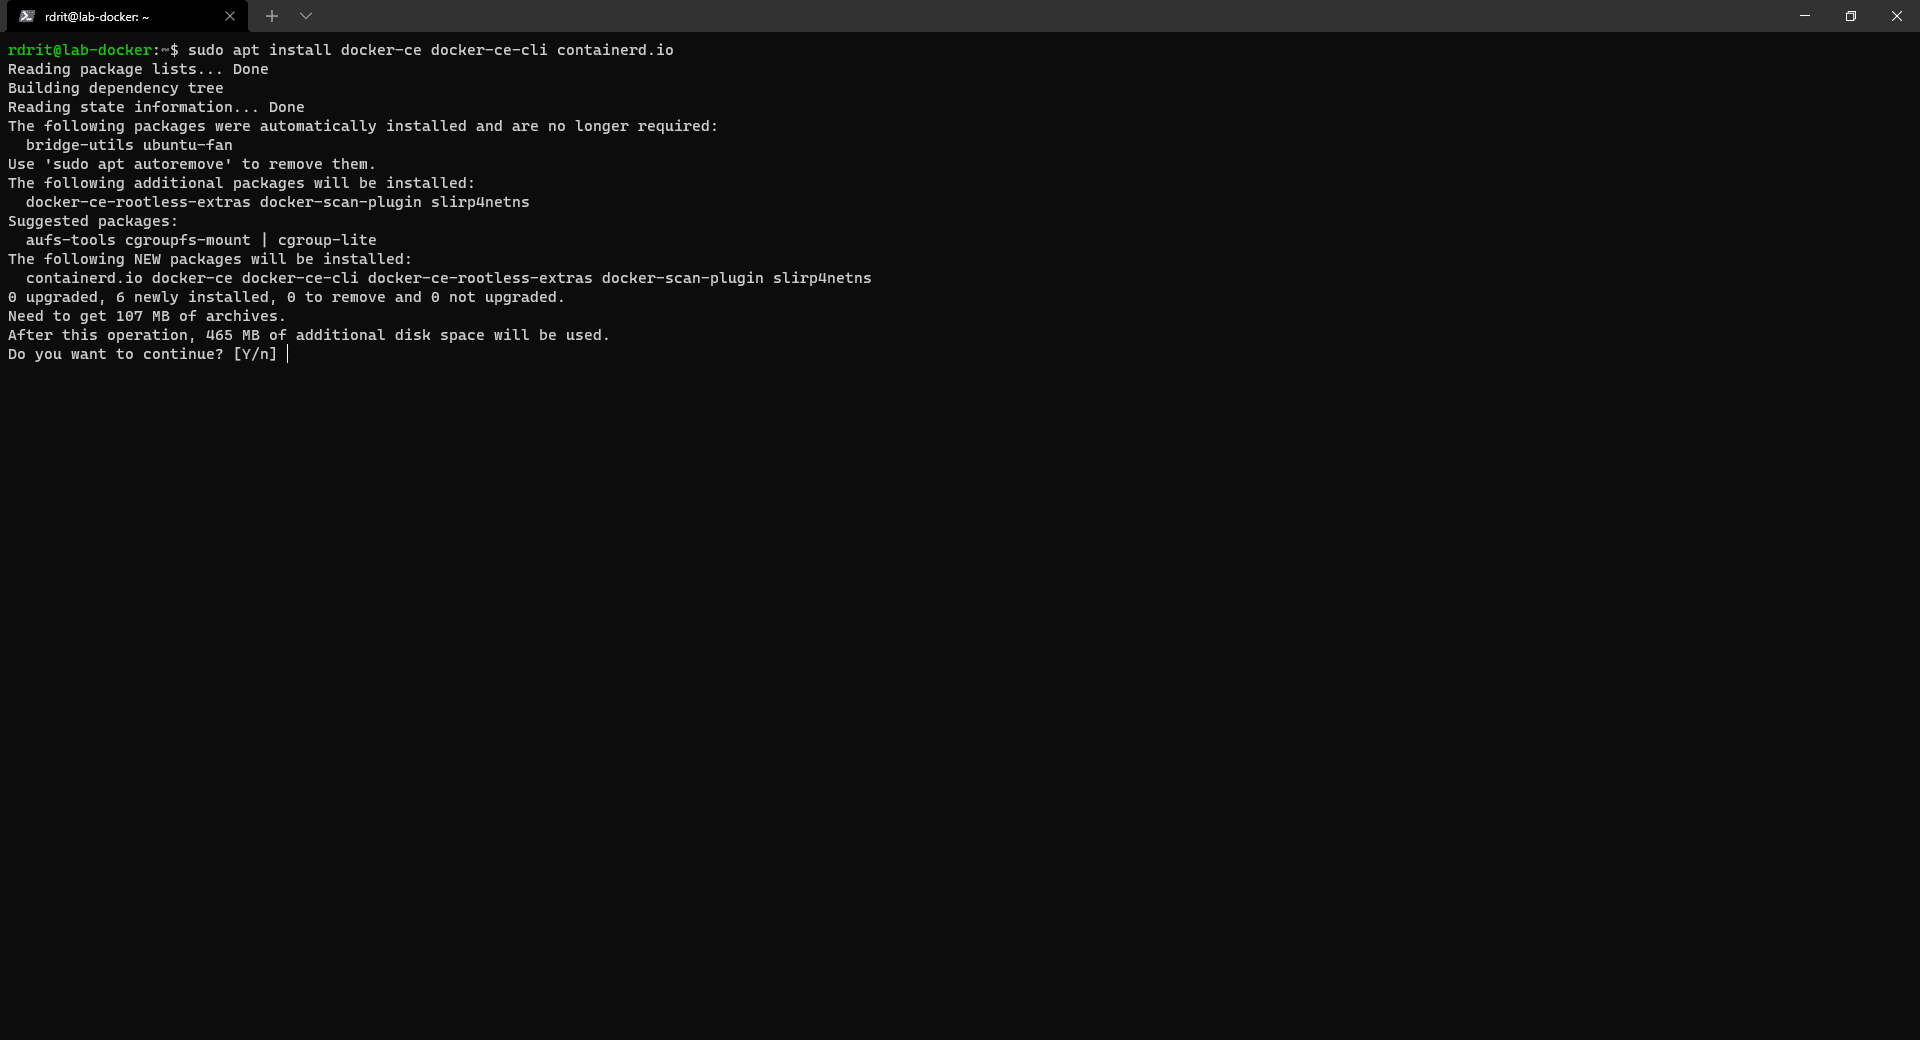
If you encounter an error at the end of the installation: Errors were encountered while processing: docker-ce. Re-run the package installation.
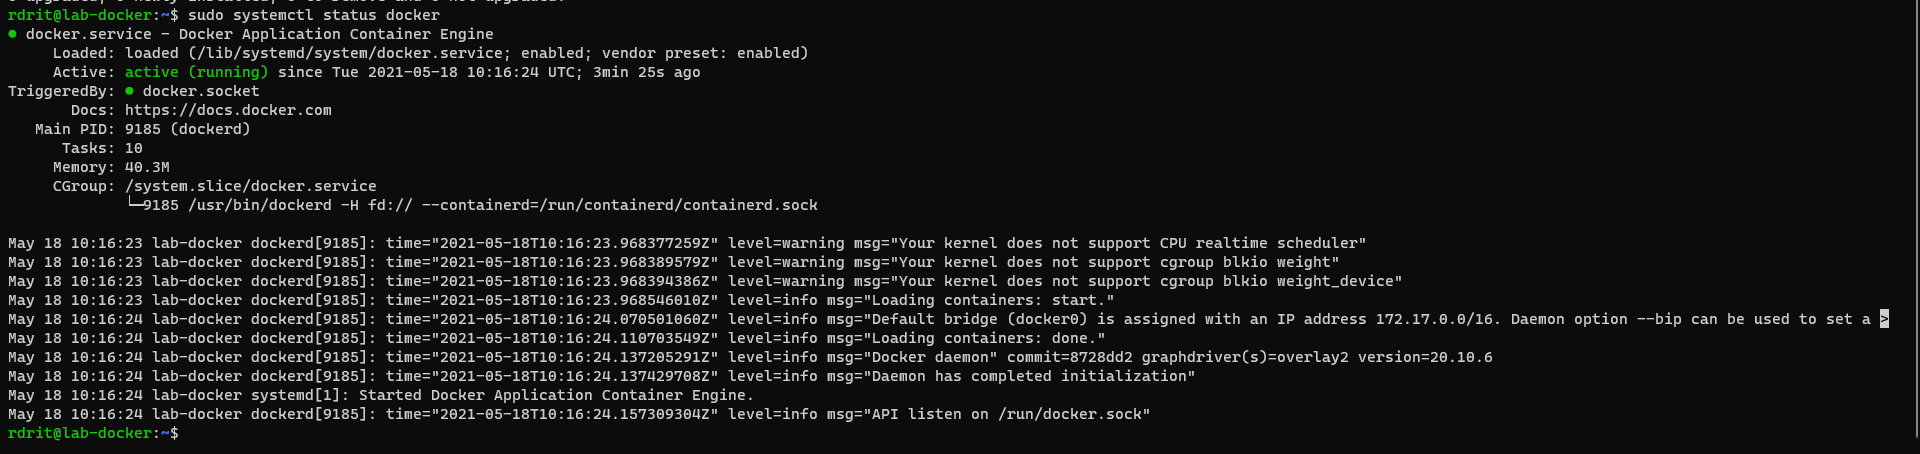
Test that isDocker working properly using the command:
sudo systemctl status docker
InstallDockerCompose
This step is optional. As I explained earlierDocker, Compose allows you to configure containers using a YAML file.
DownloadDockerCompose:
#
# Check last release on https://github.com/docker/compose/releases
#
sudo curl -L "https://github.com/docker/compose/releases/download/1.29.2/docker-compose-$(uname -s)-$(uname -m)" -o /usr/local/bin/docker-compose
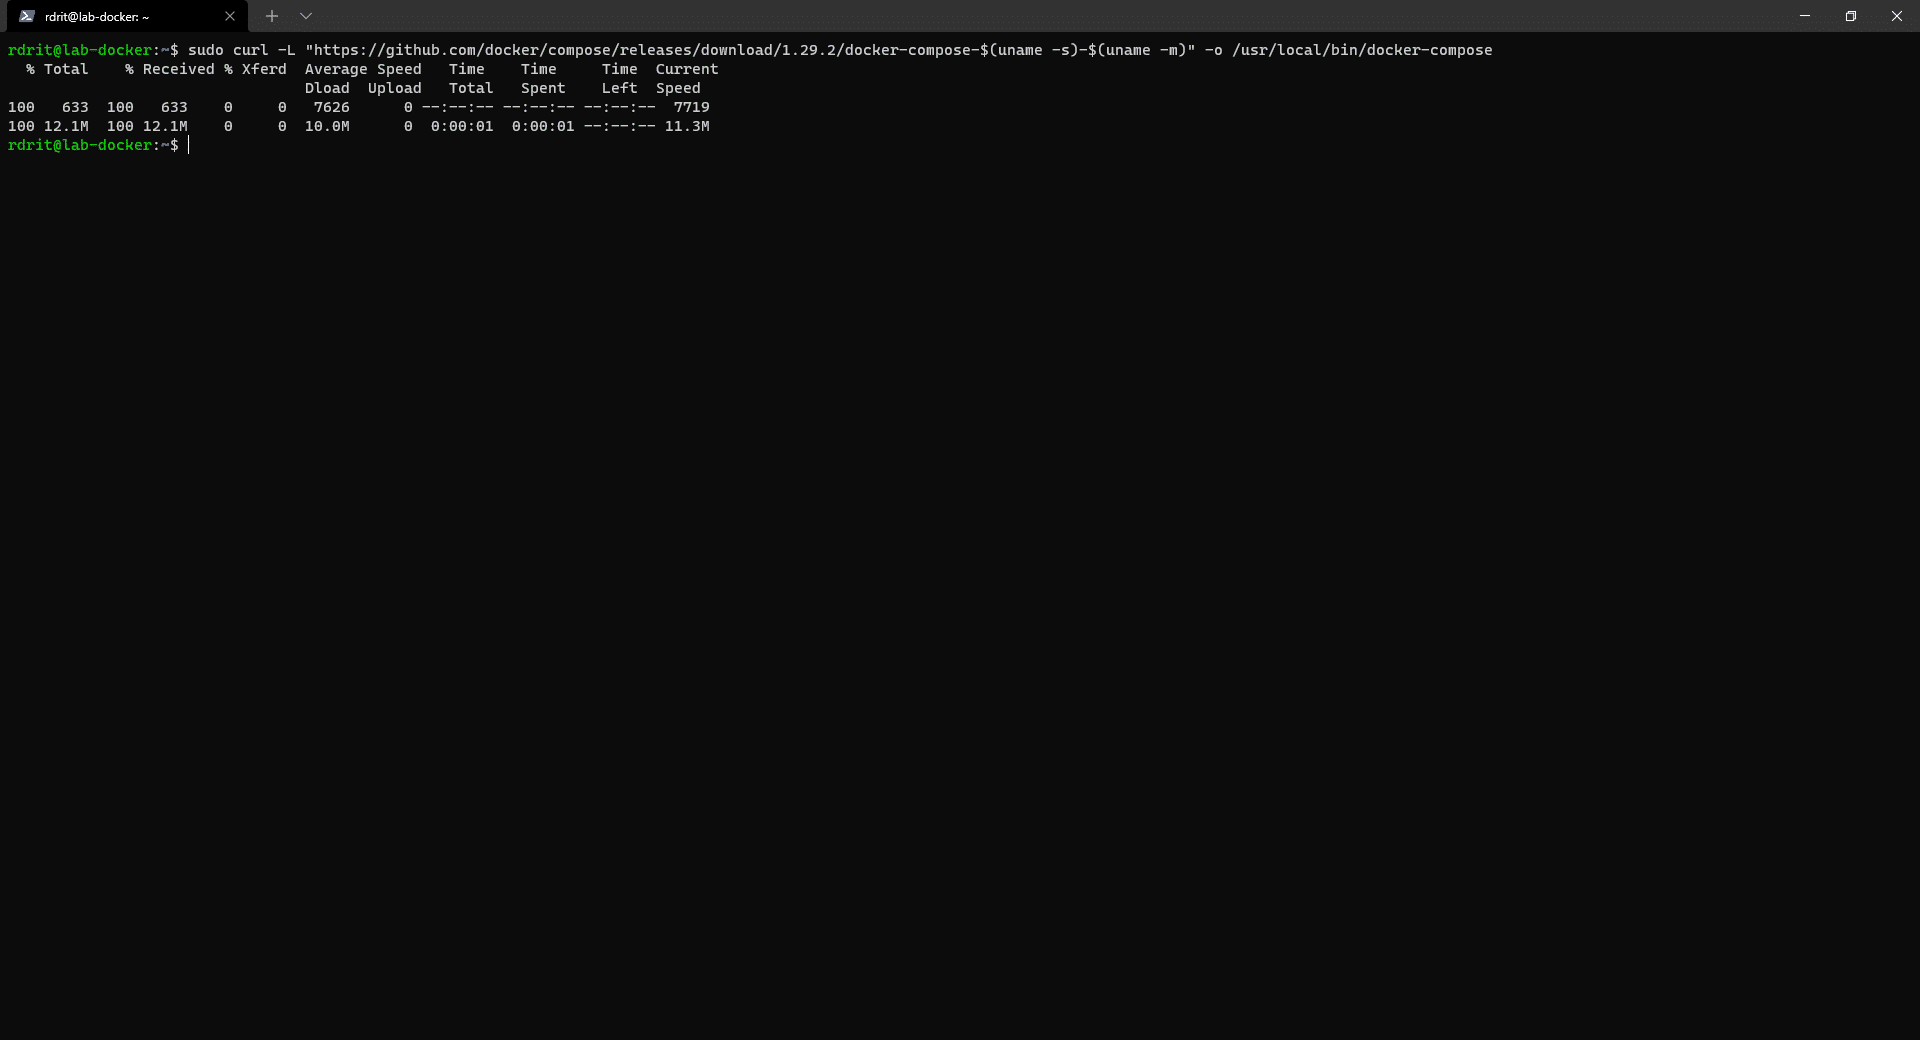
Make ComposeDocker executable:
sudo chmod +x /usr/local/bin/docker-compose
Test that it works using the following command:
docker-compose --version

TestDockerwith Hello World
We will now test our installation byDockerdeploying our first Hello World container.
This container doesn’t do anything in particular, but it will allow us to ensure that our service is working properly.
Enter the command below to launch the hello-world container:
sudo docker run hello-world
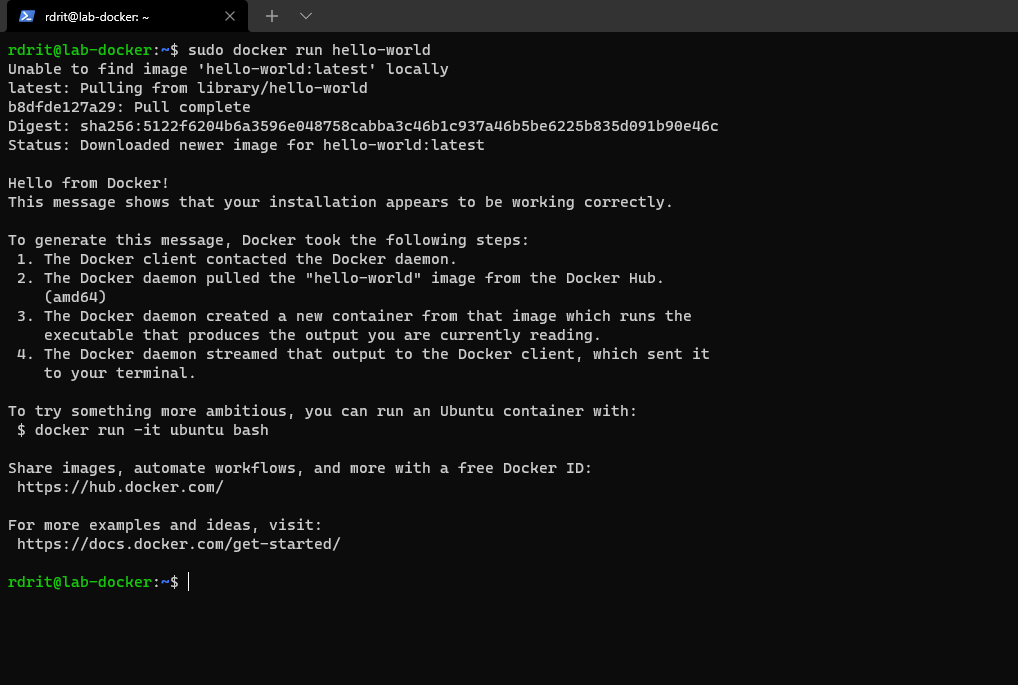
If you see the message “Hello fromDocker!”, everything is fine—congratulations, you’ve deployed your first container.
Enter the following command to display the containers on the server and their status:
sudo docker ps -a

You can see the hello-world container.
In Cockpit, you can also see our container.
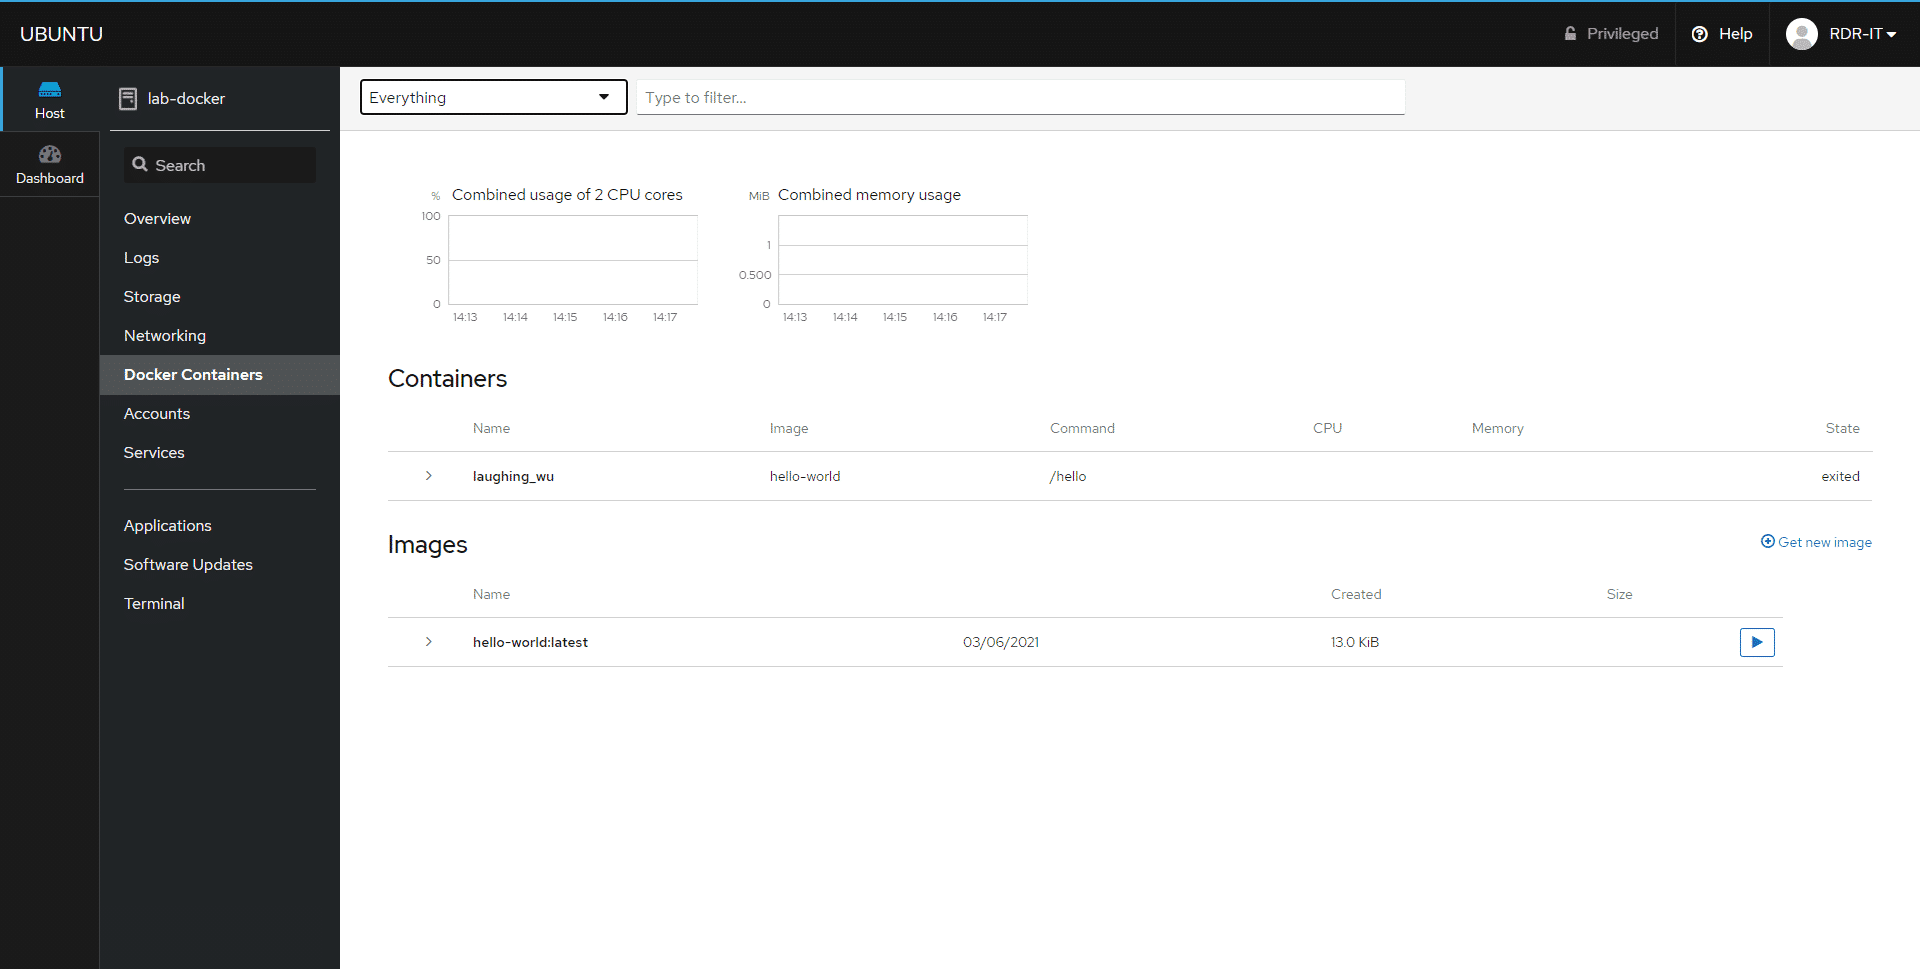
To view “stopped” containers, select Everything at the top.
Docker is now installed and running on the server; we can now move on to container deployment. Before we dive into container installation, I’ll give you some useful information before we proceed.
Docker : some useful information before…
Before we begin deploying our containers (GitLab and Discourse), here is some (somewhat random) information you should know about containers.
The network
This is what can be a bit confusing at first when thinking about virtualization: by default, containers aren’t directly exposed to an IP on your LAN; they use a NAT/PAT system to publish services.
It is indeed possible to have multiple containers running web servers; for example, you could have an Nginx container and an Apache2 container, but both containers cannot expose port 80, for instance.
That’s why, as a prerequisite, we installed Nginx as a reverse proxy.
It is possible to expose a container with “its own IP” by using a bridge.
More information: Networking overview |DockerDocumentation
A container is persistent, but be careful
A container’s storage is persistent, meaning changes are written to the container image; however, be careful: during an image rebuild or update, the data will be lost.
You can stop a container without risking data loss.
To address this rebuild/update issue, you can redirect container directories to a directory on the host server
For example, with an Apache2 container, we can redirect the container’s /var/www directory to a directory on the host, which offers two advantages:
- The ability to access the web server’s published folders and files
- Updating the container without losing data.
Where to find images
All imagesDockerare available here:Docker Hub
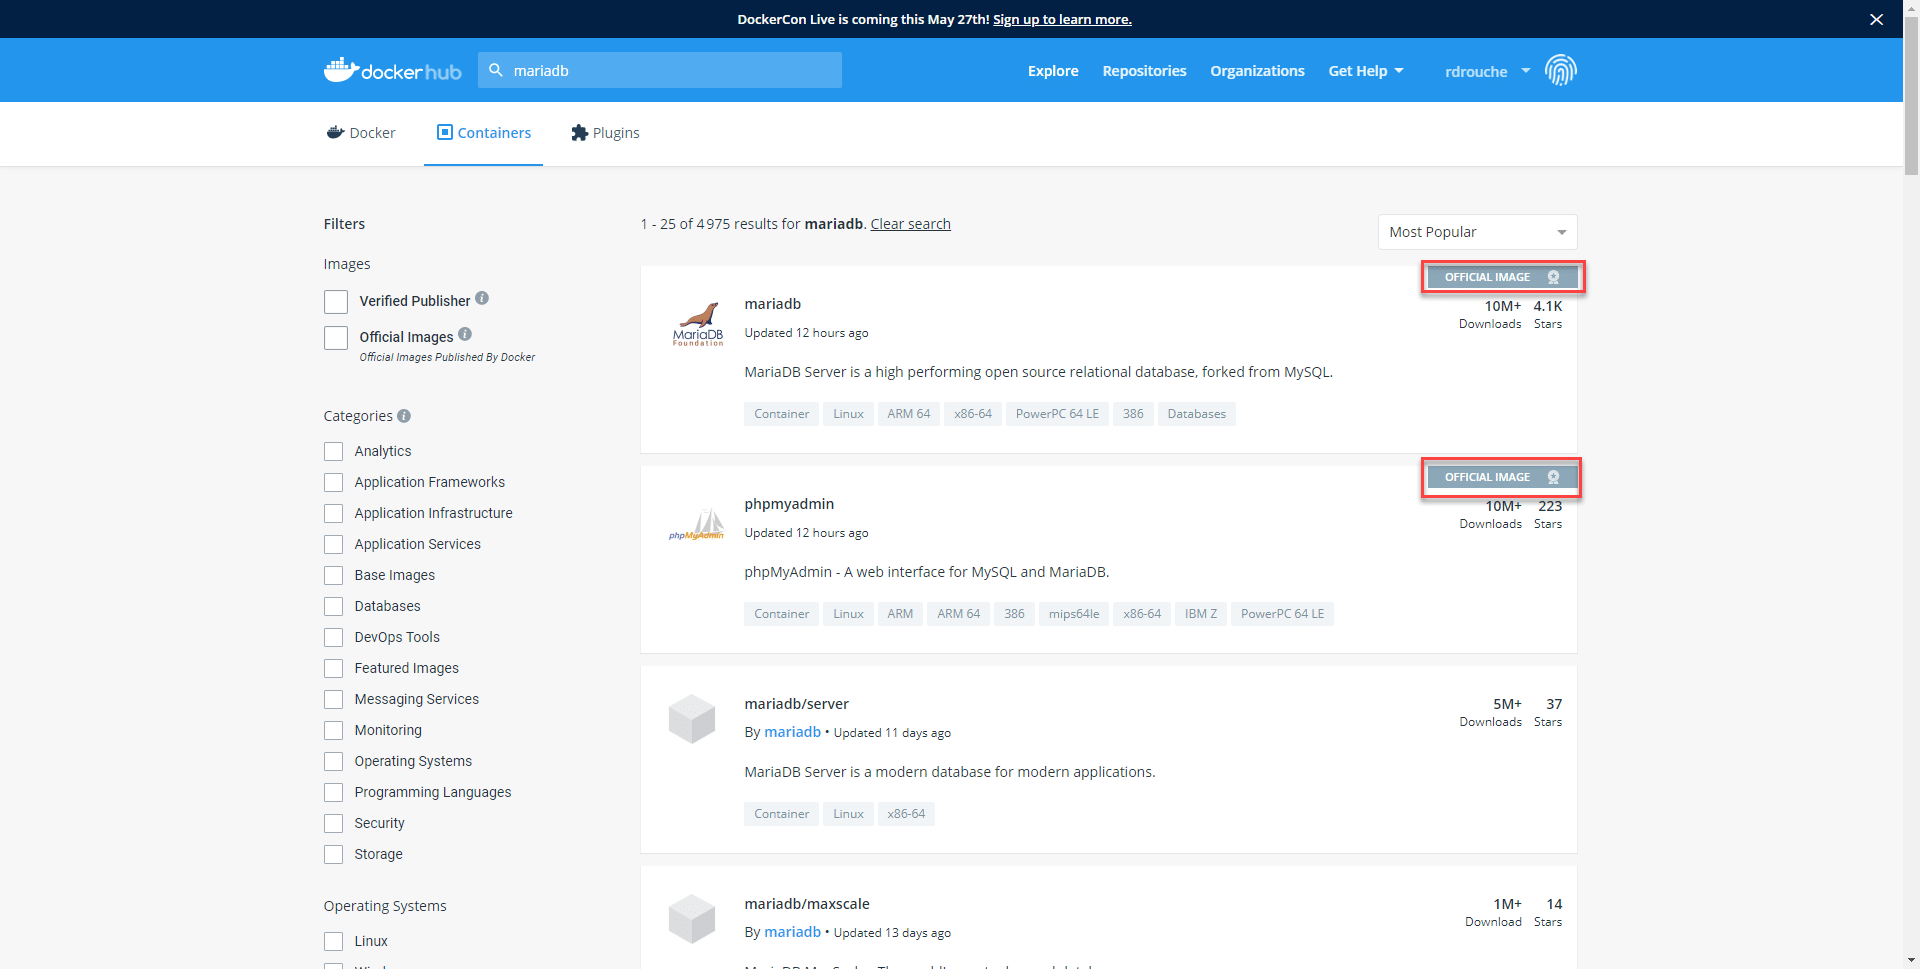
Since the hub is open to everyone, be careful when choosing images and preferentially select Official images, which are marked with a ribbon.
The “latest” tag
As shown in the screenshot below, a single image may have multiple tags; these often correspond to the specific software version you want.
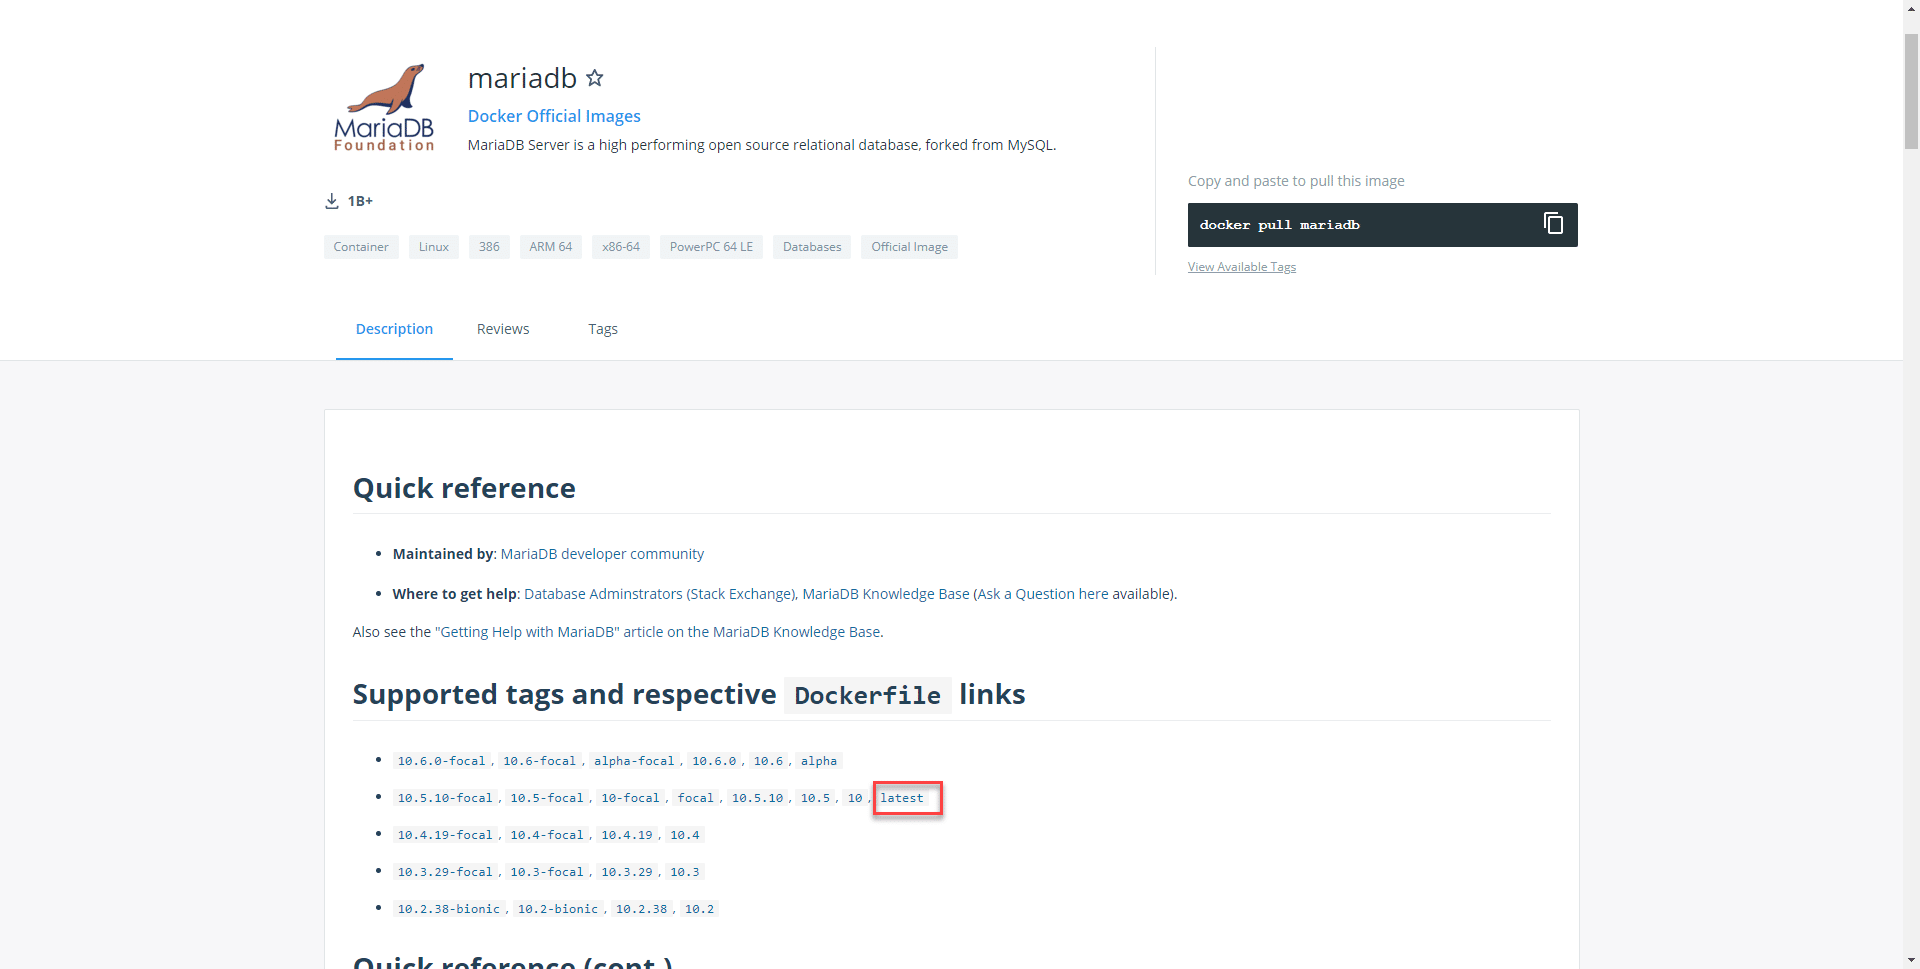
As you can see, the “latest” tag points to version 10.5 of MariaDB.
I assume you understand what the latest tag is for; it points to the most recent stable version.
In certain situations, you should be wary of this tag, especially when using multiple containers to run an application.
Let’s assume I want to run a web application that requires Apache2, PHP, and MariaDB 10.5
As of the date this tutorial was written, I can use the `latest` tag on my MariaDB container because it’s on version 10.5.
Six months later, I want to switch servers and start installing the containers. My application needs to run on MariaDB 10.5, but the `latest` tag has since been updated to 10.6, which means my application won’t work.
All this to say: be careful with tags. For containerized applications like GitLab or Discourse, using the `latest` tag does allow us to keep our application up to date.
Remember to check the versions behind “latest.”
Installing GitLab with Docker
Now we’re getting down to business in our tutorial; we’ll start by installing theDockerGitLab image.
Actually, there’s nothing complicated about it—there’s just one command to run, and yes, that’s the whole point of using Dockerit. But I’ll explain what the command does, because doing it is good, but understanding it is even better.
Here is the command we’ll run to install our GitLab container:
sudo docker run --detach \
    --hostname gitlab.rdr-it.local \
    --publish 31443:443 --publish 31080:80 --publish 31022:22 \
    --name gitlab \
    --restart always \
    --volume /var/gitlab/config:/etc/gitlab \
    --volume /var/gitlab/logs:/var/log/gitlab \
    --volume /var/gitlab/data:/var/opt/gitlab \
    gitlab/gitlab-ce:latest
docker-run The first line starts the container, and the `-d–background` parameter--detach runs it in the background; without this parameter, the container will be tied to the terminal and will therefore stop when you close the session.
The second line lets you specify the hostname --hostname gitlab.rdr-it.local
-pThe third line specifies port mapping using the or parameters--publish. In this example, I map port 31443 on the host (Ubuntu) to port 443 on the container, and so on. In theory, I could access GitLab via https://ip_du_serveur:31443
The fourth line, with the parameter --name, specifies the container’s name at the host level.
The fifth line--restart always specifies that the container should always start.
--volumeFrom the sixth line to the eighth, we configure folder redirects using the parameter. The first part corresponds to the folder on the host (Ubuntu) and the second part, after the: , corresponds to the folder in the container image.
The last linegitlab/gitlab-ce:latestis the image you want to pull fromHub (opens in a new tab)" href=“https://hub.docker.com/r/gitlab/gitlab-ce"
target=”_blank" rel=“noreferrer noopener” class=“rank-math-link”>Docker Hub.
Now that you know what the command does, we can move on to installing our container.
First, we’ll create the folders on the server
sudo mkdir /var/gitlab
sudo mkdir /var/gitlab/{config,logs,data}
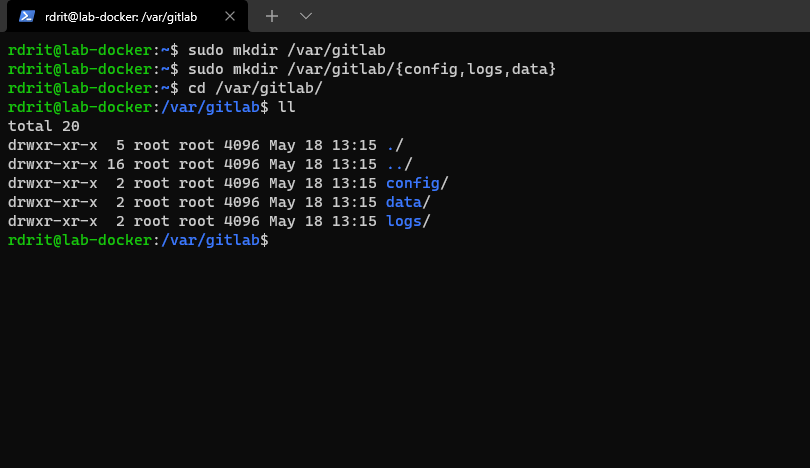
Install the GitLab container, adapting it to your environment:
sudo docker run --detach \
    --hostname gitlab.rdr-it.local \
    --publish 31443:443 --publish 31080:80 --publish 31022:22 \
    --name gitlab \
    --restart always \
    --volume /var/gitlab/config:/etc/gitlab \
    --volume /var/gitlab/logs:/var/log/gitlab \
    --volume /var/gitlab/data:/var/opt/gitlab \
    gitlab/gitlab-ce:latest
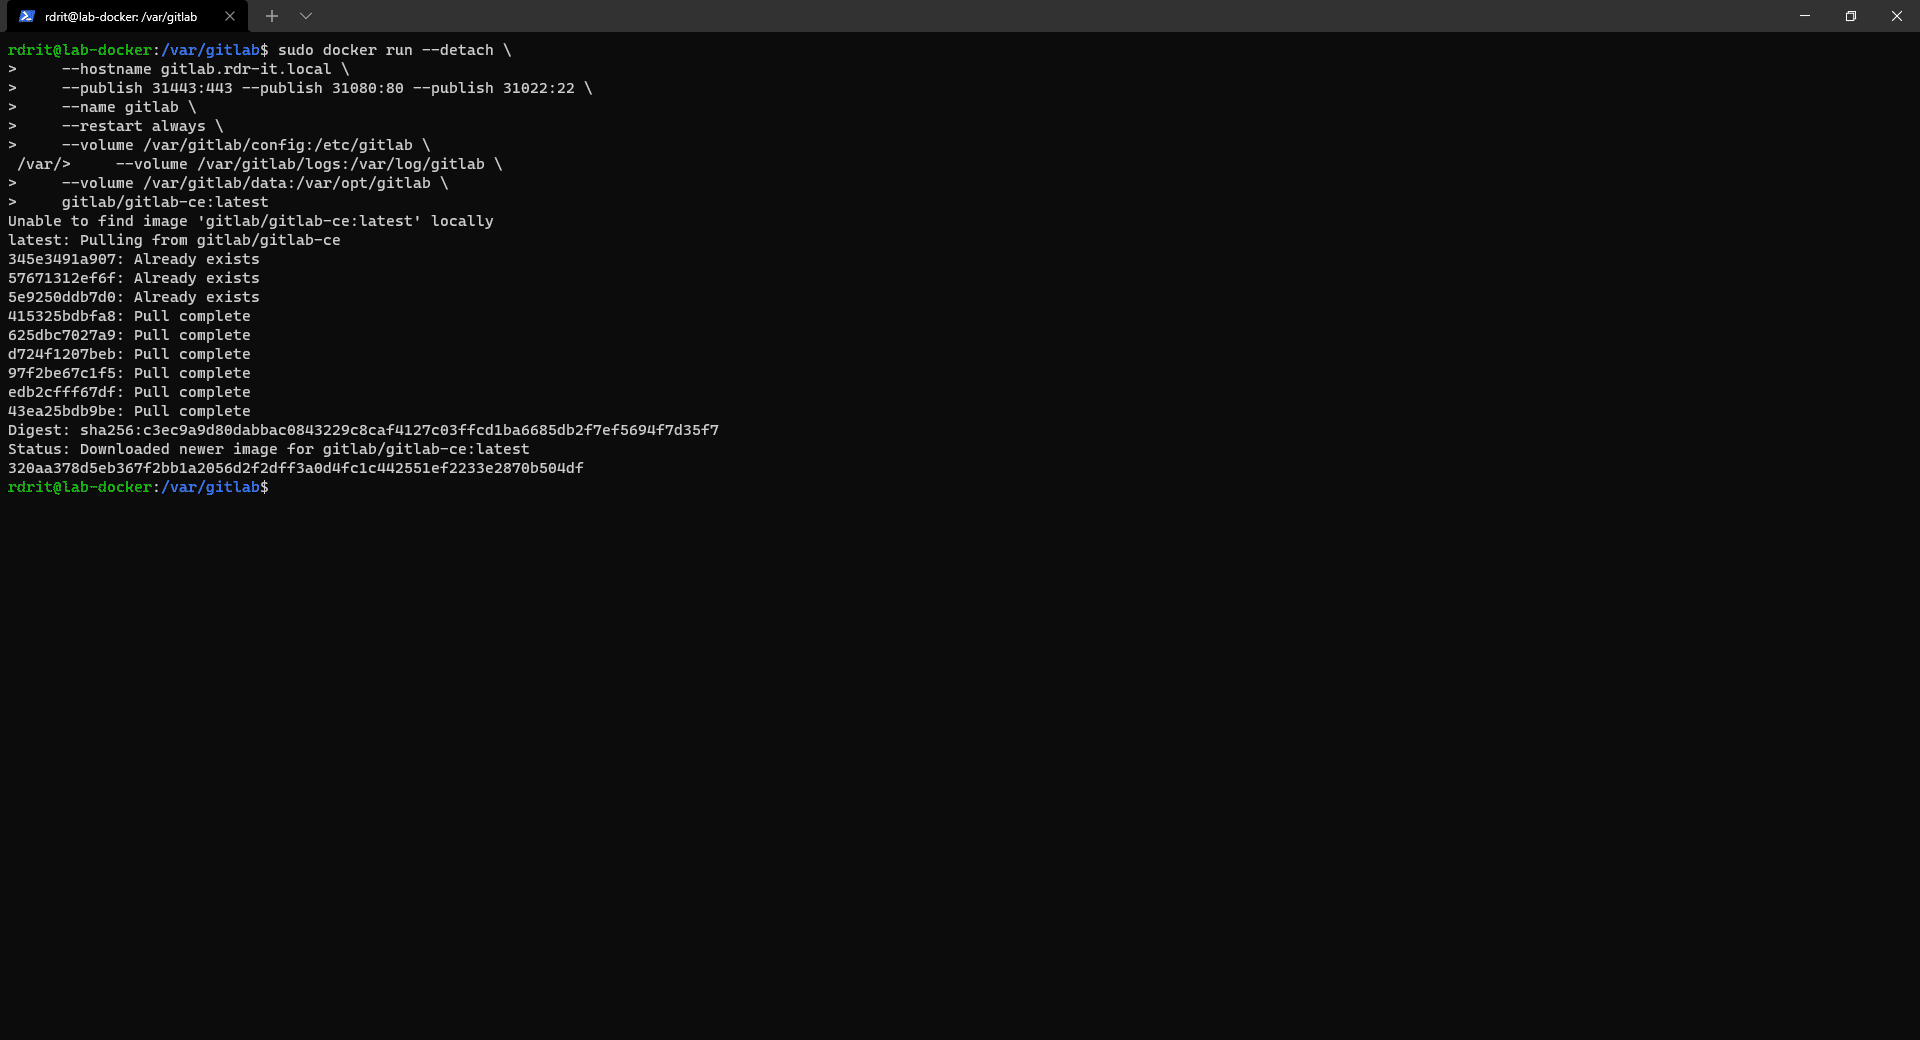
Wait while the GitLab container downloads and configures…
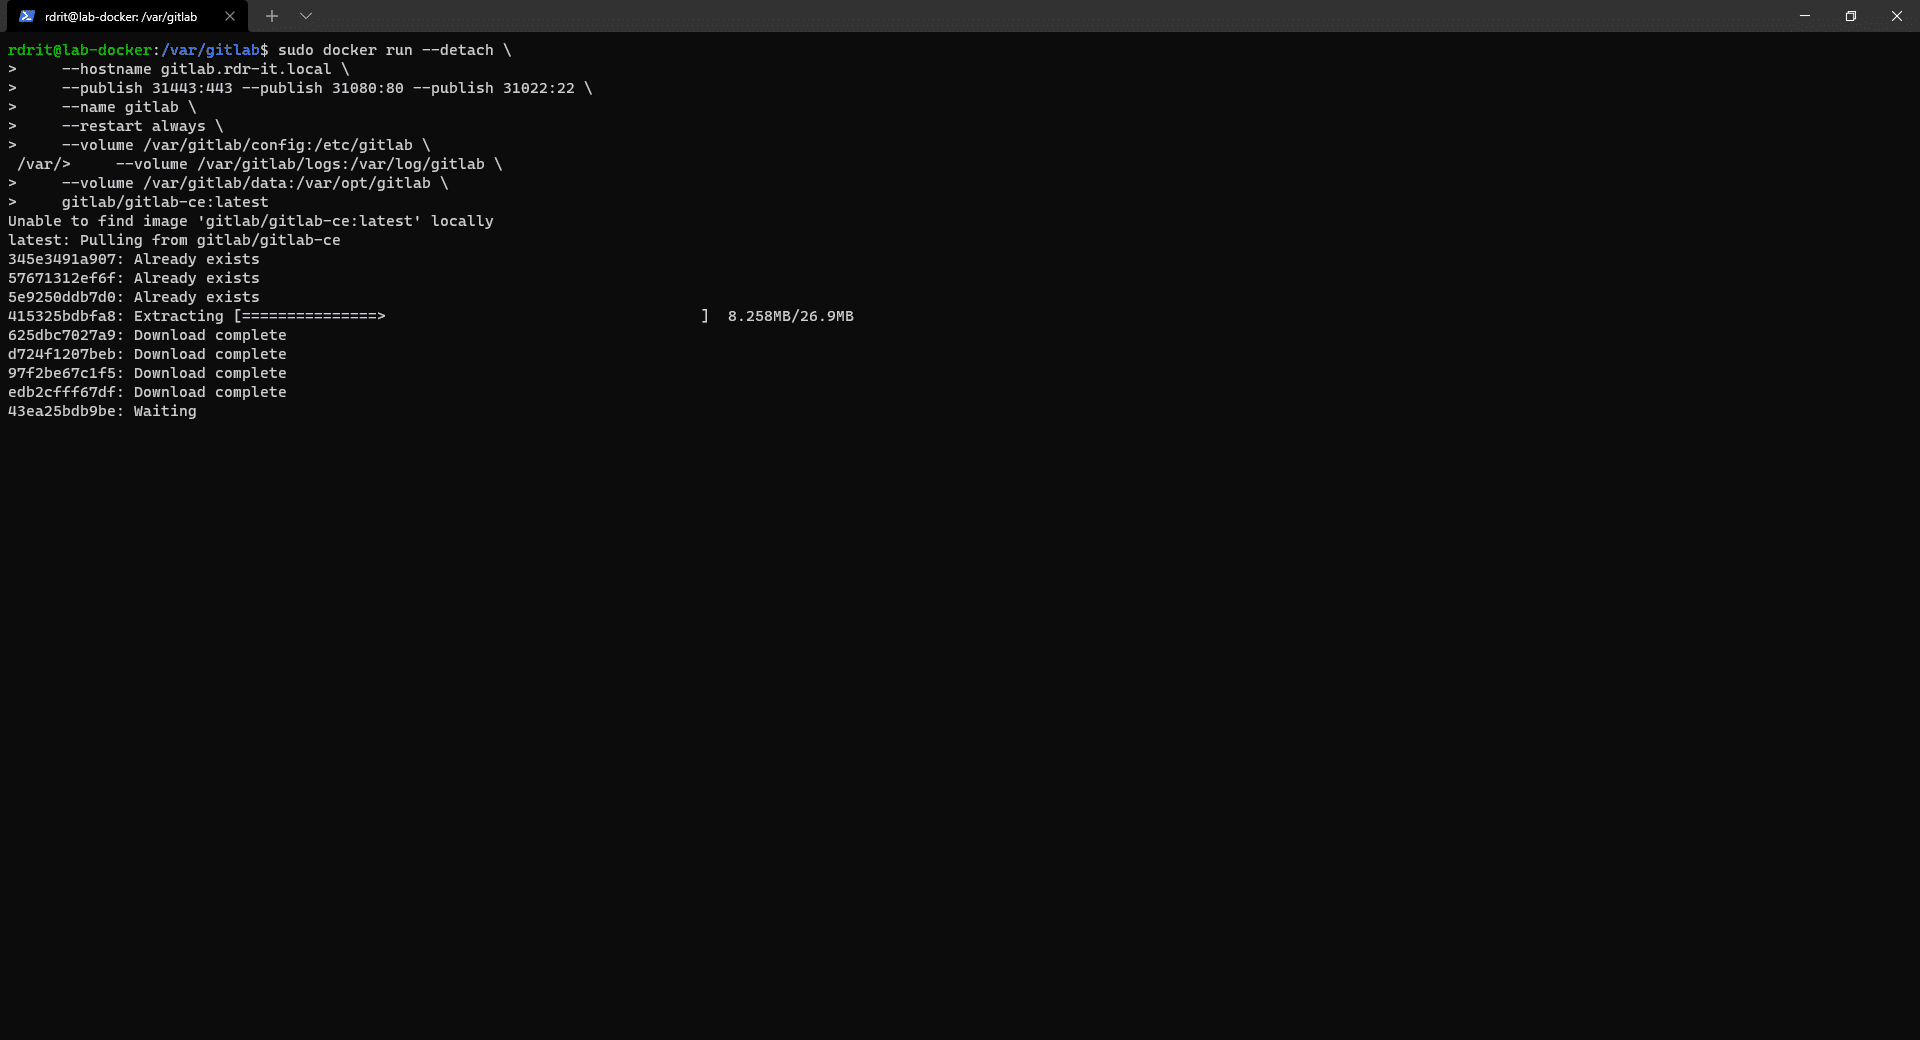
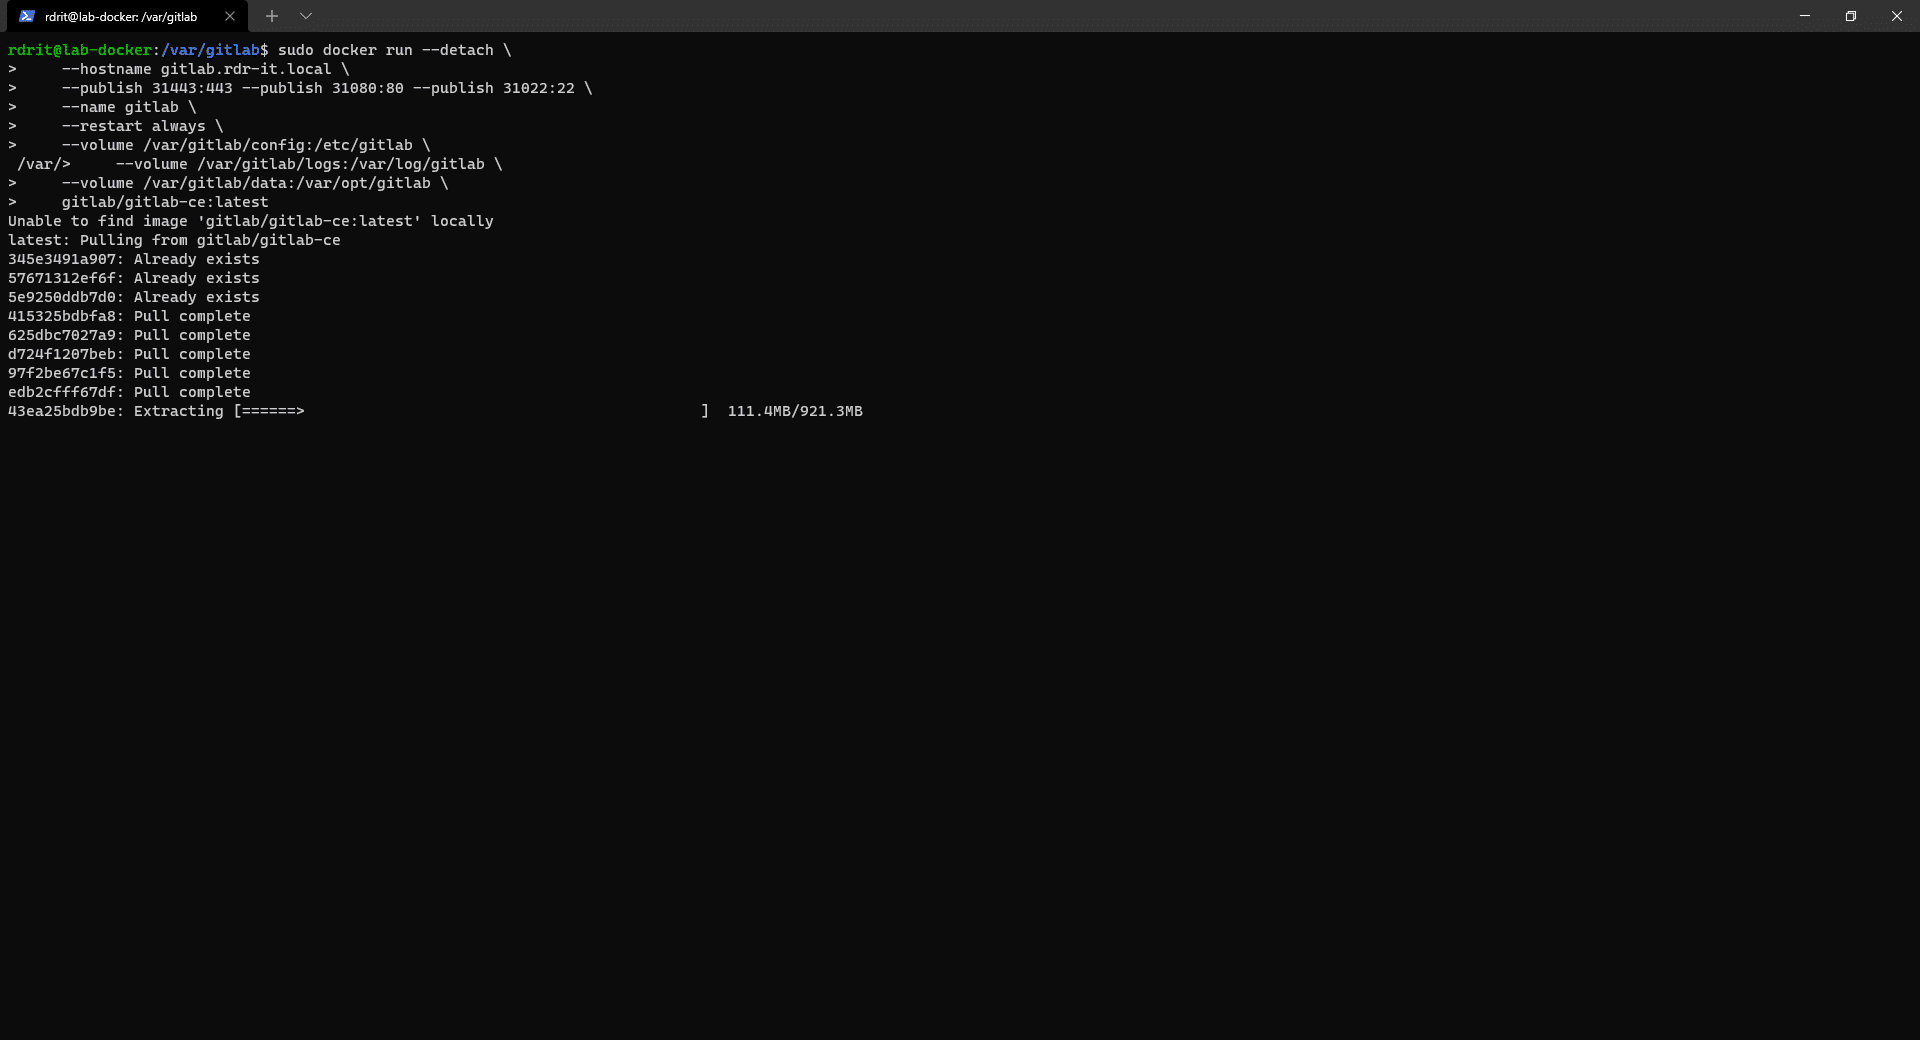
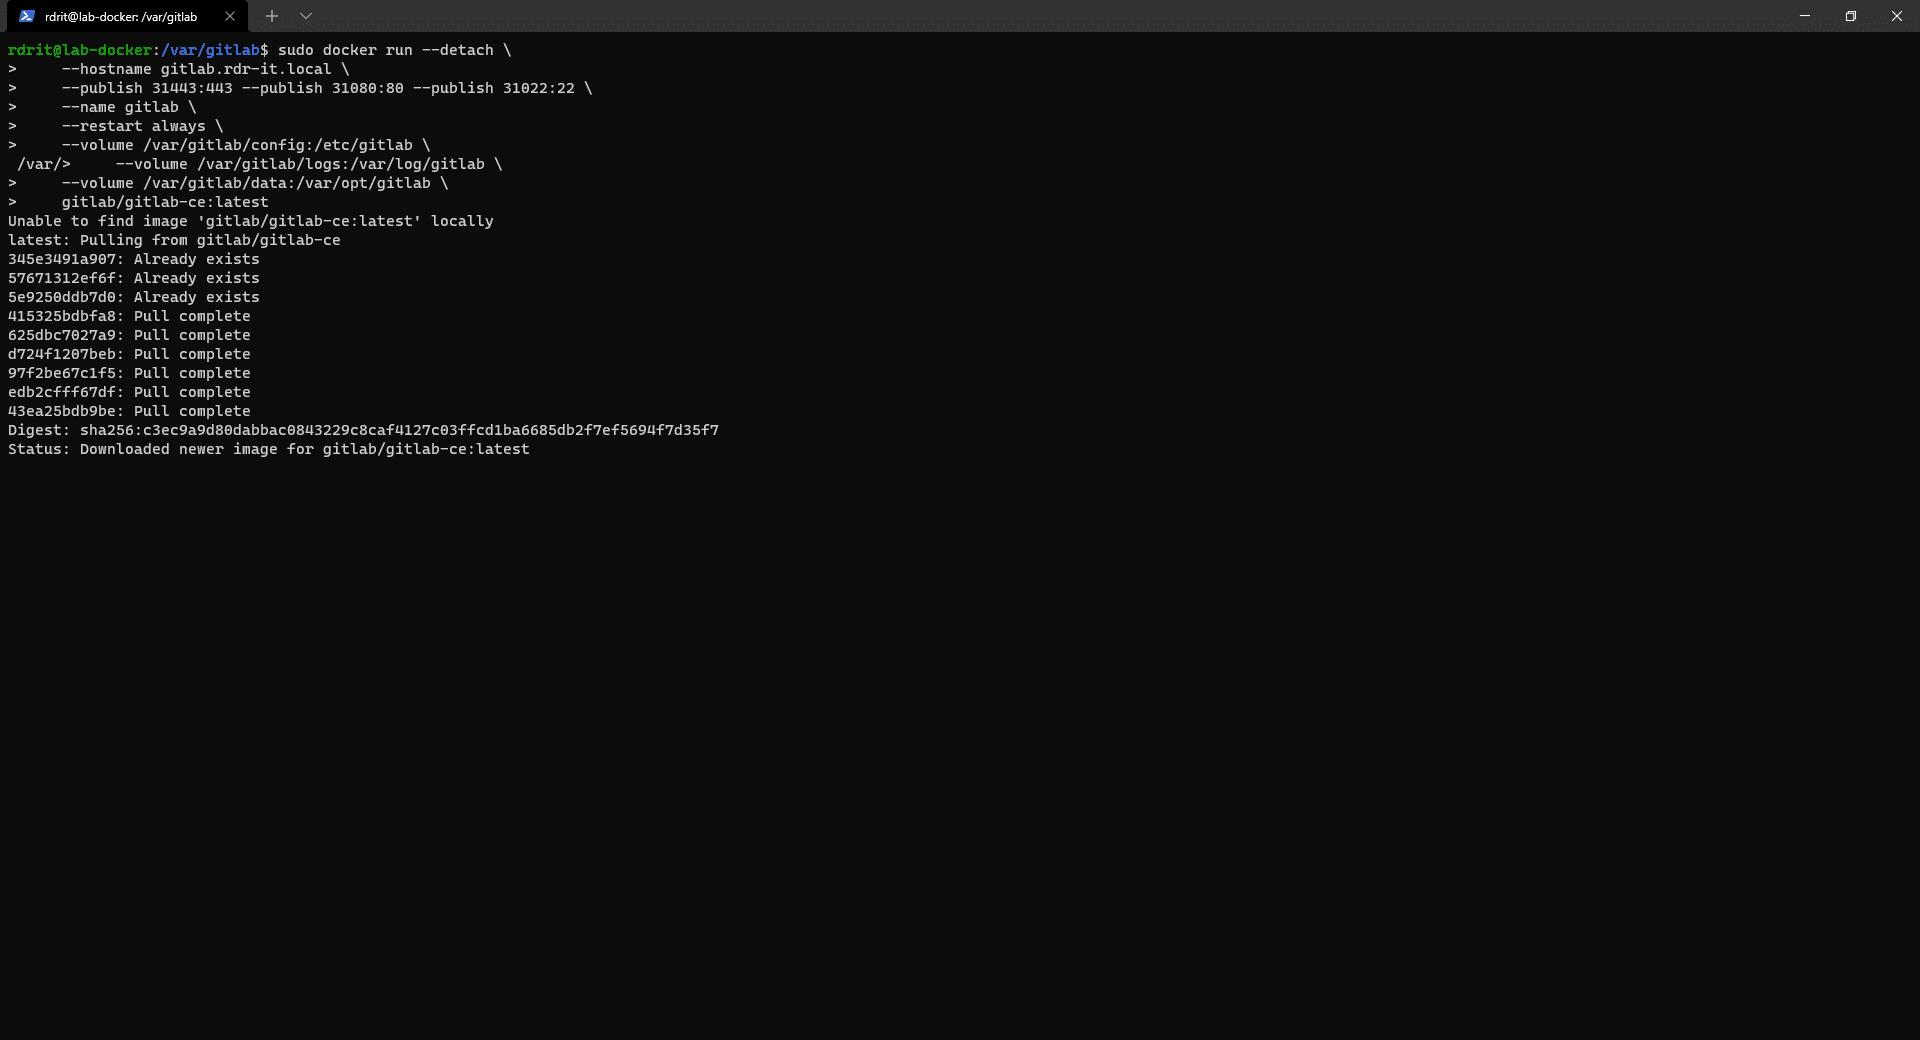
The image installation is complete when you regain control of the console.
To verify that the GitLab image is working properly, enter the command below:
sudo docker ps
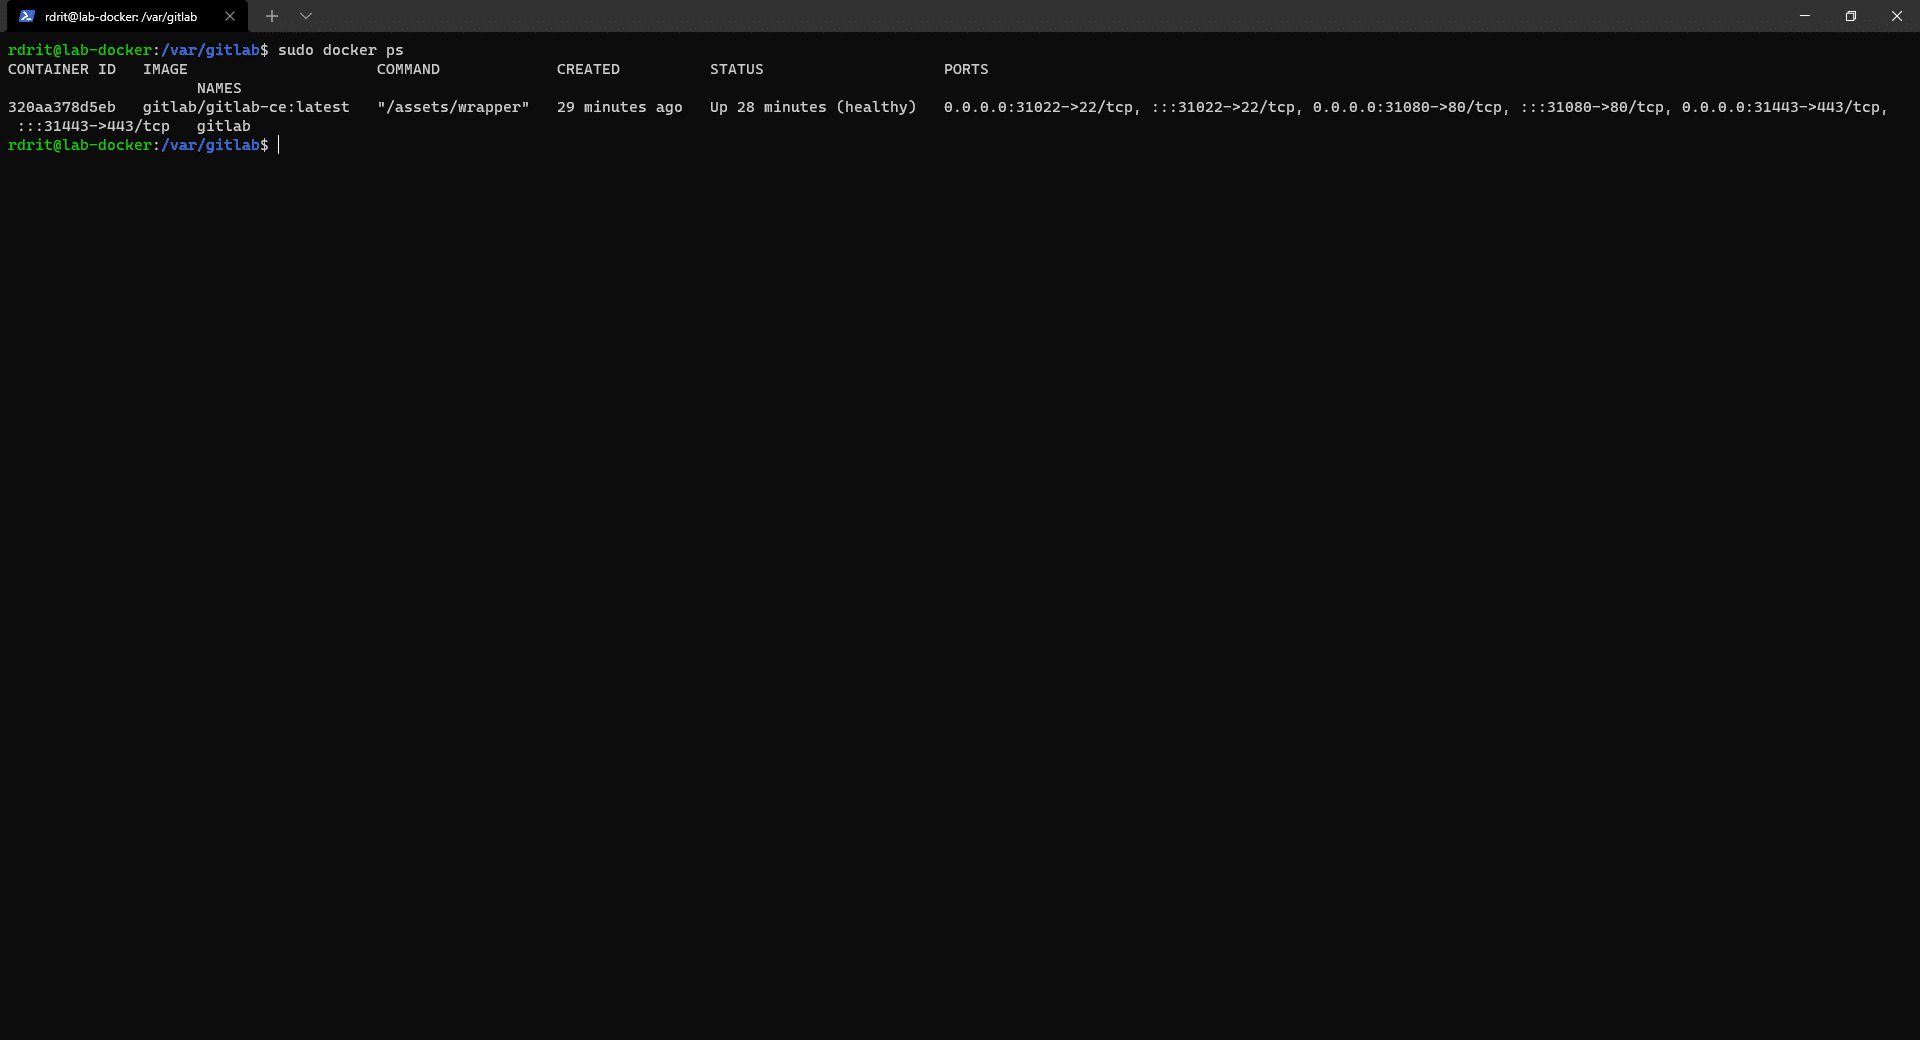
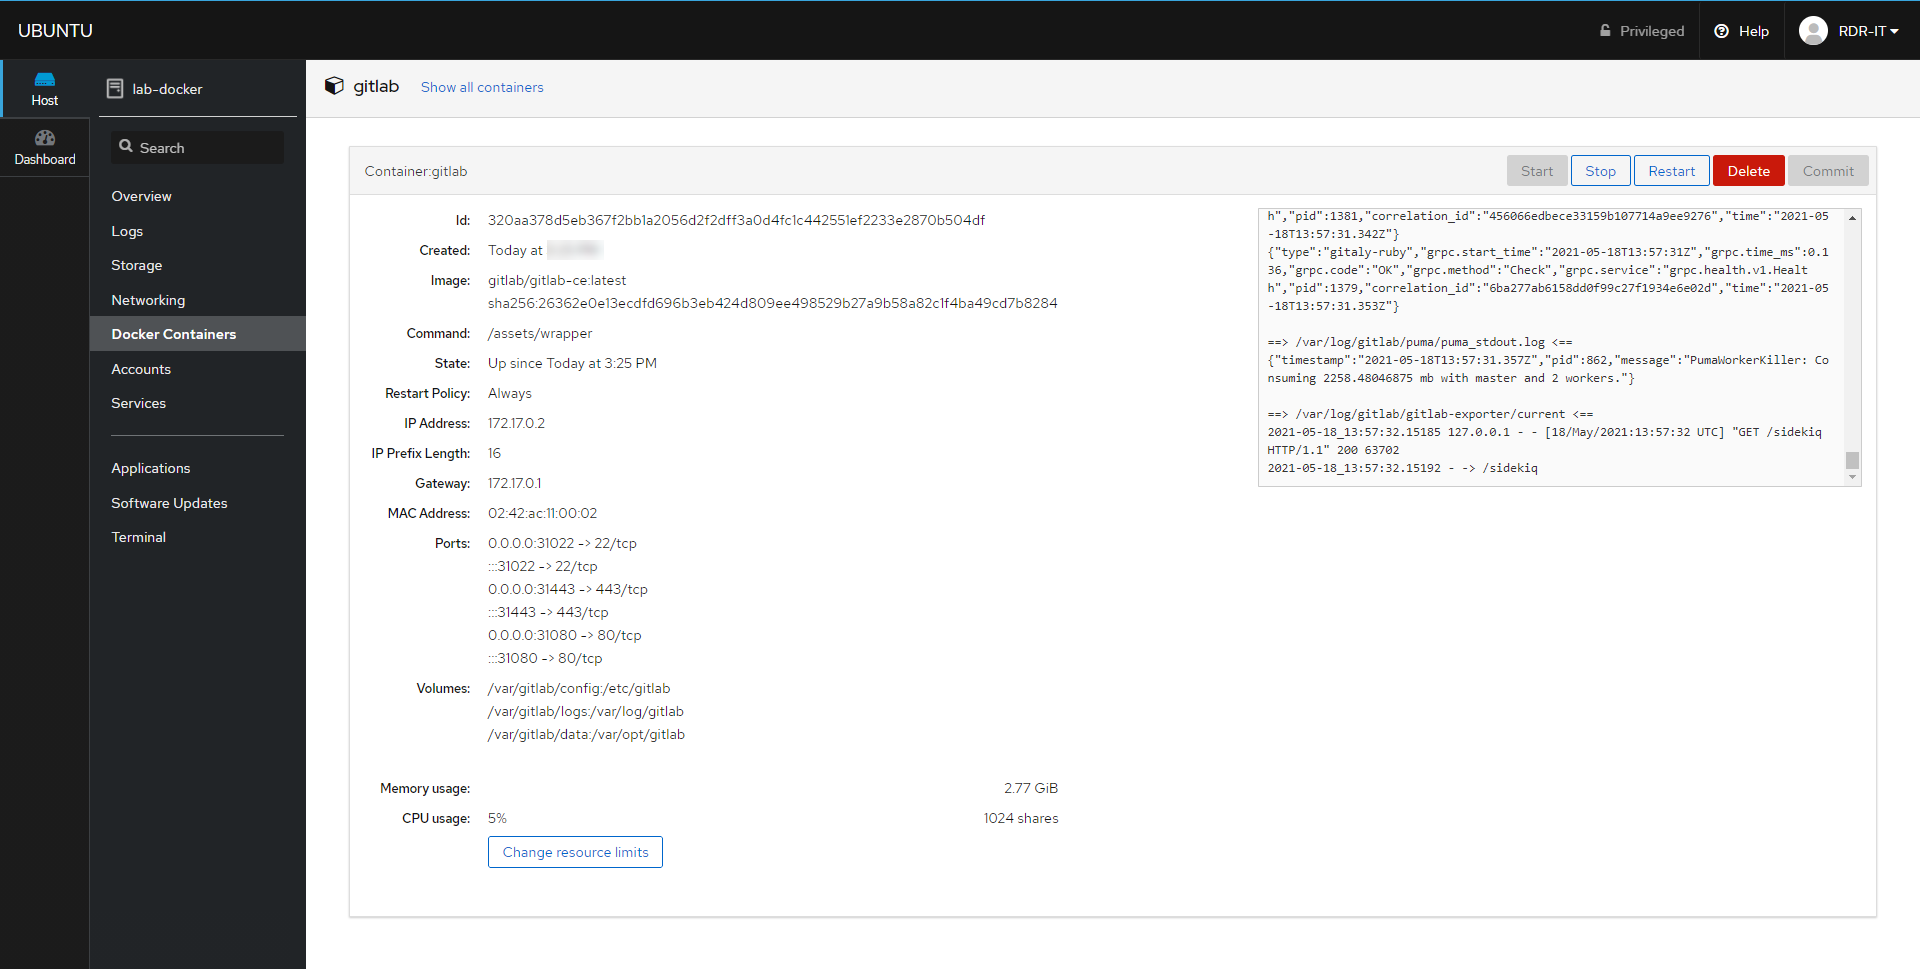
You can clearly see the container with the status “UP” and you can also see the port mapping.
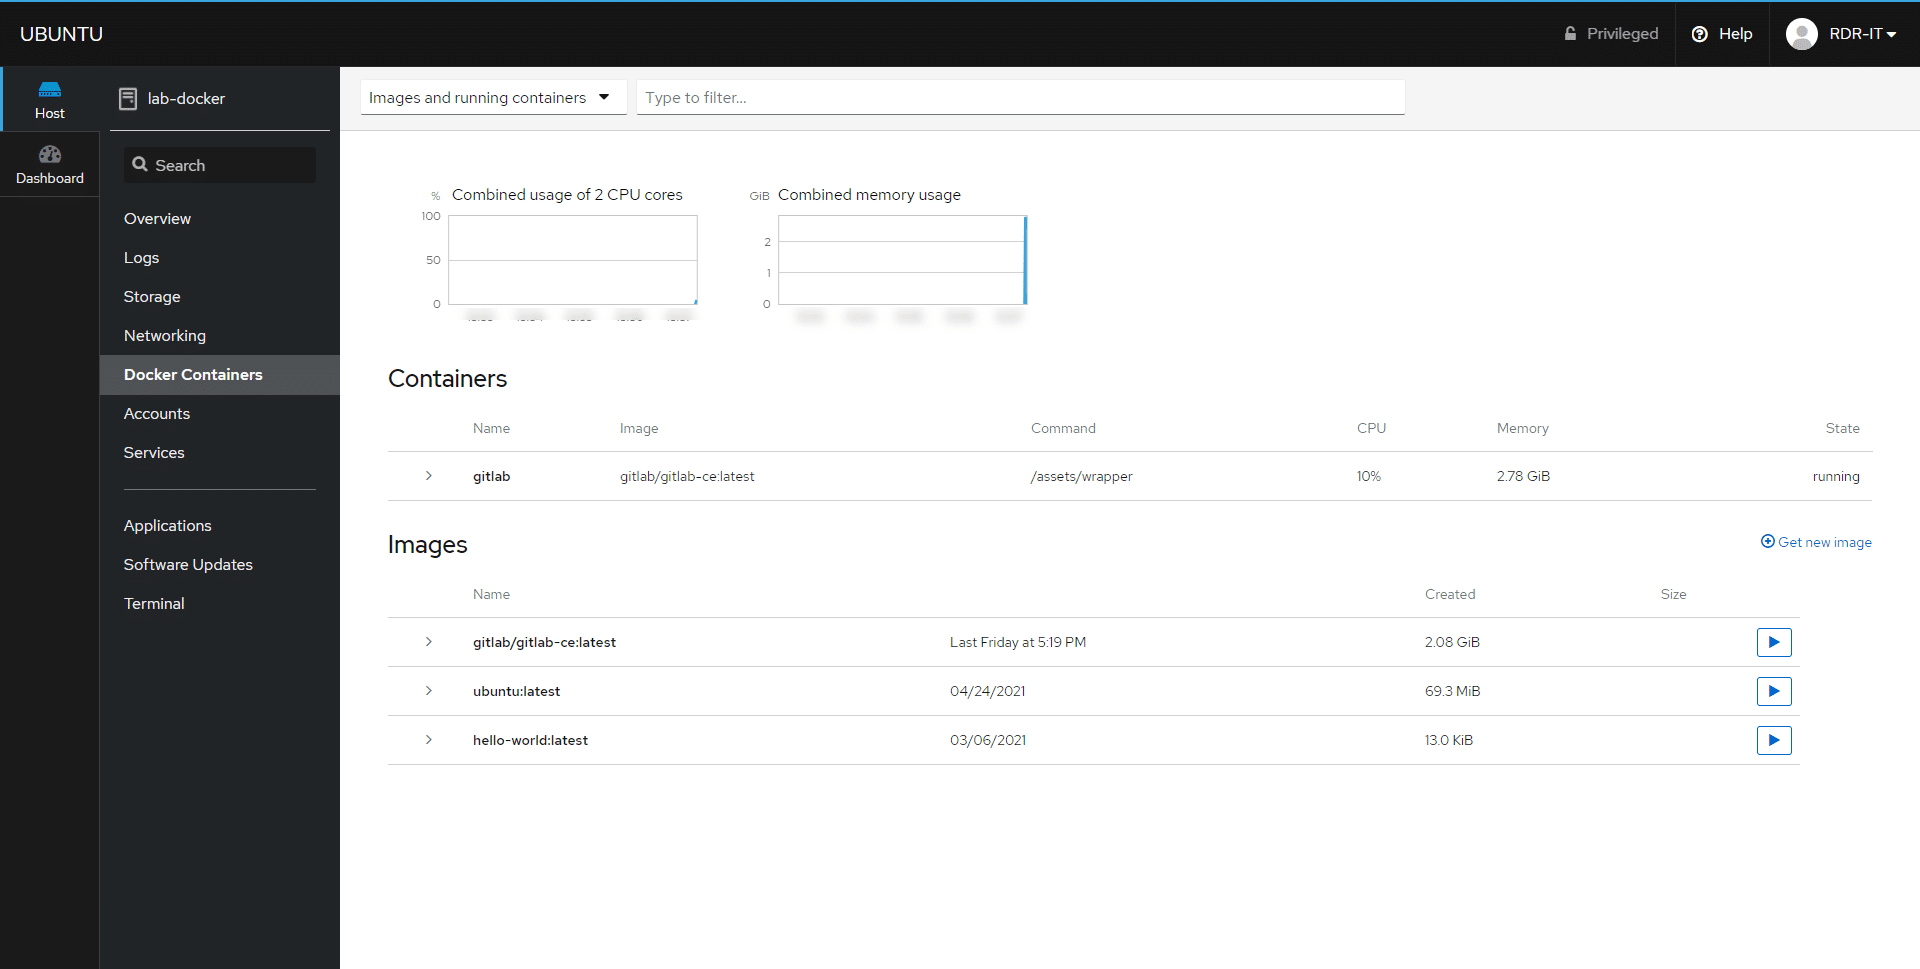
From the Cockpit interface, you can also view the container’s status.
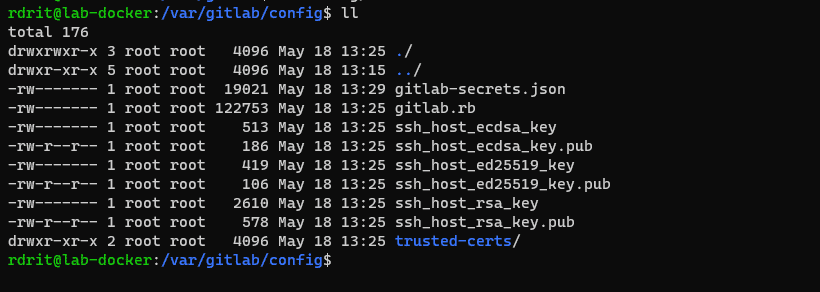
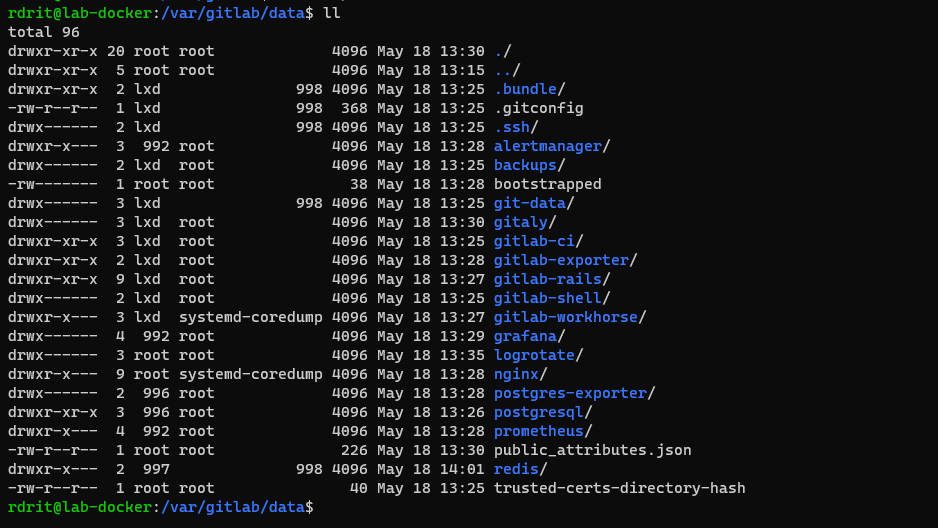
If you look in the folders you created for the volumes, you can see that files and folders have been created, so the redirection is working.
Now that our image is installed, we’ll configure Nginx as a reverse proxy.
Normally, GitLab should be available on port 31080, but I don’t recommend configuring it via the host’s port.
In the folder/etc/nginx/sites-available, create a file nano and use the configuration below:
server{
    listen 80;
    server_name gitlab.rdr-it.local;

    location / {
            proxy_pass      http://127.0.0.1:31080/;
            proxy_set_header Host $http_host;
            proxy_http_version 1.1;
            proxy_set_header X-Forwarded-For $proxy_add_x_forwarded_for;
            proxy_set_header X-Forwarded-Proto $scheme;
            proxy_set_header X-Real-IP $remote_addr;
    }
}
Adapt line 3 to your configuration by specifying the URL for accessing the application, and line 6proxy_passby configuring the port that corresponds to your container.
Save the file.
/etc/nginx/sites-enable/Create a symbolic link to the file in the folder.
sudo ln -s /etc/nginx/sites-available/<file-name> /etc/nginx/sites-enabled/

Check the Nginx configuration:
sudo nginx -t
If everything is correct, reload the Nginx configuration
sudo systemctl reload nginx
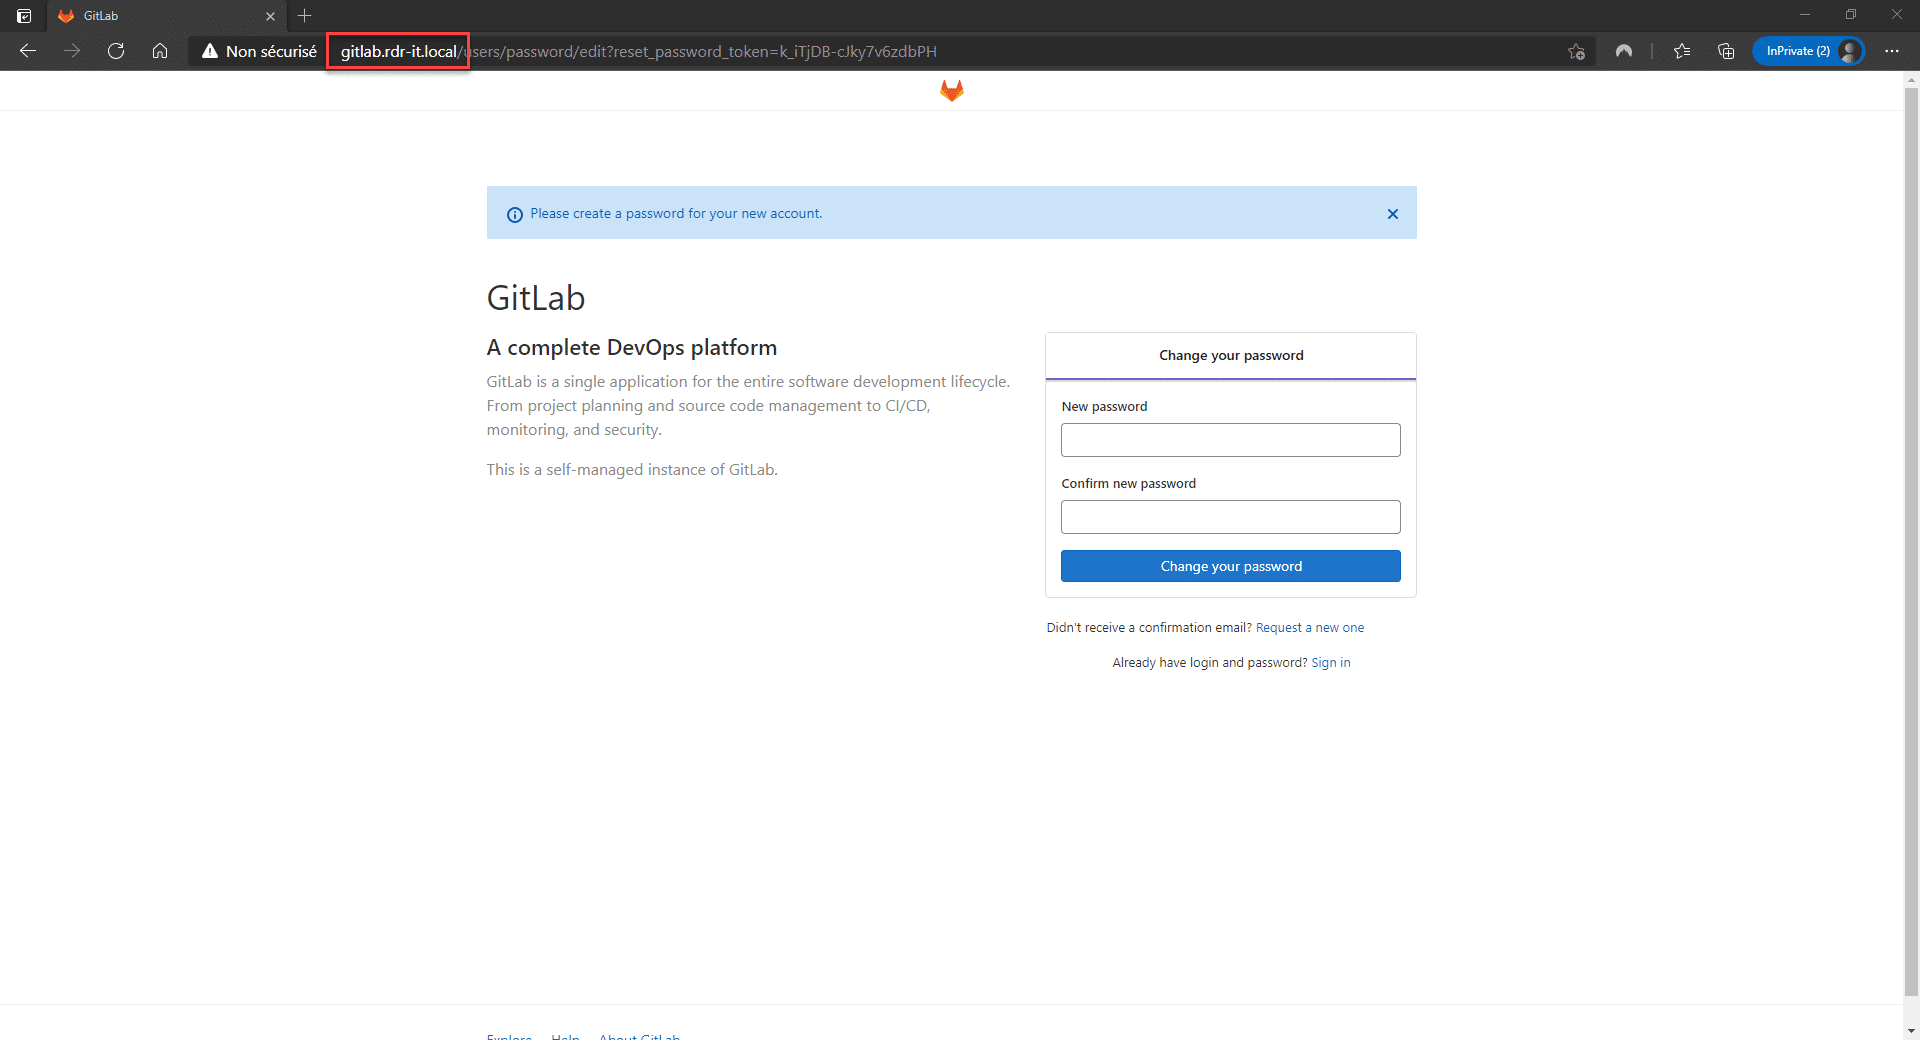
From a browser, go to the URL configured in Nginx; you should normally be taken to the GitLab root account password configuration form.
HTTPS use case.
The first step is to generate an SSL certificate using Certbot. Use the command below and follow the wizard.
sudo certbot
If everything goes well, a Let’s Encrypt certificate will be generated and the Nginx configuration will be updated for HTTPS.
To function correctly, you must modify the GitLab configuration to avoid “mixed content” errors. Currently, it is configured for HTTP, so you must configure GitLab to specify that it is accessible via HTTPS on port 80 of its web server.
Open the filegitlab.rblocated in /var/gitlab/config/.
In the file, look for the configuration elements below and configure them in the same way, except for the external_url parameter.
external_url 'https://git.example.com'
nginx['listen_port'] = 80
nginx['listen_https'] = false
Restart the GitLab configuration:
sudo docker exec -it gitlab gitlab-ctl reconfigure
Adapt the command to your container;gitlab after-it corresponds to the container name (--name).
I haven’t mentioned this yet, but the `docker exec` command allows you to run commands inside the container.
In this part of the tutorial, we’ve seen how to install a container with network port and folder mapping, how to create a reverse proxy rule with Nginx, and how to run a command in a container from the host.
Installing Discourse with Docker
DockerIn this second example of installing an image, we’ll see how to install the Discourse image, which is a forum and uses almost the same server components as:
- PostgreSQL
- Ruby
- Redis
After installing these on the same server, we will have two completely independent applications with some components “duplicated” and no conflicts.
On a single server, getting Discourse and GitLab to coexist isn’t easy—it might even be impossible; in fact, I haven’t tried it.
For the Discourse installation, I won’t go into as much detail as I did with GitLab, since a container management “utility” is provided.
On the server, create a folder for Discourse:
sudo mkdir /var/discourse/
Clone the Git repository into the folder:
sudo git clone https://github.com/discourse/discourse_docker.git /var/discourse/
Discourse and the container are configured using a file; copy the example file standalone.yml into the containers folder and rename it app.yml
sudo cp /var/discourse/samples/standalone.yml /var/discourse/containers/app.yml
Edit the app.yml file using nano
sudo nano /var/discourse/containers/app.yml
In the file, configure the `expose` section, specifying the ports for HTTP/HTTPS.
expose:
  - "32080:80"   # http
  - "32443:443" # https
Configure the following environment variables:
DISCOURSE_HOSTNAME: 'discourse.rdr-it.local'
DISCOURSE_DEVELOPER_EMAILS: '[email protected],[email protected]'
Configure a valid SMTP server; this is “required.”
Then save the file.
If you haven’t done so already, go to the /var/discourse/.
Start generating the container image:
sudo ./launcher bootstrap app
Wait while the image downloads and configures.
Now start the container with the command:
sudo./launcher start app
Verify that it is working properly with the command:
sudo docker ps

In Cockpit, you can also see the two containers:
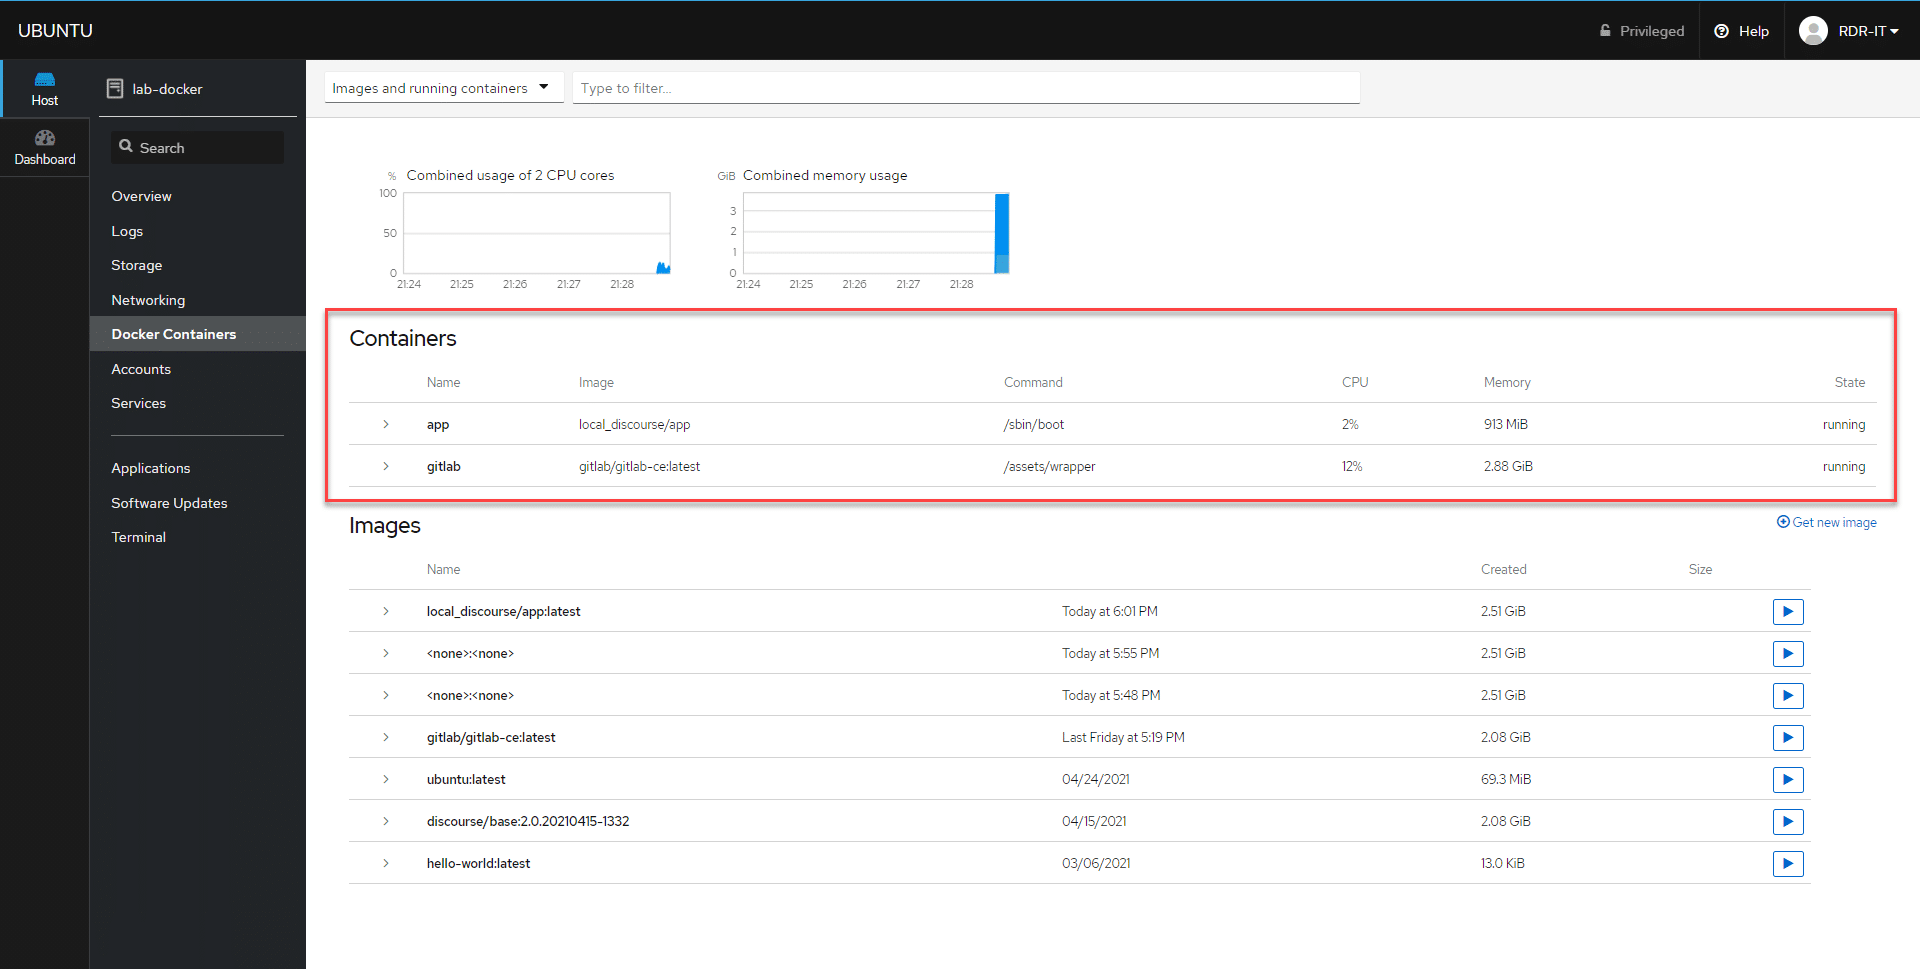
As with GitLab, we’ll create a virtual host; since this was covered previously, I’ll only include the virtual host configuration here.
server{
    listen 80;
    server_name discourse.rdr-it.local;

    location / {
            proxy_pass      http://127.0.0.1:32080/;
            proxy_set_header Host $http_host;
            proxy_http_version 1.1;
            proxy_set_header X-Forwarded-For $proxy_add_x_forwarded_for;
            proxy_set_header X-Forwarded-Proto $scheme;
            proxy_set_header X-Real-IP $remote_addr;
    }
}
Once the virtual host is configured, open a browser and go to the configured URL.
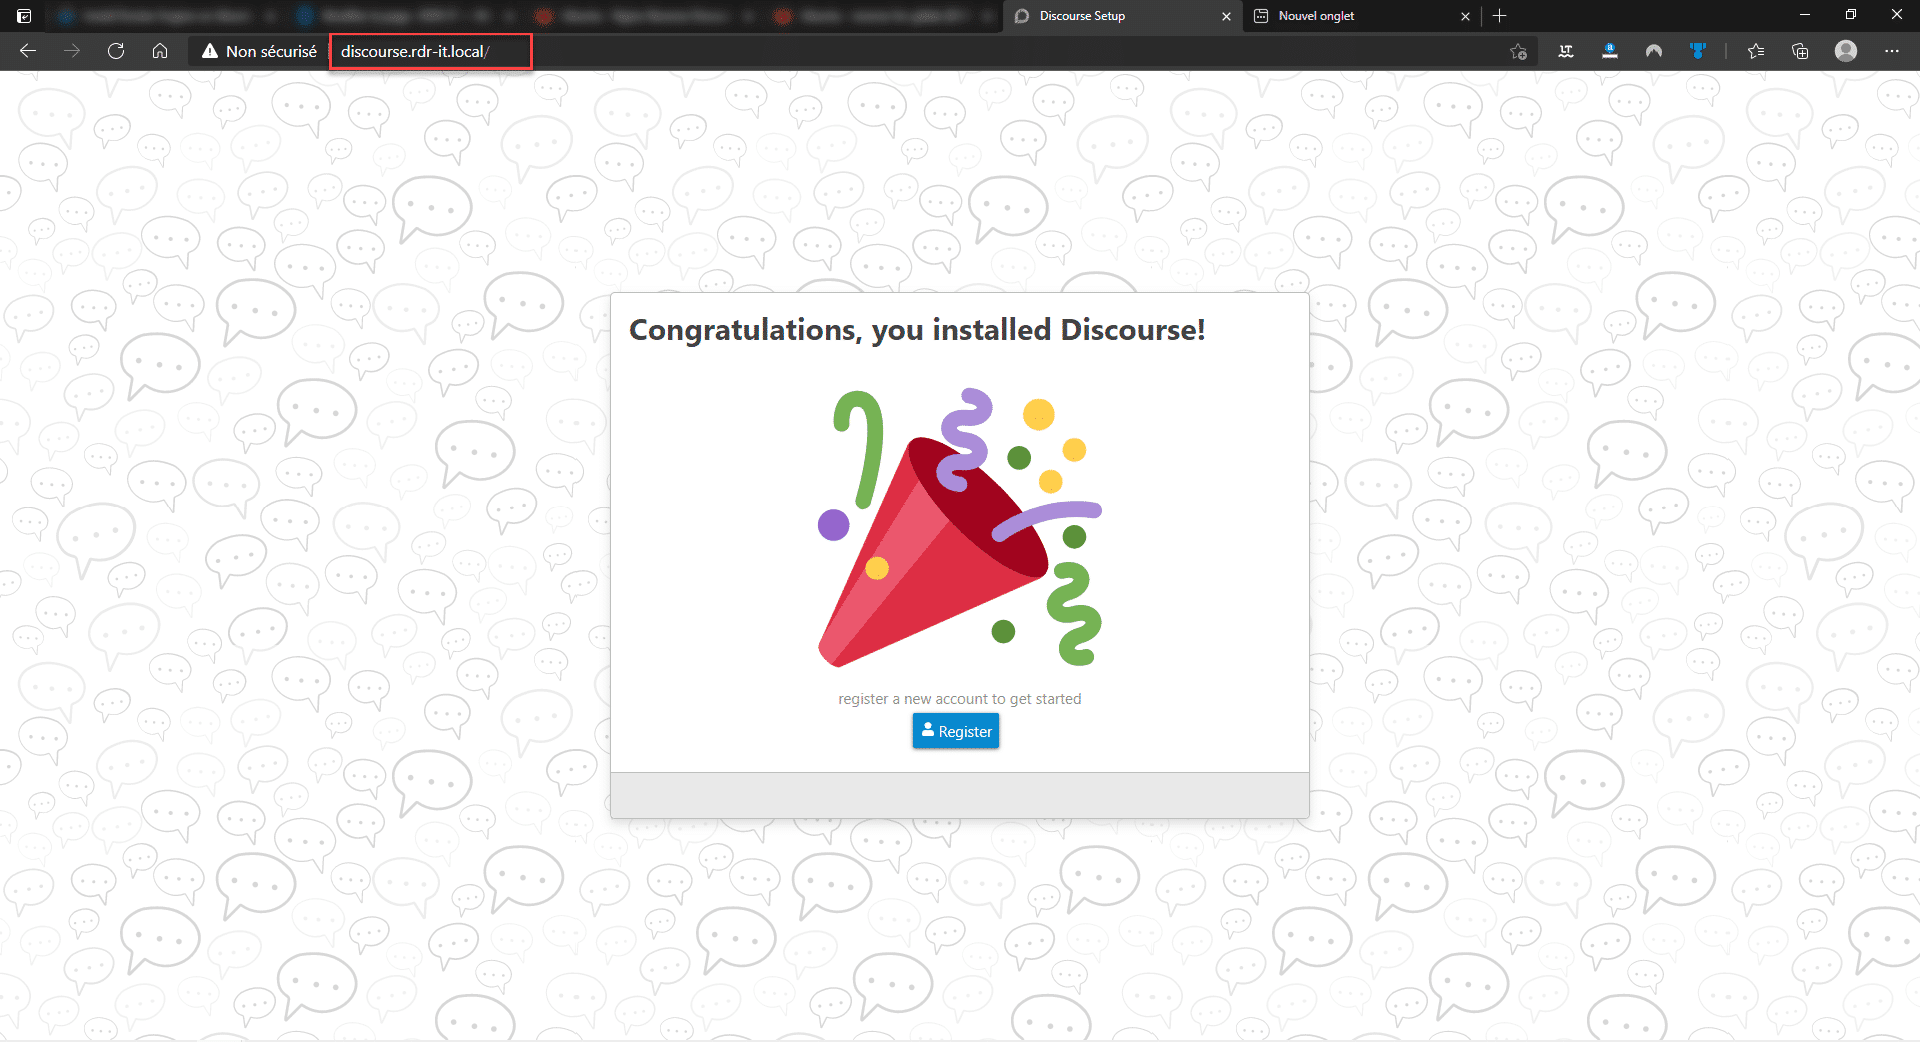
Discourse is installed and working.
As with GitLab, you can generate a Let’s Encrypt SSL certificate.
As with GitLab, to avoid mixed content issues, you must force SSL in the Discourse configuration
To wrap up this tutorial Docker
This first tutorial dedicated toDocker ends (others will follow) here, and if I had to sum it up in one word, I’d say: Awesome!
For a long time, I struggled to see the value ofDocker and containers, because tutorials often useDocker to set up a WordPress website, and this type of demonstration is too limited to really grasp the benefits of containerization—since you can achieve the same result with virtual hosts.
I admit that this experience with installing GitLab and Discourse in containers—which involves fairly complex environments—has opened my eyes toDocker containers, and I think I’ve become a fan (I’m even starting to see potential for enterprise deployments…).
DockerI hope you enjoyed this tutorial and, like me, it makes you want to explore further.